Crochet Bunny Lovey Pattern - An Easy Baby Shower Gift Idea
My crochet bunny lovey pattern is one of my favorite gift ideas for a baby shower because it combines the comfort of a soft blanket with the sweetness of a handmade toy. This fuzzy bunny lovey is designed to be gentle, huggable, and just the right size for little hands, making it a thoughtful baby shower gift or a cozy nursery keepsake that can be treasured from the very beginning.
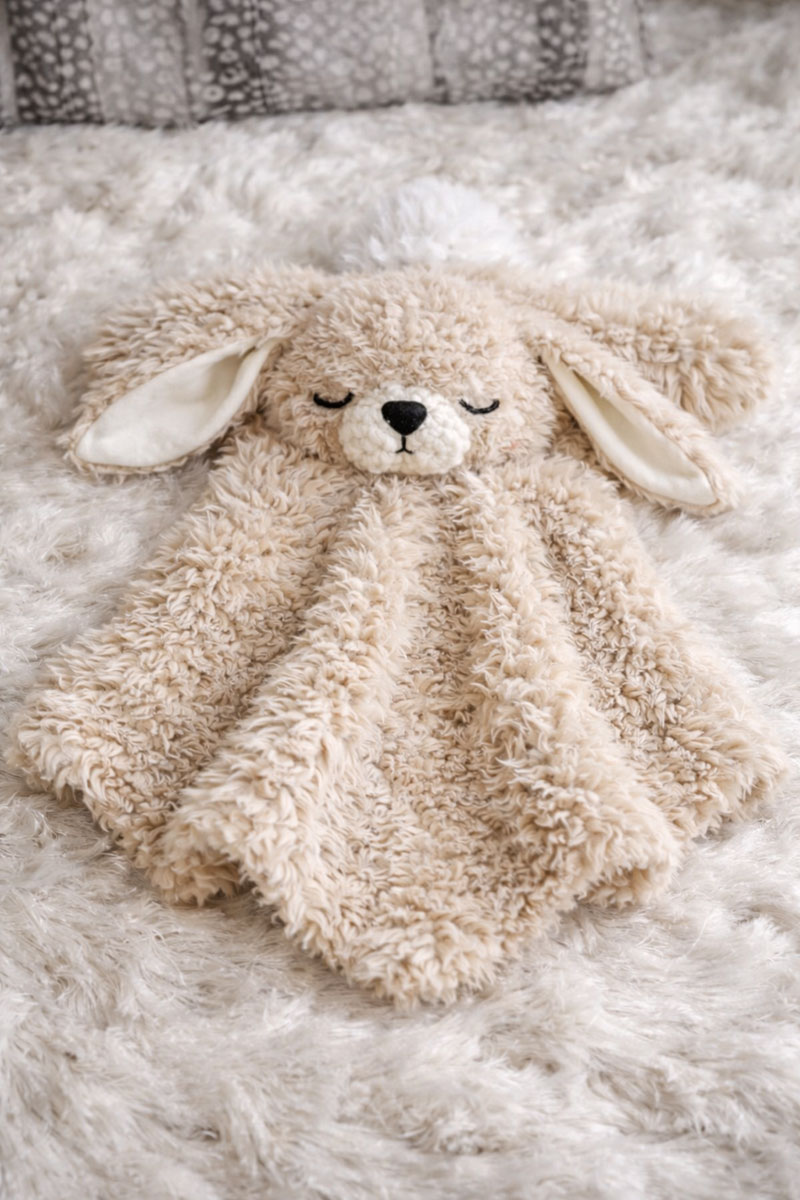
See the fuzzy faux-fur yarn I like for this bunny lovey
Crochet Bunny Lovey Pattern: A Fuzzy Faux-Fur Baby Shower Gift
If you’re hoping for a crochet bunny lovey pattern that looks like a true security blanket (flat, floppy, and extra cuddle-ready), this is the style I recommend. Instead of a big stuffed amigurumi head attached to a square, this version keeps the bunny low-profile and blanket-like—so it drapes softly, feels soothing in little hands, and photographs beautifully as a baby shower gift.
If you want to make a different style of bunny, one with a floppy body instead of a blanket-style base, my crochet bunny snuggler pattern uses a stuffed head with a flat unstuffed body and long floppy arms and legs.
If you would rather make a classic seated stuffed rabbit, use my free crochet bunny pattern with a rounded body, shaped feet, long floppy ears and an embroidered face.
On my site, I share lots of cozy nursery inspiration alongside handmade ideas, so if you’re building a whole theme around soft textures and comfort, you may also enjoy browsing my baby nursery ideas page for room styling and practical setup inspiration.
If you’re coordinating handmade pieces for the nursery, my modern rainbow crib quilt pattern adds structured color and balance that pairs beautifully with soft crochet textures like this bunny lovey.
Materials for a Faux-Fur Bunny Lovey
- Fuzzy faux-fur yarn (super bulky/6): approximately 150–180 yards for the blanket, head, and ears
- Smooth yarn (worsted/4): approximately 25–40 yards in cream, white, or light tan for the bunny muzzle and optional inner ears
- Small amount of dark yarn or embroidery floss for the embroidered eyes, nose, and mouth
- Hooks: 6.0 mm for the fuzzy yarn and 4.0 mm for the worsted-weight muzzle and optional inner ears
- Stitch markers for marking corners, rounds, and fuzzy-yarn stitch counts
- Yarn needle + scissors
- Stuffing: optional and minimal; this design should stay flat and blanket-like
Helpful note: fuzzy yarn hides stitch definition, so I recommend counting by touch and using stitch markers every round. For more cozy handmade projects, you can also browse my free baby knitting patterns collection for gift-worthy ideas beyond crochet.
For more animal lovey styles, my highland cow crochet snuggler lovey pattern has a rustic farm-animal look, while my crochet turtle lovey and frog lovey crochet pattern add playful options for nursery baskets and handmade baby gifts.
To compare more styles in one place, these crochet animal lovey patterns make it easier to choose a favorite, while these easy baby lovey crochet patterns focus on quicker blanket-style projects with simpler shaping and lighter construction.
A garden-inspired gift set can also include this crochet butterfly lovey pattern when you want a spring nursery look with handmade baby keepsake appeal.
For an Australian animal version with the same baby-gift appeal, this crochet koala lovey pattern makes a sweet nursery-friendly companion to bunny, bear, and woodland loveys.
For cleaner nursery aesthetics and understated handmade baby gifts, this minimalist crochet lovey pattern uses a simpler modern style that still feels warm, soft, and gift-worthy.
For forest-inspired sewing projects, woodland appliqué templates, rustic nursery crafts, and coordinated handmade décor ideas that pair naturally with animal-themed nurseries, browse these woodland nursery patterns for cozy woodland baby rooms and handmade gift inspiration.
Smaller stitched motifs from crochet animal applique patterns can also dress up bunny-themed blankets, nursery banners, wall hoops, and handmade baby shower gift sets.
My crochet bunny applique pattern is a good way to decorate items with a long-eared bunny that I designed to use to decorate baby blankets, nursery banners, bath towels and other handmade baby items.
For barnyard-style gifts, my crochet cow pattern adds a country-themed lovey with a flat blanket body, while these crochet farm animal lovey patterns gather cows, chickens, ducks, lambs, and other beginner-friendly farmhouse projects into one handmade baby collection.
A crochet rooster baby lovey pattern adds a brighter farmhouse style with bold barnyard colors and playful country details that work beautifully in rustic nursery themes and handmade baby shower gift baskets.
A classic elephant lovey is another adorable baby gift option when you want something sweet, familiar, and easy to pair with a nursery theme.
Supporting Image: Fuzzy Bunny Lovey Close-Up
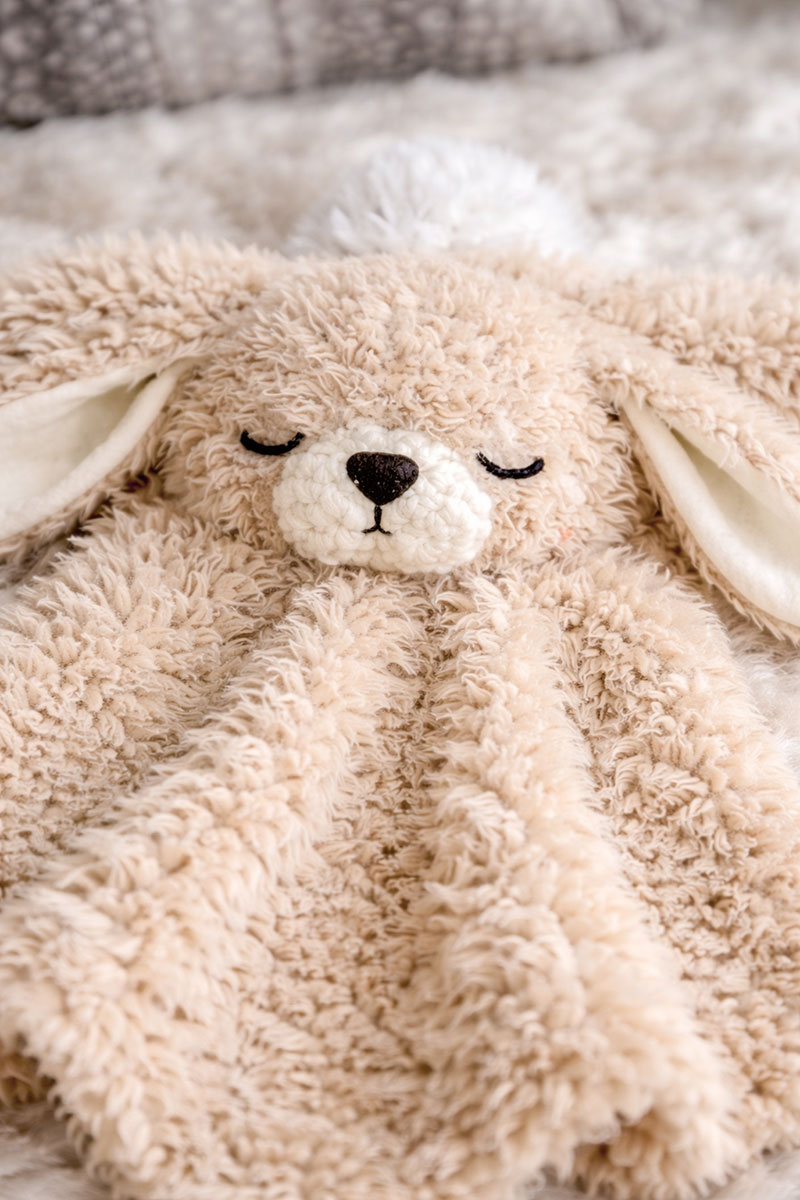
Go here to see the best faux-fur yarn to use for this crochet bunny lovey pattern
This style works best when the bunny’s face stays low and simple. That keeps the lovey feeling more like a cozy little comfort blanket instead of a bulky stuffed toy attached to a square.
Pattern Notes (Read This First)
- Skill level: Advanced beginner
- Estimated project time: 4–6 hours, depending on your experience and the yarn used
- Working gauge: Approximately 8 single crochet stitches and 8 rows measure 4 inches in fuzzy yarn with the 6.0 mm hook. Minor variation is acceptable, but use the measurement checkpoints in the pattern.
- Finished size: The blanket body measures approximately 12 × 12 inches when measured along one straight side, not diagonally. The head measures approximately 4–5 inches across, each ear measures approximately 5–6 inches long, and the muzzle measures approximately 2–2½ inches wide.
- Right side: After completing each piece, choose the neater side as the right side. For the blanket and muzzle, use the side with the less visible joins. For each row-worked outer ear, choose the neater side before sewing on the inner ear. Keep secured yarn tails on the wrong side, and lay the blanket right side up during final assembly.
- Construction: Make the blanket first, followed by the flat bunny head, two matching ears, optional inner ears, muzzle, facial embroidery, and final assembly.
- Baby-safe finish: Use embroidered facial features only, with no buttons, plastic safety eyes, beads, or other detachable pieces.
- Use: This lovey is for supervised awake cuddling only. Keep it out of cribs, bassinets, play yards used for sleep, and every infant sleep space.
For safe sleep guidance, I recommend reviewing the American Academy of Pediatrics safe sleep recommendations (this is not a sales site, and it’s a good baseline for what should and shouldn’t be in a baby’s sleep space): AAP safe sleep guidance.
Crochet Bunny Lovey Pattern Instructions
Abbreviations (US Terms)
- ch = chain
- sl st = slip stitch
- sc = single crochet
- hdc = half double crochet
- inc = increase (2 stitches in one stitch)
- dec = decrease (sc2tog)
- FO = fasten off
Part 1: Blanket Body (Soft Square)
This blanket is worked as a simple center-out square. With fuzzy yarn, simple stitches look the most luxurious and keep the drape soft.
Round beginning: The beginning ch 1 does not count as a stitch. After joining each round, work the first sc of the next round in the same stitch as the join.
- Round 1: ch 4, join with sl st to form a ring. Ch 1, work *(2 sc, ch 2)* into the ring 4 times. Join with sl st to first sc. (8 sc, 4 corner spaces)
- Round 2: ch 1, sc in each stitch around; in each ch-2 corner space work (sc, ch 2, sc). Join. (16 sc, 4 corner spaces)
- Round 3: ch 1, sc in each stitch around; in each ch-2 corner space work (sc, ch 2, sc). Join. (24 sc, 4 corner spaces)
- Round 4: ch 1, sc in each stitch around; in each ch-2 corner space work (sc, ch 2, sc). Join. (32 sc, 4 corner spaces)
- Rounds 5 and later: Continue in the same way, adding 8 sc each round. Work sc in every sc and (sc, ch 2, sc) in each ch-2 corner space.
- Final round and size checkpoint: Continue until the completed blanket measures approximately 12 inches along one straight side, not from corner to corner. At the stated gauge, this will usually be about Round 12, with 96 sc and 4 corner spaces. If your blanket reaches 12 inches on a different round, multiply the round number by 8 to confirm the total sc count. Treat the round that reaches the finished measurement as the final stabilizing round, and do not add another round afterward.
- Join the final round with a sl st to the first sc, FO, and weave in the yarn tail securely.
For a softer edge, keep your tension relaxed during the final round without making the stitches noticeably looser than the previous rounds. Continue working the established corner increases so the blanket remains flat and square.
Part 2: Flat Bunny Head Panel (Low-Profile)
Work the head in continuous rounds. Place a stitch marker in the first stitch of every round and move it upward as you work. The completed circle should lie flat before assembly.
- Round 1: With fuzzy yarn, ch 2 and work 6 sc into the 2nd ch from the hook. (6)
- Round 2: Inc in every stitch around. (12)
- Round 3: (Sc in next stitch, inc in next stitch) around. (18)
- Round 4: (Sc in next 2 stitches, inc in next stitch) around. (24)
- Round 5: (Sc in next 3 stitches, inc in next stitch) around. (30)
- Check that the circle lies flat and measures approximately 4–5 inches across. FO and leave a long tail for sewing.
Optional light padding: Keep the head flat while positioning it. During final assembly, leave a small opening in the sewing seam, insert only a thin layer of stuffing, and then close the remaining seam.
Part 3: Ears (Make 2, Sew Flat)
Leave an 18-inch beginning tail before making the foundation chain. This beginning tail will remain at the wide foundation edge and will be used to attach the ear.
Turning chains: For all outer-ear and inner-ear rows, the beginning ch 1 does not count as a stitch. Work the first sc in the first stitch and the final sc in the last stitch of the row.
- With fuzzy yarn, ch 9.
- Row 1: Sc in the 2nd ch from the hook and across. (8)
- Rows 2–3: Ch 1, turn, and sc across. (8)
- Row 4: Ch 1, turn, sc2tog, sc in next 4 stitches, sc2tog. (6)
- Rows 5–7: Ch 1, turn, and sc across. (6)
- Row 8: Ch 1, turn, sc2tog, sc in next 2 stitches, sc2tog. (4)
- Rows 9–11: Ch 1, turn, and sc across. (4)
- Check that the ear measures approximately 5–6 inches long. FO and weave in the ending tail at the narrow tip. Do not cut the long beginning tail at the foundation edge.
Optional inner ears, make 2: With smooth worsted-weight yarn and the 4.0 mm hook, ch 9.
- Row 1: Sc in the 2nd ch from the hook and across. (8)
- Rows 2–8: Ch 1, turn, and sc across. (8)
- Row 9: Ch 1, turn, sc2tog, sc in next 4 stitches, sc2tog. (6)
- Rows 10–17: Ch 1, turn, and sc across. (6)
- Row 18: Ch 1, turn, sc2tog, sc in next 2 stitches, sc2tog. (4)
- Rows 19–22: Ch 1, turn, and sc across. (4)
- Check that the inner ear measures approximately 4½–5 inches long and no more than 2 inches wide. If it is shorter than 4½ inches, repeat the final 4-stitch row until it reaches the required length. Record the number of added rows and work the same total number of rows on the second inner ear so both pieces match.
- FO and leave a long tail for sewing.
Center one inner ear on the right side of each fuzzy ear, leaving an even fuzzy border around it. Sew it in place without stretching either piece.
Ear shaping: Before assembly, pinch the wide foundation edge of each outer ear into a shallow fold. Stitch through the folded base once or twice with the long beginning tail. Arrange the two ears as mirror images.
Part 4: Bunny Muzzle (Smooth Yarn)
Use the 4.0 mm hook and smooth worsted-weight yarn. Work in joined rounds. The beginning ch 1 does not count as a stitch.
- Round 1: Ch 6. Sc in the 2nd ch from the hook, sc in next 3 ch, and work 3 sc in the last ch. Continue along the opposite side of the foundation chain, working sc in next 3 ch and 2 sc in the final ch. Join with a sl st to the first sc. (12)
- Round 2: Ch 1, inc in the first stitch, sc in next 3 stitches, inc in next stitch, sc in next stitch, inc in next stitch, sc in next 3 stitches, inc in next stitch, and sc in the final stitch. Join with a sl st to the first sc. (16)
- Check that the muzzle lies flat and measures approximately 2–2½ inches wide. FO and leave a long tail for sewing.
Part 5: Complete the Muzzle and Embroider the Face
Complete the facial details before sewing the head to the blanket. This allows all embroidery tails to be secured on the wrong side of the head instead of passing through the blanket body.
- Lay the head right side up and choose one point as the top. Pin the muzzle horizontally across the lower half of the head.
- Sew around the muzzle with small whip stitches. For a completely flat muzzle, sew it closed without stuffing. For a slightly raised muzzle, leave a 1-inch opening, insert only a thin pinch of stuffing, and close the remaining seam.
- After the muzzle is sewn in place, mark a vertical centerline through the head and muzzle. Place one eye approximately ½ inch above the upper edge of the muzzle and 1–1¼ inches to the left of the centerline. Place the second eye at the same height and the same distance to the right. The eye centers should be approximately 2–2½ inches apart.
- Embroider each closed eye with several short curved stitches. Add one or two short lash stitches at the outer end of each eye if desired. Do not use buttons or plastic safety eyes.
- Embroider a small triangle nose in the upper center of the crocheted muzzle. Add one short vertical mouth stitch directly beneath it.
- Secure every embroidery tail on the wrong side of the head before beginning final assembly.
Assembly
- Lay the blanket right side up and choose one straight side as the top edge.
- Position the completed bunny head so its center sits approximately 3 inches below the top edge of the blanket.
- Place the pinched foundation edge of each ear partly beneath the upper side edges of the head. Space the inner edges of the ear bases approximately 1 inch apart, point the ear tips outward, and confirm that the ears are arranged as mirror images.
- Use each ear's long beginning tail to sew the folded foundation edge securely to the blanket. Stitch through every layer of the folded base and make a second pass across the attachment for reinforcement.
- Sew the head to the blanket with small, evenly spaced whip stitches, covering the inner portions of the ear bases. If the head will be lightly padded, leave a 1½-inch opening, insert a thin layer of stuffing, and close the remaining seam without pulling the blanket inward.
- Weave each assembly tail through the back of the work in at least two different directions before trimming it.
- Lay the lovey flat, spread both ears outward, smooth the blanket, and gently tug the head, muzzle, and both ears to confirm that every attachment is secure.
If you’re also planning a nursery theme that leans soft and neutral, you might like pairing this project with calming décor inspiration from my baby nursery themes collection.
Approximate Finished Measurements
- Blanket body: approximately 12 × 12 inches, measured along the straight sides
- Bunny head: approximately 4–5 inches in diameter
- Each outer ear: approximately 5–6 inches long before the base is pinched
- Muzzle: approximately 2–2½ inches wide
- Finished top-to-bottom length: approximately 12–13 inches when the ears extend outward
- Overall width across the laid-out ears: approximately 14–17 inches, depending on the ear angle and how tightly the bases are pinched
Measurements may vary slightly depending on the yarn, hook size, and individual crochet tension. Adjust by the stated measurements rather than relying only on the number of rows.
Supporting Image: Flat, Floppy “Security Blanket” Style
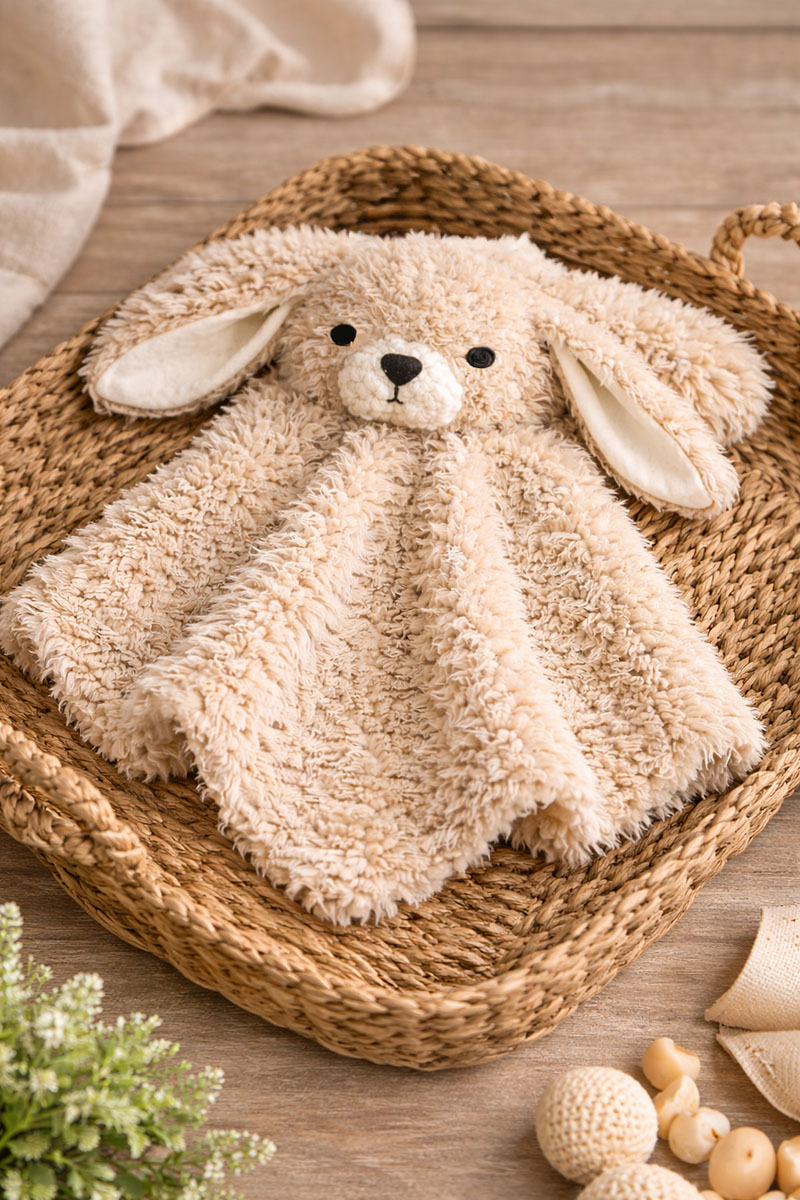
Go here to see the recommended crochet hook sizes to use for this crochet bunny lovey pattern
This is the look many makers search for when they type phrases like flat bunny lovey pattern, security blanket bunny crochet, and easy crochet lovey for baby shower gift. The secret is the low-profile head and the way the folded ear bases are secured flat beneath the upper sides of the head so everything feels soft and blanket-first.
Finishing Tips
- Weave in every yarn tail with at least two passes through the stitches before trimming.
- Gently shape the blanket by hand and smooth the corners so it lies flat.
- Lightly brush faux-fur yarn with your fingers after assembly to fluff the fibers and hide sewn joins.
- Check every attached piece by gently tugging on the head, muzzle, and both ears before gifting the lovey. Inspect the embroidered facial features without pulling directly on the stitches.
- Shape the blanket by hand. Do not apply steam, an iron, or other heat unless the yarn label specifically permits it.
Care Tips and Baby-Safe Use
- Use embroidered facial features only.
- Secure and weave in all ends with extra passes (faux-fur can loosen if ends aren’t anchored).
- Follow the yarn label exactly. If machine washing is permitted, use the recommended cycle and dry the lovey only as directed. After washing, inspect every seam, embroidered feature, and woven-in end before use.
- Use this lovey only for supervised awake cuddling. Keep it out of cribs, bassinets, play yards used for sleep, and every infant sleep space.
- Stop using the lovey if the yarn sheds, a seam loosens, an embroidery tail emerges, or any stuffing becomes accessible.
If you’re planning a shower and want more theme and activity ideas to go with a handmade gift, you may also like my baby shower ideas page for games, décor, and party inspiration.
FAQ
Is this crochet bunny lovey pattern beginner-friendly?
Yes—especially if you keep the stitches simple and use stitch markers to count your rounds. Faux-fur yarn hides stitch definition, so slow counting is your best friend.
What if my faux-fur yarn is too slippery?
Go down a hook size, keep your tension slightly firm, and avoid overly complex stitches. Single crochet and half double crochet tend to look the best with fuzzy yarn.
Can I make this as a larger comfort blanket?
Absolutely. Keep expanding the square blanket in the established pattern until it reaches the size you want. The bunny head can remain at 30 stitches, or you can add Round 6: (Sc in next 4 stitches, inc in next stitch) around. (36) Check that the larger head lies flat, then FO and leave a long tail for sewing. At the stated gauge, the larger head will measure approximately 5½–6 inches across.
If you’re building more handmade baby projects, you might also enjoy my broader collections—starting with baby gear for practical nursery planning, and returning to this crochet bunny lovey pattern whenever you want a reliable, giftable comfort project.
Quick reminder: This crochet bunny lovey pattern is designed for supervised awake cuddling only. Keep the finished lovey out of cribs, bassinets, play yards used for sleep, and every infant sleep space.
When you click on links to various merchants on this site and make a purchase, this may result in this site earning a commission. This does not affect the price you pay.

UBGI Gold Standard 2026
Reviewed under the site's
editorial checklist.
Photos, decorating ideas, party setups and reader submissions are shared for inspiration unless a page is specifically presented as a pattern, tutorial, reference guide or step-by-step project. Follow the instructions, measurements, safety guidance and manufacturer directions provided for the particular project or product.
About Jan | Contact | Baby Nursery Ideas (Blog) | Site Map | Privacy Policy | Disclosure Policy | Disclaimer | Affiliate Disclosure | Earnings Disclosure | Facebook | Pinterest
I am a participant in the Amazon Services LLC Associates Program, an affiliate advertising program designed to provide a means for us to earn fees by linking to Amazon. As an Amazon Associate I earn from qualifying purchases.
Copyright © 2006-2026. All Rights Reserved.