Baby Crafts to Make for Keepsakes, Nursery Art and Handmade Gifts
By Jan Bay
Use this baby crafts hub for handprint and footprint keepsakes, clay impressions, nursery art, holiday crafts and meaningful handmade gifts for parents and grandparents. These projects focus on preserving something personal about the baby, especially a tiny handprint, footprint, name, date or first milestone, in a form your family can frame, display or save.
Explore More Baby Handprint and Footprint Ideas
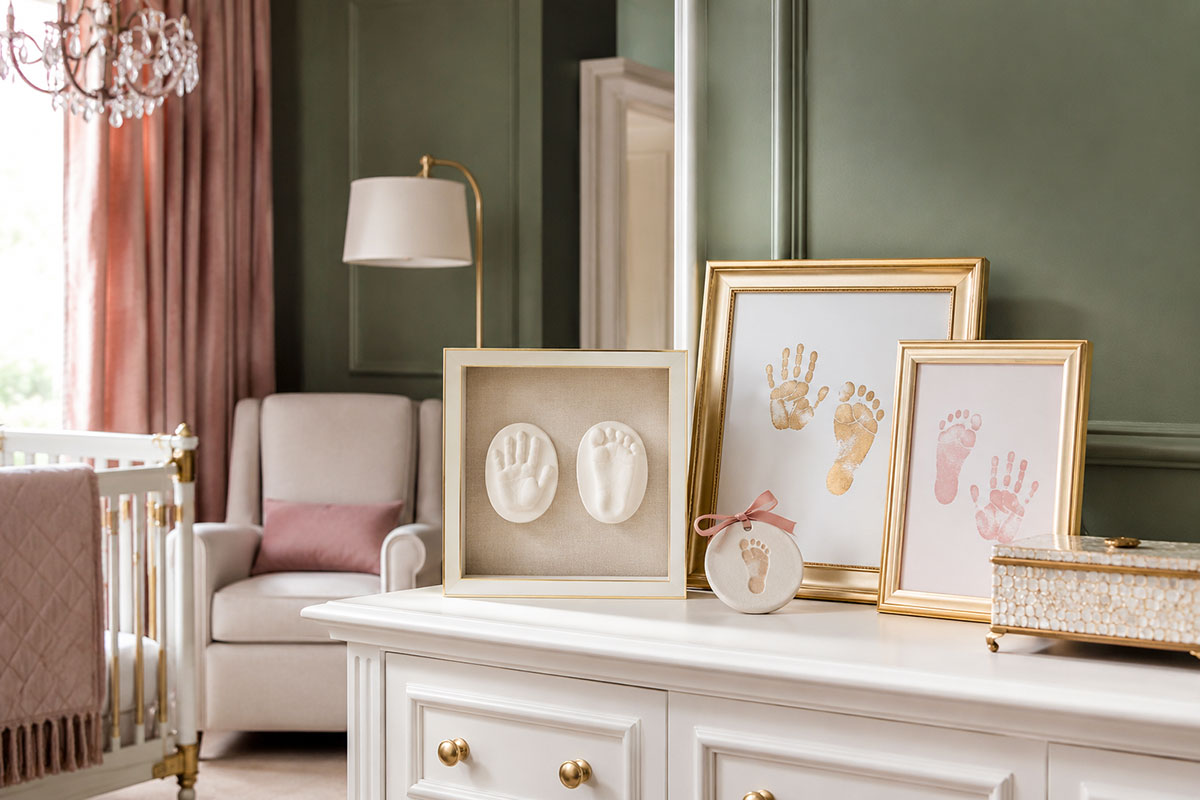
Baby Handprint and Footprint Keepsake Kit
Before Choosing a Handprint or Footprint Kit
The word “keepsake kit” may describe an inkless print pad, an air-dry clay impression set, a casting kit or a frame with print materials included. Check what the package actually contains before deciding which type suits the project.
- Confirm whether any ink, clay or impression material touches the baby’s skin.
- Read the manufacturer’s age guidance, warnings and cleanup instructions.
- Check the usable print area against the baby’s hand or foot size.
- Find out whether the frame, backing, hanging hardware and display stand are included.
- Review the drying, curing or setting time before planning the project as a gift.
- Look for extra paper or enough material to make more than one attempt.
Pass over any kit that does not clearly explain how its materials are used, how the baby’s skin should be cleaned and how the finished impression should be dried or stored.
Explore Baby Craft Ideas
Gifts for Parents and Grandparents
How to Get Cleaner Handprints and Footprints
What Makes a Baby Craft Keepsake-Worthy?
A baby craft becomes a keepsake when it records something that cannot be recreated later. A tiny handprint, footprint, name, birth date or first holiday can turn a simple project into a meaningful piece of family history.
I believe the best baby crafts are simple enough to let the baby’s print or impression remain the focus. A timeless color palette, clean lettering and a well-chosen frame will often make a small print feel more special than layers of decorations.
- It records the baby’s actual size or an important milestone.
- It includes the baby’s name, age or the date the craft was made.
- It uses materials that will not crumble, fade or tear easily.
- It fits a standard frame, shadow box or ornament storage box.
- It can be displayed in a nursery without looking like a classroom project.
- It can be given to a parent, grandparent or other family member.
Decide how you plan to use the finished piece before choosing the paper, clay or canvas. A print intended for a frame needs enough open space for a mat, while an ornament needs a secure hanging point and room for the baby’s name and date.
If you want the baby's name itself to become the keepsake, my free baby name hand embroidery pattern includes a printable alphabet and floral layout for a framed embroidery hoop.
A simple print can also become the starting point for several different projects. The ideas on the baby handprint crafts page can be adapted for framed art, cards and small nursery canvases without covering the natural shape of the hand.
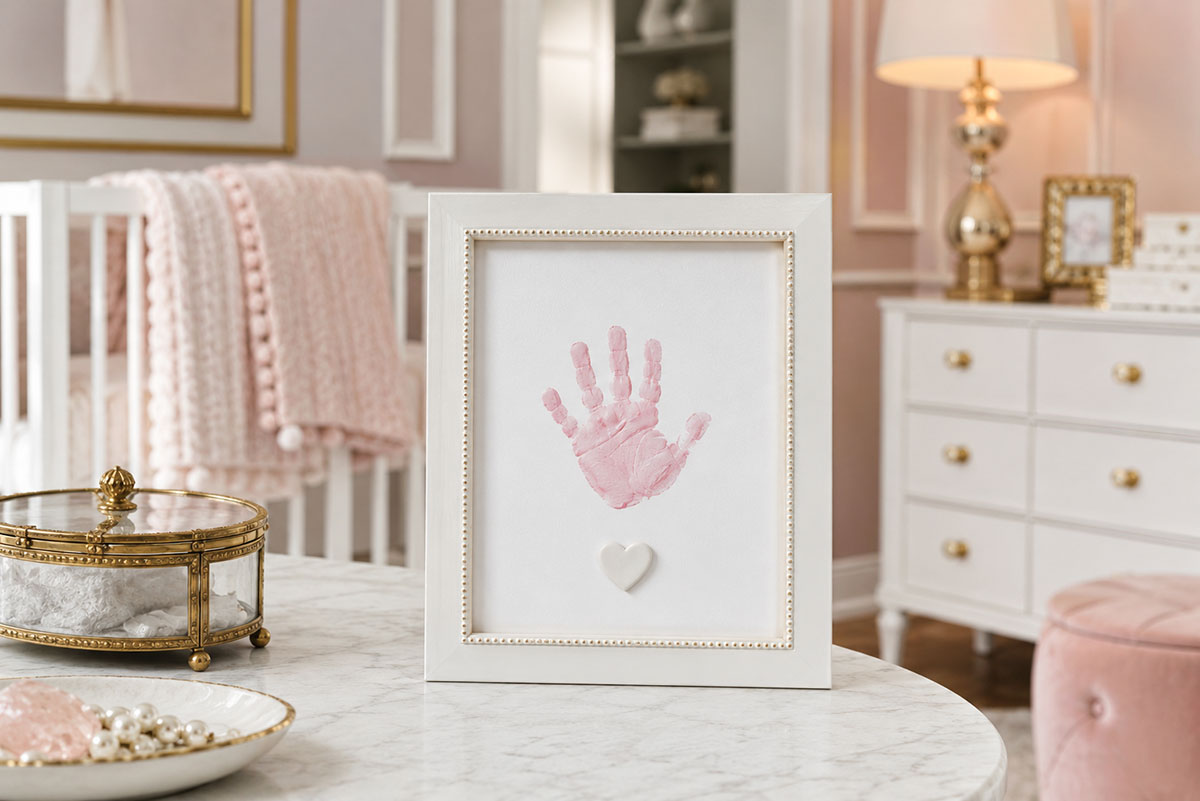
Baby Handprint Ideas Worth Framing or Giving
A baby handprint does not need to become a cartoon animal to feel finished. A clean print surrounded by the baby’s name, birth date or a few carefully chosen words can stand on its own as nursery art.
Newborn hands can be difficult to open and press flat, so allow room for an imperfect result. Curled fingers, a missing fingertip or a slightly uneven palm still record the baby’s size at that moment. Make several prints and choose the one with the most recognizable shape rather than expecting every finger to appear perfectly.
Simple ways to use a baby handprint
- Framed first handprint: Center one print on quality paper and add the baby’s full name and the date underneath.
- Birth-flower artwork: Use the handprint as the central shape and add a small painted or drawn birth flower around it.
- Parent and baby print: Place the baby’s handprint inside or beside an adult handprint to show the difference in size.
- Grandparent gift: Add a short message beneath the print and place it in a frame that suits the recipient’s home.
- Small nursery canvas: Use one handprint with a restrained woodland, floral or ocean accent rather than filling the entire canvas.
- First holiday keepsake: Add the year and a simple seasonal border that will still look attractive when displayed later.
Leave a generous margin around the print. That open space gives you room to add a mat or change the frame without trimming close to the fingers. It also keeps the finished artwork from looking crowded.
The existing baby hand and footprint ideas offer more ways to combine both prints in one keepsake. Using the same paper, lettering style and color palette will help the pair look intentional when they are displayed together.
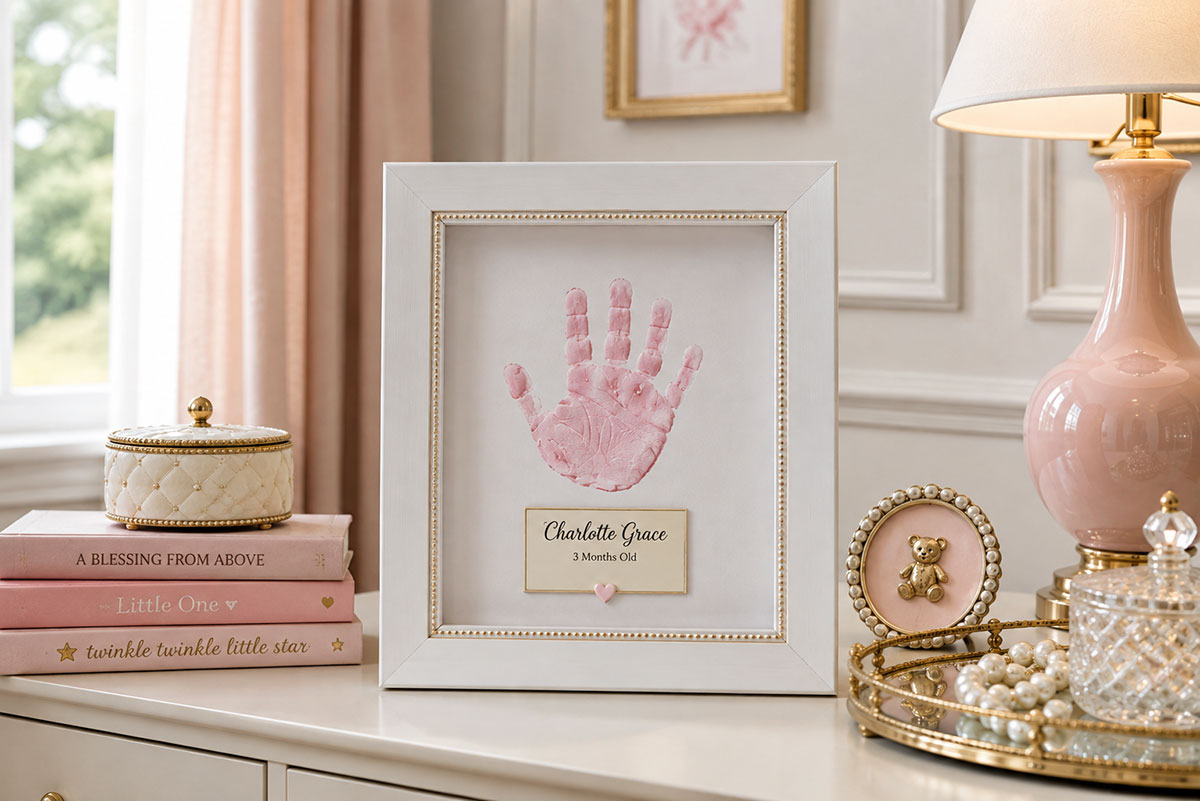
Baby Footprint Ideas for Keepsakes and Nursery Art
Footprints are often easier to capture than handprints because a baby is less likely to curl the toes tightly around the paper. They also fit neatly into frames, ornaments, cards and small clay plaques.
Choose a project that keeps the natural outline of the foot easy to recognize. A few painted leaves, flowers or simple animal features can add character, but the footprint should remain the part people notice first.
Meaningful ways to use a baby footprint
- Framed newborn footprints: Place two prints side by side and add the baby’s name, birth date, length and weight beneath them.
- Birth announcement artwork: Combine one clear footprint with neatly spaced birth information on archival-quality paper.
- Floral footprint keepsake: Add small painted stems or blossoms around the print without covering the heel or toes.
- Nursery-theme artwork: Turn the outline into a restrained woodland, safari, whale or floral design that coordinates with the room.
- Grandparent gift: Use a pair of prints with a short message and a frame that can stand on a shelf or desk.
- Holiday ornament: Transfer or press a small footprint onto a flat ornament and mark the baby’s first holiday and year.
- Clay footprint plaque: Make a shallow impression in a smooth clay surface and add the name and date after the material has set.
Before making the print, decide whether you need the right foot, left foot or both. If the finished design will include two feet, mark the back of each test print as soon as it is made. It is surprisingly easy to lose track once several sheets are drying.
Keep at least an inch of open paper around each print when possible. That extra space allows for trimming, matting and straightening the finished piece later.
More project variations can be found on the baby footprint keepsake ideas page, including ways to use prints in frames, gifts and seasonal crafts.
For a specifically autumn project, my fall baby footprint art idea turns a baby's footprint into simple seasonal artwork that can be framed or saved as a keepsake.
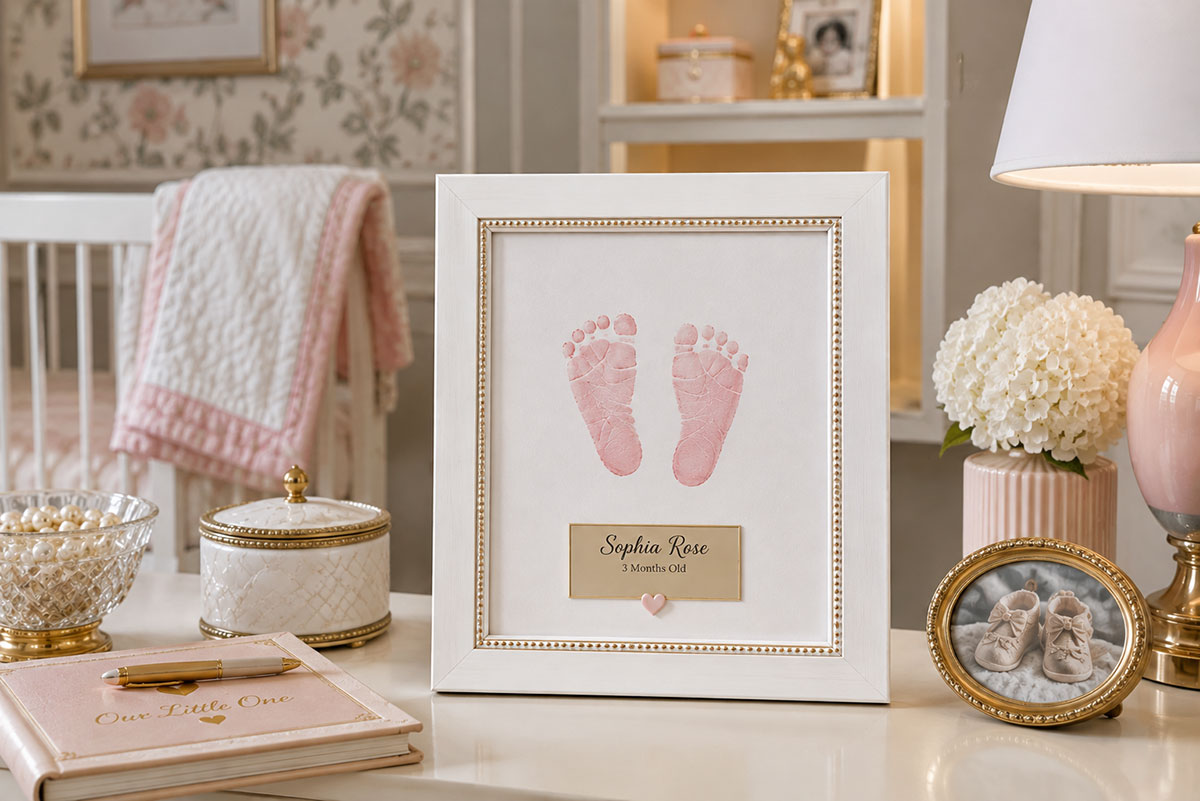
Clay Handprint and Footprint Keepsakes
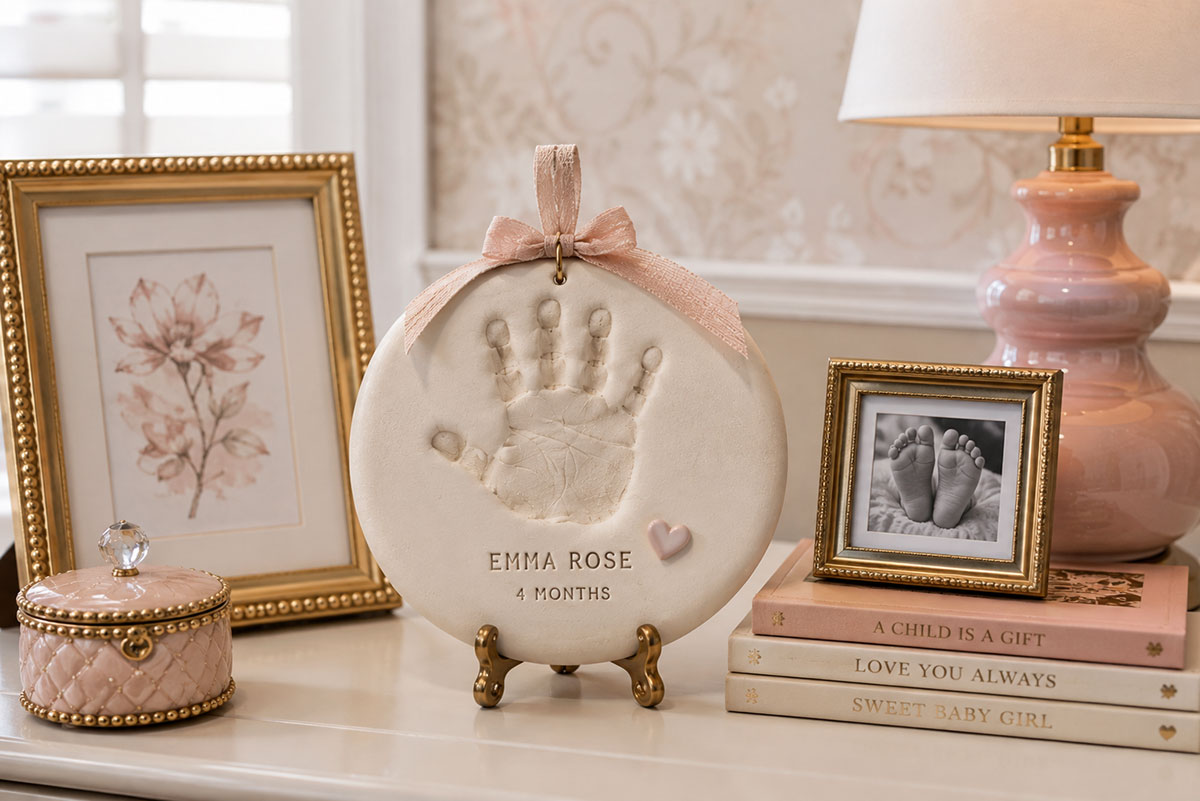
A clay impression preserves the shape and depth of a baby’s hand or foot in a way that paper cannot. The finished piece may become a framed plaque, a shelf display or a small ornament marked with the baby’s name and date.
Air-dry clay is convenient because it does not require an oven. Salt dough is inexpensive and easy to shape, but it must be dried thoroughly and sealed to help protect it from moisture. A purchased impression kit may include a frame, molding material and instructions designed for that particular product.
Read all package directions before placing any material against a baby’s skin. Do not assume that a product is suitable for direct contact simply because it is described as natural, washable or homemade.
Materials for a Simple Air-Dry Clay Impression
- Air-dry clay suitable for the planned project
- Clean rolling pin or smooth-sided jar
- Parchment paper or another protected work surface
- Round cutter, small bowl or template for shaping the plaque
- Drinking straw or wooden skewer if the keepsake will hang
- Fine-grit sandpaper for smoothing dry edges
- Non-toxic craft paint or a clear finish, if desired
- Soft cloth and warm water for cleaning the baby’s hand or foot promptly
How to Make the Impression
- Knead the clay according to its package directions until it is smooth and easy to shape.
- Roll the clay on parchment paper to the thickness recommended on the package. It must be thick enough to hold the impression without flexing, but the manufacturer’s drying directions should control.
- Cut the clay into the desired shape, leaving enough room for the print, name and date.
- Prepare the cleaning supplies before bringing the baby to the work area.
- Support the baby securely while a second adult guides the hand or foot. Press gently and evenly without forcing the fingers or toes flat.
- Lift the hand or foot straight away from the clay. Check that the heel, palm, toes or fingers are visible before deciding whether to keep the impression.
- Use a straw or skewer to make a hanging hole while the clay is still soft, keeping the hole well away from the edge.
- Add the baby’s name or date with letter stamps or a blunt tool if the clay is firm enough to hold the marks.
- Allow the plaque to dry for the full time recommended by the manufacturer. Turn it only when the directions permit so the shape is not damaged.
- Lightly smooth rough edges after the clay is completely dry. Paint or seal it only with a finish that is compatible with the clay.
A slightly uneven impression can still be beautiful. Tiny creases, rounded toes and natural variations are part of what makes the piece personal.
The ideas on the baby footprint keepsake page can help you plan how the finished impression will be labeled, framed or presented as a gift.
Place finished clay keepsakes on a stable shelf or inside a securely mounted frame. Heavy plaques should remain out of the baby’s reach and should not be hung over a crib, changing table or sleep space.
Baby Nursery Art Crafts That Fit the Room
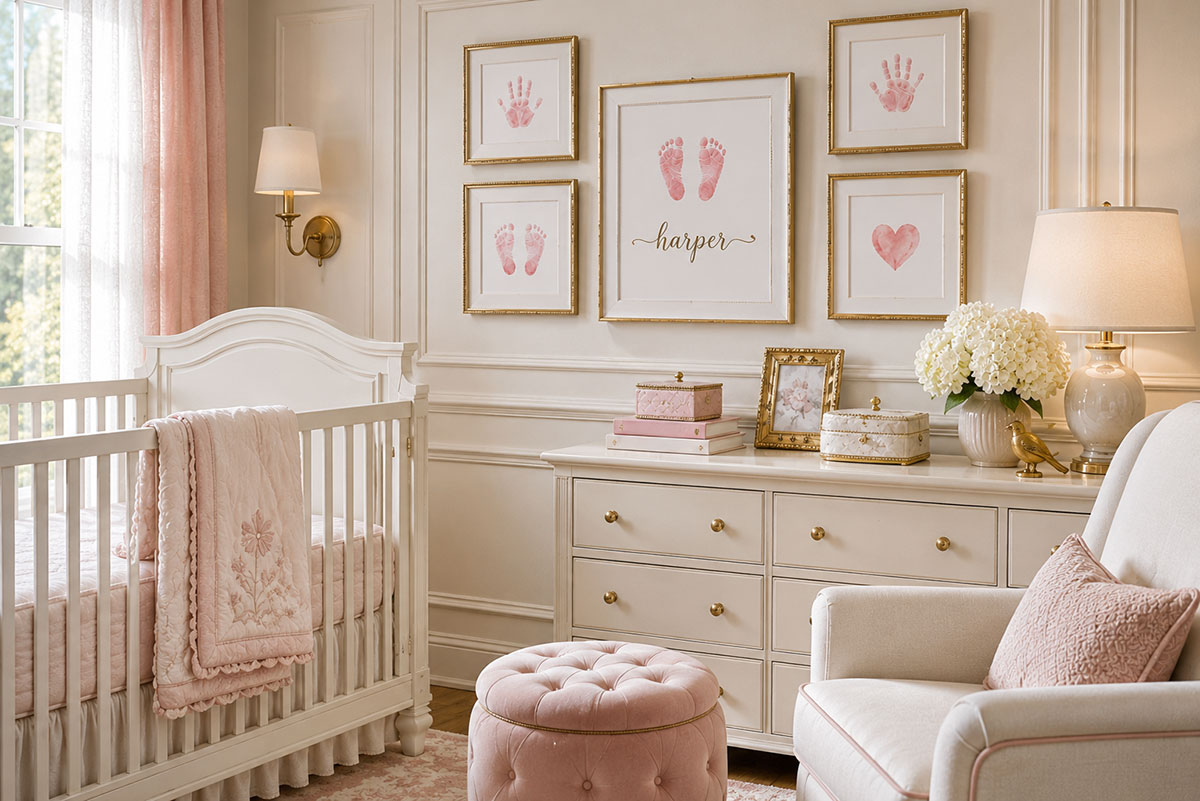
A handprint or footprint craft can become part of the nursery instead of being stored in a box. The key is to begin with the room in mind. Choose colors, framing and subject matter that belong with the bedding, wall color and other artwork already in place.
Keep the baby’s print easy to recognize. A small painted accent may connect it to the nursery theme, but the design does not need a cartoon face or a crowded background. A simple woodland branch, whale silhouette, floral border or teddy bear outline can be enough.
If you would rather stitch a framed keepsake, my baby cross stitch patterns include baby footprint, teddy bear, duck and bunny charts that can be finished in a hoop or frame and used as dresser or wall decor.
Nursery themes that work well with baby prints
- Woodland: Add a small branch, leaf shape or restrained forest-animal outline around a handprint.
- Safari: Use muted animal shapes and natural colors that coordinate with an elegant safari nursery.
- Ocean: Turn a footprint into a simple whale or place two prints beneath a wave-shaped border.
- Teddy bear: Pair a print with soft brown, blue or rose tones inspired by a teddy bear nursery theme.
- Floral: Add fine stems, leaves or the baby’s birth flower around the print.
- Circus: Use a vintage ticket shape, narrow stripe or muted star motif that fits a vintage circus nursery without making the artwork look busy.
Standard frame sizes make the finished project easier to display. An 8-by-10-inch sheet leaves enough space for one print, a name and a date. An 11-by-14-inch frame gives you more room for two prints, a wider mat or a short message.
Before adding lettering, place the unfinished artwork inside the frame and check the visible area. Frame edges and mats can cover more of the paper than expected. Keeping names and dates away from the outer edge prevents them from being hidden.
For a coordinated wall arrangement, repeat one element from the nursery in each piece. It might be the same frame finish, background color or lettering style. The crafts do not need to match exactly to look as though they belong together.
Display lightweight framed prints on a secured shelf or properly installed wall hook. Keep glass frames, clay plaques and other heavy decorations away from the crib and outside the baby’s reach.
Holiday Baby Crafts Made to Be Saved
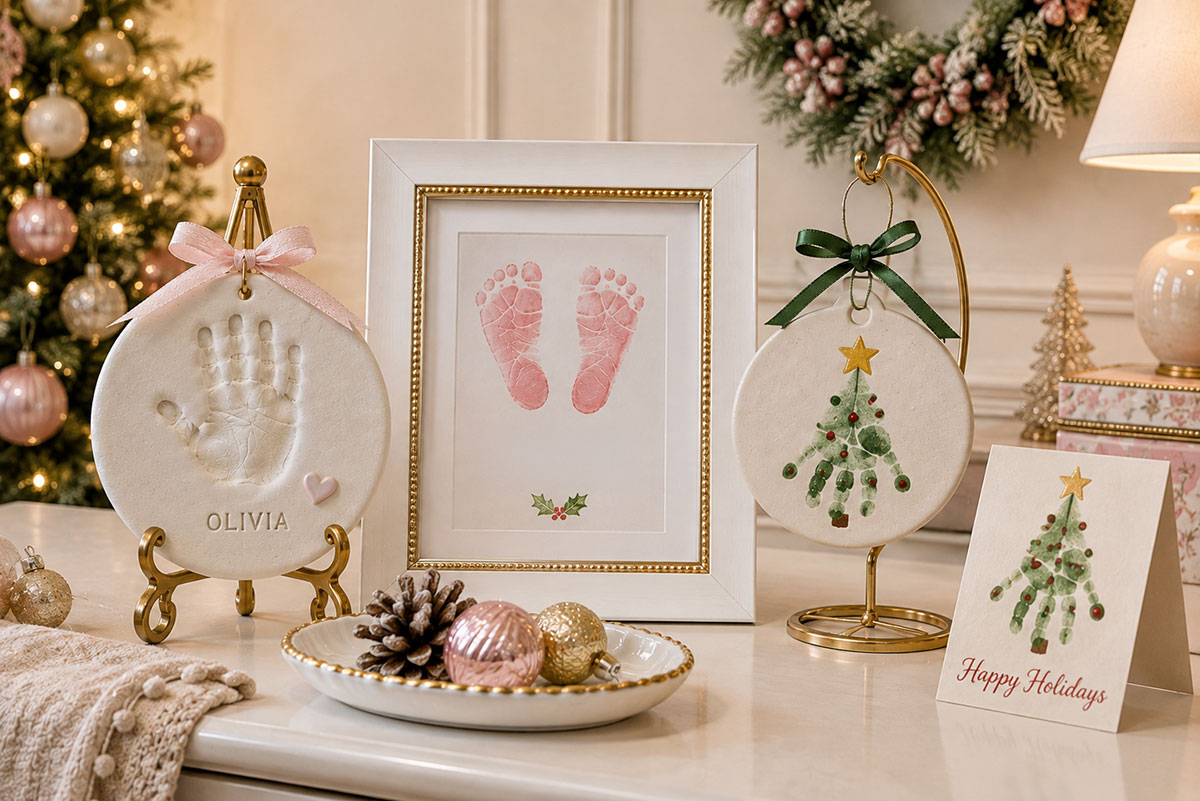
A baby’s first holidays pass quickly, which is why a dated handprint, footprint or clay impression can become more meaningful than a decoration made only for the season. Choose projects that preserve the baby’s size and can be brought out again each year.
Keep the design simple enough that the print remains recognizable. A holiday color, narrow border, ribbon or small painted accent can set the season without covering the fingers, toes or natural creases.
Baby’s First Christmas Crafts
- Flat clay handprint or footprint ornaments marked with the baby’s name and year
- Framed footprints with a small evergreen, star or snowflake accent
- A handprint card for grandparents with a separate printed photograph tucked inside
- A name-and-date ornament made from sturdy wood, clay or archival paper
- A shadow box holding a print, hospital bracelet copy and first Christmas photograph
For more first Christmas projects, browse my baby Christmas crafts collection. If you want a keepsake specifically for the tree, see these DIY baby Christmas ornaments.
Use a short ribbon or enclosed hanging loop that will not be accessible to the baby. Ornaments belong on an adult-supervised tree or secure display, not inside the crib or within reach of a changing area.
Baby Halloween and Fall Crafts
Black, rust, deep green and muted orange can create a seasonal look without turning the project into a loud novelty piece. A footprint may become a simple ghost, but it can also remain an unaltered print surrounded by a thin autumn border and the date.
- Framed first Halloween footprint with the baby’s age
- Clay pumpkin-shaped plaque with one small hand impression
- Footprint card for grandparents in a restrained fall palette
- Leaf-shaped paper keepsake with a handprint and handwritten date
- Shadow-box display combining a print with a first Halloween photograph
Thanksgiving Crafts from Baby
Thanksgiving projects work especially well as family gifts. Instead of adding a large cartoon turkey face, use a handprint with the baby’s name, the date and a short note about gratitude or family.
A framed print can be displayed during November and then stored flat with other family keepsakes. Acid-free paper and a removable seasonal mat make it easier to preserve the original artwork.
Baby Easter and Valentine Keepsakes
Soft floral accents, small hearts and simple egg-shaped borders suit spring crafts without hiding the print. A pair of footprints can be arranged inside a heart shape, while a handprint can be used on a card or small canvas for a parent or grandparent.
Skip loose sequins, beads, buttons and other small decorations. They add little to the finished keepsake and can become a hazard if they come loose.
Mother’s Day and Father’s Day Crafts from Baby
A print does not need a long poem to feel personal. The baby’s name, age, date and one sincere sentence are often enough. Use a frame, card or small canvas that suits the recipient rather than relying on heavily themed decorations.
- Baby handprint beside a parent’s hand outline
- Two footprints with the baby’s name centered underneath
- Small framed print for a desk or bedside table
- Folded card with the original print on the front
- Clay impression displayed in a deep shadow-box frame
Write the year on every holiday craft, even when the baby’s name is already included. Later, that small date will help place the keepsake within the child’s first milestones.
Baby Crafts for Parents and Grandparents
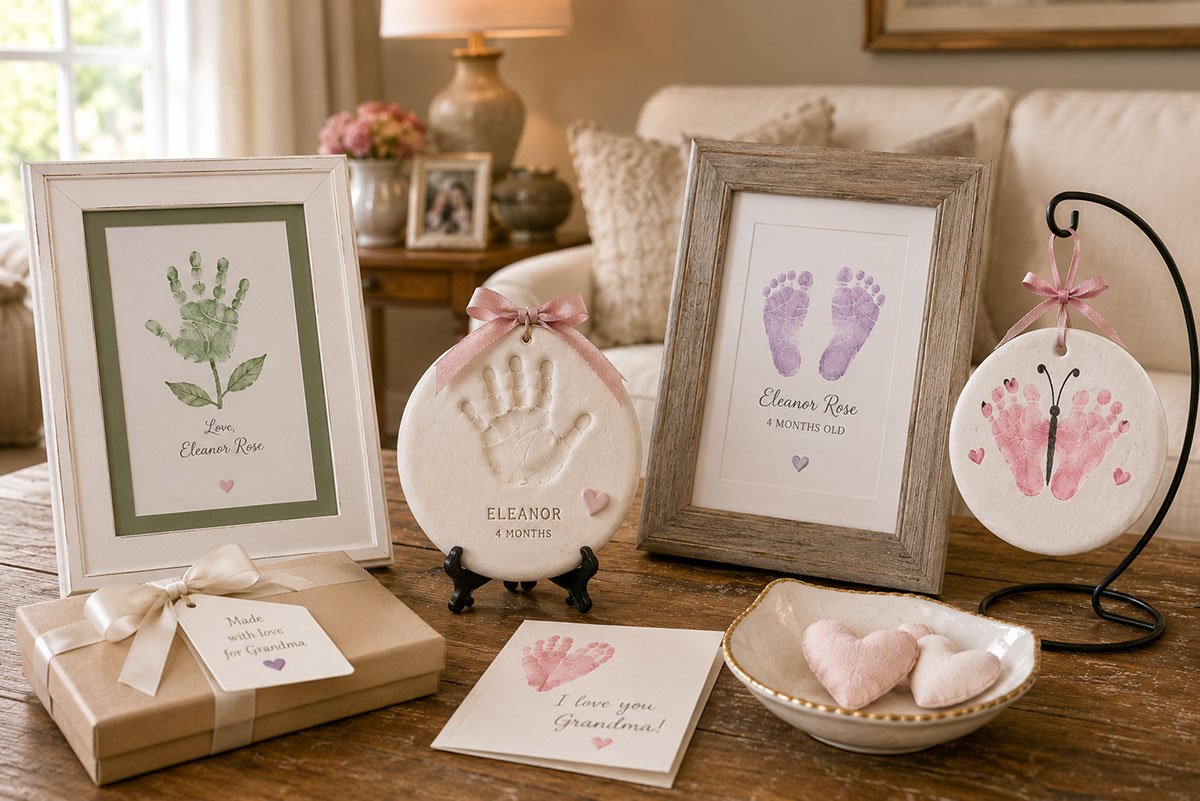
A handmade gift from a baby does not need to be complicated. The print itself carries the meaning, especially when it is paired with the baby’s name, age and the date it was made.
You can find fun projects to do with baby's name, birth details or a tiny print on my page featuring a collection of personalized baby gifts you can make that includes framed keepsakes, stitched gifts and crochet ideas.
Think about where the recipient might place the finished piece. A small frame suits a desk or bedside table, while a flat ornament is easier to store and bring out each holiday. Grandparents who prefer practical gifts may appreciate a framed print more than a heavily decorated keepsake box.
Simple Baby Keepsake Gifts
- Framed handprint: Use one clear print with the baby’s name and a short message beneath it.
- Framed footprints: Place two prints side by side with the birth date, age or first holiday.
- Clay impression: Add the baby’s name before the clay dries or attach a small labeled card after it is finished.
- Handmade card: Place the original print on the front and write a personal note inside.
- Small canvas: Use one print with a restrained border or nursery-inspired accent.
- Shadow box: Combine a print with a copy of the hospital bracelet, birth announcement or first photograph.
- Holiday ornament: Add the year clearly so the keepsake remains easy to identify later.
When making several gifts from the same print, create the original on good paper and photograph or scan it before adding paint, lettering or embellishments. The copy can then be used for cards while the original remains available for framing.
The ideas on the baby footprint frame page can help with matting, labeling and choosing a display style. A deeper frame is helpful for thicker paper, clay impressions and small keepsake items.
For a gift that feels complete, include a note explaining when the print was made. A simple line such as “Made at six weeks old” gives the recipient a detail that may not be remembered later.
Keep ribbons, loose decorations, glass frames and small attachments away from the baby. Gifts intended for nursery display should be placed on a secure shelf or wall area outside the crib and changing space.
Choosing Paint and Materials for Baby Crafts
The words “washable” and “non-toxic” do not automatically mean that a product is intended for an infant’s skin. Read the full label, including age guidance, warnings and cleanup directions, before beginning a handprint or footprint project.
Use the material only as its manufacturer directs. Keep paint and ink away from the baby’s mouth, eyes and any irritated or broken skin. If the label does not explain whether skin contact is appropriate, choose a different print-making product with clear instructions.
Prepare a Safe Crafting Area
- Cover the work surface and place cleaning supplies within reach before bringing in the baby.
- Use one adult to support the baby while another adult handles the paper and craft material.
- Apply only the small amount of paint or ink needed to make the print.
- Keep open containers, brushes, wipes and loose supplies out of the baby’s reach.
- Do not allow the baby to chew on painted fingers, toes, paper or crafting tools.
- Wash the baby’s skin promptly according to the product directions.
- Stop using the material if redness, swelling or irritation appears.
- Store unfinished crafts, clay pieces and paints where children cannot reach them.
I would rather make another print than leave paint on a baby’s skin while trying to repair a smudge. Have clean water, a soft cloth and any label-recommended cleanser ready so cleanup can begin as soon as the impression is made.
Homemade does not always mean suitable for infant skin. Food coloring, spices, essential oils and other familiar ingredients may still stain or irritate the skin. The same care should be used with clay, salt dough, stamp pads and impression compounds.
The U.S. Consumer Product Safety Commission Art and Craft Safety Guide recommends reading labels carefully and choosing art materials intended for children. Poison Control’s guidance for using art products safely also advises following product instructions and washing the skin, tools and work area after use.
For another way to record a tiny foot, see the different print-making options on the baby footprint stamp page. Check the directions for the specific pad or kit rather than assuming every product is used directly on the skin.
Small beads, buttons, sequins, bells and loose decorations should not be added to anything the baby may hold or reach. Finished crafts are keepsakes and display pieces, not toys.
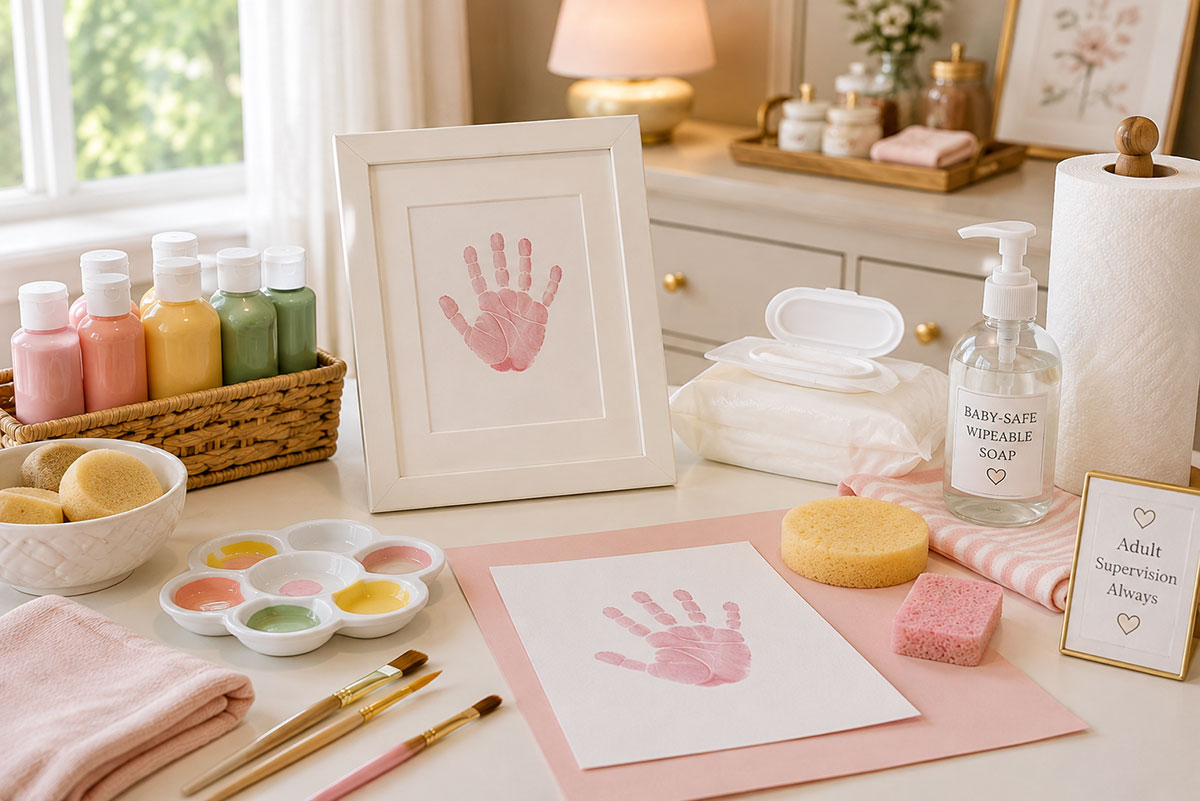
How to Get Cleaner Baby Handprints and Footprints
A clear print is helpful, but it does not need to look machine-made. Tiny gaps, curved toes and uneven fingertips are part of the record. The goal is to capture the baby’s size and natural shape without turning the project into a struggle.
Footprints are often the easier place to begin. Babies tend to keep their hands closed, while a supported foot can be lowered onto paper or pressed gently against it with less movement.
Prepare Everything Before Bringing in the Baby
- Place several sheets of paper on a firm, flat surface.
- Open the paint, ink pad or print-making kit and read its directions.
- Set out a soft cloth, warm water and any recommended cleanser.
- Write the baby’s name and the date lightly on the back of each sheet.
- Remove clothing that could brush against wet paint.
- Have one adult support the baby while another makes the print.
Steps for Making a Footprint
- Choose a time when the baby has been fed, changed and is resting comfortably.
- Support the ankle and heel without squeezing the foot.
- Apply a thin, even layer of the chosen material. Too much paint fills the spaces between the toes and can make the print look like a solid shape.
- Lower the heel first, then gently roll the rest of the foot onto the paper.
- Press lightly across the ball of the foot and toes without sliding.
- Lift the foot straight upward to reduce smearing.
- Clean the skin promptly before checking or labeling the print.
Another method is to hold the paper against the baby’s supported foot instead of lowering the foot onto a table. This can be useful with a newborn because the adult can control the paper while keeping the baby securely positioned.
Steps for Making a Handprint
- Wait until the baby’s hand is relaxed rather than trying to pull open a tight fist.
- Apply a very thin layer of paint or ink to the palm and fingers.
- Place the heel of the hand onto the paper first.
- Guide each finger down gently without forcing it straight.
- Hold the paper steady while lifting the hand directly upward.
- Wash the hand before the baby can bring it toward the mouth or face.
Do not keep pressing the same hand onto one sheet in an attempt to repair a missing finger. Make a fresh impression on clean paper instead. Several quick attempts are often easier than trying to correct one wet print.
Common Print Problems
- The print looks solid: Use less paint or ink on the next attempt.
- The toes or fingers are blurred: Lift the hand or foot straight up instead of sliding it away.
- Only part of the heel or palm appears: Apply gentle, even pressure across the full surface.
- The baby keeps moving: Stop and try again at another time rather than holding the limb in place.
- The paper wrinkles: Use heavier paper and place it on a firm surface.
- The print is crooked: Keep it if the shape is clear. A mat and careful trimming can straighten the finished presentation.
Make more than one impression while the supplies are ready. Label each sheet after it dries so the right foot, left foot, baby’s age and date are not forgotten.
The guide to making a picture of a baby footprint includes more ideas for preparing, labeling and using the finished print.
Preserving and Displaying Baby Crafts
A handprint or footprint is difficult to replace once the original begins to fade, crack or curl. A few careful choices made after the project dries can help protect it while keeping the baby’s name, age and date with the correct keepsake.
Label the Original Clearly
Write identifying information on the back before framing or storing the piece. Use a soft pencil or an archival pen that will not bleed through the paper.
- Baby’s full name
- Date the print or impression was made
- Baby’s age at the time
- Right hand, left hand, right foot or left foot
- Holiday or milestone connected with the project
- Name of the person who helped make it, when that matters to the family
Do not depend on memory alone. Two tiny footprints made several months apart may look very similar once they are removed from their frames or storage boxes.
Protect Paper Handprints and Footprints
- Allow paint, ink and added lettering to dry completely before framing.
- Use acid-free paper, mats and backing when practical.
- Keep tape, glue and adhesive labels away from the front of the original print.
- Place a mat between the artwork and the glass so painted areas do not press directly against it.
- Avoid direct sunlight, damp rooms and areas with frequent temperature changes.
- Handle the paper by its edges with clean, dry hands.
Photograph or scan the finished print before placing it in a frame. A clear digital copy makes it possible to create cards for relatives without repeatedly handling the original.
Store Clay and Salt-Dough Keepsakes Carefully
Clay and salt-dough pieces need more protection than flat paper. Let the keepsake dry or cure for the full time stated in the instructions before painting, sealing, wrapping or framing it.
- Wrap ornaments individually in acid-free tissue rather than loose newspaper.
- Store each piece in a rigid box so it cannot be crushed.
- Keep clay and dough away from damp basements, hot attics and direct sunlight.
- Do not stack heavy items on top of raised handprint or footprint impressions.
- Check stored pieces occasionally for cracks, moisture damage or loose hanging hardware.
If a clay plaque is too heavy for an ordinary frame, place it on a stable shelf with a small support stand or use a shadow box designed to hold its weight. The display method should support the keepsake rather than depending on ribbon or glue alone.
Choose a Safe Nursery Display Location
Baby crafts can add a personal note to the nursery, but they should be treated as décor rather than toys. Glass frames, clay plaques, wooden pieces and ornaments belong well outside the baby’s reach.
- Do not hang heavy crafts over the crib, bassinet or changing table.
- Secure wall frames with hardware appropriate for the frame’s weight.
- Keep shelf displays far enough back that they cannot be pulled down.
- Remove long ribbons, cords and loose decorations from accessible areas.
- Place breakable keepsakes in an adult-controlled display area.
A small group of carefully framed prints often has more meaning than a crowded wall. Leave room around each piece so the tiny hands, feet and handwritten dates remain easy to see.
Frequently Asked Questions About Baby Crafts
What crafts can I make with a baby?
Good choices include handprint and footprint art, clay impressions, framed name-and-date prints, holiday ornaments and simple cards for family members. The adult should prepare the materials, support the baby and complete all cutting, lettering and finishing.
What paint is safe for baby handprints?
Choose a product with clear manufacturer instructions for the intended use, and read its warnings and age guidance before allowing skin contact. “Washable,” “natural” and “non-toxic” do not by themselves confirm that a paint is intended for use on infant skin. Keep the material away from the baby’s mouth and eyes, then wash the skin promptly.
Are handprints or footprints easier with a newborn?
Footprints are often easier because newborns commonly keep their hands closed. A supported foot can be pressed gently onto paper without trying to straighten five curled fingers. Make several prints and keep the clearest impression.
How do I get a clear baby handprint?
Prepare the paper and cleanup supplies first, work while the baby is comfortable and use only a thin layer of paint or ink. Place the palm down first, guide the fingers gently and lift the hand straight upward. Do not force a tightly closed hand open.
How can I preserve baby handprint art?
Let the artwork dry completely, write the baby’s name and date on the back, and use acid-free paper, mats and backing when practical. Keep the framed print away from direct sunlight and damp areas. Photograph or scan the original before it is stored or framed.
What information should I add to a baby keepsake?
Include the baby’s full name, age and the date the print was made. You may also add the right or left hand or foot, birth information, holiday name or a short message for the recipient.
What baby crafts make good gifts for grandparents?
Framed prints, small clay impressions, dated ornaments and handmade cards are easy to display and store. The gift becomes more personal when it includes the baby’s age and a note explaining when the print was made.
Can baby crafts be displayed in a nursery?
Yes. Framed handprints, footprints and name-and-date artwork can coordinate with woodland, safari, ocean, floral and other nursery themes. Secure every frame properly and keep glass, clay, cords and heavy pieces away from the crib, changing table and the baby’s reach.
Are salt-dough handprints safe?
Salt dough should be treated as craft material rather than food or a toy. Supervise the entire process, prevent the baby from putting the dough in the mouth and wash the skin afterward. Dry the piece fully before sealing or storing it, and keep the finished keepsake out of reach.
Where should heavy clay keepsakes be displayed?
Place them on a stable adult-controlled shelf or in a shadow box designed to support their weight. Do not hang a heavy plaque over a crib, bassinet, changing table or other area where it could fall near the baby.
Choose One Baby Craft That Will Still Matter Later
You do not need to make a large collection of baby crafts to preserve this stage. One clear handprint, one tiny footprint or one carefully labeled clay impression can hold more meaning than a box filled with projects that were never finished or dated.
Choose the keepsake according to how you plan to use it. Paper prints are easy to frame and copy for relatives. Clay impressions preserve depth and texture. Ornaments are suited to first holidays, while a small canvas or framed print can become part of the nursery.
Prepare the materials before involving the baby, keep the process brief and accept the natural shape of the print. A bent toe or partly curled finger does not spoil the keepsake. It records the baby as they were on that particular day.
Add the baby’s name, age and date before putting the finished craft away. Then photograph the original and store or display it where it will be protected from moisture, sunlight, breakage and little hands.
The project worth making is the one your family will recognize, remember and be glad someone took the time to save.
When you click on links to various merchants on this site and make a purchase, this may result in this site earning a commission. This does not affect the price you pay.

UBGI Gold Standard 2026
Reviewed under the site's
editorial checklist.
Photos, decorating ideas, party setups and reader submissions are shared for inspiration unless a page is specifically presented as a pattern, tutorial, reference guide or step-by-step project. Follow the instructions, measurements, safety guidance and manufacturer directions provided for the particular project or product.
About Jan | Contact | Baby Nursery Ideas (Blog) | Site Map | Privacy Policy | Disclosure Policy | Disclaimer | Affiliate Disclosure | Earnings Disclosure | Facebook | Pinterest
I am a participant in the Amazon Services LLC Associates Program, an affiliate advertising program designed to provide a means for us to earn fees by linking to Amazon. As an Amazon Associate I earn from qualifying purchases.
Copyright © 2006-2026. All Rights Reserved.