Minimalist Crochet Lovey Pattern for Modern Baby Gifts
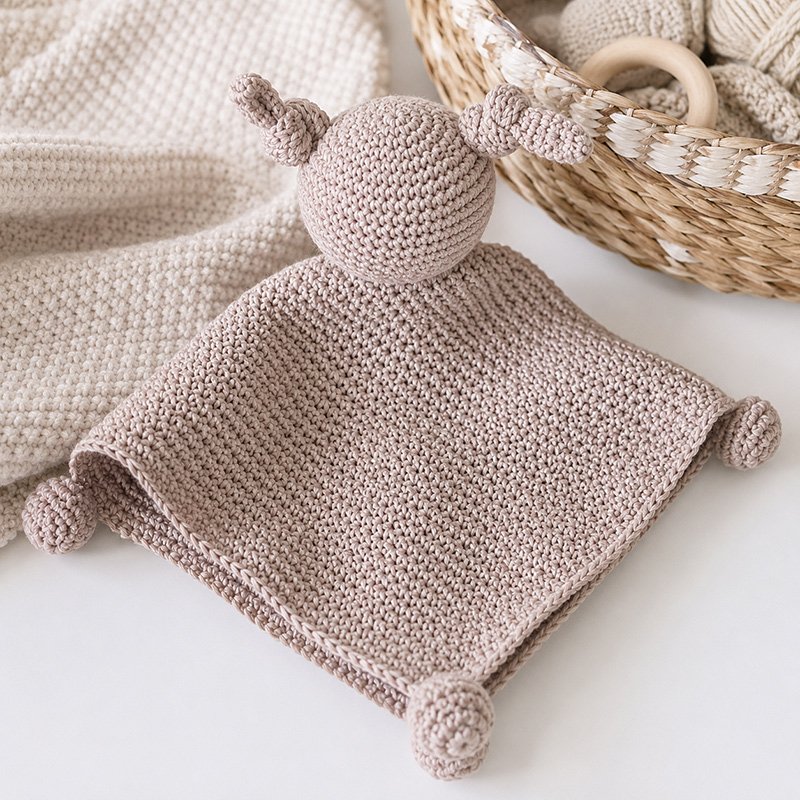
This minimalist crochet lovey pattern is a manageable project for an advanced beginner who already knows the basic crochet stitches and can work in continuous rounds. The shaping stays repetitive, and the finished design works well when you want a handmade baby gift that feels modern, simple, and nursery-friendly for an upcoming shower. This style uses an easy flat blanket body, a small rounded crochet head, simple ears, and neutral colors, which makes it one of the cleanest baby lovey patterns I offer.
More Crochet Lovey & Baby Pattern Ideas
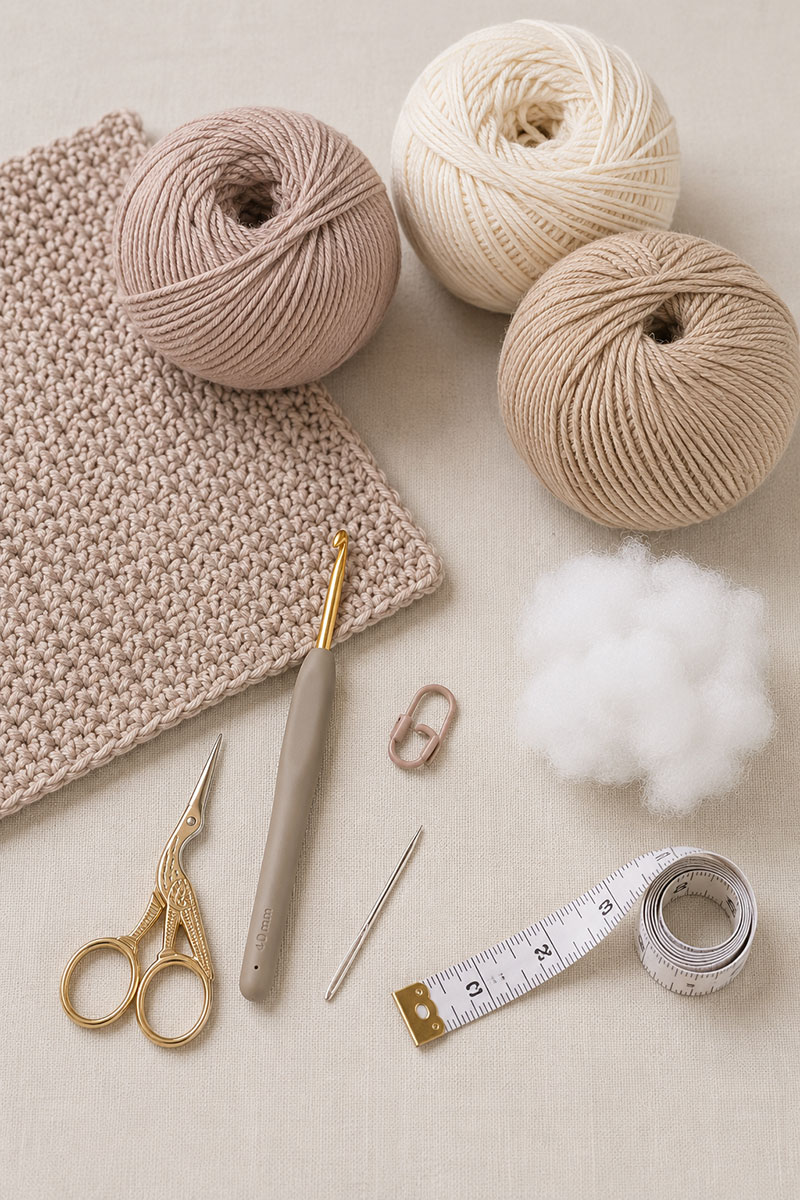
Helpful crochet supplies:
For this simple baby lovey, I like using washable baby yarn, a comfortable crochet hook, stitch markers, and a blunt yarn needle so the finishing steps stay neat and beginner-friendly.
Quick answer: A minimalist crochet lovey pattern uses simplified shapes, neutral yarn colors, and minimal detailing to create a modern baby comfort blanket that works well in contemporary nurseries and advanced-beginner crochet projects.
Round note: The head, ears, and optional corner balls are worked in continuous rounds unless the instructions specifically tell you to join. Place a stitch marker in the first stitch of each round and move it up as you work.
Jump to the part you need:
Minimalist Crochet Lovey Supplies That Keep the Pattern Simple
Some crochet loveys end up sitting unfinished in a basket because the pattern starts adding tiny details, difficult shaping, or more pieces than expected. This version keeps the shaping repetitive and uses only a square blanket, one round head, two small ears, and optional corner balls.
The entire layout stays clean and straightforward, which makes this style easy to coordinate with modern nursery colors and other simple handmade baby gifts.
This pattern is intentionally uncomplicated, but it is best suited to an advanced beginner who already knows how to work in rows, crochet in continuous rounds, increase, decrease, stuff pieces, and sew crocheted pieces together.
That simple shape is part of the reason these modern loveys read so clearly in nursery photos and baby gift displays.
For the version shown on this page, you will need:
- Medium weight cotton or cotton-blend yarn, approximately 325 to 375 yards total
- 4 mm crochet hook
- Optional 3.5 mm crochet hook for the stuffed pieces if your stitches are loose
- Small amount of washable fiberfill stuffing
- Large blunt yarn needle
- Several locking stitch markers
- Measuring tape
- Scissors
- Rustproof blocking pins and a blocking mat or folded towel, if blocking is needed
If you like simpler nursery styles, my free baby crochet patterns page includes several other projects that work nicely with modern nursery themes.
Minimalist Crochet Lovey Color Ideas That Photograph Well
A lot of baby crochet projects end up using bright rainbow palettes that compete with the room instead of blending into it. Minimalist nursery spaces work better when the yarn colors repeat tones already found in the crib sheets, curtains, or rug.
You do not need to match every item in the nursery exactly. Repeating one or two tones already used in the crib sheet, curtains, rug, or storage baskets is usually enough to make the handmade lovey look intentional in the room.
That also makes the yarn choice easier because you are choosing a coordinating color rather than trying to duplicate an exact shade.
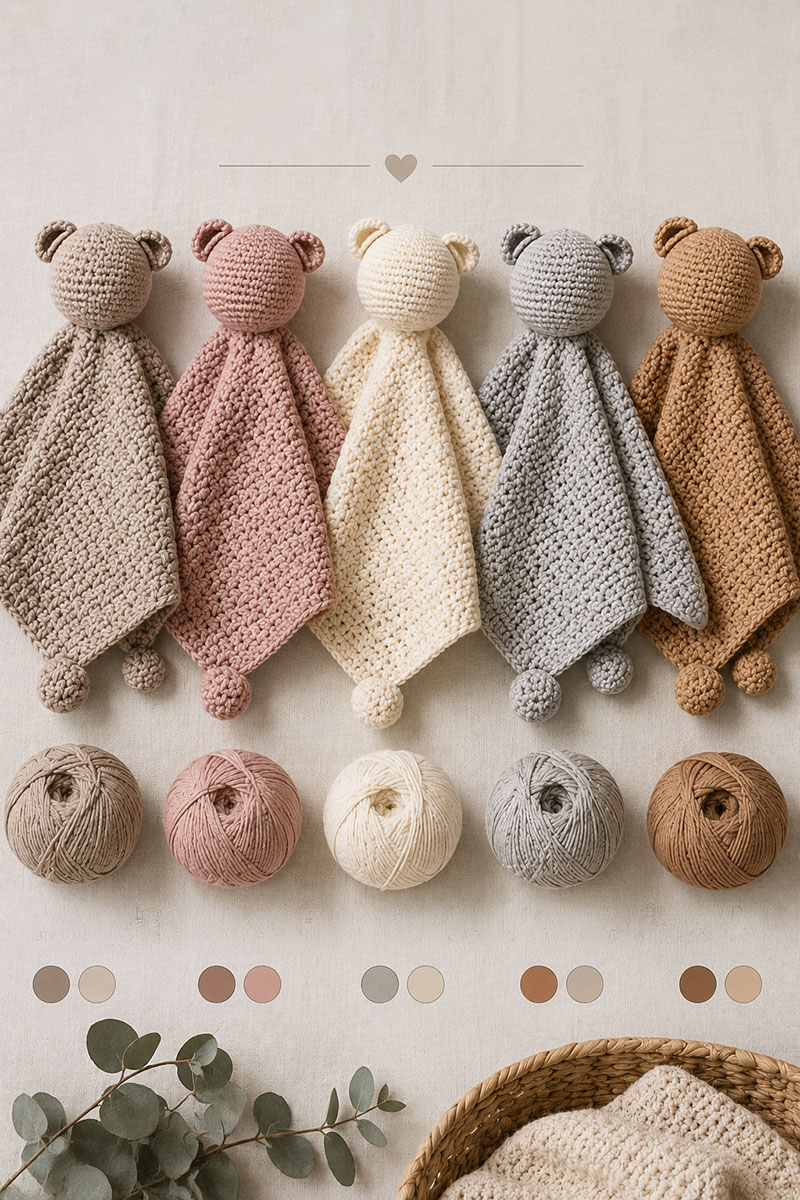
These yarn combinations work especially well:
- Warm taupe and cream
- Muted rose and oatmeal
- Stone gray and ivory
- Clay and beige
- Dusty mocha and almond
The flatter the color palette stays, the more modern the finished lovey tends to look.
For another nursery-friendly handmade project, my crochet bunny lovey pattern uses a similar easy layout with a slightly different animal shape.
Minimalist Crochet Lovey Pattern Notes Before You Start
This lovey is made in separate sections. The blanket base is crocheted first and finished with one round of single crochet. The head is worked separately from the top down in continuous rounds, lightly stuffed, closed, and sewn securely over the center of the blanket.
The two small rounded ears are sewn to the head before the head is closed so their yarn tails can be secured inside. The four stuffed corner balls shown in the photos are optional. Leaving the blanket corners plain produces the lowest-detachment version of the lovey.
The written pattern below uses the shallow rounded cup ears shown in the finished-project image. Each ear is crocheted as a small round piece with a slightly raised outer edge and is attached without folding.
Pattern status: The stitch counts and finished measurements are calculated from the stated gauge and construction, and the yarn amounts are estimates. This revised pattern has not been physically test-crocheted.
Pattern correction: The ear instructions were revised September 15, 2026. The earlier version incorrectly instructed readers to fold the crocheted ear circles in half. The current instructions use shallow rounded cup ears so the written construction is intended to reproduce the rounded ear shape shown in the finished-project image.
The completed project should measure approximately:
- Blanket including border: approximately 14 × 14 inches
- Head: approximately 3 to 3¼ inches across
- Each rounded ear: approximately 1¼ to 1½ inches across
- Each optional corner ball: approximately 1¼ to 1½ inches across
The listed head, ear, and corner-ball measurements are based on the 4 mm hook and stated gauge. Pieces made with the optional 3.5 mm hook will probably finish slightly smaller. Using the same hook and consistent tension for all matching pieces is more important than reproducing an exact stuffed-piece diameter.
The displayed height will change depending on whether the blanket is laid flat, folded, draped, or propped for a photograph, so it is not a fixed finished measurement.
Keep the stitches in the head, ears, and optional corner balls tight enough that the stuffing cannot show through. If you crochet loosely, use the optional 3.5 mm hook for those pieces while keeping the 4 mm hook for the blanket.
For more animal-inspired layouts, my crochet animal lovey patterns page includes additional beginner-friendly shapes.
Easy Minimalist Crochet Lovey Pattern Step by Step
This minimalist crochet lovey pattern includes measurement, stitch-count, border-spacing, orientation, and assembly checkpoints. Read through the complete pattern before beginning, especially if you plan to include the optional corner balls.
Terminology: This pattern uses standard U.S. crochet terms.
Skill level: Advanced beginner. You should already be comfortable working in rows, working continuous rounds, making simple increases and decreases, using a magic ring, stuffing pieces, and sewing crocheted pieces together.
Gauge: Approximately 18 sc and 20 rows equal 4 inches in single crochet with the 4 mm hook. Measure the fabric while it is lying flat without stretching it. Gauge does not need to be exact for the project to function, but it determines whether the blanket finishes close to 14 inches.
First-row checkpoint: The first completed blanket row should measure approximately 13¼ to 13¾ inches before the border is added. If it is more than ½ inch outside this range, change hook size and begin again rather than continuing with a blanket that will finish much smaller or larger than stated.
Turning-chain note: The turning ch 1 does not count as a stitch. Work the first sc into the first stitch of every row.
Round note: The head, ears, and optional corner balls are worked in continuous rounds unless the instructions specifically tell you to join. Place a stitch marker in the first stitch of each round and move it up as you work.
Magic-ring safety note: After completing several rounds of every magic-ring piece, thread the starting tail onto the yarn needle. Weave it around the closed ring center and through nearby stitches in more than one direction, then secure it inside the piece before stuffing or closing it. The center should not loosen or open when pulled firmly.
Right-side note: The turned single-crochet blanket does not have a strongly defined right or wrong side. After the border is finished, choose the smoother-looking side as the display side and mark it with a removable stitch marker.
Abbreviations:
- ch = chain
- sc = single crochet
- sl st = slip stitch
- inc = work 2 sc in the same stitch
- dec = single crochet 2 stitches together
- RS = right side or selected display side
- WS = wrong side or back side
Materials
- Medium weight cotton or cotton-blend yarn, approximately 325 to 375 yards total
- Blanket and border: approximately 250 to 275 yards
- Head: approximately 45 to 55 yards
- Ears and four optional corner balls: approximately 30 to 45 yards
- 4 mm crochet hook
- Optional 3.5 mm crochet hook for stuffed pieces if needed for tighter stitches
- Small amount of washable fiberfill stuffing
- Large blunt yarn needle
- Several locking stitch markers
- Measuring tape
- Scissors
- Rustproof blocking pins and blocking surface, if needed
Blanket Body
- With the 4 mm hook, ch 62.
- Row 1: Sc in the second ch from the hook and in each remaining ch across. You should have 61 sc.
- Lay the row flat without stretching it and measure from end to end. It should measure approximately 13¼ to 13¾ inches.
- Row 2: Ch 1, turn. Sc in the first stitch and in each stitch across. You should still have 61 sc.
- Repeat Row 2, keeping 61 sc in every row, until the blanket body measures approximately 13½ inches tall or the height matches the width.
- At the stated gauge, you will probably have approximately 68 rows including Row 1. Use the measurement rather than forcing a particular row count.
- Count the stitches in the final row and confirm that 61 sc remain.
- Do not fasten off and do not turn after the final body row.
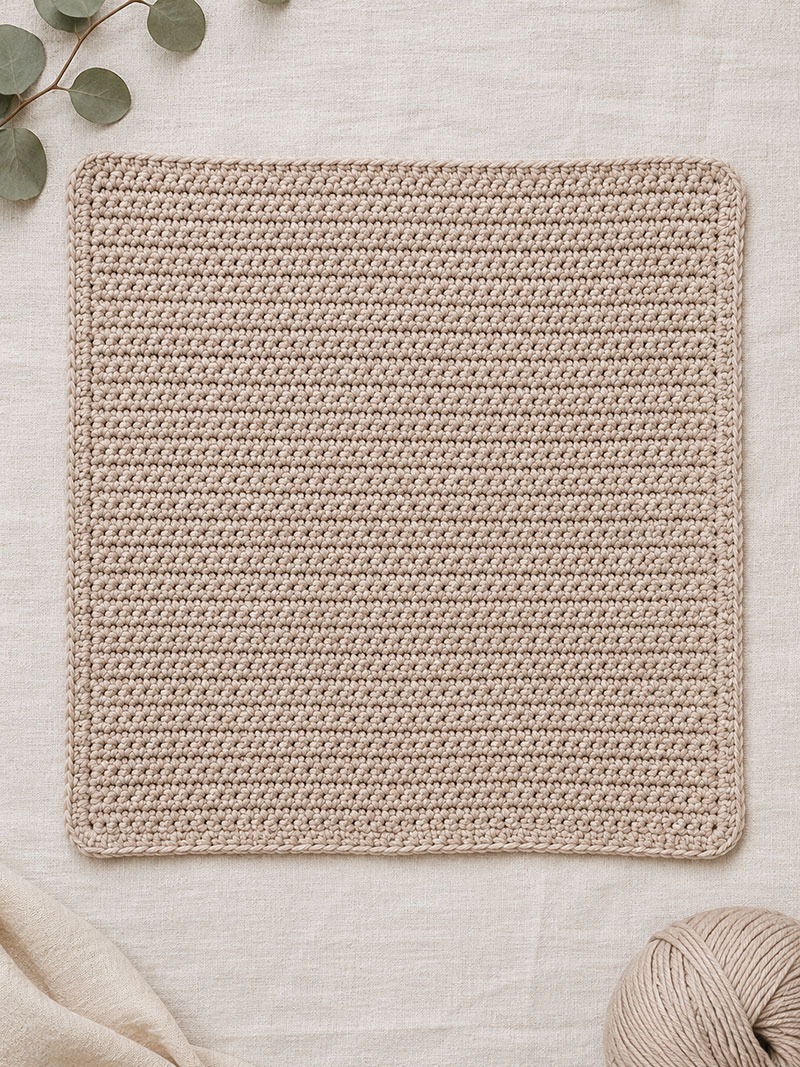
Before adding the border, fold the blanket diagonally with the corners meeting. The two folded edges should line up closely. If one dimension is noticeably longer, add or remove body rows before beginning the border.
Blanket Border
The border contains three sc in each corner. The first corner is started with one sc and completed with two additional sc immediately before the final join. This prevents four stitches from being placed in the starting corner.
- Ch 1 without turning.
- Work 1 sc in the same stitch as the last sc of the final body row. Place a stitch marker in this border stitch. This is the first stitch of the starting corner.
- Sc in each of the next 59 stitches across the top edge.
- Work 3 sc in the final stitch of the top edge.
- Count the blanket body rows before working the first side edge. Work exactly 61 sc evenly down the first side edge. If the blanket has exactly 61 body rows, work 1 sc in each row end. If it has more than 61 rows, subtract 61 from the total number of body rows and skip that many row ends, spacing the skipped row ends as evenly as possible. For example, skip 5 row ends for 66 rows, 6 for 67 rows, 7 for 68 rows, 8 for 69 rows, or 9 for 70 rows. If the blanket has fewer than 61 body rows, subtract the total number of body rows from 61 and work 2 sc into that many evenly spaced row ends, with 1 sc in every remaining row end. Keep any skipped or doubled row ends distributed evenly rather than clustered. Count the completed side edge and confirm that it contains exactly 61 sc before continuing.
- Work 3 sc in the first foundation chain at the bottom corner.
- Sc in each of the next 59 foundation chains across the bottom edge.
- Work 3 sc in the final foundation chain.
- Work exactly 61 sc evenly up the second side edge, using the same number and spacing of any skipped or doubled row ends used on the first side. Confirm that the second side also contains exactly 61 sc.
- Work 2 additional sc in the same stitch that contains the marked first border sc. The starting corner now contains 3 sc total.
- Join with a sl st to the marked first border sc.
- You should have 252 border stitches total, including all four 3-sc corner groups.
- Fasten off. On the WS, weave the border fastening-off tail and the original foundation-chain starting tail through several stitches in different directions. Trim both tails only after tugging gently to confirm that they are secure.
Border checkpoint: Lay the blanket flat before making the remaining pieces. The border should lie smoothly without ruffling, cupping, or pulling the corners inward. If it does not lie flat, confirm that the blanket body is square and close to the stated gauge, then remove the border and redistribute the same 61 stitches more evenly along each side edge. Make sure any skipped or doubled row ends are spaced evenly rather than clustered, and confirm that both side edges still contain exactly 61 sc before continuing.
Blocking the Blanket
- If the blanket does not lie square after the border is finished, dampen it according to the yarn manufacturer’s care instructions.
- Lay it on a blocking surface with the selected display side facing up.
- Shape it to approximately 14 × 14 inches without stretching the stitches excessively.
- Pin through the border rather than through open spaces in the fabric.
- Allow the blanket to dry completely before attaching the head or optional corner balls.
Face Note
The featured minimalist version is faceless and does not require eyes, a nose, buttons, or added facial pieces. If you choose to add eyes, embroider two short satin stitches with securely knotted embroidery floss or yarn while the lower head opening is still accessible. Do not use plastic safety eyes, beads, buttons, glued decorations, or removable facial pieces.
Round Head
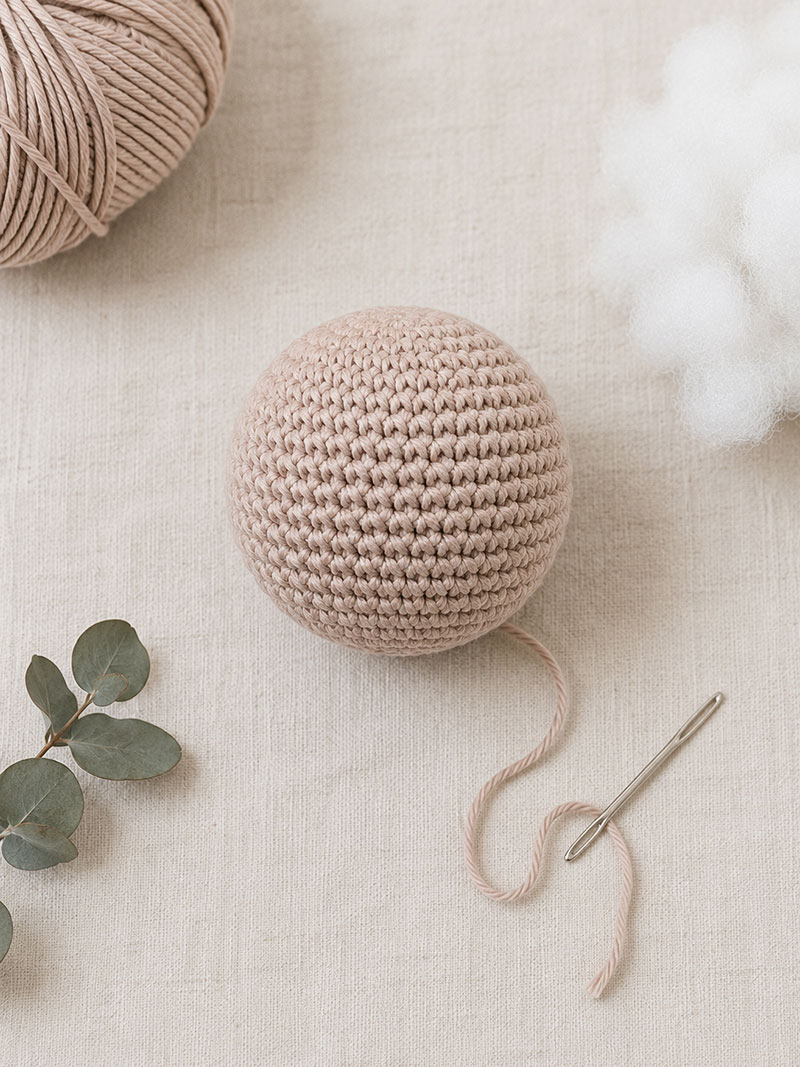
The head is worked from the top down. The magic-ring center becomes the top of the head, and the gathered final round becomes the bottom.
- With the 4 mm hook, or the 3.5 mm hook if needed for tighter stitches, make a magic ring.
- Round 1: Work 6 sc into the magic ring. Pull the ring closed firmly and place a stitch marker in the first sc. You should have 6 sc.
- Round 2: Inc in each stitch around. You should have 12 sc.
- Round 3: Sc 1, inc. Repeat around. You should have 18 sc.
- Round 4: Sc 2, inc. Repeat around. You should have 24 sc.
- Round 5: Sc 3, inc. Repeat around. You should have 30 sc.
- Round 6: Sc 4, inc. Repeat around. You should have 36 sc.
- Round 7: Sc 5, inc. Repeat around. You should have 42 sc.
- Rounds 8 through 14: Sc in each stitch around. Keep 42 sc in every round.
- Round 15: Sc 5, dec. Repeat around. You should have 36 sc.
- Round 16: Sc 4, dec. Repeat around. You should have 30 sc.
- Round 17: Sc 3, dec. Repeat around. You should have 24 sc.
- Round 18: Sc 2, dec. Repeat around. You should have 18 sc.
- Lightly stuff the head, shaping it into a smooth sphere. Leave enough room to reach inside through the 18-stitch opening while attaching the ears and any optional embroidered face.
- Do not work Rounds 19 and 20 until both ears have been made and sewn to the head.
Rounded Cup Ears
The ears are worked as small shallow cups rather than folded semicircles. Do not fold or flatten them after crocheting. Make 2.
- Make a magic ring.
- Round 1: Work 6 sc into the magic ring. Pull the ring closed firmly and place a stitch marker in the first sc. You should have 6 sc.
- Round 2: Inc in each stitch around. You should have 12 sc.
- Round 3: Sc 1, inc. Repeat around. You should have 18 sc.
- Round 4: Working in the back loops only, sc in each stitch around. Keep 18 sc. This even round turns the outer edge forward slightly and creates the shallow rounded cup seen in the finished lovey.
- Sl st to the first sc of Round 4.
- Fasten off, leaving a 20-inch yarn tail for sewing.
- Make the second ear the same way and compare the two before attaching them. They should be approximately the same diameter and depth.
- Do not fold the ears. Gently press the center of each ear back while allowing Round 4 to curve slightly forward. The finished ear should look like a shallow round cup, not a flat circle or folded half-circle.
Attaching the Ears to the Head
- Hold the head with the magic-ring center at the top and the 18-stitch opening at the bottom.
- Choose one side as the front. Position the slight staircase created by the continuous-round transitions toward the back when possible. Mark the front center at Round 10.
- At Round 10, do not count the marked front-center stitch. Count 10 stitches to the left and mark the 10th stitch. Return to the front-center marker, count 10 stitches to the right, and mark the 10th stitch. These marks locate the center position for each ear.
- On each ear, choose 6 consecutive stitches from Round 4 to form the attachment arc. These stitches become the lower inside edge of the ear. Leave the remaining 12 stitches free so the ear keeps its rounded shape.
- Place the midpoint between the third and fourth stitches of the 6-stitch attachment arc over the side marker on the head. The attachment should span approximately Rounds 8 through 11.
- Position each ear with the shallow cupped surface facing slightly forward. The ears should remain visibly round when the head is viewed from the front.
- Pin or hold both ears in position and compare them from the front, back, and top. Adjust them until they are level and the same amount of each ear is visible.
- Using the long yarn tail, sew each of the 6 attachment stitches securely to the head along a gentle curved line. Use a different section of the head fabric for each stitch rather than repeatedly entering the same hole.
- Work back across the same attachment area with 6 reinforcement stitches, placing them between the first stitches whenever possible. Keep the yarn snug without flattening the ear or gathering the head.
- Bring each yarn tail through the lower head opening, weave it through several stitches on the inside of the head in more than one direction, secure it, and trim the excess.
Ear checkpoint: Before closing the head, look at it straight on. Each ear should appear almost round with a shallow cupped center. If an ear looks like a semicircle, flat disk, or narrow loop, reshape and reposition it before continuing.
Finishing the Head
- Add or rearrange the stuffing so the head is evenly rounded but still soft. Keep stuffing away from the final stitches so fibers do not become trapped in the closure.
- Round 19: Sc 1, dec. Repeat around. You should have 12 sc.
- Add a final small amount of stuffing if needed.
- Round 20: Dec around. You should have 6 sc.
- Fasten off, leaving a 36-inch yarn tail for attaching the head to the blanket and weaving in securely afterward.
- Thread the tail through the front loops of the 6 remaining stitches.
- Pull the opening closed firmly but gradually so the yarn does not break.
- Pass the needle through the gathered opening once more and make a small securing backstitch.
- Do not cut or weave in the 36-inch attachment tail.
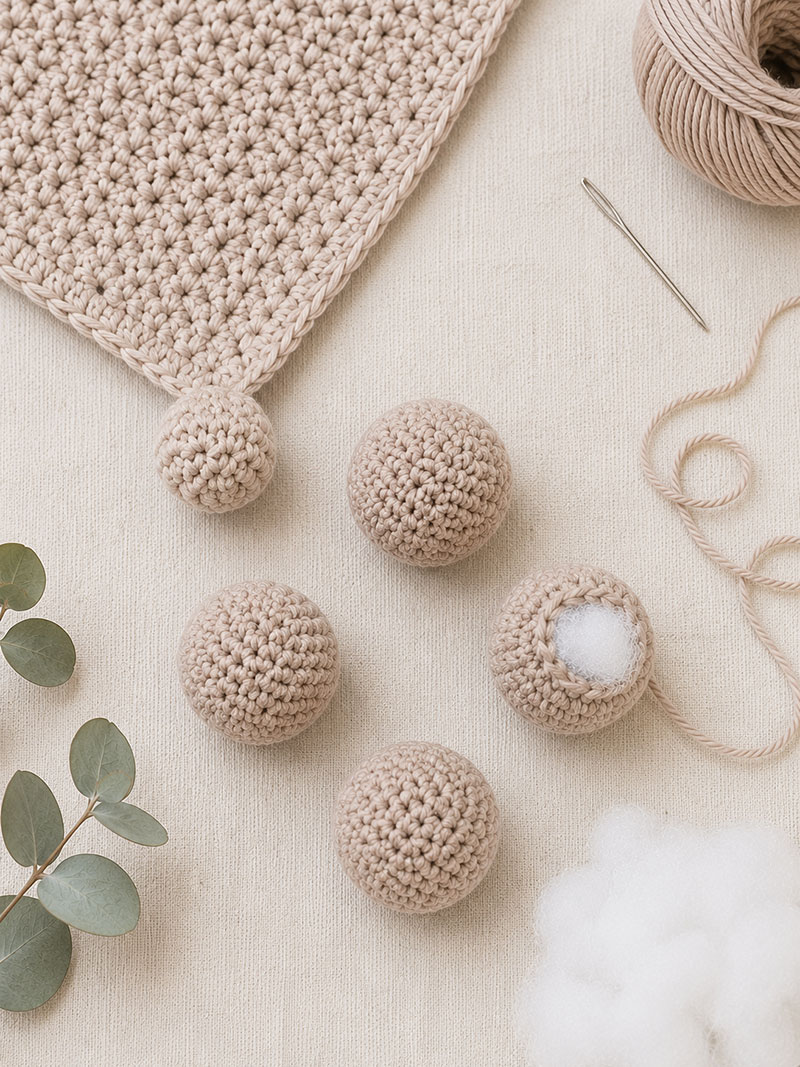
Optional Corner Balls
The corner balls are decorative and are not required for the blanket to function. For the lowest-detachment version, omit them and leave the four 3-sc border corners plain.
- Make a magic ring.
- Round 1: Work 6 sc into the magic ring. Pull the ring closed firmly and place a stitch marker in the first sc. You should have 6 sc.
- Round 2: Inc in each stitch around. You should have 12 sc.
- Round 3: Sc 1, inc. Repeat around. You should have 18 sc.
- Round 4: Sc in each stitch around. Keep 18 sc.
- Round 5: Sc 1, dec. Repeat around. You should have 12 sc.
- Add a small amount of stuffing. The ball should hold its shape without becoming hard.
- Round 6: Dec around. You should have 6 sc.
- Fasten off, leaving a 24-inch yarn tail.
- Thread the tail through the front loops of the 6 remaining stitches and pull the opening closed.
- Make a small securing backstitch at the gathered opening, but do not cut the tail.
- Make 4 matching balls total.
Attaching the Optional Corner Balls
- Lay the blanket flat with the RS facing up.
- Place the gathered opening of one ball directly over a 3-sc border corner.
- Round 5 contains 12 stitches. Use the long tail to make exactly 6 attachment stitches through every second stitch of Round 5. Distribute the blanket ends of those stitches across the three corner stitches and one adjacent border stitch on each side of the corner.
- Those five blanket stitches support six attachment stitches, so one blanket stitch will be used twice. Do not place consecutive attachment stitches through the same blanket stitch. When returning through a stitch that has already been used, pass through a different part of its loops rather than through the exact same hole.
- Make a second reinforcement pass using the 6 Round 5 stitches that were skipped during the first pass. Distribute these stitches across the same five-stitch blanket area, again avoiding consecutive stitches through the same entry point.
- Keep the tension snug but not tight enough to compress the ball or pucker the blanket corner.
- Bring the tail through the ball, weave it through several internal stitches in different directions, and trim it close to the surface.
- Repeat for the remaining three corners, checking that all four balls sit at the same angle.
- Hold each ball and pull firmly in several directions. No gap, loose loop, exposed stuffing, or movement at the seam should appear.
Because the corner balls are small separately attached stuffed pieces, omit them when making the lovey for a baby who is likely to mouth, bite, or pull forcefully on the corners. Whether the balls are included or omitted, this lovey is for awake, directly supervised handling only.
Attaching the Head to the Blanket
- Lay the blanket flat with the selected RS or display side facing up.
- Choose one blanket edge as the top edge and mark it temporarily. The front of the head should face this edge.
- Fold the blanket gently from side to side and mark the midpoint.
- Fold it from top to bottom and mark the second midpoint. The intersection between the two midpoint markings is the center of the blanket.
- Place the closed bottom of the head directly over the center point with the ears level and the front of the head facing the marked top edge.
- Pin the head in place at four evenly spaced points and look at the project from the front and both sides. Correct any leaning before sewing.
- Thread the 36-inch head tail onto the yarn needle.
- Insert the needle through the gathered bottom and bring the tail out through a stitch in Round 17, the 24-stitch round located three rounds above the gathered closure.
- Sew the head to the blanket with exactly 12 attachment stitches around Round 17. Round 17 contains 24 stitches, so work through every second stitch of that round. Pass through the selected head stitch and through a different section of blanket fabric surrounding the center point each time rather than repeatedly entering the same blanket hole.
- Pull each stitch snug enough to hold the head upright but not tight enough to flatten the head, gather the blanket, or force stuffing through the stitches.
- After completing the first 12-stitch circle, sew around the attachment line a second time with 12 reinforcement stitches. Use the 12 Round 17 stitches that were skipped during the first pass so all 24 stitches of Round 17 help support the attachment.
- Turn the blanket over and check the WS. The attachment stitches should be secure and evenly distributed without long loose loops.
- Return the needle through the head, weave the remaining tail through several internal stitches in different directions, and trim the yarn close to the surface.
- Hold the head and pull gently forward, backward, and from side to side. The base should remain firmly attached without wobbling excessively or opening a gap between the head and blanket.

Final Measurement and Construction Check
- Blanket including border: approximately 14 × 14 inches
- Head: approximately 3 to 3¼ inches across
- Ears: approximately 1¼ to 1½ inches across
- Optional corner balls: approximately 1¼ to 1½ inches across
- Displayed height: varies according to how the blanket is folded, draped, or propped
Lay the completed lovey flat and confirm that the blanket remains square, the border lies flat, the head is centered, the ears are level, and any optional corner balls are attached without puckering the corners.
Safety Note
This handmade lovey is a comfort and play item for awake, directly supervised interaction. It is not an infant sleep product and should never be placed in a crib, bassinet, play yard, bedside sleeper, or other infant sleep space.
This lovey is not designed or tested as a teether. Remove it immediately if the baby begins chewing, biting, or pulling forcefully on the head, ears, corner balls, or any other attached part.
Do not add buttons, beads, plastic safety eyes, ribbons, bells, wood rings, glued decorations, or removable pieces. If you add a face, embroider it securely with yarn or embroidery floss while the head opening is accessible.
Inspect the lovey before every use and again after every washing. Remove it from use immediately if any seam loosens, a yarn strand breaks, the fabric becomes badly stretched, an attachment moves, or stuffing becomes visible.
The optional corner balls are small stuffed attachments. Omit them for the lowest-detachment version, particularly when the lovey is intended for a baby who mouths or pulls on objects.
Care: Follow the care instructions printed on the yarn label. If the yarn is machine washable, place the lovey inside a mesh laundry bag and use a gentle cycle. Reshape it while damp and allow it to dry completely before inspecting every seam and returning it to use.
Finishing Details That Make the Lovey Look Boutique Quality
The finishing is where minimalist crochet projects either look polished or homemade in a rushed way.
Taking an extra few minutes to shape the head evenly, align the ears, distribute the attachment stitches, and weave the yarn tails cleanly changes the entire appearance.
Uneven stuffing is especially noticeable on this simple round head because there are no elaborate facial details or extra shaping to hide lumps. Add the fiberfill in small amounts and rotate the head as you fill it.
A smaller amount of evenly distributed stuffing usually gives the head and corner balls a smoother shape than packing them firmly.
Before giving any handmade lovey as a baby gift:
- Check every seam from the front and back
- Pull-test the head, both ears, and every optional corner ball
- Confirm that no stuffing is visible through the stitches
- Secure and trim every yarn end
- Remove every locking stitch marker and every pin, including blocking pins and any pins used while positioning the head
- Remove any loose fiber or clipped yarn from the surface
- Include the awake, directly supervised-use instructions with the gift
- Explain that the lovey must stay out of all infant sleep spaces
The U.S. Consumer Product Safety Commission safe sleep recommendations explain why blankets, stuffed items, and other loose objects should not be added to an infant sleep space.
Minimalist Crochet Lovey Gift Basket Ideas for Baby Showers
A minimalist crochet lovey works especially well when the rest of the shower gifts stay simple enough for the handmade piece to remain the focal point.
One practical combination is the lovey with a ribbed swaddle, a cotton bib, and a small nursery basket. Repeating one or two colors from the lovey can make the group look coordinated without requiring a themed gift set.
Keep decorative extras in the basket rather than tying ribbons, tags, charms, or other removable pieces directly to the crocheted lovey.
You can pair this lovey with:
- Neutral swaddle blankets
- Simple nursery baskets
- Organic cotton bibs
- Modern crib sheets
- A printed care and supervised-use card
Neutral baby gift basket ideas
If you want another nursery-friendly animal option, my brown bear lovey pattern keeps the same simple flat style while adding a slightly more classic teddy bear shape.
A fast fall project can maintain that clean blanket-style construction with this modern crochet bat lovey pattern, featuring compact wings, an embroidered face, and a simple attached blanket body.
Why This Minimalist Crochet Lovey Works in Modern Nurseries
The simple construction gives the yarn color and crochet texture more visual weight because the finished lovey does not depend on a detailed animal face or extra decorative pieces.
The square blanket, round head, and two small ears also make the design easy to recolor without changing the stitch counts or construction.
That makes the same pattern useful for neutral nurseries, softer color palettes, and handmade baby gifts where you want the crochet itself to be the main feature.
The optional corner balls can also be omitted without changing the core blanket-and-head construction, which gives the maker a simpler version without requiring a second pattern.
My free baby patterns page includes additional nursery-friendly crochet and sewing projects designed with that same cleaner approach.
Frequently Asked Questions About Minimalist Crochet Lovey Patterns
What yarn works best for a minimalist crochet lovey?
A smooth, washable medium weight cotton or cotton-blend yarn works well because it provides clear stitch definition and enough structure for the stuffed pieces. Always follow the yarn manufacturer’s washing and drying instructions.
Is this a good beginner crochet pattern?
It is best for an advanced beginner rather than someone making a first crochet project. The stitches are simple, but the crocheter must be able to maintain stitch counts in continuous rounds, shape stuffed pieces, position matching ears, and sew the head and optional corner balls securely to the blanket.
How long does a minimalist crochet lovey take to make?
Completion time depends on crochet speed, experience, blocking time, and whether the optional corner balls are included. Many crocheters will complete it over several sessions rather than in one sitting.
Can a baby sleep with this crochet lovey?
No. This handmade lovey is not an infant sleep product. It is intended only for awake, directly supervised handling and should remain outside cribs, bassinets, play yards, bedside sleepers, and all other infant sleep spaces.
Are the stuffed corner balls required?
No. They are optional decorative pieces. Leaving the three-sc blanket corners plain creates a simpler version with fewer separately attached components.
Why does a minimalist crochet lovey work well with modern nursery styles?
The simple shapes and flexible color palette make it easy to coordinate the lovey with different nursery colors without changing the pattern construction or adding complicated decorative details.
When you click on links to various merchants on this site and make a purchase, this may result in this site earning a commission. This does not affect the price you pay.

UBGI Gold Standard 2026
Reviewed under the site's
editorial checklist.
Photos, decorating ideas, party setups and reader submissions are shared for inspiration unless a page is specifically presented as a pattern, tutorial, reference guide or step-by-step project. Follow the instructions, measurements, safety guidance and manufacturer directions provided for the particular project or product.
About Jan | Contact | Baby Nursery Ideas (Blog) | Site Map | Privacy Policy | Disclosure Policy | Disclaimer | Affiliate Disclosure | Earnings Disclosure | Facebook | Pinterest
I am a participant in the Amazon Services LLC Associates Program, an affiliate advertising program designed to provide a means for us to earn fees by linking to Amazon. As an Amazon Associate I earn from qualifying purchases.
Copyright © 2006-2026. All Rights Reserved.