Crochet Koala Lovey Pattern (Free Baby Security Blanket)
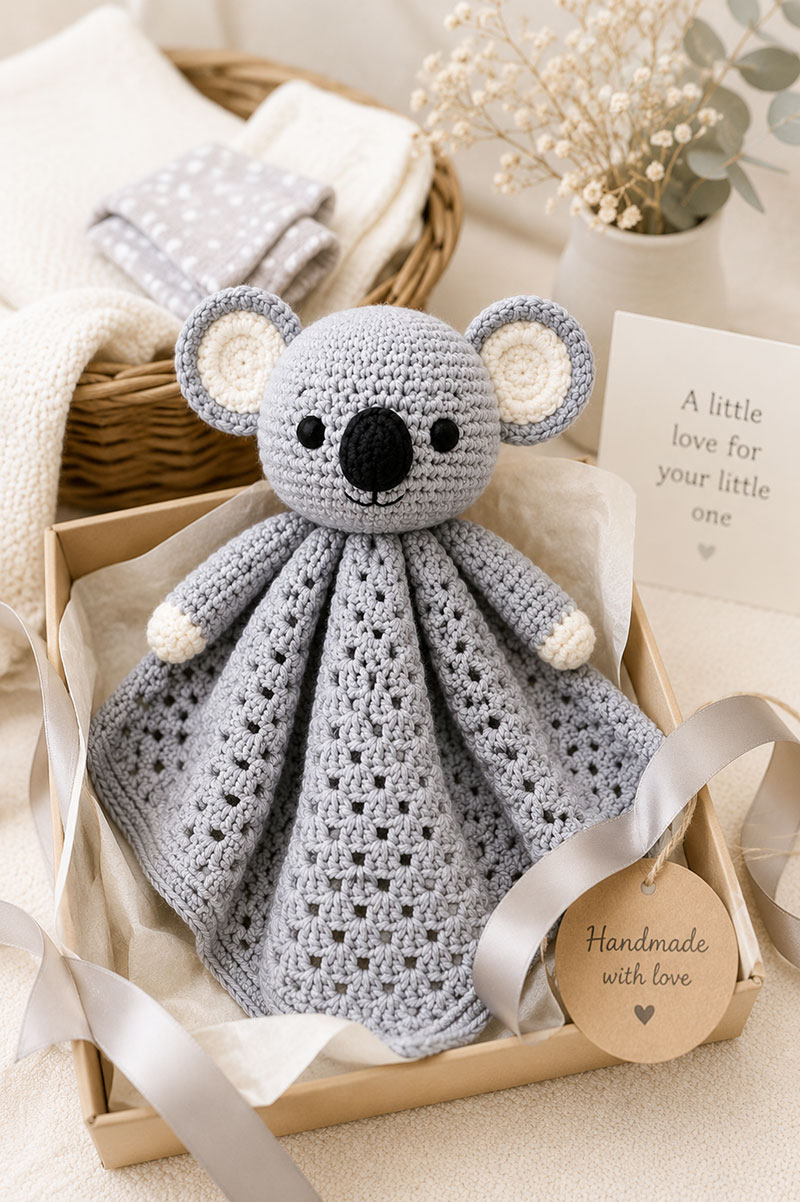
This crochet koala lovey pattern makes a soft baby security blanket with a rounded koala head, wide ears, two long arms, a simple blanket body and embroidered face details.
By Jan Bay
More baby crochet patterns:
Animal Lovey Patterns Free Baby Crochet Patterns Elephant Lovey Pattern Bunny Lovey Pattern Animal Appliqué Patterns
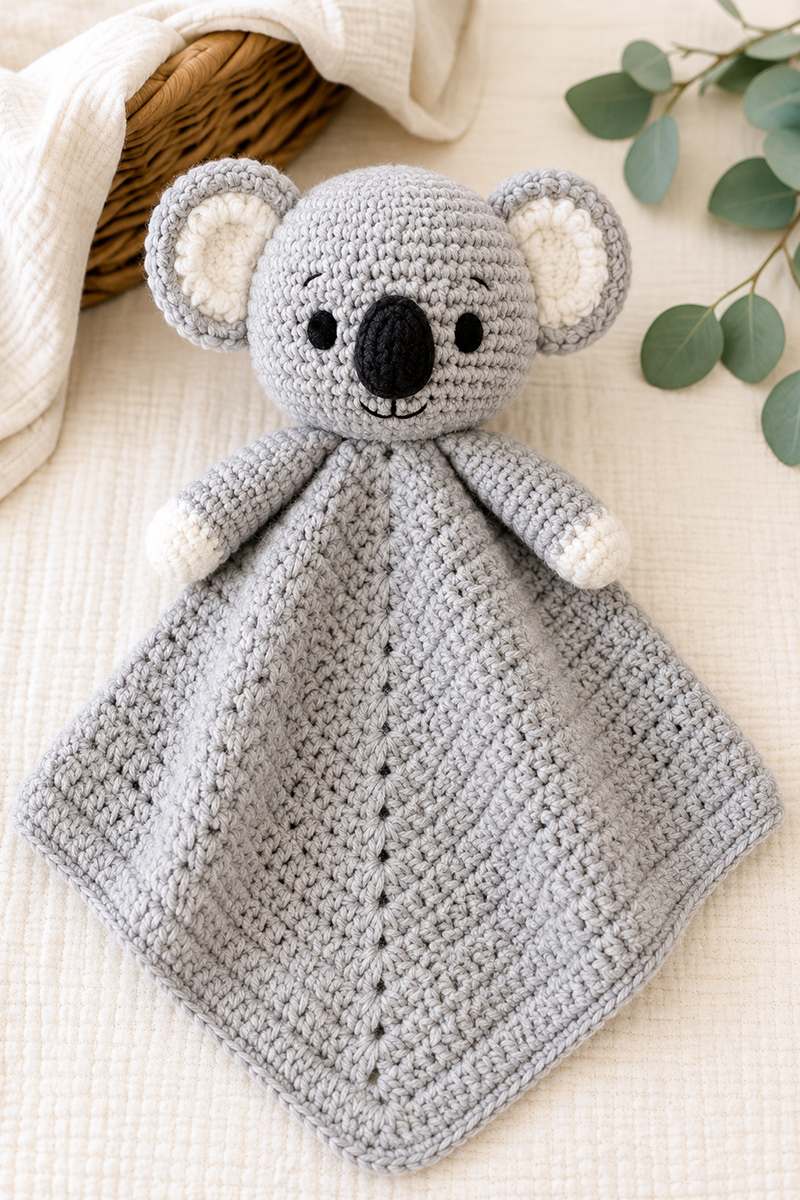
Helpful crochet supplies for this project:
Jump to:
Finished Size Materials Koala Head Ears and Face Koala Arms Blanket Body Assembly Baby Safety FAQ
Crochet Koala Lovey Pattern Finished Size
Use the blanket measurement as the main size checkpoint because the number of rounds needed will vary with the yarn and personal tension. Measure the stuffed koala head before assembly rather than relying on one exact head diameter.
- Blanket after the border: approximately 14 to 16 inches square
- Koala head: approximately 3 1/2 to 4 1/2 inches in diameter, depending on yarn and tension
- Overall displayed length: approximately 13 1/2 to 16 inches from the top of the head to the lowest blanket corner
Materials
- Worsted weight (#4) yarn
- Light gray for the head, outer ears, arms and blanket
- Cream for the inner ears and paws
- 4.0 mm (G) crochet hook
- Polyester fiberfill
- Yarn needle
- Stitch markers
- Scissors
- Black embroidery floss for the eyes, nose and mouth
Skill Level: Advanced beginner to intermediate.
Gauge: Exact gauge is not critical. Use a hook that produces firm single-crochet fabric with no openings large enough for the stuffing to show when the fabric is gently stretched. After Round 6 of the head, the circle should lie reasonably flat without ruffling or severe cupping. Control the blanket size by measurement rather than by a fixed number of rounds.
Approximate Yarn Needed:
- Gray: approximately 220 to 280 yards, depending on the finished blanket size
- Cream: approximately 25 to 35 yards
- Black embroidery floss: one skein
I prefer making this koala in separate pieces because it gives you more control over the head shape, ear placement and final seam check. The face uses embroidered details rather than plastic safety eyes.
Koala Head
The rounded koala head is worked continuously from the top down using single crochet. Gentle increases create the full shape while a short decrease section forms the lower face before stuffing and closing.
Abbreviations: sc = single crochet, dc = double crochet, ch = chain, sl st = slip stitch, st or sts = stitch or stitches, inc = work 2 single crochet in the same stitch, dec = invisible single-crochet decrease, mc = magic circle.
Koala Head Pattern
Use a stitch marker at the beginning of each round and count after every round before moving on.
Round 1: mc, 6 sc in ring (6)
Round 2: inc in each stitch around (12)
Round 3: sc 1, inc repeat around (18)
Round 4: sc 2, inc repeat around (24)
Round 5: sc 3, inc repeat around (30)
Round 6: sc 4, inc repeat around (36)
Rounds 7 to 12: sc around (36 each round)
Round 13: sc 4, dec repeat around (30)
Round 14: sc 3, dec repeat around (24)
Round 15: sc 2, dec repeat around (18)
Stuff the head firmly enough to hold its round shape, but do not overfill it. Overstuffing can stretch the stitches and make the fiberfill visible.
Round 16: sc 1, dec repeat around (12)
Round 17: dec around (6)
Fasten off, leaving a 40 to 48-inch tail. Thread the tail through the front loops of the remaining 6 stitches, pull the opening closed and secure it with a small knot. Do not weave in this tail. Reserve it for attaching the head to the blanket.
Ears and Face
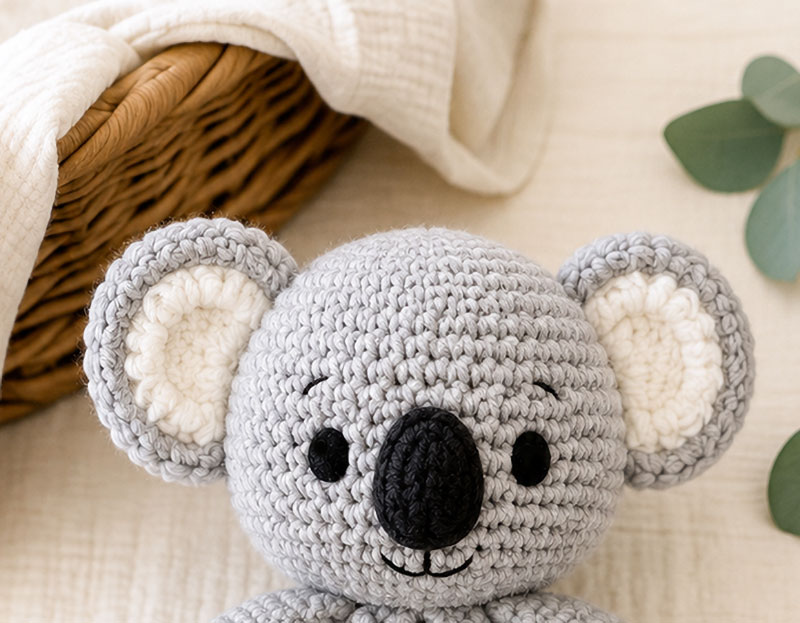
The wide ears give this crochet koala lovey its recognizable shape. Make two outer ears in gray and two smaller inner ear pieces in cream.
Outer Ears - Make 2
Round 1: With gray yarn, mc, 6 sc in ring (6)
Round 2: inc in each stitch around (12)
Round 3: sc 1, inc repeat around (18)
Round 4: sc 2, inc repeat around (24)
Round 5: sc around (24)
Fasten off, leaving a long tail for sewing.
Inner Ears - Make 2
Round 1: With cream yarn, mc, 6 sc in ring (6)
Round 2: inc in each stitch around (12)
Round 3: sc 1, inc repeat around (18)
Fasten off, leaving a tail for sewing.
The final no-increase round will cause each gray outer ear to cup slightly. Treat the concave side as the front. Sew one cream inner ear to the center of the concave side of each gray outer ear.
Pin the ears to opposite sides of the koala head between Rounds 6 and 11 with the cream centers facing forward. Check that both ears sit at the same height and angle before sewing. Sew twice across the attached edge of each ear, then secure and weave in the tails.
Face Details
After the ears are pinned or sewn in place, identify the center front of the head. Use black embroidery floss and closely placed satin stitches to make two small filled oval eyes centered between Rounds 9 and 10. Place the centers of the eyes approximately 6 stitches apart.
Use satin stitches to embroider a filled oval nose centered over approximately Rounds 10 through 13. Build the stitches beside one another until the nose measures about 1 inch wide by 3/4 inch tall without pulling the head fabric inward.
Stitch a short vertical line below the nose, followed by a shallow curved smile. After the final embroidery stitch, pass the needle through the stuffed head and bring it out about 1 inch away. Pull the floss gently, trim it close to the crochet surface and allow the end to retract into the head. Repeat for any remaining embroidery tails so no knots, loose loops or cut ends remain exposed.
Keep every facial feature flat and firmly embroidered. Do not use plastic safety eyes, buttons or glued-on face pieces for this baby lovey.
Koala Arms, Make 2
Work each arm continuously from the cream paw toward the gray shoulder. Lightly stuff only the paw and lower portion so the shoulder remains flat enough to sew beneath the head.
Round 1: With cream yarn, mc, 6 sc in ring (6)
Round 2: inc in each stitch around (12)
Round 3: sc around (12)
On the final yarn-over of Round 3, change to gray yarn. Cut the cream yarn, leaving a 4-inch tail. Secure the cream tail on the inside of the arm and tuck it into the paw before adding the stuffing.
Round 4: With gray yarn, sc around (12)
Round 5: sc 4, dec, repeat once more (10)
Rounds 6 through 14: sc around (10 each round)
Lightly stuff the cream paw and the lower half of the gray arm. Leave the upper inch unstuffed so it can lie flat against the blanket.
Flatten the open shoulder so the 10 stitches form 5 pairs. Work 1 sc through both layers of each pair to close the opening with 5 sc. Fasten off, leaving an 18-inch tail for assembly.
Make the second arm the same way. Before attachment, place the two arms side by side and confirm that they have matching lengths, paw sizes and stuffing levels.
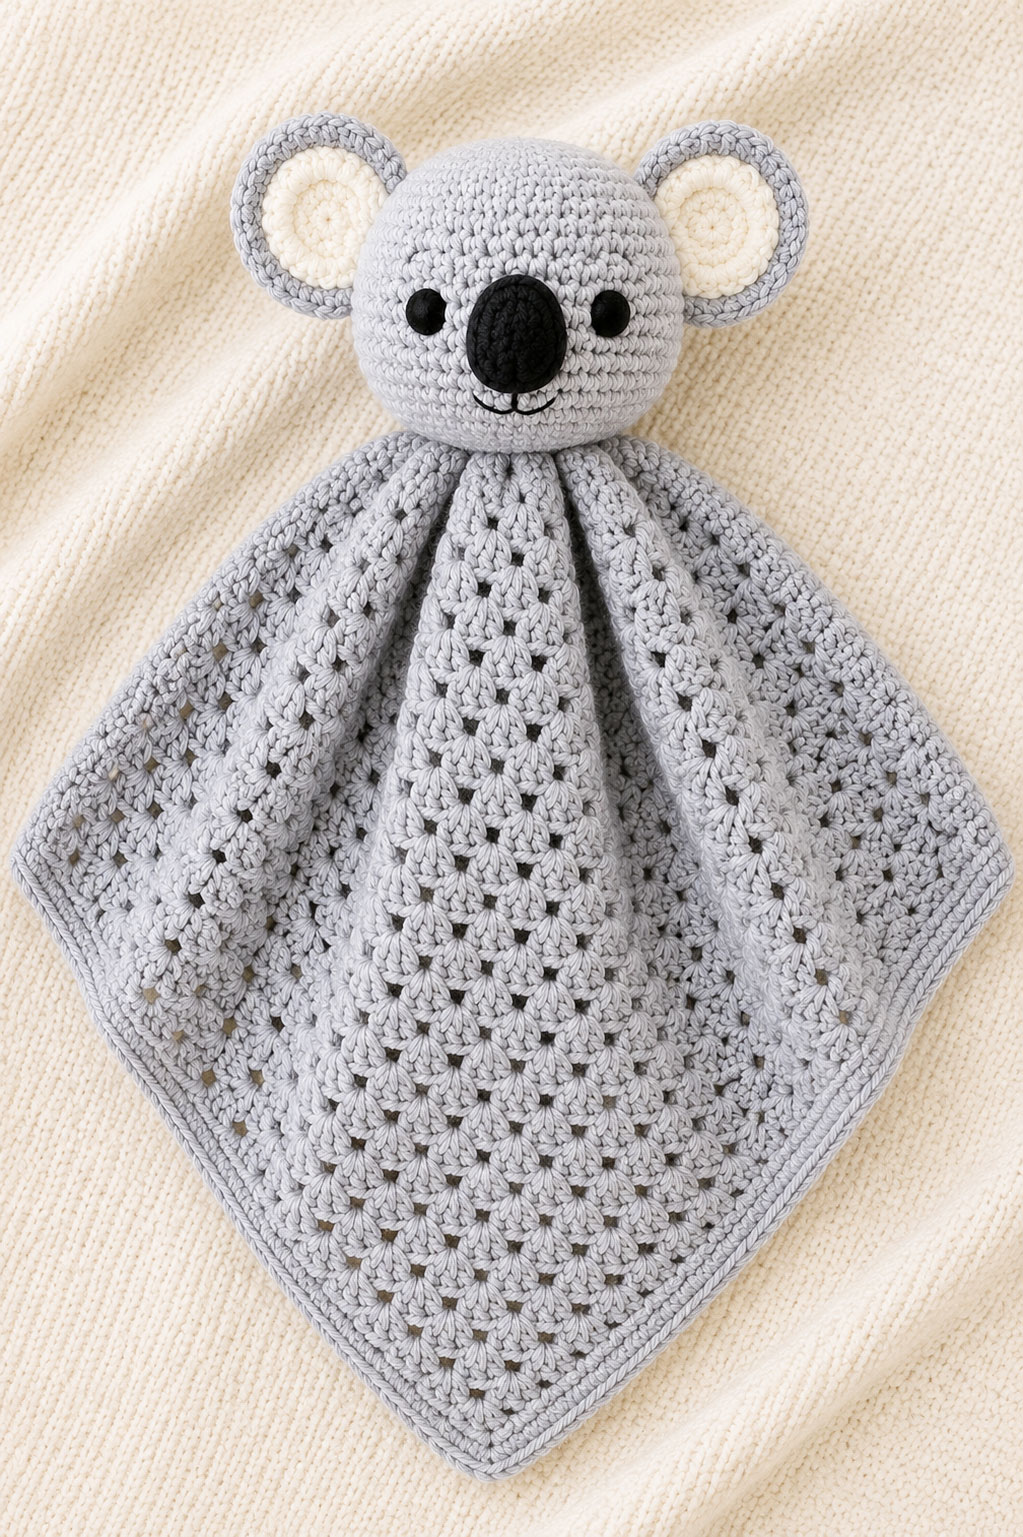
Blanket Body
The blanket body is worked from the center outward as a granny-style square. Complete the blanket and border before attaching the arms and koala head.
Every round contains four chain-2 corner spaces. Work two 3-double-crochet groups in each corner and one 3-double-crochet group in every gap between groups along the sides.
Round 1
Ch 4 and join with a sl st in the first chain to form a ring.
Ch 3, which counts as the first dc. Work 2 dc in the ring and ch 2.
Work 3 dc in the ring and ch 2 three more times.
Join with a sl st in the top of the beginning ch 3. Round 1 has 12 dc and four ch-2 corner spaces.
Round 2
Sl st in each of the next 2 dc and into the first ch-2 corner space.
Ch 3, which counts as the first dc. Work 2 dc, ch 2 and 3 dc in the same corner space.
In each of the remaining three ch-2 corner spaces, work 3 dc, ch 2 and 3 dc.
Join with a sl st in the top of the beginning ch 3. Round 2 has 24 dc and four ch-2 corner spaces. There are no side groups between the corners in this round.
Round 3 and Later Rounds
Sl st in each of the next 2 dc and into the next ch-2 corner space.
Ch 3, which counts as the first dc. Work 2 dc, ch 2 and 3 dc in the same corner space.
Work 3 dc in every gap between 3-dc groups across the next side. In the next ch-2 corner space, work 3 dc, ch 2 and 3 dc.
Repeat the previous instruction two more times. Work 3 dc in every remaining gap across the final side, then join with a sl st in the top of the beginning ch 3.
Round 3 has one side group between each pair of corners and 36 dc total. Every later round adds one additional side group to each side. At the end of any numbered round, the total number of dc is 12 times the round number. For example, Round 16 has 192 dc and four ch-2 corner spaces.
Continue repeating the round until the square measures approximately 1/2 inch smaller than the desired finished measurement. The border will add the remaining width. Do not continue automatically to Round 16 if the square has already reached the required measurement.
Border Round 1
Sl st in each of the next 2 dc and into the next ch-2 corner space. Ch 1, which does not count as a stitch.
Work 3 sc in the same corner space. Across the next side, work 1 sc in every dc and 1 sc in every gap between 3-dc groups.
In the next ch-2 corner space, work 3 sc. Continue around the blanket, working 1 sc in every dc, 1 sc in every gap between 3-dc groups and 3 sc in every ch-2 corner space.
Join with a sl st in the first sc. Lay the blanket flat and confirm that the border does not pull the corners inward or cause the sides to ripple.
Border Round 2
Ch 1, which does not count as a stitch. Work 1 sc in the same stitch.
Work 3 sc in the next stitch, which is the center stitch of the starting corner group. Continue with 1 sc in every stitch around. In the center stitch of each remaining 3-sc corner group, work 3 sc instead of 1 sc.
Join with a sl st in the first sc. Fasten off and weave in the blanket tail securely. The completed blanket should measure approximately 14 to 16 inches square.
Border stitch-count checkpoint: If the granny square ends after Round 14, Border Rounds 1 and 2 should contain 232 and 240 stitches. If it ends after Round 15, the totals should be 248 and 256 stitches. If it ends after Round 16, the totals should be 264 and 272 stitches.
Optional blocking: If the blanket does not lie flat or the corners do not appear square, lightly damp-block it before assembly. Following the yarn label's care instructions, dampen the blanket, gently shape it into an even square on a blocking mat and allow it to air dry completely before attaching the arms and head.
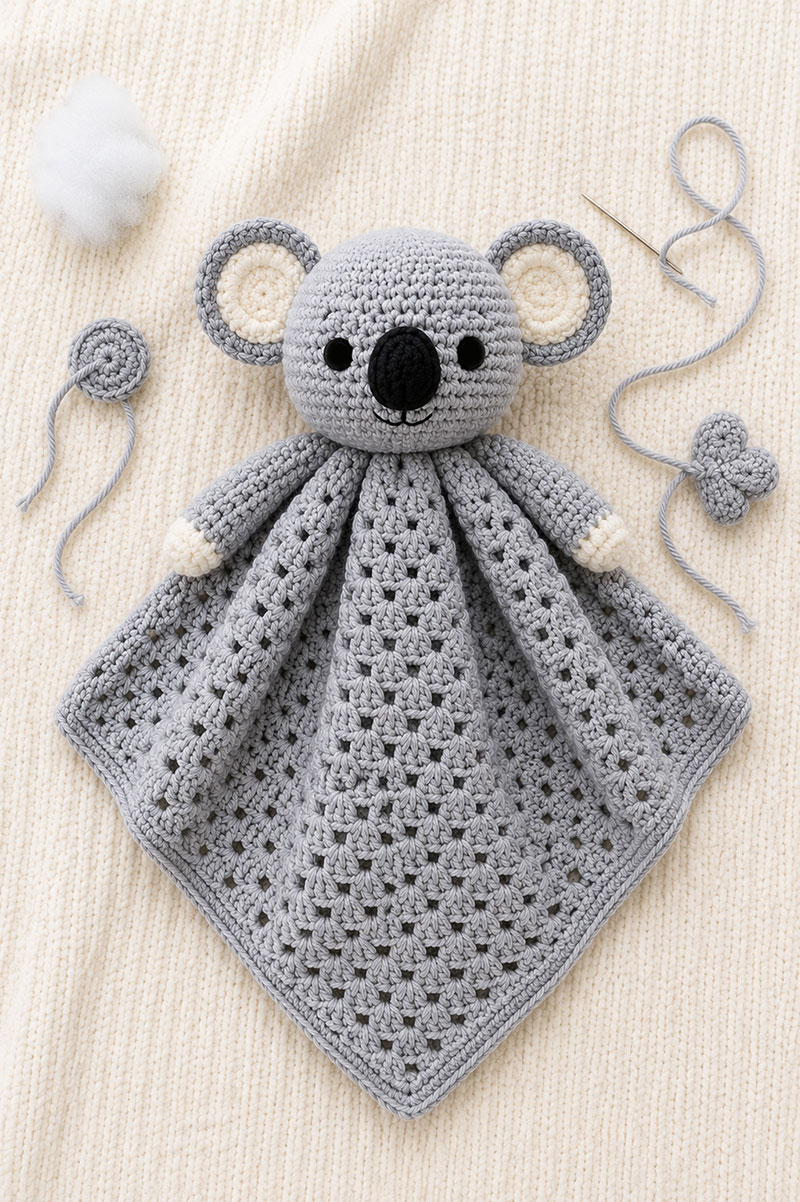
Assembly
Assembly order:
- Complete the blanket and both border rounds.
- Complete the head, ears, embroidered face and two arms.
- Mark the blanket center and front orientation.
- Attach both arms to the blanket center.
- Attach the head over the arm seams and blanket center.
- Weave in all remaining yarn ends securely.
- Check every seam and embroidered feature before use.
Mark the Center and Front
The right side of the blanket is the side that faced you while working the granny-square rounds. Lay the blanket right side up with one corner pointing straight down. The center ring is the attachment center. Place one removable marker in the center ring and another marker in the downward-pointing corner. The koala's nose should face directly toward that lower corner after assembly.
Attach the Arms
Place the flattened shoulder of one arm slightly to the left of the blanket center and the other slightly to the right. Angle both arms downward so they sit evenly beneath the sides of the head.
Using each arm's long tail, sew the flattened 5-stitch shoulder securely through the blanket stitches surrounding the center ring. Do not attach the arms only through the open center hole.
Sew across each shoulder twice, then secure and weave the tails into the wrong side of the blanket. Check the arm lengths and angles before attaching the head. The cream paws should sit at approximately the same height.
Attach the Head
Place the closed bottom of the head directly over the blanket center and the upper arm seams. Align the koala's nose with the marked downward-pointing blanket corner.
Thread the reserved head tail onto the yarn needle. Bring the tail from the closed center of the head to the lower attachment area between approximately Rounds 15 and 16.
Sew through the head fabric between Rounds 15 and 16 and through the sturdy blanket stitches surrounding the center ring. Make approximately 12 evenly spaced attachment stitches around the lower circumference of the head.
Make a second complete pass around the attachment seam. Pull each stitch firmly enough to hold the head steady, but not so tightly that the blanket center gathers or the bottom of the head becomes flattened.
Secure the tail beneath the head and weave it through several head stitches before trimming it.
Check the Ears and Face
Confirm that both ears remain at the same height and face forward. Check that the embroidered eyes, nose and mouth lie flat with no loose loops, knots or exposed tails.
Final Check
Gently tug the head, both arms, both ears and every embroidered feature. Re-stitch any area that moves, separates, gaps or causes the blanket center to distort. The finished lovey should hang with one blanket corner centered below the koala's face.
Helpful Tip
Count your stitches after every increase and decrease round before moving on. A single missed stitch early in the head can noticeably change the finished shape of the koala.
Baby Safety
This crochet koala lovey is best used as a supervised baby gift or nursery keepsake. For babies under 12 months, keep soft items out of the crib during sleep. See the CPSC safe sleep guidance for current crib and infant sleep safety recommendations.
Always embroider the facial features instead of using plastic safety eyes when making a lovey for a baby. Check the seams periodically and repair any loose stitches before each use.
Follow the care instructions on the yarn label. If the yarn is machine washable, place the lovey inside a mesh laundry bag and use a gentle cycle. Reshape the head, ears, arms and blanket while damp, then allow the lovey to air dry completely. Check every seam and embroidered feature again after washing.
Frequently Asked Questions
How big should a crochet koala lovey be?
A finished size of about 14 to 16 inches square is easy for babies to hold while remaining lightweight enough for travel and supervised cuddle time.
Can beginners make this crochet koala lovey?
Yes. If you're comfortable working in continuous rounds, making simple increases and decreases, and sewing crochet pieces together, this project is a good next step beyond basic amigurumi.
Can I use blanket yarn?
You can, but the finished lovey will be noticeably larger and softer. If you change yarn weights, use the hook size recommended on the yarn label and expect the finished dimensions to vary.
Can I make the blanket larger?
Yes. Continue adding granny-square rounds until the blanket reaches your preferred size while keeping the koala head centered.
Is this crochet koala lovey safe for sleeping?
No. Soft blankets and loveys should be kept out of a baby's sleep space. This pattern is intended for supervised comfort time, stroller rides, tummy time, or as a nursery keepsake and handmade baby shower gift.
More Crochet Baby Patterns You'll Love
Whether you're making your first handmade baby gift or adding another woodland-inspired project to your crochet collection, this crochet koala lovey pattern creates a soft keepsake that families can enjoy for years.
When you click on links to various merchants on this site and make a purchase, this may result in this site earning a commission. This does not affect the price you pay.

UBGI Gold Standard 2026
Reviewed under the site's
editorial checklist.
Photos, decorating ideas, party setups and reader submissions are shared for inspiration unless a page is specifically presented as a pattern, tutorial, reference guide or step-by-step project. Follow the instructions, measurements, safety guidance and manufacturer directions provided for the particular project or product.
About Jan | Contact | Baby Nursery Ideas (Blog) | Site Map | Privacy Policy | Disclosure Policy | Disclaimer | Affiliate Disclosure | Earnings Disclosure | Facebook | Pinterest
I am a participant in the Amazon Services LLC Associates Program, an affiliate advertising program designed to provide a means for us to earn fees by linking to Amazon. As an Amazon Associate I earn from qualifying purchases.
Copyright © 2006-2026. All Rights Reserved.