Easy Crochet Elephant Lovey Free Pattern (Baby Security Blanket)
Crochet elephant lovey free pattern instructions are below for making a small baby security blanket with a gray elephant head, floppy ears, a tapered trunk, little arms, and a simple cream blanket base. The project uses basic crochet stitches along with continuous amigurumi rounds, shaping, embroidery, stuffing, and sewn assembly. The reference photos show the intended general proportions, but finished size and appearance will vary with yarn, tension, stuffing, blocking, and placement.
Pick Another Baby Lovey Pattern
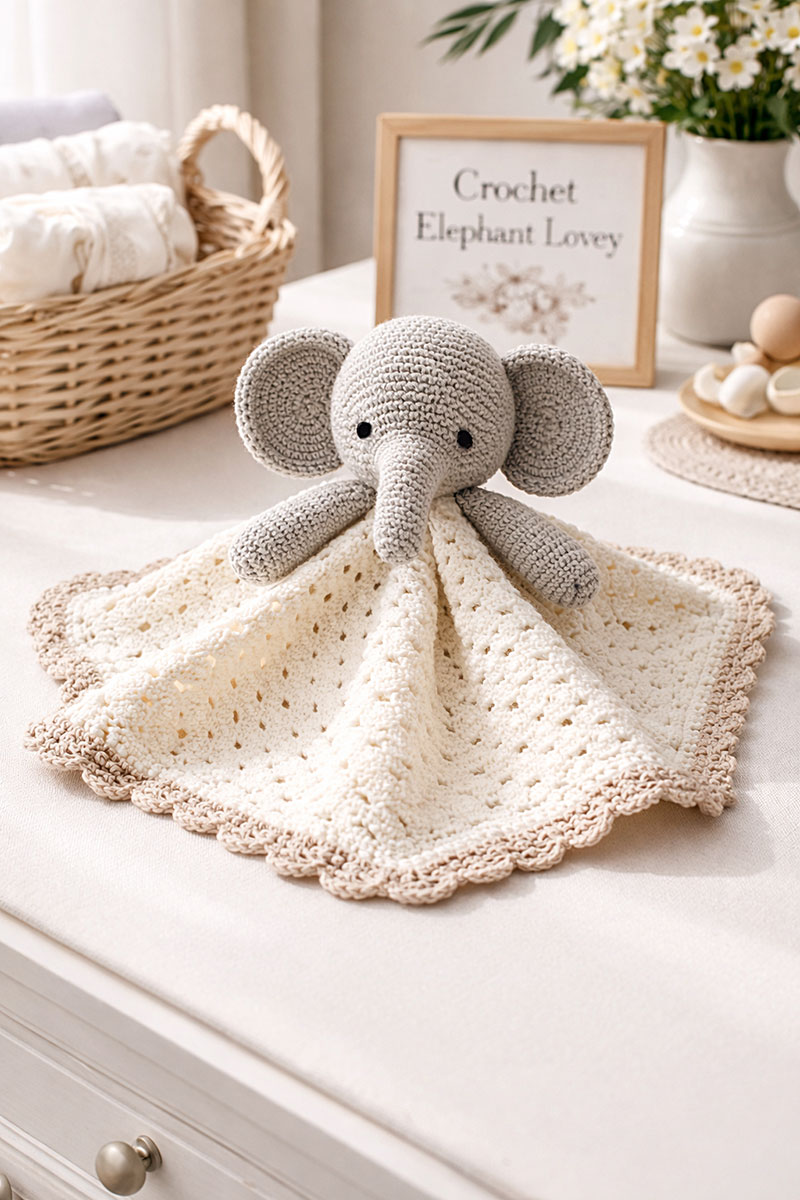
This reference image shows the intended general elephant and blanket proportions. Finished dimensions and details will vary with yarn, gauge, stuffing, and assembly.
Baby-use note: Make the eyes with securely fastened black embroidery floss and satin stitches. Do not use buttons or plastic safety eyes, even if a reference image appears to show solid black eye pieces.
Jump to:
Quick answer: This crochet elephant lovey free pattern creates a flat blanket base with a separately crocheted elephant head, trunk, two ears, and two arms. Each piece is checked against its stitch count, pinned in position, and sewn through solid crochet stitches. Check the pinned lovey from the front, back, and both sides before permanent sewing because yarn, tension, stuffing, and placement will affect the final drape.
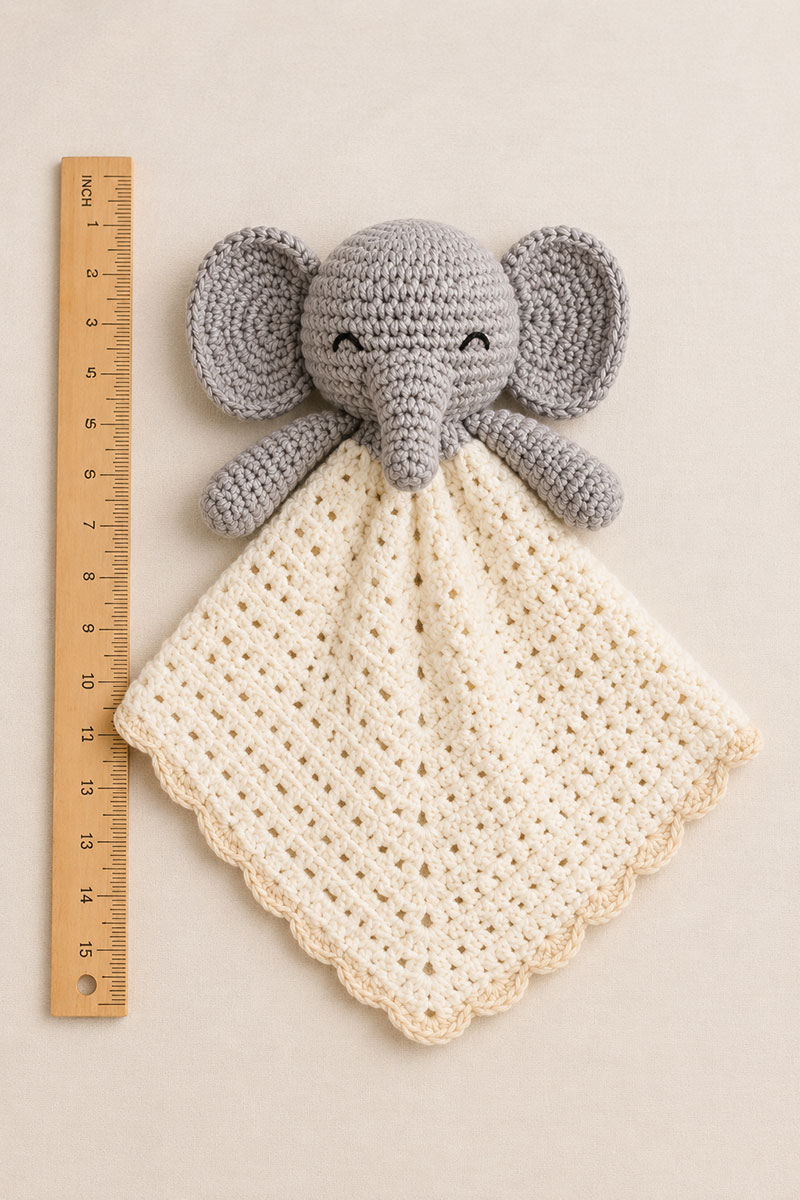
This placement guide shows how the elephant head, ears, trunk, arms, and blanket base line up before the pieces are sewn together.
Elephant loveys also make sweet handmade baby shower gifts because they feel classic without being too plain. Nursery themes built around elephants work beautifully with warm neutral rooms, layered textures, safari-style decorating ideas like these elephant nursery ideas with bedding and decor, and a full jungle baby nursery theme.
Helpful supply note:
This pattern uses a 4 mm crochet hook. A smooth hook helps keep the elephant head, trunk, and blanket stitches even while you work.
Crochet Elephant Lovey Free Pattern Materials You Will Need
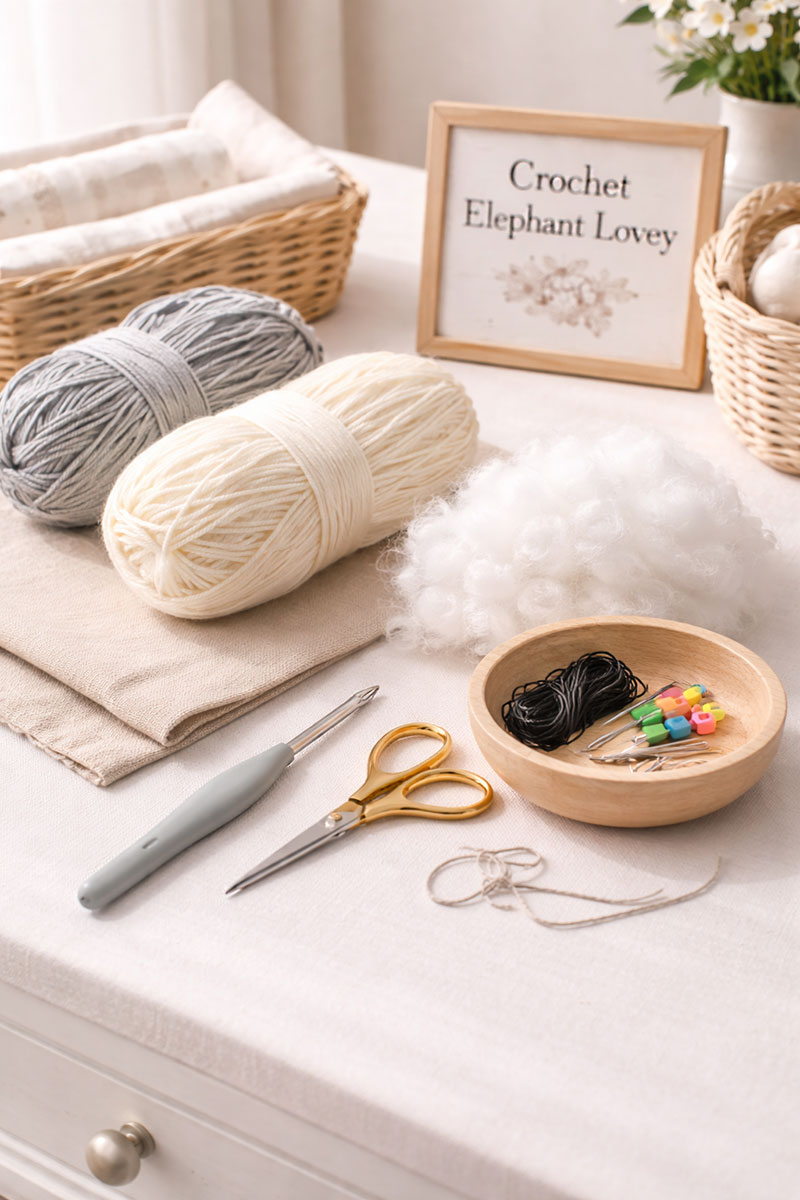
Most parents notice that when they sit down to start stitching a simple project, they spend the first ten minutes looking for the yarn needle or the scissors. I notice the whole project goes smoother when the supplies are gathered before the first stitch.
You will need worsted weight yarn in gray for the elephant pieces, cream for the blanket, and a small amount of beige or another coordinating color for the edging if you want contrast. Allow at least 125 yards of gray, 150 yards of cream, and 25 yards of contrasting edging yarn so there is enough for long sewing tails. Actual yarn use will vary with tension and yarn construction. You will also need a 4 mm crochet hook, yarn needle, scissors, at least four locking stitch markers or short pieces of scrap yarn for marking corners and rounds, rustproof straight pins or additional locking stitch markers for temporary assembly, washable polyester stuffing, and black embroidery floss.
Gauge and size: Gauge is not critical for fitting a person, but the elephant pieces should be worked firmly enough that stuffing does not show between stitches. Before adding the border, the blanket should be square. Finished dimensions vary with yarn, hook size, tension, blocking, stuffing, and assembly, so the pattern does not promise a fixed 14-inch result.
Skill level: Confident beginner. The pattern uses basic crochet stitches, but it also requires accurate counting, continuous spiral rounds, increases, decreases, embroidery, matching duplicate pieces, stuffing, adjustable border spacing, blocking, and secure sewn assembly.
Crochet Elephant Lovey Pattern Abbreviations
ch = chain
sc = single crochet
dc = double crochet
hdc = half double crochet
sl st = slip stitch
inc = increase
dec = decrease
mr = magic ring
Pattern Notes That Keep Things Real
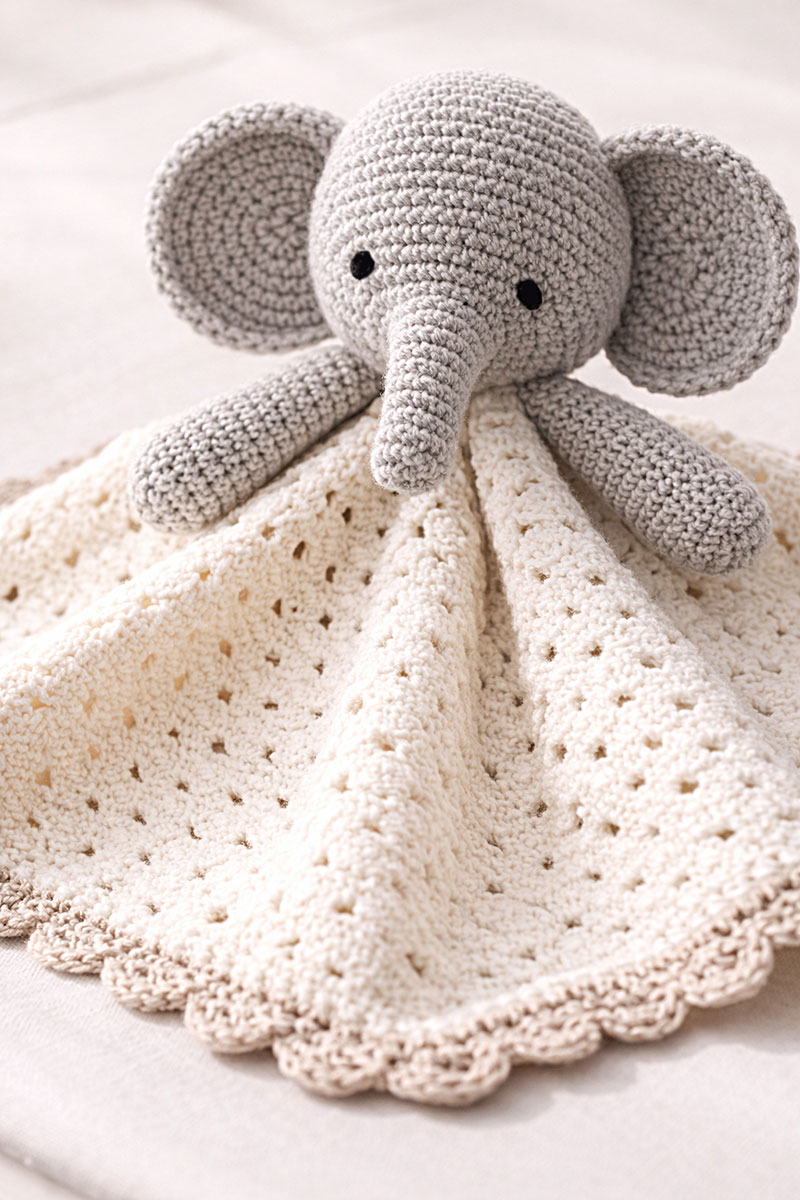
The elephant head is attached near one selected blanket corner rather than near the blanket center. When that corner is positioned at the top, the remaining three corners spread beneath the elephant in the diamond-shaped arrangement shown in the reference layout. Pin the complete head and arms before sewing because even a small sideways shift can make the blanket hang unevenly.
This pattern is worked in parts. Blanket first, then head, trunk, ears, and arms. Everything is pinned before sewing it together.
Construction terms: This pattern uses US crochet terminology. Work the head, trunk, ears, and arms in continuous spiral rounds without joining unless an instruction specifically says otherwise. Place a stitch marker in the first stitch of every round and move it upward as you work.
An increase, written as inc, means to work 2 sc in the same stitch. A decrease, written as dec, means to work one single crochet decrease over the next 2 stitches. Count every round before continuing.
Make two matching ears and two matching arms. Leave a long yarn tail on every piece that will be sewn. Pull each magic ring tightly closed. Thread its starting tail back through the first-round stitches, then weave the tail through dense crochet fabric in more than one direction before trimming. Do not trim a magic-ring tail close to the center. Weave all other finishing tails through dense fabric in more than one direction before trimming.
The blanket stitch is reversible. Choose the neater side as the right side before assembly and keep that side facing upward while positioning the elephant.
Important placement tips
Do not use the blanket midpoint as the head attachment point. Select one corner as the top and position the center of the head approximately 1 to 1 1/4 inches inward from that corner along the corner-to-corner centerline. Before sewing, trace or pin the planned head attachment circle and confirm that every part of it lies over solid blanket stitches or the plain border rather than beyond an edge, through an open ch-1 space, or through a scallop. Move the head slightly farther inward if necessary while keeping the top corner concealed beneath the lower back of the head.
Make the eyes with black embroidery floss and short satin stitches. Do not attach buttons, beads, plastic safety eyes, ribbons, cords, or other removable decorations.
This crochet lovey is intended for supervised awake use. Keep it out of every infant sleep area, including cribs, bassinets, bedside sleepers, and play yards, during naps and nighttime sleep.
Before each use, inspect the embroidered eyes, magic-ring centers, head seam, ear seams, arm seams, trunk seam, and all yarn tails. Stop using the lovey if any stitch, seam, piece, or strand becomes loose.
For current guidance, see American Academy of Pediatrics safe sleep guidance and CPSC safe sleep guidance.
How to Crochet an Elephant Lovey Blanket Step by Step
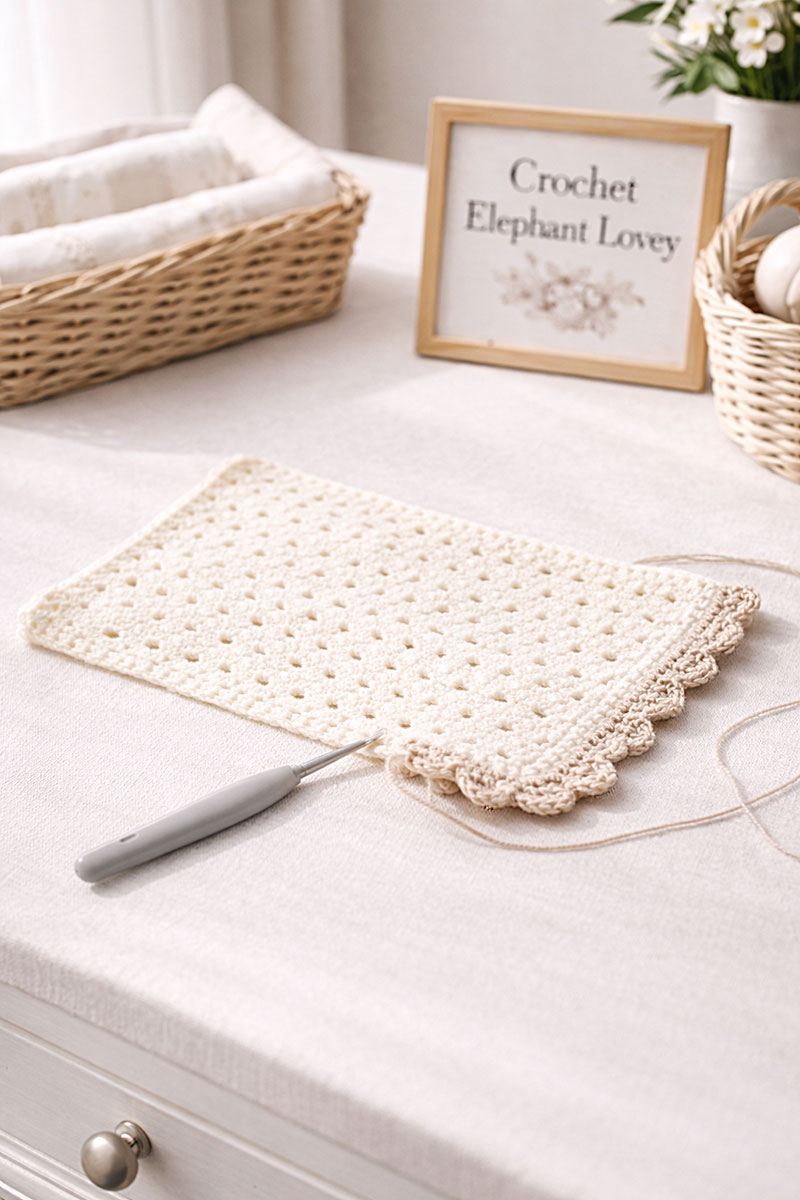
This is the point where the lovey starts to take its final shape. If the blanket lays flat now, the finished piece usually behaves the way you expect later.
Foundation
Use cream yarn for the blanket base. Ch 28.
Row 1
Sc in the 2nd ch from the hook. *Ch 1, skip the next ch, and sc in the next ch.* Repeat from * to * 13 times. Count: 14 sc and 13 ch-1 spaces.
Row 2
Ch 1 and turn. The turning ch does not count as a stitch. Sc in the first sc. *Ch 1, skip the next ch-1 space, and sc in the next sc.* Repeat from * to * 13 times. Count: 14 sc and 13 ch-1 spaces.
Rows 3 and onward
Repeat Row 2, checking after every row that there are 14 sc and 13 ch-1 spaces. Work through at least Row 25, then measure the unbordered blanket without stretching it. Continue or remove rows one at a time until the height and width are within approximately 1/4 inch of each other. Record the final row count so the same size can be reproduced later.
Border Round
Fasten off the cream blanket yarn and weave its tail securely. Use beige or another coordinating yarn for the border and scallop edge, or use the same cream yarn for a one-color lovey. Lay the blanket flat without stretching it and place one stitch marker at each of the four physical corners.
The foundation edge and final-row edge form one matching pair. The two row-end edges form the second matching pair. Because those edge types may require different stitch spacing, determine one border count for each pair.
Determine the foundation and final-row count: Join the edging yarn with a sl st in the first marked corner stitch on the foundation edge. Ch 1 and work 3 sc in that same corner stitch. The joining sl st and ch 1 do not count as border stitches.
The first and last foundation stitches form the two corner stitches. Excluding those corner stitches, 25 foundation-chain positions remain between the corner groups.
Begin by working one sc in each of those 25 interior positions. Lay the edge flat without stretching it. If 25 sc causes the edge to ripple, undo that side and work 21 sc by leaving four evenly spaced interior positions unworked. If 25 sc draws the edge inward, undo that side and use 29 sc by working a second sc in four evenly spaced interior positions.
If another adjustment is needed, continue changing the count by four stitches at a time so the selected count remains one stitch more than a multiple of four, such as 21, 25, 29, 33, 37, or 41. Distribute all omitted or additional stitches evenly across the edge and do not place more than 2 sc in one position. Record the completed straight-side count as H. Work 3 sc in the last marked foundation corner stitch.
Determine the row-end side count: Count the visible row-end spaces between the two marked corner stitches. Work one sc in each row-end space as the starting distribution. Add a second sc in evenly spaced row ends or leave evenly spaced row ends unworked as needed to reach a count that is one stitch more than a multiple of four, such as 21, 25, 29, 33, 37, or 41. Do not place more than 2 sc in one row end. Lay the side flat and record the successful count as V. Work 3 sc in the next marked corner stitch.
The first and last sc of the final row form the next two corner stitches. Excluding them, the final-row edge contains 12 interior sc and 13 ch-1 spaces, giving 25 positions between the corner groups. Work exactly H sc across those 25 positions, using the same evenly distributed placement established on the foundation edge. Work 3 sc in the next marked corner stitch.
Work exactly V sc along the remaining row-end side, using the same spacing established on the first row-end side. Join with a sl st to the first sc of the beginning corner group.
Total border count: 2 × H + 2 × V + 12 stitches.
Lay the blanket flat before continuing. If either pair of edges draws inward, undo that pair and use the next higher suitable count. If either pair ripples or waves, undo that pair and use the next lower suitable count. Do not begin the scallops until the entire border lies flat without gathering, cupping, flaring, or twisting.
Scallop Edge
Fasten off after completing the border round. Rejoin the edging yarn with a sl st in the border stitch immediately before any 3-sc corner group.
*Skip the next sc, work 5 dc in the next sc, skip the next sc, and sl st in the next sc.* Repeat from * to *.
After completing the first 6 to 8 scallops, lay that portion of the edge flat without stretching it. The shells should open naturally without pulling the border inward or producing a pronounced ruffle. Correct uneven dc tension or recheck the underlying border spacing before continuing if the edge does not lie flat.
Continue the same four-stitch repeat around the entire border. Because both H and V are one stitch more than a multiple of four, one shell will fall in the middle stitch of every 3-sc corner group.
Scallop count: (2 × H + 2 × V + 12) ÷ 4. For example, H = 25 and V = 25 produce 112 border stitches and 28 scallops. H = 25 and V = 29 produce 120 border stitches and 30 scallops.
The final repeat ends with a sl st in the same border stitch where the edging yarn was originally joined. Do not add another shell or an additional slip stitch after completing the calculated number of scallops. Fasten off and weave both edging tails securely through dense border stitches.
Crochet Elephant Head Pattern Full Step By Step
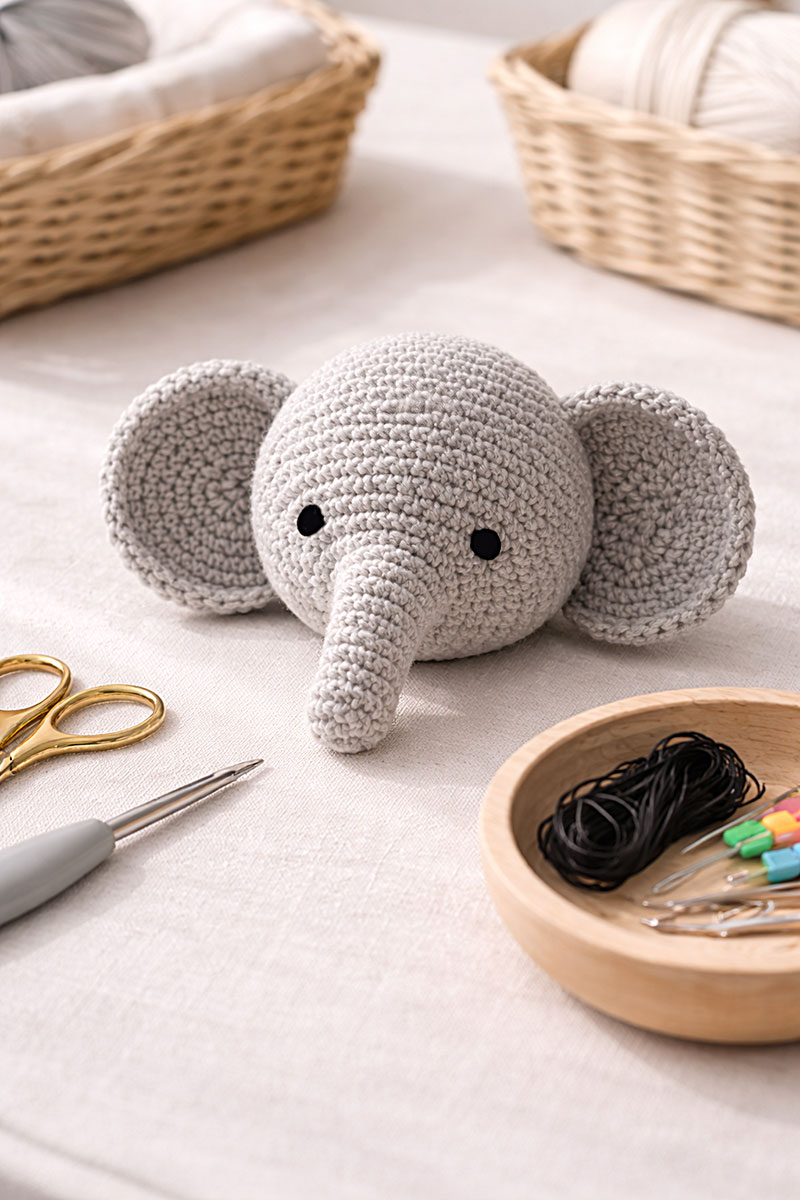
I notice most people tend to overstuff this part at first. It feels flat until it is attached, but in my experience less stuffing gives a better result. Start out with less and build rather than using too much that you have to pull out.
Use gray yarn and work in continuous spiral rounds.
Round 1: Work 6 sc in a mr. Count: 6 sc.
Round 2: Inc in each stitch around. Count: 12 sc.
Round 3: *Sc in next stitch, inc in next stitch.* Repeat around. Count: 18 sc.
Round 4: *Sc in next 2 stitches, inc in next stitch.* Repeat around. Count: 24 sc.
Round 5: *Sc in next 3 stitches, inc in next stitch.* Repeat around. Count: 30 sc.
Round 6: *Sc in next 4 stitches, inc in next stitch.* Repeat around. Count: 36 sc.
Rounds 7 through 12: Sc in each stitch around. Count after every round: 36 sc.
Before beginning the decreases, mark the front center of the head. Using black embroidery floss, embroider one eye on each side of the center between Rounds 9 and 10. Leave approximately 7 stitches between the inner edges of the eyes. Form each eye with 4 to 6 short satin stitches, secure the floss ends inside the head, and do not use buttons or plastic eyes.
Round 13: *Sc in next 4 stitches, dec over next 2 stitches.* Repeat around. Count: 30 sc.
Round 14: *Sc in next 3 stitches, dec over next 2 stitches.* Repeat around. Count: 24 sc.
Begin stuffing the head. Add small amounts and distribute the stuffing evenly around the sides rather than forcing a firm lump into the center.
Round 15: *Sc in next 2 stitches, dec over next 2 stitches.* Repeat around. Count: 18 sc.
Round 16: *Sc in next stitch, dec over next 2 stitches.* Repeat around. Count: 12 sc.
Finish stuffing the head so it holds its shape without becoming hard or stretching the stitches apart.
Round 17: Dec around. Count: 6 sc.
Cut the yarn, leaving a tail at least 30 inches long. Thread the tail through the front loop of each remaining stitch and pull the opening closed. Secure the closed opening, but keep the remaining tail outside the head. Coil or loosely secure the tail out of the way until it is used to sew the head to the blanket.
Crochet Elephant Trunk Step By Step
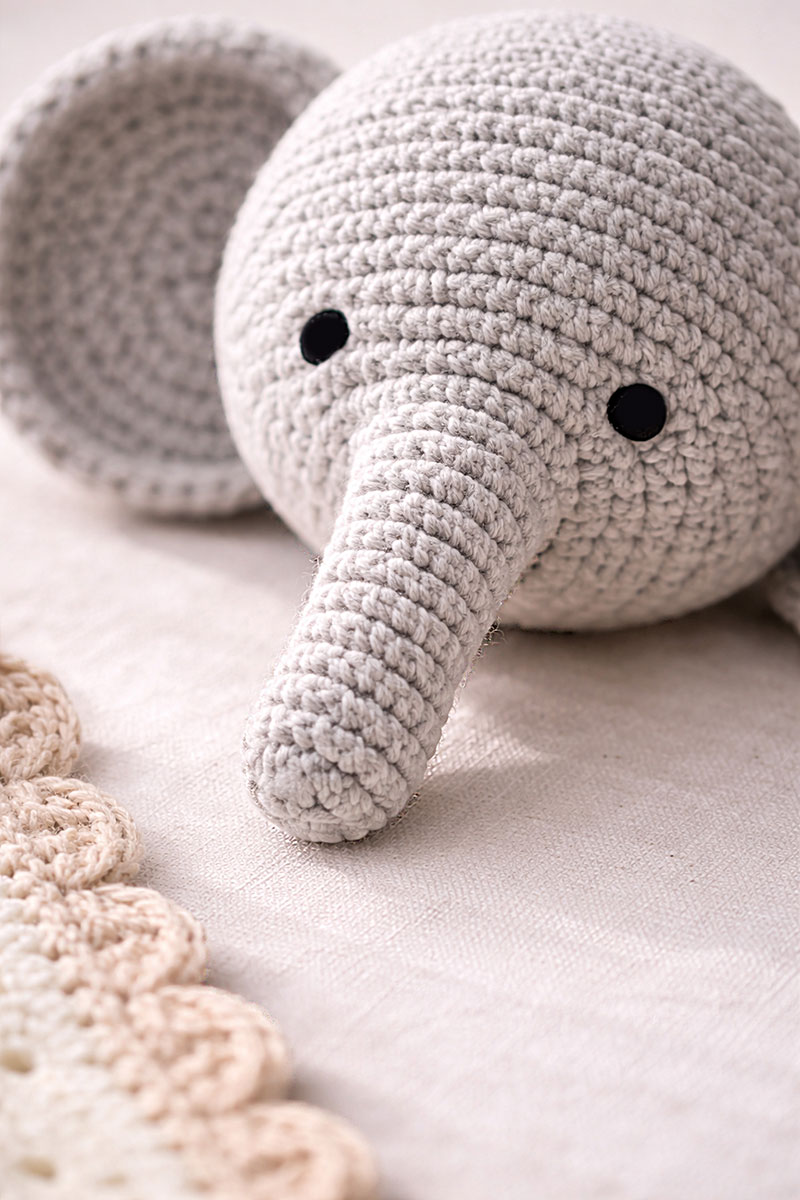
A short trunk holds its shape better. Longer ones tend to collapse and get too loose and floppy really quick.
Use gray yarn and work in continuous spiral rounds from the tip toward the face.
Round 1: Work 6 sc in a mr. Count: 6 sc.
Rounds 2 through 4: Sc in each stitch around. Count after every round: 6 sc.
Round 5: *Sc in next 2 stitches, inc in next stitch.* Repeat twice. Count: 8 sc.
Rounds 6 through 9: Sc in each stitch around. Count after every round: 8 sc.
Round 10: *Sc in next 3 stitches, inc in next stitch.* Repeat twice. Count: 10 sc.
Rounds 11 and 12: Sc in each stitch around. Count after every round: 10 sc.
Fasten off without closing the 10-stitch opening and leave a tail at least 18 inches long. Lightly stuff the trunk from the open base toward Round 5, leaving the final tip soft enough to bend slightly.
Center the open base below and between the embroidered eyes. Pin it before sewing. Sew through every stitch around the 10-stitch opening and through full head stitches, checking from the front that the trunk remains centered and points downward.
Crochet Elephant Ears Step By Step That Fall Naturally
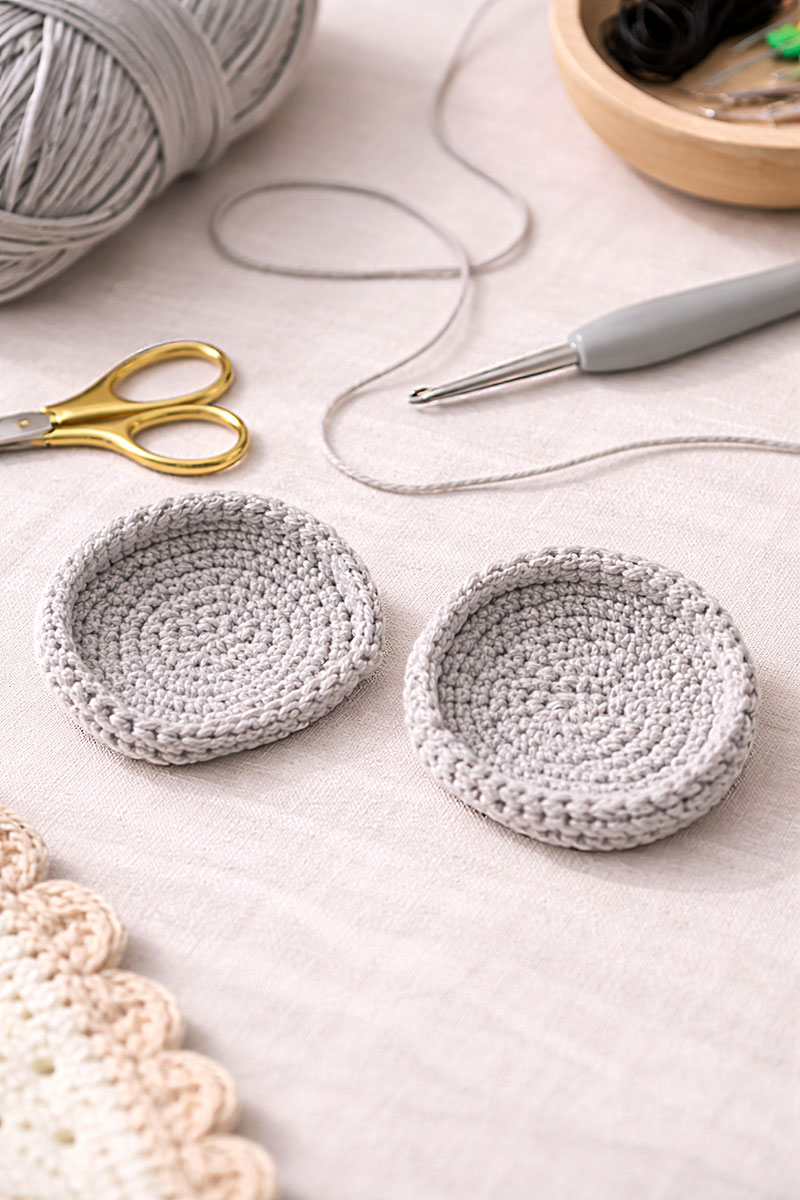
Ears define the look. Letting them fall naturally to see what looks right before sewing makes a big difference.
Make 2 matching ears. Use gray yarn and work in continuous spiral rounds.
Round 1: Work 6 sc in a mr. Count: 6 sc.
Round 2: Inc in each stitch around. Count: 12 sc.
Round 3: *Sc in next stitch, inc in next stitch.* Repeat around. Count: 18 sc.
Round 4: *Sc in next 2 stitches, inc in next stitch.* Repeat around. Count: 24 sc.
Round 5: *Sc in next 3 stitches, inc in next stitch.* Repeat around. Count: 30 sc.
Round 6: Working in the back loops only, sc in each stitch around. Count: 30 sc.
Fasten off each ear with a tail at least 18 inches long. Do not stuff. The final no-increase round creates the shallow cupped edge shown in the intended ear shape.
Place the two ears together with their centers, outer edges, and final rounds aligned. Confirm that both ears contain 30 stitches, have matching diameters and cup to approximately the same depth. Correct any visible size or shaping difference before marking the attachment stitches.
Choose the side of each ear with the visible front-loop ridge as the front and turn the shallow cup slightly forward. Count 15 consecutive stitches along the half of the final round that will rest against the head. Place markers in the first, eighth, and fifteenth stitches of this section. The eighth stitch is the middle attachment stitch. Leave the other 15 ear stitches unsewn.
Remark the front center of the head between the eyes. At approximately Round 9, count 9 stitches around the 36-stitch head circumference in each direction from the front center to locate the left and right side centers.
Pin the marked middle attachment stitch of one ear at the first side center. Pin the upper end of its 15-stitch seam near Round 6 and the lower end near Round 12, forming a gently curved vertical attachment line behind the side of the face. Keep the unsewn half of the ear facing forward.
Sew the 15 marked ear stitches to 15 separate, evenly spaced bites of head fabric along that curved line. Do not bunch several ear stitches into one attachment point and do not pull the seam tightly enough to dent the head.
Mirror the same placement on the opposite side, using the second Round 9 side-center mark and matching the Round 6 and Round 12 endpoints. Before securing the tails, check from the front, back, top, and both sides that the ears have equal height, forward tilt, and exposed unsewn edges.
Crochet Elephant Arms Step By Step
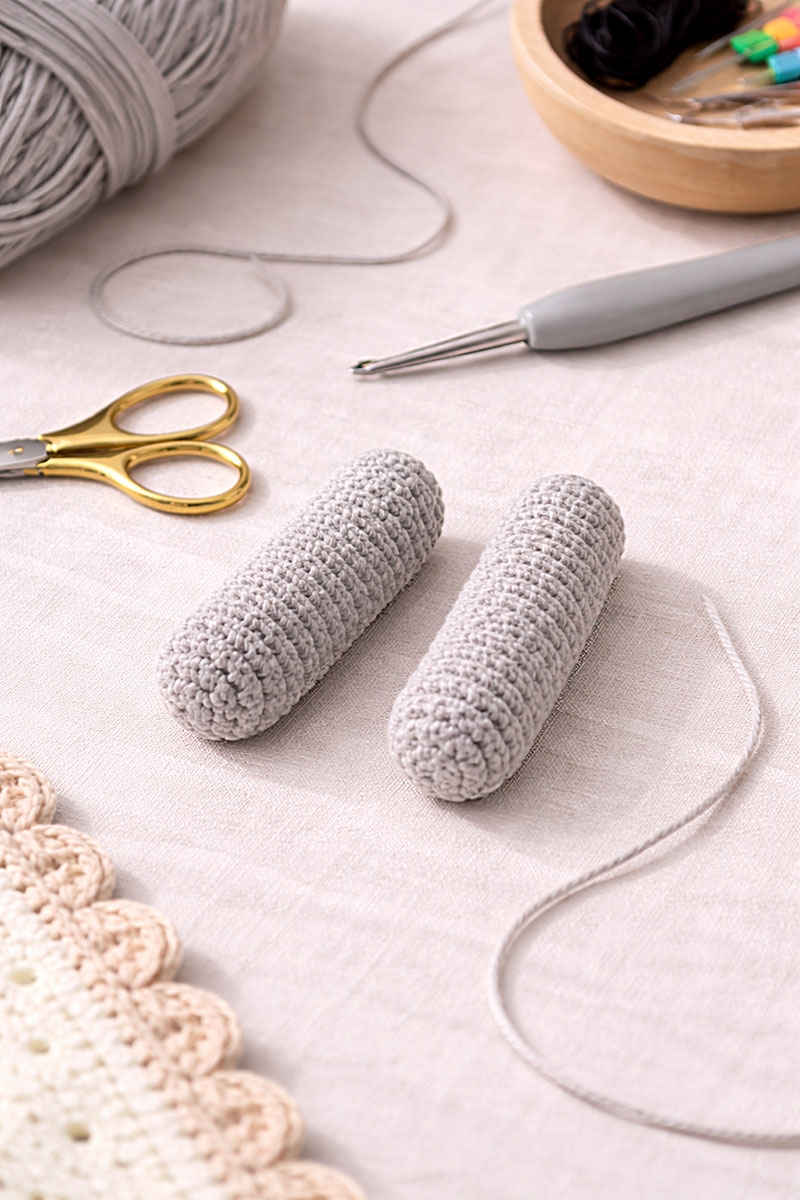
Small arms keep the lovey easy to handle. If they're too big they're too bulky and don't feel or look right.
Make 2 matching arms. Use gray yarn and work in continuous spiral rounds from the rounded hand toward the shoulder.
Round 1: Work 6 sc in a mr. Count: 6 sc.
Round 2: Inc in each stitch around. Count: 12 sc.
Rounds 3 through 8: Sc in each stitch around. Count after every round: 12 sc.
Round 9: *Sc in next 4 stitches, dec over next 2 stitches.* Repeat twice. Count: 10 sc.
Rounds 10 through 12: Sc in each stitch around. Count after every round: 10 sc.
Lightly stuff Rounds 1 through 8, concentrating the stuffing in the rounded hand end. Leave Rounds 9 through 12 unstuffed so the shoulder can lie flat.
Flatten the opening so five stitches line up across the front and five across the back. Sc through both layers across the opening. Count: 5 closing sc. Fasten off with a tail at least 18 inches long.
Place the finished arms side by side before assembly and confirm that their round counts, lengths, stuffing levels, and flattened five-stitch shoulder edges match.
How To Assemble The Crochet Elephant Lovey Cleanly
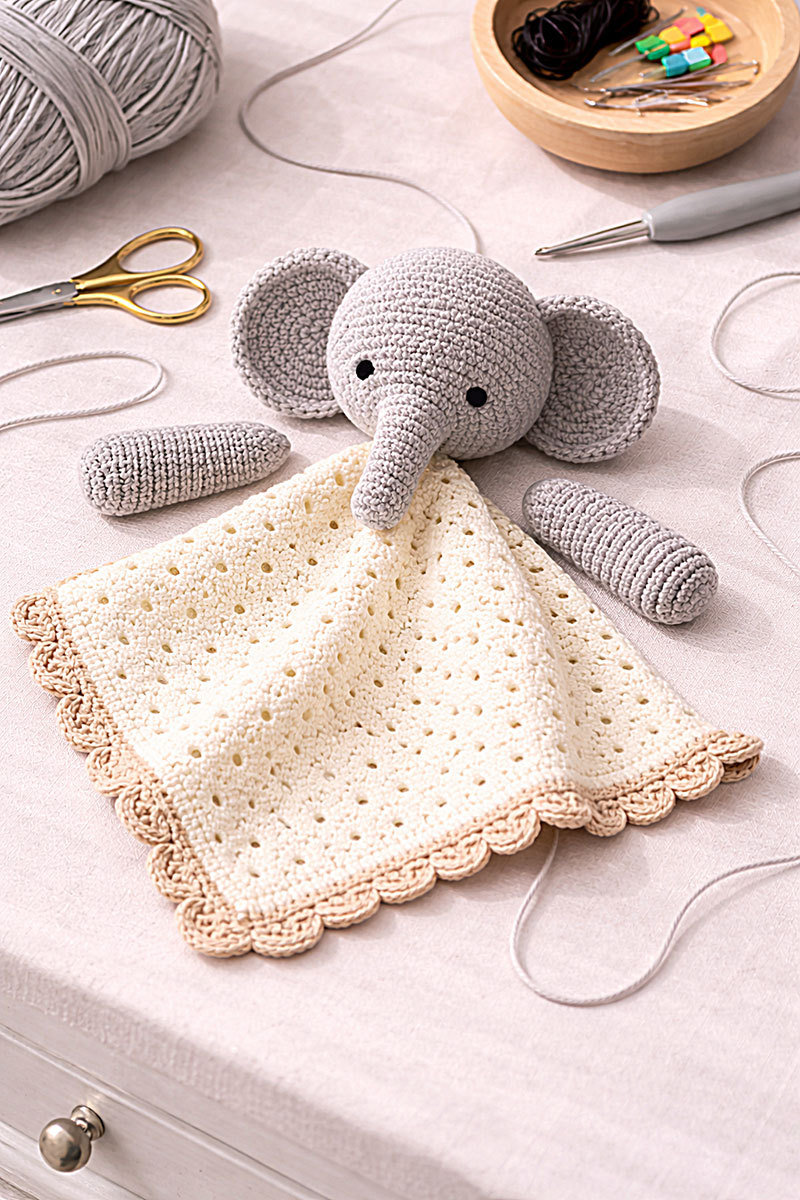
This is where the real elephant-style magic happens...or not. It's important to step back before sewing because placement always looks different from a distance. I have made several and still do not skip this step.
Step 1: Complete the elephant head. Sew the trunk and both ears to the stuffed and closed head before attaching the head to the blanket. Check the face from the front, back, top, and both sides before continuing.
Step 2: Prepare the blanket. Lightly block the blanket according to the yarn-care instructions and allow it to dry completely. Lay it right side up with one selected corner pointing upward and the opposite corner pointing downward.
Step 3: Mark the upper-corner centerline. Bring the left and right blanket corners together temporarily to mark the centerline running from the selected upper corner to the lower corner. Reopen the blanket. Place a marker on that centerline approximately 1 to 1 1/4 inches inward from the upper corner. Keep the marker inside the plain border rather than on a scallop.
Step 4: Orient the head. Place the closed underside of the head over the marker with the face and trunk directed toward the lower blanket corner. The selected upper blanket corner should extend beneath the lower back of the head rather than remaining visible above it. Pin the head through solid sc stitches and plain border stitches, not through scallops or open ch-1 spaces.
Step 5: Check the pinned placement. View the lovey from the front, back, top, and both sides. Lift the blanket gently by its left and right corners while supporting the head. Adjust the pins until the head sits directly above the blanket centerline and the three remaining corners spread evenly beneath it. Mark the planned 1- to 1 1/4-inch attachment circle or shallow oval beneath the head and confirm that its entire outline rests on solid blanket stitches or the plain border. If any part crosses beyond the blanket edge, through a ch-1 opening, or onto a scallop, move the head farther inward before sewing.
Step 6: Sew the head. Use the long closing tail left at the underside of the head. Sew the head to the blanket in a circle or shallow oval approximately 1 to 1 1/4 inches across. Catch full head stitches near the lower decrease rounds and solid blanket or plain-border stitches. Sew around the attachment area twice, changing direction on the second pass. Do not pull tightly enough to flatten the head, draw the corner upward, or gather the blanket.
Step 7: Position the arms. Place one flattened five-stitch shoulder edge beneath each lower side of the head. Angle the arms toward the lower left and lower right corners. Measure from the upper corner and centerline so both shoulder seams begin at matching positions.
Step 8: Sew the arms. Use each arm's long tail to sew its five-stitch shoulder edge to solid blanket stitches immediately beside and below the head. Add two or three small tack stitches between the upper inside edge of each arm and the lower side of the head. Keep the two attachment areas equal so one arm does not sit higher or project farther than the other.
Step 9: Perform a complete seam check. Remove every straight pin, stitch marker, scrap-yarn marker, and other temporary placement aid. Count the removed markers and pins against the number used before checking the seams. Support the head and turn the lovey front to back. Gently test the head, trunk, both ears, and both arms. If the head tips, add two or more evenly spaced attachment stitches rather than pulling one isolated stitch tightly. Add stitches anywhere a piece lifts away from its intended position.
Step 10: Finish the tails. Weave every yarn tail through dense crochet fabric in more than one direction. Pull the fabric gently after weaving to confirm that no end works loose, then trim the excess yarn without cutting close to a seam or magic-ring center.
Finished Crochet Elephant Lovey In Everyday Use
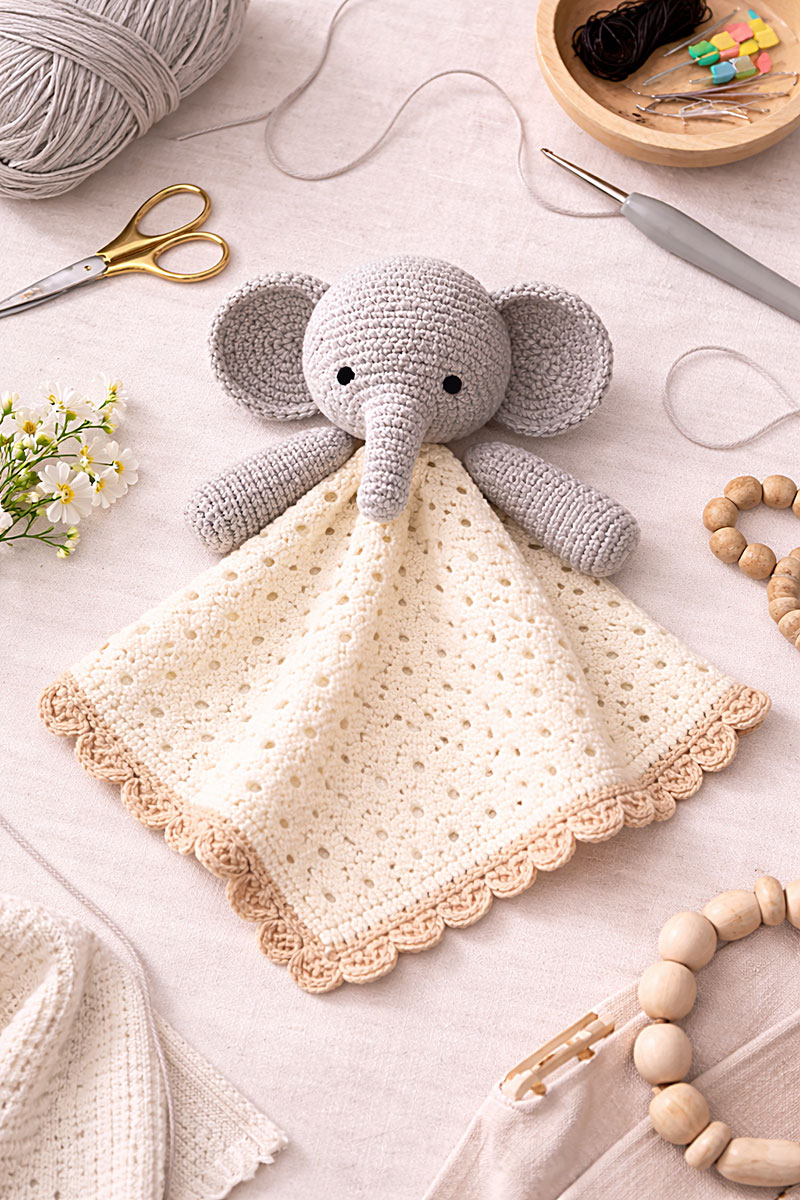
I notice the loveys I have given as gifts usually end up in the same places. They get draped over a chair, tucked into a diaper bag, or carried from room to room in little arms. That is when shape and balance matter most.
If the blanket curls, block it only as permitted by the yarn-care instructions and shape it flat without stretching the eyelets or scallops. Allow the blanket and every stuffed component to dry completely.
If the head tips, add two or more evenly spaced attachment stitches through solid blanket fabric so the load is distributed across the seam. Do not correct the problem by pulling one isolated stitch tightly. If the ears sit at unequal heights, reopen the shorter or higher seam and confirm that both ears are attached through 15 stitches across matching head rounds.
For folding, lay the lovey face up and fold the left and right blanket corners inward beneath the arms. Fold the lower corner upward without bending the trunk or compressing the head. For rolling, begin at the lower corner and roll loosely only as far as the lower edge of the head.
For storage or display, support the stuffed head and allow the trunk, ears, and arms to remain uncompressed. Do not hang or carry the lovey by the trunk, either ear, or either arm.
For more handmade baby projects, visit my free baby crochet patterns page, try the owl lovey pattern, or browse these easy baby lovey crochet patterns for smaller beginner-friendly projects with simple blanket bases and lighter shaping.
For cleaner nursery aesthetics and more understated handmade baby gifts, this minimalist crochet lovey pattern uses a simpler modern style that coordinates especially well with neutral nursery themes and contemporary baby rooms.
Animal loveys also make it easy to build a little themed set. My crochet cow pattern adds a familiar farm animal option for nursery gift baskets, while this highland cow crochet snuggler lovey pattern has a shaggy look that feels very different from the elephant.
These crochet animal lovey patterns gather elephant, safari, woodland, farm and ocean designs in one place for planning a coordinated handmade set.
For a safari-inspired baby gift, my crochet lion lovey pattern combines a playful mane with a soft blanket body, making it a natural companion to elephant, giraffe, and jungle-themed nursery projects.
The same safari gift set can include my crochet monkey lovey pattern when you want a second jungle animal with a very different face and ear shape.
A woodland baby gift set can move in a different direction with my raccoon crochet pattern, which makes a seated forest animal amigurumi with a mask face, striped tail, and shelf-ready nursery keepsake style.
An Australian animal gift set can use a cute bear created using my crochet koala lovey pattern as a Aussie companion to elephant and jungle nursery projects.
An ocean-inspired option like this crochet sea turtle pattern pairs naturally with the crochet jellyfish pattern, crochet fish pattern, and crochet octopus pattern for a coordinated ocean-themed baby room set.
For smaller stitched animal pieces that can decorate blankets, bibs, banners, and nursery keepsakes, browse my crochet animal applique patterns collection.
The separate crochet elephant applique pattern includes both a flat circus elephant and a lightly padded safari elephant for projects that do not need a complete lovey.
Remember, the goal is to create a comforting little elephant that will hold up to a lot of love.
FAQ Crochet Elephant Lovey Pattern
Is this crochet elephant lovey free pattern beginner friendly?
This is best described as a confident-beginner project. It uses basic crochet stitches, but the crocheter must also keep accurate round counts, work continuous amigurumi rounds, shape matching pieces, embroider the eyes, stuff the components, and complete secure sewn assembly.
Can I change the yarn?
Yes, but changing the yarn weight or fiber can alter the blanket dimensions, head size, drape, stuffing coverage, and the way the pieces align. Use the same yarn weight for all elephant pieces and check that the finished fabric is firm enough to conceal the stuffing.
Is a crochet elephant lovey safe for babies?
Use securely fastened embroidered eyes rather than buttons, beads, or plastic safety eyes. Inspect every seam, magic-ring center, and yarn tail before use. This lovey is intended for supervised awake use and should remain out of cribs, bassinets, play yards, and every other infant sleep area during naps and nighttime sleep.
How do I clean a crochet elephant lovey?
Follow the care instructions for the yarn used. Wash gently, support the stuffed head and attached pieces, reshape the blanket while damp, and allow the entire lovey to dry completely before use or storage.
When you click on links to various merchants on this site and make a purchase, this may result in this site earning a commission. This does not affect the price you pay.

UBGI Gold Standard 2026
Reviewed under the site's
editorial checklist.
Photos, decorating ideas, party setups and reader submissions are shared for inspiration unless a page is specifically presented as a pattern, tutorial, reference guide or step-by-step project. Follow the instructions, measurements, safety guidance and manufacturer directions provided for the particular project or product.
About Jan | Contact | Baby Nursery Ideas (Blog) | Site Map | Privacy Policy | Disclosure Policy | Disclaimer | Affiliate Disclosure | Earnings Disclosure | Facebook | Pinterest
I am a participant in the Amazon Services LLC Associates Program, an affiliate advertising program designed to provide a means for us to earn fees by linking to Amazon. As an Amazon Associate I earn from qualifying purchases.
Copyright © 2006-2026. All Rights Reserved.