Crochet Lamb Lovey Pattern - Easy Baby Shower Gift Idea
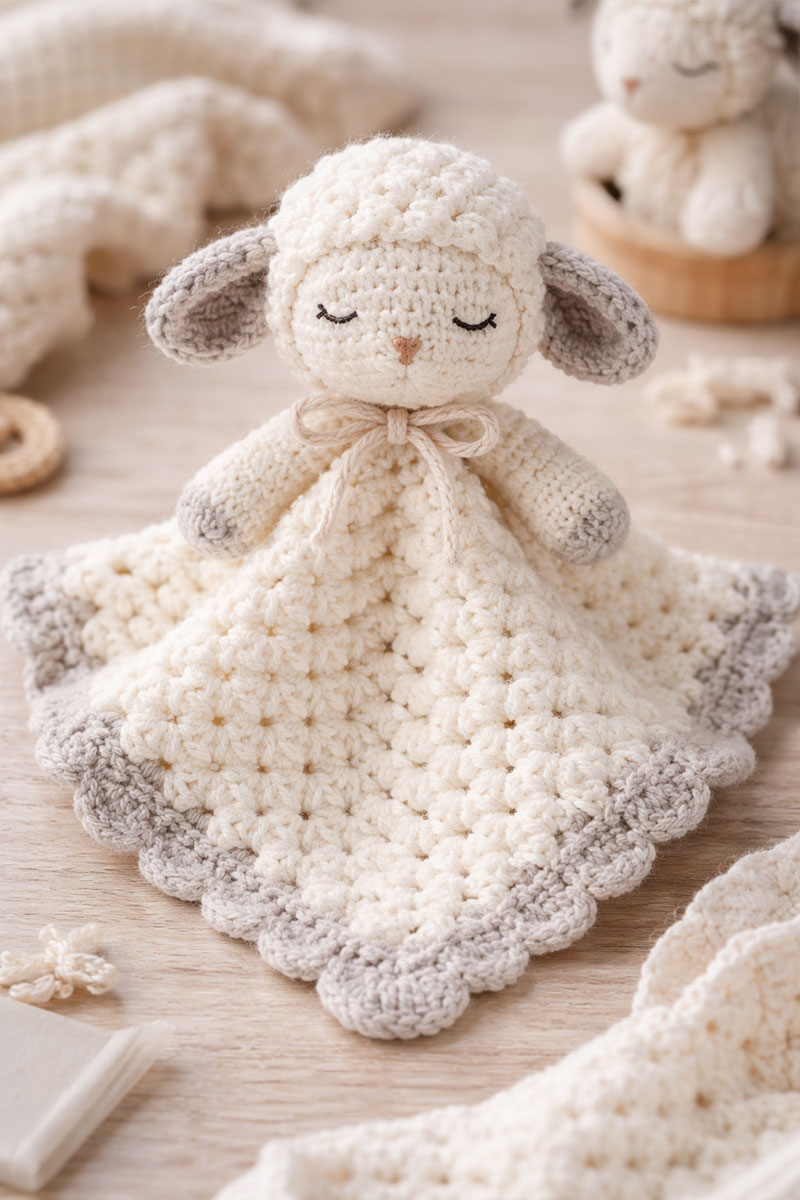
This crochet lamb lovey pattern makes a small handmade baby comfort blanket with a lamb head topper, a simple granny-style base, and beginner-friendly construction that works well for baby shower gifts, keepsakes, and supervised cuddle time.
Try Another Baby Lovey Pattern
Choose a Lovey Style:
See the baby yarn that gives this lamb lovey its cozy finish →
The correct yarn choice is what gives this lovey its soft, gift-ready finish.
See what using a softer yarn changes →
On this page
Crochet Lamb Lovey Pattern Details
Skill level: Advanced beginner
Estimated time: Approximately 5–8 hours, depending on crochet speed, blanket size, and finishing details
Finished blanket size: Approximately 13–15 inches across after the border
Finished head size: Approximately 2–2½ inches across when firmly but lightly stuffed, depending on yarn, hook size, and tension
Yarn weight: Category 3 or 4 smooth baby yarn
Estimated yarn: Approximately 250–350 yards total, depending on yarn weight, tension, and the number of blanket rounds needed
Hook size: 3.5 mm to 4.5 mm, or the size needed to produce firm stitches without visible stuffing gaps
Gauge: Exact gauge is not required because the blanket is worked to a measured size. The head stitches should be tight enough that stuffing does not show through.
Construction: Granny-style blanket base, separate muzzle and ears, stuffed lamb head with a 12-stitch open attachment base, embroidered face, and sewn assembly
Wool texture: Two bobble rounds form the textured upper portion of the lamb head while the lower face remains smooth for the muzzle and embroidered features.
Pattern scope: These instructions make the simplified granny-square lamb lovey described below. Loose bows, long ties, separate arms, and other detachable embellishments are not included.
Intended use: Baby shower gifts, nursery keepsakes, supervised awake-time cuddles, and supervised stroller use
Pattern notes: The blanket is worked in joined rounds. The lamb head and muzzle are worked in continuous rounds without joining. Place a stitch marker in the first stitch of each continuous round and move it up as you work.
Beginning chains: The beginning ch 3 counts as the first dc in each blanket round. A beginning ch 1 used for single crochet does not count as a stitch.
Abbreviations: ch (chain), ch-sp (chain space), sc (single crochet), dc (double crochet), sl st (slip stitch), st or sts (stitch or stitches), inc (work 2 sc in the same stitch), dec (single crochet decrease)
Decrease method: For a less visible decrease, insert the hook through the front loop of each of the next two stitches, yarn over and draw through both front loops, then yarn over and draw through the two loops remaining on the hook.
Design note: The lamb head is kept small in proportion to the blanket so the finished lovey remains balanced and does not pull heavily on the center of the square.
Face detail: All facial features are embroidered with yarn or embroidery floss. Do not use plastic eyes, buttons, beads, bells, loose bows, or other removable decorations.
About this crochet lamb lovey pattern
This crochet lamb lovey pattern creates a small comfort blanket with an openwork granny-style base and a securely sewn lamb head topper. It is intended for supervised cuddles, stroller time, keepsake gifts, and other awake-time use. It should not be placed in a crib, bassinet, or other infant sleep space.
The blanket is worked until it reaches a measured size rather than relying on one fixed round count. This allows the pattern to work with either category 3 or category 4 yarn while still producing a finished blanket approximately 13–15 inches across.
The head is attached through an open 12-stitch base instead of being closed into a narrow point. This creates a wider sewing area and distributes the strain around the center of the blanket.
A lamb lovey fits naturally with nursery themes that lean sweet, neutral, farmhouse, cottage, vintage, or handmade. Its simple construction also makes it practical for a baby shower gift basket or keepsake package.
For cleaner nursery aesthetics and simpler handmade baby gifts, this minimalist crochet lovey pattern uses a more understated style that works especially well in modern nursery themes and neutral baby gift baskets.
Materials + sizing notes
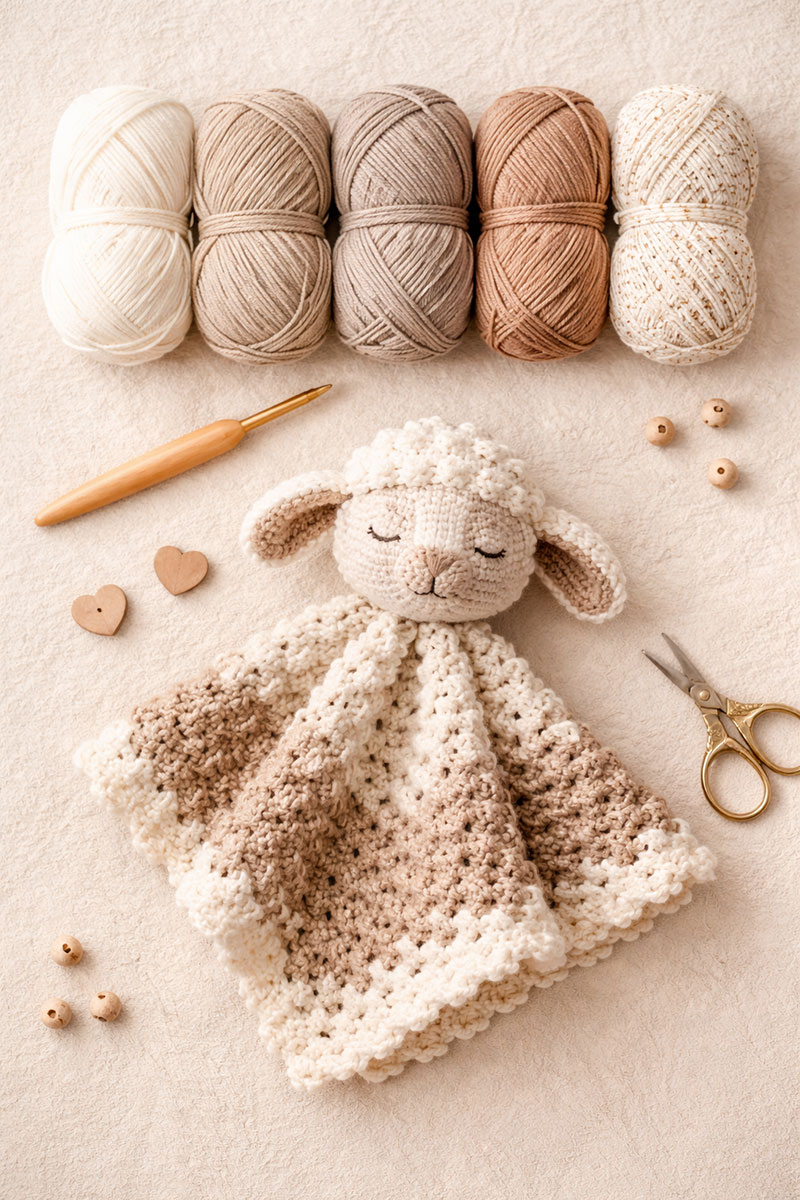
• Approximately 225–315 yards of category 3 or 4 baby yarn for the blanket, head, and ears
• Approximately 25–35 yards of contrasting yarn for the muzzle and, if desired, the border; the border may also be worked in the main color
• Small amount of black embroidery floss or smooth black yarn for the eyes
• Small amount of pink or black yarn for the nose
• Crochet hook, 3.5 mm to 4.5 mm, or the size needed to produce firm stitches
• Small handful of polyester fiberfill stuffing
• Yarn needle for assembly and weaving in ends
• Stitch marker for continuous rounds
• Rustproof pins or removable stitch markers for positioning pieces
• Scissors
• Measuring tape
Yardage varies because the blanket is worked to measurement. Category 3 yarn generally requires more rounds and more yardage than category 4 yarn to reach the same finished size.
Choose smooth baby yarn that holds its shape and allows every stitch and seam to be inspected. Avoid very fuzzy novelty yarn because it can shed, hide loose stitches, and make it difficult to confirm that stuffing remains fully enclosed.
Repeatability note:
The same measured blanket base and open-base attachment method can be used with other small crocheted animal heads.
Keep any replacement head lightweight, use tight stitches, avoid loose embellishments, and attach it through a wide sewing area rather than one narrow yarn tail or closed point.
Blanket base pattern for the crochet lamb lovey pattern
Want another quick handmade baby gift?
See easy baby quilt patterns that work up fast →
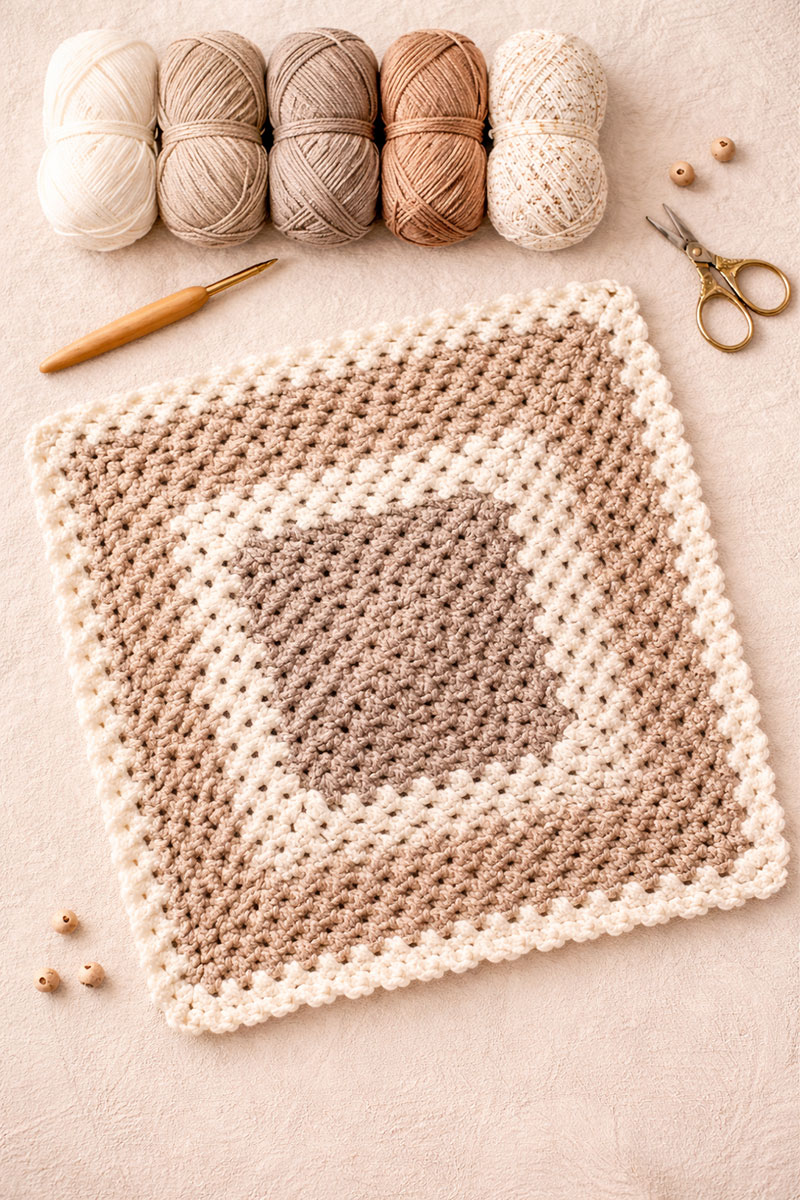
The blanket is worked in joined granny-square rounds. Do not turn the work after joining each round; keep the same side facing throughout the blanket and border. Each corner contains a ch-2 space. The spaces between the 3-dc clusters are ch-1 spaces.
Round 1: Make a magic ring. Ch 3, which counts as the first dc. Work 2 dc in the ring, ch 2, *3 dc in the ring, ch 2* three times. Join with a sl st to the top of the beginning ch 3. Pull the magic ring firmly closed. (12 dc, four ch-2 corner spaces)
Round 2: Sl st in each of the next 2 dc and into the first ch-2 corner space. Ch 3, 2 dc, ch 2, and 3 dc in the same corner space. Ch 1. In each of the next three ch-2 corner spaces, work 3 dc, ch 2, 3 dc, then ch 1. After the final ch 1, join with a sl st to the top of the beginning ch 3. (24 dc, eight 3-dc clusters, four ch-1 side spaces, and four ch-2 corner spaces)
Rounds 3 and beyond: After joining the previous round, sl st in the next 2 dc and then sl st into the first ch-2 corner space. Ch 3, 2 dc, ch 2, and 3 dc in the same corner space. Ch 1. Work 3 dc in each ch-1 space across the first side, placing ch 1 between each 3-dc cluster. In the next ch-2 corner space work 3 dc, ch 2, 3 dc. Ch 1. Continue in this manner around the square. After completing the fourth corner, ch 1 and join with a sl st to the top of the beginning ch 3.
Round-count checkpoints:
• Round 3: 36 dc in twelve 3-dc clusters
• Round 4: 48 dc in sixteen 3-dc clusters
• Round 5: 60 dc in twenty 3-dc clusters
• Round 6: 72 dc in twenty-four 3-dc clusters
• Round 7: 84 dc in twenty-eight 3-dc clusters
• Round 8: 96 dc in thirty-two 3-dc clusters
• Round 9: 108 dc in thirty-six 3-dc clusters
• Round 10: 120 dc in forty 3-dc clusters
• Round 11: 132 dc in forty-four 3-dc clusters
• Round 12: 144 dc in forty-eight 3-dc clusters
The listed stitch totals count the dc stitches only. They do not include the ch-1 spaces or the four ch-2 corner spaces.
Shape checkpoint: After each round, confirm that the square has four corners and that every side contains the same number of 3-dc clusters. The number of 3-dc clusters on each side should match the round number.
Continue repeating the established round until the unbordered square measures approximately 12½–14½ inches across. End only after completing and joining a full round. The final border adds approximately ½ inch to the overall width.
If the square ripples, confirm that only one 3-dc cluster was worked in each ch-1 side space and that only two 3-dc clusters were worked in each ch-2 corner space. If the square cups upward, relax your tension slightly or use a hook one size larger for the blanket only.
Final border: With the right side of the blanket facing, fasten off the blanket color. Join either the main color or the contrast color with a sl st in any ch-2 corner space. Ch 1, which does not count as a stitch, and work 3 sc in the same corner space. Work 1 sc in every dc and 1 sc in every ch-1 space across the side. Work 3 sc in the next ch-2 corner space. Repeat around. Join with a sl st to the first sc.
Border stitch-count checkpoint: If the final granny-square round is Round 8, the border has 136 sc. Round 9 has 152 sc, Round 10 has 168 sc, Round 11 has 184 sc, and Round 12 has 200 sc. For any other final round, multiply the round number by 16 and add 8.
Fasten off the border yarn and securely weave in all blanket, border, and joining ends.
Finished blanket checkpoint: The bordered square should measure approximately 13–15 inches across and should lie flat without tightly curled edges or deeply rippled sides.
Lightly block the blanket before attaching the head. Shape all four corners evenly and allow the blanket to dry completely before assembly.
Lamb head pattern
Make the muzzle and ears before crocheting the head. This allows the facial pieces to be attached while the bottom of the head is still open and all yarn ends can be secured inside.
Muzzle
Muzzle, make 1: Work in continuous rounds. Place a stitch marker in the first stitch of each round.
Round 1: Work 6 sc in a magic ring. (6)
Round 2: Inc in each stitch around. (12)
Round 3: *Sc in the next stitch, inc in the next stitch* six times. (18)
Round 4: Sc in every stitch around. (18)
Fasten off, leaving an 18-inch sewing tail. Do not stuff the muzzle yet.
Lamb ears
Lamb ears, make 2: The ch 1 used for turning does not count as a stitch.
Foundation chain: Ch 11.
Row 1: Sc in the second chain from the hook and in each chain across. Ch 1 and turn. (10)
Row 2: Sc in each stitch across. Ch 1 and turn. (10)
Row 3: Dec over the first 2 stitches, sc in each of the next 6 stitches, then dec over the final 2 stitches. Ch 1 and turn. (8)
Row 4: Sc in each stitch across. Ch 1 and turn. (8)
Row 5: Dec over the first 2 stitches, sc in each of the next 4 stitches, then dec over the final 2 stitches. (6)
Fasten off, leaving a 12-inch sewing tail. Weave the beginning tail through the ear fabric, but leave the longer ending tail for attachment.
Bring the two lower corners of the wide foundation edge slightly toward the center so they overlap by approximately ¼ inch. Using the sewing tail, stitch through both folded corners to hold the base in a shallow cupped shape. Do not roll or fold the entire ear.
Stuffed lamb head
The head is worked from the top downward in continuous rounds. Do not join at the end of the rounds. Place a stitch marker in the first stitch and move it up after every completed round.
Round 1: Work 6 sc in a magic ring. (6)
Round 2: Inc in each stitch around. (12)
Round 3: *Sc in the next stitch, inc in the next stitch* six times. (18)
Round 4: *Sc in each of the next 2 stitches, inc in the next stitch* six times. (24)
Round 5, wool texture: *Bobble in the next stitch, sc in the next stitch* twelve times. (12 bobbles and 12 sc, 24 stitches total)
Round 6: Sc in every stitch around. Push any bobbles that formed toward the inside of the head outward before continuing. (24)
Round 7, wool texture: *Bobble in the next stitch, sc in the next stitch* twelve times. (12 bobbles and 12 sc, 24 stitches total)
Before beginning Round 8, push all 12 bobbles from Round 7 toward the outside of the head so the wool texture remains visible.
Rounds 8–10: Sc in every stitch around. (24)
Round 11: *Sc in each of the next 2 stitches, dec over the next 2 stitches* six times. (18)
Round 12: *Sc in the next stitch, dec over the next 2 stitches* six times. (12)
Fasten off, leaving a sewing tail approximately 30 inches long. Do not decrease again and do not close the 12-stitch opening. The open base will be used to attach the head securely to the blanket.
Bobble stitch: Yarn over, insert the hook into the indicated stitch, yarn over and draw up a loop, then yarn over and draw through 2 loops. Repeat this partial dc four more times in the same stitch. Yarn over and draw through all 6 loops remaining on the hook. Work the following sc firmly to help the bobble project outward.
Face and ear assembly
Keep the head unstuffed while positioning and attaching the facial pieces. Place the spiral jog and stitch marker line at the center back of the head. The smooth area directly opposite that line is the center front.
Center the muzzle over the lower front of the head, with its upper edge near Round 8 and its lower edge near Round 11. Pin or mark it in place before sewing.
Using the muzzle tail, sew around the outer edge of the muzzle. When approximately 1 inch of the seam remains open, add only a small pinch of stuffing. The muzzle should be softly raised rather than firm or rounded. Complete the seam, knot the yarn securely inside the head, and trim the excess.
Embroider a small inverted triangle nose near the center of the muzzle. Add one short vertical stitch beneath the triangle. Carry the embroidery ends through the open bottom of the head, knot them securely together, and trim the excess.
Embroider the eyes on the smooth portion of Round 8 or Round 9, directly above the muzzle. Place the eye centers approximately four stitches apart so they appear even on either side of the front center.
Keep the eye stitches short, flat, and securely anchored. Carry all embroidery ends to the inside of the head, knot them securely, and trim them before stuffing.
Position one ear on each side of the head with the folded foundation edge spanning approximately Rounds 6–8. The folded edge should face toward the back so the ears drape beside the face.
Confirm that both ears sit at the same height and the same distance from the muzzle. Sew through the folded base of each ear twice, knot the tails securely inside the head, and trim the excess.
Stuffing and attaching the head
Add fiberfill through the 12-stitch opening in small pieces. Shape the head as you work. The finished head should feel firm enough to hold its shape but should still compress slightly when gently squeezed.
Keep the stuffing approximately ½ inch away from the open base so loose fibers do not become trapped in the attachment seam. No stuffing should be visible between the stitches.
Head measurement checkpoint: The stuffed head will usually measure approximately 2–2½ inches across with firm stitches. The exact measurement may vary with yarn, hook size, and tension. Remove a small amount of stuffing if the stitches stretch or visible gaps appear.
Lay the blocked blanket with one corner pointing downward. Center the open base of the head over the blanket’s starting ring with the face pointing toward the lower corner. The ears should extend evenly toward the left and right sides.
Use removable stitch markers or rustproof pins to align the 12 open head-base stitches with the 12 dc stitches from Blanket Round 1. Place one head-base stitch over each Round 1 dc and do not use the four ch-2 corner spaces as attachment points. Confirm that the face points toward the lower blanket corner and that the head does not lean before sewing.
Using the 30-inch head tail and a yarn needle, pass through both loops of the first head-base stitch and through the corresponding Round 1 dc directly beneath it. Continue around the opening, attaching each of the 12 head-base stitches to one separate Round 1 dc.
Do not skip, duplicate, or combine attachment points. Do not pull the seam so tightly that the blanket gathers or the head opening puckers. The head should sit upright while the blanket remains flat.
After completing the first pass through all 12 matched attachment points, sew through the same 12 points a second time for reinforcement. Knot the yarn securely beneath the head, pass the remaining tail through the stuffed head, bring it out through a different stitch, pull gently, and trim the yarn close so the end retracts inside.
Gently tug the head, muzzle, and both ears in several directions. None of the pieces should shift, loosen, or expose a yarn tail.
Final inspection: Before gifting or using the finished lovey, confirm that:
- All yarn ends have been securely woven into the crocheted fabric or securely knotted before being buried inside the stuffed head.
- The head is attached through all 12 base stitches with two complete sewing passes.
- The blanket remains flat around the attachment area without gathering or puckering.
- The muzzle and ears cannot be loosened with a firm tug.
- No stuffing is visible through the stitches or attachment seam.
- The embroidered eyes and nose are flat and secure with no exposed tails.
- No buttons, beads, plastic eyes, bells, bows, long ties, or removable decorations have been added.
- The blanket border and corners lie flat without excessive curling or rippling.
Taking a few minutes to inspect the finished project helps confirm that the construction is secure and ready for gifting or supervised awake-time use.
Safety + use notes
This crochet lamb lovey is intended only for supervised comfort and awake-time use.
Do not place the lovey in a crib, bassinet, play yard, or other infant sleep space. Soft blankets, toys, comfort objects, and other loose items should remain outside an infant’s sleep area.
Use embroidered facial features rather than plastic eyes, buttons, beads, bells, or other hard attachments. Do not add loose bows, long yarn ties, ribbons, or loops that could pull free or wrap around a child.
Inspect the lovey before every use and after every washing. Check the center attachment, ears, muzzle, embroidery, border, and all visible stitches for looseness, damage, or exposed stuffing.
Repair damage before allowing further use. Discontinue use if a seam, attachment, or damaged section cannot be restored securely.
For broader nursery safety information, see the guidance provided by the American Academy of Pediatrics.
Safe sleep information from HealthyChildren.org
Once you have completed one lamb lovey, the measured blanket base and wide head-attachment method can be adapted for other small crocheted animal designs.
More Handmade Baby Gift Ideas
See the baby lovey pattern list →
This lamb lovey pairs well with other handmade baby gifts, especially when you are building a nursery-themed gift basket or planning a baby shower present.
The complete crochet animal lovey pattern collection can help you choose another animal that matches the same nursery theme or handmade gift basket.
For more handmade projects, visit my free baby crochet patterns collection.
For full baby shower planning ideas that pair beautifully with handmade gifts, visit my baby shower ideas hub.
For a coordinating celebration look built around the same gentle lamb theme, see these lamb baby shower theme ideas that complement a handmade lovey.
Frequently Asked Questions About This Crochet Lamb Lovey Pattern
Can this crochet lamb lovey pattern be enlarged?
Yes. Continue the established granny-square round until the unbordered blanket reaches your preferred measurement, then add the final single crochet border. Keep the head close to the stated size so it remains lightweight and does not pull heavily on the blanket center.
Can I use a different animal head instead of a lamb?
Yes. The blanket base can support another small crocheted animal head when the replacement head is similar in size and is attached through a wide open base rather than one narrow point.
For another farm-style handmade baby gift, see my crochet cow pattern. For a safari-style version, my crochet lion lovey pattern uses the same kind of soft lovey structure with a different animal topper.
For an Australian animal baby gift, this crochet koala lovey pattern uses the same handmade lovey idea with a nursery-friendly animal topper.
What yarn works best for a baby comfort blanket?
Smooth, washable category 3 or category 4 baby yarn is easier to crochet, inspect, and care for than fuzzy novelty yarn. Use a hook that produces firm head stitches without making the blanket stiff.
Can this lovey be machine washed?
That depends on the care instructions for the yarn used. When the yarn label permits machine washing, place the lovey in a mesh laundry bag and use a gentle cycle. Reshape it after washing and allow it to dry completely before use.
Inspect the center attachment, muzzle, ears, embroidery, and all seams after every washing. Include the yarn brand, fiber content, washing instructions, and inspection reminder when giving the lovey as a gift.
Is this crochet lamb lovey pattern safe for newborns?
This crochet lamb lovey is intended for supervised awake-time comfort rather than sleep. It should remain outside the crib, bassinet, and other infant sleep spaces.
Use tight stitching, secure seams, embroidered features, and regular inspection. Do not add plastic eyes, buttons, beads, bells, loose bows, long ties, ribbons, or other removable embellishments.
Careful stitching, a wide reinforced head attachment, secure embroidered details, and clear supervised-use boundaries help make the finished lamb lovey a practical handmade keepsake or baby shower gift.
When you click on links to various merchants on this site and make a purchase, this may result in this site earning a commission. This does not affect the price you pay.

UBGI Gold Standard 2026
Reviewed under the site's
editorial checklist.
Photos, decorating ideas, party setups and reader submissions are shared for inspiration unless a page is specifically presented as a pattern, tutorial, reference guide or step-by-step project. Follow the instructions, measurements, safety guidance and manufacturer directions provided for the particular project or product.
About Jan | Contact | Baby Nursery Ideas (Blog) | Site Map | Privacy Policy | Disclosure Policy | Disclaimer | Affiliate Disclosure | Earnings Disclosure | Facebook | Pinterest
I am a participant in the Amazon Services LLC Associates Program, an affiliate advertising program designed to provide a means for us to earn fees by linking to Amazon. As an Amazon Associate I earn from qualifying purchases.
Copyright © 2006-2026. All Rights Reserved.