Crochet Giraffe Lovey Free Pattern
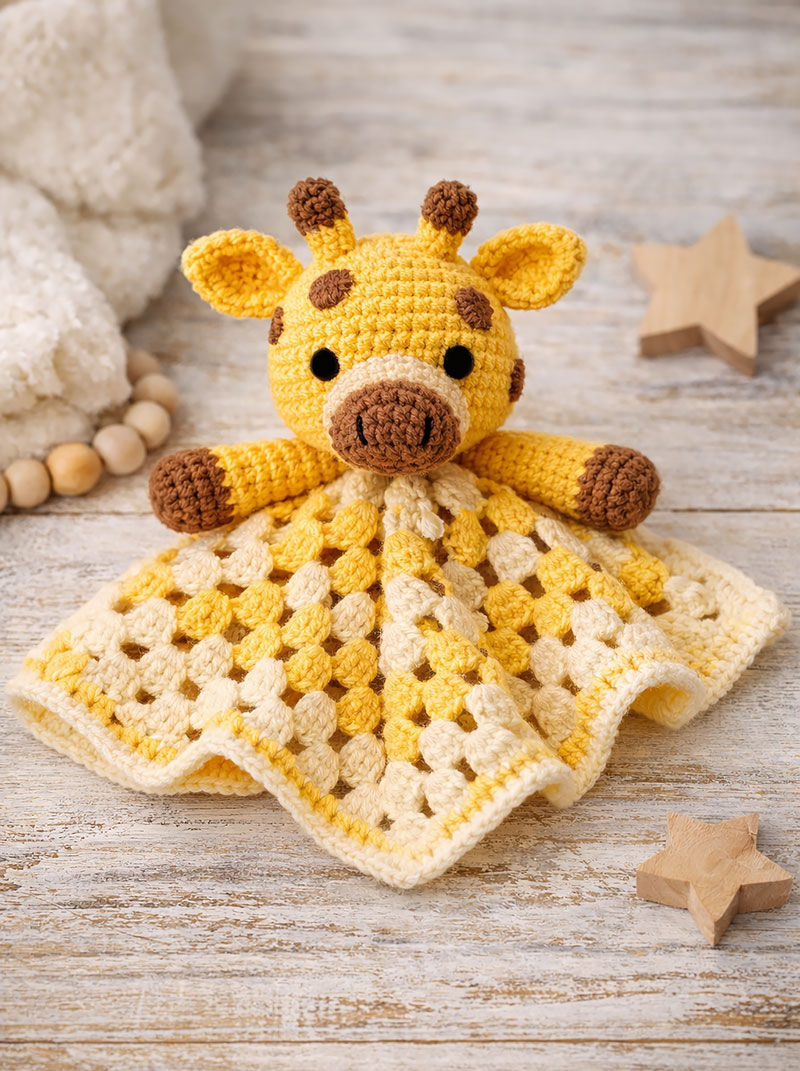
Crochet giraffe lovey free pattern projects create such great gifts. These little loveys are the ones babies love and reach for. I’ve seen other beautifully made pieces sit untouched, while the simple ones get carried everywhere, tucked under little arms, and dragged from room to room. This pattern is designed for that kind of real love and everyday use. It is something that is easy to make and easy to hold that is kept in constant play rotation.
Pick Another Baby Lovey Pattern
Jump to a section on this page
Crochet giraffe lovey free pattern
Step by step pattern instructions
Quick answer: This free giraffe lovey pattern will tell you how to make a small giraffe head attached to a flat blanket, creating a lightweight baby comfort/security item that is easy to hold and simple to finish.
This pattern includes the stitch counts, shaping steps, and assembly directions needed to complete the project.
Preferred soft baby yarns for crochet projects
The instructions below include stitch counts, color changes, size checkpoints, and clear assembly placement guidance.
Preferred soft baby yarns for crochet projects
Crochet Giraffe Lovey Free Pattern That Is Easy To Follow
This version uses a counted granny square blanket, a two-layer muzzle, shaped horns, flat spots, embroidered facial details, and a reinforced center attachment.
This pattern is an original design created for this site and may not be copied or redistributed.
Baby-use note: Use embroidered eyes and nostrils only. Do not add buttons, beads, bells, plastic eyes, or other hard attached pieces. Check every seam and yarn end before use, and remove the lovey if any part becomes loose or damaged. Use the lovey only during awake, supervised time with a baby. Keep it out of cribs, bassinets, play yards, and other infant sleep spaces during naps and nighttime sleep.
Materials And Yarn Details
Yarn: Medium worsted weight yarn, category 4
Color A, yellow main color: About 180 yards
Color B, cream contrast color: About 120 yards
Color C, brown detail color: About 50 yards
Black yarn: A small amount for embroidered eyes and nostrils
Hook: 3.75 mm crochet hook, or the size needed to make a firm fabric
Other supplies: Washable stuffing, yarn needle, stitch marker, scissors, and sewing pins
Skill level: Confident beginner
Finished size: For the standard version ending after Round 8, the bordered blanket should measure about 10 to 12 inches along one edge. The finished standard-size lovey should measure about 14 to 17 inches from the top of the horns to the opposite blanket corner. Optional Rounds 9 and 10 will make both measurements larger.
Size checkpoint: Measure the blanket after Round 8. For the standard size, continue to the border. To add one round, work Round 9 with Color A and place 7 side groups between each pair of corners. Round 9 has 36 groups and 108 dc. To add a second round, work Round 10 with Color B and place 8 side groups between each pair of corners. Round 10 has 40 groups and 120 dc. The border totals change when extra rounds are added.
Abbreviations
US crochet terms are used.
MR magic ring
ch chain
sl st slip stitch
sc single crochet
dc double crochet
inc 2 single crochet stitches in the same stitch
dec single crochet decrease over the next 2 stitches
st stitch
sts stitches
Notes Before Starting
Work the muzzle, snout, spots, ears, horns, arms, and head in continuous rounds unless the instructions say to join. Place a marker in the first stitch of each round.
Work the blanket in joined rounds without turning. The side facing you while you crochet is the right side of the blanket. The chain 3 at the beginning of a blanket round counts as the first double crochet.
For the horns and arms, complete the final yarn over of the last stitch in the old color with the new color. Cut the old color with a secure tail and weave that tail into the inside of the piece before stuffing. For the blanket, fasten off after every round and join the next color in a corner space as directed.
Keep the single crochet fabric firm enough that stuffing does not show between stitches.
Leave a yarn tail at least 15 inches long on the muzzle, snout, spots, ears, horns, and arms. Use these tails for sewing, then secure and weave each tail into the inside of the head, the back of the muzzle, or beneath the blanket as appropriate. The head is attached later with a separate 30-inch strand.
After pulling each magic ring closed, tie the starting tail securely around a nearby stitch on the wrong side, then weave it through several stitches in more than one direction. Keep the secured tail inside stuffed pieces or beneath sewn appliqués, and do not trim it close to the center ring.
Step By Step Crochet Giraffe Lovey Free Pattern Instructions
Cream Outer Muzzle
With Color B, chain 6.
Round 1: Sc in the second chain from the hook and in the next 3 chains. Work 3 sc in the last chain. Turn the foundation chain so you can work along its unused underside. Sc in the next 3 chain loops. Work 2 sc in the same chain loop where the first sc was made. Do not join. (12)
Round 2: Inc in the first stitch, sc in the next 3 stitches, inc in each of the next 3 stitches, sc in the next 3 stitches, inc in each of the last 2 stitches. (18)
Round 3: Sc 1, inc, sc in the next 3 stitches, repeat sc 1 and inc 3 times, sc in the next 3 stitches, repeat sc 1 and inc 2 times. (24)
Round 4: Sc in each stitch around. (24)
Fasten off and leave a long sewing tail.
Brown Snout
With Color C, chain 5.
Round 1: Sc in the second chain from the hook and in the next 2 chains. Work 3 sc in the last chain. Turn the foundation chain and work along its unused underside. Sc in the next 2 chain loops. Work 2 sc in the same chain loop where the first sc was made. Do not join. (10)
Round 2: Inc in the first stitch, sc in the next 2 stitches, inc in each of the next 3 stitches, sc in the next 2 stitches, inc in each of the last 2 stitches. (16)
Round 3: Sc in each stitch around. (16)
Fasten off and leave a long sewing tail.
Center the brown snout on the cream muzzle and sew around most of its outer edge. Add a very small amount of stuffing so the brown snout is gently rounded but not firm. Finish sewing the edge securely. Embroider two short black nostrils on the brown snout. Secure all yarn ends on the back of the muzzle.
Small Head Spots, Make 5
With Color C, work 6 sc in a magic ring. Pull the ring closed, join with a slip stitch to the first sc, and fasten off with a long sewing tail. (6)
Large Head Spots, Make 2
Round 1: With Color C, work 6 sc in a magic ring. (6)
Round 2: Inc in each stitch around. Join with a slip stitch to the first sc and fasten off with a long sewing tail. (12)
Ears, Make 2
Use Color A.
Round 1: Work 6 sc in a magic ring. (6)
Round 2: Inc in each stitch around. (12)
Round 3: Repeat sc 1 and inc around. (18)
Rounds 4 and 5: Sc in each stitch around. (18 each round)
Round 6: Repeat sc 1 and dec around. (12)
Do not stuff. Flatten the ear so six stitches lie along each side. Fasten off and leave a long sewing tail. Pinch the lower edge slightly during assembly to give the ear a cupped shape.
Horns, Make 2
Begin with Color C.
Round 1: Work 6 sc in a magic ring. (6)
Round 2: Inc in each stitch around. (12)
Round 3: Sc in each stitch around. (12)
Round 4: Repeat sc 1 and dec around. (8)
Change to Color A.
Rounds 5 through 8: Sc in each stitch around. (8 each round)
Lightly stuff the brown knob and yellow stem. Do not pack the stuffing firmly. Fasten off and leave a long sewing tail.
Arms, Make 2
Begin with Color C for the hoof.
Round 1: Work 6 sc in a magic ring. (6)
Round 2: Inc in each stitch around. (12)
Rounds 3 and 4: Sc in each stitch around. (12 each round)
Change to Color A.
Rounds 5 through 10: Sc in each stitch around. (12 each round)
Lightly stuff the hoof and the lower part of the yellow arm through about Round 6. Leave the upper part unstuffed so it can lie flat beneath the head.
Flatten the open top so six stitches lie along each side. Sc through both layers across the top. (6)
Fasten off and leave a long sewing tail.
Head
Use Color A. Keep the round marker at the back of the head. The opposite side will be used for the face.
Round 1: Work 6 sc in a magic ring. (6)
Round 2: Inc in each stitch around. (12)
Round 3: Repeat sc 1 and inc around. (18)
Round 4: Repeat sc 2 and inc around. (24)
Round 5: Repeat sc 3 and inc around. (30)
Round 6: Repeat sc 4 and inc around. (36)
Rounds 7 through 12: Sc in each stitch around. (36 each round)
Round 13: Repeat sc 4 and dec around. (30)
Round 14: Repeat sc 3 and dec around. (24)
Round 15: Repeat sc 2 and dec around. (18)
Begin stuffing the head evenly. Keep the lower part firm enough to hold its shape but slightly softer than the forehead.
Round 16: Repeat sc 1 and dec around. (12)
Place the live loop on a stitch marker while the face is completed.
Complete The Face Before Closing The Head
Embroider the eyes with black yarn between Rounds 9 and 10. Place them about 8 stitches apart from center to center. Build each eye with several short stitches so no hard or removable eye piece is used. Secure the yarn ends inside the open head.
Center the cream muzzle beneath the eyes. Place its upper edge near Round 10 and its lower edge near Round 15. Sew most of the way around the muzzle, add a small amount of stuffing, and finish sewing the edge securely.
Pin the 2 large spots and all 5 small spots in place before sewing any of them. Position the large spots on the upper front of the head between about Rounds 5 and 8. Arrange the small spots around the forehead and sides, keeping at least one clear stitch between every spot and the eyes or muzzle. Check the head from the front and both sides, then sew each spot securely around its outer edge.
Add or remove stuffing until the head is round and the muzzle sits forward without pulling the face inward.
Round 17: Dec around. (6)
Fasten off. Thread the yarn tail through the front loops of the remaining 6 stitches, pull the opening closed, secure it, and bury the tail inside the head.
Attach The Ears And Horns
Position the horns on top of the head between about Rounds 3 and 5. Leave about 5 stitches between their inner edges. Sew around each open horn base twice.
Pinch the bottom of each ear slightly. Position the ears on opposite sides of the head between about Rounds 5 and 8. Check the head from the front to make sure the ears match in height and angle before sewing them in place.
Two-Color Granny Square Blanket
Use Color A for Rounds 1, 3, 5, and 7, plus optional Round 9.
Use Color B for Rounds 2, 4, 6, and 8, plus optional Round 10.
Do not turn the blanket between rounds.
A corner unit means 3 dc, ch 2, 3 dc worked in the same corner space.
Round 1, Color A: Chain 4 and join with a slip stitch to the first chain to form a ring. Chain 3, which counts as the first dc. Work 2 dc in the ring, ch 2, then repeat 3 dc in the ring and ch 2 three more times. Join with a slip stitch to the top of the beginning chain 3. Fasten off. You should have 4 groups, 12 dc, and 4 corner spaces.
Round 2, Color B: Join the yarn in any corner space. Chain 3 and work 2 dc, ch 2, and 3 dc in the same corner space. Ch 1. Work a corner unit in the next corner space and ch 1. Repeat around. Join to the top of the beginning chain 3 and fasten off. You should have 8 groups and 24 dc. There are no side groups between the corners on this round.
Rounds 3 through 8: Join the required color in any corner space. Chain 3, which counts as the first dc. Work 2 dc, ch 2, and 3 dc in the same corner space, then ch 1. Work one 3-dc group in every ch-1 side space from the previous round, placing ch 1 after every group. In each remaining corner space, work 3 dc, ch 2, and 3 dc, then ch 1. Continue around and join with a slip stitch to the top of the beginning chain 3. Fasten off.
Round 3, Color A: Work 1 side group between each pair of corners. You should have 12 groups and 36 dc.
Round 4, Color B: Work 2 side groups between each pair of corners. You should have 16 groups and 48 dc.
Round 5, Color A: Work 3 side groups between each pair of corners. You should have 20 groups and 60 dc.
Round 6, Color B: Work 4 side groups between each pair of corners. You should have 24 groups and 72 dc.
Round 7, Color A: Work 5 side groups between each pair of corners. You should have 28 groups and 84 dc.
Round 8, Color B: Work 6 side groups between each pair of corners. You should have 32 groups and 96 dc.
Optional Round 9, Color A: Work this round the same way as Rounds 3 through 8. Work 7 side groups between each pair of corners. You should have 36 groups, 108 dc, and 8 ch-1 side spaces along each side. Join with a slip stitch to the top of the beginning chain 3 and fasten off.
Optional Round 10, Color B: Work this round the same way as Rounds 3 through 8. Work 8 side groups between each pair of corners. You should have 40 groups, 120 dc, and 9 ch-1 side spaces along each side. Join with a slip stitch to the top of the beginning chain 3 and fasten off.
Blanket Border
Border Round 1, Color A: Join Color A in any corner space. Ch 1, which does not count as a stitch. Work 3 sc in the same corner space. Work 1 sc in every counted dc position, including the top of the beginning chain 3, and work 1 sc in every ch-1 side space. Work 3 sc in each remaining corner space. Join with a slip stitch to the first sc. The stitch total is 136 after Round 8, 152 after optional Round 9, or 168 after optional Round 10.
Border Round 2, Color B: Join Color B in the center stitch of any 3-sc corner. Ch 1, which does not count as a stitch, and work 3 sc in that same stitch. Sc in each stitch around. At the center stitch of each remaining 3-sc corner, work 3 sc instead of the usual 1 sc. Join with a slip stitch to the first sc. The stitch total is 144 after Round 8, 160 after optional Round 9, or 176 after optional Round 10.
Fasten off and weave in every blanket yarn end securely. Lay the blanket flat and gently shape all four corners. The blanket should not ruffle, cup, or twist.
Assembly And Finishing
Lay the blanket with its right side facing up. Fold it corner to corner in both directions and lightly mark the exact center.
Place the 6-stitch closed edge of each arm near the blanket center. The yellow arm tops should point toward the center, and the brown hooves should point outward. Position the arms at matching angles on opposite sides.
Sew each arm top through the solid stitches of the center granny groups. Do not attach an arm only through a chain space.
Center the bottom of the head over the blanket center and over the sewn arm tops. The face should point toward the space between the two arms.
Cut a separate 30-inch length of Color A and thread it onto the yarn needle. Sew through the lower two rounds of the head and through the solid stitches of all four center granny groups. Work completely around the head base twice without pulling tightly enough to gather the blanket. Do not rely only on the center chain ring for support.
Secure the yarn inside the head or beneath the blanket and weave in the tail so no loop or knot remains exposed.
Check that both arms match, the head faces forward, all facial pieces lie flat, and every seam remains firm when gently pulled.
For gift-box or basket display, fold the blanket loosely beneath the head. Do not tightly roll the head or pull against the center attachment seam.
Recommended crochet finishing tools set
Practical Tips for This Crochet Giraffe Lovey Free Pattern
A centered attachment seam helps the head sit more evenly. Keep the lower head slightly softer than the forehead, and sew through the four solid center granny groups instead of attaching the head only through the center chain ring.
For a giraffe nursery theme, safari animal room, or full jungle baby nursery, this piece pairs naturally with giraffe nursery ideas and giraffe quilt patterns to create a polished look.
You might round out your safari set with my crochet lion lovey pattern, which adds a scalloped mane, soft blanket body and baby-safe embroidered face to the same jungle nursery gift theme.
My crochet monkey lovey pattern is another natural choice for that safari set, especially when you want a round-eared jungle animal beside the giraffe and lion.
For a woodland-inspired baby gift, my raccoon crochet pattern creates a charming forest animal with a striped tail and signature mask markings, making it a fun contrast to safari-themed loveys like the giraffe and lion.
An Australian animal set can add interest with a cute bear crocheted with my crochet koala lovey pattern for a soft eucalyptus-inspired baby gift that still fits naturally beside giraffe and safari nursery projects.
This pattern is also a good starting point when building a complete set of handmade baby items. It is especially attractive when paired with a matching quilt or nursery decor.
For cleaner nursery aesthetics and more understated handmade baby gifts, this minimalist crochet lovey pattern uses a simpler modern design that works beautifully in neutral nursery themes and contemporary baby rooms.
For more options, browse free baby crochet patterns, or compare all of the animal-style designs together on my crochet animal lovey patterns page. You can also try the elephant lovey pattern and bunny lovey pattern for a different look.
Flat stitched details from crochet animal applique patterns can also be used on nursery blankets, baby gift sets, banners, and safari-themed handmade accents.
If you want the giraffe without the lovey blanket, use my crochet giraffe applique pattern for a separate lightly padded motif that can be sewn onto a blanket, banner or nursery project.
For a barnyard-style variation with a flatter blanket body and easy spotted coat, my crochet cow pattern creates a beginner-friendly lovey that works beautifully for baby shower gifts and nursery baskets.
A beach-y, ocean-style option like my crochet sea turtle pattern brings in a relaxed coastal look, and when paired with the crochet jellyfish pattern, crochet fish pattern, and crochet octopus pattern, it creates a cute set that works beautifully together in various areas of the nursery.
One bit of advice I would like to offer is that reducing the amount of stuffing near the neck helps the lovey lay flat instead of tipping forward after washing.
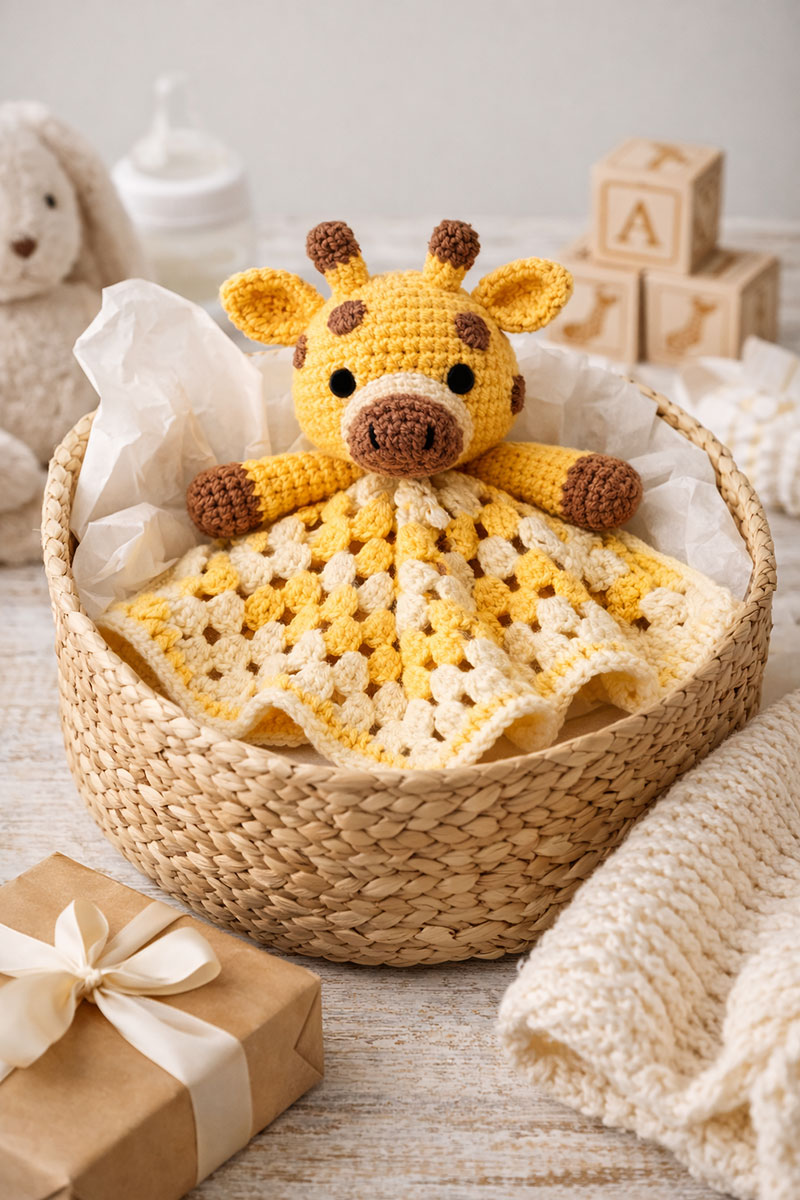
When finished, the lovey lays flat with the head centered so it looks neat in a nursery storage basket or folded into a baby shower gift box.
Common Mistakes And Fixes
Head looks pointed add stuffing evenly
Blanket curls check corner spacing
Head flops reduce stuffing at base and resew
Arms uneven count rounds again
Muzzle sticks out reduce stuffing
FAQ
Is this crochet giraffe lovey free pattern beginner friendly?
It is best for a confident beginner who can work in continuous rounds, make an oval, change colors, follow a granny square, embroider details, and sew stuffed pieces securely.
Can I use cotton yarn?
Yes it holds shape well.
Can I make it larger?
Yes. Add Optional Round 9, or add both Optional Rounds 9 and 10, before working the blanket border.
Is it safe for babies?
Use embroidered eyes and nostrils instead of plastic eyes, buttons, beads, or other hard attached pieces. Check all seams before use and remove the lovey if any part becomes loose or damaged. Use the lovey only during awake, supervised time with a baby. Keep it out of cribs, bassinets, play yards, and other infant sleep spaces during naps and nighttime sleep.
How long does it take?
Usually a few hours.
Summary
This crochet giraffe lovey free pattern creates a balanced baby comfort item using basic stitches and clear shaping so it is easy to make and practical for everyday use.
When you click on links to various merchants on this site and make a purchase, this may result in this site earning a commission. This does not affect the price you pay.

UBGI Gold Standard 2026
Reviewed under the site's
editorial checklist.
Photos, decorating ideas, party setups and reader submissions are shared for inspiration unless a page is specifically presented as a pattern, tutorial, reference guide or step-by-step project. Follow the instructions, measurements, safety guidance and manufacturer directions provided for the particular project or product.
About Jan | Contact | Baby Nursery Ideas (Blog) | Site Map | Privacy Policy | Disclosure Policy | Disclaimer | Affiliate Disclosure | Earnings Disclosure | Facebook | Pinterest
I am a participant in the Amazon Services LLC Associates Program, an affiliate advertising program designed to provide a means for us to earn fees by linking to Amazon. As an Amazon Associate I earn from qualifying purchases.
Copyright © 2006-2026. All Rights Reserved.