Crochet Seahorse Lovey Pattern for Ocean Nurseries
A crochet seahorse lovey pattern can create a cute sea creature and bring ocean atmosphere to a baby's nursery room or baby shower gift basket. A colorful seahorse lovey feels personal, handmade, and unique for coastal and underwater nursery themes.
More Crochet Lovey & Ocean Nursery Ideas
Jump to the part you need:
Supplies for the Seahorse Lovey
Round Blanket and Scalloped Edge
Supplies for This Crochet Seahorse Lovey Pattern
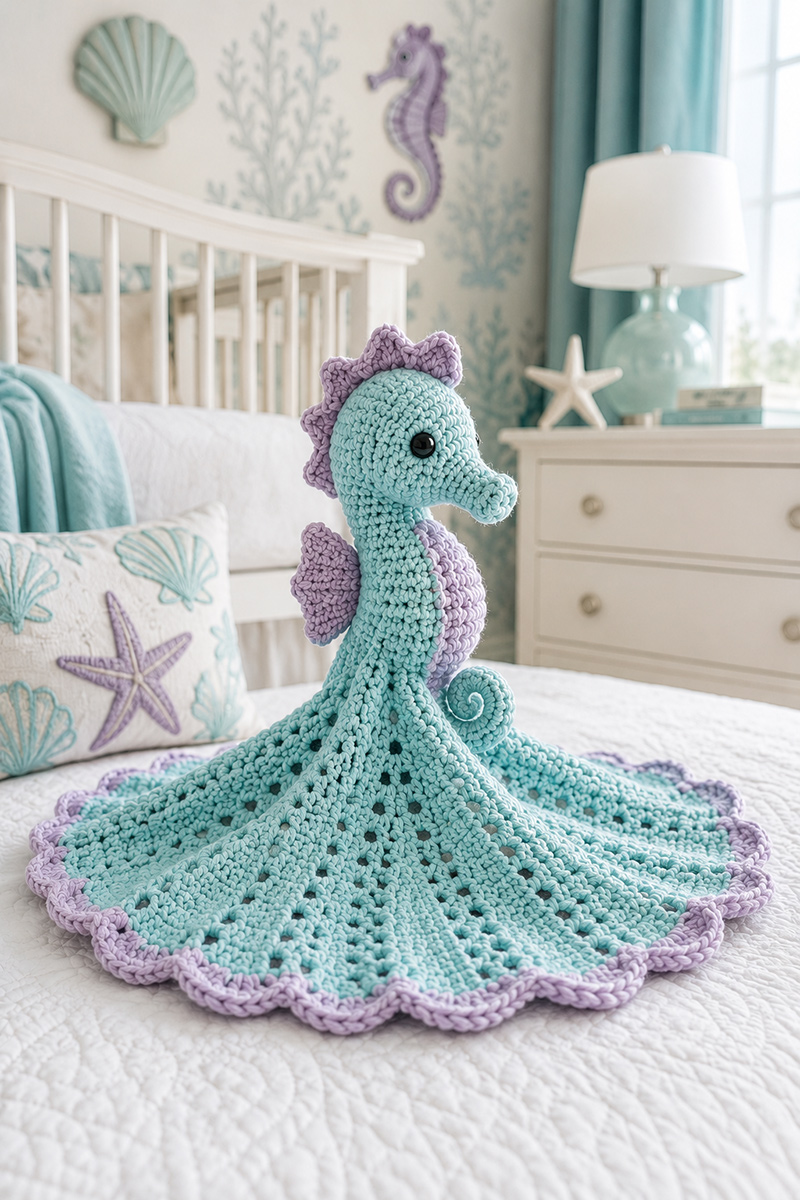
This crochet seahorse lovey pattern makes a lightly stuffed seahorse attached to a round baby lovey blanket with a lavender scalloped border. The finished lovey is meant for a baby shower gift, nursery display, or supervised cuddle time, not for placing loose in a crib with a sleeping baby.
Pattern and photo note: The reference photos are styled examples. The written pattern makes a simplified seahorse lovey with a smooth double crochet blanket, small sewn fins, a separate scalloped mane, and a flat curled tail. It does not reproduce every stitch, proportion, or decorative detail shown in the photos. The written version also uses an embroidered eye instead of a hard attached eye.
Blunt answer: Use embroidered eyes only.
Materials:
- Worsted weight cotton or cotton blend yarn in seafoam, about 180 yards
- Worsted weight cotton or cotton blend yarn in lavender, about 60 yards
- 4.0 mm G crochet hook
- Fiberfill for the head, snout, neck, and upper body
- Black embroidery floss for the eye
- Small amount of white embroidery floss for the eye highlight, optional
- Yarn needle
- Stitch markers
- Sewing pins
- Scissors
Finished size: At the stated single crochet gauge, the seahorse is approximately 5 1/2 to 6 inches tall from the base to the crown. The 96-stitch blanket is expected to finish approximately 8 to 10 inches across including the scalloped edge, depending on double crochet tension.
Gauge: 4 single crochet stitches and 4 rounds should measure about 1 inch. Gauge does not need to be perfect, but loose stitches can let stuffing show through the seahorse head.
Skill level: Confident beginner. You should be comfortable making a magic ring, working continuous and joined rounds, increasing, decreasing, embroidering, stuffing, sewing small crochet pieces, and shaping a stuffed body.
Abbreviations:
- ch = chain
- sc = single crochet
- hdc = half double crochet
- dc = double crochet
- sl st = slip stitch
- inc = 2 single crochet in the same stitch
- dec = single crochet 2 stitches together
- st = stitch
- Rnd = round
Step by Step Seahorse Pattern for Confident Beginners
Round method: Work the head, snout, neck, and upper body in continuous rounds. Do not join, turn, or add a beginning chain unless an instruction specifically says to do so. Keep a stitch marker in the first stitch of every round. The blanket uses joined rounds as explained in the blanket section.
Secure every magic ring: After pulling a magic ring closed, thread its beginning yarn tail onto the yarn needle. Pass the tail under at least 6 stitches around the center, reverse direction, and pass it under several stitches again. Tug the center gently to confirm that it does not reopen. Secure the head and snout rings before stuffing blocks access. Secure the base-disk and blanket rings before final assembly.
Reserve yarn for the snout: Before beginning the head, wind about 8 yards of seafoam yarn into a separate small ball. Use the main yarn supply for the head and body. Use the reserved small ball for the snout so the unfinished head can remain attached to the main yarn.
Crochet Seahorse Head
- Using seafoam yarn, make a magic ring.
- Rnd 1: Work 6 sc into the ring. Pull ring closed. 6 sts.
- Rnd 2: Inc in each stitch around. 12 sts.
- Rnd 3: Sc in next stitch, inc in next stitch. Repeat around. 18 sts.
- Rnd 4: Sc in next 2 stitches, inc in next stitch. Repeat around. 24 sts.
- Rnd 5 through Rnd 8: Sc in each stitch around. 24 sts.
- Rnd 9: Sc in next 2 stitches, dec. Repeat around. 18 sts.
- Add small pieces of fiberfill. Push stuffing toward the top and sides of the head first.
- Rnd 10: Sc in next stitch, dec. Repeat around. 12 sts.
- Do not fasten off. Enlarge the working loop slightly, remove the crochet hook, and place a locking stitch marker through the live loop so it cannot unravel while you make and attach the snout.
- Leave the 12 stitches open so the neck can continue from the head.
Crochet Seahorse Snout
- Using the reserved small ball of seafoam yarn, make a magic ring.
- Rnd 1: Work 6 sc into the ring. 6 sts.
- Rnd 2 through Rnd 4: Sc in each stitch around. 6 sts.
- Fasten off, leaving a 14-inch yarn tail.
- Lightly stuff the snout with a tiny amount of fiberfill.
- Place the snout on the front center of the head between Rnd 5 and Rnd 8.
- Angle the snout slightly downward.
- Sew around the snout edge with small whip stitches until secure.
- Make 2 small securing stitches beneath the lower edge of the snout.
- Insert the needle through the head and bring it out through the open neck. Knot the sewing tail securely inside the head and trim the excess.
Embroider the eye before continuing the neck: Choose which side of the seahorse will face forward. This pattern uses one embroidered eye on that display side. Keep the 12-stitch opening at the bottom of the head accessible. Thread black embroidery floss onto a needle. Insert the needle through the open neck and bring it out at the eye position between Head Rnd 5 and Head Rnd 6, leaving a 4-inch floss tail inside the head. Stitch a small oval about one quarter inch wide and fill it with satin stitches. Bring the needle back through the open neck. Knot the two black floss ends securely inside the head and trim the excess.
Optional eye highlight: Thread a short piece of white embroidery floss onto the needle. Enter through the open neck, leaving a 4-inch tail inside the head. Make one tiny straight stitch near the upper edge of the black eye, then bring the needle back through the open neck. Knot the two white floss ends securely inside the head, trim the excess, and adjust the stuffing before continuing.
Crochet Seahorse Neck and Upper Body
- Remove the locking stitch marker from the live head loop and place the loop back on the crochet hook.
- Return to the 12 open stitches at the bottom of the head.
- Rnd 1: Sc in each stitch around. 12 sts.
- Rnd 2: Sc in next 2 stitches, inc in next stitch. Repeat around. 16 sts.
- Rnd 3 through Rnd 8: Sc in each stitch around. 16 sts.
- Begin stuffing the upper body lightly.
- Rnd 9: Sc in next 2 stitches, dec. Repeat around. 12 sts.
- Rnd 10 through Rnd 12: Sc in each stitch around. 12 sts.
- Stuff the upper body lightly and evenly. Keep the 12-stitch opening accessible and do not pack the lowest 2 rounds firmly.
Crochet Seahorse Base and Tail
Orientation: The snout marks the front of the seahorse. The center back is directly opposite the snout.
- After Neck and Upper Body Rnd 12, stop with 12 stitches. Do not decrease or close the body.
- Finish stuffing the head, neck, and upper body. Keep the stuffing light near the 12-stitch opening so the opening remains round and can sit flat against the base disk.
- Fasten off, leaving an 18-inch seafoam yarn tail for sewing the body to the base disk.
- To shape the body, thread a separate 24-inch strand of seafoam yarn onto the yarn needle.
- Insert the needle through the open base and bring it out at the front center of Neck and Upper Body Rnd 4, leaving a 4-inch yarn tail inside the body.
- Move 1 stitch downward and insert the needle back into the body. Run the needle through the inside of the stuffed body and bring it out at the front center of Neck and Upper Body Rnd 11.
- Move 1 stitch downward, insert the needle back into the body, and bring it out through the open base.
- Pull the two yarn ends gently from inside the body until the front shortens enough to form a soft seahorse curve. Only 2 tiny one-stitch anchoring bars should be visible on the front. No long strand should lie across the outside of the body.
- Knot the two shaping-yarn ends securely inside the body. Trim the ends to about 1 inch and tuck them into the stuffing before attaching the base disk.
- Join seafoam yarn at the center back of Neck and Upper Body Rnd 11, one round above the open lower edge. Leave a 6-inch beginning yarn tail at the joining point.
- Ch 26.
- Work 3 sc into the second ch from the hook.
- Work 3 sc into each of the remaining 24 chains. 75 sc.
- Sl st into a body stitch beside the original tail joining point.
- Fasten off, leaving an 18-inch ending yarn tail.
- Thread the 6-inch beginning tail onto the yarn needle. Pass it through a nearby body stitch and bring it into the open lower body. Leave it inside until the curled tail is completely shaped.
- Arrange the curled strip into a flat spiral.
- Use the 18-inch ending yarn tail to place 3 or 4 hidden stitches through adjoining sections of the curled strip so the spiral holds its shape. Do not pull tightly enough to bunch the tail.
- Bring the remaining ending yarn tail through the open lower body.
- Tie the beginning and ending tail yarns together securely inside the body. Trim both ends to about 1 inch and tuck them into the stuffing before attaching the base disk.
Crochet the Base Disk
Work the base disk in continuous rounds. Keep a stitch marker in the first stitch.
- Using seafoam yarn, make a magic ring.
- Base Rnd 1: Work 6 sc into the ring. Pull the ring closed. 6 sts.
- Base Rnd 2: Inc in each stitch around. 12 sts.
- Base Rnd 3: Sc in the next stitch, inc in the next stitch. Repeat around. 18 sts.
- Base Rnd 4: Sc in the next 2 stitches, inc in the next stitch. Repeat around. 24 sts.
- Fasten off, leaving a 48-inch yarn tail for attaching the disk to the blanket.
- Place the base disk right side up on a table.
- Center the 12-stitch body opening over Base Rnd 2. Keep the snout facing forward and the curled tail centered at the back.
- Thread the 18-inch yarn tail from the body opening onto the yarn needle.
- Sew the body opening to Base Rnd 2 one stitch at a time. Match each of the 12 open body stitches to one of the 12 Base Rnd 2 stitch posts, keeping the body centered and upright. Add or adjust the stuffing before sewing the final 3 stitches.
- Secure the body yarn tail inside the seam between the body and base disk.
- Leave the 48-inch base-disk tail unworked for final attachment to the blanket.
Crochet Seahorse Mane
- Using lavender yarn, ch 19.
- Starting in the second chain from the hook, sl st in the next chain.
- Work 3 dc in the next chain.
- Repeat the previous 2 steps across the foundation chain. The strip will have 9 scallops.
- Fasten off, leaving an 18-inch yarn tail for sewing.
- Thread the short beginning tail onto the yarn needle. Weave it through the back of the foundation chain in one direction and then back in the opposite direction. Trim the excess.
- Place the straight chain edge along the center back of the seahorse, directly opposite the snout. Position it from the crown of the head down the back of the neck.
- Pin the mane in place before sewing.
- Using the long yarn tail, sew through the foundation-chain edge and the seahorse fabric with small hidden stitches.
- Do not sew through the outer tips of the scallops. The scallops should remain free and raised.
- Make 2 small securing stitches beneath the lower end of the mane.
- Insert the needle through the stuffed body and bring it out at least 1 inch away. Pull gently and trim the yarn close to the surface so the end retracts inside the body.
Crochet Side Fins
- Make 2 fins with lavender yarn.
- Ch 4.
- Work 3 dc into the fourth chain from the hook.
- Ch 2.
- Sl st into the same chain.
- Fasten off, leaving a 12-inch tail for sewing.
- Thread the short beginning tail onto the yarn needle. Weave it through the back of the fin in one direction and then back in the opposite direction. Trim the excess.
- Pin one fin onto each side of the upper body directly below the head. Angle both fins slightly backward and check that they sit at the same height.
- Use each long yarn tail to sew the base of its fin securely to the body with small stitches.
- Make 2 additional securing stitches beneath each fin.
- Insert the needle through the stuffed body and bring it out at least 1 inch away. Pull gently and trim the yarn close to the surface so the end retracts inside the body.
Round Blanket and Scalloped Edge
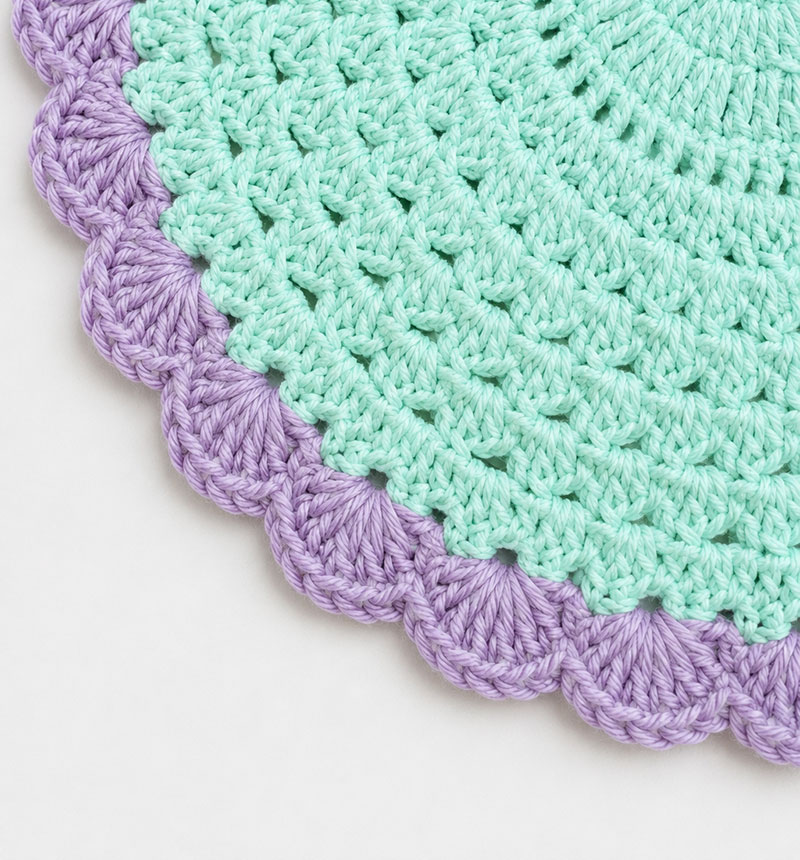
The round blanket is the part that makes this a lovey instead of a small crochet toy. I like this shape because the seahorse has a real center point to sit on, and the scalloped edge gives the finished piece an ocean wave look without adding loose trims.
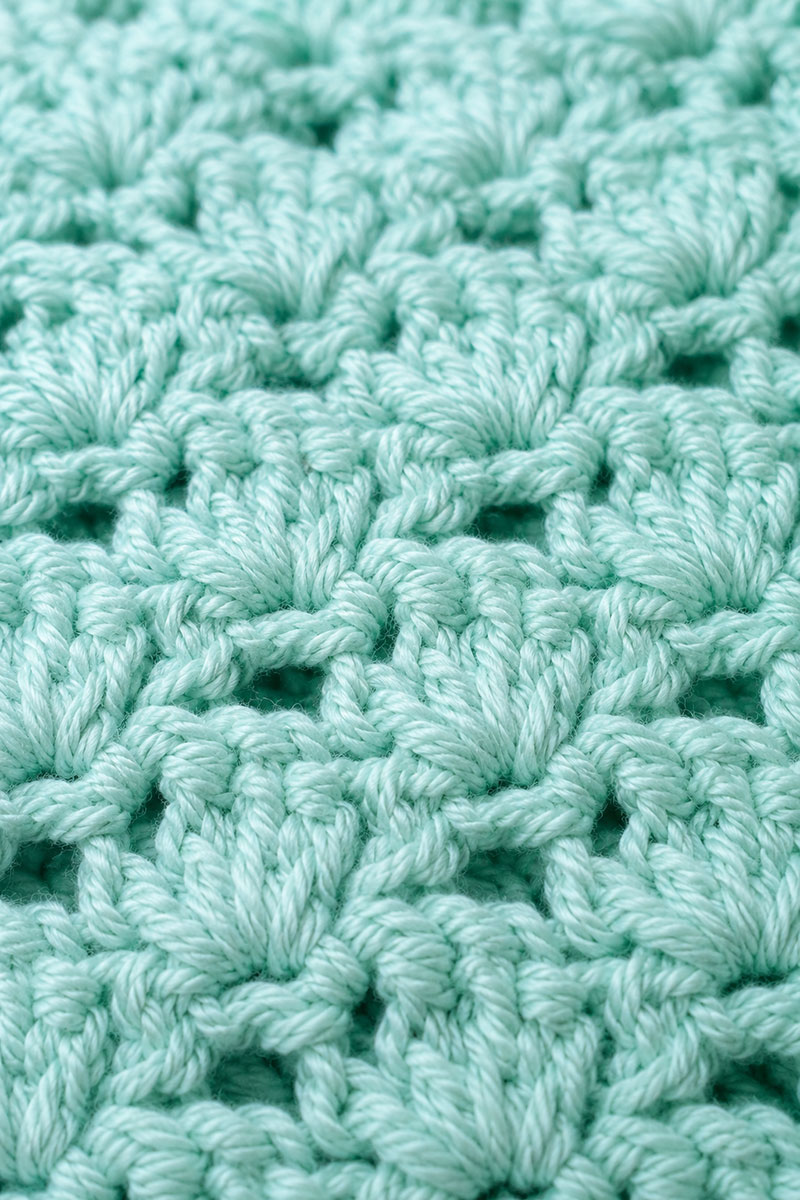
Pattern note: The blanket below is a smooth joined-round double crochet circle. It will not reproduce the clustered stitch texture shown in the close-up reference photos.
Round note: In Rnd 1 through Rnd 8, the beginning ch 3 counts as the first dc. Join each round with a sl st in the top of the beginning ch 3. Do not work into the joining sl st.
- Using seafoam yarn, make a magic ring.
- Rnd 1: Ch 3. Work 11 dc into the ring. Join in the top of the beginning ch 3. 12 dc.
- Rnd 2: Ch 3. Work 1 dc in the same base stitch as the beginning ch 3. Work 2 dc in each of the remaining 11 stitches. Join. 24 dc.
- Rnd 3: Ch 3. Work 2 dc in the next stitch. Work 1 dc in the next stitch and 2 dc in the following stitch 11 times. Join. 36 dc.
- Rnd 4: Ch 3. Dc in the next stitch. Work 2 dc in the following stitch. Work 1 dc in each of the next 2 stitches and 2 dc in the following stitch 11 times. Join. 48 dc.
- Rnd 5: Ch 3. Dc in each of the next 2 stitches. Work 2 dc in the following stitch. Work 1 dc in each of the next 3 stitches and 2 dc in the following stitch 11 times. Join. 60 dc.
- Rnd 6: Ch 3. Dc in each of the next 3 stitches. Work 2 dc in the following stitch. Work 1 dc in each of the next 4 stitches and 2 dc in the following stitch 11 times. Join. 72 dc.
- Rnd 7: Ch 3. Dc in each of the next 4 stitches. Work 2 dc in the following stitch. Work 1 dc in each of the next 5 stitches and 2 dc in the following stitch 11 times. Join. 84 dc.
- Rnd 8: Ch 3. Dc in each of the next 5 stitches. Work 2 dc in the following stitch. Work 1 dc in each of the next 6 stitches and 2 dc in the following stitch 11 times. Join. 96 dc.
- Rnd 9: Ch 1. The ch 1 does not count as a stitch. Sc in the same stitch and in each remaining stitch around. Join with a sl st in the first sc. 96 sc.
- Count the 96 stitches and lay the blanket flat before adding the scalloped edge. The seafoam portion should lie flat without forming a bowl or a noticeable ruffle.
- Fasten off the seafoam yarn, leaving an 8-inch tail. Weave the tail securely through the wrong side of the blanket in one direction, reverse direction, and weave it through several stitches again before trimming the excess.
If the blanket begins forming a bowl shape instead of laying flat, your stitches are probably too tight. Moving up one hook size usually fixes it quickly without changing the finished look of the lovey.
Lavender Scalloped Edge
- Join lavender yarn with a sl st in any sc of Blanket Rnd 9. This joining sl st is the first anchor point.
- Skip the next sc, work 5 dc in the following sc, skip the next sc, and sl st in the following sc.
- Repeat the previous step 23 more times. On the final repeat, work the last sl st into the same stitch that holds the beginning yarn join. 24 scallops.
- Fasten off and weave in all ends. Do not add another joining sl st.
Finishing and Baby Gift Safety
Lay the blanket flat on a table. Center the seahorse base disk over the blanket's magic-ring center. Position the curled tail toward the back and make sure it is not trapped beneath the base disk. Keep the seahorse upright and pin the base disk to the blanket at the front, back, left side, and right side.
- Thread the 48-inch seafoam yarn tail from the base disk onto the yarn needle.
- Beginning at the back of the base disk, sew each of the 24 stitches of Base Rnd 4 to the blanket fabric directly beneath it. Follow the round shape of the disk instead of pulling the stitches toward the blanket's magic-ring center.
- Use small whip stitches and keep the tension even. Do not pull tightly enough to cup the disk or pucker the blanket.
- After sewing around Base Rnd 4, make a second securing circle through Base Rnd 3 and the blanket fabric directly beneath it.
- Do not sew through the stuffed body or through the curled tail.
- Keep the body upright and check its position several times while sewing.
- Secure the yarn beneath the base disk and bury the remaining yarn end between the disk and the blanket.
- Pick the lovey up gently by the seahorse body. Confirm that the base disk remains flat and that the body does not pivot, lean loosely, or separate from the blanket.
- Before gifting or supervised use, inspect the magic-ring centers, embroidered eye, snout, mane, fins, tail, base disk, and blanket attachment. Confirm that no yarn ends are loose and that no stuffing is visible. Repeat this inspection after washing and stop using the lovey if any seam or attachment loosens.
Do not add buttons, beads, glued decorations, ribbons, bells, or loose trim. For current United States safe sleep guidance, keep loose items out of the crib with a sleeping baby. The U.S. Consumer Product Safety Commission has safe sleep information here: CPSC Safe Sleep.
For more handmade baby projects, visit free baby crochet patterns and crochet animal lovey patterns. The ocean nursery side connects naturally with ocean nursery theme ideas, ocean nursery decor, sea turtle nursery ideas, and ocean baby quilt pattern.
For a brighter garden-themed handmade baby gift, this crochet bee lovey pattern gives the lovey collection a cheerful non-ocean option.
Crochet Seahorse Lovey FAQ
Is this crochet seahorse lovey pattern beginner friendly?
It is best for a confident beginner who can work in rounds, count stitches, increase, decrease, stuff and shape a crochet piece, sew pieces together, and embroider a simple eye. A brand-new crocheter may want to practice the magic ring and basic sewing techniques before starting.
A coastal shoreline baby gift like this crochet otter lovey pattern also fits naturally beside seahorse, turtle, crab, starfish, whale, and other ocean-themed crochet loveys.
Can I use safety eyes?
For this baby lovey, embroidered eyes are the better choice. They keep the face flat and remove a hard piece that could loosen with use.
Does the pattern match the example image?
No. The photos are styled references, while the written instructions make a simplified seahorse lovey with a smooth double crochet blanket, a separate scalloped mane, small fins, an embroidered eye, and a flat curled tail. The colors and general seahorse theme are similar, but the stitches and proportions are not an exact match.
Can this be used in a crib?
Use this lovey for supervised snuggle time, nursery display, or a baby shower gift basket. Do not place loose handmade items in the crib with a sleeping baby.
Can I make it without the blanket?
You can, but then it becomes more of a small seahorse toy. The round blanket is what makes this project work as a baby lovey.
When you click on links to various merchants on this site and make a purchase, this may result in this site earning a commission. This does not affect the price you pay.

UBGI Gold Standard 2026
Reviewed under the site's
editorial checklist.
Photos, decorating ideas, party setups and reader submissions are shared for inspiration unless a page is specifically presented as a pattern, tutorial, reference guide or step-by-step project. Follow the instructions, measurements, safety guidance and manufacturer directions provided for the particular project or product.
About Jan | Contact | Baby Nursery Ideas (Blog) | Site Map | Privacy Policy | Disclosure Policy | Disclaimer | Affiliate Disclosure | Earnings Disclosure | Facebook | Pinterest
I am a participant in the Amazon Services LLC Associates Program, an affiliate advertising program designed to provide a means for us to earn fees by linking to Amazon. As an Amazon Associate I earn from qualifying purchases.
Copyright © 2006-2026. All Rights Reserved.