Free Crochet Whale Pattern (Baby Lovey & Snuggler)
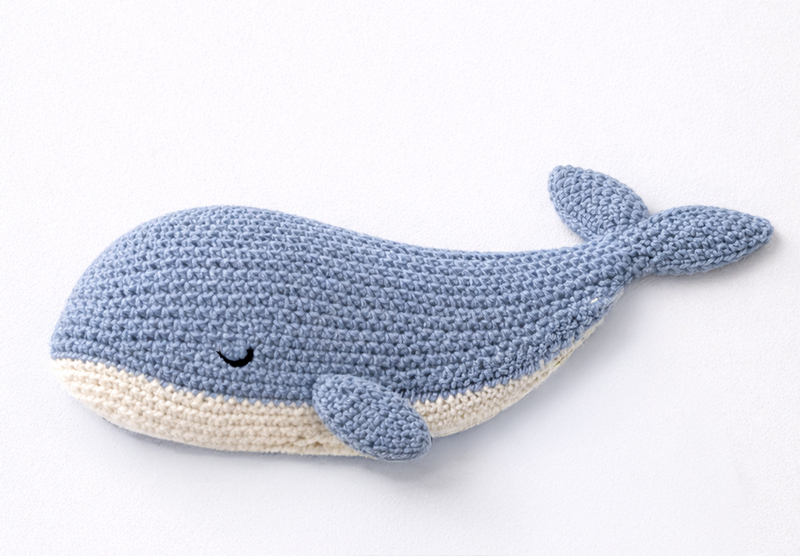
This free crochet whale pattern shows you how to make a flat whale lovey or snuggler that fits naturally into an ocean nursery.
Jump to what you need:
Quick answer: This crochet whale pattern makes a flat whale lovey or snuggler with two matching body panels, small fins, a flat tail and an embroidered eye. It remains unstuffed so it can lie flat during supervised awake time or be stored in a basket outside the baby’s sleep space.
Materials, gauge and finished size
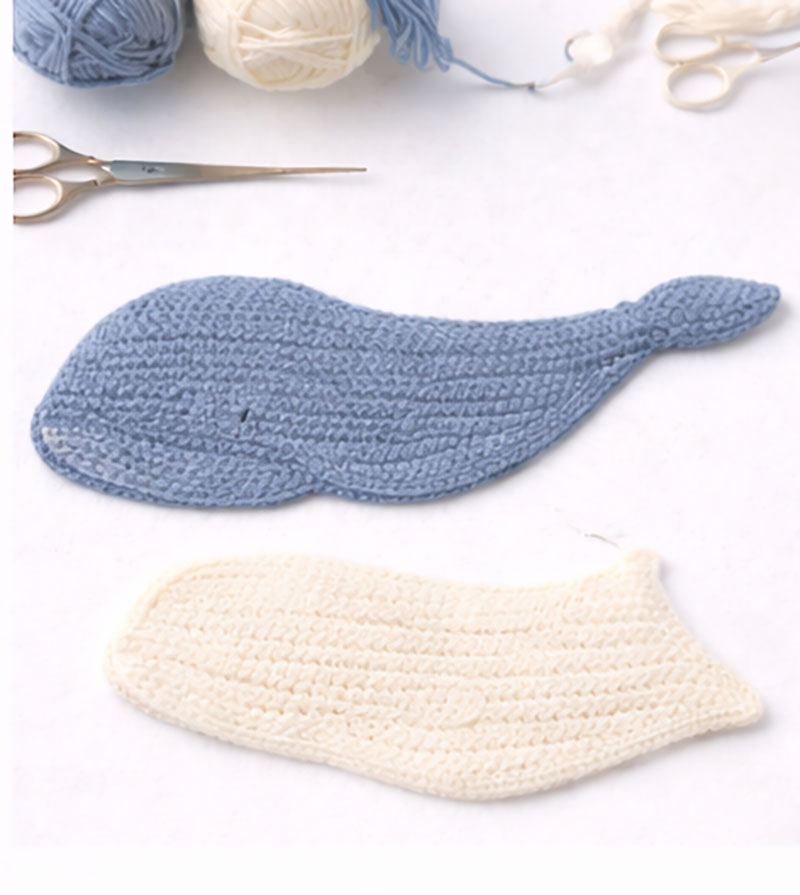
This flat crochet whale is made from two matching body panels. The blue-gray panel forms the top, and the cream panel forms the belly. The fins and tail flukes are secured between the panels while the outer edge is joined.
Skill level: Advanced beginner. You should be comfortable working single crochet rows, increasing, decreasing, embroidering a simple face and joining shaped pieces.
US crochet terms are used throughout.
Abbreviations
ch = chain
sc = single crochet
sc2tog = single crochet 2 stitches together
sc3tog = single crochet 3 stitches together
st or sts = stitch or stitches
RS = right side
WS = wrong side
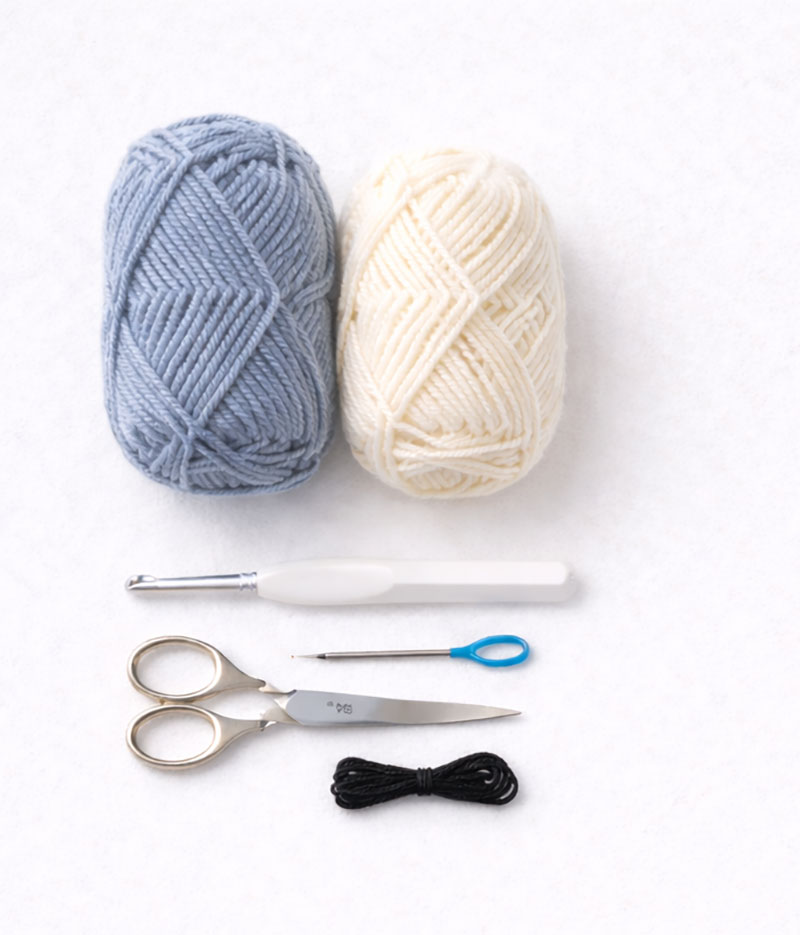
Materials
Approximately 100 yards of worsted-weight blue-gray yarn for the top panel, fins, tail flukes and joining edge.
Approximately 75 yards of worsted-weight cream yarn for the belly panel.
A small amount of black embroidery floss or smooth black yarn for the eye.
4 mm crochet hook, or the hook needed to obtain gauge.
Tapestry needle.
Scissors.
Locking stitch markers.
Measuring tape.
Gauge
16 single crochet stitches and 18 rows = 4 inches after the swatch is gently flattened. Exact gauge is not essential, but both body panels must be made with the same yarn weight, hook and tension.
Finished measurements
The finished whale measures approximately 9½ inches from the front of the head to the ends of the tail flukes, about 6 inches across the widest part of the body and approximately 8 inches across from fin tip to fin tip.
Measure the blue-gray panel after completing it. The cream panel should match it within ¼ inch in both length and width. If the second panel is noticeably larger or smaller, remake it before assembly rather than stretching or gathering the pieces to fit.
If you enjoy sea creature projects, this shape pairs well with the crochet fish pattern, the crochet jellyfish pattern, and the crochet octopus pattern. For more soft baby projects with the same animal-lovey feel, visit my crochet animal lovey patterns page, or browse the free baby patterns collection.
You will also want to visit the ocean crochet patterns collection that features a whale, fish, jellyfish, octopus, turtle, and other sea animals all together for a coordinated handmade nursery set.
For a completely different animal lovey gift with a safari nursery angle, my crochet lion lovey pattern adds a soft blanket base, rounded ears, and textured mane that works well in handmade baby gift sets.
A small crochet starfish lovey pattern also fits naturally into that ocean set when you want one more simple sea creature accent for a nursery shelf, baby gift basket, or handmade mobile display.
A tiny crochet crab pattern adds a coastal shoreline detail that pairs neatly with whale, starfish, fish, turtle, and octopus crochet projects.
A crochet otter lovey pattern also belongs in this ocean crochet group because it pairs naturally with whale, fish, sea turtle, jellyfish, octopus, crab, and starfish projects for coastal baby gifts and nursery displays.
Keep the color palette simple. In a real nursery, pieces that stay within one or two tones tend to blend into the room better than multi-color designs that compete with bedding or wall decor.
Crochet the whale body panels
The whale is worked in rows from the narrow tail end toward the rounded head. Make one blue-gray top panel and one matching cream belly panel.
Chain 1 at the beginning of every row. The turning chain does not count as a stitch. Turn after every row. For this pattern, treat Row 1 as a right-side row. After completing the first few rows, place a locking stitch marker on the right side so the top, belly and embroidery orientations remain clear.
On every increase row, work 2 single crochet in the first stitch and 2 single crochet in the last stitch. This adds 2 stitches.
On every decrease row, work single crochet 2 together over the first 2 stitches and single crochet 2 together over the final 2 stitches. This removes 2 stitches.
Blue-gray top panel
Row 1: Chain 7. Single crochet in the second chain from the hook and in each remaining chain. Turn. 6 stitches.
Row 2: Increase in the first stitch, single crochet across to the final stitch, increase in the final stitch. Turn. 8 stitches.
Row 3: Single crochet across. Turn. 8 stitches.
Row 4: Increase at both ends. Turn. 10 stitches.
Row 5: Single crochet across. Turn. 10 stitches.
Row 6: Increase at both ends. Turn. 12 stitches.
Row 7: Single crochet across. Turn. 12 stitches.
Row 8: Increase at both ends. Turn. 14 stitches.
Row 9: Single crochet across. Turn. 14 stitches.
Row 10: Increase at both ends. Turn. 16 stitches.
Row 11: Single crochet across. Turn. 16 stitches.
Row 12: Increase at both ends. Turn. 18 stitches.
Row 13: Single crochet across. Turn. 18 stitches.
Row 14: Increase at both ends. Turn. 20 stitches.
Row 15: Single crochet across. Turn. 20 stitches.
Row 16: Increase at both ends. Turn. 22 stitches.
Row 17: Single crochet across. Turn. 22 stitches.
Row 18: Increase at both ends. Turn. 24 stitches.
Rows 19–32: Single crochet across. Turn. 24 stitches in every row.
Row 33: Decrease at both ends. Turn. 22 stitches.
Row 34: Decrease at both ends. Turn. 20 stitches.
Row 35: Decrease at both ends. Turn. 18 stitches.
Row 36: Decrease at both ends. 16 stitches.
Fasten off and weave in the yarn tail at the head end. The foundation edge with 6 stitches is the tail end, and the final edge with 16 stitches is the front of the head. After confirming the orientation, weave the foundation tail securely into the wrong side of the blue-gray panel.
Gently flatten the panel without stretching it. It should measure approximately 8 inches from tail edge to head edge and about 6 inches across its widest section.
Cream belly panel
Using cream yarn, repeat Rows 1–36 exactly as written for the blue-gray top panel. Do not stop the belly panel early or make it smaller.
Fasten off and weave in the tail at the head end. Leave the foundation tail temporarily in place so it can help identify the 6-stitch tail edge. After confirming which end is the tail, weave the foundation tail securely into the wrong side of the cream panel before assembling the whale.
Lay the panels together before making the fins or tail. Their tail edges, head edges and shaped sides should align without stretching. Each panel has the same row and stitch counts, so neither panel should be gathered to fit the other.
Crochet the fins, tail flukes and embroidered face
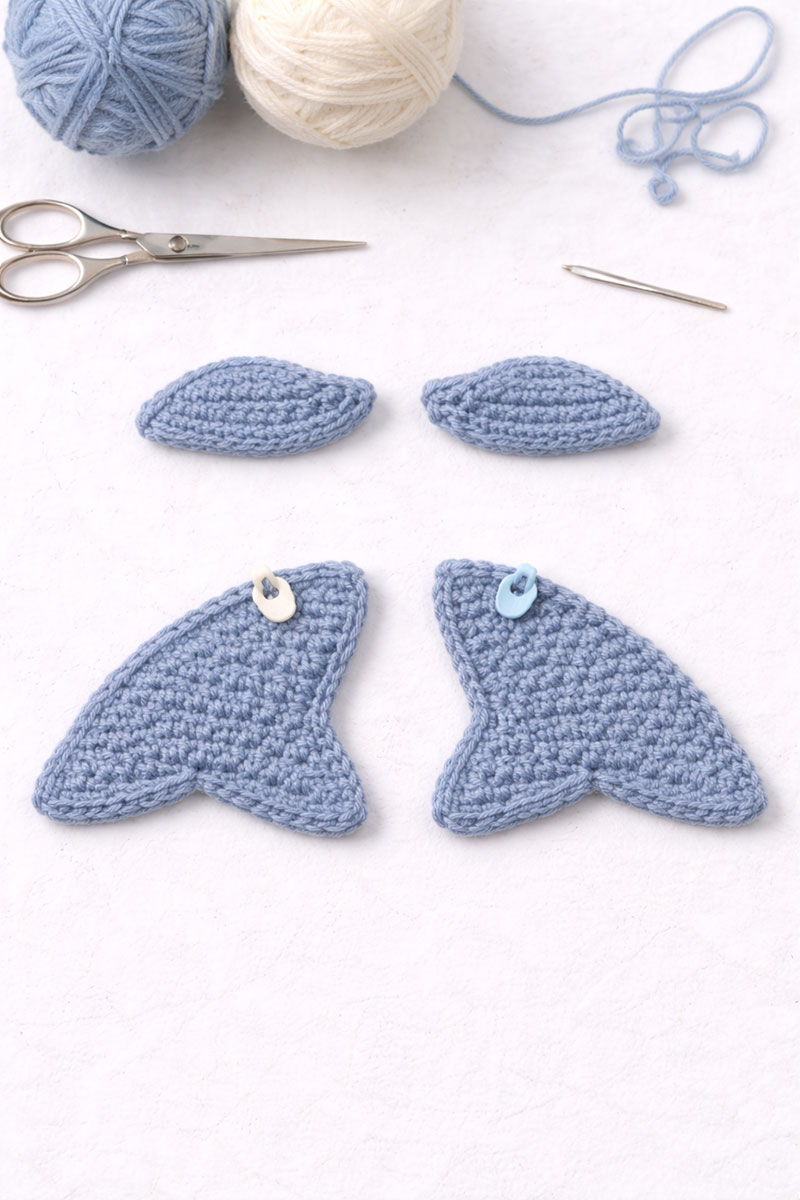
Side fins—make 2
Use blue-gray yarn. Chain 1 at the beginning of each row. The turning chain does not count as a stitch.
Row 1: Chain 8. Single crochet in the second chain from the hook and across. Turn. 7 stitches.
Row 2: Single crochet across. Turn. 7 stitches.
Row 3: Single crochet 2 together, single crochet in the next 3 stitches, single crochet 2 together. Turn. 5 stitches.
Row 4: Single crochet 2 together, single crochet in the next stitch, single crochet 2 together. Turn. 3 stitches.
Row 5: Single crochet 3 together. 1 stitch.
Fasten off. Weave the ending tail securely into the pointed end. Weave the beginning tail securely along the wrong side of the 7-stitch foundation edge. The wide foundation edge will be inserted between the body panels during assembly.
Tail flukes—make 2
Use blue-gray yarn. Chain 1 at the beginning of each row. The turning chain does not count as a stitch.
Row 1: Chain 8. Single crochet in the second chain from the hook and across. Turn. 7 stitches.
Row 2: Work 2 single crochet in the first stitch, single crochet in the next 5 stitches, and 2 single crochet in the final stitch. Turn. 9 stitches.
Row 3: Single crochet across. Turn. 9 stitches.
Row 4: Single crochet 2 together, single crochet in the next 5 stitches, single crochet 2 together. Turn. 7 stitches.
Row 5: Single crochet 2 together, single crochet in the next 3 stitches, single crochet 2 together. Turn. 5 stitches.
Row 6: Single crochet 2 together, single crochet in the next stitch, single crochet 2 together. 3 stitches.
Fasten off. Weave in the starting tail at the wide end. Leave a 10-inch sewing tail at the narrow 3-stitch end.
Place the two flukes side by side with their narrow ends touching. Use one sewing tail to stitch the two inner corners together with two small stitches. Do not overlap the flukes. Weave that sewing tail securely into the wrong side of one fluke. Weave the unused sewing tail securely into the wrong side of the other fluke. Their two 3-stitch ends now form a 6-stitch attachment edge that matches the 6-stitch tail edge of the body panels.
Embroider the eye
Complete the embroidery before joining the body panels so the knots and yarn ends will be enclosed inside the whale.
Place the blue-gray panel with its right side facing you. Turn it so the tail points to the left and the head points to the right.
Using black embroidery floss, make one shallow curved eye approximately ¾ inch long. Center it over Rows 31–33 and place it about 1¼ inches below the upper body edge.
Use three or four closely placed backstitches to form the curve. Secure the embroidery ends firmly on the wrong side of the blue-gray panel. Do not use plastic eyes, buttons, beads or glued features.
Arrange the whale for assembly
Lay the cream belly panel with its wrong side facing up. Place the blue-gray panel over it with its right side facing up. The wrong sides of the two panels should face each other.
Align the 6-stitch tail edges, the 16-stitch head edges and all 36 row ends along both sides.
Position the joined 6-stitch base of the tail flukes between the two panels at the tail end. The flukes must extend away from the body. Match one fluke-base stitch to each of the 6 body stitches.
Position one fin between the panels along each side of the body. Place each 7-stitch foundation edge beside the row ends for Rows 22–28. The pointed ends must extend away from the body.
Use locking stitch markers to hold both fins, the tail and the two body panels together. Confirm that neither fin nor tail fluke has been folded inside the body.
Join and finish the crochet whale
Use blue-gray yarn for the joining edge. The whale remains unstuffed so it stays flat.
Join the yarn at the upper corner of the head edge. Chain 1. The chain does not count as a stitch.
Head edge: Working through both body panels, single crochet once through each of the 16 stitches across the head edge. 16 joining stitches.
First side: Work 1 single crochet through both panels for each of the 36 row ends. At Rows 22–28, work through the blue-gray panel, the 7-stitch foundation edge of the fin and the cream panel together. 36 joining stitches.
Tail edge: Work 1 single crochet through the blue-gray panel, one tail-base stitch and the cream panel in each of the 6 tail-edge stitches. 6 joining stitches.
Second side: Work 1 single crochet through both panels for each of the 36 row ends. At Rows 22–28, include the 7-stitch foundation edge of the second fin between the panels. 36 joining stitches.
Slip stitch to the first joining stitch. The completed joining round contains 94 single crochet stitches: 16 across the head, 36 along the first side, 6 across the tail and 36 along the second side.
Do not add extra stitches at the four corners. The shaped rows already form the outline, and extra corner stitches may cause the joining edge to ripple.
Fasten off. Thread the ending tail onto a tapestry needle and weave it through several joining stitches in one direction, then back through several stitches in the opposite direction. Secure the beginning tail at the upper corner of the head in the same way. Trim both tails only after they are secure.
Remove every stitch marker and inspect the complete edge. Confirm that both fins and both tail flukes are held through all intended layers and that no yarn tails, loops or openings remain.
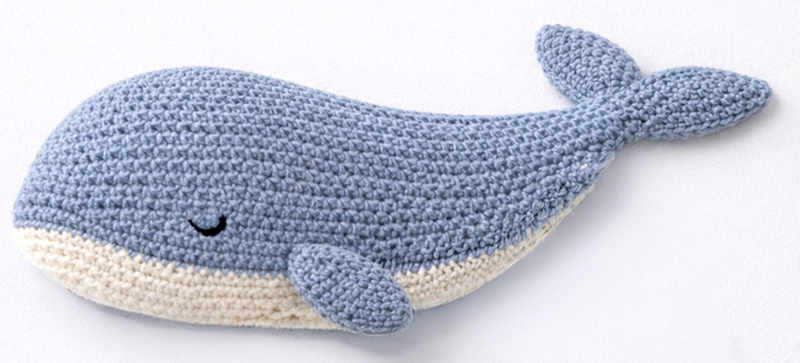
Wash according to the care directions for the chosen yarn. Place the whale on a towel, return the fins and tail flukes to their intended positions and allow it to dry flat.
Use this handmade whale only during supervised awake time. Keep it out of the crib, bassinet and every other infant sleep space during naps and nighttime sleep. The American Academy of Pediatrics recommends keeping soft objects out of an infant’s sleep space: American Academy of Pediatrics safe sleep guidance.
How to use this whale in an ocean nursery
This type of piece works best when it blends into the room rather than standing out as a toy. The flatter shape allows it to sit neatly in places where bulkier items do not fit.
My page on ocean themed nursery ideas shows how color, quilts, and sea creature accents can tie the room together without feeling repetitive.
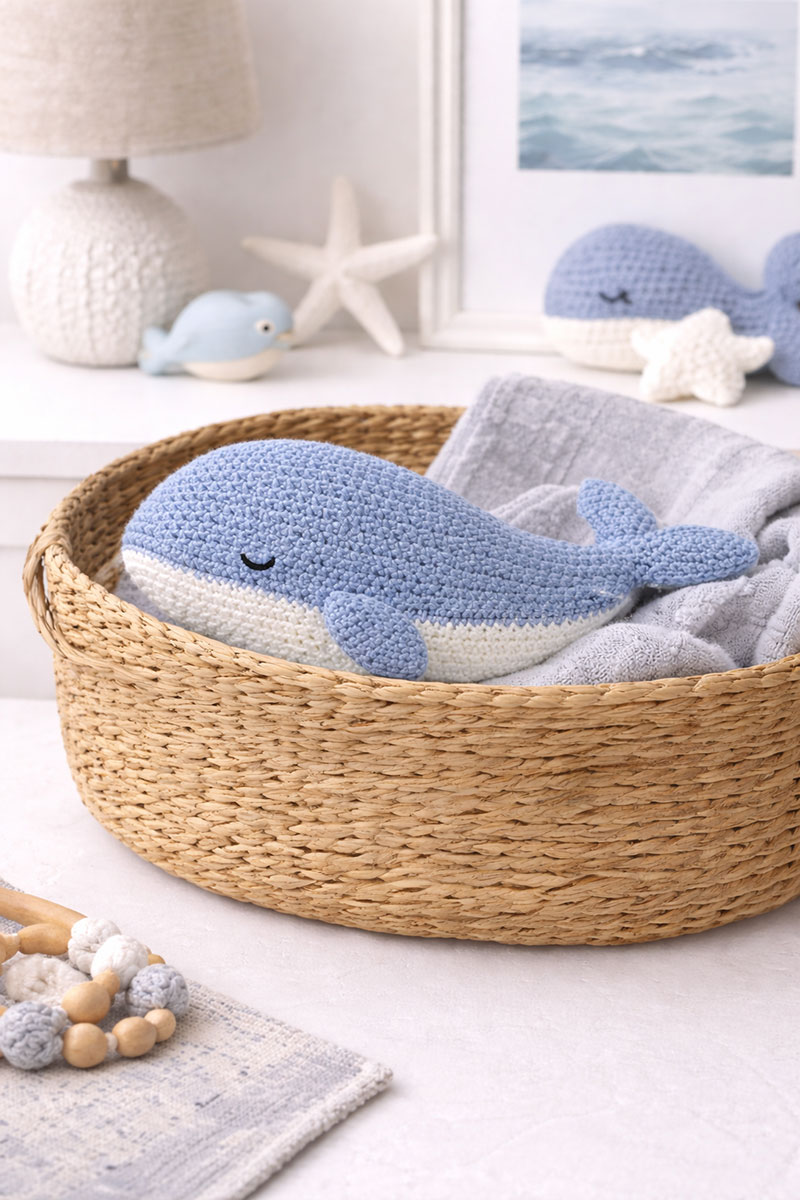
Place it in a basket on a dresser, drape it over the arm of a chair, or set it on a shelf near framed prints. In a real nursery, these are the spots where handmade pieces are actually seen.
Using a consistent color palette helps tie everything together. Blue gray with cream tends to coordinate well with bedding and wall decor without overpowering the space.
FAQ about the crochet whale pattern
Can a beginner make this crochet whale pattern?
This pattern is best for an advanced beginner who is comfortable with single crochet, increases, decreases, simple embroidery and joining shaped pieces.
Can this be made as a stuffed toy?
This pattern is designed to remain flat and unstuffed. Turning it into a stuffed toy would require additional shaping and construction changes that are not included in these instructions.
What yarn works best?
Yarn that shows stitch definition helps maintain the shape and makes assembly easier.
Is it safe for a crib?
No. Keep the crochet whale out of the crib, bassinet and every other infant sleep space. Use it only during supervised awake time outside the baby’s sleep space.
Can colors be changed?
Yes. Keeping the palette simple usually gives the best result in a nursery setting.
When you click on links to various merchants on this site and make a purchase, this may result in this site earning a commission. This does not affect the price you pay.

UBGI Gold Standard 2026
Reviewed under the site's
editorial checklist.
Photos, decorating ideas, party setups and reader submissions are shared for inspiration unless a page is specifically presented as a pattern, tutorial, reference guide or step-by-step project. Follow the instructions, measurements, safety guidance and manufacturer directions provided for the particular project or product.
About Jan | Contact | Baby Nursery Ideas (Blog) | Site Map | Privacy Policy | Disclosure Policy | Disclaimer | Affiliate Disclosure | Earnings Disclosure | Facebook | Pinterest
I am a participant in the Amazon Services LLC Associates Program, an affiliate advertising program designed to provide a means for us to earn fees by linking to Amazon. As an Amazon Associate I earn from qualifying purchases.
Copyright © 2006-2026. All Rights Reserved.