Crab Crochet Pattern
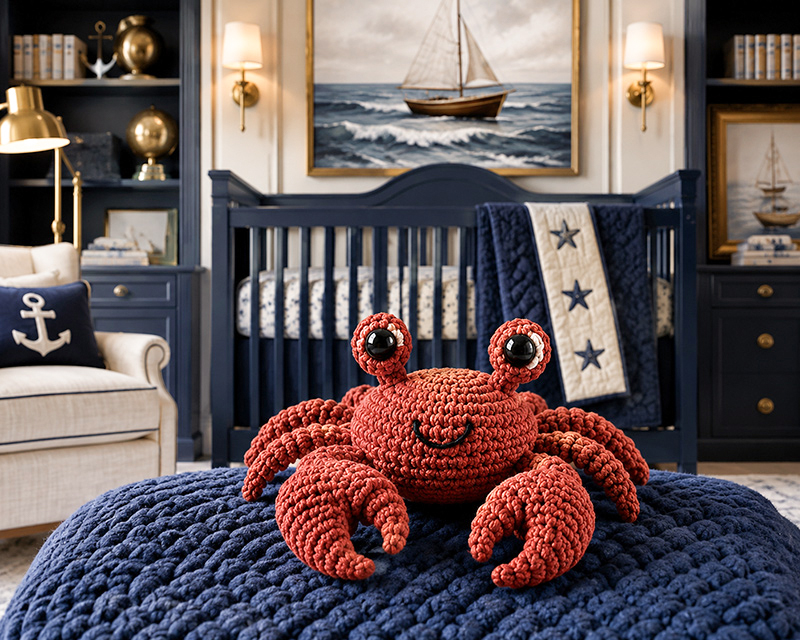
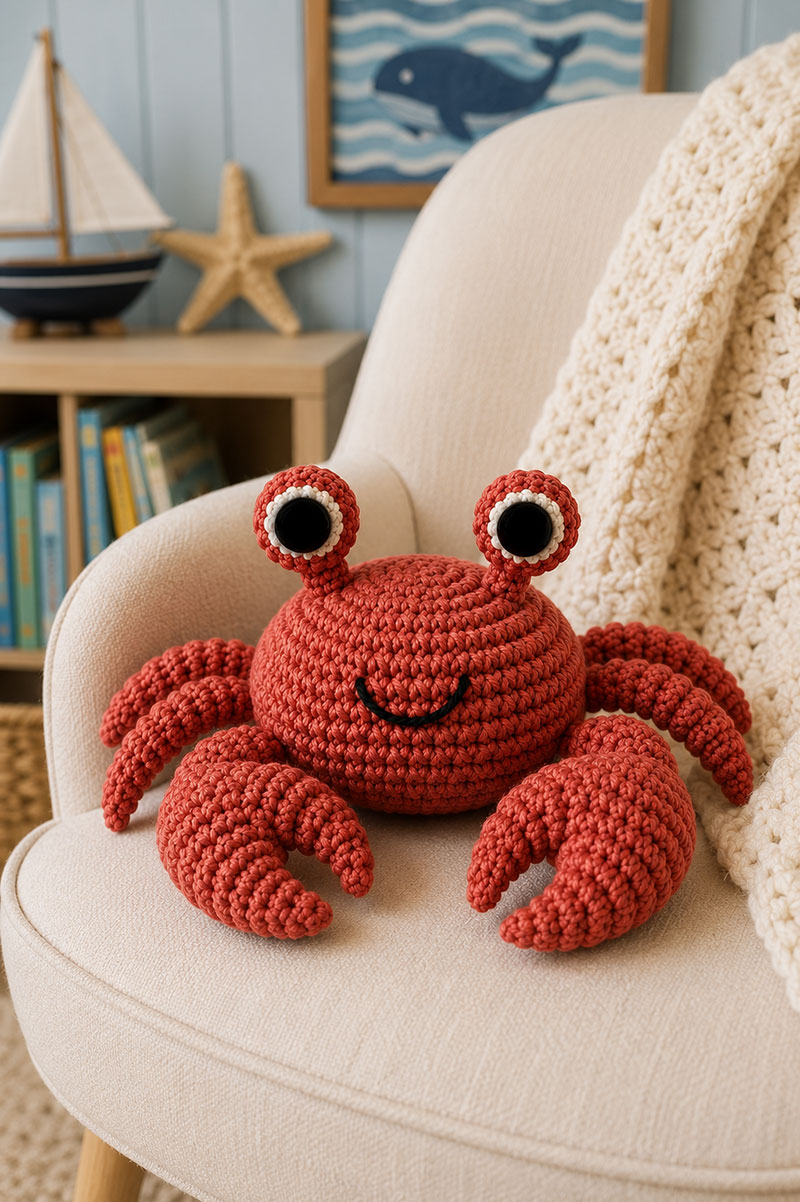
This crab crochet pattern makes a cute little ocean animal with raised eyes, tiny claws, and just enough personality to turn a simple ball shape into a baby gift people will stop and admire.
Before you start this little crab, peek at these ocean baby crochet projects too:
Need cotton yarn, stuffing, or safety-eye alternatives before you start? See the best yarn and crochet supplies needed to make this little crocheted crab.
Jump to the part you need:
A lot of crochet crab patterns end up looking flat once the claws and eyes are attached. The shape starts collapsing inward, the legs twist, and suddenly the little crab that looked adorable in the photo turns into a lopsided red circle sitting on the table. That usually happens when the body gets overstuffed or the legs are sewn on too low.
This pattern avoids that problem completely.
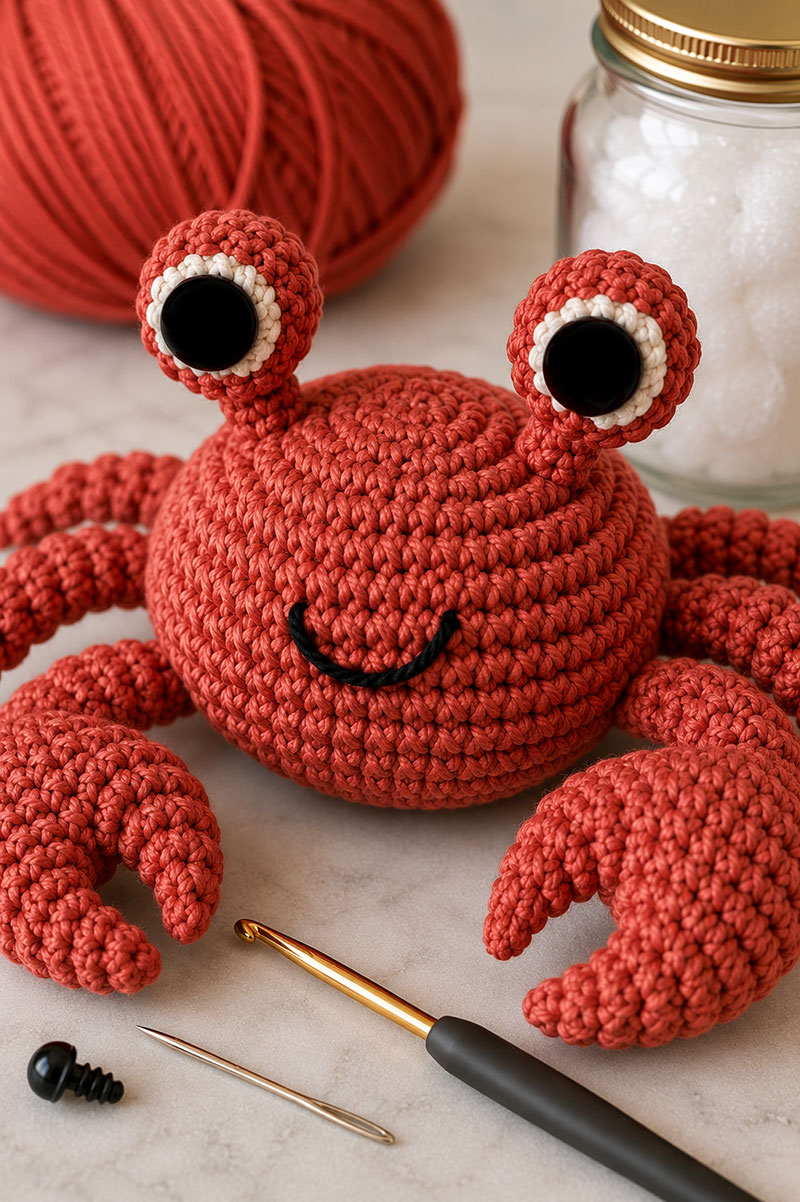
The crab in these photos was built with tighter stitches, shorter legs, oversized claws, and raised eye stalks that sit slightly forward instead of straight upward. That one small change gives the face expression instead of the startled look many crab patterns end up with.
Precision Notes Before You Begin The Crab Crochet Pattern
This pattern is worked in continuous rounds. Do not join rounds unless the instructions specifically say to do so.
The crab in the example image was made using tight tension and cotton yarn with very small stitch gaps. If your stitches look loose enough to see stuffing through the shell, go down one hook size.
The finished crab should measure:
- 6 inches across the shell
- 10 inches wide including claws
- 3.5 inches tall from bottom to top of eyes
- Each claw should measure 3 inches long
- Each eye stalk should measure 1.25 inches tall
The shell should sit slightly flattened on the bottom instead of perfectly round. That shape is what creates the same look as the example image.
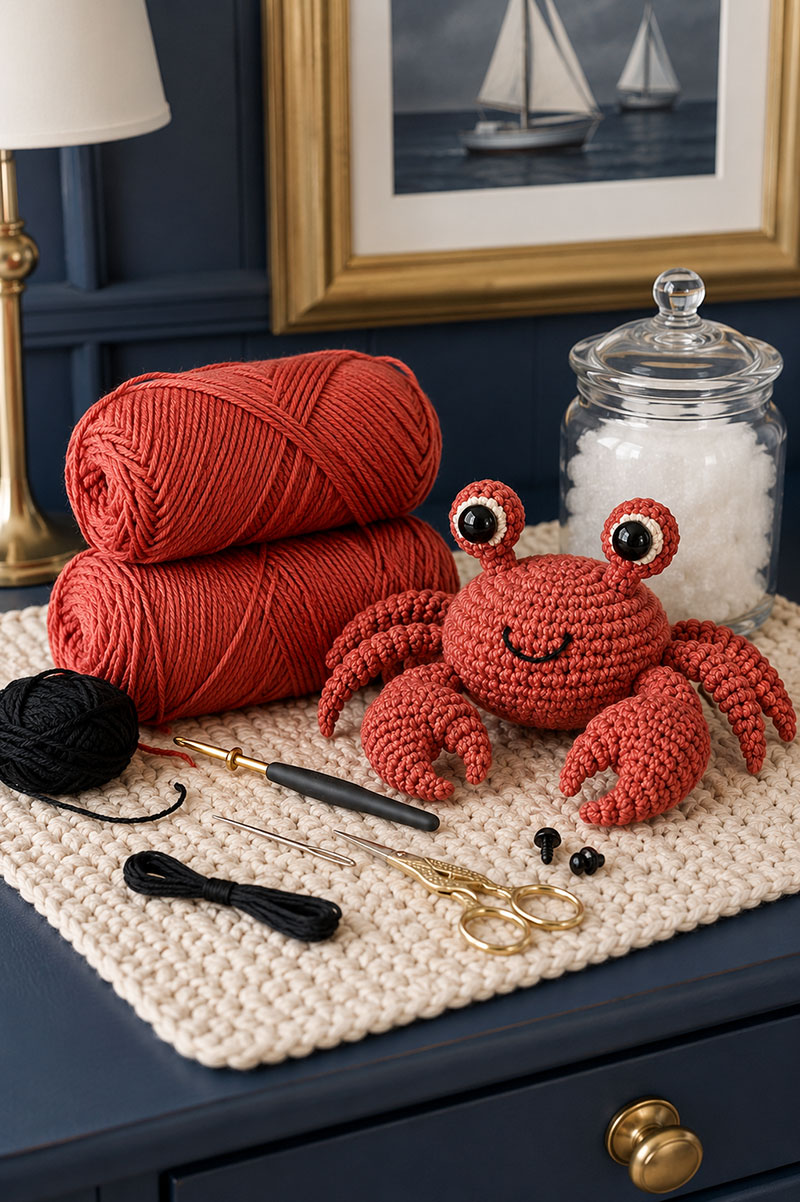
Crab Crochet Pattern Supplies That Hold Their Shape
The yarn choice matters more here than people think. Acrylic tends to make the claws collapse inward after a few weeks. Cotton gives the crab structure and keeps the rounded shell from sagging.
I believe this pattern works best with a matte cotton yarn because the stitch definition stays visible even in lower nursery lighting.
- Worsted weight cotton yarn in rust or coral
- Small amount of black yarn for smile
- Small amount of white cotton yarn for eye rings
- 3.5 mm crochet hook
- Fiberfill stuffing
- Yarn needle
- Stitch marker
- 20 mm safety eyes or embroidered eyes for babies
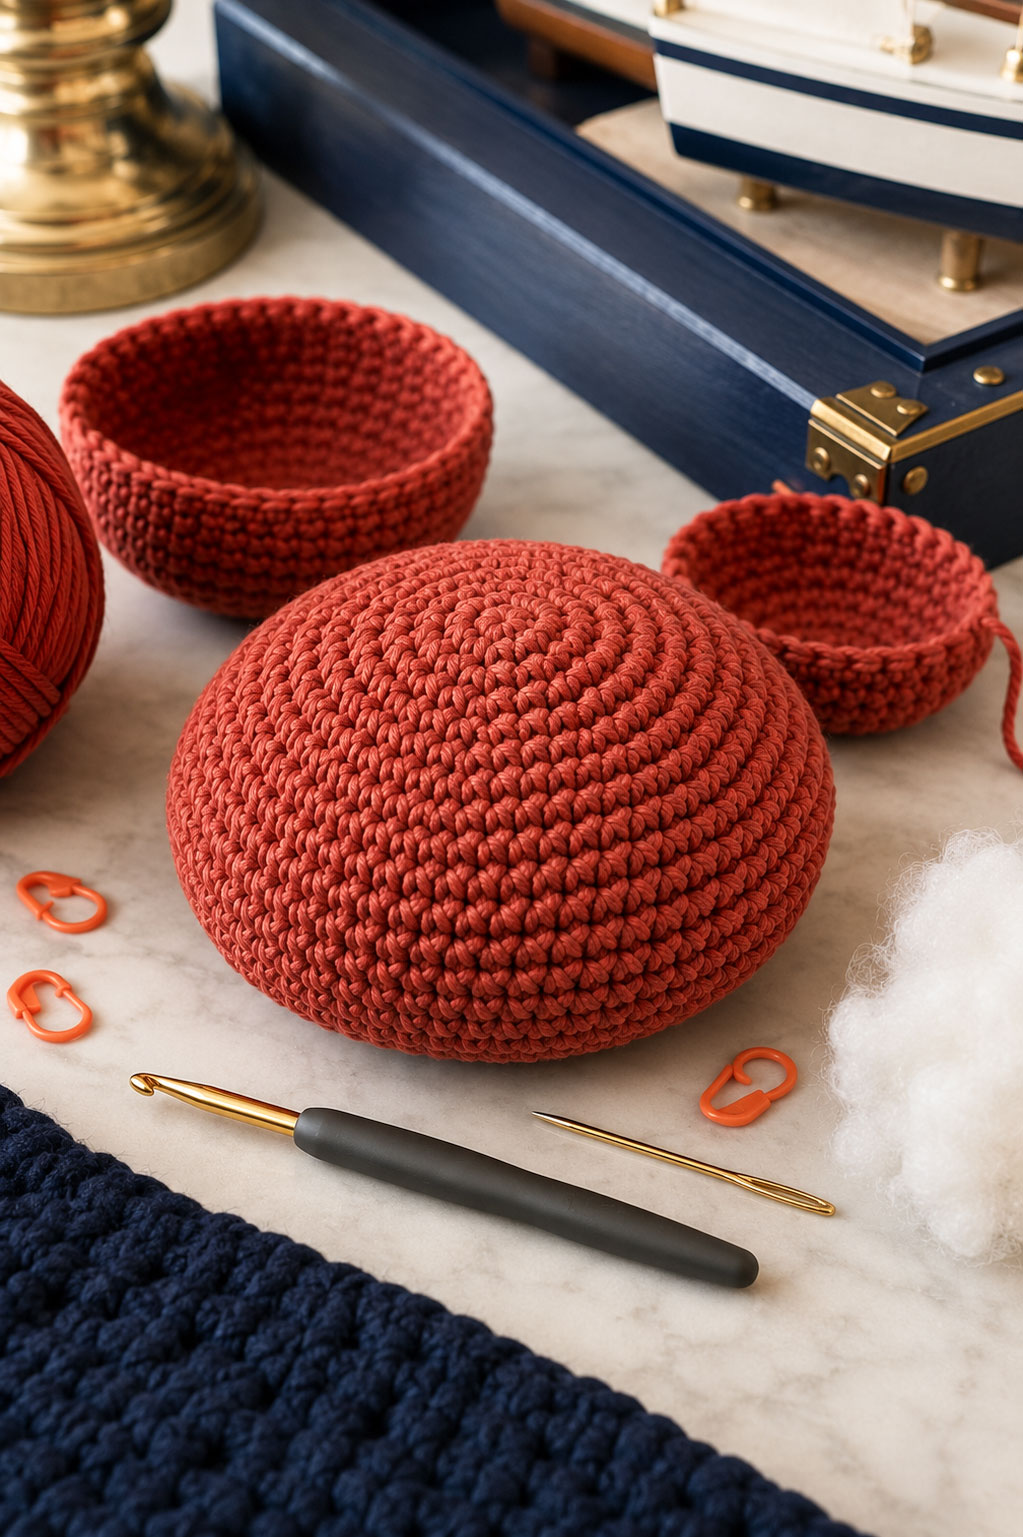
How To Crochet The Crab Body Without It Going Flat
Parents often notice shell problems around the halfway point. One side starts curving upward while the other stays low. That almost always traces back to a missed increase.
Top Shell
Round 1: 6 sc in magic ring (6)
Round 2: inc around (12)
Round 3: sc, inc around (18)
Round 4: 2 sc, inc around (24)
Round 5: 3 sc, inc around (30)
Round 6: 4 sc, inc around (36)
Round 7: 5 sc, inc around (42)
Round 8: 6 sc, inc around (48)
Rounds 9 through 13: sc around (48)
The shell should now measure roughly 6 inches across.
Fasten off.
Bottom Shell
Repeat rounds 1 through 8 only.
Do not fasten off.
The lower section should remain flatter than the upper shell.
Do not force fullness with extra stuffing.
How To Join The Shell Pieces Correctly
Place the top shell over the bottom shell with right sides facing outward.
Use stitch markers first so the shell edges stay even while joining.
Working through both shell loops:
Sc evenly around the entire body.
Pause when about 3 inches remain open.
Add stuffing gradually.
The center should compress slightly when pressed with your hand.
If the shell becomes stiff like a ball, remove stuffing before closing.
Continue single crocheting until fully closed.
Slip stitch into first joining stitch.
Fasten off and weave in tail.
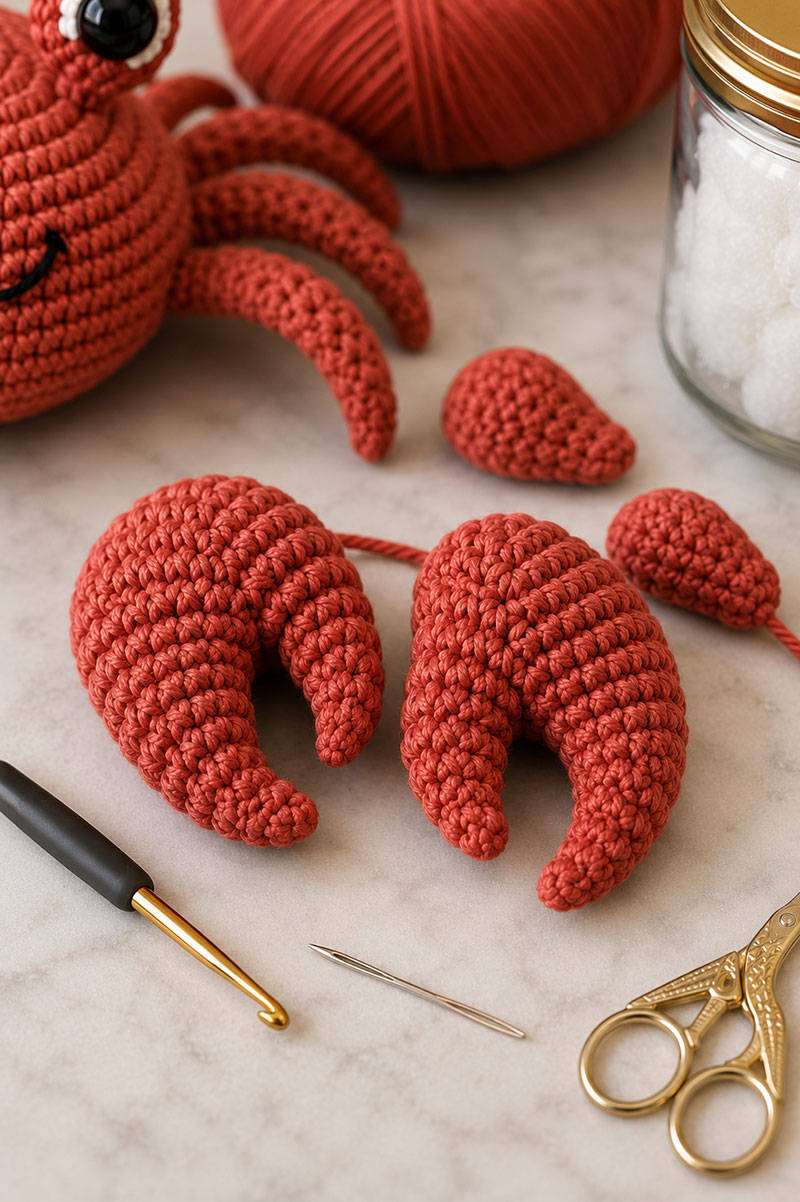
Oversized Crab Claws Make The Pattern Look Finished
Small claws change the personality of the crab immediately. The photographed version uses oversized claws with slightly uneven inward angles because perfectly straight claws make the face look stiff in nursery photos.
Lower Claw
Round 1: 6 sc in magic ring (6)
Round 2: inc around (12)
Round 3: sc, inc around (18)
Round 4: sc around (18)
Round 5: sc, dec around (12)
Round 6: sc around (12)
Lightly stuff only the rounded front section.
The rear section should stay flexible.
Upper Pincer
Round 1: 5 sc in magic ring (5)
Round 2: inc around (10)
Round 3: sc around (10)
Flatten the piece gently.
Sew onto lower claw at a slight downward inward angle.
Do not center the pincer exactly.
The photographed crab has slightly asymmetrical claw placement, which makes it look more natural.
Raised Crab Eyes That Stay Upright
Long eye stalks tend to lean outward after a while. This version stays upright because the decrease round starts earlier and the neck section remains mostly unstuffed.
Eye Stalk Pattern
Round 1: 6 sc in magic ring (6)
Round 2: inc around (12)
Rounds 3 and 4: sc around (12)
Round 5: dec around (6)
Round 6: sc around (6)
Stuff only the rounded top portion.
Do not stuff the narrow neck section.
Attach 20 mm eyes centered between rounds 2 and 3 of the bulb section.
White Eye Ring Detail
Using white cotton yarn, surface crochet or embroider a small ring around each black eye after the eyes are attached.
Work the white stitches around the outside edge of the eye between rounds 2 and 3 of the bulb section.
Use 8 to 10 small stitches per eye ring.
Keep the white ring narrow so it frames the eye without covering the coral stitches.
For the same look as the example crab, place the thickest part of the white ring slightly toward the lower outside edge of each eye.
Sew the eye stalks onto the shell between rounds 7 and 8 of the top shell.
Place them 8 stitches apart.
The eyes should angle slightly inward toward the smile instead of pointing straight upward.
That placement creates the expression shown in the example image.
How To Assemble The Crab So It Looks Balanced
Attach the legs before sewing on the claws.
That order keeps the crab symmetrical and prevents the body from twisting while sewing.
Leg Pattern
Chain 12.
Starting in second chain from hook:
- 2 sc
- 3 hdc
- 3 dc
- 2 hdc
- 1 sc
Make six legs total.
Curve each leg slightly before attaching.
Attach the first leg directly beside the claw.
Leave 3 stitches between each additional leg.
The rear legs should angle backward.
The middle legs should point outward.
The front legs should tilt slightly toward the claws.
This spacing creates the same stance shown in the example image.
Exact Claw Placement
Attach claws between rounds 8 and 9 of the shell.
The claws should sit 10 stitches apart.
Angle both claws inward slightly.
The tips should curve toward the smile.
If the claws point straight outward, the crab loses the same expression as the photographed version.
Smile Placement
Use black yarn or embroidery thread.
Place the smile between rounds 9 and 10.
The smile should span roughly 7 stitches wide.
Curve the ends upward slightly.
Do not place the smile too close to the eyes.
Lower placement gives the crab the same relaxed expression shown in the example image.
Common Beginner Mistakes That Change The Crab Shape
Problem: Shell becomes round like a ball.
Cause: Too much stuffing.
Fix: Remove stuffing until the shell settles lower.
Problem: Eye stalks lean sideways.
Cause: Overstuffed stalk necks.
Fix: Stuff only the bulb portion.
Problem: Claws droop downward.
Cause: Loose yarn or loose tension.
Fix: Use cotton yarn and smaller hook.
Problem: Crab tilts forward.
Cause: Claws attached too low.
Fix: Reattach claws slightly higher between rounds 8 and 9.
Beginner Shortcut That Keeps Everything Symmetrical
Before sewing permanently, pin every piece into place using stitch markers or safety pins.
Set the crab on a table and look at it from the front.
That quick check catches uneven eye height and crooked claw angles before the sewing becomes permanent.
Many people skip this step and regret it halfway through assembly.
Keep the ocean theme going:
For nursery safety information in the United States, the Consumer Product Safety Commission maintains updated guidance here:
https://www.cpsc.gov/SafeSleep
Crab Crochet Pattern FAQ
Is this crab beginner friendly?
Yes. The project uses basic stitches and repeating rounds. The shaping stays manageable once the stitch counts remain accurate.
Can I use acrylic yarn?
Yes, although cotton holds the shape better over time.
How do I make this baby safe?
Use embroidered eyes instead of safety eyes and stitch all pieces firmly.
Why does my crab lean forward?
The claws are probably overstuffed or attached too low on the body.
Can this become a lovey?
Yes. Attach the crab body to a crochet security blanket square instead of adding lower shell rounds.
What yarn color works best?
Rust, coral, muted red, and cinnamon tones photograph better than bright red.
When you click on links to various merchants on this site and make a purchase, this may result in this site earning a commission. This does not affect the price you pay.
UBGI Gold Standard 2026
Verified for performance, SEO,
and accessibility compliance.
Photos, decorating ideas, party setups, and reader submissions are shared for inspiration only and are not intended as step-by-step decorating, construction, or DIY instructions.
About Jan | Contact | Baby Room Ideas (Blog) | Site Map | Privacy Policy | Disclaimer | Affiliate Disclosure | Earnings Disclosure | Facebook | Pinterest
I am a participant in the Amazon Services LLC Associates Program, an affiliate advertising program designed to provide a means for us to earn fees by linking to Amazon.
Copyright © 2006-2026. All Rights Reserved.