Crochet Starfish Lovey Pattern for Ocean Nurseries
This crochet starfish lovey pattern creates a lovable sea creature that fits naturally in an ocean nursery, coastal baby shower gift basket, or handmade under the sea baby room theme. It is a good beginner project because the shape is simple, recognizable, and easy to pair with other sea animal loveys.
More ocean crochet and nursery ideas:
Jump to a section:
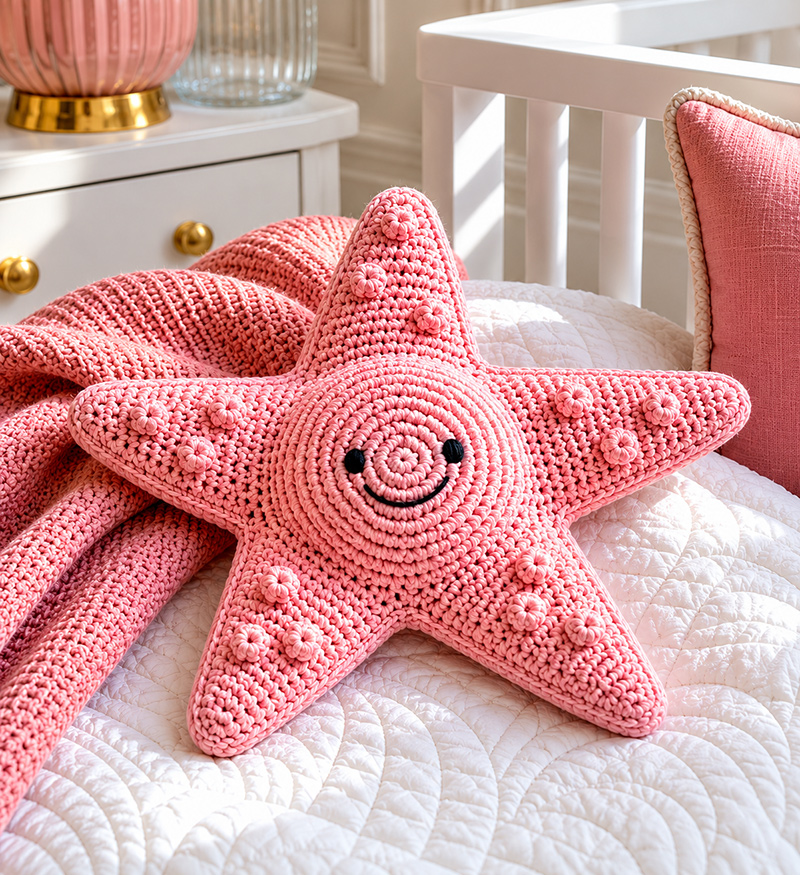
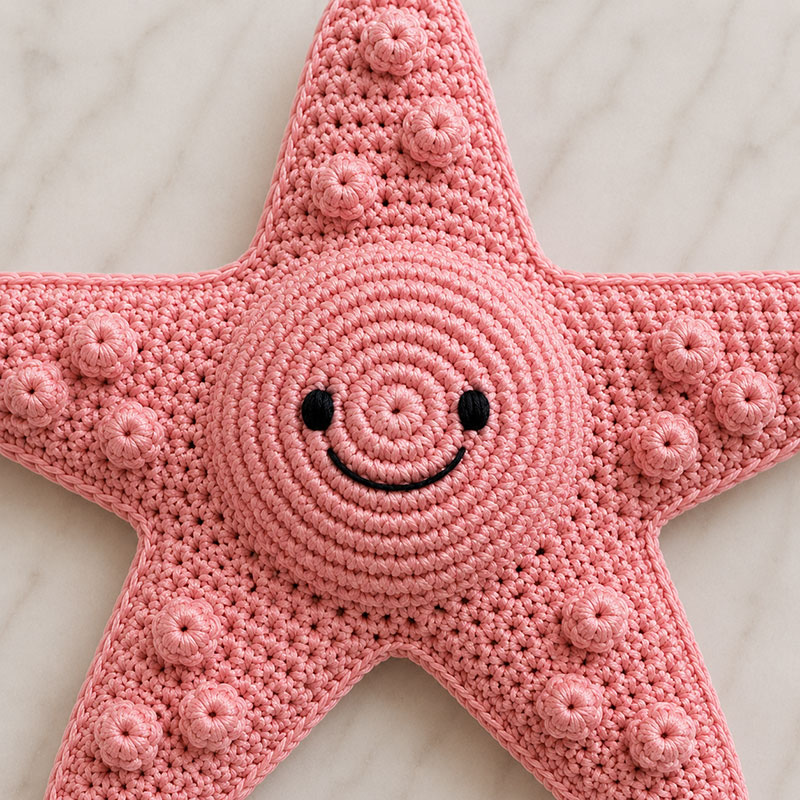
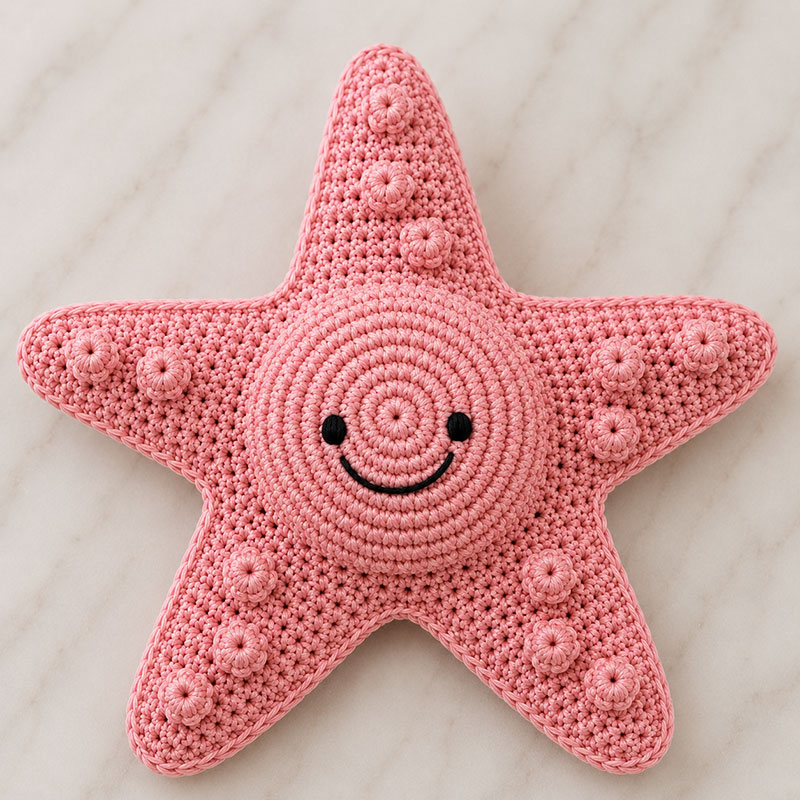
Quick answer: This crochet starfish lovey pattern creates a rounded five-arm sea star with a raised spiral center, embroidered face, and light shaping that matches the example image without complicated stitch work.
This crochet starfish lovey pattern is written with exact stitch counts, arm sections, stuffing notes, and finishing steps so the finished sea star matches the main page image as closely as possible.
Some crochet sea stars end up looking thin and pointy even when the stitch count is technically right. The version below keeps the arms broader and the center slightly raised.
This pattern is worked flat in rows after the center circle is completed.
Turn your work after every row.
The starfish is decorative and should not be placed in a baby's crib.
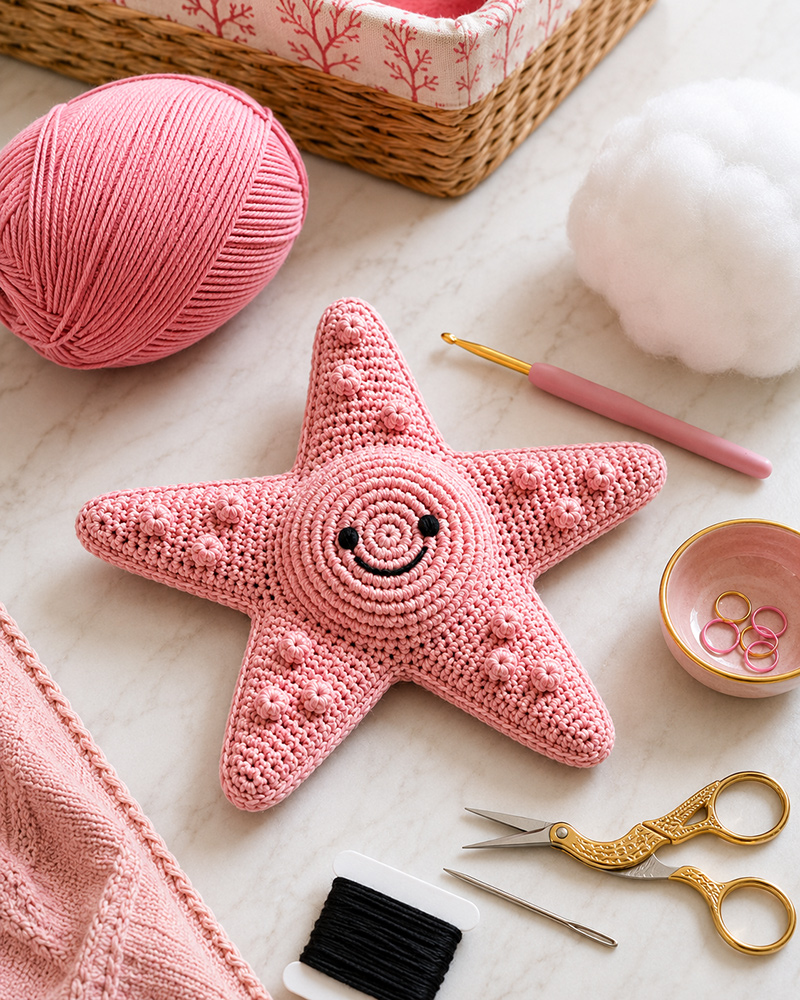
Materials for the Crochet Starfish Lovey
Worsted cotton yarn works best here because it gives the arms enough structure to stay rounded without becoming stiff. Acrylic yarn can stretch too much once the stuffing settles.
- Worsted weight cotton or cotton blend yarn
- 4 mm crochet hook
- Fiberfill stuffing
- Stitch marker
- Scissors
- Yarn needle
- Dark embroidery thread
Finished size: about 10 inches across
Abbreviations:
- sc = single crochet
- sl st = slip stitch
- inc = 2 sc in same stitch
- dec = single crochet 2 stitches together
- ch = chain
- dc = double crochet
- bobble = 3 unfinished dc in same stitch, yarn over pull through all loops
Crochet the Starfish Center Circle
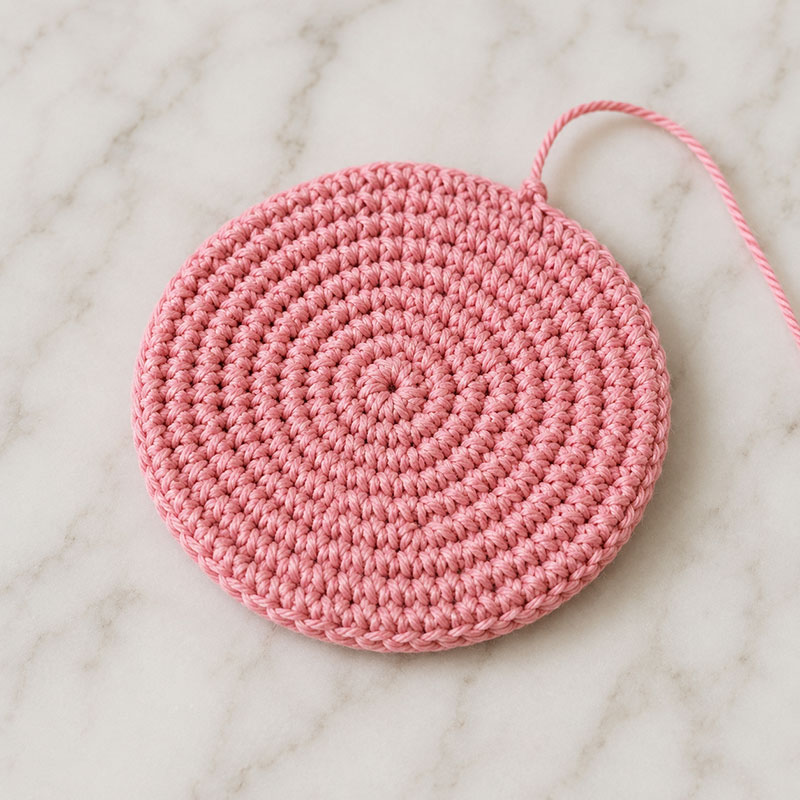
The center circle must end with exactly 40 stitches. That gives each arm its own 8-stitch section with no gaps between arms.
Place a stitch marker at the beginning of every round.
- Make a magic ring.
- Round 1: Work 8 sc into ring. Pull closed. 8 stitches.
- Round 2: inc in every stitch around. 16 stitches.
- Round 3: sc in next stitch, inc in next stitch. Repeat around. 24 stitches.
- Round 4: sc in next 2 stitches, inc in next stitch. Repeat around. 32 stitches.
- Round 5: sc in next 3 stitches, inc in next stitch. Repeat around. 40 stitches.
Lay the circle flat.
Divide the circle into these exact arm sections:
- Arm 1 uses stitches 1 through 8
- Arm 2 uses stitches 9 through 16
- Arm 3 uses stitches 17 through 24
- Arm 4 uses stitches 25 through 32
- Arm 5 uses stitches 33 through 40
Do not skip stitches between arms.
The next arm begins immediately in the next stitch section.
At this stage the project may look uneven spread across the table. That happens before the stuffing and edge seam pull everything together.
Crochet Starfish Lovey Pattern Arm Instructions
Attach yarn to stitch 1.
Work only across stitches 1 through 8 for the first arm.
- Row 1: sc across 8 stitches. ch 1. Turn.
- Row 2: inc in first stitch. sc across until last stitch. inc in last stitch. 10 stitches. ch 1. Turn.
- Row 3: sc in first 4 stitches. Work 1 bobble in stitch 5. sc in remaining 5 stitches. 10 stitches. ch 1. Turn.
- Row 4: sc across 10 stitches. ch 1. Turn.
- Row 5: dec. sc in next 2 stitches. Work 1 bobble in next stitch. sc in next 3 stitches. dec. 8 stitches. ch 1. Turn.
- Row 6: sc across 8 stitches. ch 1. Turn.
- Row 7: dec. sc in next stitch. Work 1 bobble in next stitch. sc in next 2 stitches. dec. 6 stitches. ch 1. Turn.
- Row 8: sc across 6 stitches. ch 1. Turn.
- Row 9: dec. sc in next 2 stitches. dec. 4 stitches. ch 1. Turn.
- Row 10: dec twice. 2 stitches. ch 1. Turn.
- Row 11: dec once. Fasten off.
The arm should taper gradually with a rounded point instead of a sharp tip.
If the arm curls upward heavily, tension is probably too tight.
Repeat the exact same arm instructions for:
- stitches 9 through 16
- stitches 17 through 24
- stitches 25 through 32
- stitches 33 through 40
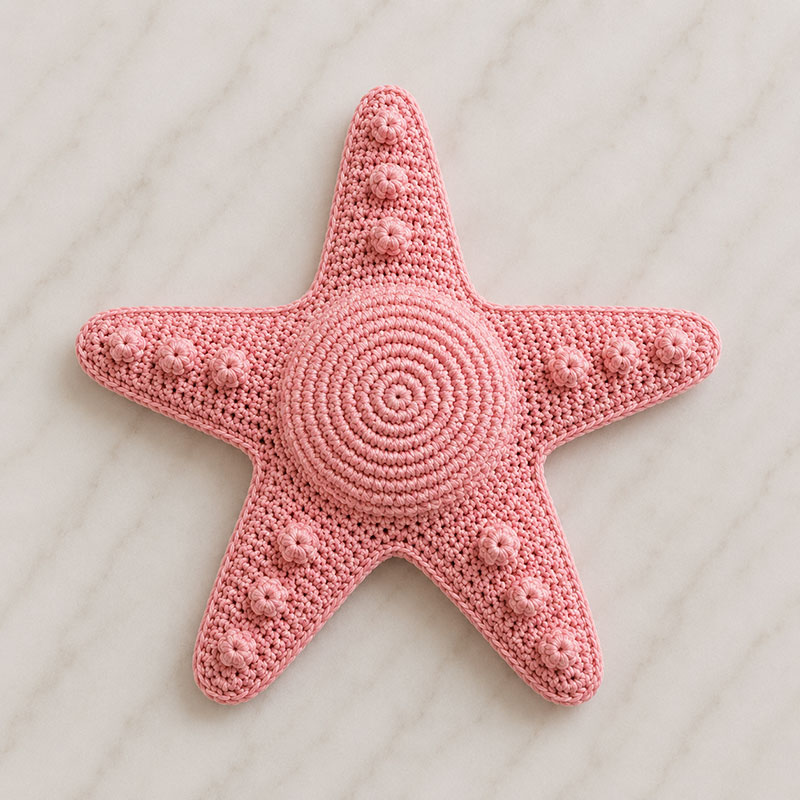
You now have the full front panel.
Repeat the complete instructions again to make the back panel.
Do not add:
- bobbles
- face embroidery
- spiral detail
The back should remain flat.
Add the Raised Texture and Face
The center spiral should sit slightly raised above the surface so the finished crochet starfish matches the example image.
- Attach yarn near the center.
- Surface sl st following the visible crochet rounds.
- Create exactly 3 spiral rotations.
- Keep stitches loose enough that the center remains flat.
- Fasten off on the back side.
Use embroidery thread for the face, sizing the stitched eyes so they remain visible against the raised spiral center.
Place the eyes:
- 2 stitches apart
- centered in the spiral
- slightly above the middle
Stitch a curved smile about 4 stitches wide.
Smaller embroidered features usually look better but each sea creature I've made has its own unique personality.
Join and Stuff the Starfish
Place the two panels together with wrong sides touching.
Match all arm tips first.
Attach yarn near the bottom of one arm.
- Work sc evenly through both layers around entire starfish.
- Use approximately one sc per row edge along the arm sides.
- Place 2 sc at each arm tip.
- Do not pull the seam tight.
- Pause before closing final arm.
Stuffing guide:
- Use a moderate handful in center section so the middle stays slightly fuller than the arms
- Use about cotton-ball amount in each arm
The starfish should flatten naturally when resting on a blanket or nursery chair while still keeping a lightly padded center section.
Too much filling causes the seams to twist and the points to curl upward.
- Finish remaining seam.
- sl st to first stitch.
- Fasten off.
- Weave in all yarn tails securely.
Set the finished starfish flat overnight before taking photographs or wrapping it as a gift. Cotton yarn relaxes slightly after handling, and the shape becomes more balanced by the next day.
Ocean Nursery Crochet Ideas
A crochet starfish pairs naturally with ocean themed quilts, white crib rails, shell-inspired color palettes, and coastal nursery themes.
For a coordinated handmade set, pair this project with the crochet seahorse lovey pattern, the crochet crab lovey pattern, and the ocean baby quilt pattern.
The ocean nursery theme ideas page also offers advice on nursery colors, bedding, and wall decor around the same sea-inspired look.
For additional ocean crochet patterns, see the crochet sea turtle pattern, crochet octopus pattern, crochet jellyfish pattern, crochet fish pattern, and crochet whale pattern.
The main crochet animal lovey patterns page also collects nursery-friendly crochet animals in one place.
According to the American Academy of Pediatrics safe sleep guidance, toys and loose objects should stay out of infant sleep spaces. Use this crochet starfish for supervised cuddle time, nursery decorating, or gifting rather than inside the crib.
Crochet Starfish Lovey Pattern FAQ
Is this crochet starfish lovey pattern beginner friendly?
Yes. It uses basic stitches, exact arm sections, and row-by-row shaping so a beginner does not have to guess where each arm or bobble belongs.
Can this crochet starfish go in a crib?
No. This starfish is for supervised use, nursery decorating, photos, or gifting. It should not be placed in a baby's sleep space.
How many bobbles should be on each arm?
Each arm has exactly 3 bobbles, placed on Rows 3, 5, and 7.
Does this pattern match the example image?
Yes. The rounded arms, raised center, embroidered face, and 3 bobbles on each arm are written to match the example image closely.
When you click on links to various merchants on this site and make a purchase, this may result in this site earning a commission. This does not affect the price you pay.

UBGI Gold Standard 2026
Reviewed under the site's
editorial checklist.
Photos, decorating ideas, party setups and reader submissions are shared for inspiration unless a page is specifically presented as a pattern, tutorial, reference guide or step-by-step project. Follow the instructions, measurements, safety guidance and manufacturer directions provided for the particular project or product.
About Jan | Contact | Baby Nursery Ideas (Blog) | Site Map | Privacy Policy | Disclosure Policy | Disclaimer | Affiliate Disclosure | Earnings Disclosure | Facebook | Pinterest
I am a participant in the Amazon Services LLC Associates Program, an affiliate advertising program designed to provide a means for us to earn fees by linking to Amazon. As an Amazon Associate I earn from qualifying purchases.
Copyright © 2006-2026. All Rights Reserved.