Crochet Otter Lovey Pattern (Free Baby Security Blanket Pattern)
By Jan Bay
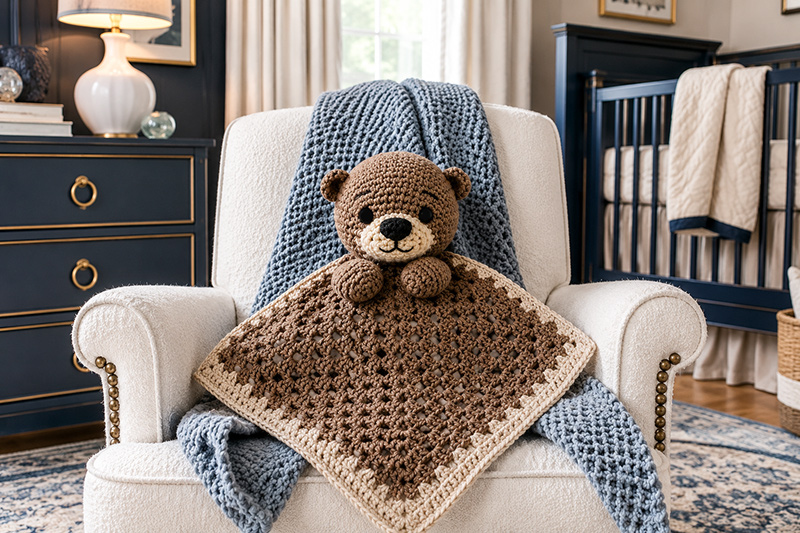
This crochet otter lovey pattern makes a soft baby security blanket with an otter head, small rounded ears, embroidered face, little paws and a simple blanket body that works beautifully as a handmade baby shower gift or nursery keepsake.
Jump to:
Don't crochet the blanket first.
It's tempting because a square works up quickly, but the little otter face is what gives this project its personality. I like getting the head just right before adding the blanket. Once those tiny features are in place, everything else seems to come together much more naturally.
Crochet Otter Lovey Pattern Quick Answer
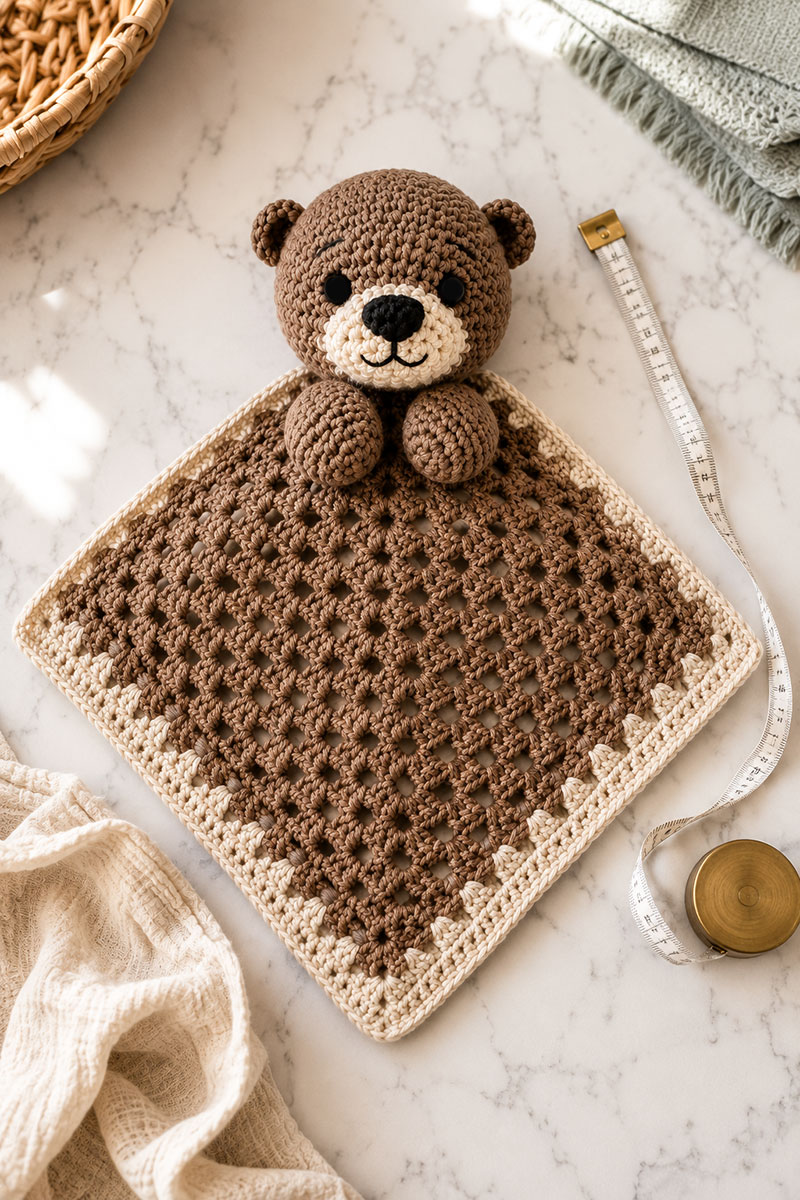
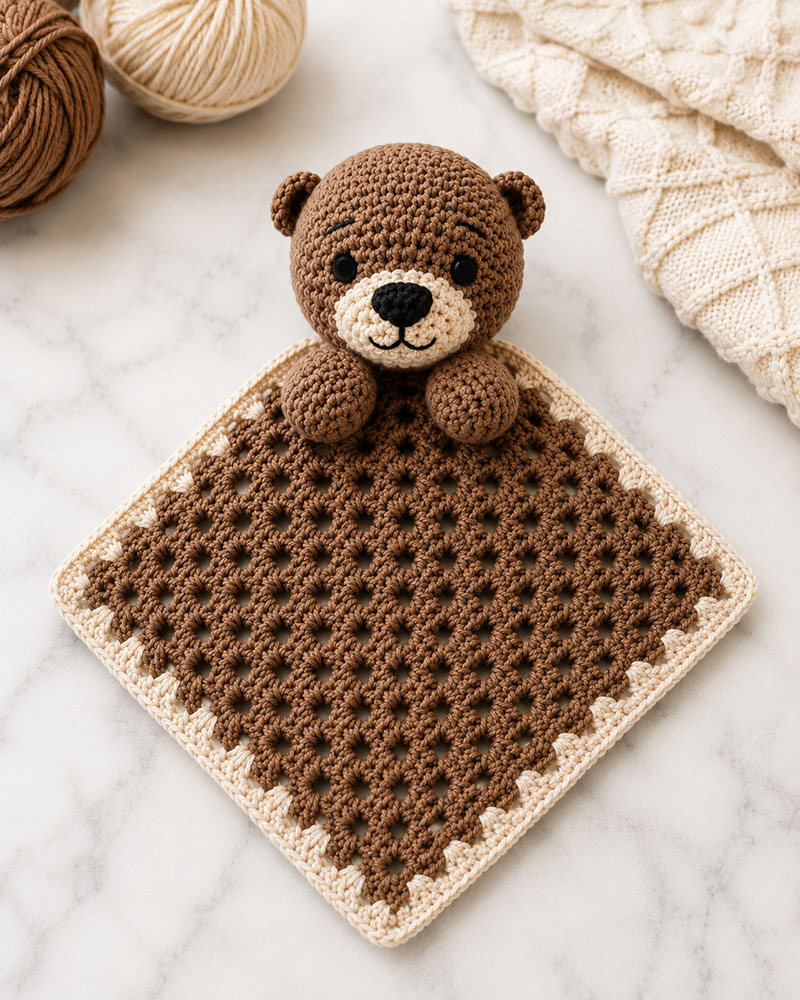
Quick Answer: This crochet otter lovey pattern creates a baby security blanket with a rounded otter head, embroidered facial features, small ears, front paws, and a lightweight square blanket body. The finished blanket body measures approximately 16 inches by 16 inches. When displayed in the diamond position, the complete lovey measures approximately 25 inches from the top of the head to the bottom blanket corner.
Unlike a full amigurumi otter that is meant to sit on a shelf or become a toy, a lovey is designed around the blanket itself. The head simply becomes the comforting focal point while the blanket is what little hands actually hold. That difference keeps the project lighter, easier to wash, and much more practical for everyday use.
If you're building an entire collection, my Crochet Animal Lovey Patterns page brings all of the animal designs together in one place. You'll also find more handmade nursery projects on Free Baby Crochet Patterns.
Materials for This Crochet Otter Lovey Pattern
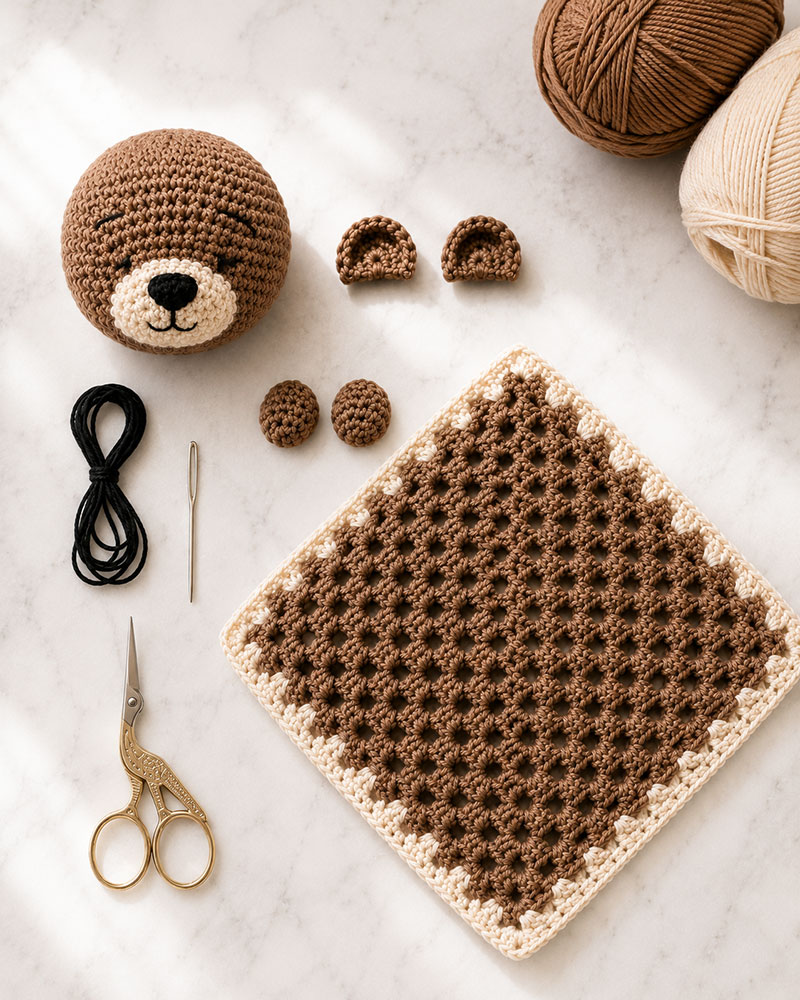
One practical advantage of a lovey is that it doesn't require a huge pile of supplies. A few skeins of yarn, basic tools, and an afternoon of steady stitching are enough to create something that can become part of a baby's daily routine.
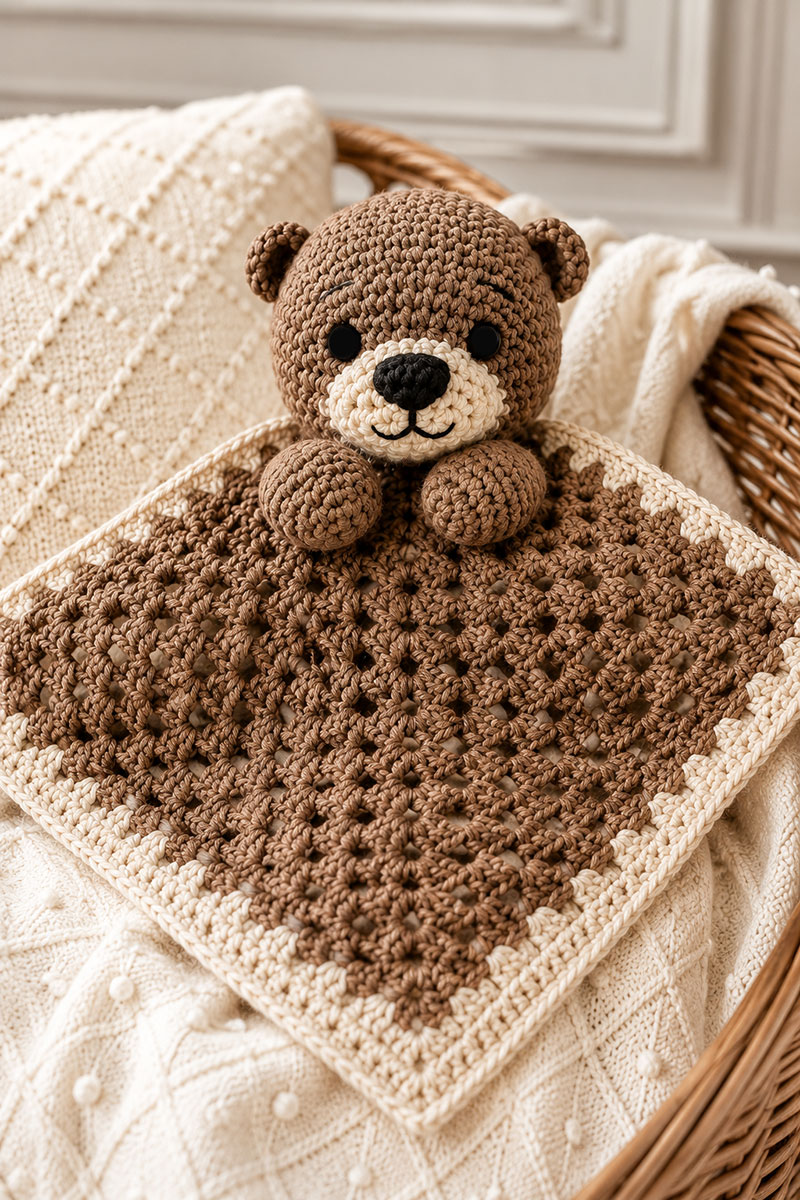
The sample shown on this page was designed with smooth worsted weight yarn because the stitch definition stays crisp and the finished blanket folds neatly without becoming bulky.
- Worsted weight cotton or cotton blend yarn in medium brown, approximately 180 yards
- Cream or ivory yarn for the muzzle, final blanket round and border, approximately 60 to 80 yards
- Small amount of dark brown or black yarn for embroidered facial details
- 4.0 mm (G) crochet hook
- 4.5 mm crochet hook
- Washable fiberfill stuffing for the head and front paws
- Yarn needle
- Stitch markers
- Sharp embroidery scissors
- Flexible tape measure
Hook use: Use the 4.0 mm hook for the head, muzzle, ears and front paws. Use the 4.5 mm hook for the blanket body and border.
Although plastic safety eyes are common on amigurumi projects, embroidered facial features remain the better choice for a baby lovey. They eliminate small hard parts while giving the otter a friendlier expression.
Stitches Used in the Crochet Otter Lovey Pattern
This pattern stays intentionally straightforward. The otter's personality comes from shaping and placement instead of complicated stitch combinations. If you're comfortable working in continuous rounds and counting stitches carefully, you'll have no trouble following along.
- MR = Magic Ring
- ch = Chain
- sl st = Slip Stitch
- sc = Single Crochet
- hdc = Half Double Crochet
- dc = Double Crochet
- inc = Work 2 stitches in the same stitch
- dec = Single Crochet Two Together
- FO = Fasten Off
Use a stitch marker at the beginning of each continuous round for the head, muzzle, ears and front paws. The blanket rounds are joined rather than worked continuously. It only takes one missed stitch to shift the ears or muzzle slightly off center, and that tiny difference becomes surprisingly noticeable once the face is finished.
Gauge note: Six rounds of single crochet for the head should measure close to 3 inches across before stuffing. If your head is much larger, use a smaller hook. If it is much smaller, move up one hook size so the finished lovey stays close to the measurements shown here.
Finished Measurements
After light blocking, the finished lovey measures approximately:
- Blanket body: 16 inches by 16 inches
- Head height: 3½ inches
- Head width: 3¼ inches
- Ear diameter: 1 inch
- Front paws: 1¾ inches each
- Total displayed height from top of head to bottom blanket corner: approximately 25 inches when the 16 inch blanket is positioned like a diamond
I believe this size strikes a nice balance. It is large enough for little hands to gather the blanket naturally while still fitting easily into a diaper bag or nursery basket.
Crochet Otter Lovey Head Pattern
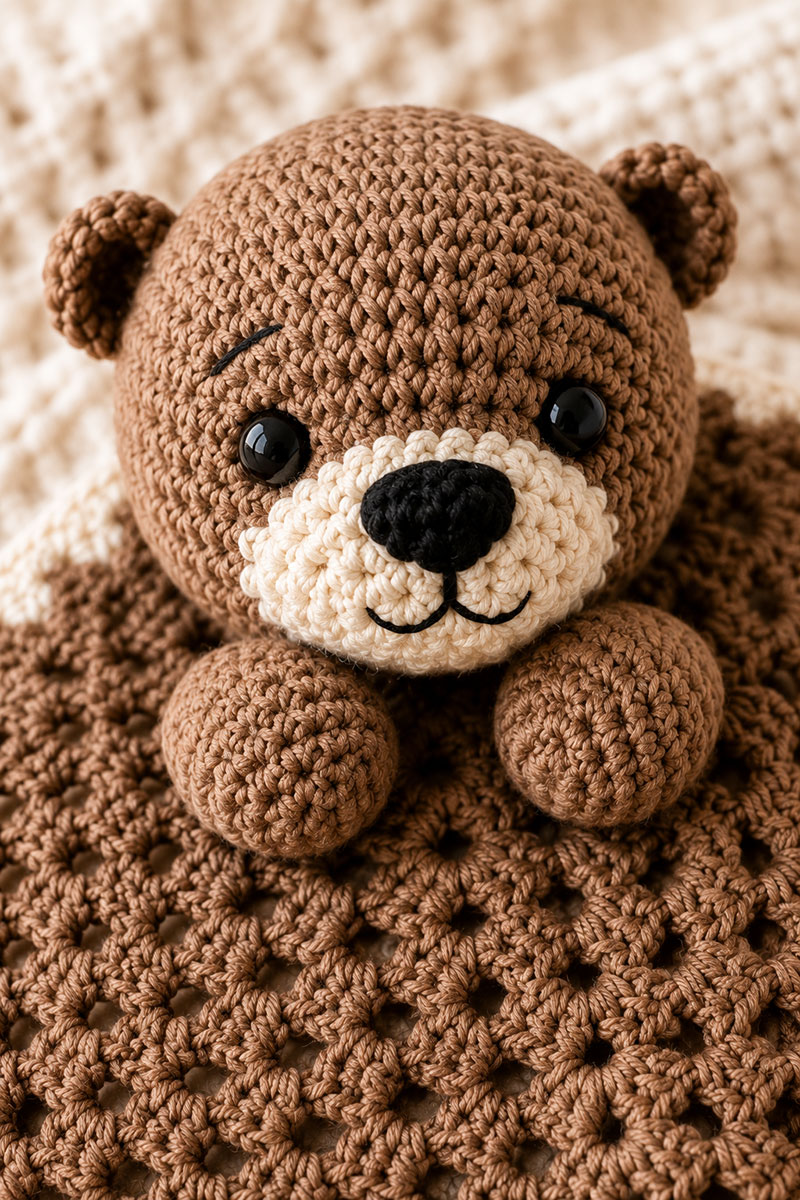
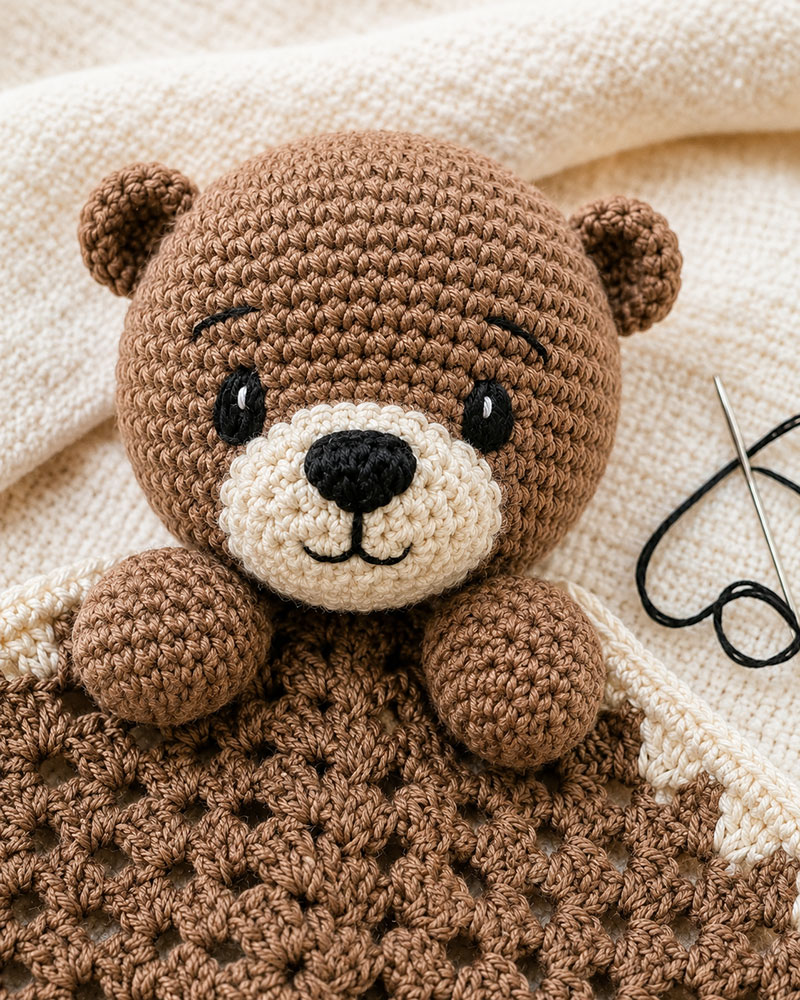
Before making the first stitch, take a close look at the example image near the top of the page. The head is nearly round instead of oval, and the cheeks are slightly fuller than those on many crochet bears. That single change helps the finished project read as an otter almost immediately.
Stuff the head gradually instead of waiting until the very end. Adding a little filling every few rounds creates a smoother shape and avoids corners that can develop if all of the stuffing is pushed into place at once.
Using brown yarn and a 4.0 mm crochet hook:
- Round 1: Make 6 sc into a magic ring. (6)
- Round 2: Inc in each stitch around. (12)
- Round 3: (Sc 1, inc) six times. (18)
- Round 4: (Sc 2, inc) six times. (24)
- Round 5: (Sc 3, inc) six times. (30)
- Round 6: (Sc 4, inc) six times. (36)
- Rounds 7 through 11: Sc in each stitch around. (36 each round)
- Round 12: (Sc 4, dec) six times. (30)
- Round 13: (Sc 3, dec) six times. (24)
- Begin adding fiberfill a little at a time, shaping the cheeks with your fingertips as you work. Don't pack the stuffing tightly. A lightly filled head keeps the cheeks rounded and prevents the blanket from pulling downward once the lovey is finished.
- Round 14: (Sc 2, dec) six times. (18)
- Round 15: (Sc 1, dec) six times. (12)
- Add the final bit of stuffing and shape the head before closing.
- Round 16: Dec six times. (6)
- Fasten off, leaving a long tail. Thread the tail through the front loops of the remaining 6 stitches, pull closed, and weave in securely.
Crochet Otter Face and Features
Here's where the character starts to appear. Otters have a surprisingly compact face. If the muzzle is too large or the ears sit too high, the finished piece begins to resemble a bear instead. Spending an extra few minutes pinning the pieces before sewing makes a noticeable difference.
Leave a long yarn tail on each piece for sewing. Trimming the tails too short almost always makes assembly harder than it needs to be.
Crochet the Otter Muzzle
Using ivory yarn:
- Round 1: Make 6 sc into a magic ring. (6)
- Round 2: Inc in each stitch around. (12)
- Round 3: (Sc 1, inc) six times. (18)
- Round 4: Sc in each stitch around. (18)
- Fasten off, leaving a 16 inch yarn tail for sewing.
Do not stuff the muzzle. Flatten it gently between your fingers so it forms a slight oval rather than a perfect circle. Position its upper edge between Rounds 9 and 10, centering it below the embroidered eye line. Pin the muzzle in place, then use the 16 inch yarn tail to sew around the entire outer edge with small, even stitches. Keep the muzzle flattened into an oval as you sew. Secure the yarn and bury the remaining tail inside the head.
Crochet the Ears
Make two using brown yarn.
- Round 1: Make 6 sc into a magic ring. (6)
- Round 2: Inc in each stitch around. (12)
- Round 3: Sc around. (12)
- Fasten off, leaving a long tail.
Flatten each ear so the two halves of Round 3 line up, creating a rounded folded edge and a straight open base. Place the ears between Rounds 5 and 6, leaving about six stitches between their inner edges. Otter ears sit fairly low, so avoid placing them directly on top of the head. Use each yarn tail to sew through both layers of the aligned Round 3 stitches and into the head along the entire base. This closes each ear as it is attached while leaving the rounded folded edge facing outward. Secure and bury the yarn tails inside the head.
Embroider the Face
Tiny changes make a surprising difference here. Moving an eye only one stitch can completely change the otter's expression, so pin the placement first if you're unsure.
- Embroider the eyes between Rounds 8 and 9.
- Leave approximately five stitches between the eyes.
- Center the nose near the upper edge of the muzzle.
- Add one short vertical stitch beneath the nose.
- Work two tiny curved stitches for the smile.
After completing each embroidered feature, pass the yarn ends through the stuffed head to a hidden point at the lower back. Tie the ends securely, pull the knot into the stuffing with the yarn needle, and trim the ends so no loose yarn remains exposed.
If the face doesn't look quite right the first time, remove the embroidery and stitch it again before assembling the rest of the lovey. A five minute adjustment here has much more impact than adding decorative details later.
Crochet the Front Paws
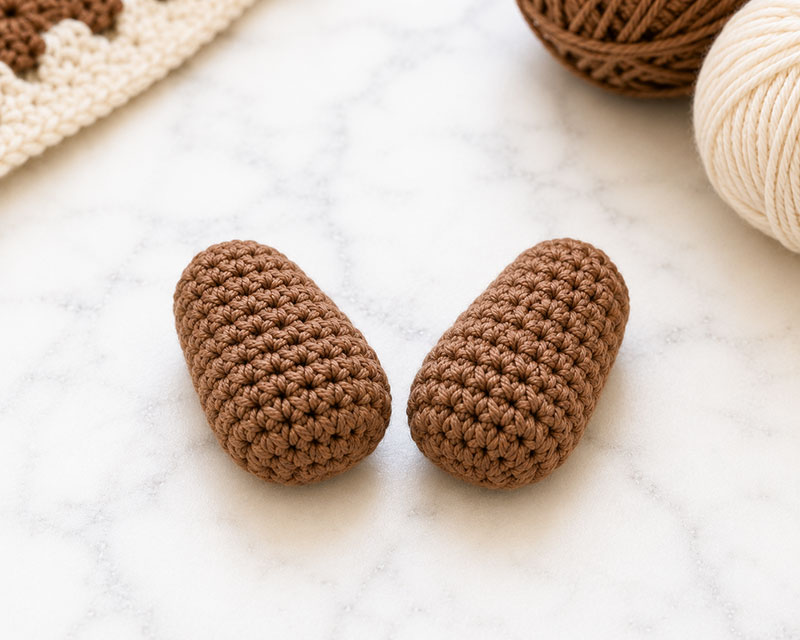
The paws are intentionally small. They suggest little front feet resting on the blanket instead of becoming oversized arms. That keeps the attention on the otter's face while giving the finished lovey another recognizable feature.
Make two using brown yarn and a 4.0 mm crochet hook.
- Round 1: Make 6 sc into a magic ring. (6)
- Round 2: Inc in each stitch around. (12)
- Round 3: (Sc 1, inc) six times. (18)
- Rounds 4 and 5: Sc in each stitch around. (18 each round)
- Round 6: (Sc 1, dec) six times. (12)
- Add a small amount of fiberfill. Keep the paw rounded, but soft enough to flatten slightly where it will be sewn to the blanket.
- Round 7: Dec six times. (6)
- Fasten off, leaving an 18 inch sewing tail. Thread the tail through the front loops of the remaining 6 stitches, pull the opening closed, and secure the closure. Do not weave in the remaining tail. Use it to attach the paw during assembly.
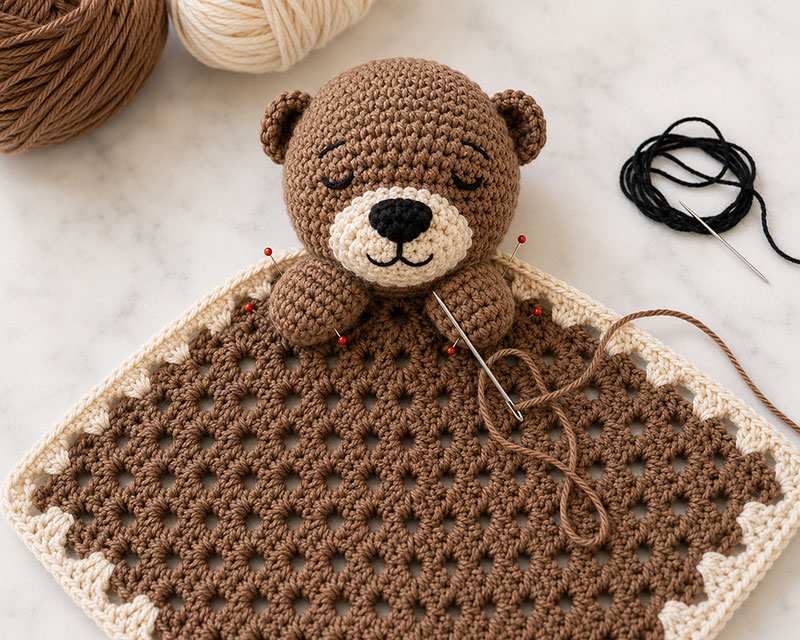
Position each paw just below the head during assembly. Let the lower back of each paw overlap the blanket by about half an inch. Sew a broad section of each paw to the blanket so the rounded paws rest against the surface instead of pivoting or sticking straight out.
Crochet the Blanket Body
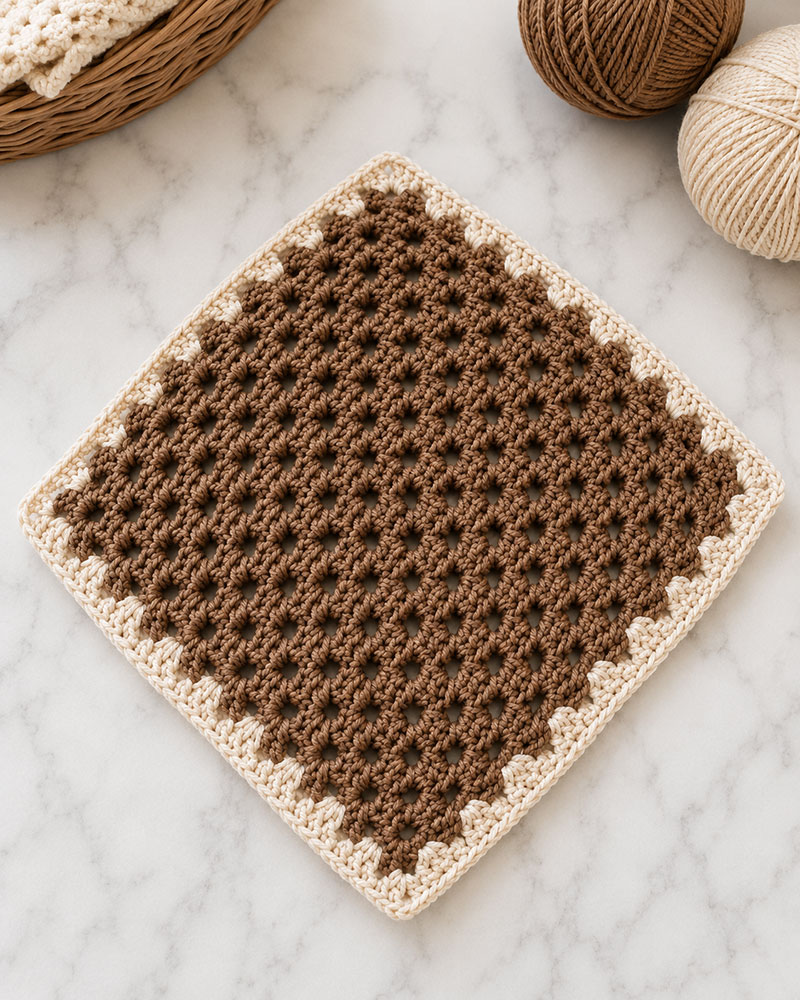
The blanket is intentionally uncomplicated because the otter head already provides plenty of interest. I believe a traditional granny square works especially well here because it folds easily into little hands while letting the otter remain the focal point.
Beginning from the center also makes it easy to stop when the blanket reaches the size you prefer.
Using brown yarn and a 4.5 mm hook:
Blanket round note: Do not turn the work. Keep the right side facing you throughout the blanket. The beginning ch 3 counts as the first dc in every granny round.
- Make a magic ring. If you prefer not to use a magic ring, chain 4 and join with a slip stitch to form a ring.
- Round 1: Ch 3. The beginning ch 3 counts as the first dc. Work 2 dc into the ring, ch 2. Work (3 dc into the ring, ch 2) three more times. Join with a slip stitch to the top of the beginning ch 3. You should have 4 groups of 3 dc and 4 corner ch 2 spaces.
- Round 2: Slip stitch in the next 2 dc and into the first corner ch 2 space. Ch 3, then work 2 dc, ch 2, 3 dc in the same corner space. Work 3 dc, ch 2, 3 dc in each of the remaining three corner spaces. Join with a slip stitch to the top of the beginning ch 3. You should have 8 groups of 3 dc.
- Rounds 3 and beyond: Slip stitch in the next 2 dc and into the first corner ch 2 space. Ch 3, then work 2 dc, ch 2, 3 dc in the same corner. Work 3 dc in each space between the 3 dc groups along the next side. In the next corner, work 3 dc, ch 2, 3 dc. Repeat the side and corner instructions two more times. Work 3 dc in each space along the final side, then join with a slip stitch to the top of the beginning ch 3.
- Round-count checkpoint: Each completed granny round adds one 3 dc group to every side. Round 1 has 1 group per side, Round 2 has 2 groups per side, Round 3 has 3 groups per side, and so on. Round number N should have N groups on each side and 4 times N groups around the entire square.
- Continue working granny rounds in brown until the square measures about 14 inches across, or approximately 2 inches smaller than the intended finished size. End after completing and joining a full round.
- Fasten off the brown yarn. With the right side facing you, join the cream or ivory yarn with a slip stitch in any corner ch 2 space. Ch 3, then work 2 dc, ch 2, 3 dc in the same corner. Complete one full granny round using the established Round 3 method. Join with a slip stitch to the top of the beginning ch 3.
- Border Round 1: Slip stitch in the next 2 dc and into the corner ch 2 space. Ch 1. The ch 1 does not count as a stitch. Work sc, ch 2, sc in the same corner space. Work 1 sc in each dc and 1 sc in each gap between the 3 dc groups across the next side. In the next corner ch 2 space, work sc, ch 2, sc. Repeat the side and corner instructions two more times. Work 1 sc in each dc and 1 sc in each gap across the final side. Join with a slip stitch to the first sc.
- Border Round 2: Ch 1. The ch 1 does not count as a stitch. Sc in the same stitch. Work 1 sc in each remaining sc around. In every corner ch 2 space, work sc, ch 2, sc. Do not work into the first sc again when you return to the beginning of the round. Join with a slip stitch to the first sc. Fasten off and weave in the yarn securely.
- Lay the blanket flat and measure it without stretching. Lightly block it to approximately 16 inches by 16 inches, keeping all four corners square and the side edges straight.
Lay the blanket flat before attaching the head. If one side has stretched slightly farther than another, a light blocking session will even everything out and make final assembly much easier.
Assemble the Crochet Otter Lovey Neatly
Assembly is where a lovey either looks finished or homemade in the wrong way. Take the extra time to pin everything first, then hold the piece up from a few angles before sewing. A part can look centered on the table and still lean once the blanket hangs.
- Lay the blanket right side up in a diamond position, with one corner pointing up and the opposite corner pointing down.
- Center the head over the top corner with the face looking forward.
- Position the head so the lower back overlaps the blanket corner by about 1 inch.
- Pin the head in place. Lift the blanket and view it from the front before sewing so the head does not lean to either side.
- Cut a 36 inch length of brown yarn and thread it through the yarn needle.
- Using that yarn, sew the head to the blanket around the full oval-shaped contact area with small, closely spaced stitches. Make a second pass around the attachment area for additional security.
- Position the two front paws below the head, leaving approximately ½ inch between their inner edges.
- Let the lower back of each paw overlap the blanket by about ½ inch. Using each paw's 18 inch sewing tail, sew a broad section of the paw to the blanket so it cannot pivot outward.
- Weave in every end carefully. Gently pull the head and each paw in several directions to confirm that all attachment seams remain secure.
Do not rush the head attachment. That seam carries the most movement when the lovey is picked up, folded, washed, or tucked into a gift basket.
Crochet Otter Lovey Placement Measurements
Small measurement choices make this otter look intentional instead of patched together. Keep the face low enough to look like an otter, but not so low that the muzzle disappears into the blanket edge.
- Muzzle upper edge: between Rounds 9 and 10 of the head
- Eyes: between Rounds 8 and 9, about 5 stitches apart
- Ears: between Rounds 5 and 6, about 6 stitches apart across the top curve
- Head overlap on blanket: about 1 inch
- Paw spacing: approximately ½ inch between the inner edges of the paws
- Paw overlap on blanket: about ½ inch
If the face looks more like a bear, move the ears slightly lower and keep the muzzle more oval than round. That one adjustment usually brings the otter shape back into focus without adding extra pieces.
Baby Safety Notes for Crochet Loveys
A handmade lovey can be a thoughtful nursery gift, but it should still be made with baby safety in mind. The version with the most decorative details is not always the safest choice for a baby.
- Use embroidered eyes instead of buttons or plastic safety eyes.
- Do not add beads, charms, ribbons, bells, or removable parts.
- Sew every attached piece with tight, even stitches.
- After washing, check the head, muzzle, ears, paws, embroidered features and all attachment seams for looseness.
- Use washable yarn that can handle normal baby messes.
- Keep the lovey out of an infant's crib, bassinet, or other sleep space during sleep. Use it only during supervised awake time.
The U.S. Consumer Product Safety Commission safe sleep guidance is a good reminder that blankets, pillows, and loose items do not belong in a crib with a sleeping baby. I would treat this otter lovey as a supervised comfort item, a baby shower gift, or nursery keepsake until the child is old enough for it to be used appropriately.
Fix Common Crochet Otter Lovey Problems
Little crochet animals can change expression quickly. If something looks off, it is almost always placement, stuffing, or tension rather than the whole pattern being wrong.
- The otter looks like a bear: Move the ears lower and flatten the muzzle into a wider oval.
- The head pulls the blanket down: Remove a little stuffing and resew the head with more stitches around the base.
- The face looks uneven: Take out the embroidery and restitch before attaching the head to the blanket.
- The blanket border pulls or curls: Undo the tight border round and rework it with looser tension or the next larger hook, keeping the same corner increases.
- The paws stick out: Remove some stuffing if necessary, then sew a wider section of each paw to the blanket so the rounded paws rest against the surface.
Many small issues are easier to fix before the final assembly. I believe pinning all pieces in daylight, even for just a few minutes, saves more frustration than any other step in this project.
Using the Otter Lovey as a Handmade Baby Gift
An otter lovey fits nicely with woodland, river, lake, ocean, and animal nursery ideas without locking the room into a heavy theme. That is one reason I like it for a baby shower gift. It can look playful in a baby boy nursery, gentle in a baby girl room, or neutral in a shared gift basket.
For a coordinated handmade bundle, pair this pattern with another animal from the animal lovey pattern collection. The crochet bunny lovey pattern leans classic, the puppy lovey crochet pattern feels familiar for family gifting, and the crochet elephant lovey free pattern works especially well when the nursery has gray, ivory, or animal decor.
If the gift is for someone who likes animals but does not want a heavily themed nursery, the otter is a nice middle ground. It has personality without taking over the whole room.
More Baby Crochet Lovey Patterns to Make Next
Once you understand the head, blanket, and placement method in this crochet otter lovey pattern, the rest of the animal lovey family becomes easier to picture. The main difference from one design to the next is usually the face shape, ear placement, and small animal details.
For a woodland style gift, try the crochet koala lovey pattern or the crochet bunny lovey pattern. For something with a little more personality, the crochet monkey lovey pattern, crochet dinosaur lovey pattern, and crochet dragon lovey pattern give you more character while staying tied to baby gifts and nursery crochet.
Crochet Otter Lovey Pattern FAQ
Is this crochet otter lovey pattern suitable for beginners?
Yes, if you're already comfortable making a magic ring, working in continuous rounds, and counting stitches. The blanket uses familiar stitches, and the otter's personality comes from careful placement rather than complicated shaping.
How is a crochet otter lovey different from an amigurumi otter?
An amigurumi otter is a complete stuffed toy. A crochet otter lovey combines a lightly stuffed head with a blanket body that little hands can grasp. The blanket is the working part of the project, while the otter provides the character.
What yarn works best for a baby lovey?
A smooth worsted weight cotton or cotton blend gives clear stitch definition and stands up well to repeated washing. If you substitute another yarn, make a small swatch first so you can check the finished size before starting the entire project.
Can I use plastic safety eyes?
For a baby lovey, I recommend embroidered eyes instead. They avoid hard pieces that could loosen over time and keep the design more appropriate for a nursery gift.
How much yarn does this crochet otter lovey use?
Plan on approximately 180 yards of the main color and 60 to 80 yards of cream or ivory yarn for the muzzle, final contrast round, and border. You will also need a small amount of dark yarn for the embroidered face. Because tension and the number of granny rounds affect yardage, keep additional main-color yarn available.
Can I make the blanket larger?
Yes. Continue adding brown granny-square rounds until the blanket is approximately 2 inches smaller than your intended finished size. Then add the cream or ivory granny round and the two border rounds. Measure the blanket without stretching before blocking it lightly. Keep the head the original size so the finished proportions stay balanced.
How to Wash a Crochet Otter Lovey
Handmade baby gifts almost always need cleaning sooner than expected. A little planning now helps the lovey stay looking its best through many wash cycles.
- Wash in cool or lukewarm water using a mild detergent.
- Place the lovey inside a mesh laundry bag if using a washing machine.
- Reshape the head while it is still damp.
- Lay flat on a clean towel until completely dry.
- Inspect the embroidered face and sewn seams after washing.

Why This Crochet Otter Lovey Pattern Works So Well
Some animal loveys depend on lots of tiny details to make them recognizable. An otter doesn't need that. Rounded cheeks, a compact muzzle, small ears, and a pair of little paws are enough for people to recognize the animal almost immediately.
That simplicity is one reason I think this pattern is enjoyable to make. The finished lovey has plenty of personality without requiring dozens of separate pieces or advanced shaping techniques.
If you're putting together several handmade baby gifts, this design pairs naturally with projects from my Free Baby Crochet Patterns collection. You'll also find more nursery-friendly animals on my Crochet Animal Lovey Patterns page, including the Crochet Koala Lovey Pattern, Crochet Elephant Lovey Pattern, Crochet Cat Lovey Pattern, and Puppy Lovey Crochet Pattern.
When you click on links to various merchants on this site and make a purchase, this may result in this site earning a commission. This does not affect the price you pay.

UBGI Gold Standard 2026
Reviewed under the site's
editorial checklist.
Photos, decorating ideas, party setups and reader submissions are shared for inspiration unless a page is specifically presented as a pattern, tutorial, reference guide or step-by-step project. Follow the instructions, measurements, safety guidance and manufacturer directions provided for the particular project or product.
About Jan | Contact | Baby Nursery Ideas (Blog) | Site Map | Privacy Policy | Disclosure Policy | Disclaimer | Affiliate Disclosure | Earnings Disclosure | Facebook | Pinterest
I am a participant in the Amazon Services LLC Associates Program, an affiliate advertising program designed to provide a means for us to earn fees by linking to Amazon. As an Amazon Associate I earn from qualifying purchases.
Copyright © 2006-2026. All Rights Reserved.