Baby Handprint Crafts Worth Framing and Keeping
By Jan Bay
Baby handprint crafts are most meaningful when the baby’s actual print stays at the center of the design. These ideas turn one small handprint into framed nursery art, a clay keepsake or a handmade gift marked with the baby’s name, age and date.
Explore More Baby Keepsake and Craft Ideas
Baby Crafts for Keepsakes and Handmade Gifts
Baby Footprint Crafts and Keepsakes
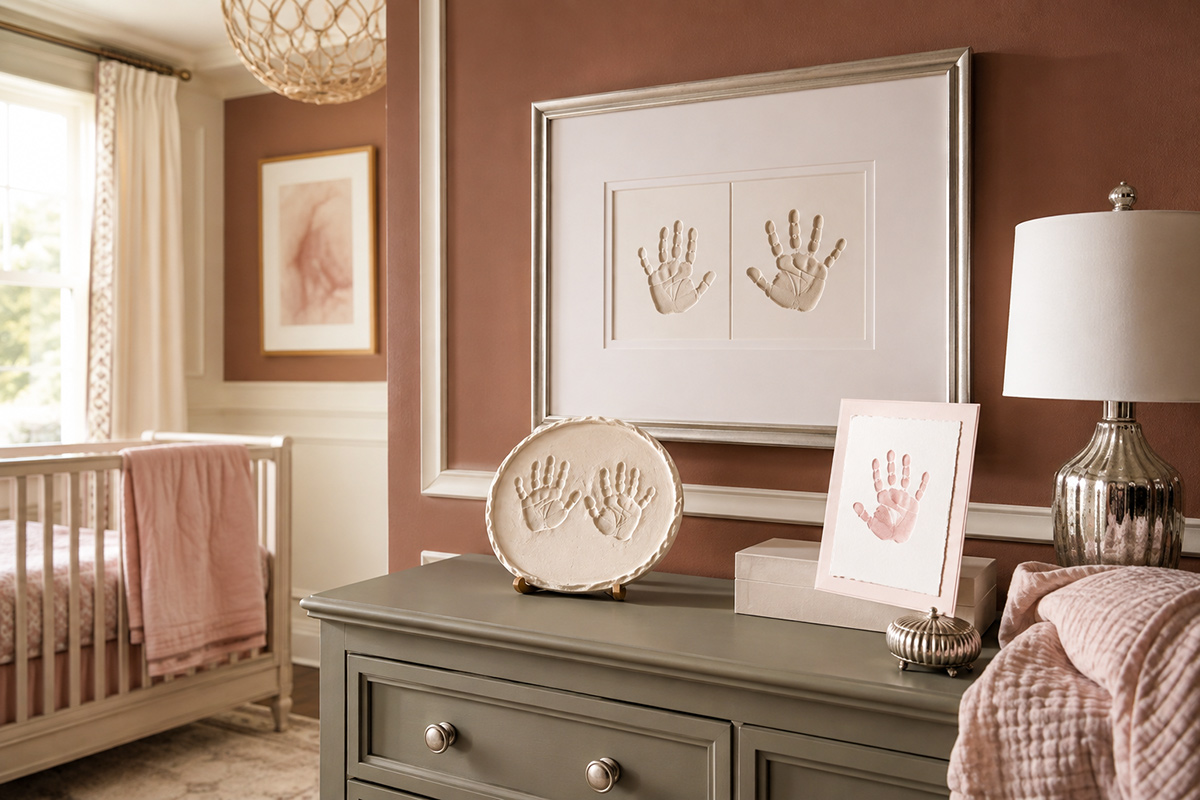
Baby Handprint and Footprint Keepsake Kit
Before choosing a kit, check whether it uses clean-touch ink, paint or clay; whether the paper, clay surface or frame opening is large enough for the baby’s hand; how the material dries or cures; and whether the package includes enough paper or clay for more than one attempt.
Jump to the Baby Handprint Craft Ideas
Capture a Clear Baby Handprint
Add the Baby’s Name, Age and Date
Frame and Display the Finished Keepsake
Quick answer: The best baby handprint crafts preserve a clear print, record the baby’s name, age and date, and turn it into framed art, a clay plaque or a gift that remains easy to display.
Begin with the Baby’s Handprint, Not the Decoration
The best baby handprint crafts begin with the part that cannot be recreated later: the baby’s actual print. Before choosing a frame, ribbon, paint color or nursery theme, decide how the tiny fingers and palm will remain easy to see.
A simple print often has more meaning than a crowded design. Leave enough open space around it, then add only the information the family will want to remember, such as the baby’s name, age and the date the print was made.
Decorative elements can turn the print into flowers, woodland animals, ocean shapes or a family tree, but the hand should still be recognizable. When the design hides the fingers or changes the shape too much, the keepsake starts to look like ordinary craft art instead of a record of the baby at that age.
Before applying paint or ink, write the baby’s name and date lightly on the back of the paper or canvas. That small step prevents an important keepsake from becoming an unidentified print later.
I believe the most successful handprint keepsakes leave the palm and fingers recognizable. The frame, lettering and nursery theme should support the print, not redesign it.
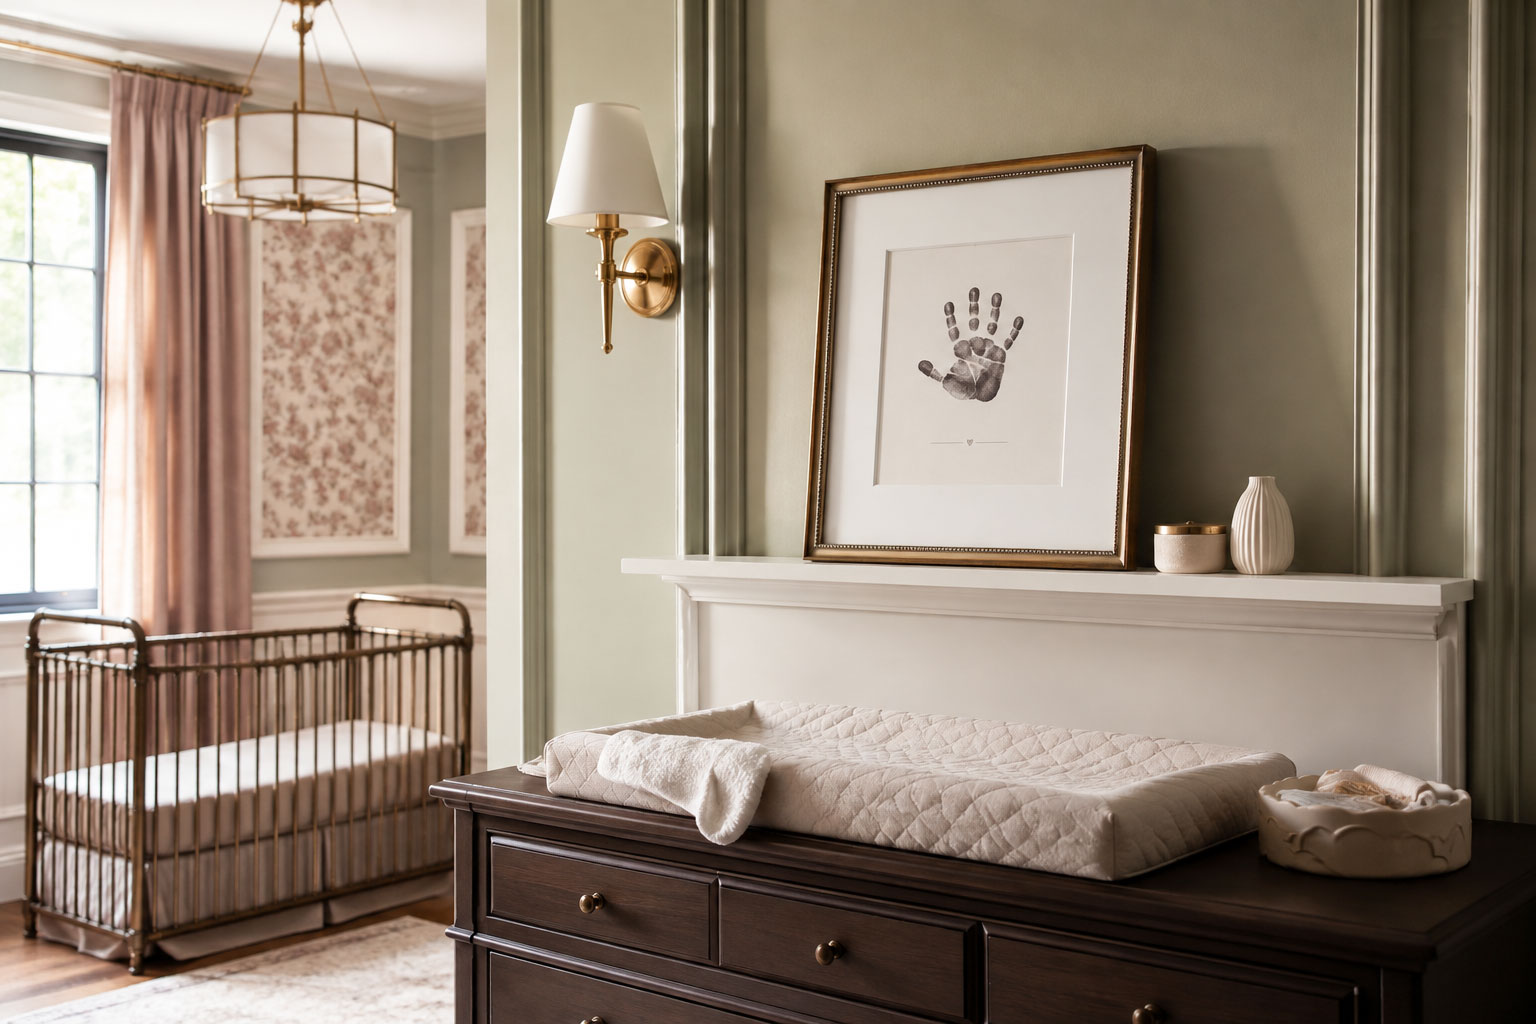
Choose Paint, Ink or Clay for the Handprint
The material changes both the look of the finished craft and the way the print is collected. Paint makes a solid, colorful print. Ink gives finer lines and works well for framed paper art. Clay records the shape as an impression instead of adding color.
Paint for Baby Handprint Art
For direct contact with the baby’s hand, use only a product whose label specifically permits that use, or choose a clean-touch printing system that keeps ink away from the skin. The words washable and non-toxic do not, by themselves, mean that an ordinary craft paint is intended to be applied to the body. Avoid paint made for walls, furniture, ceramics or outdoor projects.
Place a small amount of paint on a flat plate and spread it into a thin layer with a foam brush. Brush the paint lightly across the palm and fingers rather than pressing the baby’s hand into a puddle. Too much paint fills the little spaces between the fingers and turns the print into a solid shape.
Ink for a Fine Baby Handprint
A baby-safe, mess-free ink pad can capture palm lines and finger shapes with less cleanup. Some pads keep the baby’s skin from touching the ink, which can be useful when the finished print will be added to a baby handprint and footprint frame.
Ink prints are best made on smooth, heavyweight paper. Textured cardstock can interrupt the lines, while thin paper may wrinkle or tear during framing.
Clay for a Handprint Impression
Air-dry clay and impression clay create a recessed print that can become a plaque, shadow-box feature or nursery display. The clay should be soft enough to accept the print without requiring firm pressure against the baby’s hand.
Roll the clay to an even thickness on a clean surface before making the impression. Leave enough space around the hand for trimming, a name, a date or a hanging hole. Follow the clay maker’s drying directions because drying time and shrinkage vary by product.
Paint, ink and clay should be used only with close adult supervision. Keep the materials away from the baby’s mouth and eyes, wash the baby’s hand promptly after making the print, and treat the finished keepsake as decoration rather than a toy.
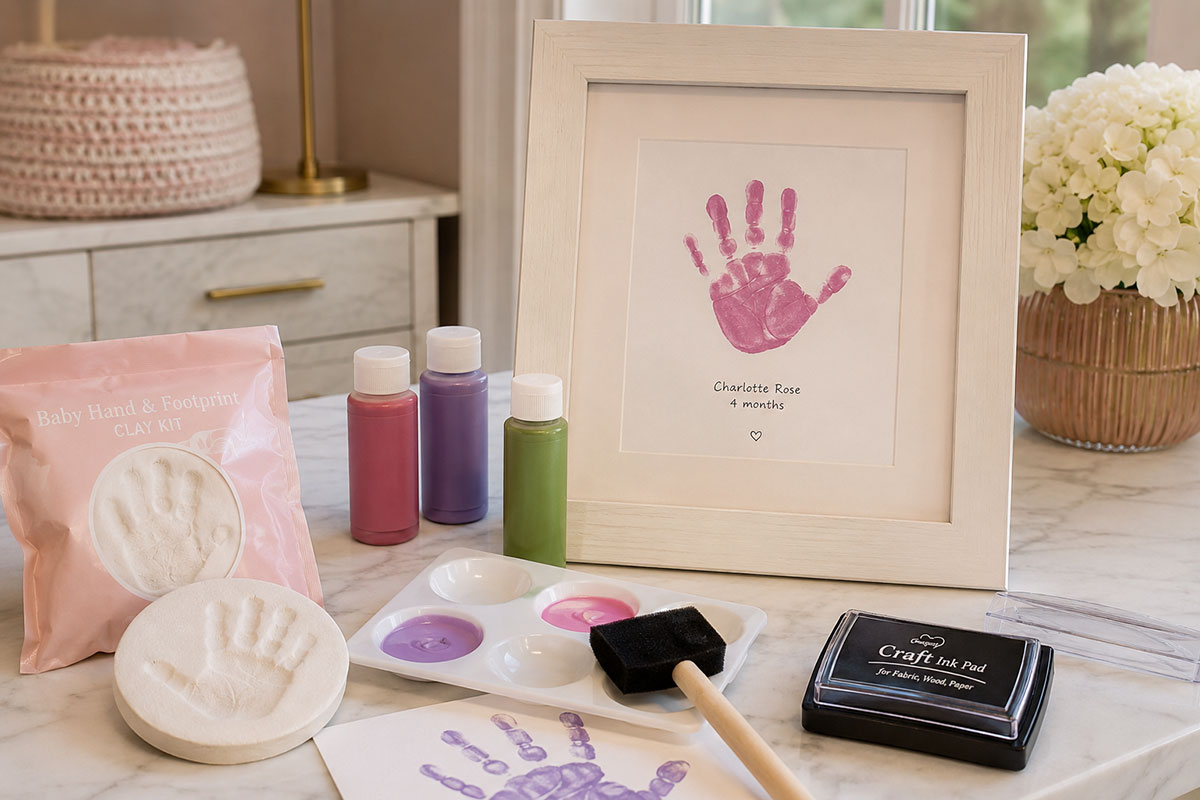
How to Capture a Clear Baby Handprint
A clear baby handprint often comes from preparation rather than repeated attempts. Set out every supply before bringing the baby to the work area so the print can be made quickly and the hand can be cleaned right away.
Supplies
- A product specifically labeled for the intended skin-contact use, or a clean-touch baby ink-print system
- Heavyweight smooth paper, cardstock or a prepared canvas
- A foam brush for applying a thin coat of paint
- A firm board or tray to support the paper
- Several practice sheets
- A damp washcloth
- Mild soap and water for cleanup
- A pencil for marking the name and date on the back
Step-by-Step Handprint Method
- Choose a settled moment. Make the print when the baby is comfortable and another adult is available to help. One person can support the baby while the other handles the paper and paint.
- Secure the paper. Place it on a firm, flat surface and tape the corners to a board if it tends to slide. A moving sheet can smear the palm before the fingers touch down.
- Prepare the hand. Make sure the palm is clean and dry. Gently open the fingers without pulling or forcing them apart.
- Apply a thin coat. Use a foam brush to spread paint across the palm and each finger. Cover the skin evenly, but do not leave thick ridges or puddles.
- Lower the palm first. Guide the center of the hand onto the paper, then press each finger down gently. Keep the hand in one position rather than rocking it from side to side.
- Lift straight upward. Support the wrist and raise the hand without dragging the fingers across the page.
- Clean the hand promptly. Wipe away the paint, then wash the baby’s hand according to the product directions.
- Let the print dry flat. Do not add names, dates or decorative painting until the handprint is completely dry.
Make two or three prints while the supplies are ready. A small gap in one finger does not always need to be repaired. Those little differences can make the finished keepsake feel more like the baby’s real hand and less like a stamped design.
Do not paint missing fingers back into place or redraw the outline so heavily that the original print disappears. Choose the clearest impression, add the date, and let the handprint remain the focus.
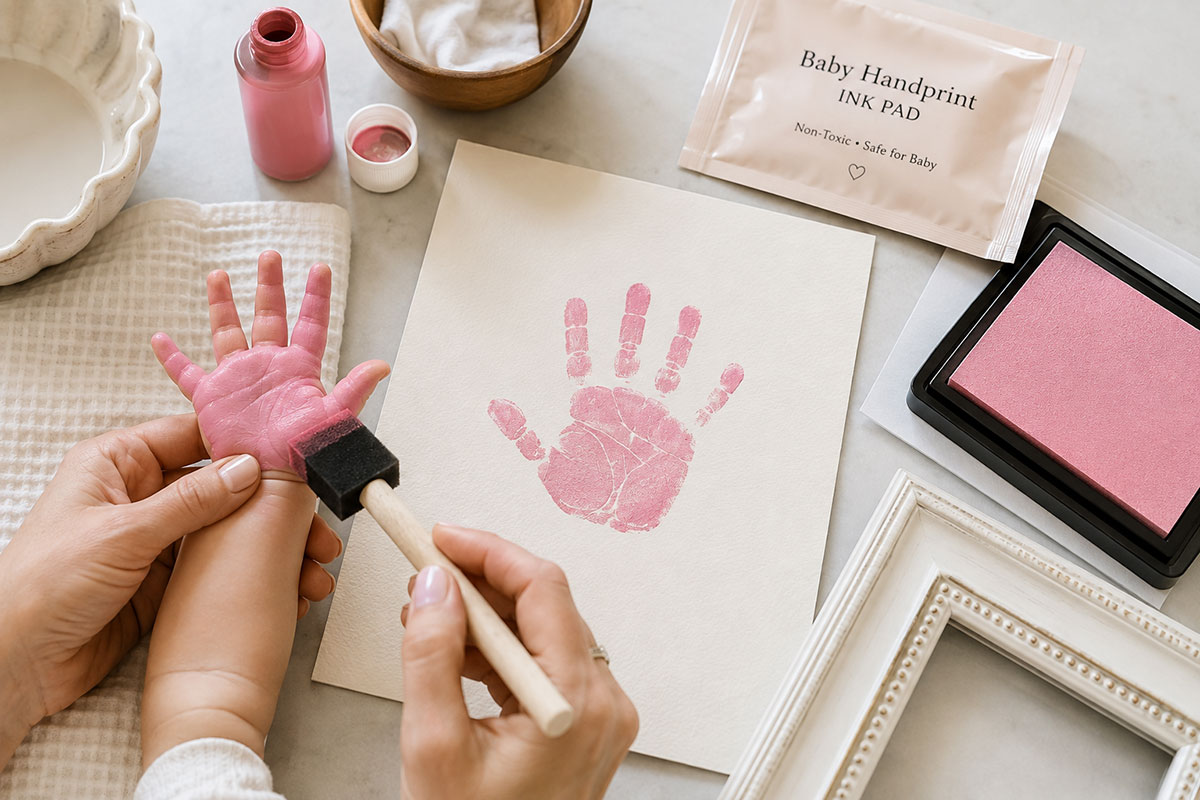
Framed Baby Handprint Art
A framed handprint can be simple enough for a modern nursery and personal enough to become a meaningful family keepsake. The print does not need a busy border or a long verse. A clean mat, a well-chosen frame and a small line of identifying information are often enough.
Materials
- A dry baby handprint on heavyweight paper
- An acid-free backing sheet or mat
- A frame with a removable back
- A ruler
- A pencil
- Archival photo corners or acid-free mounting tape
- A fine-tip archival pen, if adding a name or date by hand
- An optional baby photograph, hospital bracelet copy or birth announcement
How to Make a Framed Baby Handprint Keepsake
- Choose the best print. Look for a handprint with a clear palm and enough visible finger shape to recognize the baby’s hand. A small uneven area is not a reason to discard it.
- Plan the finished layout. Place the handprint near the center or slightly above center if the baby’s name and date will appear underneath. Leave open space around the print so it does not feel crowded inside the frame.
- Trim only after measuring. Measure the frame opening and mat before cutting the paper. Keep more border than you think you need until the final placement is settled.
- Add the identifying information. Write the baby’s name, age and the date beneath the print in small, neat lettering. Another option is to print the wording on a separate strip of matching paper and mount it below the handprint.
- Mount without damaging the print. Use archival photo corners or a small amount of acid-free mounting tape on the back. Do not place adhesive directly over painted or inked areas.
- Close and inspect the frame. Check that the paper lies flat, the wording is level and no part of the handprint is hidden beneath the mat.
A square frame works well for one centered handprint. A wider frame provides room for a print beside a baby photograph, while a shadow box can hold a handprint with a copied hospital bracelet, a small name card or another flat keepsake.
Keep original hospital items and anything irreplaceable away from adhesives that may discolor them. A photograph or scanned copy can preserve the look while the original remains stored safely.
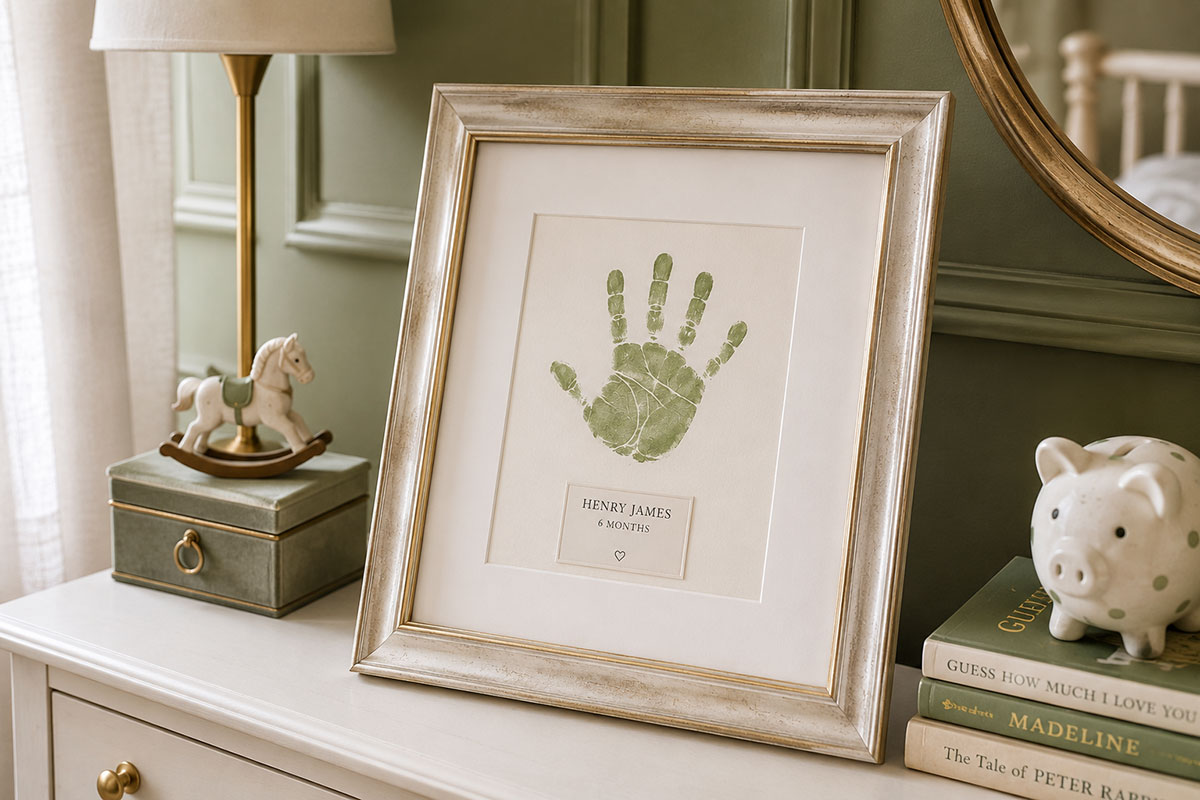
The frame should suit the room instead of competing with the print. Natural wood, painted wood and narrow metal frames can all work with the ideas on the DIY nursery decor page. Choose a mat and frame that allow the baby’s hand to remain the first thing people see.
Baby Handprint Nursery Art Ideas
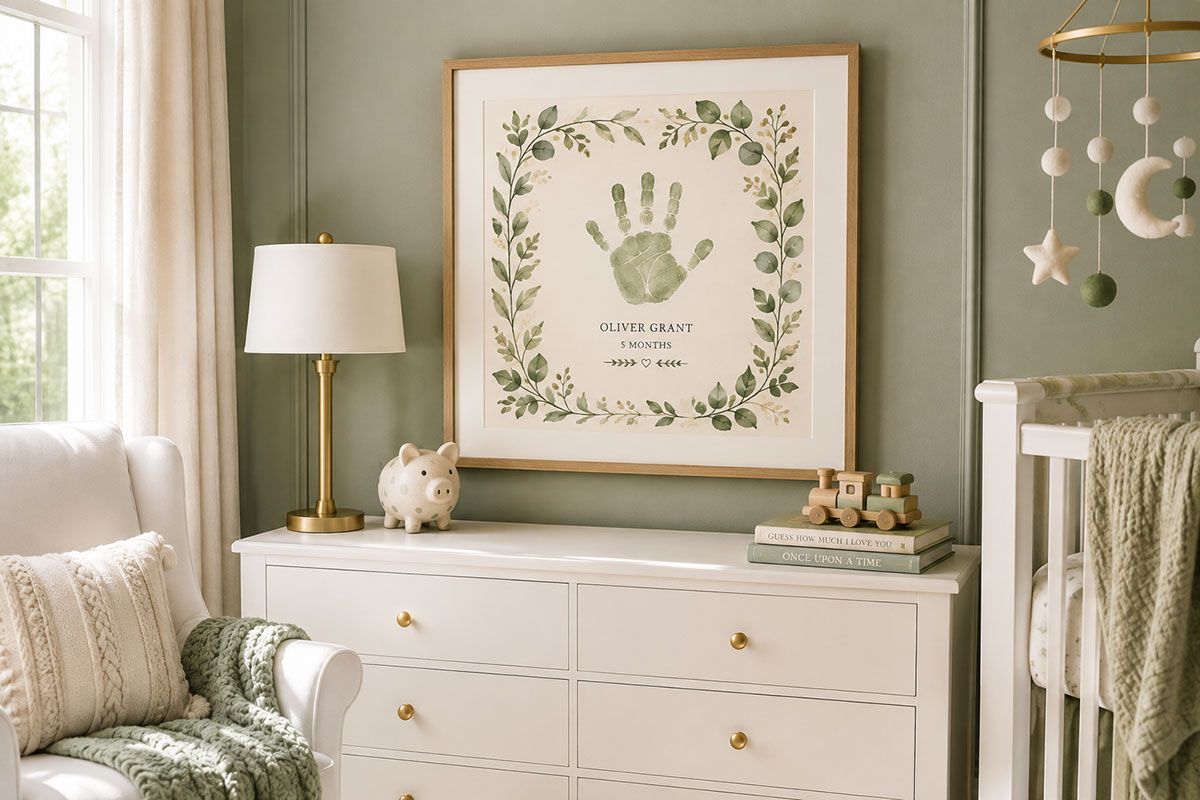
Baby handprint nursery art should look at home with the rest of the room rather than like a temporary craft pinned to the wall. Begin with the nursery colors and choose one simple way to build around the print. The handprint can suggest a flower, tree, animal or family grouping without losing the shape of the palm and fingers.
Minimal Name-and-Date Handprint
Place one handprint in the center of white or lightly colored archival paper. Add the baby’s name beneath it, followed by the birth date or the date the print was made. A wide mat gives the small print enough breathing room and makes it suitable for a dresser, bookshelf or gallery wall.
Birth-Flower Handprint Art
Turn each fingertip into the beginning of a flower without painting over the original print. Add slender stems beneath the palm and place small painted or paper flowers near the fingertips. Use the baby’s birth-month flower as inspiration, but keep the arrangement loose enough that the tiny hand remains easy to recognize.
Woodland Handprint Art
A brown, rust or muted green handprint can become part of a woodland nursery picture. Use the palm as the body of a simple tree canopy or place the print beside delicately painted leaves, mushrooms and forest shapes. Avoid adding cartoon faces or covering the fingers with heavy decoration.
Woodland art looks especially natural beside wood frames, woven storage and the earthy colors found in many baby nursery themes.
Ocean and Whale Nursery Art
Use a blue handprint as the central shape in an ocean scene, then add a few small waves or water droplets around it. The palm can suggest a whale’s body while the fingers form the lower edge, but the added lines should remain light. A deep blue, sea-glass green or clear turquoise print can provide color without requiring a crowded background.
Teddy Bear Handprint Keepsake
Place a warm brown handprint beside a simple bear silhouette, the baby’s initial or a small line of wording. It does not need ears, eyes and a face painted over the palm. Keeping the print intact gives it a more polished look and allows it to coordinate with a teddy bear nursery theme without becoming too childish.
Make a Coordinated Set of Nursery Prints
- Use the same paper, mat color and frame style for every piece.
- Repeat one paint color from the crib bedding, curtains or wall art.
- Pair the handprint with a footprint, baby photograph or birth-information print.
- Keep lettering small so it supports the artwork instead of dominating it.
- Leave enough blank space around each print to make the grouping feel balanced.
A set of three frames can include one handprint, one footprint and one simple name-and-date panel. This arrangement fills more wall space without asking one little handprint to carry an elaborate design.
Clay Baby Handprint Keepsakes
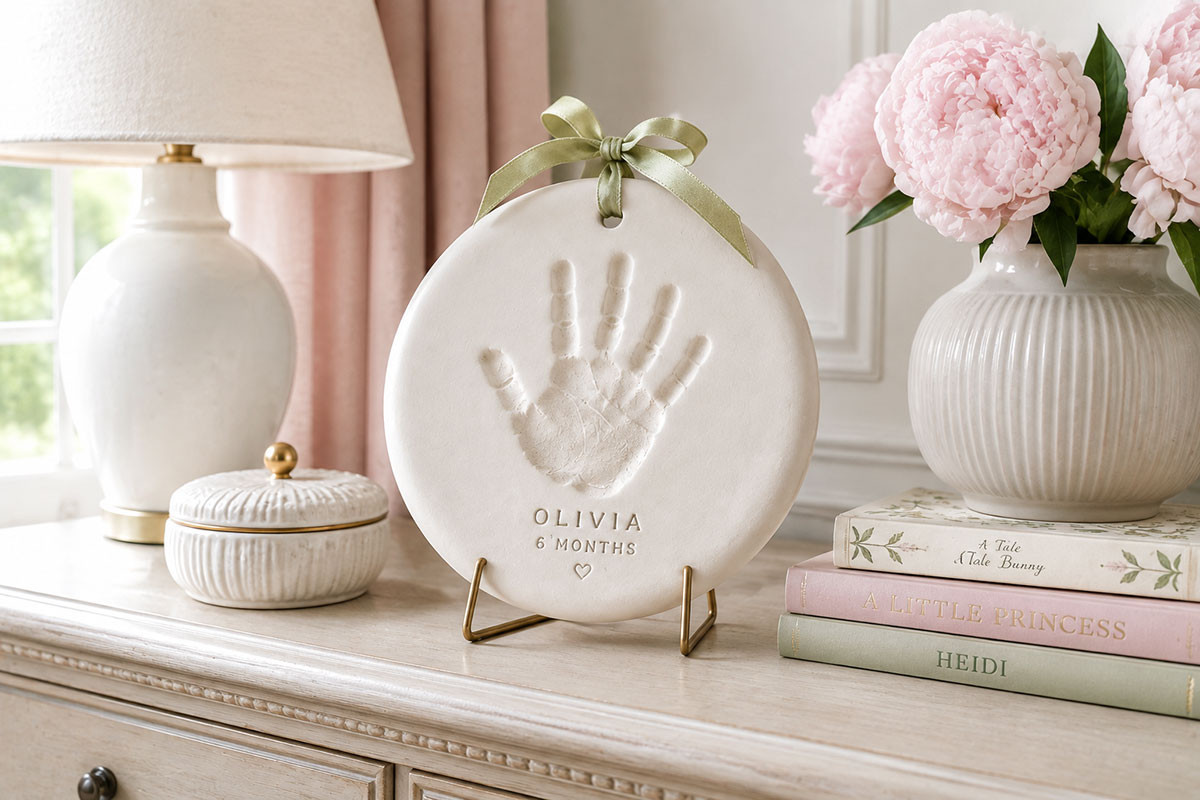
A clay handprint keepsake records the depth and shape of the baby’s hand rather than transferring color to paper. The finished piece can become a framed plaque, a shadow-box insert or a small nursery display.
Choose a clay made for handprint impressions and follow the maker’s directions for drying, baking or sealing. Craft clay products are not all prepared in the same way, so the package instructions should guide the drying time and finish.
Materials
- Air-dry clay or impression clay suitable for keepsake crafts
- A smooth rolling pin
- Parchment paper or a clean nonporous work surface
- Two wooden guides of equal thickness for rolling evenly
- A round cutter, bowl or paper template
- A drinking straw or small tool for an optional hanging hole
- A damp cloth for smoothing the edges
- A toothpick or clay lettering tool
- Fine sandpaper, if permitted by the clay maker
- Water-based craft paint and a soft brush, if color will be added
- A compatible clear sealer, if recommended for the product
- Ribbon for display, if desired
How to Make a Clay Baby Handprint Plaque
- Prepare the work surface. Lay the clay on parchment paper or another smooth surface that will not leave a pattern on the back.
- Roll the clay evenly. Place equal-height wooden guides on each side and roll until the clay has a consistent thickness. A thin plaque may crack, while an overly thick one can take much longer to dry.
- Plan the shape before making the print. Lightly mark the outer edge with a cutter or template, but leave the clay uncut until the handprint has been accepted. This gives you room to adjust the final shape.
- Position the baby securely. Have another adult support the baby while you guide the hand. Keep the clay on a firm surface rather than lifting it toward the baby.
- Press the palm gently. Lower the palm into the clay, then guide each finger down. Use only enough pressure to create a visible impression. Do not force the hand flat.
- Lift the hand straight up. Raising the wrist slowly helps prevent the fingers from dragging through the clay.
- Inspect the impression. A clear palm with several visible fingers is enough. If the clay can be safely rerolled according to the product directions, you may make another attempt.
- Trim the plaque. Center the handprint inside the chosen shape and cut the outside edge. Smooth rough areas with a damp fingertip or cloth without touching the impression.
- Add the name and date. Press the wording into the clay with a small lettering tool, or leave room to paint it after drying.
- Make a hanging hole. Use a straw near the top edge while the clay is still soft. Leave enough clay above and around the hole to prevent cracking.
- Dry or cure the plaque. Keep it flat and follow the product directions. Turn it only when instructed and do not rush the process with extra heat unless the manufacturer specifically allows it.
- Finish the surface. Smooth permitted rough edges, add paint if desired and apply only a sealer that is compatible with the clay.
Soft white, pale blue, muted green and warm clay tones can blend easily with nursery decor. Another option is to leave the clay unpainted and add only the baby’s name and date in a small amount of color.
Ribbon can make the plaque look ready to hang, but it should remain a display piece. Keep clay plaques, cords, glass frames and small decorative additions securely out of the baby’s reach.
Baby Handprint Gifts for Parents and Grandparents
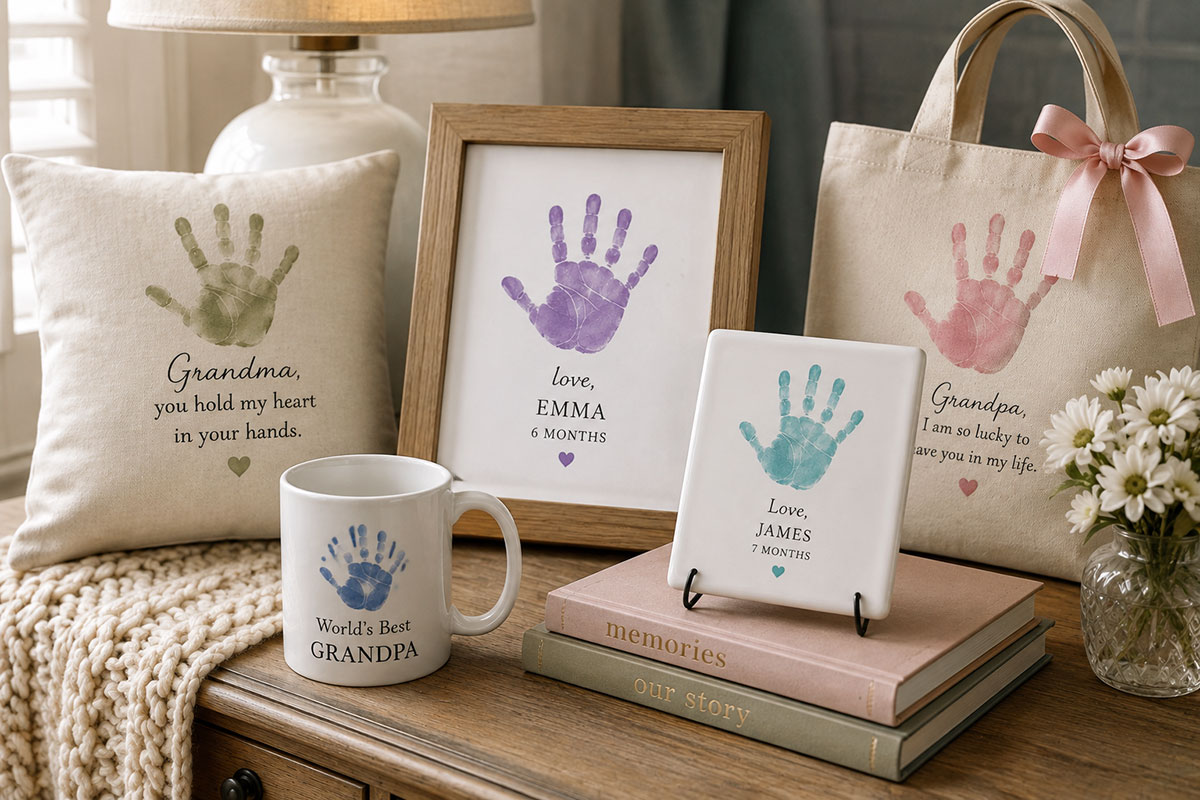
A gift built around one real handprint needs very little decoration. The print already carries the meaning, so the rest of the project should protect it, identify it and present it neatly.
A framed handprint paired with a recent baby photograph makes a thoughtful gift for grandparents, parents or another close family member. It also avoids turning the print into a seasonal object that may be packed away after a holiday.
If you want to include a second keepsake, my personalized baby gifts you can make offer name, embroidery and birth-detail ideas to go with the handprint.
Framed Baby Handprint and Photo Gift
Materials
- One dry baby handprint on smooth, heavyweight paper
- One clear baby photograph
- A double-opening frame or a wide frame with a custom-cut mat
- Acid-free backing paper
- Archival photo corners or acid-free mounting tape
- A ruler and pencil
- A fine-tip archival pen
- An optional printed name-and-date card
Step-by-Step Instructions
- Select the handprint and photograph. Choose a print with a visible palm and fingers, then pair it with a photograph taken near the same date. The images do not need matching backgrounds.
- Measure the frame openings. Check how much of the paper and photograph will remain visible beneath the mat before trimming either piece.
- Prepare the identifying line. Add the baby’s name, age and handprint date beneath the print. Keep the lettering small enough that it does not compete with the hand.
- Arrange the two pieces. Place the photograph on one side and the handprint on the other. Leave a similar amount of open space around each so the finished frame looks balanced.
- Mount the paper and photograph. Secure them to acid-free backing with archival corners or mounting tape placed on the reverse side.
- Check the alignment. Set the mat over the arrangement before closing the frame. Make sure the handprint is fully visible and the name line is level.
- Finish the back. Add a short handwritten note to the frame backing with the occasion and giver’s name. This keeps the front clean while preserving another useful piece of family information.
Other Baby Handprint Gift Ideas
- Grandparent shadow box: Pair the print with a photograph and a copied birth announcement.
- Handprint canvas: Use one centered print with the baby’s name beneath it and a narrow painted border.
- Family flower arrangement: Use handprints from siblings as separate flowers, with each child’s name and date placed below the design.
- Parent keepsake card: Mount a small handprint on folded heavyweight cardstock and write the message inside rather than across the print.
- Matching framed pair: Make one frame for each set of grandparents using prints collected during the same session.
When making more than one gift, collect several prints before cleaning up the supplies. Use the same paint color, paper and date on each, but let small differences remain. Each print should look like the baby’s hand, not like a copy that has been corrected until every finger matches.
Glass frames, clay pieces, ribbon loops and small decorations are intended for display. Package them securely and remind the recipient to keep the finished keepsake outside the baby’s reach.
Add the Baby’s Name, Age and Date
A handprint becomes much more useful as a family record when it includes a name and date. Without that information, even a carefully framed print can become difficult to identify later, especially when several children’s keepsakes are stored together.
Choose the wording before the final paper is trimmed or the clay is shaped. This prevents the name and date from being squeezed into whatever space remains.
What to Include
- The baby’s full name or first name
- The date the handprint was made
- The baby’s age, such as 6 weeks or 8 months
- Birth information when it is directly connected to the design
- A short occasion line, such as First Mother’s Day, when appropriate
The date the print was made is more accurate than using only the baby’s birth date. A handprint collected at nine months records a very different stage than a newborn print, so include the age when that difference matters.
Simple Wording Examples
- Clara, 3 months, April 18, 2026
- James Michael at 6 weeks
- Emma’s first handprint, August 2026
- Made for Grandma with love from Noah
- Our family, 2026
Keep the wording short. A long poem or oversized quotation can make the baby’s print feel like a background decoration. Longer messages are better placed on the back of the frame, inside a keepsake card or on a separate note stored with the piece.
Where to Place the Information
On framed paper art, center the name and date beneath the handprint or place them in one lower corner. For a clay plaque, press the name along the bottom edge while the clay is soft, leaving enough space between the lettering and the impression.
A separate printed label can be mounted below the artwork when handwriting does not suit the design. Choose a clear, simple typeface and print a practice copy before attaching it to the finished keepsake.
Write the same information lightly on the back, even when it appears on the front. Include the materials used and the date the piece was completed if someone may need that information later.
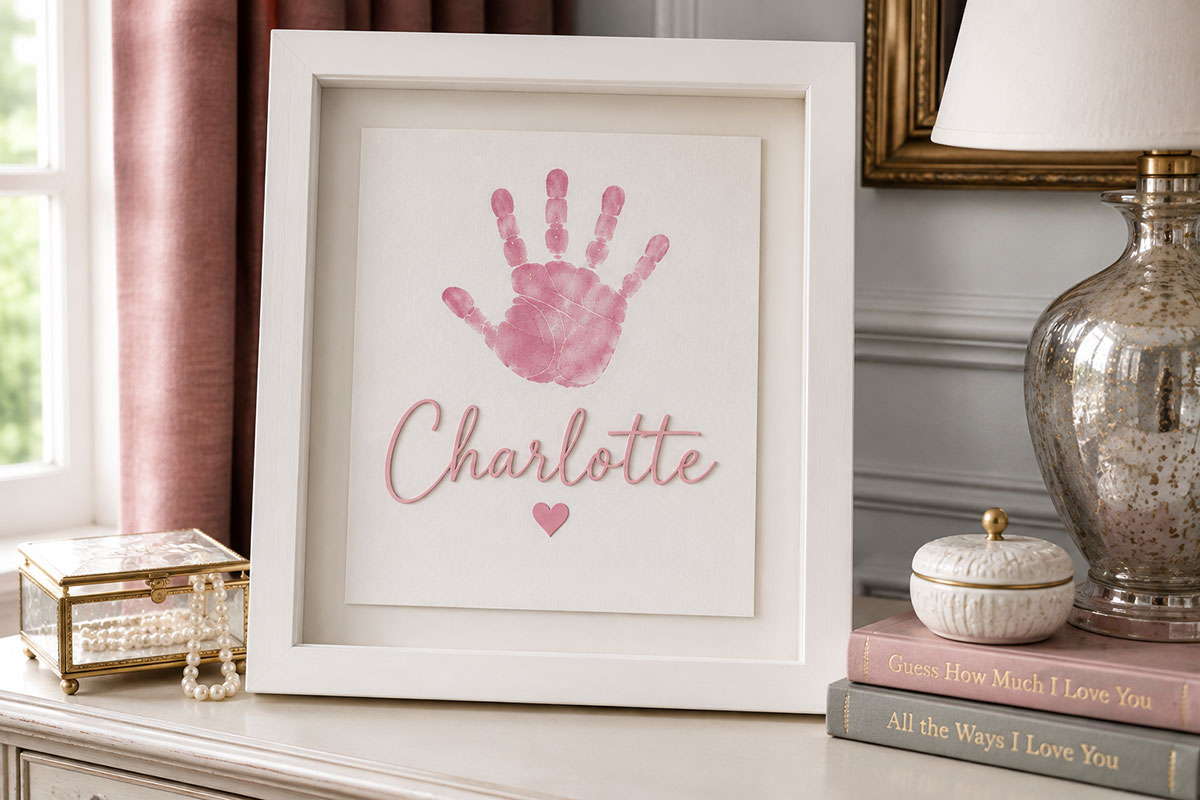
Frame and Display the Finished Handprint Keepsake
The finished display should protect the handprint without making it disappear beneath a heavy mat, ornate frame or crowded group of decorations. Measure the artwork first, then choose a frame that leaves visible space around the palm and fingertips.
Choose a Frame That Fits the Keepsake
- Standard frame: Best for a flat print on paper or cardstock.
- Double-opening frame: Holds a handprint beside a baby photograph.
- Shadow box: Provides space for a clay plaque or several flat keepsake pieces.
- Floating frame: Shows the edges of handmade paper or an unusually shaped print.
- Deep display frame: Works for a thicker impression piece when the depth is confirmed before purchase.
Check the frame dimensions rather than relying only on the size printed on the packaging. A frame listed as 8 by 10 inches may show less of the artwork once the mat and frame lip are in place.
Use Materials That Protect the Print
Allow paint, ink, clay, lettering and sealers to dry fully before framing. Place paper artwork against an acid-free backing and use archival corners or acid-free tape on the reverse. Ordinary household tape can yellow, loosen or leave marks on the paper.
Do not press damp paint or incompletely cured clay behind glass. Trapped moisture can damage the surface and may affect the backing material.
Plan the Nursery Placement
A small handprint frame can sit above a dresser, join a gallery wall or stand on a high shelf. Hang it near other personal pieces, such as a birth print or family photograph, while leaving enough room for each item to be seen clearly.
Keep frames away from the crib, changing surface and any place where the baby could reach a cord, hook or breakable object. Wall displays should be attached with hardware suited to the frame weight and wall type.
Store an Unframed Copy
If several prints were made, frame one and place another in a labeled envelope or archival sleeve. Store it flat in a dry location with the baby’s name, age, date and the materials used.
A clear photograph or high-resolution scan also creates a useful backup. It can later be used for duplicate gifts, a family album or another display without handling the original handprint again.
Leave enough room for the print to speak for itself.
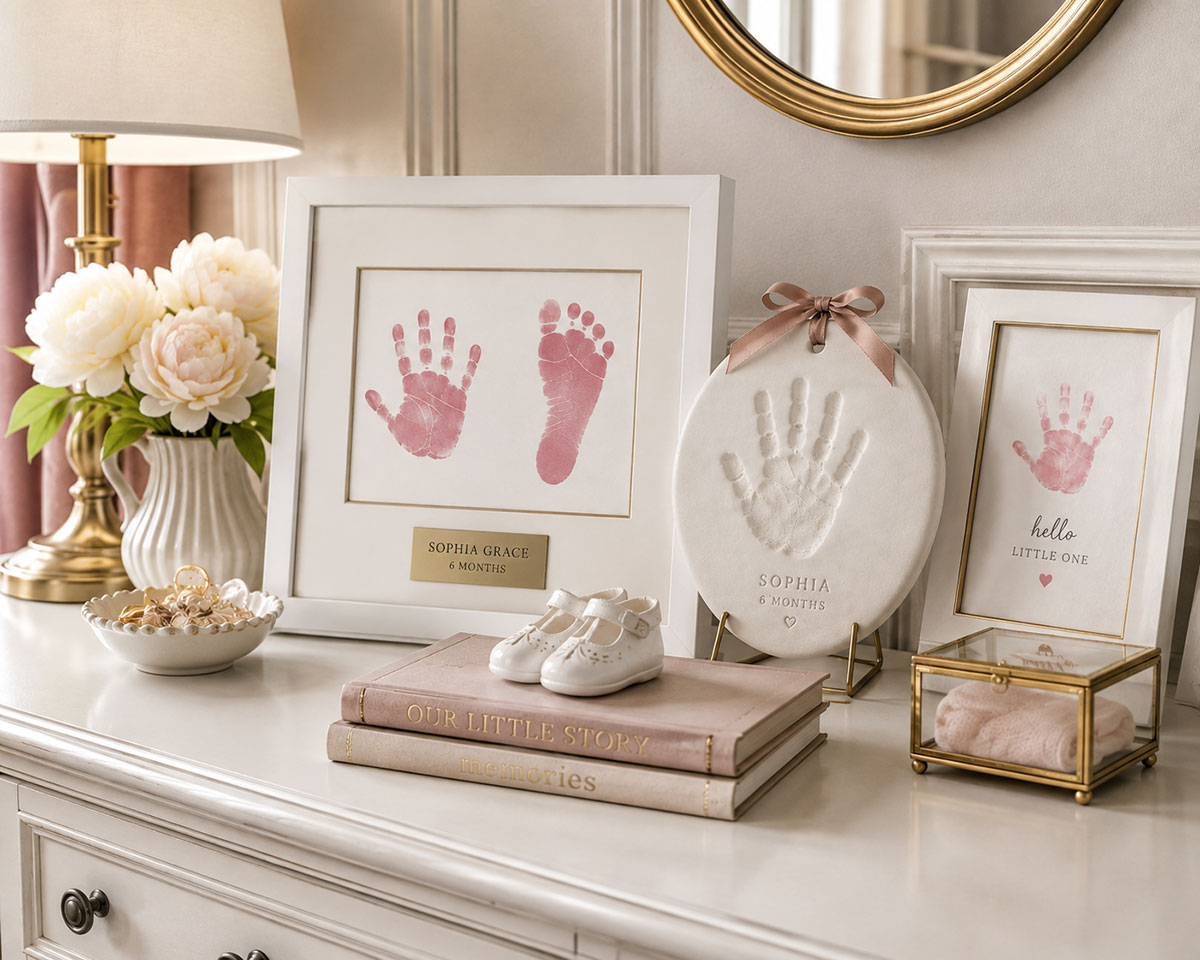
Baby-Safe Materials and Display Guidance
A handprint craft involves brief contact between the baby’s skin and the chosen material, so read the complete product label before beginning. A paint described as washable is not automatically suitable for use on skin.
Check Every Craft Material Before Use
- For direct contact with the baby’s hand, use only a product whose label specifically permits that use, or choose a clean-touch print system. For color added after the print is dry, choose water-based, non-toxic art materials suitable for the surface.
- For art materials, the AP Approved Product Seal confirms toxicological review for the product’s intended use. It does not replace the need to check whether the label permits deliberate application to skin. The Art and Creative Materials Institute explains its certified product seals and skin-contact limits.
- Follow the product directions even when the same type of material has been used before. Ingredients and instructions can differ by brand.
- Do not use wall paint, fabric dye, permanent ink, outdoor paint or ceramic glaze on the baby’s hand.
- Do not use a product on irritated, broken or unusually sensitive skin.
- Keep paint, clay, ink pads, sealers and cleaning supplies away from the baby’s mouth and eyes.
Prepare for Quick Cleanup
Keep a damp cloth beside the work surface and have mild soap and water ready before applying paint or ink. Clean the baby’s hand as soon as the print is finished. Stop immediately if the skin becomes irritated or the baby appears uncomfortable.
Another adult should support the baby during the project. Never leave the baby on a changing table, counter or other raised surface while reaching for paper or supplies.
Keep the Finished Craft Out of Reach
A framed print, clay plaque or shadow box is nursery decoration, not a toy. Glass, hanging ribbon, wire, hooks, loose embellishments and breakable clay pieces should remain securely outside the baby’s reach.
Do not hang a handprint plaque or frame over the crib. Display it above a dresser, on a gallery wall away from the sleep area or on a high secured shelf. Keep ribbons, hanging cords and monitor cords out of the baby’s reach and away from the sleep space. The U.S. Consumer Product Safety Commission’s Safe Sleep guidance explains how to keep the crib area clear and safer.
Check wall hardware from time to time, especially after furniture is moved or the room is rearranged. As the baby becomes mobile, review every display from the child’s new reach level rather than relying on the original placement.
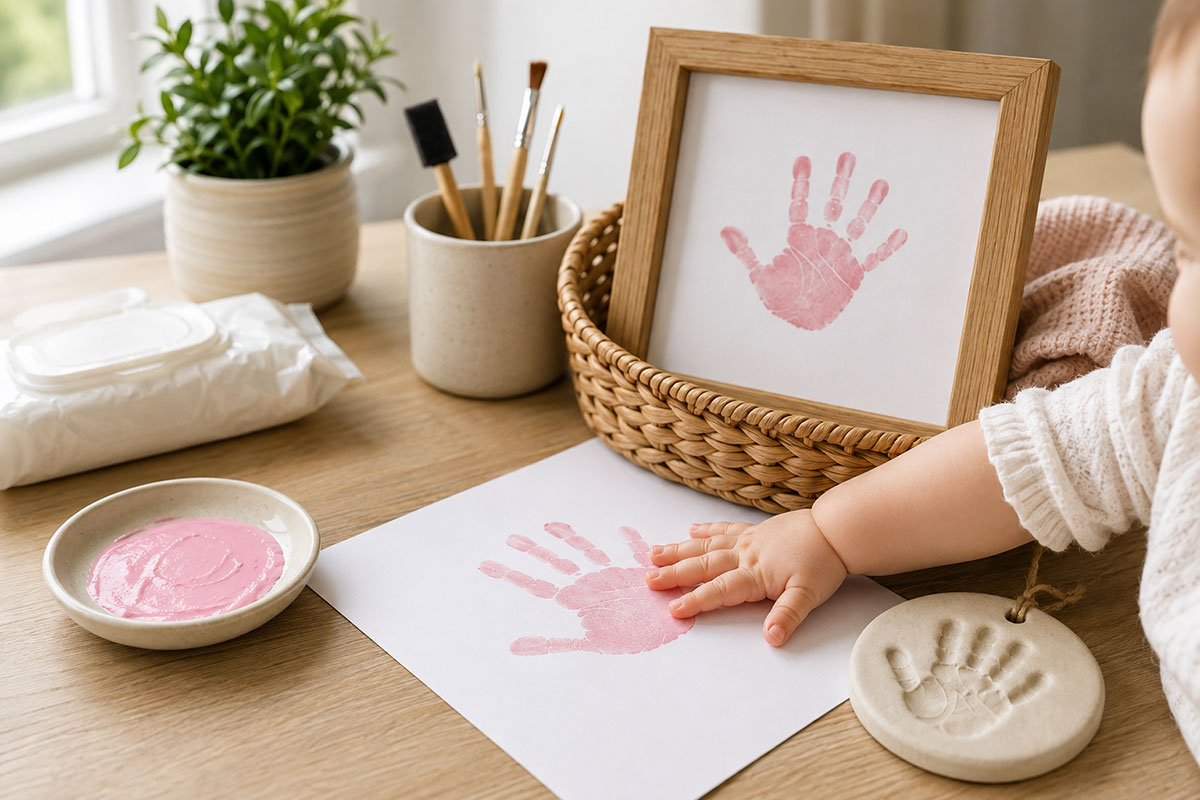
Seasonal Baby Handprint Crafts Worth Keeping
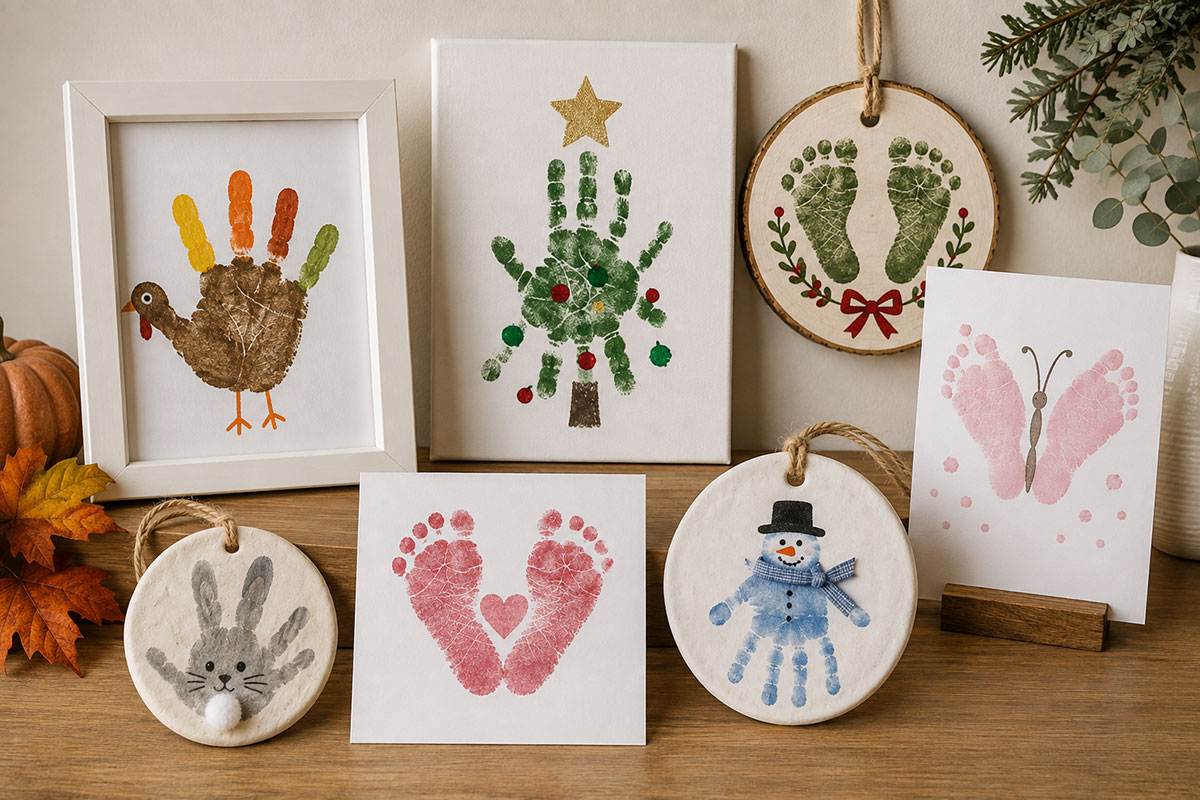
A seasonal handprint craft can still feel like a lasting keepsake when the design is simple enough to display after the occasion has passed. Use the holiday or season as a light theme around the print rather than covering the hand with layers of decoration.
Mother’s Day and Father’s Day Handprint Art
Place one handprint on heavyweight paper and add the baby’s name, age and date beneath it. A short message can be written below the print or placed on the back of the frame.
For a floral design, add narrow stems beneath the fingertips and paint a few small leaves around them. For a simpler parent gift, pair the handprint with a photograph taken during the same month.
Baby Handprint Cards
A folded card works best when the handprint is made on a separate piece of cardstock and attached after it dries. This prevents paint from soaking through the card or leaving an uneven surface inside.
- Make the handprint on smooth, heavyweight paper.
- Allow it to dry completely.
- Trim the paper with an even border around the print.
- Mount it on the front of a folded card with acid-free adhesive.
- Write the baby’s name and the handprint date inside.
Keep the front uncluttered. A small handprint and one short line of wording are enough for a card that may later be framed.
Fall and Thanksgiving Handprint Keepsakes
Rust, warm brown, muted orange and deep green can turn a handprint into fall nursery art without relying on bright classroom colors. Add a few painted leaves near the fingertips or place the print beside a simple family name-and-date panel.
A family tree can include one small handprint for each child. Keep the names and dates close to the matching prints so the finished piece remains easy to identify.
Christmas Handprint Decorations
A baby handprint can be used for a framed holiday print, a clay plaque or a small card included with a gift. Avoid adding loose glitter, bells or small glued decorations that may fall away during storage.
For a Christmas tree keepsake built around the print, see my baby handprint Christmas ornament ideas for clay and dough impressions, painted prints and simple first Christmas ornament designs.
For more ways to turn handprints, footprints and other keepsakes into holiday projects, see these baby Christmas crafts.
For an ornament-style clay impression, make the hanging hole while the clay is soft and follow the product directions for drying or curing. Use a secure ribbon only after the piece is fully finished, and store it wrapped so the fingers in the impression are not chipped.
Spring and Easter Handprint Art
Soft green, blue, lavender or pink prints can be paired with small flowers, leaves or a simple name panel. A handprint flower arrangement is easier to display later than a design covered with holiday wording or cartoon features.
The most useful seasonal keepsakes still record the same basic information: whose hand it is, the baby’s age and the date it was made.
More keepsake projects can be found on the baby crafts page, including ideas that combine handprints, footprints, nursery art and handmade gifts.
Baby Handprint Crafts FAQ
What paint is suitable for baby handprint crafts?
Use only a product whose label specifically permits the intended contact with skin, or choose a clean-touch print system that keeps ink away from the baby’s hand. The words washable and non-toxic do not, by themselves, mean that an ordinary art paint is intended for body application. Read the complete label before beginning.
How do I keep a baby’s fingers open for a handprint?
Have another adult support the baby while you gently guide the hand. Lower the palm first, then press each finger without pulling or forcing it flat. A settled baby, a prepared work area and a quick printing method make the process easier.
Why does my baby’s handprint look like a blob?
Too much paint often fills the spaces between the fingers and hides the palm lines. Apply a thin, even layer with a foam brush instead of dipping the hand into paint. Lift the hand straight upward without rocking it across the paper.
What kind of paper is best for baby handprint art?
Smooth, heavyweight paper or cardstock accepts paint and ink without wrinkling as easily as thin paper. Choose acid-free paper when the print will be framed or stored as a keepsake.
Can I make a newborn baby handprint?
Yes, but newborn hands often remain curled. Do not force the fingers open. A partial handprint, footprint or mess-free ink-print system may be easier to use during the newborn stage.
Should I correct missing parts of the handprint?
A small gap or faint fingertip does not always need correction. Heavy repainting can hide the original print. Choose the clearest impression and let natural differences remain unless a very small touch-up is needed around the outside edge.
What information should go on a baby handprint keepsake?
Include the baby’s name, age and the date the print was made. Birth information or a short occasion line may also be added when it suits the project. Write the same information on the back in case the front label becomes separated from the artwork.
Can handprint art be made on canvas?
Yes. Use a smooth, tightly woven canvas and apply only a thin coat of paint to the hand. A heavily textured canvas may leave breaks in the palm and fingers. Test the paint on a spare surface before making the final print.
How should a clay baby handprint be dried?
Follow the directions supplied with the clay. Air-dry, oven-cured and impression products have different drying times and temperature requirements. Keep the plaque flat while it cures unless the manufacturer instructs otherwise.
How can I preserve a baby handprint craft?
Allow every material to dry or cure completely. Frame paper prints with acid-free backing and archival mounting materials. Store an extra print flat in a labeled sleeve, and photograph or scan the finished handprint as a backup.
Are baby handprint keepsakes safe for the nursery?
They are suitable as decoration when displayed securely outside the baby’s reach. Do not place glass frames, clay plaques, ribbon loops, cords or small embellishments above the crib or near a changing surface. These keepsakes are display pieces, not toys.
Keep Exploring Baby Keepsake and Nursery Ideas
A handprint is only one way to record how small the baby was at a particular stage. The baby hand and footprint ideas include more ways to combine prints with photographs, names and birth information.
A footprint may be easier to capture when a young baby keeps those little fingers curled. See the baby footprint crafts and keepsakes for display ideas that can coordinate with the handprint projects on this page.
For a finished gift or nursery display, compare arrangements on the baby handprint and footprint frame page. Matching paper, mats and frame finishes can bring two separate prints together without covering either one with extra decoration.
You can also use the nursery itself to guide the colors and presentation. Browse the baby nursery themes for woodland, ocean, teddy bear and other room ideas, or visit the DIY nursery decor ideas for more handmade pieces that can be displayed with a framed handprint.
Keep the original print, the baby’s name and the date at the center of the project. Everything added around them should help preserve the memory rather than hide it.


When you click on links to various merchants on this site and make a purchase, this may result in this site earning a commission. This does not affect the price you pay.

UBGI Gold Standard 2026
Reviewed under the site's
editorial checklist.
About Jan | Contact | Baby Nursery Ideas (Blog) | Site Map | Privacy Policy | Disclosure Policy | Disclaimer | Affiliate Disclosure | Earnings Disclosure | Facebook | Pinterest
I am a participant in the Amazon Services LLC Associates Program, an affiliate advertising program designed to provide a means for us to earn fees by linking to Amazon. As an Amazon Associate I earn from qualifying purchases.
Copyright © 2006-2026. All Rights Reserved.