Baby Footprint Ink Pads, Inkless Print Kits and Stamps: What to Know
By Jan Bay
Baby footprint ink pads, inkless print kits and stamps work in different ways, and the best choice depends on what kind of print you want to make. Before choosing supplies, it helps to understand how each method transfers the footprint, what paper it works with, whether ink touches the baby's skin and how much cleanup is involved.
Explore More Baby Footprint and Keepsake Guides
Baby Footprint Crafts and Keepsake Ideas
How to Get a Clear Baby Footprint
Baby Footprint Printing Supplies: Know Which Type You Need
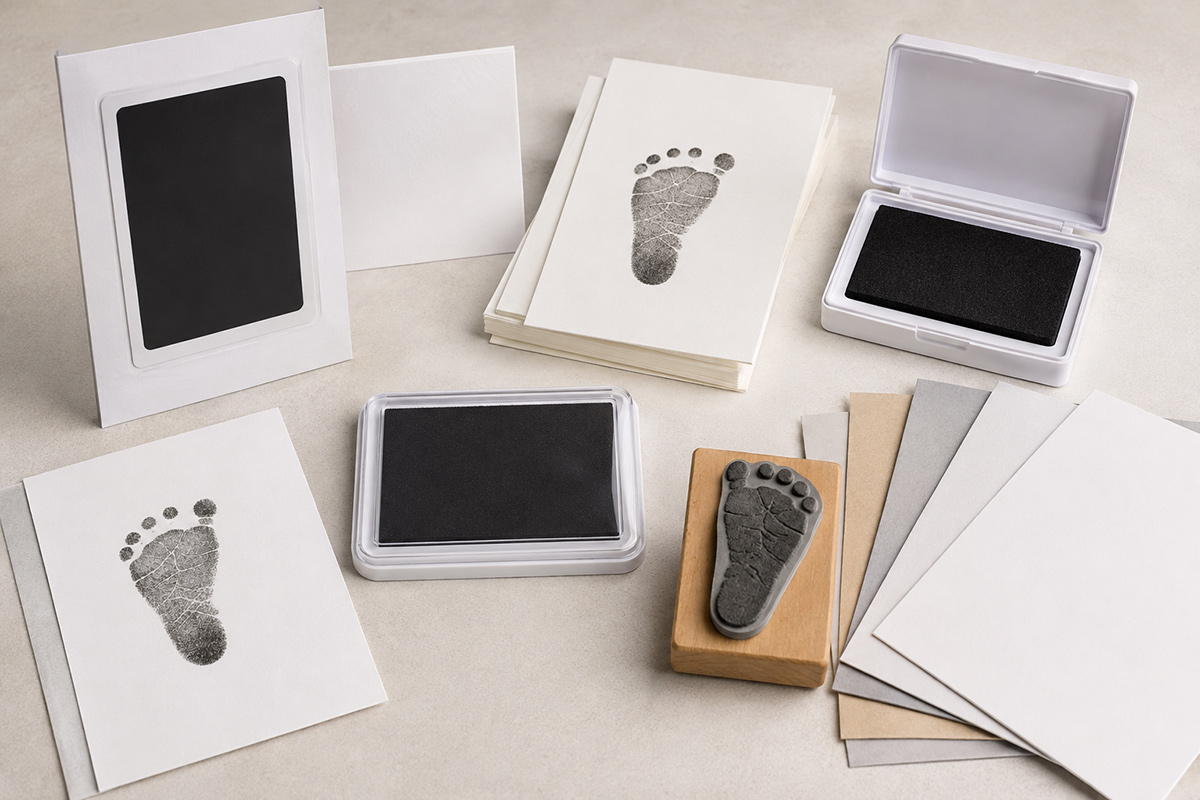
It is easy to lump inkless kits, footprint ink pads and footprint stamps together, but they do three different jobs. The useful question is not simply which product looks easiest. Start with the kind of print you want to end up with, then choose the material that is designed to make it.
Inkless footprint kits are made to capture the baby's actual footprint without using a conventional visible ink pad on the foot. Some are clean-touch systems that keep the ink behind a film or transfer surface. Others use a colorless applicator with specially treated paper. Because "inkless" can describe more than one method, check the directions to see exactly what touches the baby's skin and which paper the system requires.
Baby footprint ink pads are different. With a conventional pad, the baby's foot contacts the ink and the inked foot is then pressed onto paper or another surface permitted by the product directions. This method gives you more freedom to choose the paper and sometimes the ink color, but it also means you need to pay closer attention to the product label, intended use and cleanup instructions.
Clean-touch or no-contact transfer pads are one common type of inkless system. The baby's foot presses against one side of a film or transfer surface while the ink remains on the other side. The terminology is not completely consistent from one manufacturer to another, so I would look at how the product actually works instead of relying on the words "clean," "inkless" or "mess-free" on the front of the package.
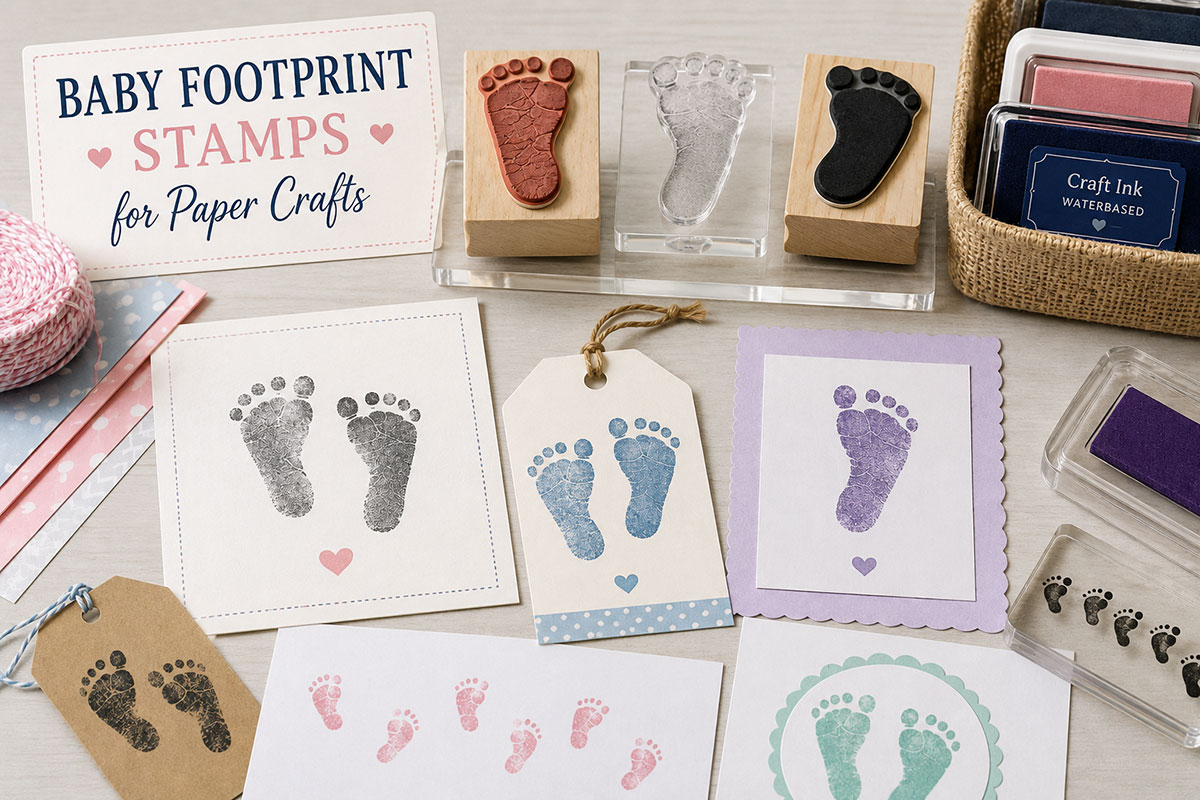
Decorative baby footprint stamps are not designed to record the baby's actual foot at all. They reproduce a ready-made footprint shape. They can be useful for invitations, scrapbook pages, gift tags and other adult craft projects when you want a footprint motif without making a new print from the baby.
That distinction matters. A tiny rubber footprint stamp may produce a very neat image, but it is a design of a baby foot, not a record of your baby's foot. An inkless kit may produce a less perfectly shaped print, yet the uneven toe spacing and individual outline are exactly what make that print personal.
| Type | What It Records | Does Color Touch the Foot? | Best Use |
|---|---|---|---|
| Inkless footprint kit | The baby's actual footprint | Not with a true no-ink-on-skin system when used as directed | Keepsake prints and records |
| Clean-touch transfer pad | The baby's actual footprint | The inked side should not contact the foot when the system is used correctly | Low-mess footprint transfers |
| Traditional footprint ink pad | The baby's actual footprint | Yes | Prints when the specific ink is suitable for the intended use |
| Decorative footprint stamp | A manufactured footprint design | No baby contact is needed | Paper crafts, cards and decorative motifs |
Before buying anything, also check what comes in the package. Some inkless systems include only a small number of treated sheets. Others allow several impressions from one transfer pad. A kit that sounds generous because it includes several cards may still give you fewer actual printing attempts than expected.
Size is another detail worth checking before the package arrives. Look for the usable printing area, not only the outside dimensions of the pad or card. A newborn foot and an older baby's foot do not require the same amount of space, and you need room around the footprint if you plan to trim, mount or frame the finished print.
If you already have the print and are deciding how to turn it into something made to keep, the ideas on baby footprint crafts and keepsakes take over from there. This guide stays with the printing supplies themselves so you can tell what you are buying before a little foot ever goes near the package.
How Inkless Baby Footprint Kits Work and What to Check
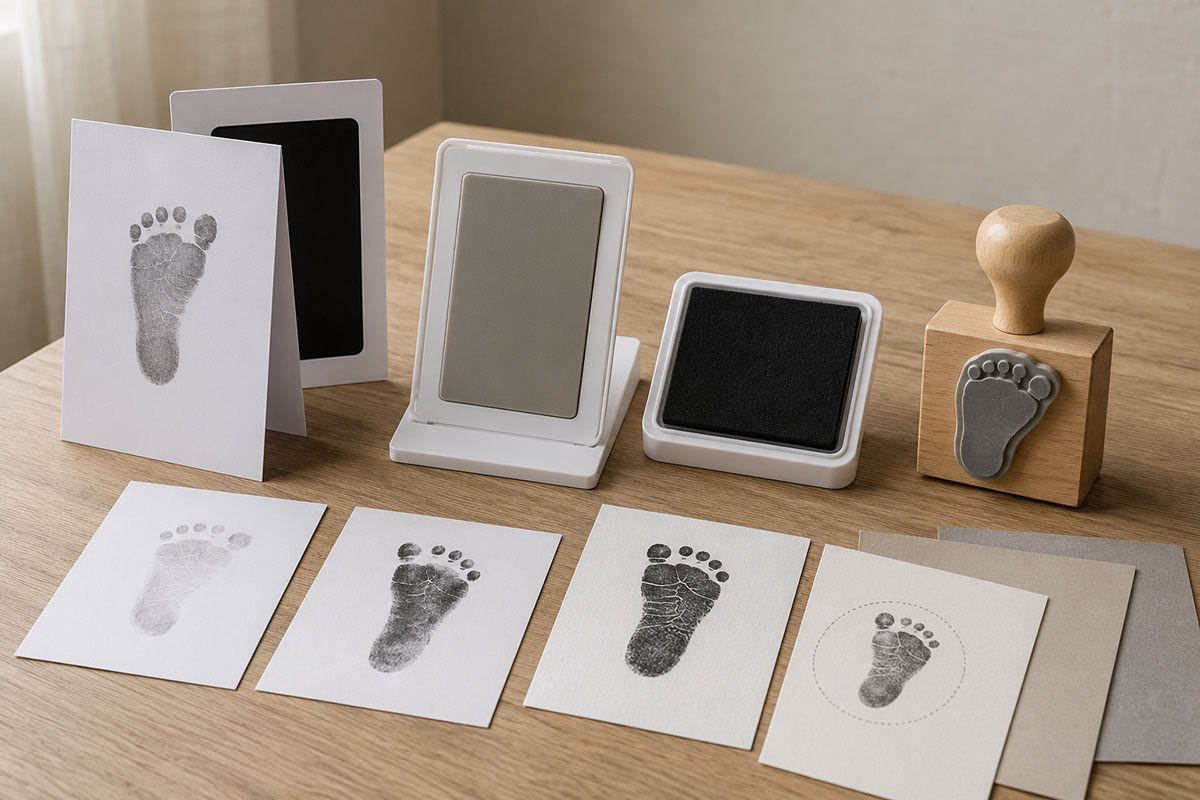
An inkless baby footprint kit is meant to capture the baby's real footprint without rubbing a conventional ink pad across the sole of the foot. That makes it appealing for a keepsake print, but the word "inkless" does not tell you everything you need to know about the system inside the package.
Some kits use a coated transfer surface. The baby's foot presses against one side while the developing material stays on the opposite side. Other kits use specially treated paper that reacts with a compatible applicator or transfer medium. The finished result can look similar, but the supplies are not necessarily interchangeable.
Read the directions before separating any cards, films or treated sheets. With some systems, touching the wrong side of the transfer surface can leave fingerprints or marks that cannot be removed. A little preparation matters when the kit gives you only two or three attempts.
Check the usable print area first. Product photos can make a pad look larger than it is. What matters is the area that can actually receive the complete foot from heel through the longest toe. If the baby is no longer a newborn, compare the stated printing dimensions with the baby's foot before you choose a kit.
Check how many impressions the kit is designed to make. Four cards do not always mean four separate attempts. One transfer pad may be intended for several impressions, or a treated sheet may work only with one particular side of the pad. The package directions should make that clear.
Look at the paper restrictions. A true inkless system may require the paper supplied with the kit because the image develops through a reaction between the transfer material and the prepared sheet. If you want a footprint directly on a handmade card, scrapbook page or special keepsake paper, make sure the system permits that before assuming you can substitute your own paper.
This is an important difference between inkless kits and traditional ink pads. An inkless kit can be wonderfully tidy, but it may give you less freedom over the final paper. A conventional pad can offer more flexibility, provided the ink is appropriate for the intended use and you follow its directions.
Look for clear skin-contact information. Do not assume that every product marketed with a baby footprint picture is intended for direct contact with a baby's skin. The package should explain how the print is made and which surface, if any, touches the foot. If those directions are vague, I would choose a product with clearer instructions rather than guessing.
Also check whether the manufacturer gives age guidance, warnings or cleanup directions. Those details are more useful than broad words such as "safe," "natural" or "non-toxic" printed prominently on the front of a package.
If you want to apply color directly to a baby's foot for a craft rather than use a transfer system, that becomes a different material choice. My guide to choosing paint for baby crafts explains what to look for on paint labels and why ordinary adult craft paint should not automatically be treated as a baby footprint material.
Think about the finished print before you make it. If you want one footprint for a frame and another for a grandparent gift, buy enough attempts to allow for both plus at least one imperfect print. Babies curl their toes, twist their ankles and pull away at inconvenient moments. A kit with only one usable impression leaves no room for that very normal unpredictability.
Inkless prints also vary in contrast. Some develop as a dark, crisp impression while others produce a softer gray or charcoal effect. Neither result is automatically better. A softer print can preserve tiny lines beautifully, while a very dark print can be easier to scan or reproduce later.
If your goal is simply to preserve the baby's actual foot shape, I would give priority to a generous printing area, clear instructions and enough attempts to make a second print. Fancy packaging matters much less once the footprint is tucked into a memory box.
Baby Footprint Ink Pads: When Direct Ink Makes Sense
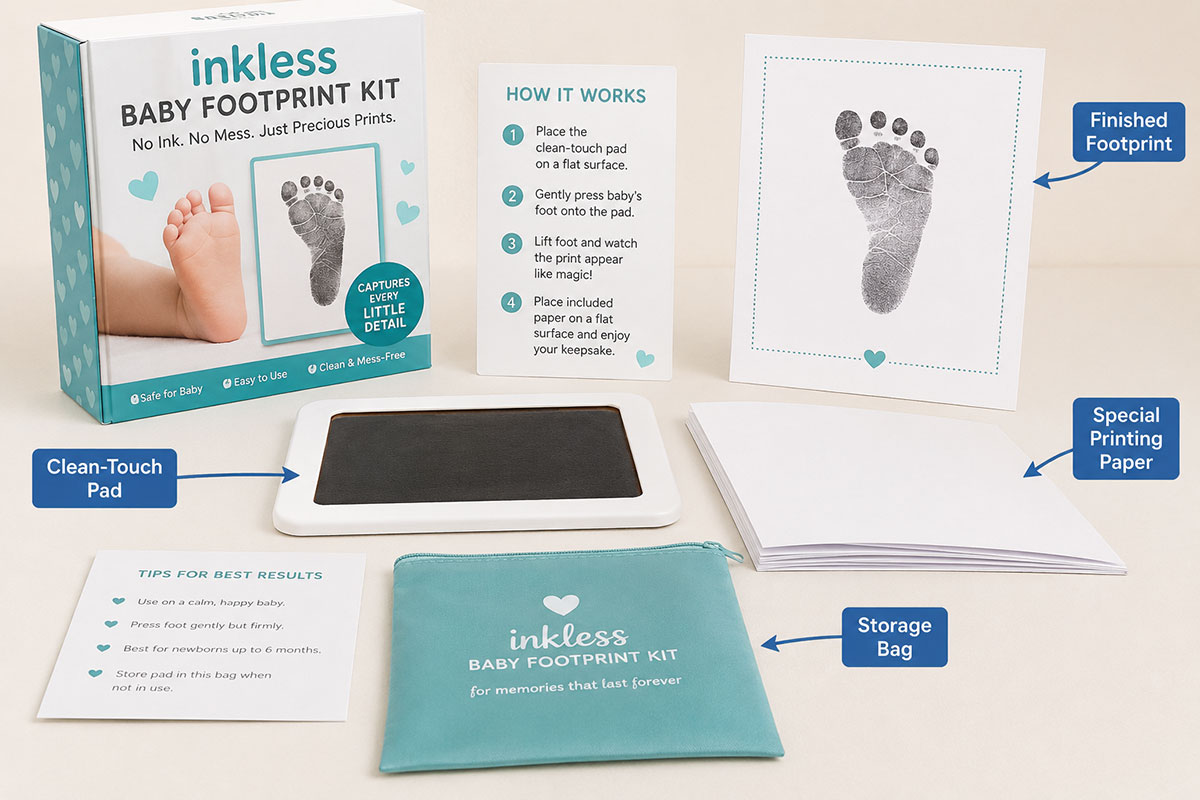
A traditional baby footprint ink pad puts ink directly on the foot before you press it onto paper. That gives you more control over paper choice and often makes it easier to create several impressions, but it also means the ink itself deserves more attention than the color on the package.
Start by checking whether the manufacturer actually intends the pad for skin contact. A small craft ink pad can look perfect for a baby's foot and still be made only for rubber stamps, paper crafts or other surfaces. I would not use a general stamping pad on a baby simply because the label says washable or non-toxic. Those terms do not automatically mean the product is intended for infant skin.
Read the intended-use statement. Look for wording that clearly explains whether the ink can be used on skin and whether the manufacturer provides directions for that use. If the package is designed specifically for baby handprints or footprints, it should also tell you how to apply the ink, how to remove it and what precautions to follow.
Check the pad dimensions. A footprint pad can be large overall but have a much smaller inked area inside the case. The entire heel, arch, ball of the foot and toes need to fit comfortably on the usable surface. Trying to ink half the foot and then reposition it usually creates an uneven impression.
A larger pad also gives you room to lower the foot onto the ink instead of rubbing the pad back and forth across the skin. That matters because rubbing can load some areas with too much ink while barely covering others.
Do not assume darker is better. A heavily inked foot can make a thick silhouette that hides the small creases and toe shapes you were hoping to preserve. A lighter, even coating often records more detail. If the pad is very wet, test it on an adult fingertip or another permitted surface first so you know how much ink it transfers.
The surface of the pad matters too. A firm pad tends to coat the raised areas of the foot first, while a very soft or saturated pad can push ink farther into the creases. Neither automatically creates a better footprint. What you want is an even layer without pools of ink around the toes.
Choose the Paper Before You Ink the Foot
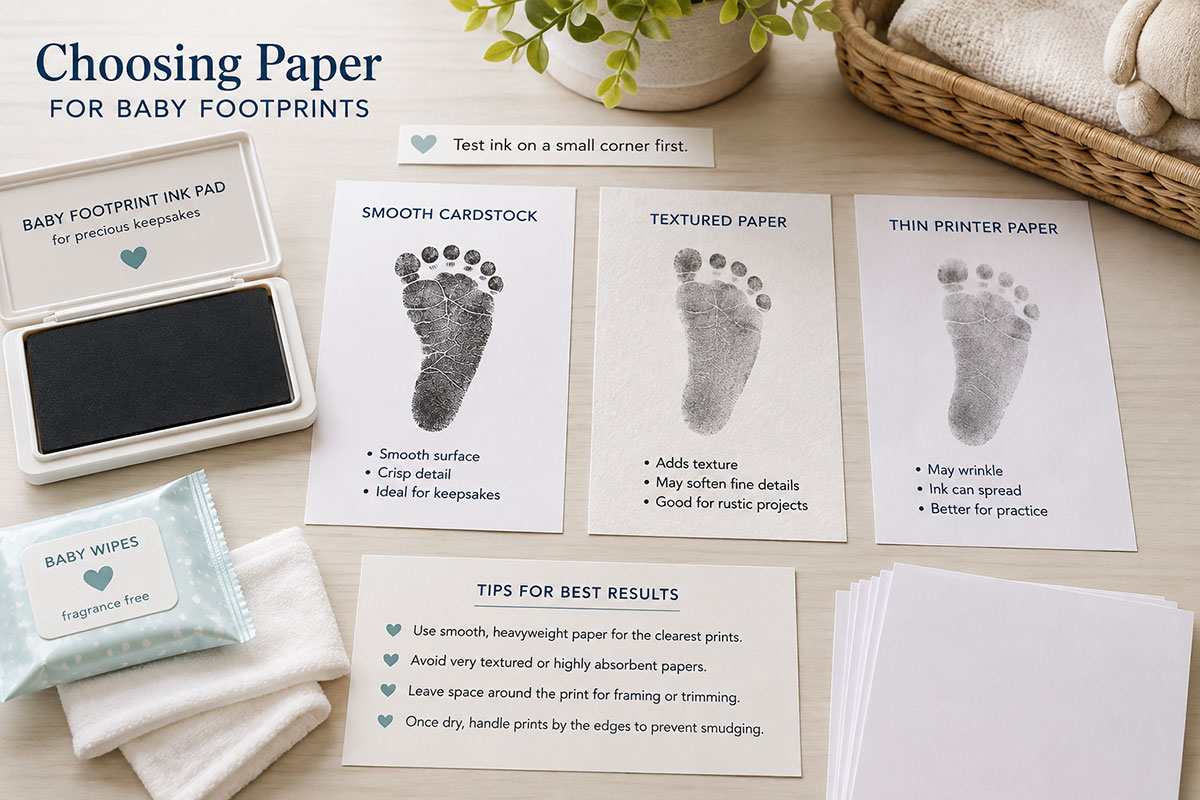
Traditional ink pads give you more paper choices than many inkless kits, but not every sheet produces the same result. Smooth paper usually captures small lines more cleanly than a deeply textured surface. Very absorbent paper can pull ink outward and soften the edges of the footprint.
If the print will become a framed keepsake, card or scrapbook piece, test the ink on a spare piece of the same paper first. Watch for feathering, slow drying or color showing through to the back. That ten-second test is much easier than discovering afterward that your only good footprint smeared on the paper you chose.
Leave enough blank space around the foot for the way you plan to use the print. A footprint placed right at the edge of a card may be difficult to crop or mount later. For a keepsake, I prefer giving the print a little breathing room and trimming the paper after the impression is dry.
When you are ready to make the actual print, have the paper, cleanup supplies and a second sheet within reach before you begin. The goal is not to keep re-inking the baby's foot until you get a flawless impression. Make a few thoughtful attempts, then work with the print that best captures the baby's real foot.
If you need help with positioning the foot and reducing smears, see how to get a clear picture of a baby footprint. That page deals with the actual printing technique, while this guide stays focused on choosing the materials.
Cleanup Is Part of Choosing an Ink Pad
Check the cleanup directions before the first print, not after the ink is already on the baby's foot. Some inks are designed to wash away with soap and water. Others may require a specific method provided by the manufacturer.
Have everything ready before you open the pad. You do not want to be searching for wipes or reading tiny package directions while holding an inked foot.
Washable also does not mean stain-proof. Ink can transfer to clothing, towels, upholstery and your own hands during the few seconds between making the print and cleaning the foot. A simple workspace with only the supplies you need is easier to manage than a decorated craft table full of items that can be bumped or stained.
For direct-contact printing, I would choose clarity over novelty every time. A manufacturer that clearly states the intended use, gives understandable skin-contact directions and explains cleanup is giving you information you can actually use. A cute footprint graphic on the package is not a substitute for that.
Baby Footprint Stamps Are for Designs, Not Personal Footprints
A baby footprint stamp is useful when you want the look of tiny feet without making a print from the baby. Rubber stamps, clear stamps and foam stamps can add footprint motifs to cards, scrapbook pages, gift tags, memory books and other adult craft projects. They belong in the same shopping aisle as footprint kits, but they solve a very different problem.
The easiest way to tell the difference is to ask what you want the finished image to represent. If you want the baby's actual heel shape, toe spacing and little creases, choose a method that records the real foot. If you simply want a decorative pair of baby feet on a project, a ready-made stamp can do that without involving the baby at all.
That distinction is especially important when shopping online. Search results for "baby footprint stamp" can include actual footprint kits, clean-touch transfer pads, rubber craft stamps and even personalized stamps made from a previously supplied image. Read the product description instead of relying on the listing title or photograph.
Rubber, Clear and Foam Footprint Stamps
Rubber footprint stamps are often mounted on wood or another firm backing. They can produce a crisp repeatable image when the stamp surface is evenly inked. The rigid mount also makes it easier to place the design without bending it during the impression.
Clear polymer stamps are typically used with a separate acrylic block. Their transparency can help when you need to position a pair of footprints near a name, date or another paper element. Make sure the stamp is designed for the ink you plan to use because not every ink behaves the same way on every stamp material.
Foam footprint stamps tend to create a simpler, bolder shape. They can work well when fine skin-line detail is not important, but the softer surface may produce a less precise edge than a well-made rubber or clear stamp.
None of those options needs to touch the baby. Ink the stamp, press it onto the project and clean the stamp according to the manufacturer's directions.
Look Closely at the Footprint Design
Footprint stamps vary more than their small size suggests. Some show a realistic sole with individual toe pads and fine lines. Others are simplified icons with five round toes above an oval foot. A stamp can also be a single foot, a left-and-right pair or a trail of tiny footprints.
Choose the design for the project rather than assuming the most detailed stamp is automatically the best one. Fine lines can look lovely on smooth paper, but they may disappear when stamped onto heavily textured cardstock. A simpler footprint can remain readable at a smaller size.
Orientation matters too. A pair of feet that angle inward creates a different look from two straight footprints. If you are making a card or keepsake page, look at the actual stamp impression shown by the manufacturer rather than judging only by the shape of the stamp itself.
I would also check whether the design is meant to look newborn-sized or simply miniature. A decorative stamp does not need to match the dimensions of an actual baby's foot, but knowing the printed size helps prevent surprises when a tiny motif arrives for a project that needed a larger focal image.
Check the Finished Impression Size
Stamp measurements can refer to the entire rubber block, acrylic sheet or package instead of the footprint image. Look for the dimensions of the actual stamped design whenever they are provided.
A small footprint stamp can be useful for:
- gift tags
- small cards
- scrapbook borders
- memory-book accents
- envelope decoration
A larger footprint design gives you more room for visible sole and toe details and can work as the main image on a card or paper keepsake.
If you want to add a baby's real footprint to a keepsake instead of using a decorative motif, return to the baby footprint crafts and keepsake ideas page for ways to use the actual print after you have captured it.
Do Not Use a Craft Stamp Pad on the Baby
The ink sold beside rubber stamps is intended for stamping unless the manufacturer specifically says otherwise. A decorative footprint stamp can be used with many kinds of craft ink because the ink goes on the stamp, not on the baby's skin.
Keep those two uses separate. A stamp pad that performs beautifully on cardstock is not automatically suitable for making a direct footprint from a baby's foot.
This is also why I would store decorative stamping supplies separately from any pad or transfer system purchased specifically for making the baby's actual print. Similar-looking cases can be easy to mix up once the original packaging is gone.
Personalized Footprint Stamps Are Another Option
Some services can turn a previously captured footprint into a custom stamp. In that case, the stamp can reproduce the shape of one particular baby's footprint on future paper projects without repeating the original printing process.
The quality of a custom stamp depends heavily on the source image. A clear footprint with distinct edges gives the maker more information to work with than a faint, smeared or shadowed print. Fine creases may also simplify when the image is converted into a stamp, especially at a small finished size.
A personalized stamp is best treated as a reproduction tool. Keep the original footprint or a high-quality scan separately if preserving the baby's actual print matters to you.
For a decorative craft, a ready-made stamp is often enough. For a personal record, start with the baby's real footprint first. Those two jobs may look similar on the finished page, but they are not interchangeable.
How to Choose Baby Footprint Supplies for the Print You Want
The easiest way to choose among inkless kits, clean-touch pads, direct ink pads and decorative stamps is to start with the finished result. Do not begin with the package that promises the least mess or the prettiest set of cards. Decide first whether you want an original footprint, a reusable reproduction or simply a decorative footprint design.
If you want one original footprint with little or no ink on the baby's skin: Look first at inkless or clean-touch systems. Read the directions closely enough to understand exactly what touches the foot and whether the supplied paper is part of the printing process.
If you want several original prints on paper you choose yourself: A direct-contact footprint pad may give you more flexibility. The product should clearly state that it is intended for the type of skin contact you plan, and the ink should be compatible with your paper.
If you already have a good original footprint and want to repeat it: A custom stamp made from that print may be useful. Keep the original separately because the stamp is a reproduction, not a replacement for the source print.
If you only want little footprint shapes as decoration: Use an ordinary craft stamp. There is no reason to involve the baby's foot when the project calls for a decorative motif rather than a personal impression.
I would also separate "easy to use" from "easy to correct." An inkless kit can be very simple to operate but may give you only a few prepared sheets. A traditional pad may take more cleanup, yet it can allow another attempt on a fresh piece of paper. The better choice depends partly on how much room you want for a second try.
Use These Five Checks Before You Buy
1. What actually touches the baby's foot?
Look beyond the product name. Find the directions or diagram that shows whether the foot contacts ink, a dry transfer film, a coated surface or another material. If you cannot tell how the system works from the information provided, choose one that explains it clearly.
2. How large is the usable printing area?
Measure the baby's foot from the back of the heel to the end of the longest toe. Then compare that measurement with the usable area listed for the pad or transfer surface. Allow extra space around the foot so you are not trying to land a moving heel on the exact edge of the pad.
3. Can you use your own paper?
This question can eliminate the wrong product quickly. Some inkless systems depend on special paper supplied with the kit. Direct ink pads are often more flexible, but the paper still affects how cleanly the impression dries.
4. How many real attempts do you get?
Count impressions, not pieces in the package. A kit with several cards may still rely on one limited-use transfer pad. If you want two matching prints, a print for grandparents and another for your own keepsake, make sure the supplies are meant to cover that many impressions.
5. What happens after the print is made?
Check drying time, cleanup and storage directions. If the footprint must dry flat for a certain period, prepare a place for it before you begin. If the pad must be sealed immediately after use, have the lid within reach instead of setting it aside under a pile of paper.
A Simple Way to Match the Method to the Project
| Your Goal | Method to Consider | Check Before Choosing |
|---|---|---|
| Preserve one actual newborn footprint | Inkless or clean-touch kit | Printing area, number of attempts and required paper |
| Make several actual prints on selected cardstock | Direct-contact footprint pad intended for the use | Skin-contact directions, pad size, drying and cleanup |
| Repeat one already captured footprint on future projects | Custom stamp made from the original print | Source-image quality and finished stamp dimensions |
| Decorate cards or scrapbook pages with tiny footprints | Ready-made decorative footprint stamp | Actual stamped-image size and level of detail |
The age of the baby can change the decision too. A product marketed with a newborn photograph may have a printing area that becomes cramped surprisingly quickly. Measure first if you are making a print several months after birth rather than assuming every "baby footprint" kit will accommodate every baby foot.
Think about who will handle the supplies as well. A one-time keepsake made by two adults can be approached differently from a craft session where several prints are planned. Fewer loose pieces, clear directions and a prepared work surface make the process easier to control.
There is also no rule that says the most elaborate kit produces the most meaningful result. A simple footprint on good paper can be easier to preserve than a package filled with frames, decorative cards and extras you never intended to use.
If the footprint will later become framed art, a holiday keepsake or a gift, make the clean original print first. You can decide how to decorate it afterward. The baby footprint crafts and keepsake ideas page has options for using that finished print without turning the printing session itself into a complicated craft project.
Choosing Paper for Baby Footprints
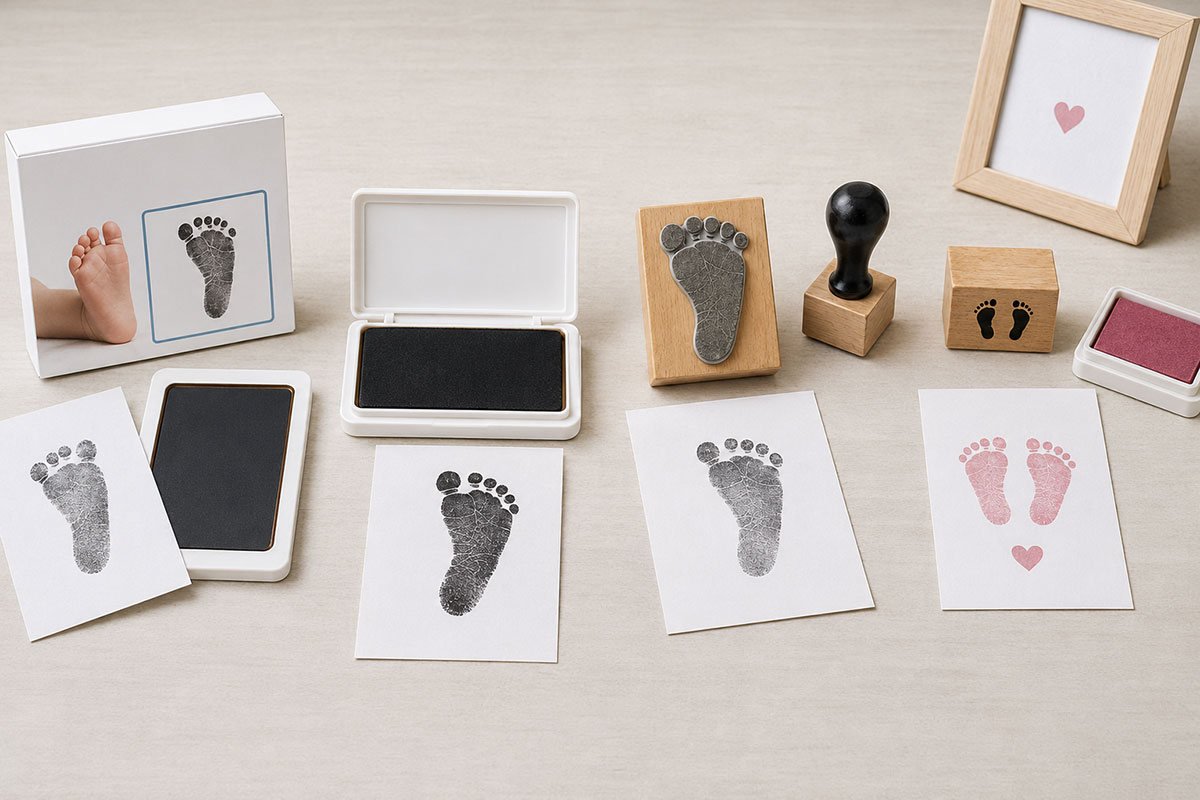
The paper can change a footprint almost as much as the printing method. A beautiful pad or inkless kit cannot produce a crisp impression if the surface is so rough that the toes disappear into the texture or so absorbent that the edges spread before the print dries.
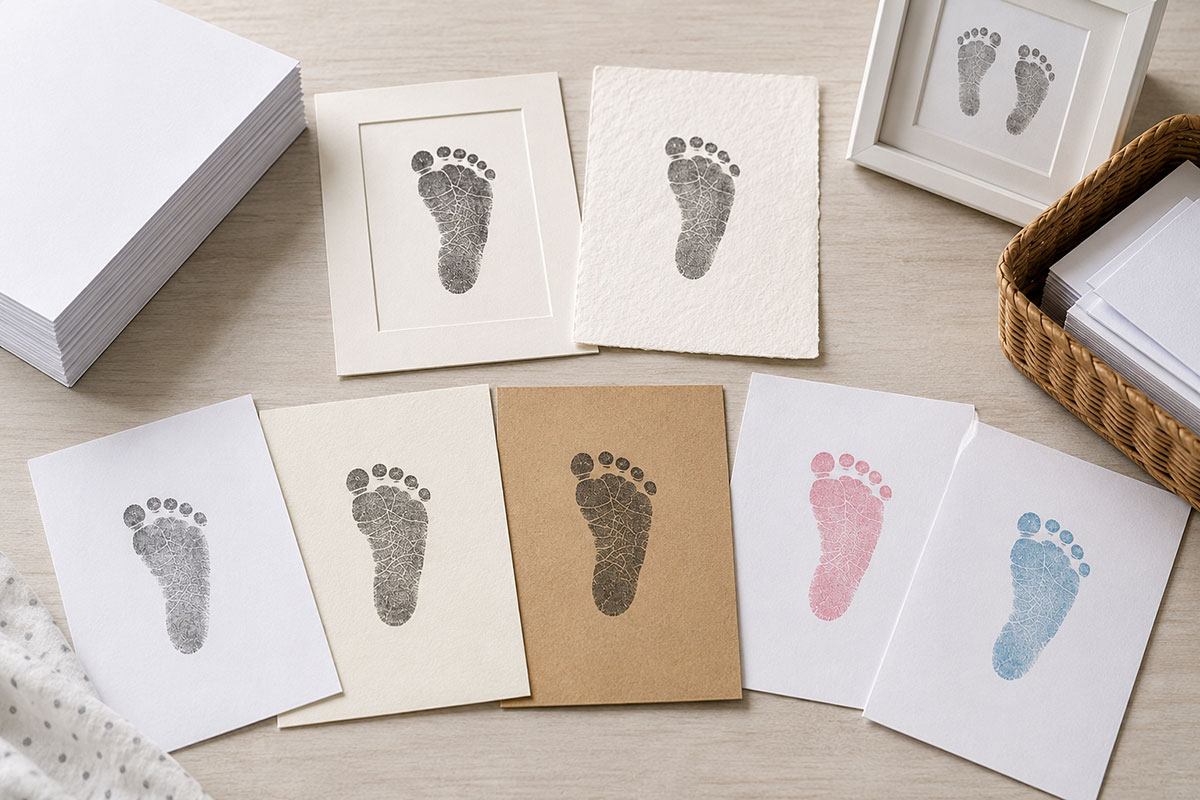
For a first footprint, smooth heavyweight paper is usually the easiest surface to work with. It gives the heel and toe pads a flat place to make contact and leaves enough body in the sheet for framing, mounting or scanning later.
You do not need expensive artist paper for every print. What matters more is that the surface suits the ink or transfer system and that the sheet is sturdy enough for what you plan to do with it afterward.
Smooth Cardstock for Crisp Footprint Detail
Smooth cardstock is a practical choice when you want a clear outline and visible toe shapes. The flatter surface lets more of the foot contact the paper at once, which can help preserve little creases instead of breaking the impression into patches.
Cardstock also gives you room to trim the print later without making the finished piece feel flimsy. If the footprint will be mounted in a frame or added to a keepsake page, a heavier sheet is often easier to handle than ordinary printer paper. For the next step, see my baby footprint frame ideas for layout, matting, preservation and display options.
Do not confuse heavyweight with heavily textured. Linen, laid and embossed papers can be lovely for invitations, but their surface pattern can interrupt the footprint itself.
Watercolor Paper Can Hide Fine Details
Watercolor paper looks substantial and feels special, but the texture can work against a tiny footprint. Cold press paper has a noticeable tooth that may break up the heel, arch and toe impressions.
If you want an art paper appearance, a smoother hot press watercolor paper is more suitable for detailed printing than a deeply textured sheet. Even then, test your ink first because different coatings and fibers absorb color differently.
Very Thin Paper Can Wrinkle or Show Through
Light printer paper can be useful for practice impressions, but it is not always the best choice for the print you plan to preserve. Wet ink can wrinkle thin paper, and a dark footprint may show through when you mount the sheet over another color.
A practice sheet still has value. Use it to check ink coverage, positioning and pressure before moving to the paper you have chosen for the finished print.
If the printing system requires specially treated paper, however, do not substitute practice paper for the actual impression unless the manufacturer's directions say you can. Some inkless systems depend on a reaction with the supplied sheet and will not develop correctly on ordinary cardstock.
Colored Paper Changes the Look of the Ink
A footprint does not have to be made on white paper. Soft pink, pale blue, gray and other light colors can work well when the ink has enough contrast to remain readable.
Dark cardstock is more difficult unless the printing medium is specifically designed to show on a dark surface. A black or charcoal footprint that looks clear on white paper may nearly disappear on navy, burgundy or deep green.
Consider scanning or photographing the original before cutting or mounting it if the print has personal significance. A digital copy gives you another way to reproduce the footprint later while allowing the original sheet to remain intact.
Give Yourself More Paper Than You Think You Need
Cut several sheets before you begin instead of preparing them one at a time while the baby is waiting. Make each one large enough to leave generous space around the foot.
That extra border is useful even if you eventually want a small finished piece. You can trim a good footprint. You cannot add paper back around a heel that landed too close to the edge.
Keep the sheets flat and within reach. Avoid stacking fresh impressions immediately because ink that feels dry on the surface may still transfer to the sheet above it.
When the goal is a keepsake rather than a practice print, I would choose the simplest paper that does the job well. The footprint itself is the important part. Decorative borders, names, dates and embellishments can be added after you have a clean original.
Cleanup and Storage for Footprint Ink Pads and Kits
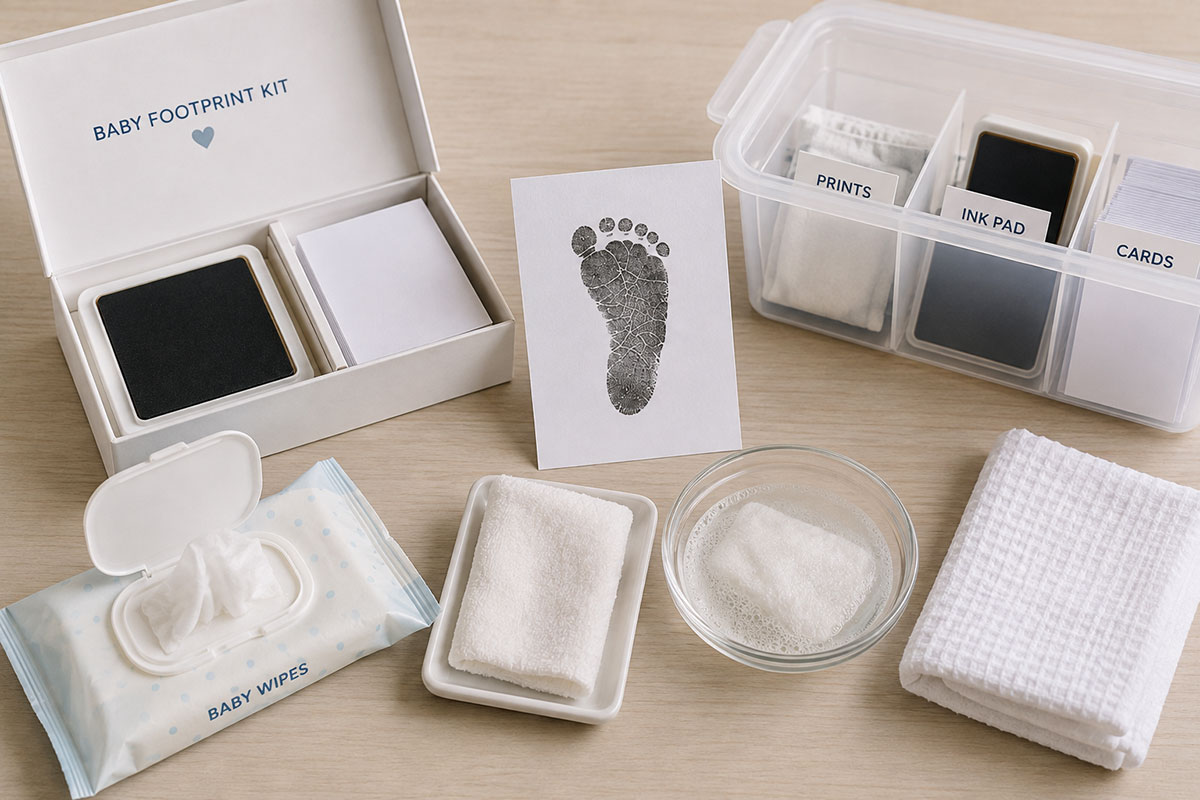
Cleanup is easier when you plan it before opening the pad. Put the paper in place, open only the supplies you need and keep the manufacturer's cleanup directions within reach.
For any material that touches the baby's skin, follow the instructions provided with that specific product. Do not assume two footprint pads clean up the same way because their packaging looks similar.
If a product says to wash with soap and water, have those supplies ready before making the impression. If it provides different directions, use those instead. The goal is to avoid improvising once there is ink on a wiggling foot.
Keep Decorative Stamp Ink Separate
Ordinary paper craft ink and a footprint pad intended for direct skin contact can come in nearly identical little cases. Once the wrappers are removed, it may be difficult to remember which is which.
Keep the original label or store the skin-contact product with its instructions. Decorative stamp pads can stay with your rubber stamps and paper craft supplies.
This simple separation becomes even more useful if you make baby crafts more than once. You do not want to identify a mystery ink pad by color or memory later.
Close Ink Pads Promptly
Replace the lid as soon as you finish making the impressions. Leaving an ink pad uncovered can let the surface begin to dry and may also increase the chance of accidental marks on clothing, furniture or finished prints.
If the pad has an inner seal, protective film or storage insert, follow the manufacturer's instructions about whether it needs to be replaced.
Do not add water or another liquid to a drying pad unless the manufacturer specifically provides instructions for doing so. Changing the ink can affect both the print quality and the way the product performs.
Inkless Kits May Have Components That Cannot Be Reused
Some inkless systems are designed for a limited number of impressions. A transfer surface may become less effective after repeated use, and specially treated cards may be single use.
Before throwing away the packaging, check whether the remaining pieces can be stored for another printing session. Keep any unused treated paper sealed as directed so moisture, fingerprints or household residue do not affect it.
If the kit is clearly designed for one session, plan all of the prints before you begin. Make the ones that matter most first. A keepsake for your own records should not become the final attempt after several decorative extras have used most of the transfer surface.
Let Footprints Dry Before Stacking or Framing
A footprint can look dry before the ink has fully set. Place finished prints on a clean, flat surface and leave them undisturbed for the drying time given with the product.
Do not slide a fresh print directly into a frame or plastic sleeve. Trapped moisture or partially dry ink can smear against the glazing or protective sheet.
When the print is completely dry, store it away from moisture and direct sunlight. If it is important to you as an original record, keep a scan or clear photograph as a backup before adding permanent decorations.
Any paint used later to turn the print into a craft should be chosen separately from the material used to capture the footprint. The paint for baby crafts guide covers that material choice in more detail.
A small amount of organization goes a long way here. Label the pad, keep the directions and preserve the original footprint before you start cutting or decorating it. Those few steps protect the part of the project that cannot be recreated in exactly the same way later.
What Product Labels Can and Cannot Tell You
Packaging can help you rule out the wrong material, but a few familiar phrases are easy to read too broadly. I would give more weight to specific directions than to large claims printed on the front of the package.
If a footprint pad is intended to touch skin, look for directions that clearly describe that use. If the manufacturer describes the product only as a stamping ink for paper, rubber stamps or craft projects, do not assume it becomes suitable for a baby's foot because it is washable or labeled non-toxic.
In the United States, the Consumer Product Safety Commission explains that consumer art materials are subject to federal labeling requirements, including requirements related to potential hazards. You can read the CPSC guidance for art materials for more information.
A statement such as "Conforms to ASTM D-4236" relates to the review and labeling requirements for art materials. It should not be treated as a separate promise that a particular craft ink or paint is intended for direct application to a baby's skin. For footprint printing, I would still look for directions that specifically match the way you plan to use the product.
Also pay attention to warnings, age guidance, storage instructions and what the manufacturer says to do if the product gets somewhere it was not intended to go. Good instructions should make the process clearer, not leave you filling in important details yourself.
Frequently Asked Questions About Baby Footprint Ink Pads, Kits and Stamps
Is an inkless baby footprint kit really inkless?
The baby's foot does not contact conventional wet ink in a true inkless or no-contact system, but the kit still needs a way to create the image. Depending on the design, that may involve a transfer coating, treated paper or another developing material. Read the directions so you know which surface touches the foot and which supplies must be used together.
Is a clean-touch footprint pad the same as an inkless kit?
Not always. A clean-touch system generally keeps the inked surface away from the baby's skin by placing a film or barrier between the foot and the ink. Some sellers use "inkless" for these systems as well. Product names vary, so the construction of the pad is more useful than the wording in the listing title.
Can I use a regular rubber stamp ink pad for a baby's footprint?
Do not assume that you can. Many stamp pads are made for putting ink on rubber or polymer stamps and then transferring that ink to paper. If the manufacturer does not state that the product is intended for the skin contact you have in mind, choose a footprint product with clearer directions.
What is the difference between a baby footprint stamp and a footprint ink pad?
A footprint ink pad helps capture the baby's actual foot. A decorative baby footprint stamp already contains the foot shape and simply repeats that design on paper. The stamp is useful for decoration, but it does not preserve the individual shape of the baby's foot.
Can I use my own cardstock with an inkless footprint kit?
Sometimes, but not with every kit. Some systems require specially treated paper for the footprint to appear. If the instructions specify the supplied cards or sheets, ordinary cardstock may not work. Check this before buying if printing directly onto your own paper is important to you.
What paper gives the clearest baby footprint?
A smooth, reasonably sturdy paper generally gives the foot a flat surface and allows small details to show more clearly than deeply textured paper. The printing material still matters, so test the ink on a spare piece of the same paper whenever the system allows it.
How big should a baby footprint ink pad be?
The usable inked or transfer area should be larger than the baby's foot from the back of the heel to the tip of the longest toe. Leave some extra room rather than trying to fit the foot exactly inside the listed dimensions. Check the usable area, not just the outside dimensions of the case.
How many footprint attempts should I plan for?
More than the number of finished prints you need. If you want two keepsakes, having enough material for at least one additional attempt gives you room for curled toes, a partial heel or a quick movement at the wrong moment. Check the manufacturer's stated number of impressions because the number of cards in a kit does not always equal the number of usable attempts.
Does washable mean a footprint ink pad is intended for baby skin?
No. "Washable" describes cleanup and does not by itself tell you that an ink is intended for direct contact with a baby's skin. Look for manufacturer directions that specifically permit the type of skin contact you plan, and follow the warnings and cleanup instructions supplied with that product.
Can an original footprint be turned into a reusable stamp later?
Yes. Some custom stamp makers can work from a clear scan or photograph of an existing footprint. Keep the original print separately and use a high-quality copy for the stamp order whenever possible.
Choose the Printing Method Before You Plan the Keepsake
A baby footprint can end up on a framed print, card, memory book or handmade gift, but the first decision is much simpler. Decide whether you need the baby's actual footprint or only a decorative footprint shape. Then choose a printing system that clearly explains how it works, what touches the foot, which paper it needs and how many attempts it provides.
Once you have a print you want to keep, let it dry completely and preserve the original before you start trimming, painting or decorating around it. You can always make the finished project more elaborate later. You cannot go back and capture that exact little footprint again.
For ideas that begin after the print is finished, continue with baby footprint crafts and keepsakes or browse more baby crafts made to keep.


When you click on links to various merchants on this site and make a purchase, this may result in this site earning a commission. This does not affect the price you pay.

UBGI Gold Standard 2026
Reviewed under the site's
editorial checklist.
About Jan | Contact | Baby Nursery Ideas (Blog) | Site Map | Privacy Policy | Disclosure Policy | Disclaimer | Affiliate Disclosure | Earnings Disclosure | Facebook | Pinterest
I am a participant in the Amazon Services LLC Associates Program, an affiliate advertising program designed to provide a means for us to earn fees by linking to Amazon. As an Amazon Associate I earn from qualifying purchases.
Copyright © 2006-2026. All Rights Reserved.