Air Dry Clay Baby Keepsake Footprint
By Jan Bay
An air-dry clay baby keepsake footprint captures the actual size and shape of one tiny foot in a piece you can display long after the newborn stage has passed. This project uses one clear footprint impression in a simple arched plaque that is substantial enough to preserve the details that mean so much and disappear all too soon.
Explore More Baby Footprint Ideas
Baby Footprint Crafts and Ideas
Jump to:
Air Dry Clay Baby Keepsake Footprint : Step-by-Step
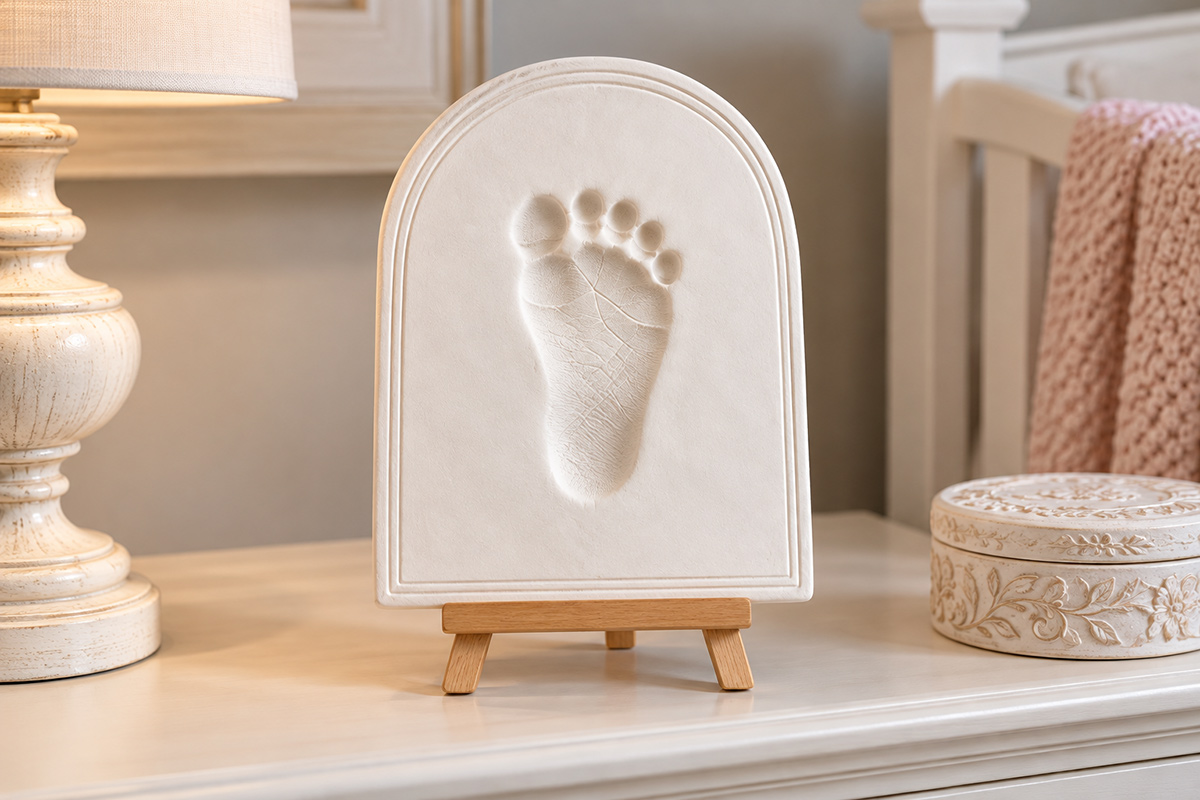
The finished plaque shown here is deliberately simple: one real footprint, one arched shape and a narrow double-line border. I wouldn't pile flowers, lettering and little clay decorations around the print. The footprint is the keepsake.
The target finished size is about 6 1/2 inches wide by 8 1/2 inches tall and approximately 3/8 inch thick. That gives a newborn footprint enough breathing room without turning the project into a large nursery sign. The plaque sits on a small tabletop easel, so there are no hanging holes or ribbon to work around.
If you'd rather make a paper version before committing a print to clay, the baby footprint crafts and ideas page gives you other ways to use the same tiny-footprint theme.
What You'll Need
- White or natural air-dry impression clay specifically labeled by the manufacturer for baby handprints or footprints
- About 1 to 1 1/4 pounds of clay so you have enough to roll and trim comfortably
- Rolling pin or smooth acrylic roller
- Parchment paper, silicone craft mat or another nonstick work surface
- Ruler
- Cardstock or thin cardboard for the arch template
- Craft knife or clay cutting tool for adult use
- Wood skewer, blunt clay tool or similar tool for the border
- Small cup of water for smoothing, used very sparingly
- Fine-grit sandpaper for the completely dried edge
- Optional compatible clear acrylic varnish
- Small tabletop easel for display
You don't need paint unless you actually want it. I prefer this one left in a soft white or natural clay color because the shadows inside the footprint show the detail without anything competing with it.
Make the Arch Template First
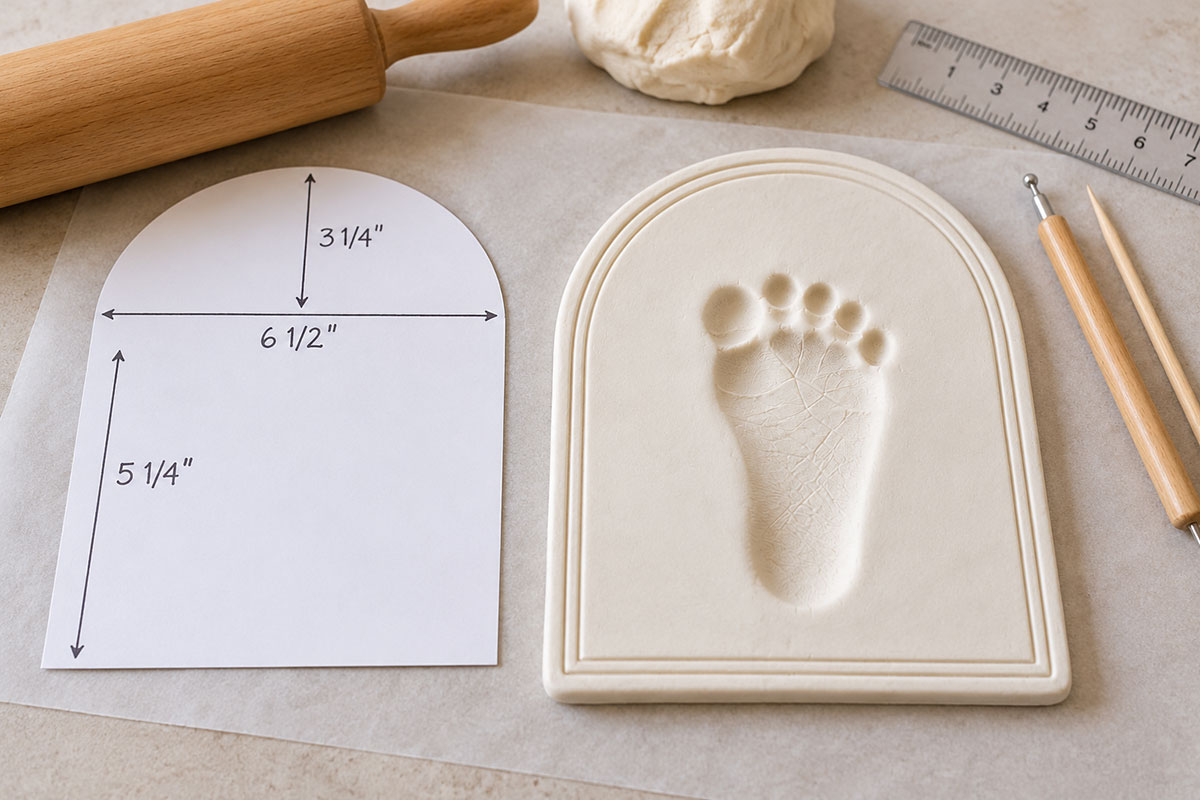
Cut a cardstock template 6 1/2 inches wide and 8 1/2 inches tall. The lower sides run straight for 5 1/4 inches. Above that, draw a semicircular top with a 3 1/4-inch radius so the curve meets both straight sides cleanly.
That sounds more complicated than it is. You are basically making a rectangle with a half-circle sitting on top of it.
Keep the template nearby before you bring the baby into the project. Once you're ready to take the footprint, you want the clay prepared and waiting rather than trying to measure and cut while holding a wiggly foot.
Roll and Cut the Clay Plaque
Knead the clay only enough to make it workable, then roll it on the nonstick surface to an even 3/8-inch thickness. Check several spots with the ruler instead of judging it from the edge alone.
I would not go thinner just to make the plaque look delicate. A footprint impression removes some thickness from the clay, and the piece still has to survive drying and handling. Crayola advises making its Air-Dry Clay pieces at least 1/4 inch thick because pieces that are too thin can crack. Your clay brand's own instructions should take priority if they differ.
Lay the arch template on the rolled clay and cut around it cleanly. Lift away the scraps rather than picking up the plaque itself. Smooth the cut edge with a fingertip and only the smallest amount of water if needed. Too much water can weaken the surface and contribute to cracking as the clay dries.
Add the Double-Line Border
The two narrow lines around the edge are part of the finished design, but keep them shallow.
Use a ruler as a guide along the straight portions and a blunt clay tool or skewer around the arch. Score the outer line approximately 1/4 inch from the edge. Add the second line about 1/8 inch farther toward the center, putting it roughly 3/8 inch from the outside edge.
Don't cut deeply into the clay. You only want an incised line that will catch a little shadow after drying.
Take the Baby's Footprint
Have everything ready before you pick up the baby's foot. The clay should already be rolled, cut, bordered and sitting flat on its drying surface.
Use clean, dry skin and make sure there are no cuts, rashes or irritated areas where the clay will touch. For direct contact with a baby's foot, choose an air-dry impression clay whose manufacturer specifically identifies it for baby handprints or footprints rather than relying on a general "non-toxic" craft-clay label. Wash and dry the baby's foot promptly after taking the impression.
Position the foot vertically with the toes pointing toward the rounded top. Center it from side to side and leave enough blank clay around the impression that none of the toes crowd the border. With a typical newborn-size print, the heel will fall in the lower half of the plaque and the toes will finish comfortably below the arch.
Support the ankle and lower the heel into the clay first. Then bring the ball of the foot and toes down with steady, gentle pressure. Press each toe just enough to register it, then lift the foot straight back up.
Don't rock the foot from side to side. That's how a tiny footprint turns into nothing but a messy, wide blur.
If the print smears badly, don't try to repair five toes with a sculpting tool. Re-knead the clay, roll it again and take another print. A clean second attempt is much more convincing than a footprint that has obviously been carved back into shape.
Check the Impression Before You Let It Dry
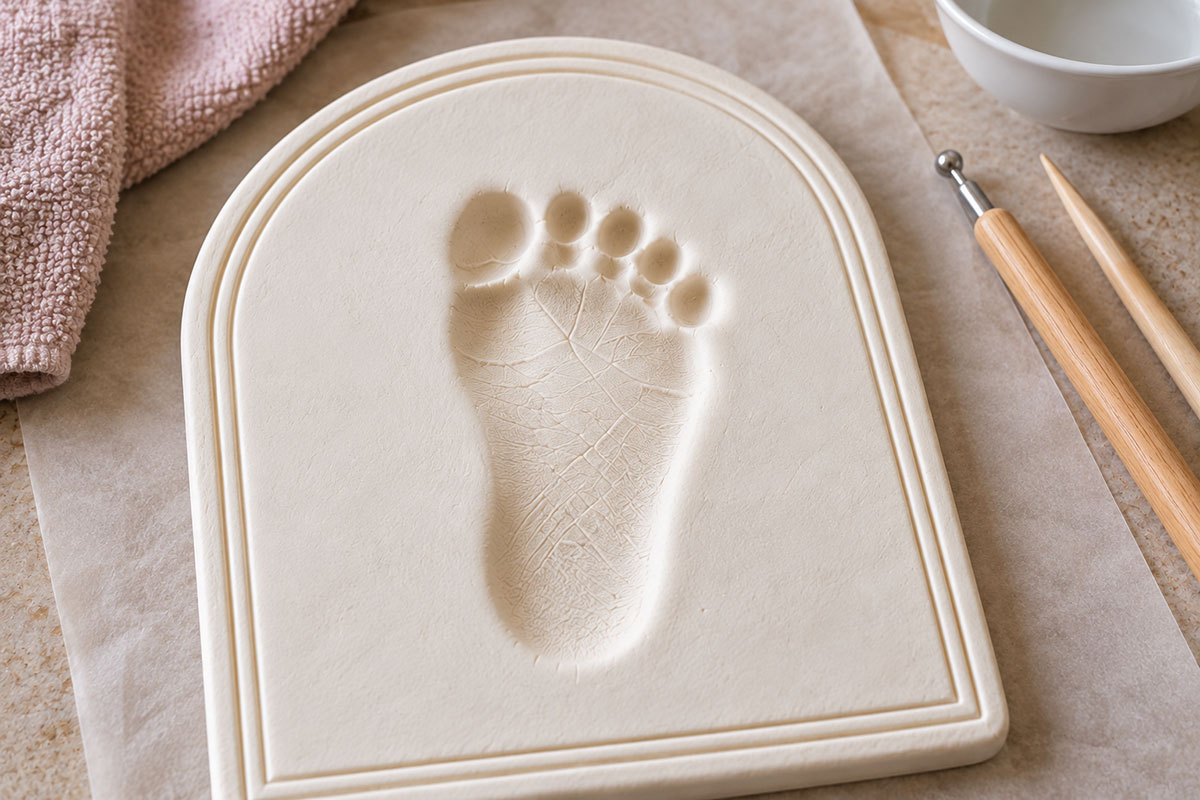
Look at the heel, outside edge, ball of the foot and all five toes. You do not need every skin line to show. What matters is that the shape reads clearly as this baby's footprint rather than a generic foot-shaped depression.
If one toe barely registered but the rest of the print is clean, I'd leave it alone. Real baby footprints aren't perfectly even.
Check the outer shape again too. Taking the print can push the soft clay outward slightly. If an edge has spread, place the cardstock template back over the plaque without pressing on the footprint and carefully trim only what is necessary.
Dry the Plaque Without Rushing It
Leave the plaque flat and follow the drying instructions for the particular clay you bought. Don't assume that dry on the surface means dry through the center.
As one useful reference, Crayola says its Air-Dry Clay generally becomes dry to the touch in about 24 hours and completely dry in about 72 hours, although the size of the piece and environmental conditions can change the timing. You can read its Air-Dry Clay drying guidance here. Crayola also notes separately that flat pieces can warp when their edges dry faster than the center, so follow the drying and turning directions for the particular clay you're using.
A 3/8-inch plaque is substantial enough that I would give it the full drying time specified by the manufacturer rather than trying to finish it the next morning.
Keep it away from a heater, hair dryer, sunny window or other shortcut meant to speed things up. Uneven drying is not your friend here.
Finish the Edges
Once the plaque is fully dry, check the outer edge with your fingertips. If you find a rough spot, lightly sand only that area with fine-grit sandpaper.
Don't sand inside the footprint. The little creases and uneven marks are the part worth keeping.
Dust the plaque thoroughly with a dry soft brush or cloth after sanding. If your particular clay can be sealed, you can apply a compatible clear finish according to the clay and varnish manufacturers' directions.
Crayola recommends waiting until its clay is completely dry before applying acrylic varnish and notes that sealing does not make the finished clay waterproof. That's another reason this plaque belongs indoors rather than on a porch or anywhere damp.
What About Adding a Name or Date?
You can add one, but I would keep it optional.
The example image leaves the face of the plaque uncluttered so the single footprint remains the focal point. If you want the baby's name, birth date or age recorded permanently, one neat solution is to inscribe it on the back while the clay is still soft.
Use a fine blunt tool and write lightly enough that you don't weaken the plaque. Keep the writing away from the edges and avoid pressing directly behind the footprint where the clay has already been compressed from the front.
If you want the name to become part of the front design instead, leave enough open space below the heel before taking the impression. I would choose either a name or a date there, not both plus a quote plus decorations. Keep this one simple.
Displaying the Finished Footprint Keepsake
Set the completely dried plaque on a small tabletop easel with enough lip to support its lower edge. Check that the easel sits firmly before placing the keepsake on a dresser, bookcase or shelf.
This is decorative keepsake art, not something for a baby to handle. Keep the plaque, easel and any broken pieces well out of reach and don't place it inside the crib or another sleep space.
If what you really want is a footprint displayed behind glass rather than a dimensional clay impression, the baby footprint frame ideas page is the better project. For an ink or inkless version, see the baby footprint stamp ideas.
And if you're making this near baby's first Christmas, don't turn this plaque into an ornament just because there's ribbon in the craft drawer. I already have a separate baby footprint Christmas ornament project for that.
Air-Dry Clay Baby Footprint Keepsake FAQ
How thick should the clay be for a baby footprint plaque?
For this project, aim for about 3/8 inch before making the footprint. The impression will compress part of that thickness. I would not reduce the plaque below 1/4 inch in its unprinted areas unless the manufacturer of your clay specifically directs otherwise.
How long does an air-dry clay baby footprint take to dry?
That depends on the clay, the thickness of the plaque, humidity and airflow. Follow the package directions. As a reference point, Crayola lists about 24 hours to become dry to the touch and about 72 hours to dry completely for its Air-Dry Clay.
Can I bake the plaque to make it dry faster?
Only if the manufacturer specifically says that product can be baked. Air-dry clay and oven-bake clay are not interchangeable. Crayola specifically says not to put its Air-Dry Clay in an oven, microwave or kiln.
What if the first footprint doesn't come out clearly?
If the clay is still fresh and clean, knead it back together and start again. That's better than trying to carve missing toes or reshape a smeared heel after the fact.
Should I paint the footprint?
You can, provided the clay is fully dry and the paint is compatible with it, but the plaque doesn't need paint to work. The recessed footprint already catches natural shadow. I would leave the example white and let the impression do the work.
Can I make two footprints instead of one?
You can, but use a larger plaque. Squeezing two prints into this 6 1/2 by 8 1/2-inch arch changes the proportions and starts pushing the project toward the paired-print keepsake designs that are already everywhere. The single footprint is what gives this version its cleaner look.


When you click on links to various merchants on this site and make a purchase, this may result in this site earning a commission. This does not affect the price you pay.

UBGI Gold Standard 2026
Reviewed under the site's
editorial checklist.
About Jan | Contact | Baby Nursery Ideas (Blog) | Site Map | Privacy Policy | Disclosure Policy | Disclaimer | Affiliate Disclosure | Earnings Disclosure | Facebook | Pinterest
I am a participant in the Amazon Services LLC Associates Program, an affiliate advertising program designed to provide a means for us to earn fees by linking to Amazon. As an Amazon Associate I earn from qualifying purchases.
Copyright © 2006-2026. All Rights Reserved.