By Jan Bay
Baby footprint crafts turn one tiny print into something worth keeping. Start with the part that cannot be recreated later: your baby’s actual footprint, the date it was made and, when it suits the project, a name or short note. From framed nursery art and painted keepsakes to clay impressions and gifts for grandparents, the best projects keep the footprint itself as the focus.
Explore More Baby Craft Ideas
Jump to Baby Footprint Ideas
A baby footprint can become nursery art, a small clay keepsake, a framed birth record, a gift for grandparents or part of a larger family piece. The footprint is tiny, but it carries most of the meaning. I believe the best designs give it enough room to be noticed instead of burying it under decorations.
Before choosing paint colors, frames or embellishments, decide what you want the finished piece to preserve. A footprint made during the newborn stage tells a different story from one made near a first birthday. Adding the date keeps that difference from being lost later.
If you are already making keepsakes from your baby's hands, the ideas on baby handprint crafts can be adapted into matching footprint projects. A pair does not have to look identical. A handprint and footprint can share the same frame color, lettering style or background while remaining separate pieces.
Here are several ways to use one clear print without turning the project into a pile of craft supplies:
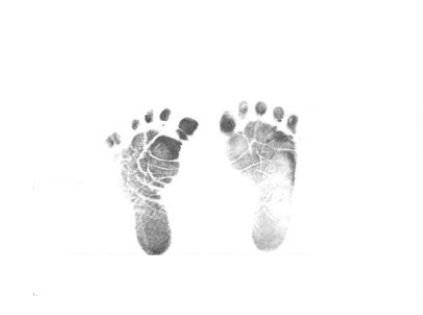
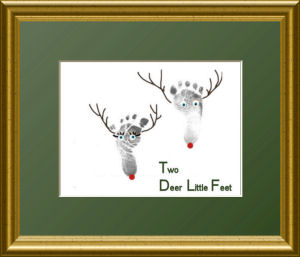
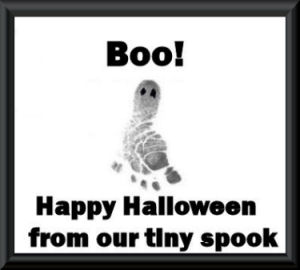
A footprint does not need to become an animal, flower or holiday character to look finished. Sometimes the little heel, toes and uneven edges are the whole design.
A cross stitched footprint makes a lovely keepsake gift and my baby cross stitch patterns that include a counted baby footprint chart that can be finished in a hoop or frame will get you started.

The same footprint can look very different depending on where it will end up. A print intended for a small frame needs more open space around it than one that will become part of a larger piece of nursery art. A footprint that will be scanned and reused should be made on a clean, plain background with clear edges.
Think about the final size before you add names or dates. Tiny lettering that looks fine on a full sheet of paper can become difficult to read when the piece is trimmed for a 5-by-7-inch frame.
It also helps to leave more blank paper around the print than you think you will need. You can trim it later. You cannot put the margin back after it has been cut away.
Baby feet are small, soft and rarely interested in staying exactly where you place them. A clear print depends more on preparation than on pressing harder.
Set out everything before you bring the baby into the project. Have the paper or keepsake surface ready, along with the printing material, a damp cloth and whatever you need for cleanup. If another adult can help position the paper or steady the baby's leg, the process can be easier.
For more detail about making the print itself, see how to make a clear baby footprint.
That heel-to-toe motion often gives the toes a better chance to register individually. Pressing the entire foot down at once can cause the toes to curl or smear.
Make several prints if the material allows it. The first print does not need to become the keepsake. It can simply show you whether you need less paint, more even coverage or a slightly different angle.
A handmade baby footprint does not need five mathematically perfect toes. Small gaps, a lighter heel or one slightly crooked toe can still produce a lovely keepsake. What matters is that the overall foot shape is recognizable and that enough detail remains to make the print feel personal.
Heavy blobs of paint hide more detail than they reveal. If the toes merge into one solid shape, reduce the amount of material rather than increasing pressure.

If you make a particularly clear print, photograph or scan it before adding lettering, cutting the paper or gluing it into another project. That clean copy gives you options later.
You might use the same footprint for a grandparent gift, a second frame or a birth announcement keepsake without asking the baby to cooperate for another printing session.
Keep the unedited version too. A future project may need a different crop, background or orientation.
Paint, ink and clay do different jobs. Choose the material according to the keepsake you want rather than assuming one method is best for every project.
If you plan to use paint, read the product label before it touches the baby's skin. Look at the intended use, age guidance, directions and warnings. My guide to choosing paint for baby crafts explains what to check before starting a handprint or footprint project.
Paint is useful when color is part of the finished design. It works especially well for framed paper keepsakes and nursery art because you can coordinate the footprint with the room.
Apply a thin, even layer rather than coating the foot heavily. Too much paint fills the small spaces around the toes and can turn the print into a solid shape.
Have cleanup supplies beside you before applying anything. Follow the product directions and wash the baby's foot promptly after the print is made.
Ink can produce crisp detail and is a good choice when you want the footprint itself to look almost like a record or signature. Some keepsake systems are designed so the baby's foot does not directly touch the ink. Follow the directions supplied with the product you choose. If you are comparing printing methods, see my guide to baby footprint ink pads, inkless print kits and stamps.
Black, charcoal or deep navy ink can look especially good when the finished piece includes a name and date. The result does not have to look clinical. A warm wood frame, colored mat or textured paper can soften the presentation without covering the print.
Clay changes the footprint from a flat image into a small object. The depth of the heel and toes becomes part of the keepsake, which is why clay impressions can be especially appealing when you want something tactile rather than another framed print.
Prepare the material before positioning the baby. Smooth the surface first and make sure there is enough material around the footprint for the final shape you want.
Press only as directed for the keepsake material. If you do not like the first impression and the material can safely be reworked, smooth it completely before trying again. Repeated overlapping impressions are much harder to correct once the material begins to set.

Metallic paint, decorative paper, ribbon, elaborate frames and specialty clay can all be attractive. None of them carries the meaning of the baby's actual print.
When several decorative ideas compete for space, remove one. A small footprint already gives the project a natural focal point. The surrounding design only needs to help people see it.
That approach also makes the finished keepsake easier to use in a nursery later. A simple footprint in colors chosen for the room can remain on display even after the crib, bedding and other baby-stage pieces have changed.
Footprint nursery art does not have to look like a preschool craft project. The print can be treated almost like a tiny piece of line art, with plenty of open space around it and a frame that belongs in the room.
Start with the nursery rather than the craft aisle. Look at the wall color, wood tones, metal finishes and other artwork already in the space. Then choose one or two details that connect the footprint piece to the room.
A deep blue footprint can look polished in a walnut frame. A muted green print can work beautifully against crisp white paper in a darker nursery. Black or charcoal footprints are especially flexible because the frame and mat can carry the room's color.
You do not need to match the crib sheet or every accent exactly. A keepsake that coordinates with the broader room palette will be easier to keep on display as the nursery changes.
One centered footprint: Use a single print with the baby's name and date beneath it. This is a good choice for a small frame or a quiet spot on a gallery wall.
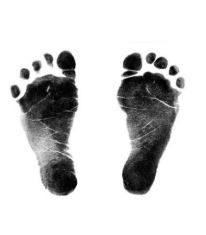
A pair of footprints: Position the left and right footprints side by side with enough space between them to see each shape clearly.
Footprint with birth details: Place the print above a short line of information such as the baby's name, birth date, weight and length. Keep the type smaller than the footprint.
Handprint and footprint pair: Make two separate pieces in coordinating frames. The baby handprint craft ideas page has more ways to develop the handprint half of the pair.
Sibling collection: Give each child the same size frame and background, then let the different footprint sizes tell the story.

A tiny footprint can disappear when it is surrounded by borders, quotes, illustrations and decorative lettering. Give it breathing room.
If the footprint measures only a few inches long, a larger mat can make it look more intentional rather than making the frame feel empty. The blank space directs the eye toward the small print.
Before cutting the paper, place the frame or mat over the footprint and move it around until the spacing looks balanced. Measure only after you like the position.
The baby's footprint does not need to become a fox, butterfly, tractor or flower just because the nursery has a theme. A plain print can sit comfortably in a woodland, coastal, traditional or modern room if the color and framing make sense.
If you want a decorative detail, keep it secondary. A narrow painted border, small nameplate or coordinating mat can connect the piece to the nursery while leaving the actual footprint easy to see.
There are many more keepsake projects on the Baby Crafts page if you want to build a small collection rather than make a single framed piece.
A footprint gift has an advantage that a purchased baby gift does not. The important part cannot simply be ordered again later. It records how small that foot was on one particular day.
That does not mean the gift needs a complicated design. In fact, a simple presentation often makes the footprint feel more valuable.
A small framed footprint is an easy gift to display on a desk, shelf or wall. Choose a frame that suits the recipient's home rather than automatically selecting something decorated for a nursery. My baby footprint frame ideas cover layout, matting, photographs, preservation and display options for the finished print.
For grandparents, consider adding the baby's first name and the date the print was made. A short relationship line such as "Grandma's little love" can be included if it feels right for your family, but it is not necessary.
If you need several gifts, make one clear footprint and preserve a high-quality scan or photograph before cutting or framing the original.
You can then create matching copies for grandparents, parents or other relatives without repeating the printing process with the baby. Change the frame or mat if you want each gift to suit a different home.
Keep the original file at full size. A compressed phone screenshot is much less useful if you later decide to print the footprint larger.
A two-opening frame can hold the footprint on one side and a baby photograph on the other. Choose a photograph from approximately the same period as the print so the two pieces belong to the same moment.
The photo does not need props or a special setup. A simple portrait often keeps the finished keepsake from becoming too busy.

Not every footprint needs to go on a wall. A printed card can be placed inside a keepsake box with a hospital bracelet, birth announcement, first photograph or other small items that matter to the family.
For more ways to build a gift around those details, see my homemade personalized baby gifts, including name keepsakes and gifts made with prints.
Write the date on the back even if the date is already shown on the front. Loose keepsakes have a way of being separated from their original display.
If you include a clay impression, wrap or compartmentalize it so harder objects do not scrape the surface during storage.
The name and date are small details now, but they become increasingly useful as time passes. A footprint that looks obviously newborn today may be harder to place accurately when several baby keepsakes are stored together later.
At minimum, record the date the footprint was made. That date may be different from the baby's birth date.
If the footprint was made as a newborn keepsake, you can include both:
You do not need all five pieces of information on the front. Put extra details on the back of the artwork if the front begins to feel crowded.
"Six weeks old" may feel obvious when you make the project, but an exact date is more useful in long-term storage. If you want the age on the front, add the date discreetly on the back as well.
For siblings, use full names or initials in addition to dates. Similar-sized newborn footprints can be surprisingly difficult to identify after they have been packed away for a while.
If the finished footprint will be mounted inside a frame, write the identifying information on the back of the artwork before closing the frame.
Use a writing tool suitable for the paper or backing material and allow it to dry before the piece touches another surface.
For a clay keepsake, add identifying information according to the material's directions. If writing directly on the finished clay is not appropriate, label the storage box or attach a separate archival note.

A footprint keepsake can spend part of its life in the nursery and part of it safely stored away. Plan for both.
Framed pieces are easiest to move from a nursery to a hallway, bedroom or family gallery wall when the design is not tied too closely to infant decor. That is another reason I prefer letting the footprint carry the sentimental part while the frame handles the decorating.
If you plan to keep the artwork displayed for a long time, use paper, mats and framing materials intended for long-term artwork storage when practical.
Store loose prints flat rather than folding or rolling them. Place each print in its own suitable protective sleeve or between appropriate archival-quality sheets so neighboring keepsakes do not rub against it.
Do not stack a heavy baby book, clay ornament or keepsake box directly on top of an unframed footprint print.
Clay keepsakes need protection from impact more than paper prints do. Store them in a rigid box with enough padding to keep the piece from moving against harder objects.
Follow the material manufacturer's directions for drying, curing, sealing and long-term care. Different air-dry and casting materials can have different requirements.

A digital copy is not a replacement for the handmade original, but it gives you a useful backup.
Photograph or scan the footprint straight on before placing it behind glass. Include the entire print and enough surrounding paper to allow for future cropping.
Name the file with the baby's name and the exact date instead of leaving it with a generic camera filename. If you later find twenty similar footprint photographs, that small step will matter.
Store the original full-resolution file rather than only a version that has been resized for messaging or social sharing.
A keepsake is not improved by making the printing session longer than it needs to be. Prepare the surface, materials and cleanup supplies before you begin so the baby's foot can be cleaned promptly when the print is finished.
Use only products as directed by their manufacturers. Read the label before using paint, ink, clay or another craft material with a baby. If a product is not intended for the way you plan to use it, choose another method.
Do not try to force a perfect print if the baby is uncomfortable, pulling away or repeatedly curling the toes. Stop and try again another time, or use one of the imperfect prints you already have. A keepsake can still be beautiful with one faint toe.
Once the print is finished, the rest of the project can wait. Lettering, framing and decorating are much easier to do after the baby is no longer part of the work session.
If you want additional background on how art materials are labeled in the United States, the U.S. Consumer Product Safety Commission explains art material labeling requirements. Product labels and manufacturer directions still matter because materials can differ.
A simple paper footprint is usually the easiest place to begin because you can make several attempts and choose the clearest one later. Prepare the paper, printing material and cleanup supplies first. Support the baby's ankle, lower the heel first, then gently bring down the rest of the foot and lift it straight back up.
Choose according to the finished project. Paint gives you more color options for nursery art and decorative keepsakes. Ink can produce a cleaner, more graphic-looking print. Read the product directions and intended-use information before using either method with a baby.
Use only a thin, even layer of the printing material and avoid sliding the foot across the paper. Place the heel first, lower the toes gently and lift the foot straight up when the print is complete.
Keep it if the overall shape is clear. A slightly faint heel, uneven toe or tiny gap can make the print look more like the baby's actual foot rather than a manufactured design. Make another print if you want options, but do not discard a meaningful print simply because every toe is not identical.
The baby's name and the date the footprint was made are the most useful details. You can also include the birth date, weight and length if the piece is intended as a birth keepsake. Extra information can go on the back if the front starts to look crowded.
Yes. Once you have a clear original, scan or photograph it before trimming, decorating or framing it. That lets you create additional keepsakes without making another print from the baby's foot.
Keep the design simple and choose colors and framing that relate to the room. A plain footprint on good paper can look polished when it has generous empty space around it. You do not need to turn the print into a character or themed illustration.
Yes. You can place them together in one larger frame or create two coordinating pieces. Keeping the paper, frame style or lettering consistent helps the pair feel connected without making both prints compete for attention.
Any age can become a meaningful milestone. A newborn print records just how small the foot was at the beginning, while later prints can mark a first holiday, six months, a first birthday or another date important to your family. Write down the exact date whenever you make one.
There is no need to turn every baby footprint into an elaborate project. Sometimes the best finished piece is simply a clear little foot, a name, a date and enough open space to let you see what you actually wanted to remember.
Make the print first. Save a clean copy. Then decide whether it belongs in a frame, a keepsake box, a clay impression or a gift.
If you want to continue building a collection, explore more baby crafts and keepsake ideas or pair the footprint with one of these baby handprint crafts.
When you click on links to various merchants on this site and make a purchase, this may result in this site earning a commission. This does not affect the price you pay.
UBGI Gold Standard 2026
Reviewed under the site's
editorial checklist.