15 DIY Pink Christmas Decorations You Can Make Yourself for a Shower or Party
By Jan Bay
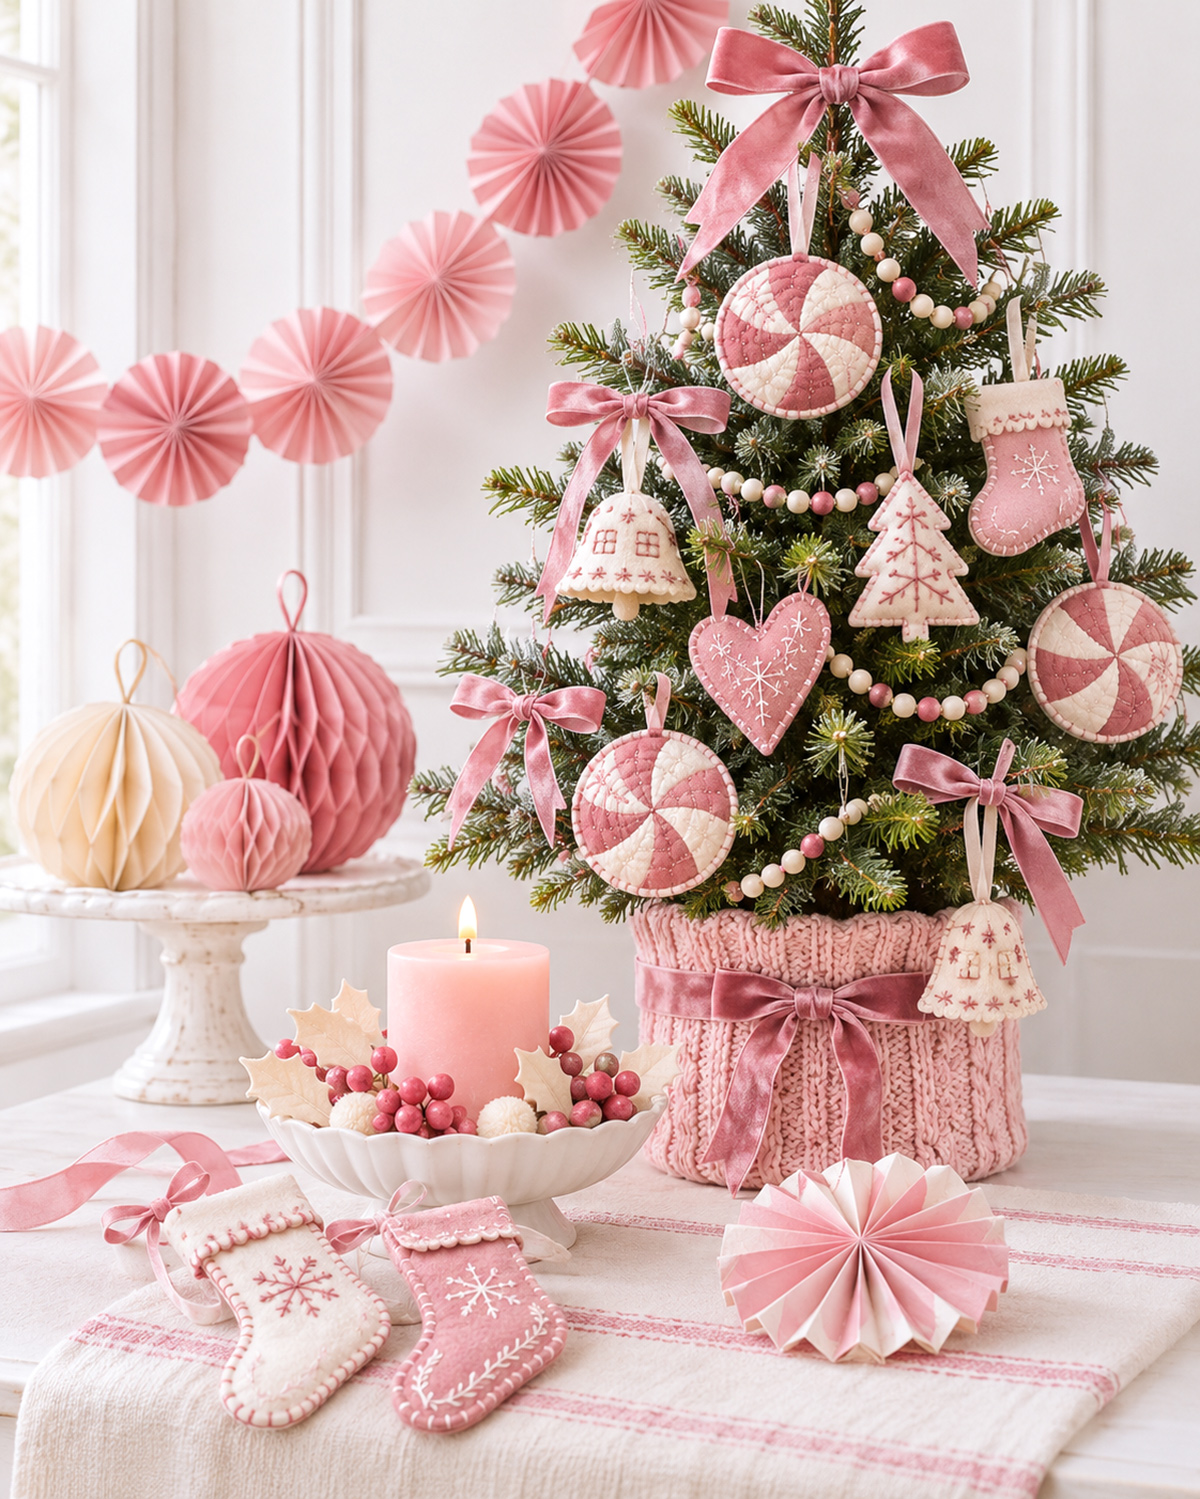
These DIY pink Christmas decorations are a pretty way to give your holiday decorating a handmade touch. From little ornaments and ribbon garlands to Christmas table decorations, these 15 projects bring together shades of blush, rose, and cheerful pink. Make a few for your Christmas tree, create matching decorations for a holiday party, or use your favorites to decorate a baby girl Christmas shower. You'll find instructions for some projects right here, while others link to their own complete tutorials with materials, measurements, and printable templates where needed.
Explore More Christmas Crafts and Baby Shower Ideas
Baby Christmas Crafts and Keepsakes
See Supplies for These Christmas Crafts Here.
Browse the 15 DIY Pink Christmas Decorations
- Quilted Pink Peppermint Ornament
- Pink Velvet Ribbon Baubles
- Little Pink Felt Stocking Ornaments
- Pink Quilted Present Ornament
- Crochet Pink Christmas Bell
- Pink Candy-Stripe Fabric Garland
- Pink Christmas Mitten Pocket Garland
- Layered Pink Ribbon Door Decoration
- Pink and Silver Christmas Starburst
- Pink Christmas Sleigh Centerpiece
- Mini Pink Gift-Box Place Settings
- Pink Christmas Bell Napkin Rings
- Pink Christmas Candy Centerpiece
- Mini Felt Baby Bib Ornament Favors
- Pink Christmas Baby Shower Welcome Sign
1. Quilted Pink Peppermint Christmas Ornament
This little quilted peppermint ornament is a lovely way to use small pieces of pink and ivory fabric. Eight wedges come together to make the candy design, while a narrow fabric edge and velvet hanging loop give it a finished look. Make one for your Christmas tree, or sew several for a handmade ornament gift.
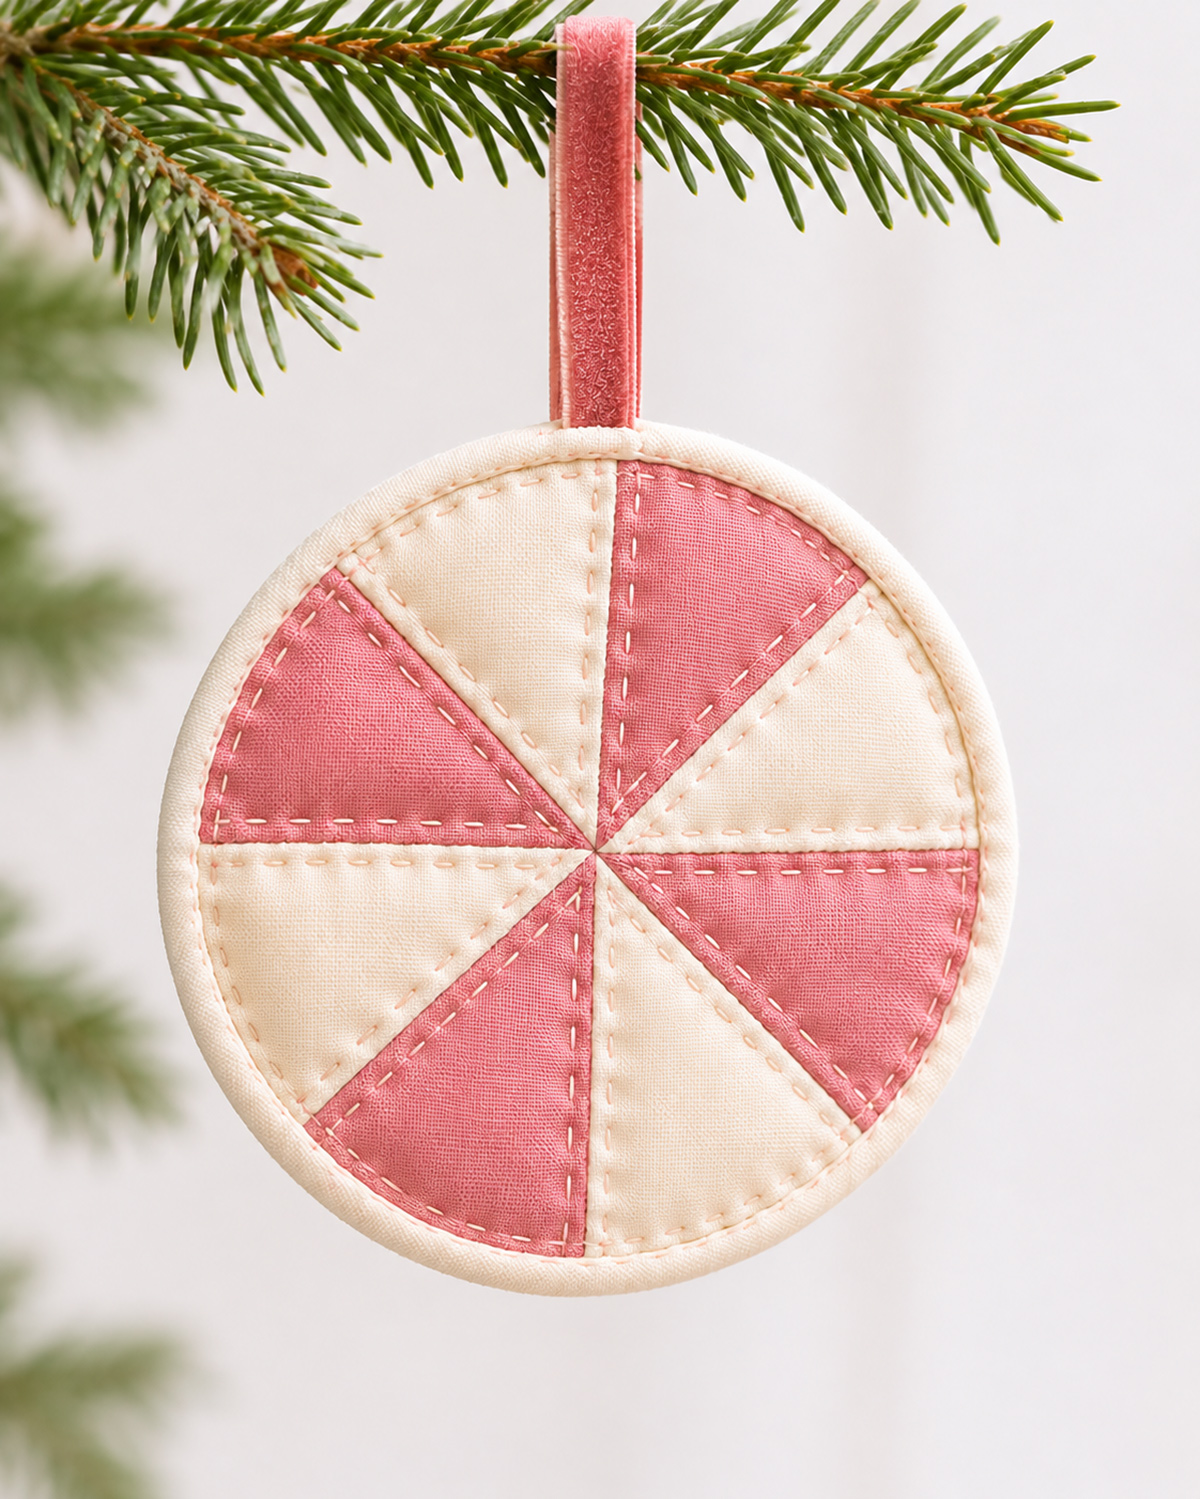
Finished size: Approximately 4 1/4 inches across, excluding the hanging loop.
Skill level: Confident beginner to intermediate. You'll need to sew accurate 1/4-inch seams and work with several seams meeting at one point.
Materials
- One 6-inch square of dusty-rose quilting cotton
- One 6-inch square of ivory quilting cotton
- One 5-inch square of ivory cotton for the backing
- One 5-inch square of thin cotton or polyester quilt batting
- Approximately 18 inches of ivory bias binding, 1 1/2 inches wide before folding
- 8 inches of dusty-rose velvet ribbon, approximately 3/8 inch wide
- Coordinating sewing thread
- Ivory or pale-pink embroidery floss for decorative running stitches
- Hand-sewing needle and embroidery needle
- Sewing machine or hand-sewing supplies
- Fabric scissors, pins, ruler and iron
- Printed cutting templates
Printable templates: Download the Pink Peppermint Ornament Cutting Templates.
Print the templates at 100% or Actual Size, with page scaling turned off. Check that the printed test square measures exactly 1 inch before cutting your fabric.
Cutting the Fabric Pieces
- Cut out the wedge template along its solid outer outline. The template already includes the 1/4-inch seam allowances along both long sides.
- Cut four identical wedges from the dusty-rose fabric and four from the ivory fabric. Keep the fabric grain straight along the length of each wedge where possible.
- From the backing fabric, cut one circle measuring 4 1/4 inches across.
- Cut one matching 4 1/4-inch circle from the thin batting.
- Cut an 18-inch length of 1 1/2-inch-wide ivory bias binding. Join shorter lengths with diagonal seams if necessary.
- Cut an 8-inch length of velvet ribbon for the hanger.
Cutting checkpoint: You should have eight front wedges, one backing circle, one batting circle, one binding strip and one ribbon hanger.
Sewing the Peppermint Front
- Lay the eight fabric wedges on your work surface, alternating pink and ivory. All eight narrow ends should point toward the same center.
- Using the dashed seam guides on the paper template, mark the center meeting point on the wrong side of each fabric wedge. This is the point where the finished seam lines meet, not the pointed end of the cutting template.
- Place one pink wedge and one ivory wedge right sides together. Match the long edges and the marked center positions.
- Sew the first pair together using a 1/4-inch seam allowance. Begin at the wide outer edge and sew toward the marked center dot. Stop exactly at the dot and secure the stitches. Do not sew into the extra pointed fabric beyond the dot. That fabric is seam allowance and will be trimmed after joining.
- Press the seam allowance open. Take care not to stretch the fabric.
- Repeat until you have four joined pairs, each containing one pink wedge and one ivory wedge.
- Place two sewn pairs right sides together along their remaining long edges. Match the marked center dots and pin through them to keep the points aligned. Sew from the wide outer edge toward the center, stopping exactly at the marked dot. Press the seam open to make one four-wedge half circle.
- Join the remaining two pairs in the same way to make the second half circle. Both halves should have four wedges, with their center points aligned and the extra pointed seam allowances still unstitched.
- Place the two half circles right sides together, matching their center seams and arranging the colors so pink and ivory alternate all the way around.
- Pin the center first. Sew the halves together with a 1/4-inch seam allowance, stitching through the center intersection.
- Press the final seam open. Trim bulky seam-allowance tips near the center without cutting any stitching.
- Lay the 4 1/4-inch round template over the pieced front, centering the point where the eight wedges meet. Trace around the circle and trim along the line.
Piecing checkpoint: The front should be a complete circle with four pink wedges and four ivory wedges. All eight wedge seams should meet near the center. The circle should measure 4 1/4 inches across after trimming.
If the center doesn't line up neatly, correct the seam alignment before trimming the circle. Don't try to hide a large gap with decorative stitching.
Adding the Batting and Quilting
- Lay the ivory backing circle wrong side up on your work surface.
- Center the batting circle over the backing.
- Place the pieced peppermint front right side up over the batting. All three circles should line up around their edges.
- Pin or baste through all three layers to hold them together.
- Thread an embroidery needle with two strands of ivory or pale-pink embroidery floss.
- Beginning near the center, work a line of small running stitches approximately 1/8 inch to one side of a pieced seam. Continue toward the outer edge, stopping approximately 3/8 inch before the raw circular edge.
- Repeat on the opposite side of that seam. Work the remaining seven seams the same way, making two parallel rows of decorative running stitches beside each seam.
- Keep the stitches approximately 1/8 inch long, with similar spaces between them. The stitching should be visible without pulling the fabric into deep grooves.
- Add one light circular row of running stitches approximately 3/8 inch inside the raw outer edge. Work through all three layers, keeping the row evenly spaced from the edge. This row will remain visible just inside the ivory binding.
- Secure the thread ends between the layers rather than leaving knots visible on the front.
The running stitches should sit close to the seams. You don't need heavy quilting or large stitches. Just enough to hold the layers together and give the ornament the handmade finish shown in the example image.
Adding the Velvet Hanging Loop
- Fold the 8-inch velvet ribbon in half, bringing the cut ends together.
- Lay the ornament right side down. Position the ribbon ends against the ivory backing at the top edge, centered over one of the wedge seams. The folded loop should extend above the ornament.
- Overlap the ribbon ends onto the backing by approximately 1/2 inch, keeping the ribbon straight and untwisted.
- Using a hand-sewing needle and matching thread, secure the ribbon ends with several small backstitches approximately 3/8 inch below the outer edge. Catch the backing fabric and batting without sewing through the decorative front.
- When attaching the ivory binding, make sure the 1/4-inch binding seam also catches the ribbon ends at the top edge. This provides a second attachment point.
- Check that the loop hangs straight and feels securely attached before finishing the binding.
Binding the Round Edge
- Press one short end of the bias strip to the wrong side by 1/4 inch.
- Starting near the lower edge of the ornament, place the right side of the binding against the right side of the peppermint front, aligning their raw edges.
- Leave approximately 1 inch of the folded starting end free, then begin sewing with a 1/4-inch seam allowance.
- Work slowly around the circle, easing the bias binding along the curved edge without stretching it tightly.
- When you approach the starting point, trim the loose binding end so it can overlap the folded starting end by approximately 1/2 inch. Tuck the raw end beneath the folded end and finish sewing the overlap.
- Fold the binding over the raw edge toward the back of the ornament.
- Turn the remaining raw edge of the binding under approximately 1/4 inch. Adjust the fold so it covers the first stitching line on the back.
- Pin or clip the binding in place around the entire circle.
- Hand-sew the folded edge to the backing using small slip stitches.
- Check the top of the ornament and add a few reinforcing stitches where the velvet hanging loop meets the bound edge.
Finishing checkpoint: The ornament should measure approximately 4 1/4 inches across, with an even ivory edge, a flat quilted center and a secure pink hanging loop.
Give the ornament a light press with a pressing cloth, keeping the iron away from the velvet ribbon. The batting should provide just a little padding rather than making the ornament look stuffed.
Making a Matching Set
You can make these in several shades of pink without changing the pattern. Try blush with ivory, dusty rose with white, or deeper pink with a pale cream fabric. I would keep the binding the same color throughout the set so the ornaments look like they belong together.
For a baby girl Christmas shower, the finished ornaments could be displayed on a small decorative tree and given to guests afterward. Keep them as decorative ornaments rather than toys for babies.
2. Pink Velvet Ribbon Christmas Baubles
These pink velvet ribbon baubles are a pretty way to dress up plain Christmas ornaments without sewing anything. You'll wrap a lightweight ball with dusty-rose velvet ribbon, add a pleated ivory band around the middle, and finish it with a little pink bow.
I like this project for a beginner because you can make one ornament first and see how the ribbon behaves before putting together a matching set. The ivory band gives the ornament a dressed-up look, but the basic construction is quite simple.
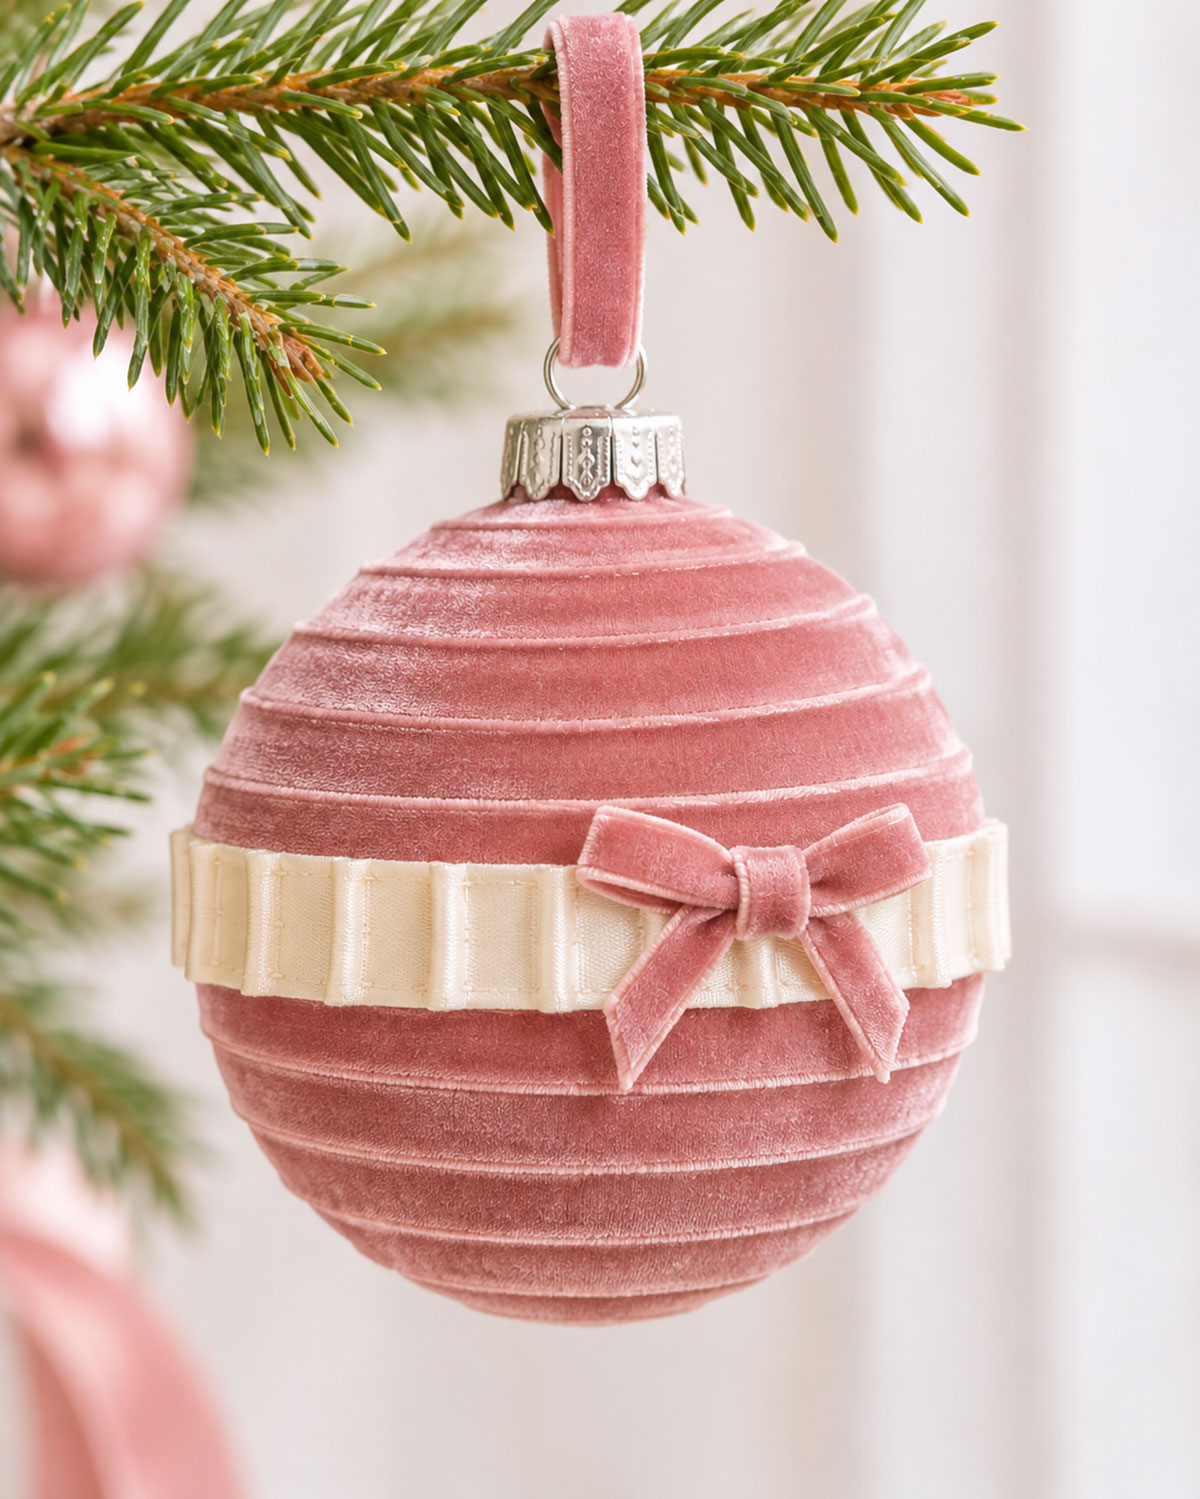
Finished size: Approximately 3 1/4 inches across, including the ribbon layers. The ivory band may extend slightly beyond this measurement.
Skill level: Beginner.
Materials for One Bauble
- One 3-inch smooth, lightweight, shatterproof plastic Christmas ball with an attached metal cap and hanging eye
- 2 1/2 yards of 1/2-inch-wide dusty-rose velvet ribbon, non-wired, for covering the ball
- 18 inches of 5/8-inch-wide ivory satin ribbon, non-wired, for the pleated center band
- 12 inches of 3/8-inch-wide dusty-rose velvet ribbon for the small bow
- 6 inches of matching 3/8-inch velvet ribbon for the hanging loop
- One small circle of matching pink felt or velvet, approximately 5/8 inch across, for covering the bottom ribbon end
- Clear-drying craft adhesive suitable for both plastic and fabric, or a low-temperature glue gun suitable for the ornament base
- Ivory sewing thread and a hand-sewing needle for holding the ribbon pleats
- Fabric scissors, measuring tape, ruler and clips
Before you begin: Test your adhesive on a hidden part of the ornament. Some glues can discolor velvet or damage plastic. Apply glue sparingly to the back of the ribbon rather than letting it soak through the front.
Wrapping the Ornament with Pink Velvet Ribbon
- Remove any temporary store hanger or packaging, but leave the metal ornament cap and hanging eye attached. Check that the cap is firmly secured.
- Hold the ornament upright with the metal cap at the top. The velvet ribbon will travel around the ball in horizontal circles, gradually moving downward in a spiral.
- Place the cut end of the 1/2-inch velvet ribbon against the ball immediately below the metal cap. Keep the velvet side facing outward.
- Secure the first inch of ribbon with a small amount of adhesive on its underside. Let it grip before continuing.
- Wrap the ribbon around the upper part of the ball, keeping it flat against the curved surface. Secure it with small amounts of adhesive as needed.
- After completing the first circle, angle the ribbon slightly downward. Overlap the previous ribbon edge by approximately 1/8 inch.
- Continue wrapping around the ornament in a gentle downward spiral. Keep each new turn close to the previous one so the original ball doesn't show between the ribbon rows.
- Use the same amount of overlap as you work across the widest part of the ball. The horizontal edges should create a series of neat, shallow ridges.
- As you approach the lower curve, work slowly and ease the ribbon into place. You may need to increase the overlap slightly as the circumference becomes smaller.
- Continue until the ball is covered, leaving no more than a small area at the bottom where the ribbon can no longer lie flat.
- Trim the ribbon, tuck the final raw end neatly underneath the last complete turn, and secure it with adhesive.
- Glue the small matching felt or velvet circle over the remaining uncovered spot at the bottom. Press it gently into place without flattening the surrounding ribbon.
Wrapping checkpoint: The ball should now be covered with horizontal rows of pink velvet. The original metal cap should still be visible at the top, and no large gaps should show between the ribbon wraps.
If a row starts to twist or wrinkle, lift it carefully before the glue sets and lay it down again. Small adjustments here are easier than trying to cover a badly twisted section later.
Making the Pleated Ivory Ribbon Band
The little ivory band is what gives this ornament its distinctive finish. It's made separately and then wrapped around the middle of the ball.
- Cut an 18-inch length of 5/8-inch ivory satin ribbon. Lay it flat on your work surface with the right side facing up.
- Fold the first 1/4 inch of ribbon to the wrong side to hide the starting raw edge. Secure the fold with a small stitch.
- Begin making shallow, evenly spaced tucks. At approximately 3/4-inch intervals along the unpleated ribbon, fold about 1/8 inch of ribbon back underneath itself and then forward again. Each tuck consumes approximately 1/4 inch of ribbon length.
- Secure each tuck with a tiny stitch near the upper edge of the ribbon, where it will be less noticeable on the finished band.
- Continue making the tucks in the same direction. The finished band should show a row of small upright pleats across its front.
- After making approximately 18 to 20 pleats, gently wrap the band around the widest part of the ornament to check its length.
- Adjust the number of pleats until the band sits around the ornament without stretching. For a 3-inch ball, the finished band will generally need to measure approximately 9 1/2 inches, allowing a small overlap.
- Trim any excess ribbon, leaving approximately 1/4 inch to turn under at the finishing end. Fold this raw end to the back and secure it.
Band checkpoint: The pleats should be evenly spaced, and the band should lie around the middle of the ornament without pulling tight enough to distort the velvet covering.
Attaching the Ivory Band
- Find the widest point around the middle of the ornament. This is where the ivory band will sit.
- Place a small amount of adhesive along the back of the first inch of the pleated band.
- Position the starting end at the back of the ornament and press it into place.
- Continue wrapping the band around the ornament, keeping it level and securing it in short sections.
- Avoid putting glue across the front of the pleats. Apply it underneath the band so the folds keep their shape.
- When the ends meet at the back, overlap them neatly by approximately 1/4 inch and secure them.
- Look at the ornament from the front and side. Adjust any uneven pleats before the adhesive has fully set.
The ivory band should look like a narrow pleated belt around the ball. It doesn't need to cover a large section of velvet. A little contrast is enough.
Making the Small Pink Velvet Bow
- Cut a 12-inch length of 3/8-inch dusty-rose velvet ribbon.
- Make a small two-loop bow, keeping the velvet side facing outward.
- Adjust the loops until the bow measures approximately 2 inches across.
- Trim the two ribbon tails to approximately 3/4 to 1 inch long, cutting the ends at an angle.
- Secure the center knot with a small hidden stitch or a tiny dab of adhesive on the back.
- Position the bow at the front of the ivory band, centered from left to right.
- Attach the bow with a small amount of adhesive behind its center knot, leaving the loops and tails free.
Keep the bow fairly small. It should decorate the ivory band without hiding all those little pleats you just made.
Adding the Velvet Hanging Loop
- Cut a 6-inch length of matching 3/8-inch velvet ribbon.
- Pass the ribbon through the original metal hanging eye at the top of the ornament.
- Bring the two ribbon ends together, making sure the velvet faces outward and the loop isn't twisted.
- Overlap the ends by approximately 1/2 inch and secure them with several small backstitches using matching thread.
- Turn the joined section toward the back of the ornament so the stitches are less noticeable.
- Check that the original metal cap remains firmly attached and that the ribbon loop supports the ornament when lifted.
Finishing and Checking Your Ornament
- Allow all glued areas to cure according to the adhesive manufacturer's instructions.
- Check the velvet wrapping for loose edges and secure any that have lifted.
- Check the ivory pleats and make sure the band is firmly attached around the middle.
- Gently straighten the bow loops and trim any loose threads.
- Lift the ornament by its hanging loop over a padded work surface to check that the hanger and original cap remain attached.
- Hang the finished bauble on a Christmas tree or use it in a decorative tabletop arrangement.
Finished ornament checkpoint: You should have a round dusty-rose ornament with horizontal velvet ribbon rows, a narrow ivory pleated band around the middle, a small pink bow at the front, and a velvet hanging loop attached to the original metal cap.
Making a Matching Set
Once you've made the first one, try changing the pink shade while keeping the ivory band the same. Blush, dusty rose, and a deeper pink would make a pretty set without needing three completely different patterns.
These would also be lovely hanging on a small Christmas tree at a baby girl shower. You could use them as decorations during the party and give them to guests afterward. They're intended for decorating, not for babies to handle or play with.
3. Little Pink Christmas Stocking Ornaments
These little felt Christmas stockings look so pretty together in dusty rose and ivory. Each has a scalloped cuff, a simple embroidered snowflake, and a velvet ribbon loop for hanging. You can make a matching pair for your Christmas tree or use them as handmade decorations for a pink Christmas baby shower.
There's no sewing machine needed. You'll cut the felt pieces, embroider the snowflakes, and sew the edges by hand. Both stockings use the same pattern, so once you've made the first one, the second goes together in much the same way.
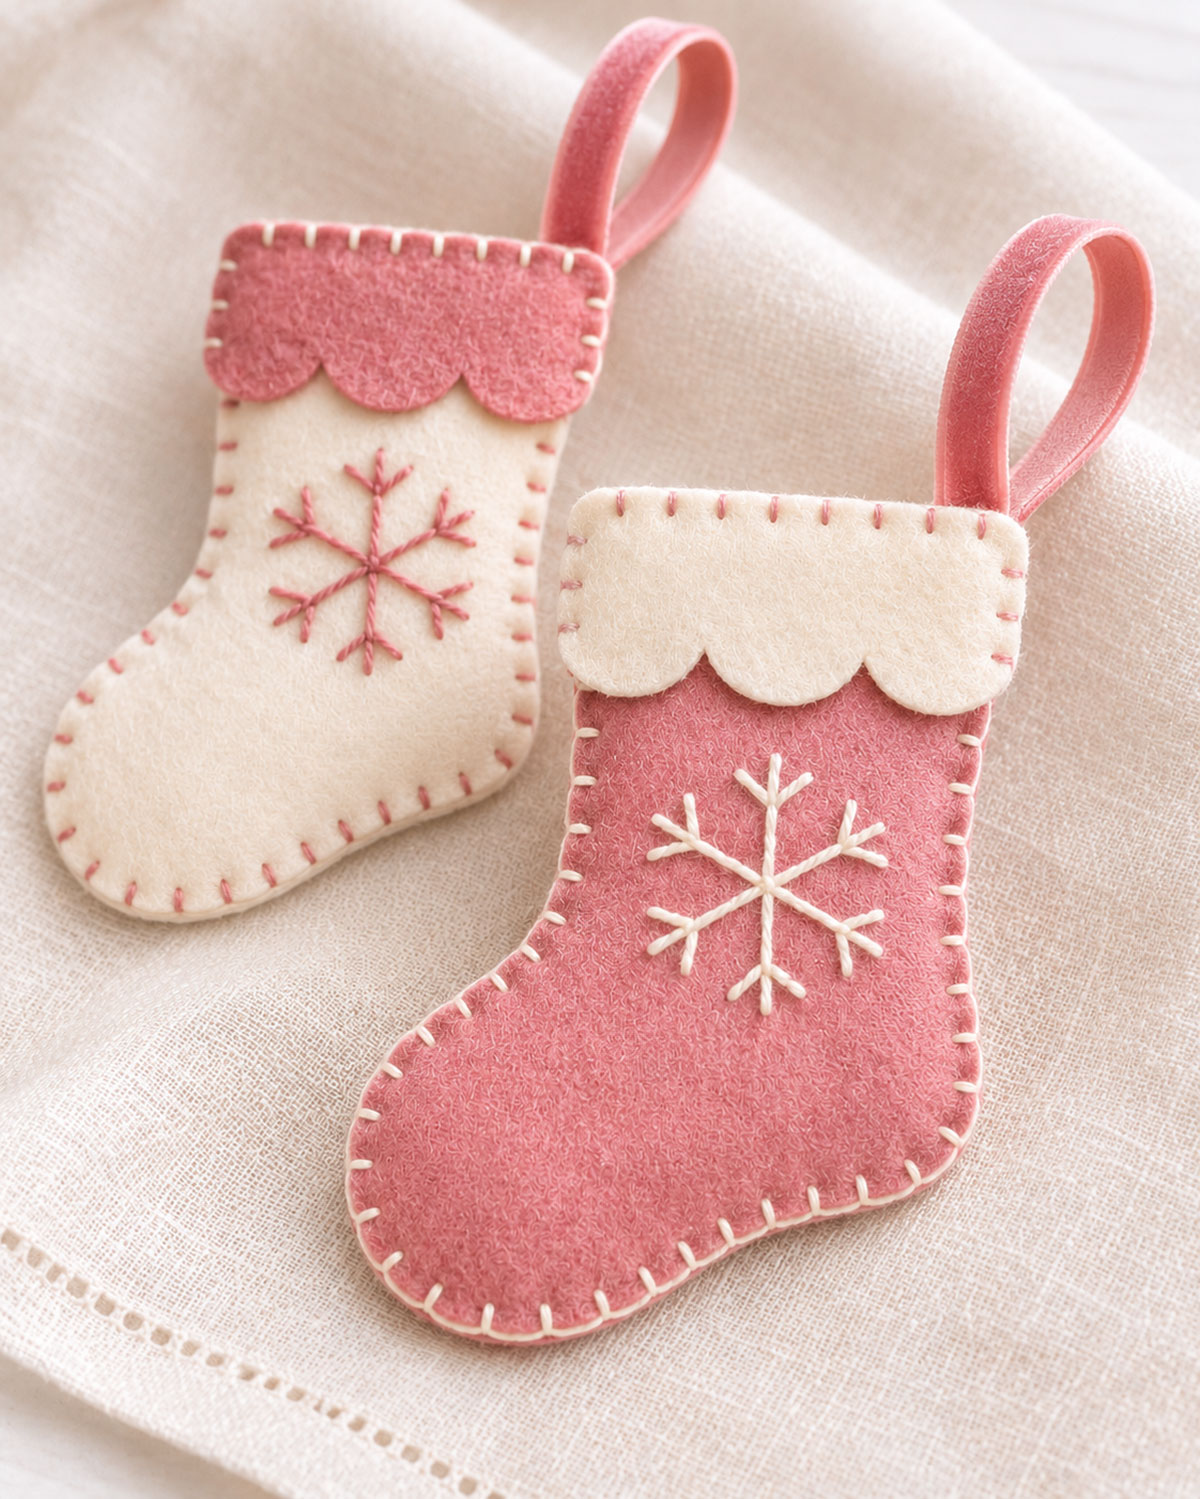
Finished size: Approximately 5 3/4 inches tall and 4 1/2 inches across at the widest point, excluding the hanging loop.
Skill level: Confident beginner. You'll use simple embroidery, small appliqué stitches, and blanket stitching.
Construction: Flat, double-layer felt ornaments with closed tops. No stuffing is needed.
Materials for Two Stocking Ornaments
- One 9 x 12-inch sheet of dusty-rose felt, approximately 1.5 to 2 mm thick
- One 9 x 12-inch sheet of ivory felt of the same thickness
- 14 inches of dusty-rose velvet ribbon, approximately 3/8 inch wide
- Ivory embroidery floss
- Dusty-rose embroidery floss
- Matching sewing thread for attaching the cuffs and ribbon loops
- Embroidery needle and hand-sewing needle
- Sharp fabric scissors
- Fine pins or sewing clips
- Washable or removable fabric marking pen suitable for felt
- Ruler and printed cutting templates
Printable pattern: Download the Pink Felt Christmas Stocking Ornament Templates.
The PDF includes the full-size stocking outline, three-scallop cuff, and two snowflake embroidery guides. Print on US Letter paper at 100% or Actual Size. Turn off Fit to Page or other scaling options. The test square must measure exactly 1 inch across.
Cutting the Felt Pieces
Both stockings have the same shape, with the toes pointing left. The colors are simply reversed.
- Cut out the full-size stocking body template from page 1 of the PDF.
- Trace the outline twice onto dusty-rose felt and twice onto ivory felt. Cut carefully along the traced outlines.
- Cut the three-scallop cuff template from page 2.
- Use this cuff template to cut one ivory cuff and one dusty-rose cuff.
- Cut two 7-inch lengths of dusty-rose velvet ribbon for the hanging loops.
Cutting checkpoint: You should have four stocking body pieces, two cuffs, and two ribbon lengths.
Each finished stocking uses two identical body pieces and one contrasting cuff. The felt edges remain exposed and will be joined with blanket stitches, so you don't need to add seam allowances.
Embroidering the Snowflakes
Embroider the snowflakes before joining the stocking pieces. That way, the thread ends can be hidden between the felt layers.
- Choose one dusty-rose body piece and one ivory body piece to be the fronts. Set the two backing pieces aside.
- Lay the dusty-rose front flat with the toe pointing left. Use the large snowflake guide from the PDF.
- Position the snowflake in the upper leg section, centered from side to side and approximately 2 1/4 inches below the top edge. The design should sit below the scalloped cuff.
- Transfer the six-spoke snowflake onto the felt using the corrected embroidery guide. Mark one vertical top spoke, one vertical bottom spoke, and four diagonal spokes, then add one short V-shaped branch near the outer end of each spoke.
- Thread an embroidery needle with three strands of ivory embroidery floss.
- Starting at the snowflake center, embroider the six straight spokes using small backstitches or short straight stitches. Follow the marked lines and keep the stitches lying flat.
- Work one short pair of branch stitches near the outer end of each spoke, forming a small V shape that angles outward from the main spoke.
- Secure the thread on the wrong side of the felt with several small stitches. Trim the loose end.
- Repeat on the ivory stocking front, using the smaller snowflake guide and dusty-rose embroidery floss.
- Remove any visible marking lines according to the marker manufacturer's instructions. Let the felt dry completely if water was used.
Embroidery checkpoint: Each stocking front should have one centered six-arm snowflake, with the larger ivory design on pink felt and the smaller pink design on ivory felt.
Keep the snowflakes simple. Small, even stitches will look much closer to the finished example than thick embroidery with several layers of thread.
Attaching the Three-Scallop Cuffs
- Lay the dusty-rose stocking front right side up.
- Position the ivory cuff over the top of the stocking, matching its straight top edge and both side edges with the stocking body.
- Make sure all three rounded scallops point downward and extend evenly across the front.
- Pin the cuff in place without stretching either piece.
- Using matching ivory sewing thread, sew small appliqué stitches along the lower scalloped edge, catching just a few fibers of the cuff and the stocking front with each stitch.
- Keep the stitches close to the felt surface so they are not prominent on the finished ornament.
- Add a few temporary basting stitches near the straight upper edge to stop the cuff from moving. The final blanket stitching will secure this edge later.
- Repeat with the ivory stocking front and dusty-rose cuff, using matching pink sewing thread.
Cuff checkpoint: Each stocking now has three rounded scallops across the top. The cuff should lie flat, with no gaps or curled corners.
Making and Attaching the Velvet Hanging Loops
- Take one 7-inch length of dusty-rose velvet ribbon and fold it in half, bringing the two cut ends together.
- Check that the velvet faces outward and the ribbon is not twisted.
- Lay one stocking backing piece flat. Position the ribbon ends at the upper right corner, approximately 1/4 inch in from the side edge.
- Place approximately 1/2 inch of both ribbon ends against the inner face of the backing felt. The folded loop should extend above the stocking's top edge.
- Secure the ribbon ends to the backing felt with several small backstitches using matching sewing thread.
- Check that the loop stands upright and is firmly attached.
- Repeat for the second stocking.
Both ornaments use pink hanging loops, even though their felt colors are reversed. That little matching detail helps them look like a set.
Joining the Stocking Front and Back
The stockings are sewn flat, without turning the pieces inside out. You'll see the neat row of blanket stitching around the finished edges.
- Place the dusty-rose stocking front over its matching dusty-rose backing, with the embroidered front and scalloped cuff facing outward.
- Align the cut edges carefully. The ribbon ends should be hidden between the layers at the upper right corner, with the loop extending above the top.
- Pin or clip the two layers together, checking that the toes and heels line up.
- Thread an embroidery needle with three strands of ivory embroidery floss.
- Begin at the upper left corner. Secure the thread between the felt layers so the starting knot is hidden.
- Work blanket stitches across the straight top edge, passing through the cuff, front, and backing felt. Keep the needle approximately 1/8 inch in from the cut edge.
- Space the stitches about 3/16 to 1/4 inch apart. Catch the thread loop along the outer edge with each stitch so the blanket-stitch border forms neatly.
- When you reach the ribbon attachment at the upper right corner, stitch carefully through the layers without catching the hanging loop itself. Add a couple of small securing stitches through the concealed ribbon ends if needed.
- Continue blanket stitching down the straight right side of the stocking.
- Follow the rounded heel and bottom edge, turning the work gradually so the stitches remain approximately the same distance from the edge.
- Continue around the toe, then up the sloping upper foot and along the left side of the leg.
- When you return to the upper left corner, join the final stitch neatly to the first blanket stitch.
- Secure the remaining thread between the felt layers and trim it close to the surface.
If you haven't worked blanket stitch before, the DMC embroidery stitch diagrams show how the needle and thread form each stitch around a fabric edge.
Assembly checkpoint: The two felt body pieces should line up, the edges should be joined all the way around, and the top should be closed. The scalloped cuff stays on the front, with its lower curved edge visible.
Finishing the Ivory Stocking
- Place the embroidered ivory stocking front over the matching ivory backing, with the dusty-rose cuff facing outward.
- Check that the velvet loop extends from the upper right corner and that its ends are hidden between the layers.
- Thread the embroidery needle with three strands of dusty-rose floss.
- Beginning at the upper left corner, work blanket stitches around the full outline, including the closed top edge, in the same order used for the pink stocking.
- Keep the stitch spacing and distance from the edge consistent with the first ornament.
- Secure and hide the thread ends between the felt layers.
The two stockings should now match in shape and size, with opposite felt colors, matching scallops, and contrasting snowflake embroidery.
Final Checks and Finishing
- Lay both stockings on a flat surface and gently smooth the felt with your fingers.
- Check that the blanket stitches have caught both layers around the full outline.
- Check the scalloped cuffs for any loose sections and add small matching stitches where needed.
- Inspect the snowflake embroidery and trim any loose thread ends.
- Gently lift each ornament by its velvet ribbon loop over a padded surface to confirm that the attachment is secure.
- If the felt needs flattening, place it under a clean cloth with a light weight for a short time. Avoid pressing a hot iron directly against the felt or velvet ribbon.
Finished project checkpoint: Each stocking should measure approximately 5 3/4 inches tall by 4 1/2 inches wide, with a three-scallop cuff, a centered embroidered snowflake, visible blanket stitching, and a pink velvet hanging loop.
Displaying Your Little Pink Stockings
Hang these on a Christmas tree, tie them to wrapped gifts, or use them in a small group of handmade decorations. The pink and ivory pair looks especially pretty beside the quilted peppermint ornaments and velvet ribbon baubles in this collection.
For a baby girl Christmas shower, you could hang several along the edge of a gift table or display them on a little Christmas tree. They're decorative pieces with sewn-closed tops, not stockings for holding treats or toys for babies.
4. Pink Quilted Christmas Present Ornament
This little pink Christmas present ornament looks like a tiny wrapped gift, right down to its ivory ribbon and velvet bow. The dusty-rose fabric has a simple diamond-stitch design, and the edges are joined with visible ivory stitches. It's a sweet decoration for a Christmas tree, and you can make several in coordinating pink shades.
You'll make the box from six fabric squares, so there aren't any complicated shapes to cut. The stitching takes a little patience, but the pieces are small enough to manage by hand. I would make one gift box first before cutting fabric for a whole set.
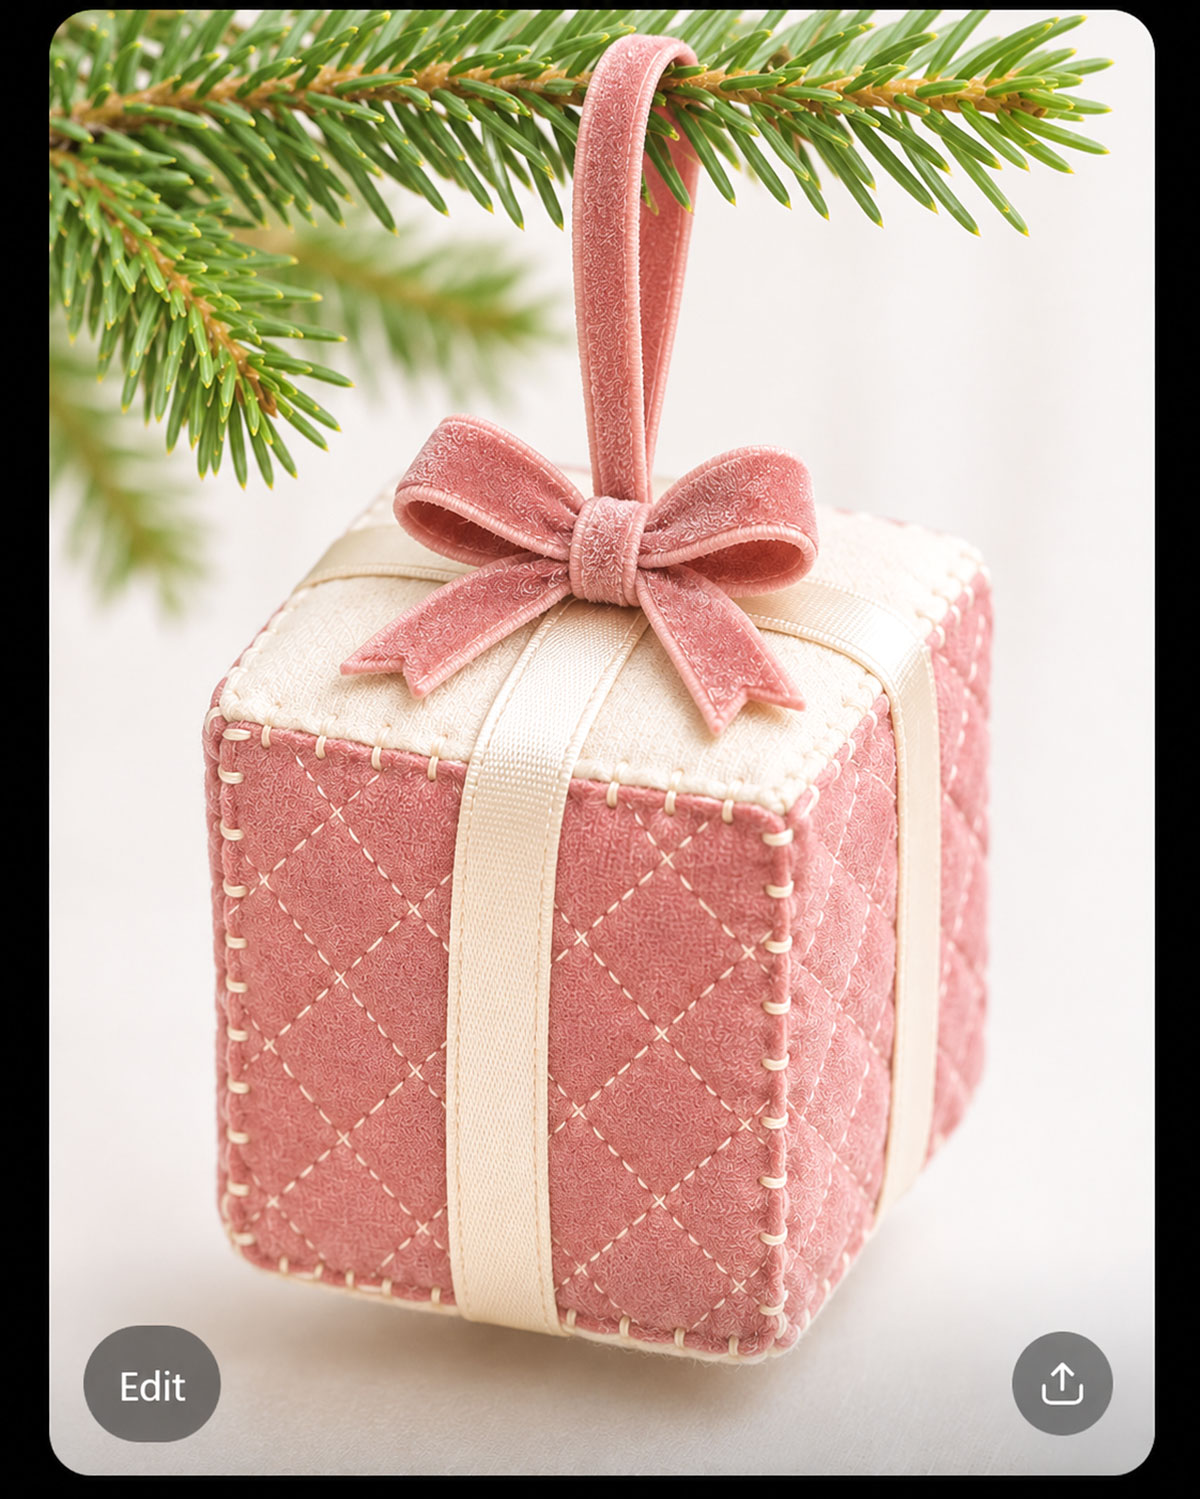
Finished size: Approximately 3 inches wide, 3 inches deep, and 3 inches tall, excluding the bow and hanging loop.
Skill level: Intermediate beginner. You'll need to make even running stitches, turn fabric edges neatly, and join six fabric panels by hand.
Construction: A lightly padded, six-sided fabric cube with decorative hand quilting and crossed ribbon.
Materials for One Ornament
- One 8 x 8-inch piece of dusty-rose quilting cotton
- One 4 x 8-inch piece of ivory quilting cotton
- Six 2 3/4-inch squares of thin fusible foam stabilizer, approximately 1/8 inch thick
- A small amount of polyester fiberfill
- Two 14-inch lengths of ivory satin ribbon, approximately 3/8 inch wide
- 11 inches of dusty-rose velvet ribbon, approximately 1/2 inch wide, for the bow
- 7 inches of dusty-rose velvet ribbon, approximately 3/8 inch wide, for the hanging loop
- Ivory embroidery floss
- Matching sewing thread
- Embroidery needle and hand-sewing needle
- Fabric scissors, ruler, pins or sewing clips
- Removable fabric marking pen
- Iron and pressing cloth
- Printed cutting and assembly guide
Printable pattern: Download the Pink Quilted Christmas Present Ornament Template and Assembly Guide.
The two-page PDF includes the full-size square cutting template, a diamond-stitch guide, and a diagram showing how the six panels fit together. Print at 100% or Actual Size on US Letter paper. Check that the test square measures exactly 1 inch.
Cutting the Six Fabric Panels
The finished ornament has four pink sides, one ivory top, and one ivory bottom. All six panels start with the same measurements.
- Using the full-size cutting template, cut four 3 1/2-inch squares from the dusty-rose fabric.
- Cut two 3 1/2-inch squares from the ivory fabric.
- Cut six squares of thin fusible foam stabilizer, each measuring 2 3/4 inches across.
- Place one foam square on the wrong side of each fabric square, centering it carefully. There should be a 3/8-inch fabric margin on every side of the foam.
- Following the stabilizer manufacturer's instructions, fuse the foam to the wrong side of the cotton. Use a pressing cloth if needed.
- Turn 1/4 inch of fabric to the wrong side along each of the four edges. Keep the folds straight and even.
- At each corner, arrange the folded fabric into a small, flat miter so the corner does not become bulky.
- Baste the folded edges in place using small temporary stitches. Each prepared square should now measure approximately 3 inches across.
Cutting checkpoint: You should have four pink panels and two ivory panels. Each should measure approximately 3 x 3 inches, with the raw fabric edges turned under and the foam centered inside.
Adding the Diamond-Stitch Quilting
The pink sides have a simple diamond pattern made with small running stitches. It's a decorative detail rather than heavy quilting, so keep the stitches light and fairly even.
- Lay one prepared pink panel right side up.
- Use a ruler and removable fabric marker to draw a diagonal line from the upper left corner toward the lower right corner.
- Draw a second diagonal line crossing the first, running from the upper right corner toward the lower left corner.
- Add parallel diagonal lines on both sides of these first two lines, using the quilting grid in the PDF as your guide. Space the lines approximately 3/4 inch apart where they meet the panel edges.
- Thread an embroidery needle with two strands of ivory embroidery floss.
- Starting approximately 1/4 inch inside the edge, work small running stitches along the first diagonal line, sewing through the cotton and foam stabilizer.
- Keep the stitches approximately 1/8 inch long, with similar spaces between them. Stop approximately 1/4 inch before the opposite edge.
- Repeat along the remaining diagonal lines until the panel has a diamond-shaped stitched grid.
- Secure the thread on the wrong side of the panel with a few small stitches.
- Repeat the quilting on the other three pink panels.
Quilting checkpoint: All four pink panels should have a similar diamond pattern. The stitches should be visible without pulling the fabric into deep grooves or making the squares curl.
Leave the two ivory panels plain. One will become the top of the present, and the other will be the bottom.
Joining the Four Pink Sides
Now you'll turn the four quilted squares into the sides of the little gift box. The ivory joining stitches will remain visible along the outside corners, just as they appear in the finished example.
- Arrange the four pink panels in a straight row with their quilted sides facing up.
- Use the assembly diagram in the PDF to identify the front panel A, right panel B, back panel C, and left panel D.
- Bring the right edge of panel A against the left edge of panel B, positioning the panels at a right angle. Keep the quilted sides facing outward and the folded fabric edges toward the inside of the future box.
- Thread a hand-sewing needle with three strands of ivory embroidery floss.
- Join the two edges using small overcast stitches. Pass the needle approximately 1/8 inch inside the finished edge of each panel and wrap the thread over the adjoining corner.
- Space the stitches approximately 3/16 inch apart. Pull each stitch snugly enough to hold the panels together without puckering the fabric.
- Continue along the full 3-inch edge. Add a second small securing stitch at the beginning and end of the seam.
- Join panel B to panel C in the same way.
- Join panel C to panel D, keeping the right sides facing outward.
- Bring the remaining free edge of panel D around to meet the free edge of panel A. Stitch these edges together to form a four-sided tube.
- Secure the thread ends on the inside of the tube.
Assembly checkpoint: You should have a square tube with four pink sides, four visible vertical rows of ivory joining stitches, and an opening at both the top and bottom.
Attaching the Ivory Bottom
- Place one ivory panel beneath the square tube with its right side facing outward. This will be the bottom of the ornament.
- Match its four corners with the four lower corners of the pink sides.
- Hold the first pair of edges together at a right angle, with their folded fabric edges facing inward.
- Using ivory embroidery floss, join the edges with the same small overcast stitches used for the vertical seams.
- Continue around all four sides of the bottom panel.
- At each corner, reinforce the seam with one or two additional small stitches before turning to the next edge.
- Secure the thread inside the ornament.
Set the box upright on a flat surface. It should now stand on its ivory bottom, with four pink sides and an open top.
Preparing the Velvet Hanging Loop
- Fold the 7-inch length of dusty-rose velvet ribbon in half, bringing the cut ends together.
- Check that the velvet faces outward and the ribbon is not twisted.
- Lay the remaining ivory panel right side down. This is the top of your gift box.
- Position the ribbon ends against the wrong side of the ivory panel, centered from left to right and approximately 1/2 inch inward from what will become the back edge.
- Let the folded ribbon loop extend beyond that back edge.
- Secure both ribbon ends with several small backstitches through the fabric and stabilizer.
- Keep the ribbon ends flat, with no thick knot underneath.
- Lift the panel gently by the loop to check that the ribbon is firmly attached.
The loop should rise from behind the top of the finished gift box. Later, the pink velvet bow will sit in front of it.
Adding the Top and Light Padding
- Position the prepared ivory top over the four pink sides, keeping its right side facing outward and the hanging loop extending upward near the back.
- Align the top panel's four corners with the four corners of the pink box.
- Using ivory embroidery floss, overcast the first top edge to the corresponding pink side.
- Continue around the second and third sides, keeping the stitches evenly spaced.
- Leave the fourth top edge open.
- Insert a small amount of polyester fiberfill through the opening. Spread it gently into the corners so the box holds its square shape.
- Use only enough filling to support the panels. The sides should stay fairly flat rather than bulging outward.
- Bring the remaining top edge into alignment with the last pink side.
- Overcast the final edge closed, matching the stitch spacing used on the other seams.
- Secure the thread and hide the end inside the box.
Box checkpoint: You should now have a closed six-sided fabric cube measuring approximately 3 inches on each side. The pink side panels have diamond stitching, the top and bottom are ivory, and the outer edges are joined with visible ivory stitches.
If the box looks too rounded, the filling may be packed too tightly. Before closing the final edge, remove a little and check the shape again.
Wrapping the Box with Ivory Ribbon
The two ivory ribbon bands give the ornament the look of a tiny wrapped present. They cross over the top and continue down all four pink sides.
- Take one 14-inch length of 3/8-inch ivory satin ribbon.
- Center the ribbon across the front of the gift box, running vertically from the top edge to the bottom.
- Continue the ribbon across the center of the top, down the center of the back, and underneath the box until the two ends meet at the bottom.
- Adjust the ribbon so it lies flat without twisting or pulling the sides inward.
- Overlap the two ends underneath the box by approximately 1/2 inch. Trim any excess and secure the overlap with several small stitches using ivory sewing thread.
- Take the second 14-inch ivory ribbon length.
- Wrap it in the opposite direction, running vertically down the left and right sides and crossing the first band at the center of the top.
- Bring the ends together underneath the box. Trim and secure them in the same way.
- Add a few tiny hidden stitches where the ribbons cross at the top to keep them from shifting.
- If necessary, tack the ribbon lightly at the lower edges of the box, keeping the stitches as inconspicuous as possible.
Ribbon checkpoint: The two ivory bands should cross neatly at the top center, with one band running down the front and back and the other running down the left and right sides.
Making the Pink Velvet Bow
- Take the 11-inch length of 1/2-inch dusty-rose velvet ribbon.
- Tie a small two-loop bow, adjusting the loops until the finished bow measures approximately 2 inches across.
- Keep the velvet side facing outward on both loops.
- Trim the two ribbon tails to approximately 3/4 to 1 inch long. Cut the ends at a slight angle.
- Secure the center knot with a few small stitches through the back so the bow will hold its shape.
- Position the bow over the crossed ivory bands at the center of the gift box top.
- Using matching pink thread, sew the bow's center securely to the ivory ribbon and the fabric top beneath it.
- Arrange the ribbon tails so they fall gently toward the front of the gift box.
- Check that the velvet hanging loop rises behind the bow without pulling it backward.
Keep the bow fairly neat and compact. It should finish the present without hiding the ivory ribbon underneath.
Finishing the Present Ornament
- Examine all twelve outside edges of the box. Add a small securing stitch anywhere the ivory joining thread feels loose.
- Check the corners to make sure the panels meet neatly and the fabric edges remain tucked inside.
- Straighten the crossed ivory ribbon bands and check their attachment underneath the box.
- Adjust the pink velvet bow and trim any remaining loose threads.
- Lift the ornament by its velvet loop over a padded work surface to confirm that the hanger is securely attached.
- Gently reshape the box with your fingers if needed. Avoid pressing a hot iron directly against the velvet bow or hanging loop.
Finished ornament checkpoint: Your ornament should look like a little fabric-wrapped gift, approximately 3 inches square, with four quilted pink sides, an ivory top, visible ivory edge stitches, crossed satin ribbon, and a pink velvet bow and hanger.
Making a Set of Pink Christmas Presents
You can make these in blush pink, dusty rose, or a deeper pink without changing the measurements. I'd keep the ivory ribbon and edge stitching the same on each ornament so the different shades look like a matching collection.
These little presents would be pretty hanging on a Christmas tree or displayed with the other handmade decorations on this page. For a baby girl Christmas shower, you could hang a few on a small tree near the gift table. They're decorations only, not fabric toys or containers for gifts.
5. Crochet Pink Christmas Bell Ornament
This little pink crochet Christmas bell has a pretty flared shape, an ivory edge, and a matching velvet bow at the top. There's even a tiny crocheted clapper hanging underneath. It won't ring like a metal bell, but it gives the ornament that familiar Christmas bell look.
You'll work the bell from the top down, adding a few stitches at a time to make the sides widen naturally. The ivory trim is crocheted right onto the bottom, so there isn't much sewing to do afterward. I'd make the first one in dusty rose, then try a lighter pink if you want a matching pair.
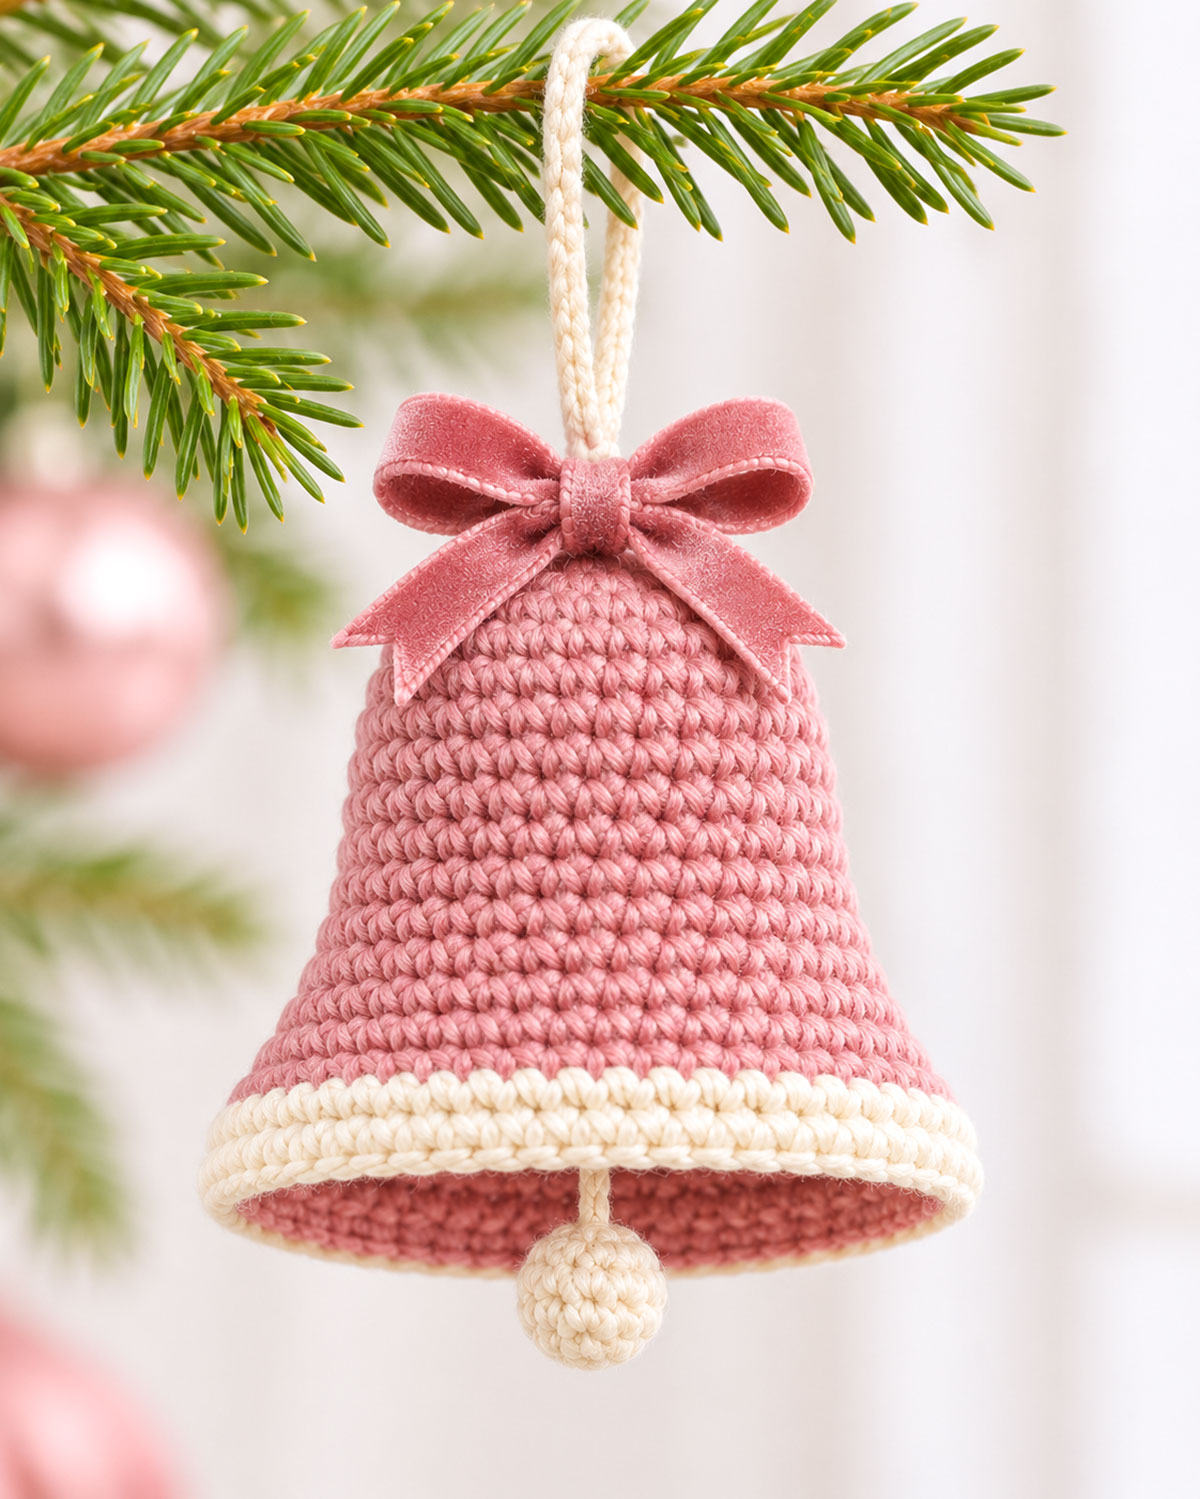
Finished size: Approximately 3 inches tall, excluding the hanger and clapper, with a bottom opening approximately 3 inches across.
Skill level: Confident beginner.
Construction: One hollow crocheted bell, one small crocheted clapper, one hanging cord, and one velvet ribbon bow.
Materials for One Pink Crochet Christmas Bell
- Approximately 40 to 50 yards of dusty-rose DK-weight cotton yarn, weight 3
- Approximately 15 yards of ivory DK-weight cotton yarn in a similar thickness
- 3 mm crochet hook, or the size needed to meet the gauge
- Approximately 10 inches of dusty-rose velvet ribbon, 1/2 inch wide
- A very small amount of polyester fiberfill for the clapper
- Stitch marker
- Yarn needle
- Small sewing needle and matching pink sewing thread
- Scissors and measuring tape
Expected gauge: Approximately 24 single crochet stitches and 28 rounds per 4 inches, using the chosen cotton yarn and hook. The gauge is a calculated target, not a measurement from a physically tested sample.
Keep your single crochet stitches fairly firm and even. The bell is hollow, so the crocheted fabric needs enough body to hold its shape without stuffing.
Crochet Abbreviations
- MR: Magic ring
- Ch: Chain
- Sc: Single crochet
- Sl st: Slip stitch
- Inc: Work 2 single crochet stitches into the same stitch
- Sc2tog: Single crochet 2 stitches together
- BLO: Back loop only
- St or sts: Stitch or stitches
- Rnd: Round
Pattern notes: Use US crochet terms. Work the bell body in continuous spiral rounds without joining, unless a round specifically says otherwise. Move your stitch marker into the first stitch of each new round. The numbers in parentheses show the total stitches at the end of that round.
The chain and slip stitches used for the hanging cord are worked separately and do not change the bell-body stitch counts.
Part 1: Crocheting the Pink Bell Body
Begin at the narrow top of the bell using dusty-rose yarn and your 3 mm hook.
Round 1: Make a magic ring and work 8 sc into the ring. Pull the ring closed firmly. Place a stitch marker in the first sc. (8 sts)
Round 2: Work 2 sc into each stitch around. (16 sts)
Round 3: Sc in each stitch around. (16 sts)
Round 4: *Sc in next 3 sts, inc in next st.* Repeat from * to * 4 times. (20 sts)
Round 5: Sc in each stitch around. (20 sts)
Round 6: *Sc in next 4 sts, inc in next st.* Repeat 4 times. (24 sts)
Round 7: Sc in each stitch around. (24 sts)
Round 8: Sc in each stitch around. (24 sts)
By now, the top should begin curving downward into a small cup. If necessary, gently turn the work so the right side of the single crochet stitches faces outward. Continue working with the right side outside.
Round 9: *Sc in next 5 sts, inc in next st.* Repeat 4 times. (28 sts)
Round 10: Sc in each stitch around. (28 sts)
Round 11: Sc in each stitch around. (28 sts)
Round 12: *Sc in next 6 sts, inc in next st.* Repeat 4 times. (32 sts)
Round 13: Sc in each stitch around. (32 sts)
Round 14: Sc in each stitch around. (32 sts)
Shape checkpoint: You should have a rounded crown leading into a gradually widening bell body. There should be 32 stitches around the lower edge at this point. The bell is still narrower than its finished opening.
Round 15: *Sc in next 7 sts, inc in next st.* Repeat 4 times. (36 sts)
Round 16: Sc in each stitch around. (36 sts)
Round 17: *Sc in next 8 sts, inc in next st.* Repeat 4 times. (40 sts)
Round 18: Sc in each stitch around. (40 sts)
Round 19: *Sc in next 9 sts, inc in next st.* Repeat 4 times. (44 sts)
Round 20: *Sc in next 10 sts, inc in next st.* Repeat 4 times. (48 sts)
Round 21: *Sc in next 11 sts, inc in next st.* Repeat 4 times. (52 sts)
Round 22: *Sc in next 12 sts, inc in next st.* Repeat 4 times. (56 sts)
Bell-body checkpoint: You should now have 56 stitches around the opening. At the expected gauge, its circumference is approximately 9 1/3 inches, giving an opening diameter close to 3 inches when held round.
The final four pink rounds increase the width steadily to form the flared lower section. Hold the bell upright by its crown. The sides should widen toward the opening rather than forming a straight tube.
Do not fasten off the pink yarn until you've completed the color change in the next section.
Part 2: Adding the Ivory Crochet Edge
The ivory edge is narrow and fairly plain. It follows the curve of the bell rather than making a large ruffle.
- On the final stitch of Round 22, work the last single crochet until two loops remain on the hook.
- Drop the dusty-rose yarn, place the ivory yarn over your hook, and draw the ivory yarn through both loops to complete the color change.
- Leave a 5-inch tail of each color on the inside of the bell. You'll weave these in later.
Round 23: With ivory yarn, sc in the back loop only of each stitch around. (56 sts)
Round 24: Sc through both loops of each stitch around. (56 sts)
Finishing Round 25: Work one loose slip stitch into the back loop of each stitch around. (56 slip stitches)
Fasten off the ivory yarn, leaving a 6-inch tail. Use a yarn needle to finish the final stitch neatly and weave the tail along the inside of the ivory edge.
Edge checkpoint: The pink body should end in a narrow ivory border with a slightly raised finishing line. The border should lie evenly around the opening without curling inward or pulling the bell closed.
If the final slip-stitch round pulls the edge too tightly, undo that round and work the slip stitches more loosely. You can use a slightly larger hook for this finishing round if necessary, then return to the original hook for the clapper.
Part 3: Crocheting the Little Ivory Clapper
The clapper is a small round crocheted ball. It hangs from the inside center of the bell and shows just below the ivory rim.
Using ivory yarn and the 3 mm hook:
Round 1: Make a magic ring and work 6 sc into the ring. Pull closed. (6 sts)
Round 2: Work 2 sc into each stitch around. (12 sts)
Round 3: Sc in each stitch around. (12 sts)
Round 4: Sc2tog 6 times. (6 sts)
Place a tiny pinch of fiberfill inside the clapper, using only enough to round it out. Do not pack it tightly.
Fasten off, leaving an approximately 18-inch yarn tail. Thread the tail through the front loops of the remaining six stitches and pull gently to close the opening.
Clapper checkpoint: You should have one small ivory ball, approximately 1/2 to 5/8 inch across at the expected gauge. The long remaining yarn tail will be used to suspend it inside the bell.
Part 4: Attaching the Clapper Inside the Bell
- Turn the bell upside down so you can see the inside of the crown.
- Thread the long ivory tail from the clapper onto your yarn needle.
- Pass the needle from inside the bell through a stitch beside the center of Round 1, bringing the yarn to the outside of the crown.
- Adjust the cord length until the top of the little clapper hangs approximately 1/8 to 1/4 inch below the ivory rim when the bell is upright. Most of the clapper should be visible beneath the opening.
- Pass the needle back through an adjacent crown stitch to the inside of the bell, keeping the selected cord length in place.
- Secure the yarn around several crown stitches with small anchoring stitches. Weave the remaining yarn tail through the inside stitches before trimming.
- Turn the bell upright and check that the clapper hangs from the center rather than pulling toward one side.
Clapper placement checkpoint: The ivory ball should hang on a short visible stem below the bell opening. It should not disappear inside the bell or hang far below the rim.
You can adjust the length before securing the yarn completely. It's much easier to make this correction now than after attaching the bow.
Part 5: Making the Ivory Hanging Cord
The hanging cord is crocheted separately so it has a little more body than a single strand of yarn.
- With ivory yarn, leave an 8-inch starting tail and chain 25.
- Slip stitch into the second chain from the hook and into each remaining chain. (24 slip stitches)
- Fasten off, leaving another 8-inch tail.
- Fold the finished cord in half to make a hanging loop. Bring both cord ends together without twisting them.
- Thread one yarn tail through the top center of the bell, passing between two stitches of the first round.
- Thread the second tail through an adjacent top stitch. Both tails should now be inside the bell, with the folded loop extending upward.
- Secure each tail around several stitches on the inside of the crown. Tie the tails together with a firm knot and weave the ends into the surrounding crochet.
- Gently lift the bell by its hanger over a padded surface to check the attachment.
Hanging checkpoint: The ivory cord should form a neat upright loop, approximately 1 1/2 to 2 inches high depending on your gauge. It should emerge from the center of the bell crown.
Keep the hanger centered. If it pulls to one side, adjust the attachments before adding the bow.
Part 6: Making the Dusty-Rose Velvet Bow
The velvet bow sits directly below the ivory hanging cord, covering the top front of the bell.
- Cut a 10-inch length of dusty-rose velvet ribbon, approximately 1/2 inch wide.
- Make a small two-loop bow, arranging the velvet side outward on both loops.
- Adjust the loops until the bow is approximately 2 to 2 1/4 inches wide.
- Trim the ribbon tails to approximately 3/4 to 1 inch long. Cut each tail at a slight angle.
- Using matching pink sewing thread, take several small stitches through the back of the bow center to keep the knot and loops from shifting.
- Position the bow on the front of the bell crown, immediately below the ivory hanging cord.
- Sew through the back of the bow center and several pink crochet stitches beneath it. Repeat until the bow is firmly attached.
- Arrange the ribbon loops and tails so they rest against the upper bell without covering too much of the crochet body.
Bow checkpoint: The velvet bow should sit at the top center of the pink bell. The ivory hanging cord should rise immediately behind the bow, while the two ribbon tails point downward toward the bell body.
Part 7: Shaping and Finishing the Bell
- Weave in any remaining yarn ends along the inside of the bell.
- Check the ivory border for loose stitches and make sure the lower opening remains evenly round.
- Gently shape the sides with your fingers, keeping the narrow crown centered above the wider opening.
- If the crochet needs a little help holding its shape, lightly dampen the cotton bell and shape it over a clean, smooth, appropriately sized cup or form. Keep the velvet ribbon dry and let the bell dry fully before displaying it.
- Check the ivory clapper. It should hang freely just below the rim.
- Check that the velvet bow and hanging cord are securely attached.
- Hang the finished ornament from a Christmas tree branch or decorative display hook.
Finished bell checkpoint: Your ornament should have a smooth dusty-rose body that widens toward the bottom, a narrow ivory crochet rim, a little ivory ball hanging beneath the opening, a pink velvet bow at the crown, and a centered ivory hanging cord.
Making a Matching Set of Crochet Christmas Bells
Try making a few bells in different pink shades while keeping the ivory trim and hanging cord the same. Blush, dusty rose, and a deeper pink would work nicely together. You don't need to change the stitch counts unless you're changing the size.
If you want a more traditional Christmas version with holly leaves and a larger bow, you can also make my free crochet Christmas bell ornament pattern.
These little pink bells can hang from a Christmas tree, decorate wrapped gifts, or dress up a small tree at a baby girl Christmas shower. They're intended as decorations rather than toys for babies.
6. Pink Candy-Stripe Fabric Garland
This pink candy-stripe fabric garland looks like a string of little wrapped Christmas sweets. Each candy has a plump striped center and gathered fabric ends, with small pink velvet bows spaced along an ivory cord. It's a pretty decoration for a mantel, Christmas party, or baby girl Christmas shower.
You'll make seven fabric candies for the garland shown here. Four have narrow pink stripes, and three have wider stripes. I like alternating the two fabrics because it gives the garland a little variety without adding more colors. You only need to sew straight seams, gather the ends, and add the bows.
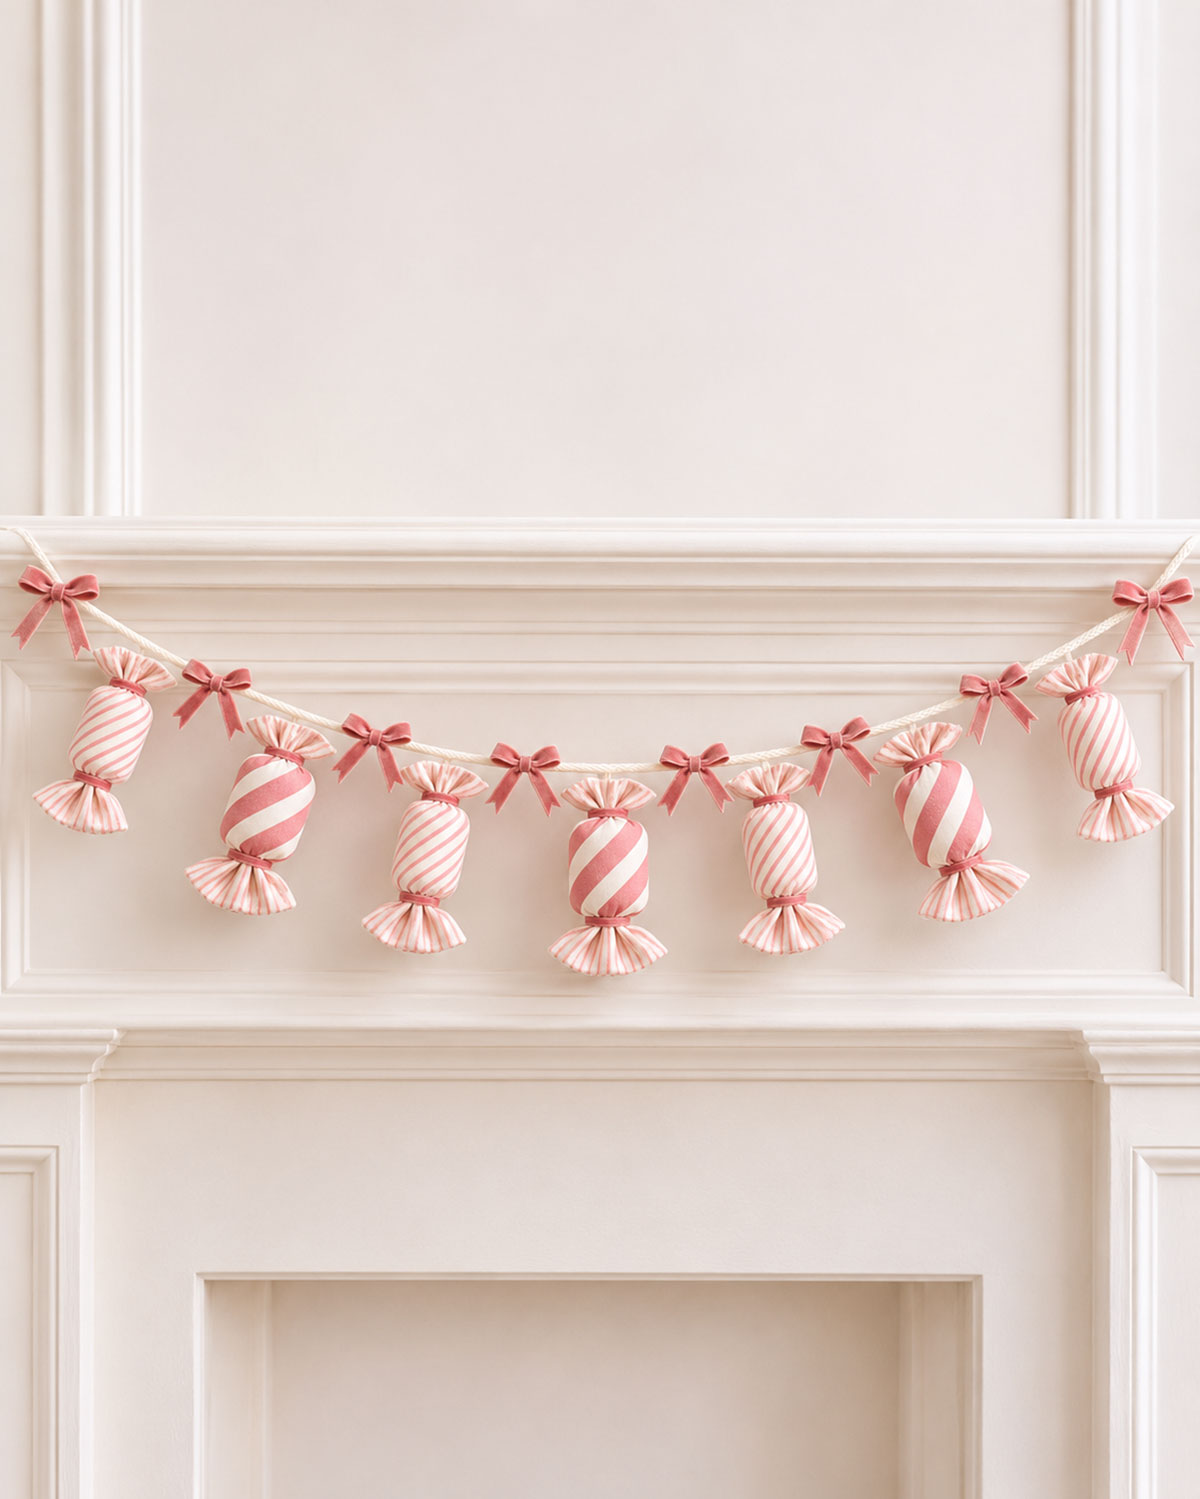
Finished size: Approximately 6 feet of cord before making the end loops, with a hanging span of about 5 feet 4 inches. Each finished candy is approximately 4 3/4 inches long and 1 1/8 inches across at its padded center.
Skill level: Confident beginner.
Construction: Seven sewn fabric candy wrappers with lightly stuffed centers, gathered ends, and individual hanging loops. Eight small velvet bows decorate the cord between the candies.
Materials for One Garland
- One fat quarter of pink-and-ivory quilting cotton with narrow diagonal stripes
- One fat quarter of coordinating quilting cotton with wider pink-and-ivory diagonal stripes
- A small amount of polyester fiberfill
- 72 inches of ivory braided cotton cord, approximately 1/8 inch thick
- Approximately 2 yards of narrow dusty-rose satin ribbon, 1/8 inch wide, for the candy necks
- Approximately 2 yards of dusty-rose velvet ribbon, 3/8 inch wide, for the eight bows
- 14 inches of narrow ivory cotton twill tape, approximately 1/8 inch wide, for the seven hanging loops
- Coordinating pink sewing thread
- Strong sewing thread for gathering the candy necks
- Sewing machine or hand-sewing needle
- Hand-sewing needle for attaching the hanging loops and bows
- Fabric scissors, ruler, pins or sewing clips
- Removable fabric marking pen
- Iron and pressing cloth
- Printed cutting and assembly guide
Printable template: Download the Pink Candy-Stripe Fabric Garland Template and Assembly Guide.
The two-page PDF includes the full-size fabric cutting rectangle, hem and gathering lines, and a diagram showing how the candies and bows are arranged. Print on US Letter paper at 100% or Actual Size. Check that the printed test square measures exactly 1 inch.
Cutting the Candy Wrappers
All seven candies use the same cutting template. Only the printed stripe pattern changes.
- Press both fabrics to remove wrinkles before cutting.
- Using the template, cut four rectangles measuring 5 3/4 inches long by 4 inches wide from the narrow-striped fabric.
- Cut three more rectangles of the same size from the wider-striped fabric.
- Keep the diagonal stripes running in the same direction on all seven pieces. The 5 3/4-inch measurement runs along the length of each finished candy.
- Cut fourteen 4-inch lengths of narrow dusty-rose satin ribbon. You'll use one at each gathered candy neck.
- Cut eight 8-inch lengths of dusty-rose velvet ribbon for the decorative bows.
- Cut seven 2-inch lengths of ivory cotton twill tape for the candy hanging loops.
- Cut the ivory garland cord to 72 inches if it has not already been cut.
Cutting checkpoint: You should have seven fabric rectangles, fourteen narrow ribbon pieces, eight velvet bow pieces, seven twill-tape pieces, and one 72-inch garland cord.
Preparing the Fabric Wrapper Ends
Each candy starts as a simple fabric tube. We'll hem its two short ends first so the gathered wrappers have neat edges rather than loose threads.
- Take one fabric rectangle and place it wrong side up, with the 5 3/4-inch length running from top to bottom.
- At the top short edge, fold 1/4 inch of fabric toward the wrong side and press.
- Fold that same edge under another 1/4 inch, enclosing the raw edge. Press again.
- Topstitch close to the inner folded edge, keeping the stitching straight.
- Repeat these steps along the bottom short edge.
- Check the length. After the two double-fold hems, the rectangle should measure 4 3/4 inches from top to bottom.
- Repeat the hemming on the remaining six rectangles.
Hemming checkpoint: Each fabric piece should measure 4 3/4 inches long and 4 inches wide. Both short ends should have neatly enclosed raw edges.
Don't hem the two long sides. Those edges will be sewn together to form the fabric tube.
Sewing the Candy Tubes
- Take one prepared rectangle and fold it lengthwise, bringing the two long raw edges together with right sides facing.
- Match the two hemmed ends and pin along the long raw edge.
- Sew along the entire long edge using a 1/4-inch seam allowance. Backstitch at both ends.
- Press the seam allowance open as much as possible without flattening the tube permanently.
- Turn the tube right side out through either open end.
- Roll the seam between your fingers until it lies straight along one side. This will become the back of the candy.
- Repeat for the other six fabric rectangles.
Tube checkpoint: You should have seven hollow fabric tubes, each approximately 4 3/4 inches long. The tube circumference will be approximately 3 1/2 inches, giving a relaxed diameter near 1 1/8 inches.
The diagonal stripes should now wrap around each tube. Keep the seam at the back when you shape the candies.
Marking the Candy Centers
You'll leave a little fabric extending beyond both ends of the stuffed center. Those extra sections become the gathered candy wrappers.
- Lay one tube flat with the long seam facing down.
- Measure 1 1/8 inches inward from the top hemmed opening. Make a small removable mark on the fabric.
- Measure 1 1/8 inches inward from the bottom hemmed opening and mark that position.
- Check the distance between the two marks. It should measure 2 1/2 inches.
- Use the gathering lines on the printed template to confirm both positions.
- Repeat on all seven tubes.
Measurement checkpoint: Each tube has a 2 1/2-inch center section with approximately 1 1/8 inches of wrapper fabric extending beyond each end.
Gathering and Stuffing the First Candy
Make one complete candy before stuffing the other six. That will help you decide how much filling gives the center a nice rounded shape.
- Thread a hand-sewing needle with a doubled length of strong sewing thread. Knot the ends together.
- Choose one end of the fabric tube to become the bottom of the candy.
- At the marked gathering line, work small running stitches all the way around the tube. Keep the stitches close together and approximately 1/8 inch long.
- Pull the thread gradually to gather the fabric into a narrow neck. Draw the opening closed tightly enough to keep the fiberfill inside.
- Wrap the working thread around the gathered neck two or three times. Secure it with several small stitches through the gathered fabric.
- Leave the 1 1/8-inch section beyond the gathered neck free. This will become the lower wrapper fan.
- Turn the candy so the remaining open end faces upward.
- Insert small pinches of polyester fiberfill through the upper opening and push them gently into the 2 1/2-inch center section.
- Continue adding filling until the center looks rounded and plump but still feels slightly compressible.
- Thread another doubled length of strong sewing thread and work running stitches around the upper marked gathering line.
- Pull the thread to close the upper neck, keeping the filling inside the center section.
- Wrap the thread around the neck several times and secure it with small stitches.
- Check that the candy body remains approximately 2 1/2 inches long between its two gathered necks.
Stuffing checkpoint: The middle should be gently rounded, with a gathered neck at each end. You should have an unstuffed fabric wrapper extending approximately 1 1/8 inches beyond each neck.
If the candy looks like a ball instead of a little cylinder, remove some filling before closing the second neck. You want a softly rounded middle with a bit of length to it.
Shaping the Candy Wrapper Fans
In the finished example, the two ends flare outward like the paper on a wrapped sweet. We'll make small folds in the fabric so the ends spread out neatly.
- Hold the first candy with its seam facing away from you.
- Gently flatten the unstuffed fabric above the upper gathered neck between your fingers.
- Arrange the fabric into four or five shallow folds, spreading the hemmed edge into a small fan shape.
- Keep the folds loose near the outer hem and closer together near the gathered neck.
- Use two or three tiny stitches near the gathered neck to keep the folds in place without flattening the outer fan.
- Repeat with the lower wrapper end.
- Cut or take one 4-inch length of narrow dusty-rose satin ribbon.
- Wrap it around the upper gathered neck, covering the gathering stitches.
- Tie a firm small knot at the back of the candy and trim the ends close to the knot. Add a hidden securing stitch if needed.
- Repeat with another 4-inch ribbon length at the lower gathered neck.
- Adjust both wrapper fans until they spread outward evenly.
Wrapper checkpoint: You should have a striped fabric candy with a rounded center, two flared fabric fans, and narrow pink ribbon collars around the gathered necks.
Keep the ribbon collars narrow. The larger velvet bows belong on the garland cord between the candies, not around the candy necks.
Adding the Candy Hanging Loop
Each candy needs its own little loop so it hangs vertically beneath the garland cord. We'll hide the loop behind the upper wrapper fan.
- Take one 2-inch length of narrow ivory cotton twill tape.
- Fold it in half, bringing the cut ends together.
- Place the folded tape against the back of the upper wrapper fan, centered over the tube's back seam. The folded end should extend approximately 1/2 inch above the top hem.
- Lay the two tape ends flat against the back of the wrapper, extending downward from the hem.
- Using matching sewing thread, stitch across both tape ends approximately 1/4 to 1/2 inch below the top hem. Sew through the hemmed fabric to make a firm attachment.
- Add a second short row of stitches through the tape ends for reinforcement.
- Check that the loop remains open and that the stitching is hidden behind the gathered fabric.
- Lift the candy gently by this loop over a padded surface. If the wrapper folds or the stitches pull loose, reinforce the attachment before continuing.
The little loop should sit behind the upper fabric fan, so the candy appears to hang naturally from the cord.
Making the Remaining Six Fabric Candies
- Take the next prepared fabric tube.
- Gather and close its lower neck, then insert a small amount of fiberfill into the center.
- Gather and close its upper neck, keeping the stuffed center approximately 2 1/2 inches long.
- Shape the two wrapper fans into shallow folds.
- Tie narrow satin ribbon around both gathered necks.
- Attach one folded ivory twill-tape hanging loop behind the upper wrapper fan.
- Repeat until all seven candies are complete.
Candy-making checkpoint: You should now have four narrow-striped candies and three wider-striped candies. Each has two gathered fans, two narrow ribbon collars, and a hanging loop behind the upper wrapper.
Lay them in a row and check their proportions. They don't need to be perfectly identical, but the stuffed centers and wrapper fans should look reasonably consistent.
Making the Eight Pink Velvet Bows
The velvet bows sit between the candies and help bring the whole garland together.
- Take one 8-inch length of dusty-rose velvet ribbon, approximately 3/8 inch wide.
- Tie a small two-loop bow, keeping the velvet side facing outward.
- Adjust the loops until the bow measures approximately 1 1/2 inches across.
- Trim the ribbon tails to approximately 1/2 to 3/4 inch long, cutting each end at a slight angle.
- Secure the knot with two or three small stitches using matching sewing thread.
- Repeat until you have eight bows of similar size.
Don't make the bows too large. They should fill the spaces between the candies without covering the striped fabric.
Arranging the Candies on the Garland Cord
Now we're ready to put everything together. The finished example has seven candies hanging in a gentle curve, with velvet bows between them and at both ends.
- Lay the 72-inch ivory braided cord on a flat surface.
- Measure from the original left end and mark the following candy-center positions with small removable marks: 9, 18, 27, 36, 45, 54, and 63 inches.
- Arrange the seven candies in this order: narrow stripe, wide stripe, narrow stripe, wide stripe, narrow stripe, wide stripe, narrow stripe.
- Thread the right end of the garland cord through the hanging loop on the first candy.
- Slide that candy along the cord until its hanging loop is centered at the 9-inch mark.
- Continue threading the remaining six candy loops onto the cord, moving each one to its marked position.
- Check that all seven candies hang with their striped centers facing forward and their gathered fans pointing up and down.
- Using small stitches of matching thread, tack each hanging loop to the garland cord at its marked position. Catch the woven fibers of the cord without cutting through them.
- Check that each candy can hang freely without sliding toward the next one.
Garland checkpoint: Seven candies should now hang vertically from the cord, with their centers spaced approximately 9 inches apart along the unstretched cord.
You can make the finished garland longer or shorter by changing the spacing, but keep the candy order consistent if you want it to look like the example.
Attaching the Velvet Bows
- Arrange the eight velvet bows along the cord between and outside the seven candies.
- Measure from the original left end and place the bows at approximately 4 1/2, 13 1/2, 22 1/2, 31 1/2, 40 1/2, 49 1/2, 58 1/2, and 67 1/2 inches.
- Position each bow so its loops face forward and its tails point downward.
- Thread a hand-sewing needle with matching pink sewing thread.
- Take several small stitches through the back of the first bow knot and around a few fibers of the ivory cord.
- Secure the thread firmly and hide the knot behind the bow.
- Repeat for the remaining seven bows.
- Hold the garland up briefly to check that the bows face outward rather than turning around the cord.
Bow placement checkpoint: There should be one bow before the first candy, one between each neighboring pair of candies, and one after the last candy.
Finishing the Garland Ends
- At the left end of the cord, fold approximately 4 inches back on itself to create a hanging loop.
- Secure the doubled cord with several tight wraps of strong sewing thread, followed by a firm knot.
- Repeat at the right end, making a matching 4-inch hanging loop.
- Trim any loose cord fibers without cutting into the secured loops.
- Check the seven candy attachments and eight bow attachments again.
- Hang the garland from two secure hooks and arrange it into a gentle curve.
- Adjust the fabric wrapper fans and velvet bows so they face forward.
Finished garland checkpoint: You should have seven pink-and-ivory fabric candies hanging vertically from an ivory cord, with eight small velvet bows arranged between them and at the ends.
The garland should drape naturally without pulling tightly between the hooks. Use secure supports and keep the hanging decoration out of reach of babies and young children.
Using the Pink Candy Garland for Christmas Decorating
This garland would look pretty across a mantel, along a holiday dessert table, or against a plain wall. The pink stripes give it a candy-shop look without needing a lot of extra decorations around it.
For a baby girl Christmas shower, you could hang it behind the gift table and use the baby Christmas craft ideas
If you want to make a smaller version, use five candies with six bows and shorten the cord to suit your display. The individual candy construction stays the same.
7. Pink Christmas Mitten Pocket Garland
These little felt mittens have a surprise. Each one has a small pocket on the front where you can tuck a folded Christmas note or a little holiday wish. The pink and ivory mittens hang from a braided cord, with matching cuffs, simple stitches, and velvet ribbon loops.
I'd make five mittens for the garland shown here, alternating dusty rose and ivory. You won't need a sewing machine, and the pockets are surprisingly simple. Just remember to leave their top edges open when you sew them onto the mittens!
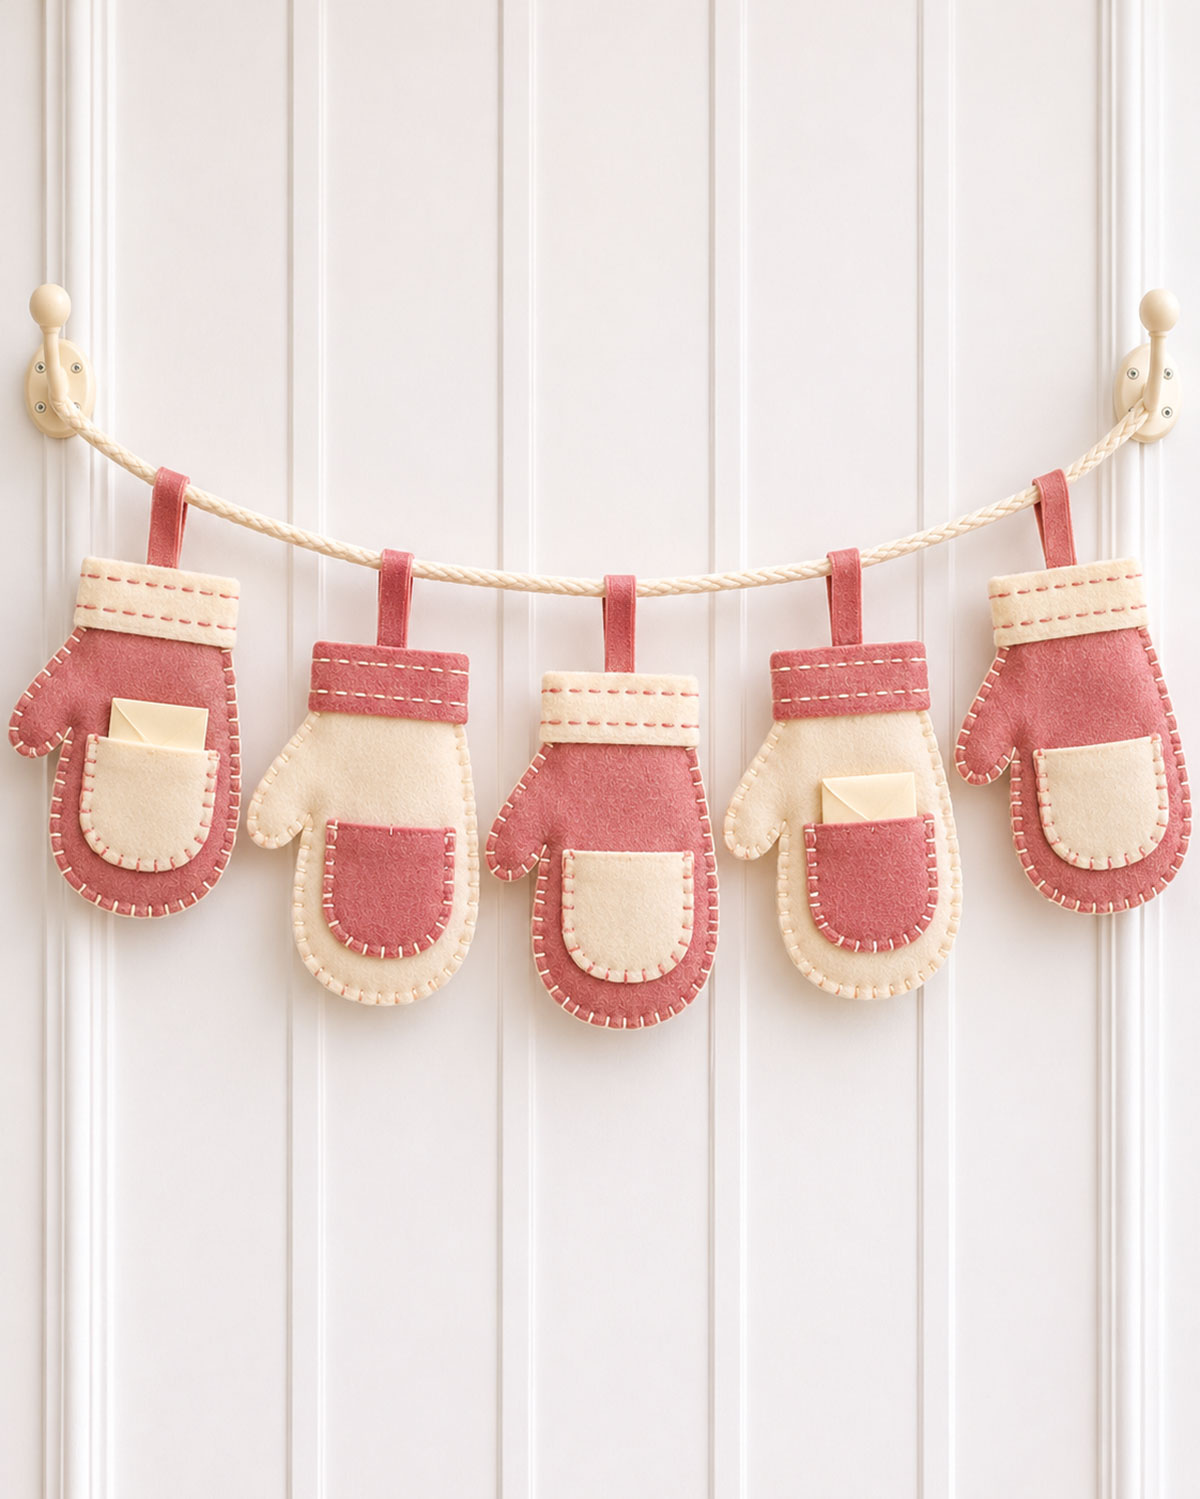
Finished size: Each mitten measures approximately 4 5/8 inches tall and 3 3/8 inches wide, excluding its hanging loop. The garland uses 72 inches of ivory cord before the end loops are formed.
Skill level: Confident beginner.
Construction: Five flat, double-layer felt mittens with closed tops, contrasting cuffs, working front pockets, and individual hanging loops.
Materials for Five Felt Mittens
- Two 9 x 12-inch sheets of dusty-rose felt, approximately 1.5 to 2 mm thick
- Two 9 x 12-inch sheets of ivory felt of the same thickness
- Approximately 24 inches of dusty-rose velvet ribbon, 3/8 inch wide
- 72 inches of ivory braided cotton cord, approximately 1/8 inch thick
- Ivory embroidery floss
- Dusty-rose embroidery floss
- Matching sewing thread for securing the hanging loops
- Embroidery needle and hand-sewing needle
- Sharp fabric scissors
- Fine pins or sewing clips
- Removable fabric marking pen
- Ruler and printed cutting templates
- Small pieces of ivory paper for the optional folded notes
Printable pattern: Download the Pink Christmas Mitten Pocket Garland Templates.
The PDF includes the full-size mitten outline, cuff, pocket, and five-mitten assembly guide. Print on US Letter paper at 100% or Actual Size, with page scaling turned off. Check that the printed test square measures exactly 1 inch before cutting your felt.
Cutting the Mitten Pieces
All five mittens use the same pattern, with the thumbs pointing to the left. The colors are simply reversed.
- Cut out the full-size mitten body template from page 1 of the PDF.
- Trace and cut six identical mitten body pieces from dusty-rose felt. These will make three pink mittens, with two layers per mitten.
- Trace and cut four identical mitten body pieces from ivory felt. These will make two ivory mittens.
- Using the cuff template on page 2, cut three ivory cuffs and two dusty-rose cuffs.
- Using the pocket template, cut three ivory pocket patches and two dusty-rose pocket patches.
- Cut five 4-inch lengths of dusty-rose velvet ribbon for the hanging loops.
- Cut the ivory braided cord to 72 inches if it hasn't already been measured.
Cutting checkpoint: You should have ten mitten body pieces, five contrasting cuffs, five pocket patches, five ribbon lengths, and one garland cord.
There are no seam allowances to add. The felt edges will remain visible and will be joined with blanket stitches.
Attaching the Contrasting Cuffs
We'll start with the cuffs. They have two simple rows of running stitches, which give them a little detail without needing any extra decorations.
- Choose one dusty-rose mitten body piece to be the front of your first mitten. Lay it flat with the thumb pointing left.
- Place one ivory cuff across the straight top edge. Center it so the top edges line up and the cuff covers the upper portion of the mitten.
- Pin the cuff in place, keeping the felt flat. If the cuff extends slightly beyond the mitten sides, trim the tiny excess flush with the body edges.
- Thread an embroidery needle with three strands of dusty-rose floss.
- Work a row of small running stitches across the cuff, approximately 1/8 inch below its upper edge.
- Keep the stitches approximately 1/8 inch long, with similar spaces between them.
- Work a second parallel row of running stitches approximately 1/8 inch above the cuff's lower edge.
- Both rows should pass through the cuff and the mitten front to hold the layers together.
- Secure the thread on the wrong side of the mitten front.
- Repeat for the other two dusty-rose mitten fronts, using ivory cuffs and pink floss.
- For the two ivory mitten fronts, attach dusty-rose cuffs with the same two rows of stitching, using ivory floss.
Cuff checkpoint: All five mitten fronts should have contrasting cuffs with two neat horizontal rows of running stitches. The cuffs should sit flat, without puckering or curling at the corners.
Preparing the Little Felt Pockets
Each pocket is a separate rounded felt patch. The curved sides and bottom are sewn to the mitten, but the straight top edge stays open.
- Take one ivory pocket patch and place it over the lower palm area of a dusty-rose mitten front.
- Position the straight upper edge approximately 2 1/8 inches above the lowest point of the mitten, following the placement guide in the PDF.
- Center the pocket on the rounded palm portion of the mitten, not over the thumb.
- Pin or clip the pocket in place.
- Thread your embroidery needle with three strands of dusty-rose floss.
- Begin at the upper left corner of the pocket. Secure the thread between the pocket and mitten front so the knot will be hidden.
- Work small blanket stitches down the left side, placing the needle approximately 1/8 inch inside the pocket's cut edge.
- Continue around the curved bottom, following the rounded shape carefully.
- Work up the right side until you reach the upper right corner.
- Secure the thread between the felt layers and trim the end.
- Do not sew across the straight upper edge of the pocket.
Pocket checkpoint: You should be able to slide a finger gently beneath the straight top edge. The sides and curved bottom should be firmly attached to the mitten front.
If the pocket pulls too tightly against the felt, loosen a few stitches. It needs a little room to hold a folded note.
Attaching the Remaining Four Pockets
- Attach ivory pocket patches to the remaining two dusty-rose mitten fronts, following the same placement and stitching method.
- Use dusty-rose embroidery floss for the visible pocket stitching.
- Next, place a dusty-rose pocket patch on each ivory mitten front.
- Center each pocket on the rounded palm area, keeping the straight upper edge at the same height as the others.
- Attach these pockets with three strands of ivory embroidery floss, stitching down one side, around the bottom, and up the other side.
- Leave the top edges open on all five pockets.
- Check that the pockets sit at similar heights when the mittens are laid side by side.
Pocket-making checkpoint: You now have three pink mitten fronts with ivory pockets and two ivory mitten fronts with pink pockets. All five pockets should be open at the top.
Making the Velvet Hanging Loops
The velvet loops are attached to the mitten backs before the front and back layers are sewn together. That keeps the ribbon ends hidden.
- Take one 4-inch length of dusty-rose velvet ribbon.
- Fold it in half, bringing the two cut ends together. Keep the velvet side facing outward and make sure the ribbon isn't twisted.
- Lay one dusty-rose mitten backing piece flat with its thumb pointing left.
- Center the ribbon ends along the upper straight edge of the backing, allowing approximately 1/2 inch of ribbon to overlap the felt.
- The folded loop should extend above the mitten's top edge.
- Using matching sewing thread, secure both ribbon ends to the inner face of the backing with several small backstitches.
- Keep the attachment stitches within the upper 1/2 inch of the felt so they will be hidden when the mitten is assembled.
- Repeat for all five backing pieces, including the two ivory backings.
Hanging-loop checkpoint: Each backing piece should have a pink velvet loop extending from the center of its upper edge. The cut ribbon ends should be secured against the inner face of the felt.
Joining the First Mitten Front and Back
The mittens are sewn flat, with the decorative blanket stitching visible around their outside edges. You won't turn them inside out or add stuffing.
- Place one prepared dusty-rose mitten front over its matching dusty-rose backing. Keep the decorated front facing outward and the ribbon attachment stitches hidden between the layers.
- Align the two body outlines carefully, including the thumb, rounded palm, and straight upper edge.
- Pin or clip the layers together, making sure the cuff and pocket remain flat.
- Thread an embroidery needle with three strands of ivory floss.
- Begin at the upper left corner of the mitten, securing the thread between the felt layers.
- Work blanket stitches across the straight upper edge, passing through the cuff, front, and backing. Keep your stitches approximately 1/8 inch inside the cut edge.
- When you reach the hanging loop at the center, stitch through the felt and secured ribbon ends without catching the open part of the loop.
- Continue to the upper right corner, keeping the top edge closed.
- Work down the right side of the mitten, following the outer edge with evenly spaced blanket stitches.
- Continue around the rounded bottom of the mitten, turning the work gradually to follow the curve.
- Stitch upward along the left side of the palm until you reach the little indentation where the thumb joins the hand.
- Follow the curved edge around the thumb, using slightly closer stitch spacing if needed at the narrow curves.
- Continue up the outer thumb and along the upper left side of the mitten until you return to the starting corner.
- Join the last stitch neatly to the first, secure the thread, and hide the end between the felt layers.
Mitten assembly checkpoint: The mitten should be closed around its entire outline, including the top. The contrasting cuff and pocket should remain visible on the front, and the velvet loop should extend from the upper edge.
Keep the pocket opening clear while you stitch. It's easy to catch the pocket edge accidentally if you're not paying attention.
Finishing the Other Four Mittens
- Join the front and back of the second dusty-rose mitten using the same ivory blanket stitching.
- Repeat for the third dusty-rose mitten.
- For the first ivory mitten, align the embroidered front with its ivory backing, keeping the pink cuff and pocket facing outward.
- Join the edges with three strands of dusty-rose embroidery floss.
- Work around the entire outline, including the thumb and closed upper edge.
- Repeat for the second ivory mitten.
- Check the hanging-loop attachment on each finished mitten.
- Gently smooth each mitten with your fingers so the felt layers lie flat.
Finished mitten checkpoint: You should have five completed mittens in this order: three dusty rose and two ivory. Each should have a contrasting cuff, an open pocket, visible blanket stitching, and a velvet hanging loop.
Preparing the Little Paper Notes
You can leave the pockets empty, but I like the idea of slipping a few folded notes inside. They make the garland a little more personal without changing the decoration.
- Cut small pieces of ivory paper measuring approximately 2 x 2 1/2 inches.
- Write a short Christmas wish, a kind message, or a little note on each piece.
- Fold the paper in half lengthwise and then in half again to make a small folded note approximately 1 x 1 1/4 inches.
- Slide the folded note gently into a mitten pocket, leaving just a little of its upper edge showing.
- Repeat with any other pockets you want to fill.
In the example, two pockets have folded notes showing. You can fill all five or leave some empty.
Arranging the Five Mittens on the Garland Cord
Now we'll put the mittens together on the ivory braided cord. Keep the color order the same as the photograph so the garland looks balanced.
- Lay the 72-inch ivory cord on a flat surface.
- Measure from its left end and mark the mitten positions at 12, 24, 36, 48, and 60 inches.
- Arrange the mittens in this order: dusty rose, ivory, dusty rose, ivory, dusty rose.
- Thread the cord through the pink velvet loop of the first mitten.
- Slide the mitten along the cord until its hanging loop is centered at the 12-inch mark.
- Thread the remaining four mitten loops onto the cord, placing them at the remaining marks.
- Lay the cord out straight and check that all five mittens have their decorated fronts facing the same direction.
- Using matching sewing thread, add a few tiny stitches through each velvet loop and around the cord to keep the mittens from sliding out of position.
- Check the spacing. The mittens should hang approximately 12 inches apart when the cord is laid straight.
Garland arrangement checkpoint: You should have five mittens hanging beneath the ivory cord, with three dusty-rose mittens alternating with two ivory mittens.
Make sure the ribbon loops sit over the cord rather than twisting around it. A little hidden stitch will keep each mitten facing forward.
Making the Garland End Loops
- At the left end of the cord, fold approximately 4 inches back on itself to make a hanging loop.
- Secure the doubled cord with several tight wraps of strong sewing thread and a firm knot.
- Repeat at the right end, making a matching hanging loop.
- Trim any loose fibers without cutting into the secured cord.
- Check the hanging loops and the five mitten attachments before displaying the garland.
- Hang the cord from two secure wall hooks, allowing the center to fall into a gentle curve.
- Adjust the mittens so they hang straight and face forward.
Finished garland checkpoint: The five felt mittens should hang in a gentle curve, with their little contrasting pockets facing outward. Each mitten should be securely attached to the ivory cord.
Displaying Your Christmas Mitten Garland
This would be pretty across a wall, above a Christmas gift table, or along a shelf. You can slip a folded Christmas wish into each pocket or leave them empty for a simpler look.
For a baby girl Christmas shower, I would hang the garland behind the gift table and keep the notes tucked into the little pockets. The pink and ivory colors also pair nicely with the other handmade felt Christmas crafts.
Keep the garland securely hung and out of reach of babies and young children. The cord, ribbon loops, and folded notes are decorative pieces, not play items.
8. Layered Pink Ribbon Door Decoration
This layered pink ribbon door decoration is a pretty alternative to a Christmas wreath. Dusty-rose velvet, ivory satin, and blush-pink ribbon come together in one large bow, with long ribbon tails and a little embroidered felt star hanging beneath it.
It looks rather elaborate, but you don't have to tie one enormous bow. You'll make the loops separately, stack them together, and secure everything to a small felt backing. I would lay out all the ribbon pieces before sewing anything so you can see how the colors and lengths will look together.
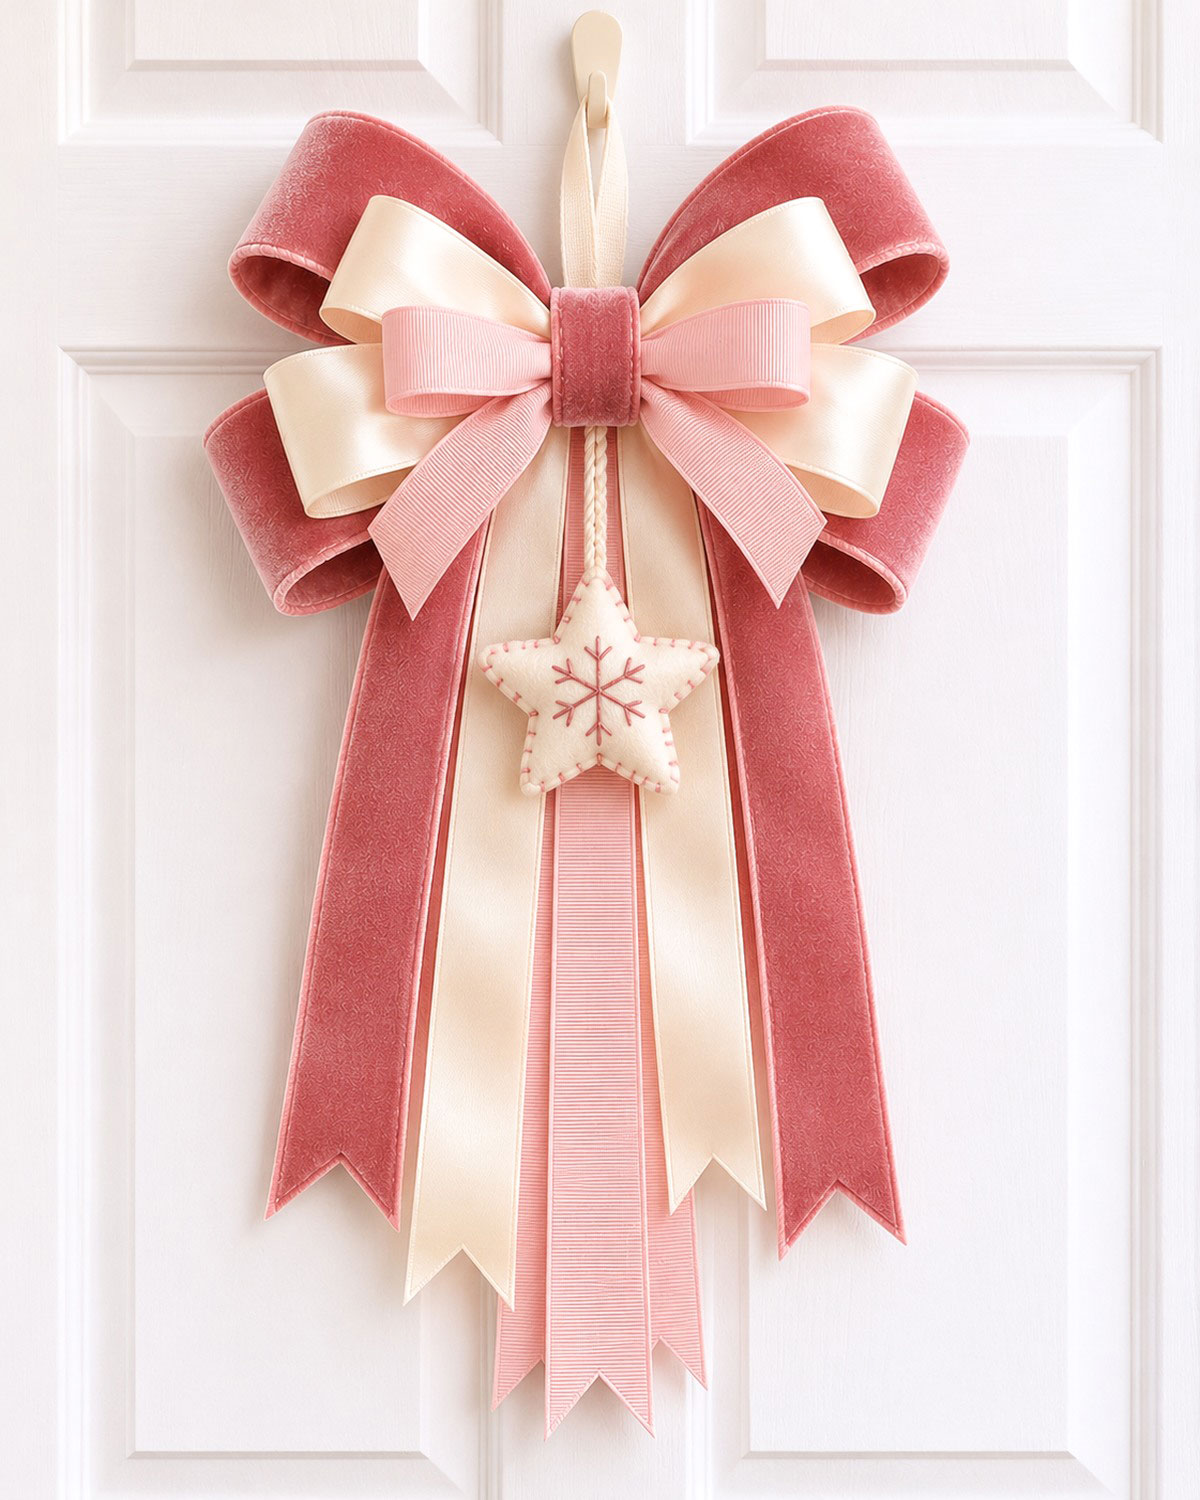
Finished size: Approximately 11 inches wide and 26 to 29 inches long, depending on how the ribbon loops and tails are arranged.
Skill level: Confident beginner.
Construction: Five separate double-loop ribbon pieces, six long ribbon tails, one embroidered felt star, and an ivory hanging loop, all secured to a small reinforced felt backing.
Materials for One Door Decoration
- Approximately 2 1/2 yards of dusty-rose wired velvet ribbon, 2 1/2 inches wide
- Approximately 2 1/2 yards of ivory wired satin ribbon, 1 1/2 inches wide
- Approximately 2 yards of blush-pink grosgrain ribbon, 1 inch wide
- 8 inches of dusty-rose velvet ribbon, 1 inch wide, for the center wrap
- 8 inches of ivory satin ribbon, 1/2 inch wide, for the hanging loop
- 6 inches of narrow ivory braided cord, approximately 1/8 inch thick, for the felt star
- One 5-inch square of firm ivory craft felt for the two mounting circles
- One 4-inch square of ivory felt for the star front and back
- One optional 2-inch circle of lightweight plastic canvas for reinforcing the backing
- Dusty-rose embroidery floss
- Strong matching sewing thread
- Hand-sewing needle and embroidery needle
- A tiny amount of polyester fiberfill for the star
- Fabric scissors, measuring tape, ruler, pins or sewing clips
- Removable fabric marking pen
- Printed star and assembly templates
Printable guide: Download the Layered Pink Ribbon Door Decoration Templates and Assembly Guide.
The PDF includes the full-size felt star, mounting circle, embroidery guide, ribbon cutting measurements, and a photograph of the finished decoration. Print at 100% or Actual Size and check the 1-inch test square before cutting the felt pieces.
Cutting the Ribbons
Cut everything before assembling the bow. Keeping the loops and tails in separate groups will make the next steps easier.
- From the 2 1/2-inch dusty-rose velvet ribbon, cut two 22-inch lengths for the large bow loops.
- Cut two additional 16-inch lengths of dusty-rose velvet ribbon for the outer hanging tails.
- From the 1 1/2-inch ivory satin ribbon, cut two 18-inch lengths for the middle bow loops.
- Cut two additional 18-inch lengths of ivory satin ribbon for the hanging tails.
- From the 1-inch blush-pink grosgrain ribbon, cut one 10-inch length for the small front bow.
- Cut two 20-inch lengths of blush-pink grosgrain ribbon for the two longest hanging tails.
- Cut one 6-inch length of 1-inch dusty-rose velvet ribbon for wrapping the completed bow center.
- Cut an 8-inch length of 1/2-inch ivory satin ribbon for the hanging loop.
- Cut a 6-inch length of narrow ivory braided cord for suspending the felt star.
Cutting checkpoint: You should have five ribbon pieces for the bow loops, six separate ribbon tails, one velvet center wrap, one hanging-loop ribbon, and one ivory cord for the star.
Keep the wired ribbon edges neat when cutting. If a cut end exposes the thin wire inside the ribbon edging, trim the wire back and secure the fabric edge so no sharp wire end remains.
Making the Long Ribbon Tails
The long tails are arranged in three layers. The wide dusty-rose ribbons sit on the outside, the ivory ribbons fall just inside them, and the two narrow blush-pink ribbons hang in the middle.
- Lay the two 16-inch dusty-rose velvet tails on your work surface with the velvet sides facing up.
- At the lower end of each ribbon, fold the ribbon in half lengthwise and cut a shallow V from the folded edge toward the outer corners. Open the ribbon to reveal a neat V-notched end.
- Repeat with the two 18-inch ivory satin tails.
- Cut matching V notches into the ends of the two 20-inch blush-pink grosgrain tails.
- Arrange all six tails side by side, with their upper ends level.
- Place the two dusty-rose tails at the outside edges, angling them slightly away from the center.
- Position the two ivory tails just inside the velvet ribbons.
- Place the two blush-pink tails in the middle, allowing them to extend slightly below the ivory tails.
- Adjust the arrangement until the tails hang in a balanced fan shape, with the narrow blush ribbons longest in the center.
Tail checkpoint: You should have six ribbons in a symmetrical arrangement: dusty rose on both outside edges, ivory next, and blush pink in the center. The V-notched ends should fall at three different levels.
Cutting and Preparing the Felt Mounting Base
A small felt base will hold the ribbon layers together. It will be hidden behind the large bow when the decoration is finished.
- Using the round template in the PDF, cut two circles from firm ivory craft felt. Each circle should measure 2 1/2 inches across.
- If you're using plastic canvas for extra support, cut one circle measuring 2 inches across.
- Place the plastic canvas against the back of the first felt circle, keeping it centered.
- Using strong sewing thread, take several stitches through the felt and plastic canvas to hold them together.
- Set the second felt circle aside. It will cover the back after the ribbon assembly is finished.
Backing checkpoint: You should have one reinforced felt circle ready for assembly and one plain felt circle for covering the back.
Attaching the Ivory Hanging Loop
- Fold the 8-inch ivory satin ribbon in half, bringing the cut ends together.
- Lay the reinforced felt circle with its front facing down.
- Position the ribbon ends at the upper center of the circle, allowing approximately 1 inch of ribbon to overlap the felt.
- Keep the ribbon straight, with the folded loop extending above the circle.
- Secure the two ends with several rows of small backstitches using strong sewing thread.
- If you've added plastic canvas, catch several of its openings with the stitches for additional support.
- Gently lift the backing by the loop over your work surface to check the attachment.
The ivory loop should rise straight from the center of the finished bow rather than leaning to one side.
Making the Embroidered Ivory Felt Star
The small ivory star gives this ribbon decoration its Christmas detail. It has a simple dusty-rose snowflake in the middle and matching pink blanket stitching around the edge.
- Cut two identical five-point stars from ivory felt using the full-size PDF template.
- Choose one star to be the front. Position it with one point facing straight upward.
- Transfer the six-spoke snowflake embroidery guide onto the center of the front star using a removable fabric marker.
- Thread an embroidery needle with three strands of dusty-rose embroidery floss.
- Beginning at the center, work the six main snowflake spokes using small backstitches or straight stitches. There should be one vertical upper spoke, one vertical lower spoke, and four diagonal spokes.
- Near the end of each spoke, work two short stitches forming a little V-shaped branch that points outward.
- Keep the embroidery centered and leave enough space between the stitching and the star's outer edges.
- Secure the embroidery thread on the wrong side of the star front.
- Fold the 6-inch ivory braided cord in half, bringing its cut ends together.
- Position the two cut ends between the star front and back at the upper point, extending approximately 1/2 inch inside the felt. The folded part of the cord should extend above the star.
- Using matching thread, secure the two cord ends to the inside of the star backing with several small stitches.
- Place the embroidered front and plain backing together, matching all five points and the spaces between them.
- Begin blanket stitching around the star using three strands of dusty-rose embroidery floss. Keep the stitches approximately 1/8 inch from the cut edge.
- Before closing the last side, add a tiny pinch of polyester fiberfill between the two felt layers. Spread it evenly so the star has a little padding without becoming rounded or distorted.
- Finish blanket stitching the remaining edge, secure the thread, and hide its end between the felt layers.
Star checkpoint: The finished ornament should be approximately 3 inches across, with five clearly shaped points, pink blanket stitching, one centered embroidered snowflake, and a doubled ivory cord extending from the upper point.
Don't overfill the star. It should look lightly padded, with the points still easy to recognize.
Attaching the Star to the Mounting Base
- Lay the reinforced felt mounting circle front side up, with the ivory hanging loop extending upward from behind it.
- Position the folded upper end of the star's suspension cord against the lower center of the felt circle.
- Adjust the cord so the top point of the star will hang approximately 1 1/2 to 2 inches below the finished bow center.
- Secure the folded cord to the mounting circle with several small stitches using strong thread.
- Arrange the doubled cord so both strands lie neatly together.
- Let the star hang below the felt circle, with its embroidered front facing outward.
Star placement checkpoint: The ivory star should hang directly beneath the center of the mounting circle. It will eventually rest in front of the long ribbon tails, rather than disappearing behind them.
Attaching the Six Ribbon Tails to the Backing
- Turn the mounting circle so its front faces you. Keep the ivory hanging loop extending above it and the felt star hanging below.
- Place the upper ends of the six ribbon tails over the front of the felt circle.
- Position the dusty-rose velvet tails on the outer left and right, angled slightly outward.
- Place the ivory satin tails just inside the dusty-rose tails.
- Position the two blush-pink grosgrain tails at the center.
- Overlap the upper ends of the ribbons over the felt mounting circle by approximately 1 inch.
- Pin or clip the ribbon ends in place, keeping the visible lengths and angles balanced.
- Using strong sewing thread, work several rows of backstitches across the overlapping ribbon ends and through the felt backing.
- Reinforce the stitching with a second row just below the first.
- Arrange the felt star's suspension cord so it passes in front of the center ribbon tails.
- Check that the six ribbons hang freely and that the felt star remains centered.
Tail assembly checkpoint: The six long ribbons should now be attached to the felt backing. Their upper ends will be concealed by the large layered bow.
Making the Large Dusty-Rose Velvet Bow Loops
The large dusty-rose loops form the back layer of the bow. You'll make two separate double-loop pieces, then place them together.
- Take one 22-inch length of dusty-rose wired velvet ribbon and lay it horizontally with the velvet side facing down.
- Find and mark the center at 11 inches.
- Bring the left ribbon end inward to the center mark, making a large loop on the left.
- Bring the right ribbon end inward to the same mark, making a matching loop on the right.
- Overlap the two raw ribbon ends by approximately 1/2 inch at the center.
- Pin the overlapping ends in place.
- Pinch the ribbon together at the center, gathering the layers into a narrow band.
- Wrap strong sewing thread around the pinched center several times, then secure the thread with a firm knot.
- Shape the two loops gently with your fingers, using the wired edges to keep them rounded.
- Repeat with the second 22-inch dusty-rose ribbon length.
Large-loop checkpoint: You should have two separate velvet double-loop pieces, each with one loop extending left and one extending right.
Making the Ivory Satin Bow Loops
- Take one 18-inch length of ivory wired satin ribbon and lay it right side down.
- Mark the center at 9 inches.
- Bring both ends inward to meet and overlap slightly at the center, forming one loop on each side.
- Pin the overlap and gather the center into a narrow band.
- Wrap with strong sewing thread and secure firmly.
- Shape both loops so they curve outward without sharp folds.
- Repeat with the second 18-inch ivory ribbon length.
You should now have two ivory double-loop pieces. They'll sit in front of the dusty-rose velvet and create the middle layer of the bow.
Making the Small Blush-Pink Front Bow
- Take the 10-inch length of blush-pink grosgrain ribbon.
- Lay it flat and mark the center at 5 inches.
- Bring both cut ends toward the center, forming one small loop on the left and one on the right.
- Overlap the ends by approximately 1/2 inch.
- Pinch the middle and wrap with strong sewing thread to secure the loops.
- Adjust the two loops so they're balanced and slightly smaller than the ivory loops.
Bow-piece checkpoint: You should have two dusty-rose velvet double-loop pieces, two ivory satin double-loop pieces, and one blush-pink grosgrain double-loop piece.
Together, these five pieces will make the ten visible bow loops.
Layering the Five Bow Pieces
Now for the part that makes this decoration look so full. We'll stack the bow pieces instead of trying to tie all the ribbon at once.
- Place the first large dusty-rose velvet double-loop piece over the center of the felt mounting circle, with its loops extending diagonally upward to the left and right.
- Place the second dusty-rose velvet piece over it, angling its loops a little lower on both sides.
- Match the two gathered centers and pin them together.
- Position the first ivory satin double-loop piece over the dusty-rose layers, allowing the ivory loops to show inside the larger velvet loops.
- Place the second ivory satin piece slightly lower, filling the spaces between the velvet and first ivory loops.
- Center the small blush-pink grosgrain bow over the ivory layers, keeping its loops nearly horizontal.
- Check the arrangement from the front. There should be four dusty-rose loops, four ivory loops, and two smaller blush-pink loops.
- Gather the five centers together, keeping the bow pieces from twisting.
- Using strong sewing thread, take several stitches through all five gathered centers and into the reinforced felt mounting circle.
- Make additional securing stitches until the ribbon layers feel firmly attached.
- Remove the temporary pins and begin shaping the loops with your fingers.
Layering checkpoint: The bow should now have ten loops in three colors, with the largest dusty-rose loops at the back, ivory loops in the middle, and two small blush-pink loops at the front.
Don't flatten the loops while stitching. The wired edges should help them keep their rounded shape.
Wrapping the Velvet Bow Center
- Take the 6-inch length of 1-inch dusty-rose velvet ribbon.
- Fold one short end under approximately 1/4 inch to hide its raw edge.
- Position the folded end at the back of the bow center.
- Wrap the ribbon around the gathered center, covering the thread and the overlapping ends of the bow pieces.
- Keep the velvet side facing outward and pull it snugly enough to hold the layers together without crushing the loops.
- Trim any excess ribbon, leaving enough to fold the final raw end under approximately 1/4 inch.
- Secure the folded ends together at the back using small stitches with matching thread.
- Add two or three stitches through the velvet center wrap and the felt mounting base so the wrap cannot slide.
If the 6-inch center wrap is too short for the thickness of your chosen ribbons, cut a slightly longer piece of the same velvet ribbon. The finished center should be neatly covered without squeezing the bow out of shape.
Finishing the Felt Backing
- Turn the ribbon decoration carefully so you can see the back of the mounting circle.
- Check that the ivory hanging loop, ribbon tails, and felt star cord are all firmly attached.
- Place the second 2 1/2-inch ivory felt circle over the back of the first, covering the attachment stitches and optional plastic canvas.
- Match the edges of the two felt circles.
- Using ivory sewing thread, work small slip stitches around the perimeter to join the circles.
- Keep the stitches close to the edge and avoid catching the hanging loop or star cord accidentally.
- Secure the thread and hide its end between the felt layers.
The backing doesn't need to be decorative because it will face the door. It does need to hold the bow and hanging pieces together.
Final Shaping and Hanging
- Hold the completed decoration upright by its ivory hanging loop over a padded work surface.
- Check that the bow hangs straight and that the mounting base doesn't twist.
- Gently open the four large dusty-rose velvet loops, arranging two slightly higher and two slightly lower.
- Shape the four ivory loops so they remain visible between the velvet loops.
- Adjust the two small blush-pink loops across the front.
- Smooth the six long tails, keeping the dusty-rose ribbons outside, the ivory ribbons inside them, and the blush-pink ribbons in the middle.
- Check that the felt star hangs in front of the center tails, directly below the bow.
- Inspect the star cord and ivory hanging loop for loose stitches.
- Hang the finished decoration from a secure indoor door hook.
Finished decoration checkpoint: Your door hanger should have one full layered bow, six graduated ribbon tails, an ivory hanging loop, and a little embroidered felt star suspended beneath the center.
Use a hook that holds the decoration without interfering with the door as it opens and closes. The felt and ribbons are best suited to an indoor door or another dry, protected display area.
Making the Decoration for a Pink Christmas Baby Shower
This would look pretty on the door leading into a baby girl Christmas shower, especially with the matching pink Christmas decorations elsewhere on this page. The embroidered star gives it a Christmas detail without needing lettering or extra ornaments.
You could also hang it above a holiday gift table or against a plain wall. I'd keep the surrounding decorations fairly simple so the different ribbon textures stand out.
For a matching handmade display, pair it with the pink candy-stripe fabric garland or the little felt stocking ornaments from this collection. Keep any long ribbon tails and hanging cords away from babies and young children.
9. Pink and Silver Christmas Starburst Wall Decoration
If you want one large Christmas decoration that doesn't need a lot of smaller pieces around it, this pink and silver paper starburst is a pretty choice. Folded dusty-rose points alternate with metallic-silver ones, while an ivory paper rosette, satin bow, and snowflake finish the center.
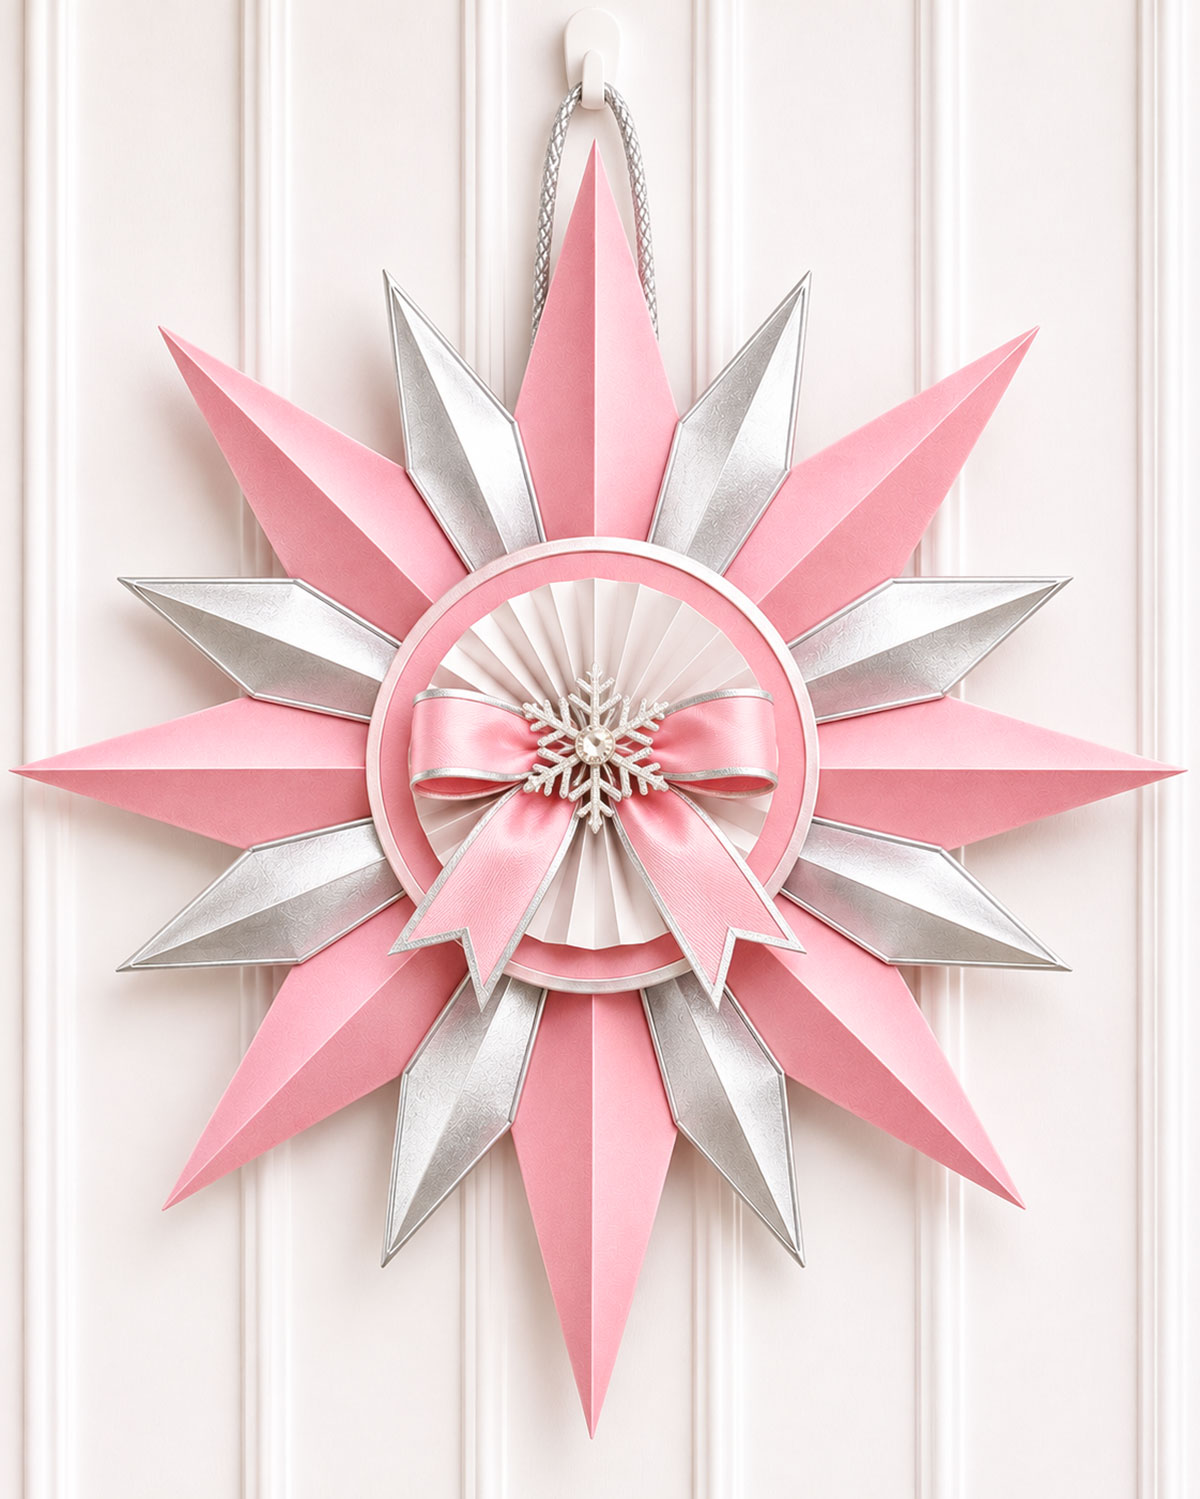
Best for: An indoor wall, holiday dessert display, or baby shower backdrop.
I would give this decoration a little room rather than surrounding it with several other large ornaments. It's already approximately 17 to 18 inches across.
See the complete DIY Pink and Silver Christmas Starburst tutorial and free printable templates.
10. Pink Christmas Sleigh Centerpiece
This little paper Christmas sleigh has dusty-rose sides, curved ivory runners, scalloped trim, and a snowflake on the side. Three miniature wrapped presents fill the open tray. I especially like it for a Christmas baby shower because you can use the same colors for the gift table and other decorations.
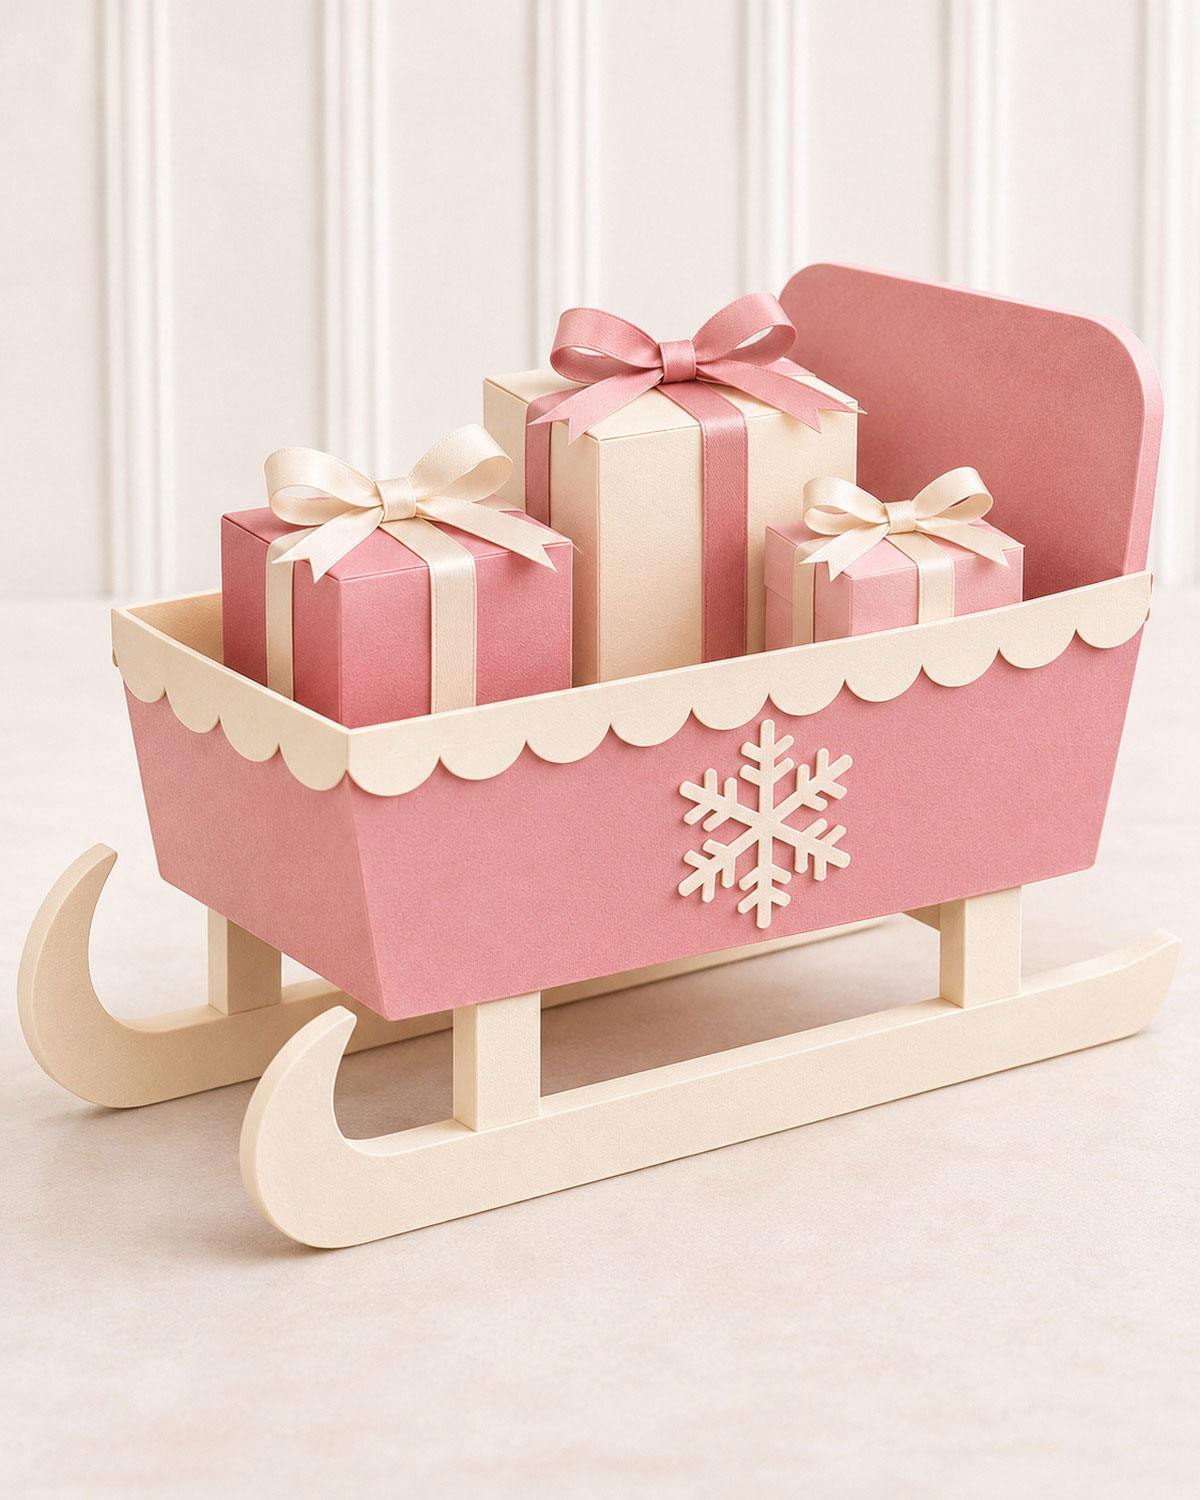
Best for: A Christmas baby shower gift table, dessert display, or holiday centerpiece.
The separate tutorial explains how to build the sleigh tray, support the curled runners, and make the three little presents. I'd make the sleigh first and add the gifts afterward so you can check that everything stands level.
Make the Pink Christmas Sleigh Centerpiece with the complete instructions and free templates.
Bonus Project: Mini Christmas Stocking Garland
These little Christmas stockings are one of my favorite ways to use leftover holiday fabric. I've mixed red gingham, ivory ticking stripes, and cheerful red polka dots, then finished each stocking with an ivory cuff and a little fabric hanging loop. Make all seven for a Christmas mantel, party backdrop, or dessert table. They're especially cute for a Baby's First Christmas celebration.
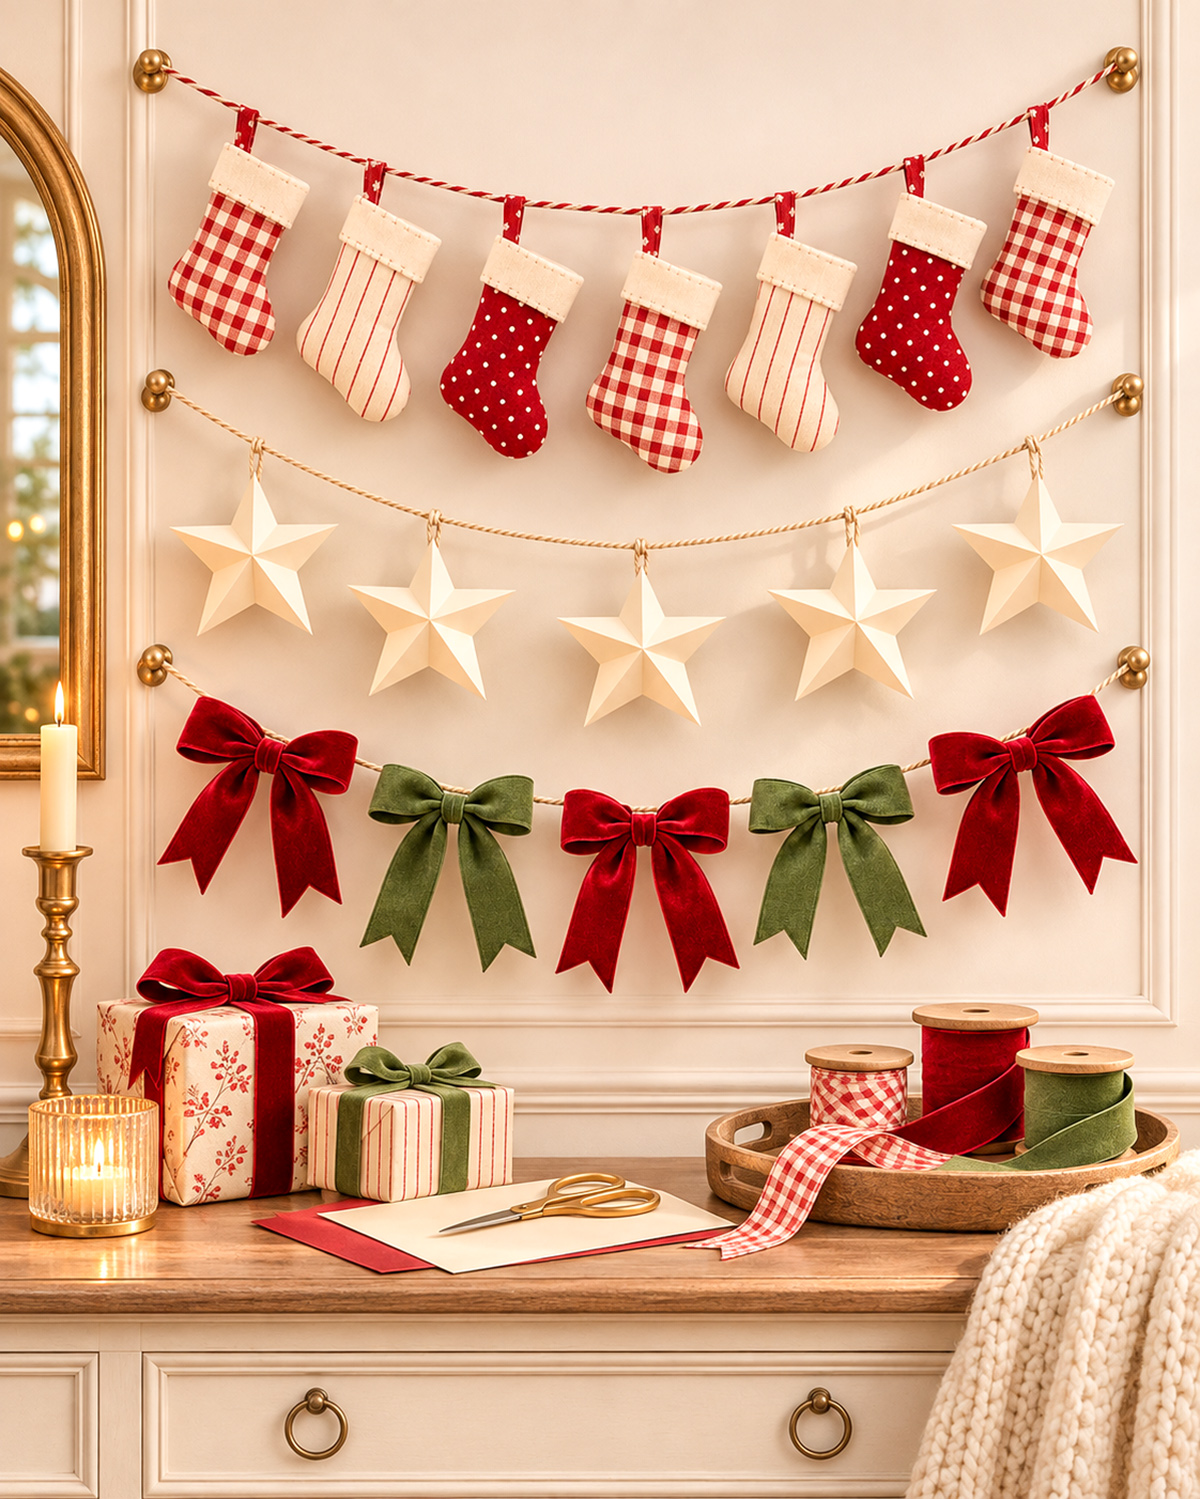
Finished Size and Project Details
- Skill level: Confident beginner.
- Finished stockings: Seven miniature fabric stockings.
- Stocking size: Approximately 3 3/4 inches tall and 2 3/4 inches wide, excluding the hanging loop.
- Garland cord: 56 inches before forming the end loops.
- Usable garland length: 48 inches between the two hanging-loop bases, measured along the cord before hanging.
- Spacing: 6 inches between neighboring stocking attachment points.
- Construction: Machine sewing or careful hand sewing, with simple hand-stitched felt cuffs.
- Seam allowance: 1/4 inch, already included in the stocking template.
The stockings are lightweight and unstuffed, so they'll hang neatly without pulling the cord out of shape. You can reverse the direction of the toes by turning the finished stockings around.
Materials and Supplies
You'll need:
- Red-and-ivory gingham cotton fabric for three stockings.
- Ivory cotton fabric with narrow red stripes for two stockings.
- Red cotton fabric with small ivory polka dots for two stockings.
- One 9-by-12-inch sheet of ivory wool-blend felt for the cuffs.
- At least 21 inches of red cotton tape or ribbon, 3/8 inch wide, for seven hanging loops.
- 56 inches of twisted red-and-ivory cotton decorating cord.
- Matching sewing thread.
- Red embroidery floss or sturdy thread for the decorative cuff stitching.
- Sewing machine or hand-sewing needle.
- Embroidery needle.
- Fabric scissors and small embroidery scissors.
- Iron and pressing surface.
- Fabric marking pencil, pins or sewing clips.
- Flexible measuring tape.
- Printed stocking and cuff templates.
Three coordinating fat quarters will provide plenty of fabric for this arrangement. Small leftover pieces of quilting cotton are also useful, provided they're large enough for the stocking templates.
Download the Free Mini Christmas Stocking Templates
Print the stocking pattern on ordinary US Letter paper at 100% or Actual Size. Do not select Fit to Page. Check the 1-inch test square with a ruler before cutting the fabric.
Download the Free Mini Christmas Stocking Garland Pattern and Templates (PDF)
The PDF includes the full-size stocking body, the ivory felt cuff template, and a placement guide for all seven stockings.
Step 1: Cut the Stocking Pieces
Begin with the stocking body template. It already includes the 1/4-inch seam allowance, so don't add another allowance when cutting.
- Fold your gingham fabric with the right sides together.
- Place the stocking template on the folded fabric and trace around it.
- Cut through both layers to make one matching front-and-back pair.
- Repeat until you have three gingham stocking pairs.
- Cut two matching stocking pairs from the striped fabric.
- Cut two matching stocking pairs from the polka-dot fabric.
Cutting checkpoint: You should have 14 individual stocking body pieces, making seven matching pairs.
Next, cut 14 ivory felt cuffs, using the rectangular cuff template. Each cuff measures 1.58 inches wide by 0.85 inch tall. You'll use one on the front and one on the back of each stocking.
Finally, cut seven pieces of red ribbon or cotton tape, each 3 inches long.
Step 2: Sew the Stocking Bodies
Work on one stocking at a time so the fabric pairs don't get mixed up.
- Place two matching stocking pieces together with the right sides facing inward.
- Line up the straight top edges, heel, and rounded toe.
- Pin or clip the layers together.
- Starting at one upper corner, sew down the side, around the heel, along the bottom, around the toe, and back up to the opposite upper corner.
- Use a consistent 1/4-inch seam allowance. Backstitch at the beginning and end.
- Leave the entire straight top edge open.
- Trim bulky seam allowances and make small clips along the curved heel and toe, stopping before the stitching.
- Turn the stocking right side out and gently ease the heel and toe into shape.
- Press the stocking flat.
Be especially careful when turning the rounded toe. A blunt turning tool can help, but don't push hard enough to damage the seam.
Repeat these steps for the remaining six stockings.
Step 3: Finish the Upper Edges
Fold the raw upper edge of each stocking 1/4 inch toward the inside. Press the fold into place.
Stitch close to the folded edge, keeping the front and back layers separate so the stocking opening stays open. You can use a short machine stitch or small hand stitches.
Check that the top opening lies flat and that the side seams meet neatly.
Step 4: Make and Attach the Hanging Loops
Each stocking needs one red hanging loop, sewn firmly to the upper back of the stocking.
- Take one 3-inch piece of red cotton tape or ribbon.
- Fold it in half, bringing the two raw ends together.
- Turn the stocking so you're looking at the inside back.
- Position the two ribbon ends together approximately 1/2 inch below the finished top edge, centered across the back.
- Sew the ribbon ends to the back fabric using a small reinforced rectangle of stitches.
- Make sure your needle catches only the back layer, not the front.
- Bring the finished loop up above the stocking opening.
The exposed loop should measure approximately 1 inch tall. It must be attached to the stocking body itself, not merely to the decorative cuff.
Repeat for all seven stockings.
Step 5: Add the Ivory Felt Cuffs
The ivory cuffs give these little stockings their finished Christmas look. We're using two felt rectangles for each stocking, so the front and back will look alike.
- Lay one stocking flat with the front facing up.
- Center an ivory felt cuff across the top, with its upper edge even with the finished stocking opening.
- Allow the felt to extend just slightly beyond the stocking's side edges.
- Using red embroidery floss or thread, make a neat row of running stitches near the lower edge of the cuff, sewing through the felt and front stocking fabric only.
- Secure the upper edge with small stitches that don't close the stocking opening.
- Turn the stocking over and repeat with the second ivory cuff.
- Join the overlapping short side edges of the two cuffs with a few small whipstitches.
- Secure and hide the thread ends beneath the felt.
Keep the running stitches fairly even. About 1/8 inch between stitches makes a pretty handmade finish without overcrowding the narrow cuff.
Cuff checkpoint: Each finished stocking should have one continuous-looking ivory cuff around the top, with the red hanging loop coming up from behind it. The opening should remain open.
Step 6: Arrange All Seven Stockings
Lay the finished stockings on your worktable in this order, from left to right:
- Red gingham.
- Ivory fabric with red stripes.
- Red fabric with ivory polka dots.
- Red gingham.
- Ivory fabric with red stripes.
- Red fabric with ivory polka dots.
- Red gingham.
This gives you a balanced arrangement with gingham at both ends and one gingham stocking in the center.
Turn individual stockings so the toes point in alternating directions, adjusting the arrangement until you like the way it looks. The cuffs and hanging loops should remain visible on every stocking.
Step 7: Prepare the Garland Cord
Cut one 56-inch length of twisted red-and-ivory cotton cord.
Before finishing the cord ends, thread the cord through the seven finished stocking loops in the order listed above. Keep the stockings together near the middle temporarily.
Now make the hanging loops at both ends of the cord:
- Measure 4 inches inward from the left end of the cord.
- Fold that end back to the 4-inch mark to form a loop.
- Secure the free end firmly to the main cord with matching thread, using several stitches through both sections. If the cord is slippery, make a secure knot before reinforcing it with stitching.
- Repeat at the right end, using the last 4 inches of cord.
After forming both hanging loops, you'll have approximately 48 inches of straight cord between the two loop bases.
Step 8: Space and Secure the Stockings
Lay the cord flat without stretching it. Starting at the base of the left hanging loop, measure and mark the following positions:
- Stocking 1: 6 inches.
- Stocking 2: 12 inches.
- Stocking 3: 18 inches.
- Stocking 4: 24 inches.
- Stocking 5: 30 inches.
- Stocking 6: 36 inches.
- Stocking 7: 42 inches.
These positions give you six equal 6-inch spaces between the stockings, with another 6 inches of cord at each end.
Slide each stocking to its marked position. Using matching thread, make several small stitches through the top of its ribbon loop and around the garland cord. This prevents the stocking from sliding when the garland hangs in a curve.
Check that every loop is secured before lifting the finished garland.
Step 9: Hang and Finish the Garland
Hang the cord from two properly installed decorating hooks or other suitable supports. Allow the middle of the cord to dip into a gentle curve.
Step back and check the arrangement. The center gingham stocking should sit at the lowest part of the curve, with three stockings balanced on either side.
Straighten the hanging loops if necessary and check that the cuffs all face forward.
You now have seven little handmade Christmas stockings ready to decorate a mantel, holiday party backdrop, or Christmas dessert table.
Ways to Use Your Mini Stocking Garland
For a Christmas baby shower, hang the finished garland above a dessert table, well away from food, candles, and guest traffic. The red-and-ivory colors work especially well with a traditional Christmas theme.
For Baby's First Christmas, use the garland as a decorative keepsake and bring it out again for family celebrations in future years.
You can also make a longer garland by sewing additional stockings. Keep the attachment points 6 inches apart and allow approximately 6 inches of undecorated cord at each end before forming the hanging loops.
Decoration note: This is a hanging decoration, not a baby toy. Keep the cord and all fabric loops completely out of reach of babies and young children. Do not hang it on a crib, bassinet, or other infant sleep space, or anywhere a child could pull it down.
More Pink Christmas Decorations for the Table and Baby Shower
These last five projects are especially useful if you're decorating for a Christmas baby shower. The table decorations, little keepsake ornaments, and welcome sign all have their own complete tutorials and printable templates, so you can choose just the projects you need.
11. Mini Pink Gift-Box Place Settings
These miniature paper gift boxes do double duty as Christmas place settings and favor holders. Two are dusty rose with ivory decorations, and the third reverses the colors. Each box has a lift-off lid, a scalloped paper band, a satin bow, and a removable place card.
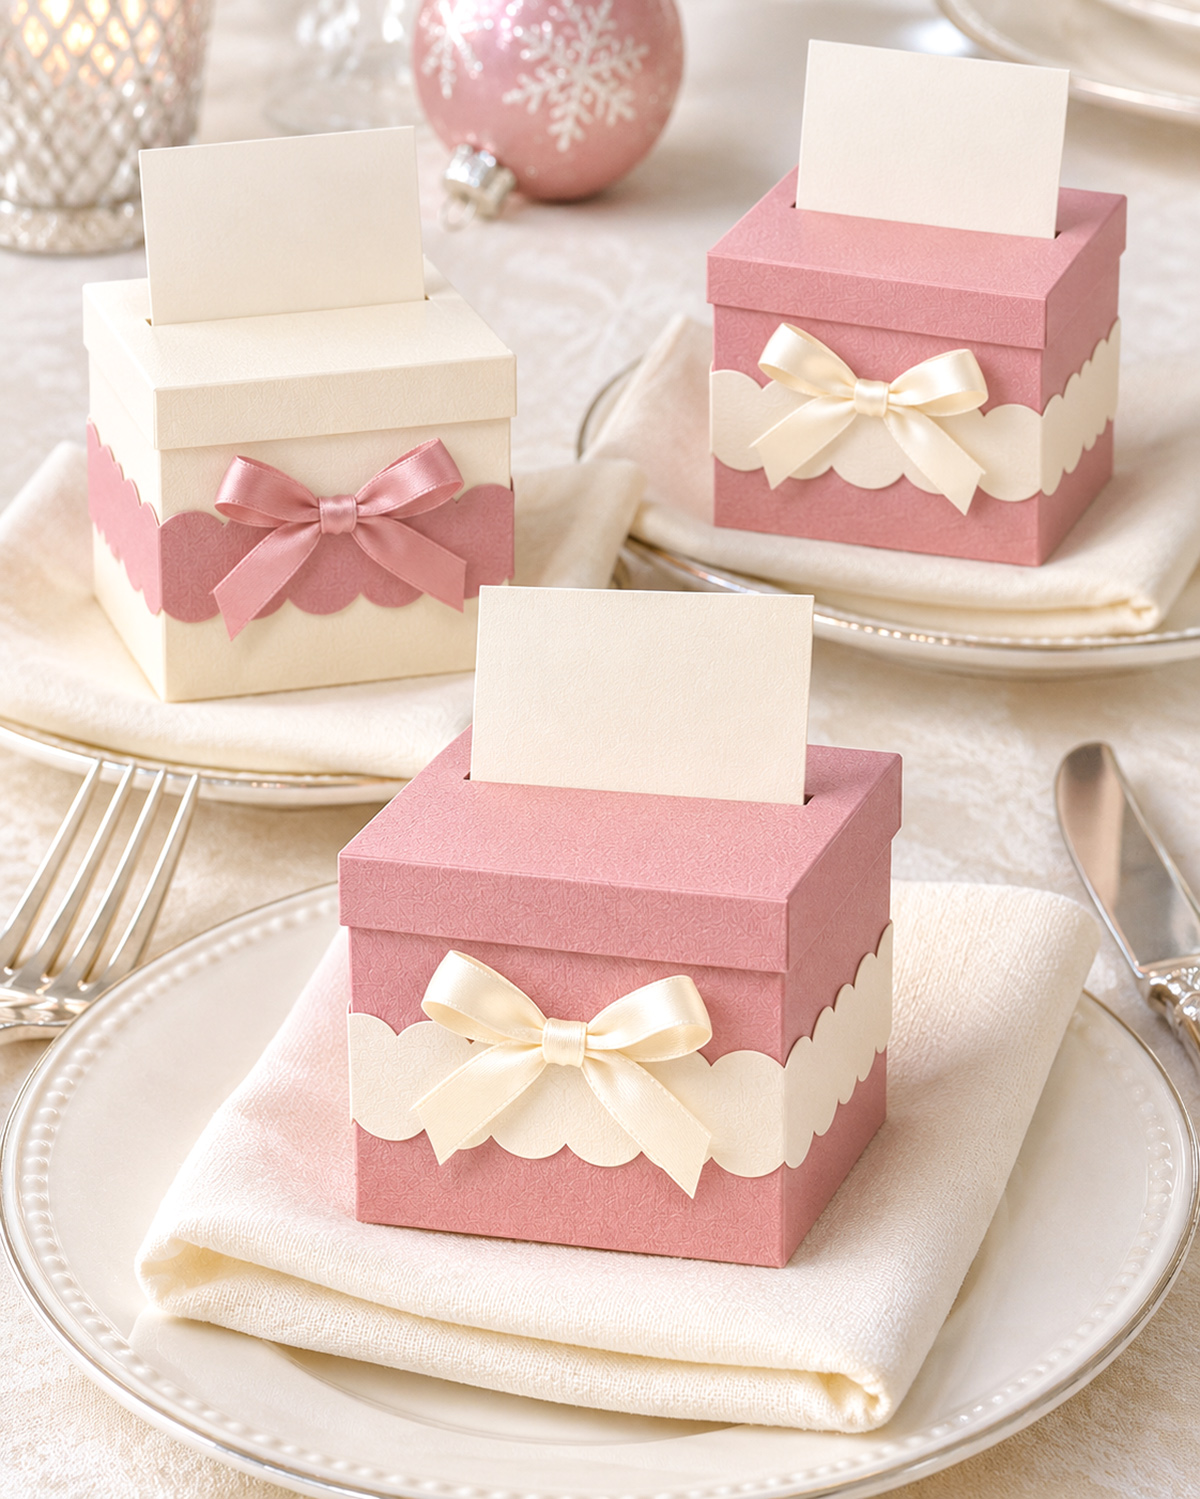
Best for: Christmas baby shower place cards, holiday dinner settings, and little wrapped favors.
I'd use these when you want the table settings themselves to be part of the decorations. Guests can take the small boxes home afterward.
Make the Mini Christmas Gift-Box Place Settings with free printable templates.
12. Pink Christmas Bell Napkin Rings
These handmade napkin rings have dusty-rose fabric bands, ivory ribbon, tiny embroidered felt bells, and satin bows. They're a nice way to use the same pink and ivory colors on the dining table without adding more large decorations.
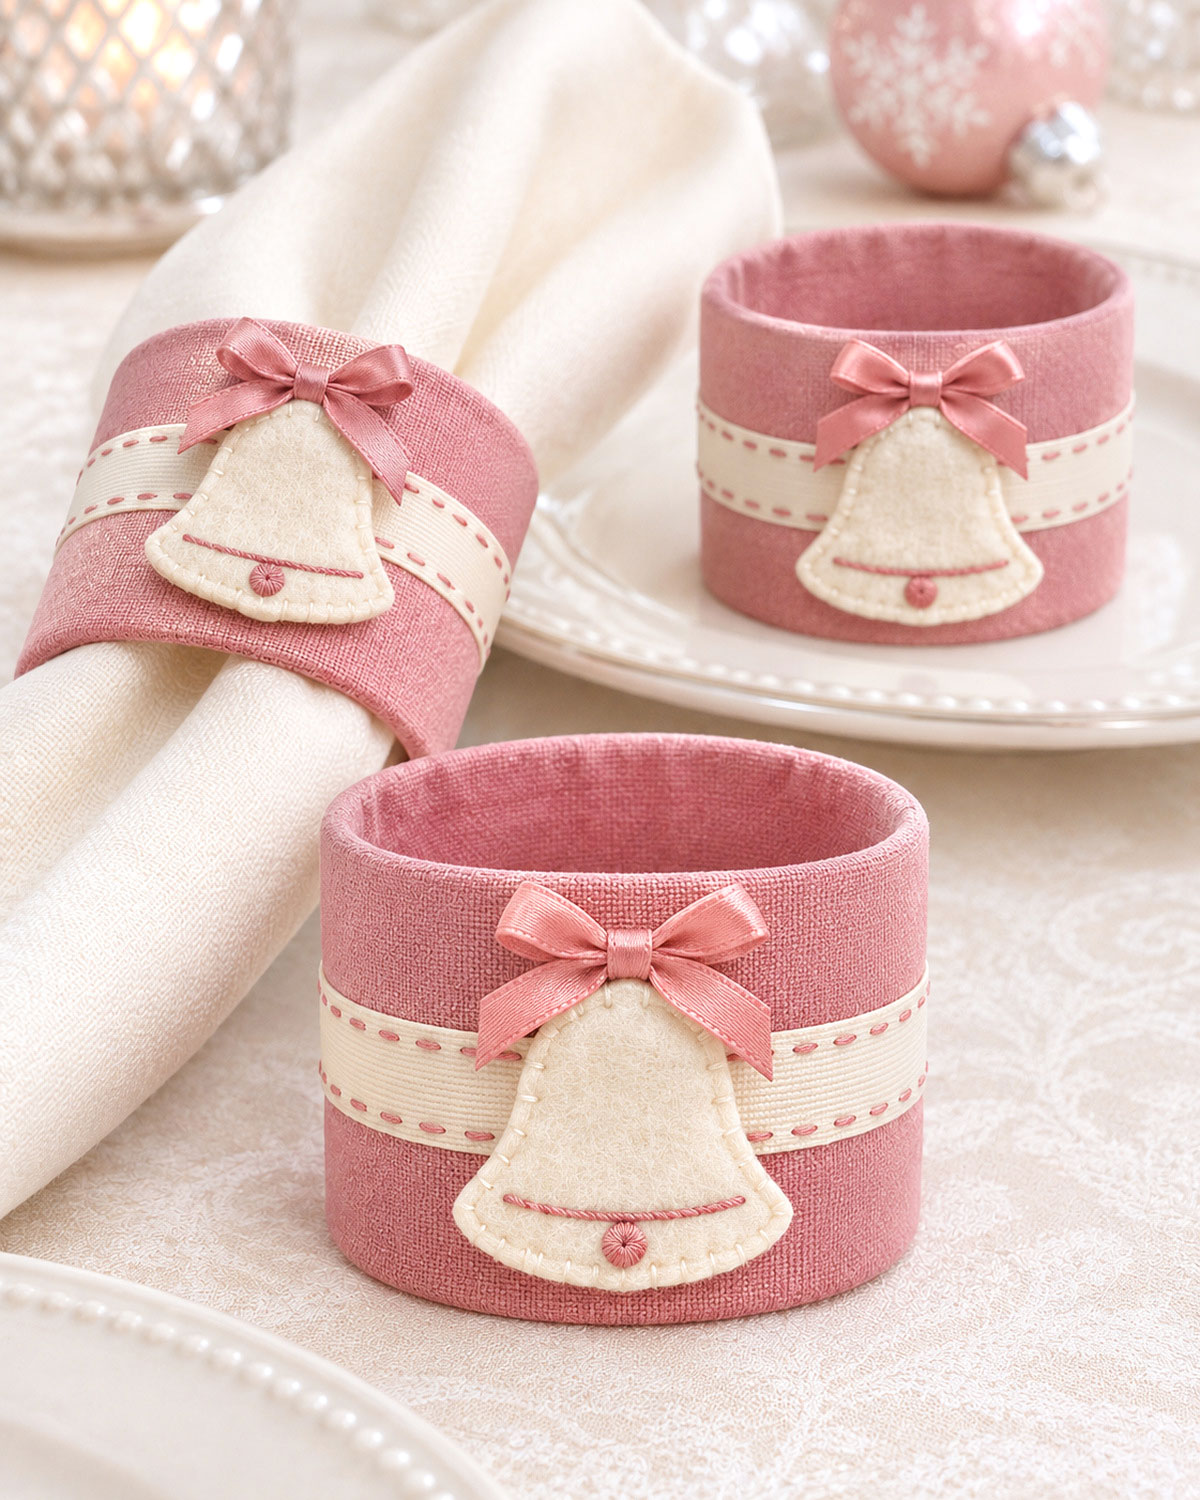
Best for: Christmas dinner tables and pink Christmas baby shower place settings.
If you're making enough for a whole party, finish one ring first and check it with your chosen napkins. You don't want to sew a dozen before finding out that the openings are too small.
See the complete DIY Christmas Bell Napkin Rings tutorial and printable pattern.
13. Pink Christmas Candy Table Centerpiece
Five oversized fabric candies in dusty rose, blush, and ivory make up this little Christmas centerpiece. They rest on an oval felt mat with pink edge stitching and a satin bow. The candies aren't attached permanently, so you can arrange them however you like.
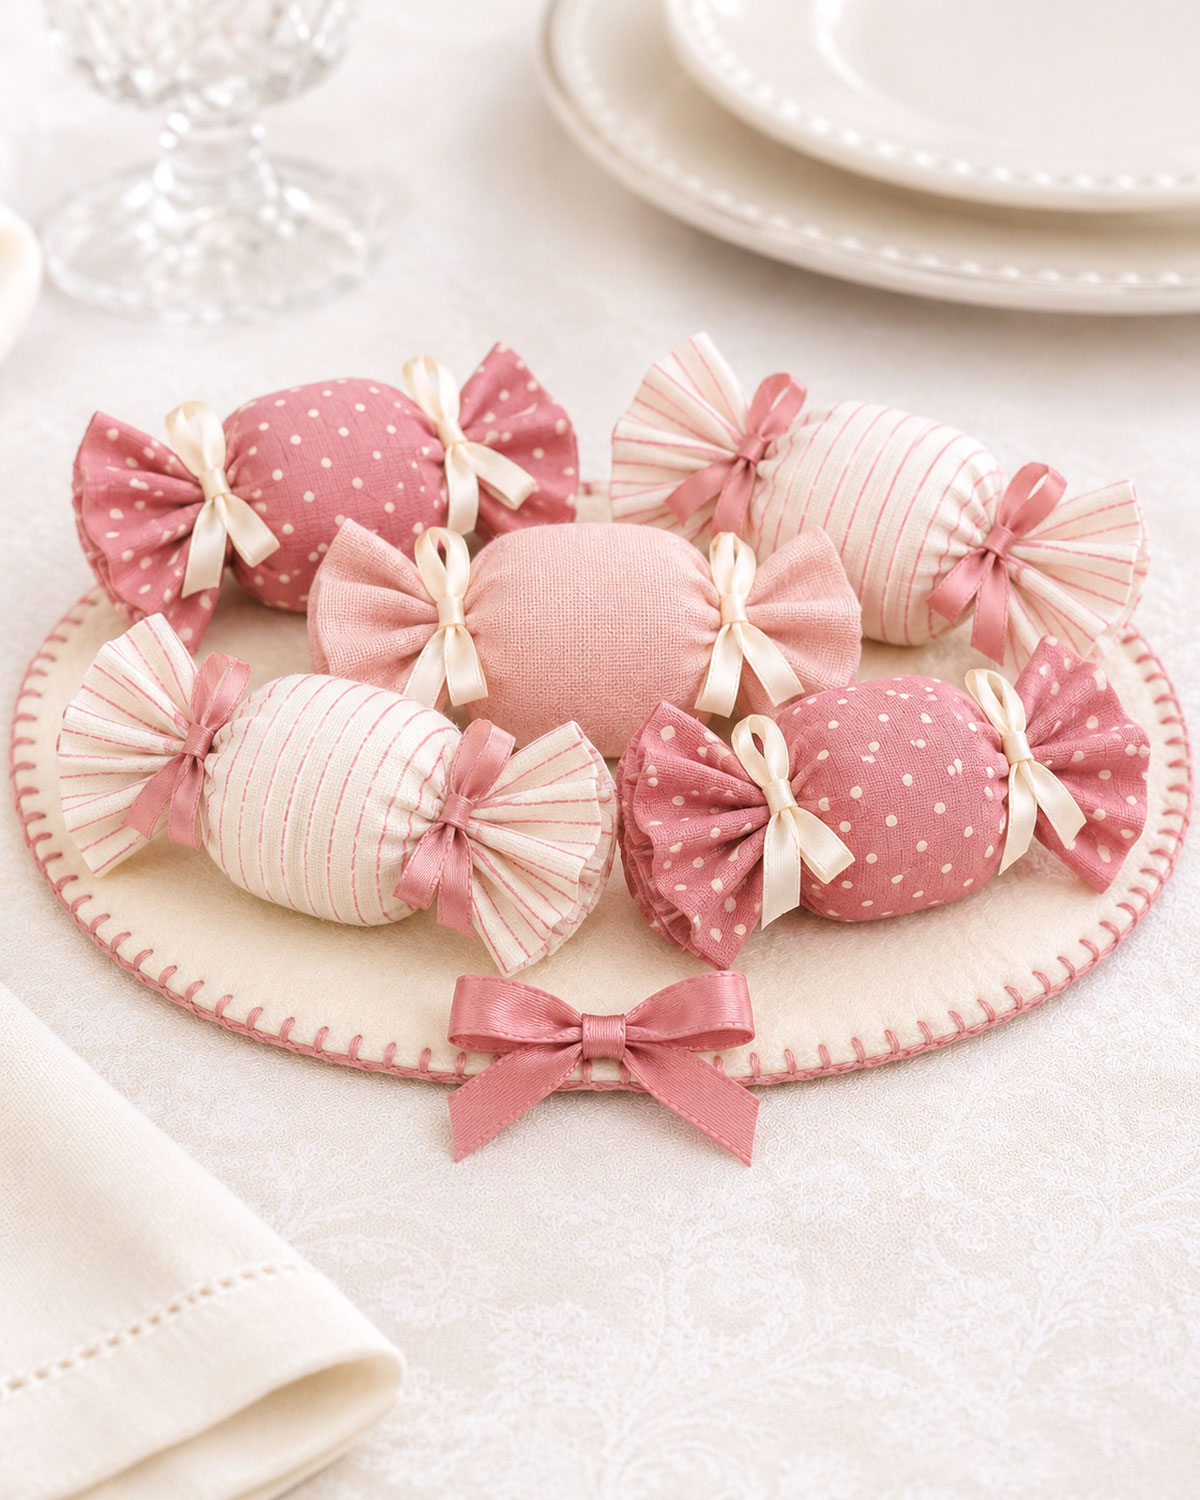
Best for: A Christmas dessert table, sideboard, or baby shower centerpiece.
I'd choose this one if you want a table decoration with a little more color but don't need anything tall. The finished oval mat measures approximately 10 by 7 inches.
Make the Pink Christmas Candy Centerpiece with the full tutorial and printable templates.
14. Mini Felt Baby Bib Christmas Ornament Favors
These little felt baby bibs are made in dusty rose, ivory, and blush pink, with embroidered star, bow, and snowflake designs. Each bib has a rounded ivory neckline, a small satin bow, and a hanging ribbon attached separately at both shoulders.
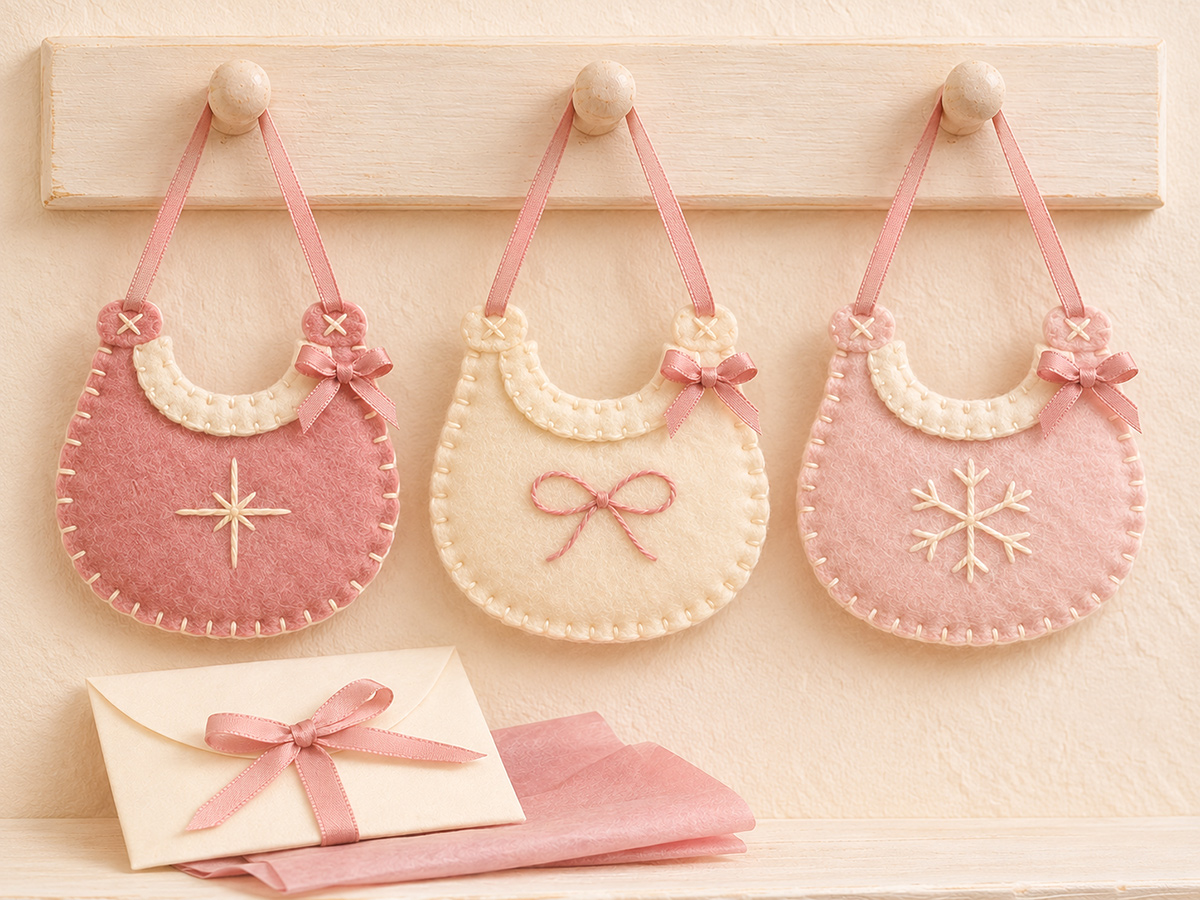
Best for: Christmas baby shower favors, a small ornament tree, or handmade holiday keepsakes.
I like the idea of using these as shower favors because the guests can take home a Christmas decoration rather than something they'll use once and throw away. Make one complete ornament first, then cut the felt pieces for the rest of the set.
Get the free Mini Felt Baby Bib Christmas Ornament Pattern and complete instructions.
15. Pink Christmas Baby Shower Welcome Sign
This ivory arched welcome sign has dusty-rose lettering that reads "Welcome to A Little Christmas Miracle Baby Shower," with a double pink border, satin bows, and three handmade ivory felt Christmas bells hanging down one side.
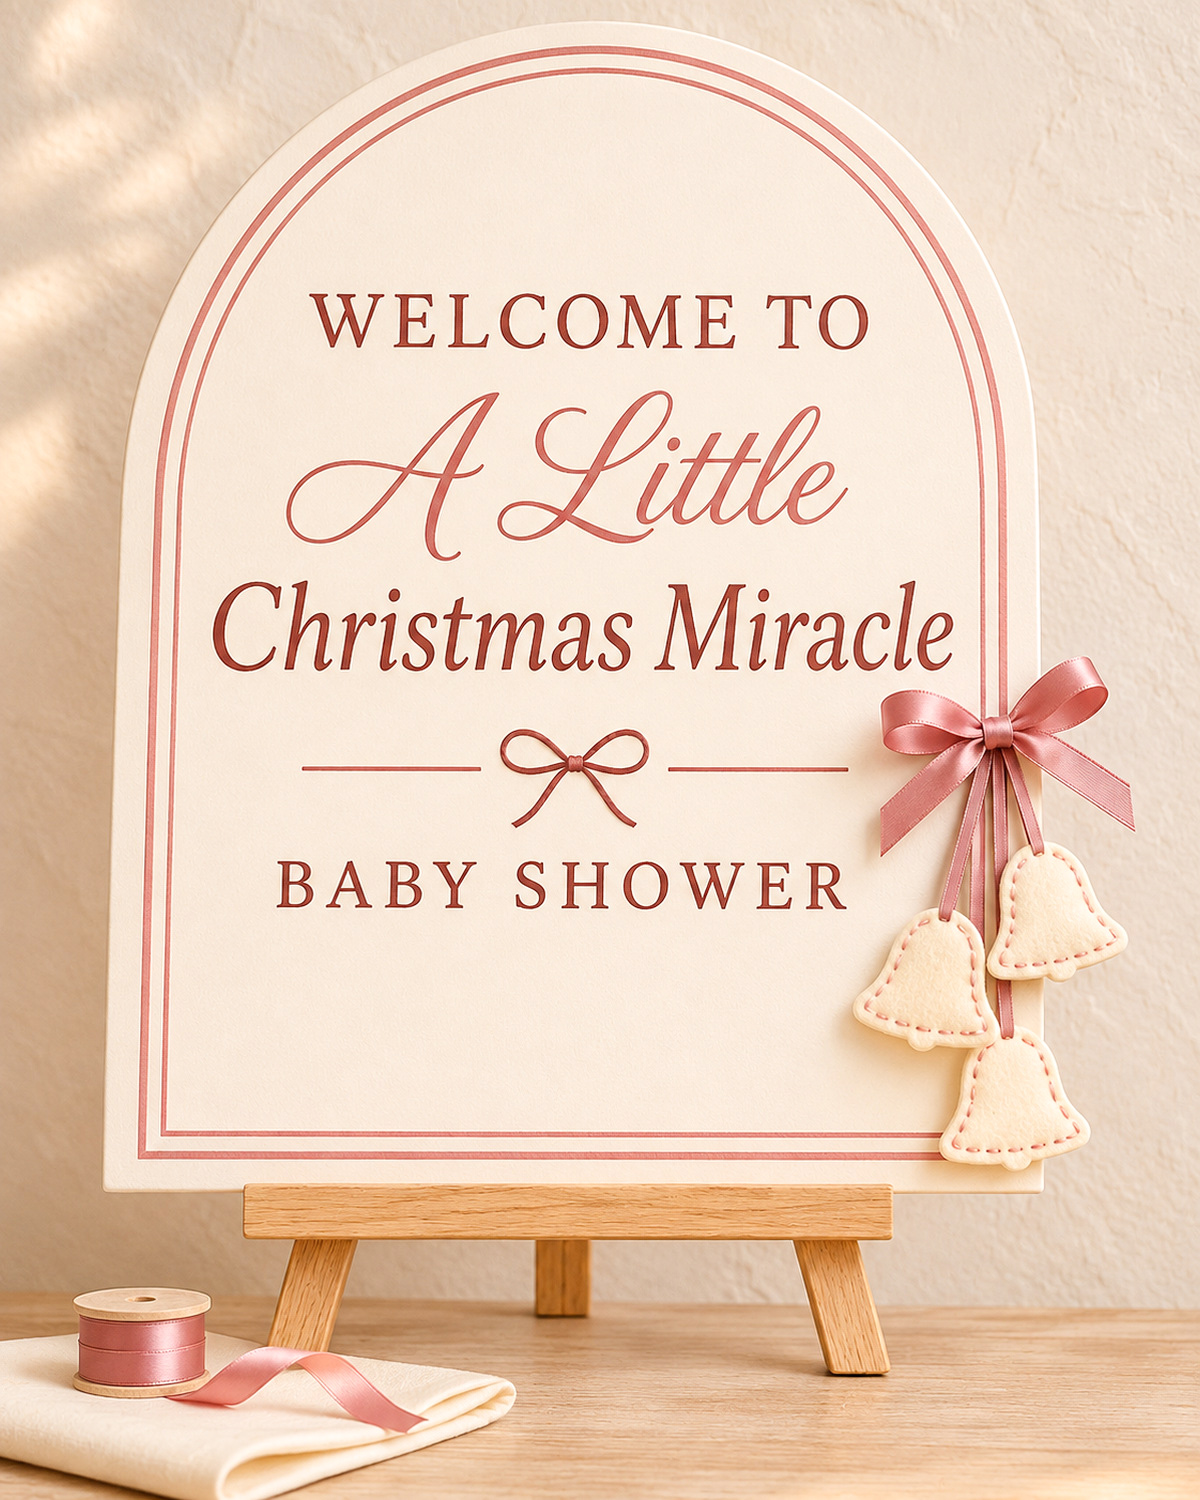
Best for: A Christmas baby shower entrance, welcome table, or gift-table display.
I'd make this the first decoration guests see when they come into the room. The sign already has plenty of detail, so you don't need to crowd the entrance with a lot of extra decorations.
The complete tutorial includes the 16 by 20-inch arched sign, printable lettering, felt bell templates, and ribbon placement measurements.
Make the Pink Christmas Baby Shower Welcome Sign with the free printable pattern.
When you click on links to various merchants on this site and make a purchase, this may result in this site earning a commission. This does not affect the price you pay.

UBGI Gold Standard 2026
Reviewed under the site's
editorial checklist.
Photos, decorating ideas, party setups and reader submissions are shared for inspiration unless a page is specifically presented as a pattern, tutorial, reference guide or step-by-step project. Follow the instructions, measurements, safety guidance and manufacturer directions provided for the particular project or product.
About Jan | Contact | Baby Nursery Ideas (Blog) | Site Map | Privacy Policy | Disclosure Policy | Disclaimer | Affiliate Disclosure | Earnings Disclosure | Facebook | Pinterest
I am a participant in the Amazon Services LLC Associates Program, an affiliate advertising program designed to provide a means for us to earn fees by linking to Amazon. As an Amazon Associate I earn from qualifying purchases.
Copyright © 2006-2026. All Rights Reserved.