Free Halloween Quilt Patterns: Witches, Ghosts & Spooky Quilt Ideas
By Jan Bay
These free Halloween quilt patterns bring together spooky ghosts, witches and their hats, bats, pumpkins and colorful patchwork for quilts you'll enjoy bringing out every October. I've gathered full quilt designs and individual quilt blocks so you can choose between a seasonal throw, a wall hanging or a smaller quilting project. Some are playful enough for a child's room, while others have a distinctly spooky Halloween look.
More Free Quilt Patterns and Ideas
See Supplies for This Project Here.
Free Halloween Quilt Patterns and Blocks
Pick a complete Halloween quilt or make individual 12-inch patchwork blocks featuring a witch hat, a ghost or a black cat. These designs use pieced fabric shapes for a fun mix of spooky and playful seasonal quilting projects.
Which Halloween Quilt Patterns Should You Make First?
I'd start by deciding whether you want a complete Halloween quilt to bring out every October or a few individual blocks you can turn into something smaller. Both are fun projects, but they involve very different amounts of sewing.
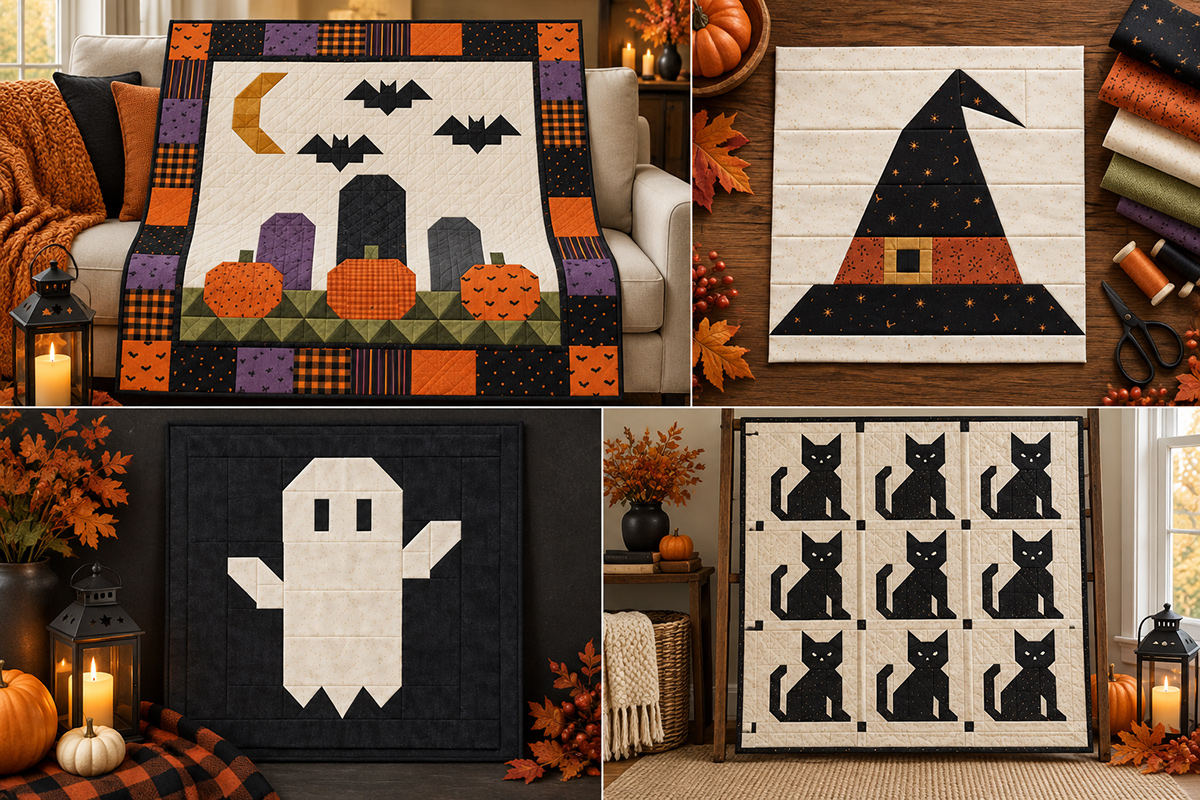
If you want a finished quilt without having to plan your own arrangement, the spooky Halloween quilt pattern is the one I'd choose. It measures 54 by 42 inches and has a whole little graveyard scene, complete with three bats, three tombstones, pumpkins and a crescent moon. The patchwork border brings in the orange, black, purple and olive fabrics without crowding the center.
It's the most involved project in this collection, but the layout is already planned. You don't have to work out where nine or twelve separate blocks should go.
For something smaller, all three of the individual Halloween quilt blocks finish at 12 inches square. That makes it possible to use them together without changing their sizes.
Ghosts, Witch Hats or Black Cats?
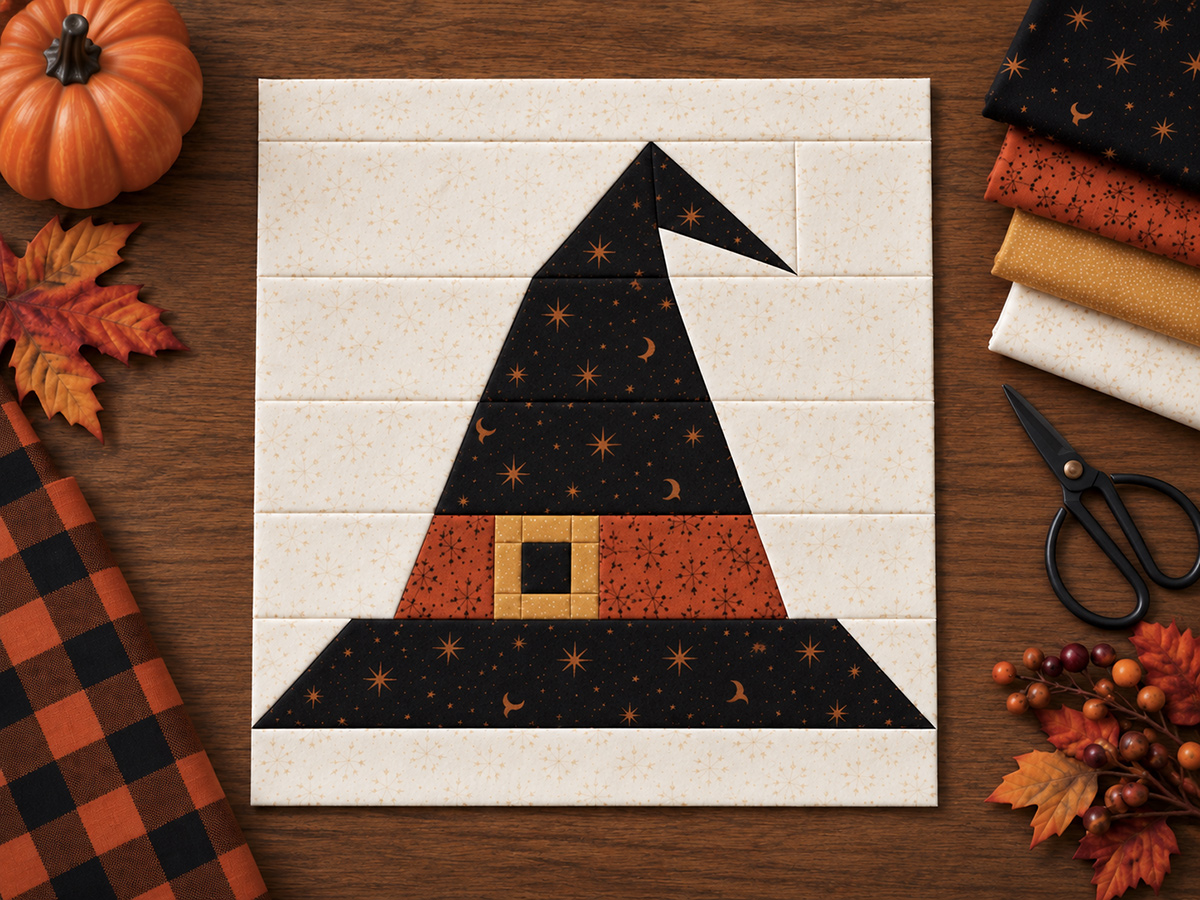
The ghost quilt block uses just two fabric colors, which makes shopping and cutting a little simpler. The ghost has one arm raised higher than the other and three points along the bottom. I'd stick with a warm white ghost against charcoal or black fabric so that funny little floating shape doesn't get lost.
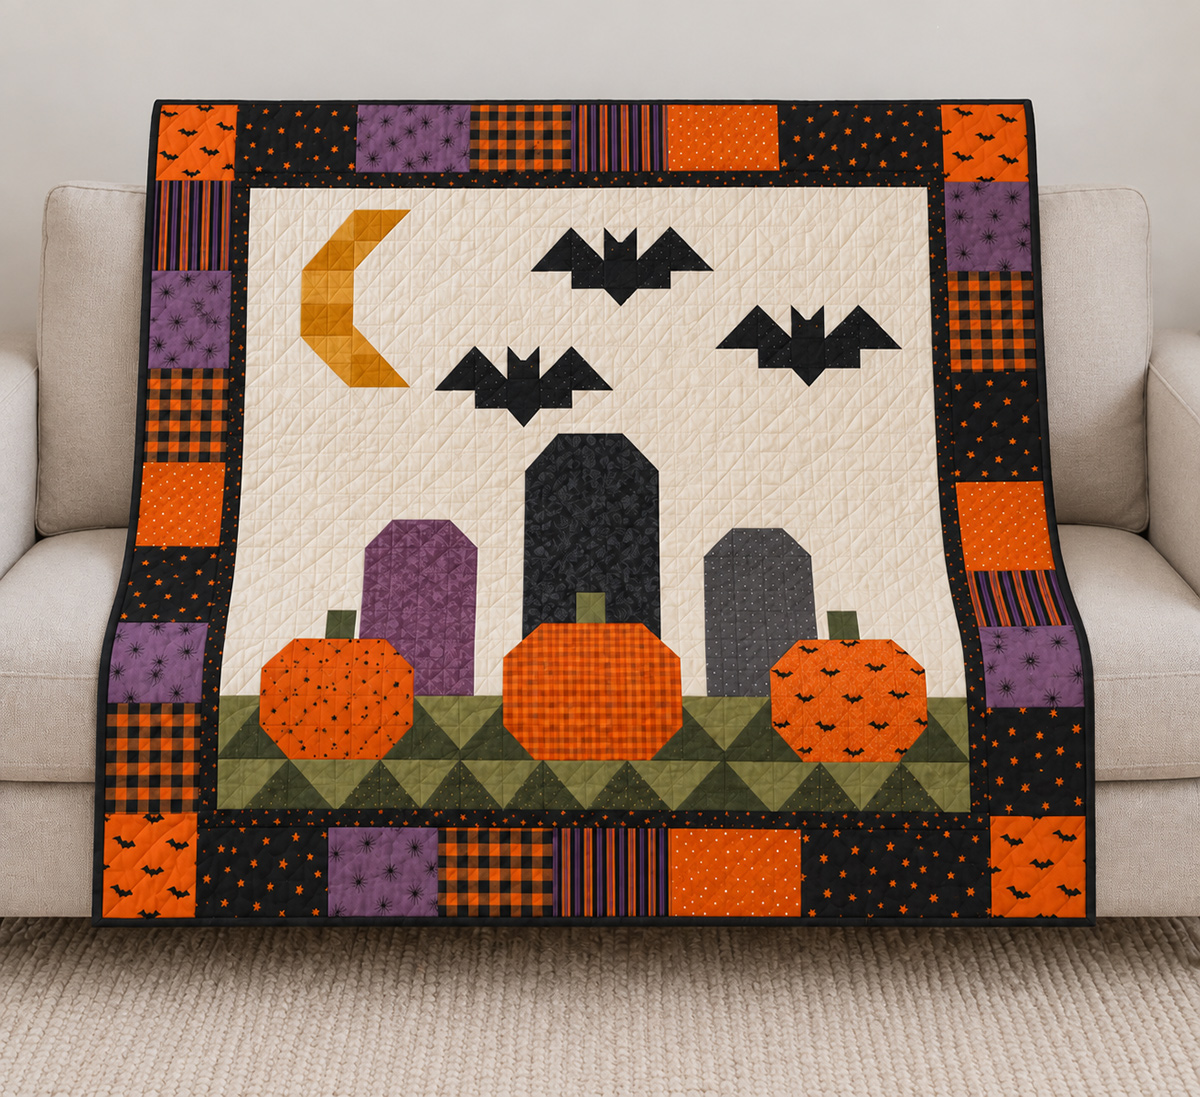
The witch hat quilt block has more color changes, but they're worth keeping. The crooked hat tip, rusty orange band and slightly off-center gold buckle give it some personality. Use a small-scale print for the black hat fabric, especially if you're choosing stars or moons. A large print could disappear when you cut the smaller pieces.
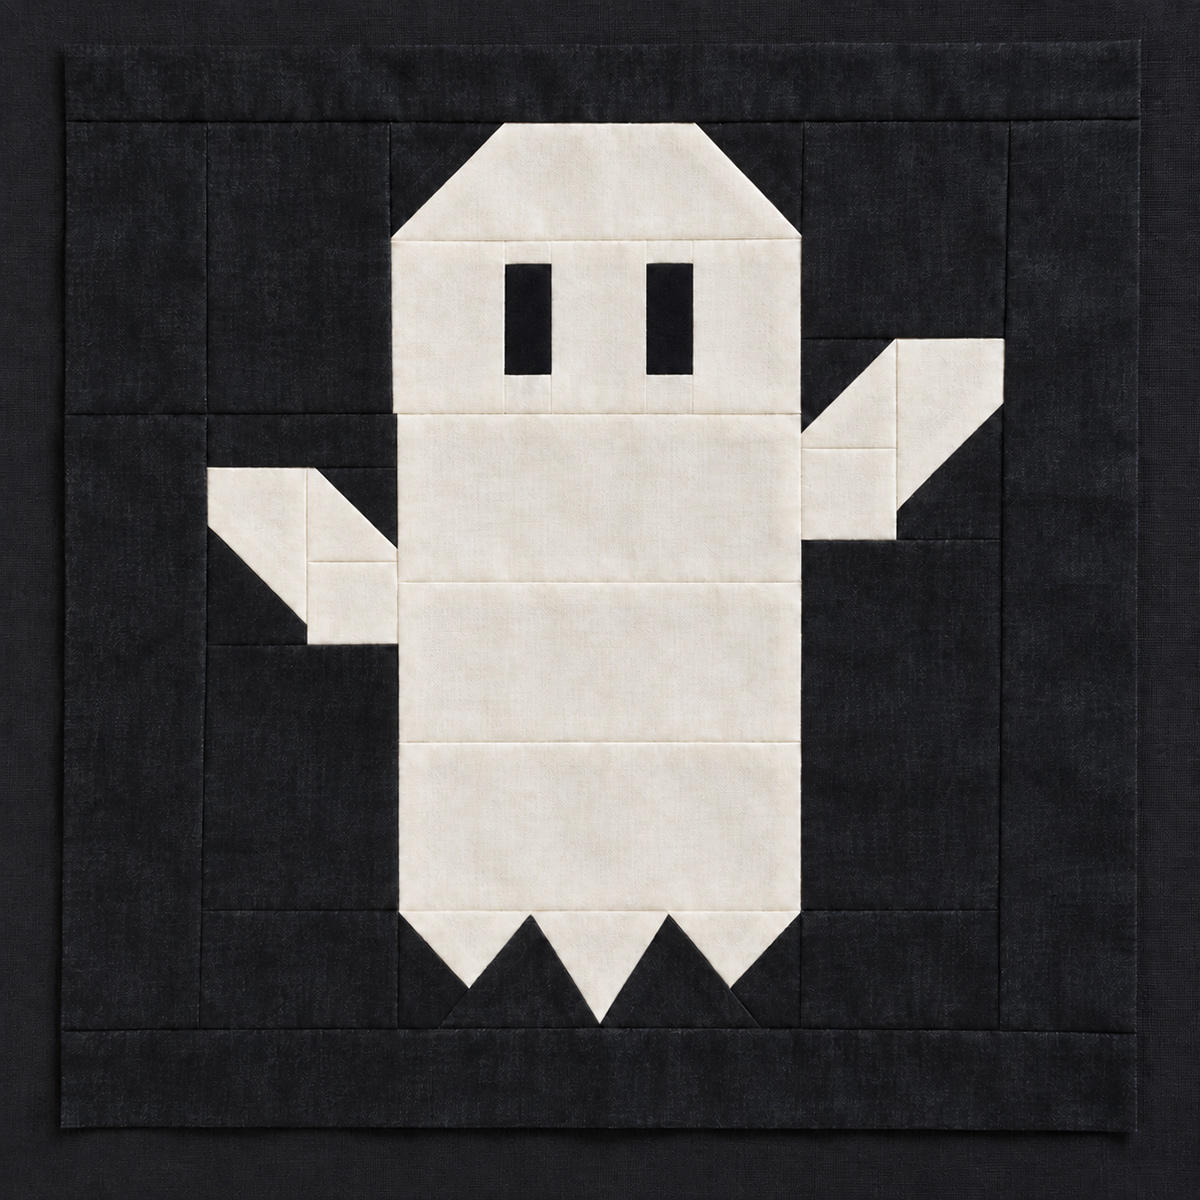
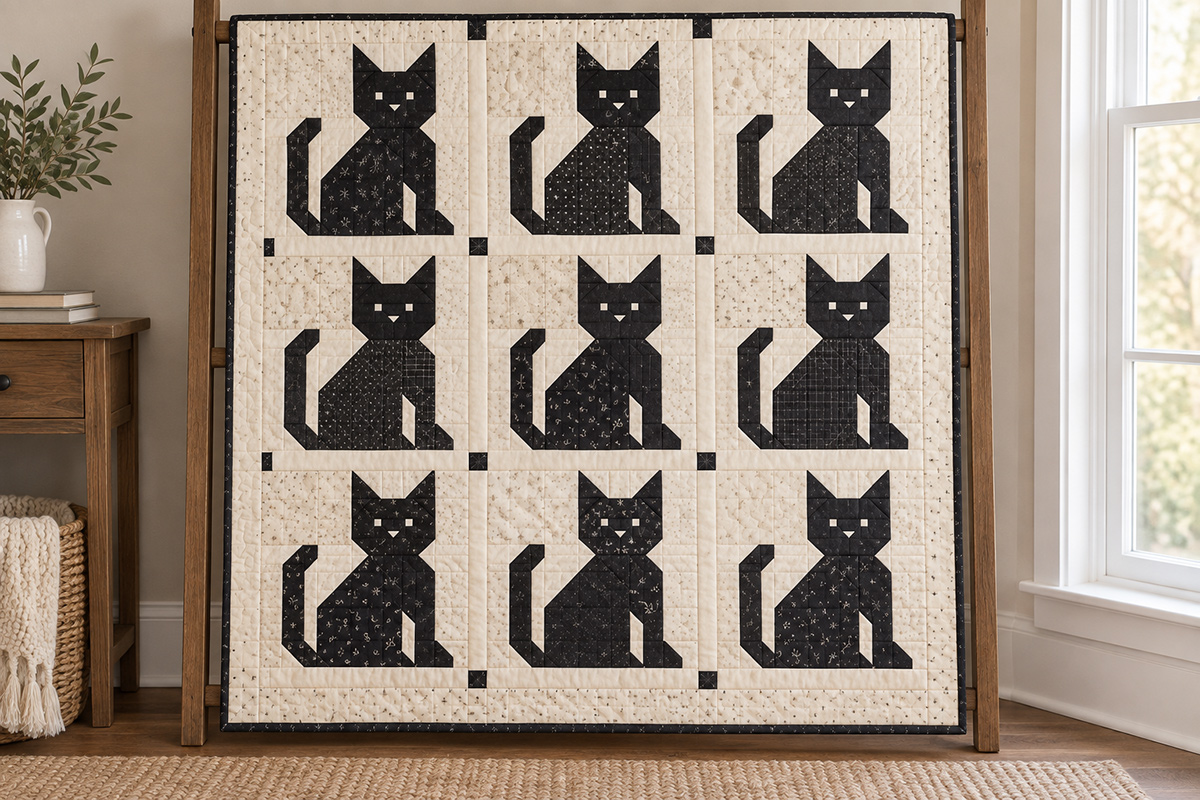
The cat quilt block pattern is a little more versatile. Make the cat black for Halloween, or sew it in gray, orange or calico fabrics for a quilt you can use all year. Its pointed ears and pieced tail give it a recognizable shape, even if you leave off the optional embroidered face.
My choice for a Halloween sampler would be to combine all three blocks. The black cats and witch hats look good against light backgrounds, while the white ghosts bring some contrast with their dark backgrounds. You get plenty of Halloween character without having to fill every square with orange fabric.
Just don't try to squeeze every Halloween motif into one block. Give each design its own space. They'll look much better together that way.
Make a Halloween Quilt Sampler With Ghosts, Cats and Witch Hats
If you can't decide between the three Halloween quilt blocks, there's no reason you can't use all of them. A nine-block sampler would make a fun little Halloween quilt, and you already have the individual patterns to get started.
I'd arrange three blocks across and three down, repeating each Halloween design three times. That gives you a balanced layout without putting matching blocks next to each other.
A Simple Nine-Block Halloween Quilt Layout
Here's an arrangement you can follow:
Row 1: Black Cat | Ghost | Witch Hat
Row 2: Witch Hat | Black Cat | Ghost
Row 3: Ghost | Witch Hat | Black Cat
Each block finishes at 12 inches square, so the nine blocks alone make a 36 by 36-inch quilt top. Add 2-inch finished sashing between the blocks and rows, plus a 3-inch finished outer border, and the calculated finished quilt size becomes 46 by 46 inches.
That's a nice size for a small seasonal throw or wall quilt. You can also leave off the outer border for a 40-inch square quilt.
Fabric Colors I'd Use Together
Keep the ghosts white against charcoal or black, the cats black against ivory, and the witch hats black with rusty orange bands and gold buckles. Those contrasts are part of what makes each design easy to recognize.
For the sashing, I'd choose a medium olive green. It separates the dark ghost backgrounds from the lighter cat and witch hat blocks without adding another bright color. A rusty orange outer border would pull the three designs together.
Small Halloween prints are fine, especially scattered stars, tiny bats or orange dots. Just keep the prints quiet enough that they don't compete with the pieced shapes.
Cutting and Putting the Sampler Together
Start by making three blocks from each of the existing free patterns. Each block should measure 12½ inches square before it's sewn into the sampler, including the seam allowances. Check this measurement before cutting the sashing.
Using ¼-inch seams throughout, cut the following pieces for the sampler:
- Six olive sashing rectangles, each 2½ by 12½ inches.
- Two olive horizontal sashing strips, each 2½ by 40½ inches. Piece these strips if your fabric isn't wide enough.
- Two rusty orange side borders, each 3½ by 40½ inches.
- Two rusty orange top and bottom borders, each 3½ by 46½ inches.
Sew the blocks together in the row order above, placing one olive sashing rectangle between neighboring blocks. You'll have three rows measuring approximately 12½ by 40½ inches each.
Next, sew the two long olive strips between the rows. Press the seams carefully so the quilt top stays flat. The assembled center should measure approximately 40½ inches square, including its outer seam allowances.
Attach the side borders first, then the top and bottom borders. Measure the quilt top before attaching each border and adjust the strip lengths if necessary. The completed top should measure approximately 46½ inches square before binding.
Finish with batting, backing, quilting and binding. Straight-line quilting is a good option for a sampler like this because you can follow the block seams without stitching complicated designs over the cats, ghosts or witch hats.
One thing I'd skip is adding more little Halloween decorations between the blocks. The cats, ghosts and witch hats already give you nine different places to look. That's plenty.
And if you decide nine blocks are more than you want to sew, start with one of each design. Three blocks arranged in a row would make a cute little Halloween wall hanging or table piece, with the final dimensions depending on the sashing and borders you choose.
Sampler pattern note: The 46-inch finished size, cutting measurements and assembly instructions for this optional sampler are mathematically calculated using the three existing 12-inch blocks. The combined sampler has not been physically test-sewn.
Choosing Fabrics for Halloween Quilt Patterns
Halloween gives you a good excuse to pull out the orange, black and purple fabrics, but I wouldn't use every Halloween print in the fabric store. A few well-chosen colors will do more for your quilt than a dozen competing prints.
I'd start with black, ivory and rusty orange, then add a little plum purple or olive green. Those colors work with all four of the Halloween projects here, and you can use leftover fabrics from one project in another.
Pick Fabrics That Show Off the Pieced Shapes
The fabric behind each design matters just as much as the fabric you use for the shape itself.
For the ghost block, use white or soft ivory against black or dark charcoal. A subtle print in the white fabric is fine, but I'd avoid large orange or purple designs that break up the ghost's outline.
The black cat needs a lighter background so you can see its pointed ears, legs and tail. A small black print adds interest to the cat without making those details disappear.
For the witch hat, a black fabric with tiny gold stars would be fun. Keep the orange hatband fairly simple so the buckle stands out. You can use a small print for the band, but the buckle should contrast clearly with the fabric around it.
The full spooky graveyard quilt already has several colors and motifs working together. I'd follow its established color arrangement rather than scattering additional Halloween prints through the center. Save those busier fabrics for the patchwork border.
Can You Use Halloween Fat Quarters?
Yes, and they're especially handy for small quilt blocks. A fat quarter gives you several fabric choices without having to purchase a large amount of each print.
Just check the cutting requirements in the individual pattern before deciding that one fat quarter will be enough. The size and direction of the pieces matter, particularly when you're working with directional prints.
I'd buy larger cuts for long sashing strips, borders and backing. Piecing those from small scraps is possible, but it adds extra seams you may not want.
If you're combining the witch hat, ghost and cat blocks into one sampler, use the same ivory background fabric wherever you want the light areas to match. The ghost blocks can keep their dark backgrounds. That contrast is what makes the sampler interesting.
Supplies and Finishing Your Halloween Quilt
You don't need special tools just because you're making a Halloween quilt. Your regular quilting supplies will handle these projects.
Before cutting, gather the following:
- Quilting cotton in your chosen Halloween colors
- Rotary cutter, cutting mat and quilting ruler
- Sewing machine and suitable machine needles
- Coordinating sewing thread
- Iron and ironing surface
- ¼-inch seam guide or presser foot
- Batting and backing fabric for a completed quilt
- Binding fabric
- Clips or pins for holding layers and binding
If you're making individual blocks, you won't need batting, backing or binding until you decide what to turn them into. You can make the blocks first and put them aside while you plan the finished project.
Batting, Backing and Binding for the Nine-Block Sampler
For the optional 46-inch square Halloween sampler described above, the completed pieced quilt top should measure about 46½ inches square before quilting and binding.
If you're allowing approximately 4 inches of extra backing and batting on every side, prepare pieces at least 54½ inches square. Your quilting method or longarm quilter may have different requirements, so check before cutting.
Ordinary quilting cotton is usually too narrow for a one-piece backing of that size. You'll need to piece the backing or choose a wider quilt backing fabric.
For binding, six strips cut 2½ inches wide across standard quilting cotton should give you enough length for the 46-inch square sampler, including room for joining and finishing. That's about ½ yard of binding fabric, assuming the fabric has sufficient usable width.
Keep the Quilting Simple
I'd use straight-line quilting for these Halloween designs, especially if you're making your first sampler. Lines through the background and along the major patchwork seams can hold everything together without competing with the shapes.
You can quilt around the outside of the ghost or witch hat if you want those shapes to stand out a little more. Follow the batting manufacturer's maximum quilting-distance instructions so the layers remain properly secured.
For the cats, I'd avoid placing heavy decorative stitching directly across the small embroidered facial details. Let the pieced shapes and faces do the work.
Finish by trimming and squaring the quilt, attaching the binding and checking that all thread ends are secured.
Don't feel that every Halloween quilt needs elaborate cobweb quilting or stitched bats. Sometimes plain straight lines look better, particularly when the fabric patterns are already busy.
Using Your Finished Halloween Quilts
One of the nice things about these Halloween patterns is that you don't have to make a full-size quilt to enjoy them. A single block can become a small wall hanging, while three or four coordinated blocks can make a seasonal table piece or a little patchwork quilt.
The complete graveyard quilt is a good choice for displaying over the back of a chair or across a quilt rack. The bats, pumpkins and tombstones tell the whole Halloween story, so you don't need much else around it.
The black cat quilt has a different feel. Because the cats are repeated in neat rows, it could work for a Halloween room without looking quite so spooky. You could even make the same design in different cat colors for year-round use.
If you're making a quilt for a baby's nursery, use it for supervised activities or decoration rather than as loose bedding in an infant's sleep space. Keep displayed quilts and their hanging hardware securely out of the baby's reach.
Storing Your Halloween Quilt Until Next October
Once Halloween is over, make sure your quilt is clean and completely dry before putting it away.
I'd store it in a cool, dry closet, away from direct sunlight. You can lay it flat if you have the space or fold it loosely with clean cotton fabric protecting it. Avoid stacking heavy boxes or other items on top.
If the quilt will be stored for a long time, changing the fold positions occasionally can help prevent permanent creases. The National Quilt Museum's quilt conservation guide has helpful information about protecting quilts during storage.
And if you're planning more seasonal sewing, you don't have to pack away every orange or olive fabric scrap. Those same colors work beautifully in maple leaf quilt blocks and other autumn projects.
Whether you make one little ghost block or an entire Halloween quilt, choose a design you'll enjoy bringing out again next October. That's a good enough reason to make it.
When you click on links to various merchants on this site and make a purchase, this may result in this site earning a commission. This does not affect the price you pay.

UBGI Gold Standard 2026
Reviewed under the site's
editorial checklist.
Photos, decorating ideas, party setups and reader submissions are shared for inspiration unless a page is specifically presented as a pattern, tutorial, reference guide or step-by-step project. Follow the instructions, measurements, safety guidance and manufacturer directions provided for the particular project or product.
About Jan | Contact | Baby Nursery Ideas (Blog) | Site Map | Privacy Policy | Disclosure Policy | Disclaimer | Affiliate Disclosure | Earnings Disclosure | Facebook | Pinterest
I am a participant in the Amazon Services LLC Associates Program, an affiliate advertising program designed to provide a means for us to earn fees by linking to Amazon. As an Amazon Associate I earn from qualifying purchases.
Copyright © 2006-2026. All Rights Reserved.