DIY Christmas Garland: 5 Handmade Projects with Free Patterns to Make
By Jan Bay
These DIY Christmas Garland ideas are a fun way to decorate your home, dress up a Christmas baby shower, or celebrate Baby's First Christmas. I've gathered five handmade projects using paper, felt, ribbon, and fabric, from little Christmas stockings and folded stars to gingerbread houses and festive bows. Each project has its own complete tutorial, with measurements and free printable patterns or guides. You can choose your favorite, make a matching set, or mix a few styles for a party without spending a fortune on store-bought decorations.
Explore More Christmas Crafts and Decorating Ideas
Baby Christmas Crafts and Keepsakes
Free Felt Crafts and Christmas Ornament Patterns
Christmas Baby Shower Ideas and Decorations
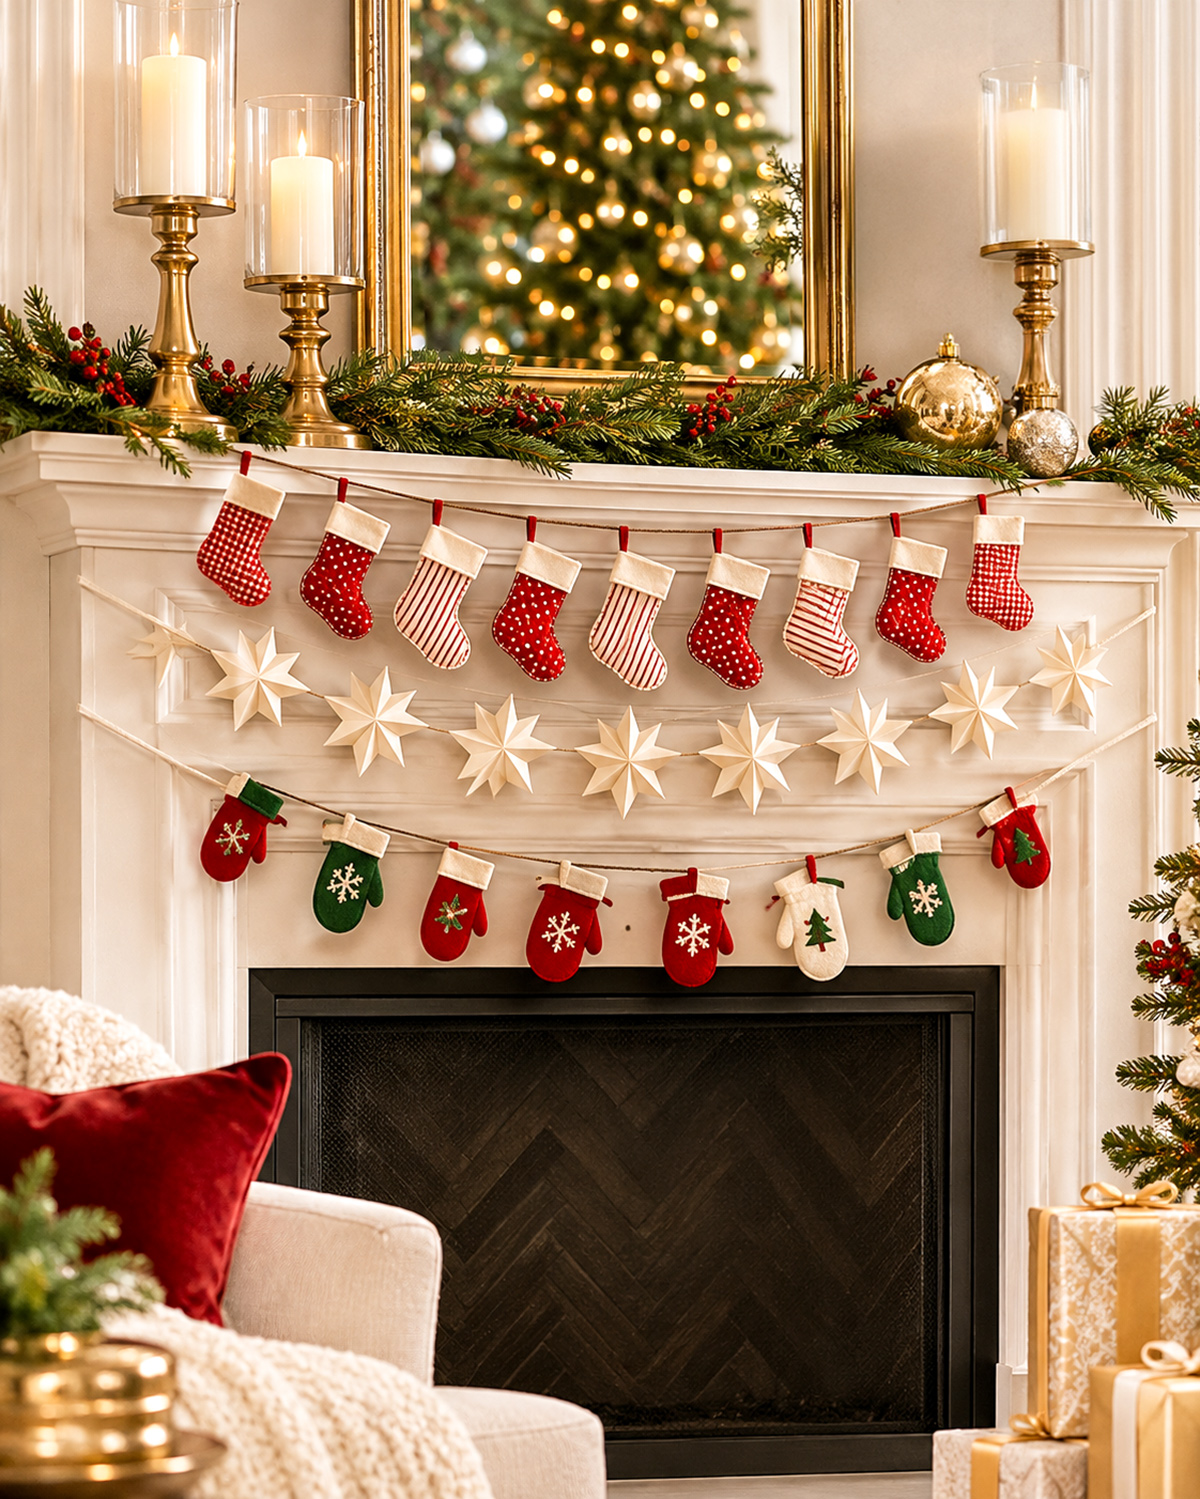
See Supplies for This Project Here.
5 DIY Christmas Garland Projects with Free Patterns
I've chosen five handmade garlands that use different materials and decorating styles. Some are quick paper crafts, while others give you a chance to do a little sewing or embroidery. Each project has its own page with the complete instructions, measurements, and free printable pattern or guide.
Jump to a Garland Project
1. Fabric Christmas Stocking Garland
These little Christmas stockings are one of my favorite ways to use leftover holiday fabric. I've mixed red gingham, ivory ticking stripes, and cheerful red polka dots, then finished each stocking with an ivory felt cuff and a red hanging loop. The seven stockings make a pretty decoration for a Christmas baby shower, Baby's First Christmas celebration, or family holiday party.
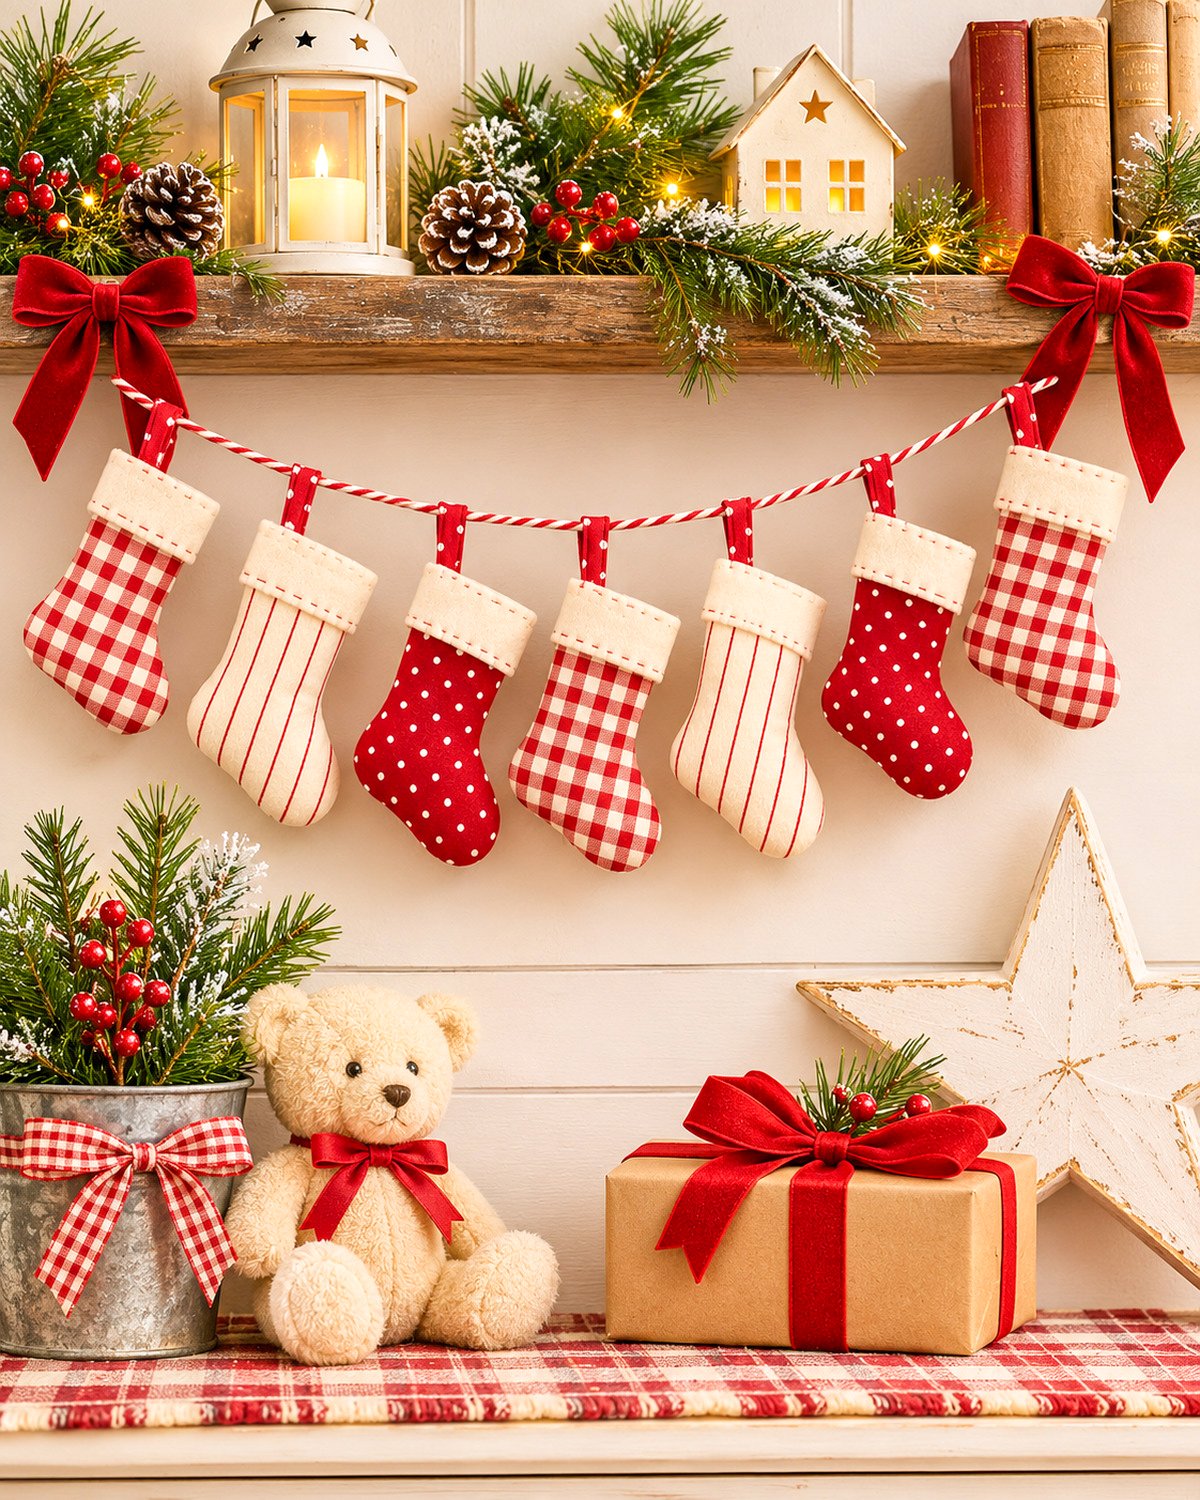
This is a good choice if you enjoy sewing and want a decoration you can use again. The stockings are made from lightweight cotton fabric, with no stuffing required. You can make the entire garland or sew individual little stocking ornaments.
Get the Free Fabric Christmas Stocking Garland Sewing Pattern and Tutorial
2. Folded Paper Christmas Star Garland
These folded paper Christmas stars look surprisingly elegant for something made from ordinary cardstock. Each five-point star has raised ridges and recessed folds that give it a three-dimensional shape. I've used warm ivory paper for a simple garland that looks lovely at Christmas parties and holiday baby showers.
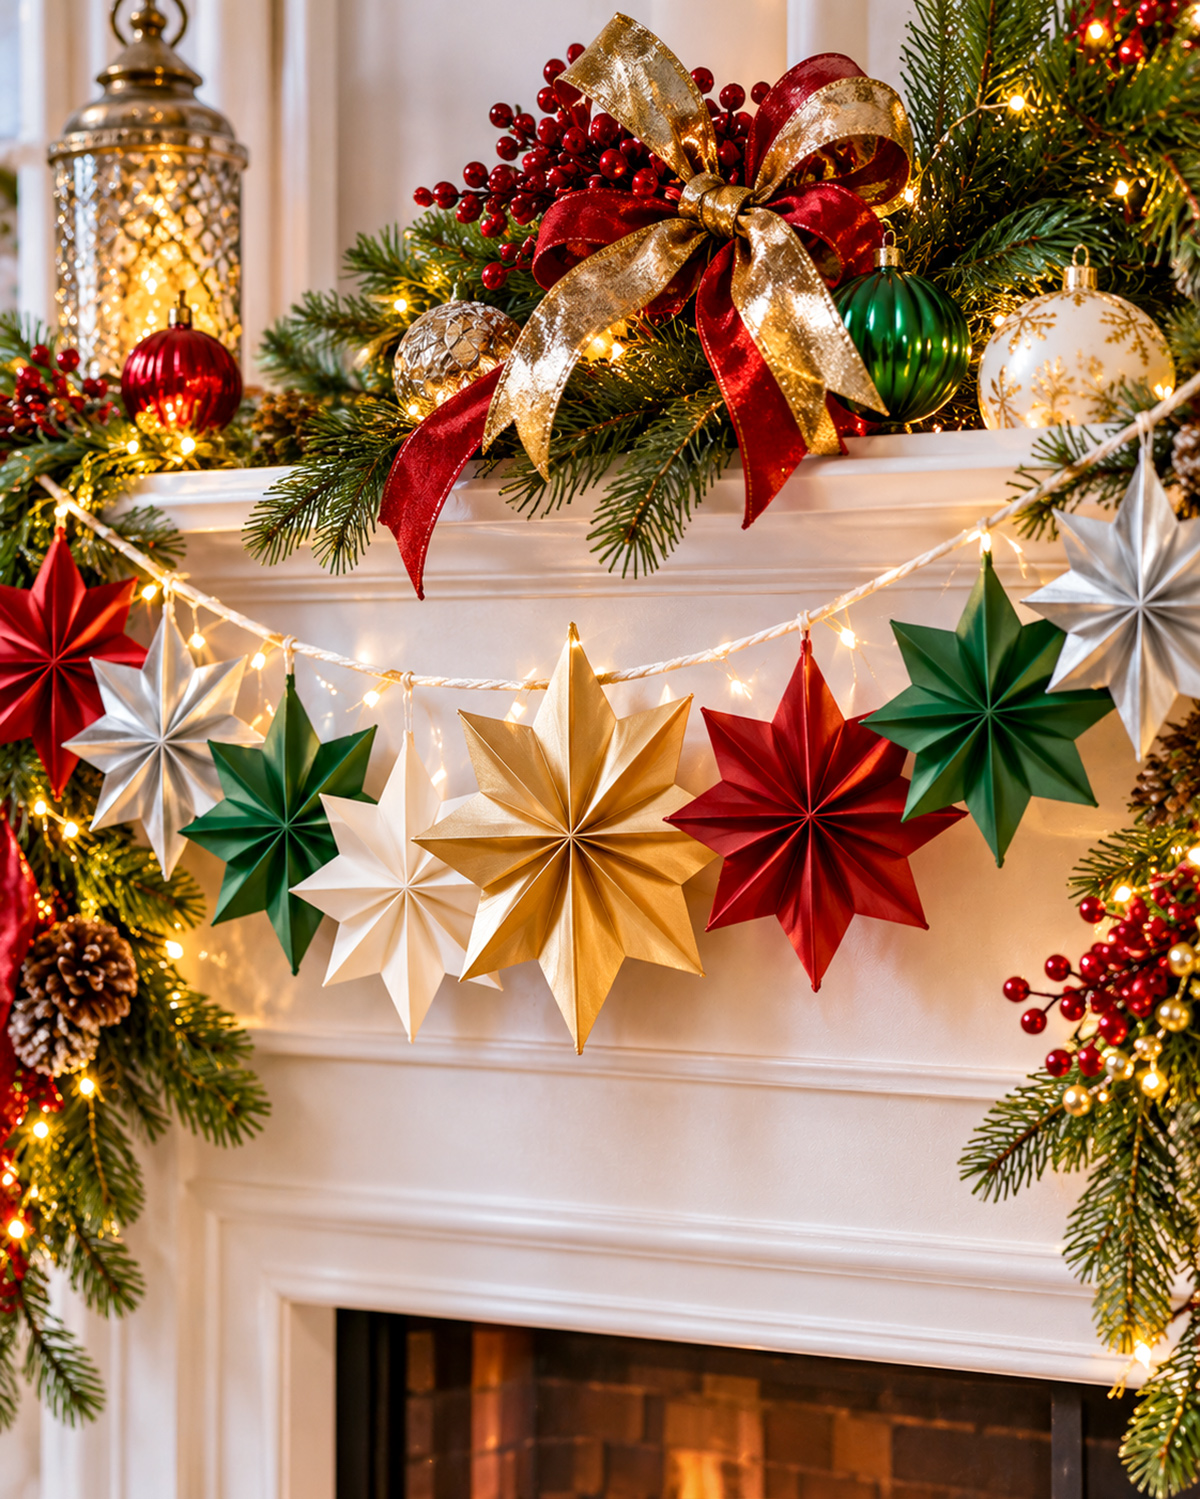
This project doesn't require a sewing machine or special cutting equipment. The tutorial explains how to cut, score, and fold seven matching stars, then arrange them on a hanging cord. You can also use pink or patterned cardstock to match your party colors.
Get the Free Folded Paper Christmas Star Templates and Tutorial
3. Gingerbread House Paper Garland
I think a little gingerbread village makes such a cheerful Christmas decoration! This garland features seven brown kraft-paper houses with scalloped ivory roofs, white icing details, four-pane windows, and little doors that alternate between Christmas red and evergreen.

These flat cardstock houses are lightweight and inexpensive to make. They're especially pretty above a gingerbread-themed dessert table or as decorations for a Christmas baby shower. The complete tutorial includes the house outlines, roof trim, door templates, and measured hanging layout.
Get the Free Gingerbread House Garland Templates and Instructions
4. Felt Christmas Mitten Garland
These little felt Christmas mittens have a lovely handmade look. I've used traditional red, ivory, and evergreen felt, with embroidered starbursts, leafy sprigs, and stitched accents. Contrasting cuffs and blanket-stitched edges give each mitten its own finishing touches.
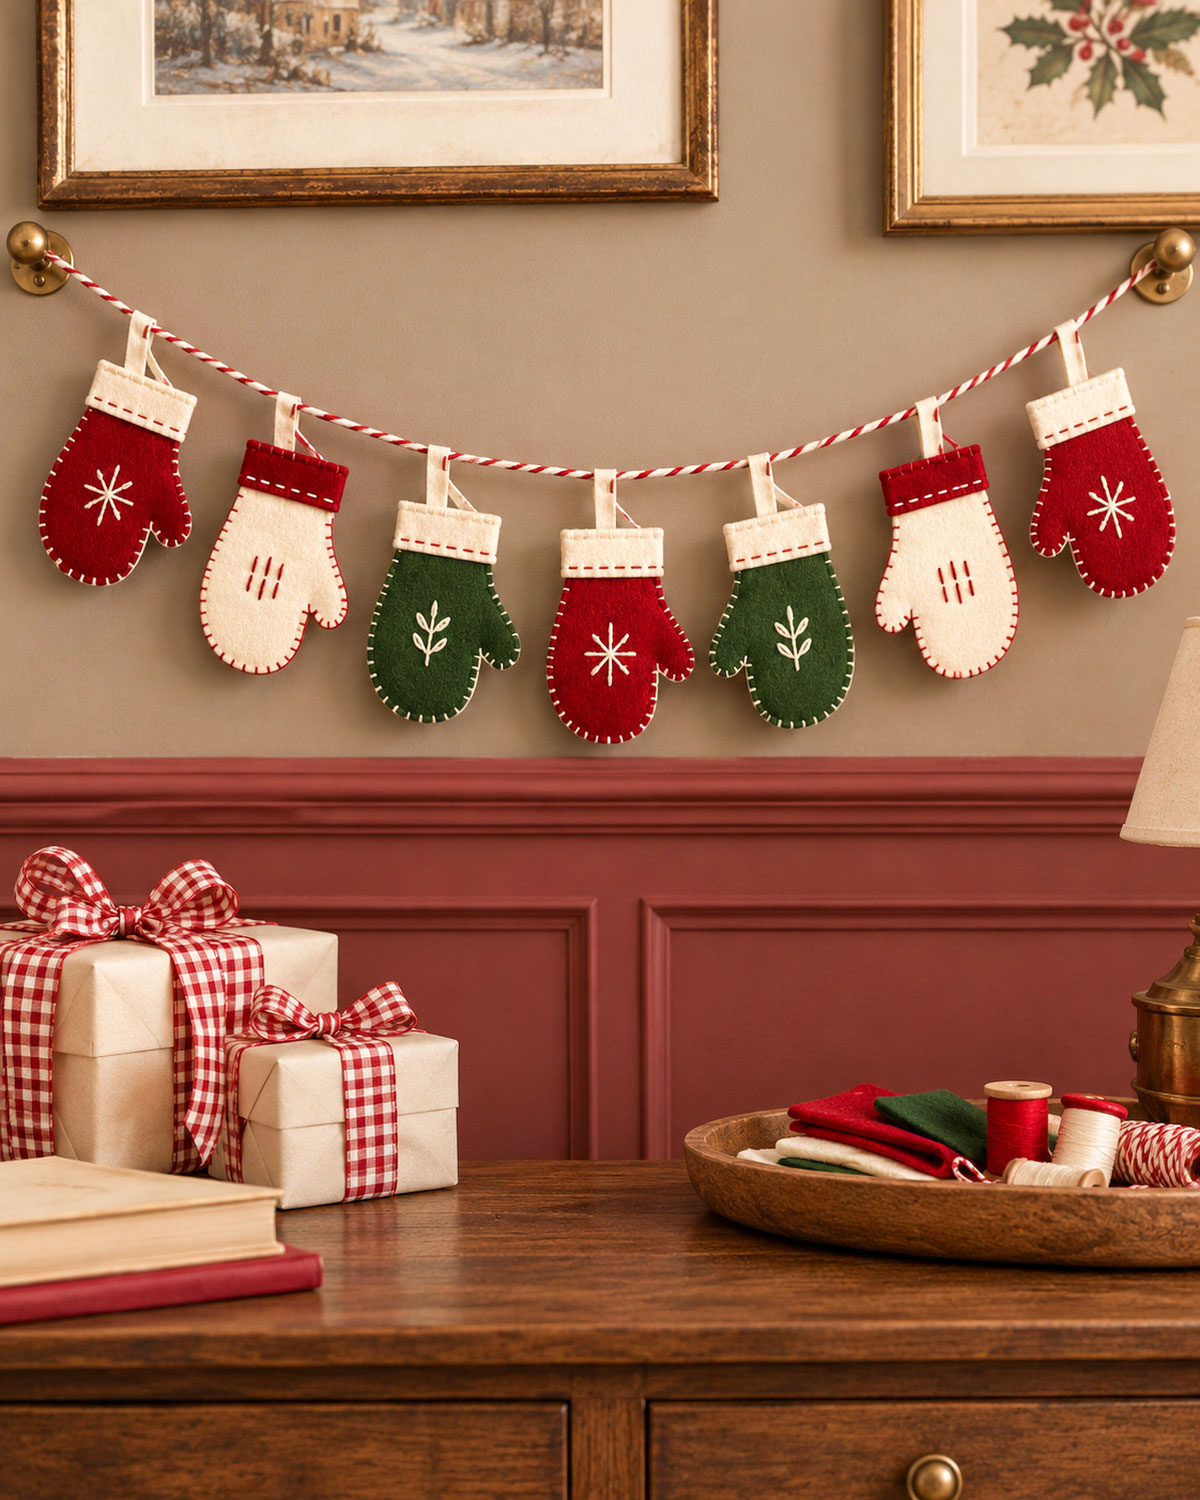
You can make this garland entirely by hand, without a sewing machine. The seven mittens are stitched from flat felt pieces, with no stuffing, buttons, or beads. The tutorial includes the printable mitten and cuff patterns, embroidery instructions, and spacing measurements.
Get the Free Felt Christmas Mitten Garland Pattern and Tutorial
5. Christmas Ribbon Bow Garland
A Christmas ribbon bow garland is one of those decorations that can make a room feel dressed up without a lot of extra work. I've used rich red and evergreen velvet ribbon to make five large bows with full loops and long, pointed tails, then arranged them along a cream-colored decorating cord.
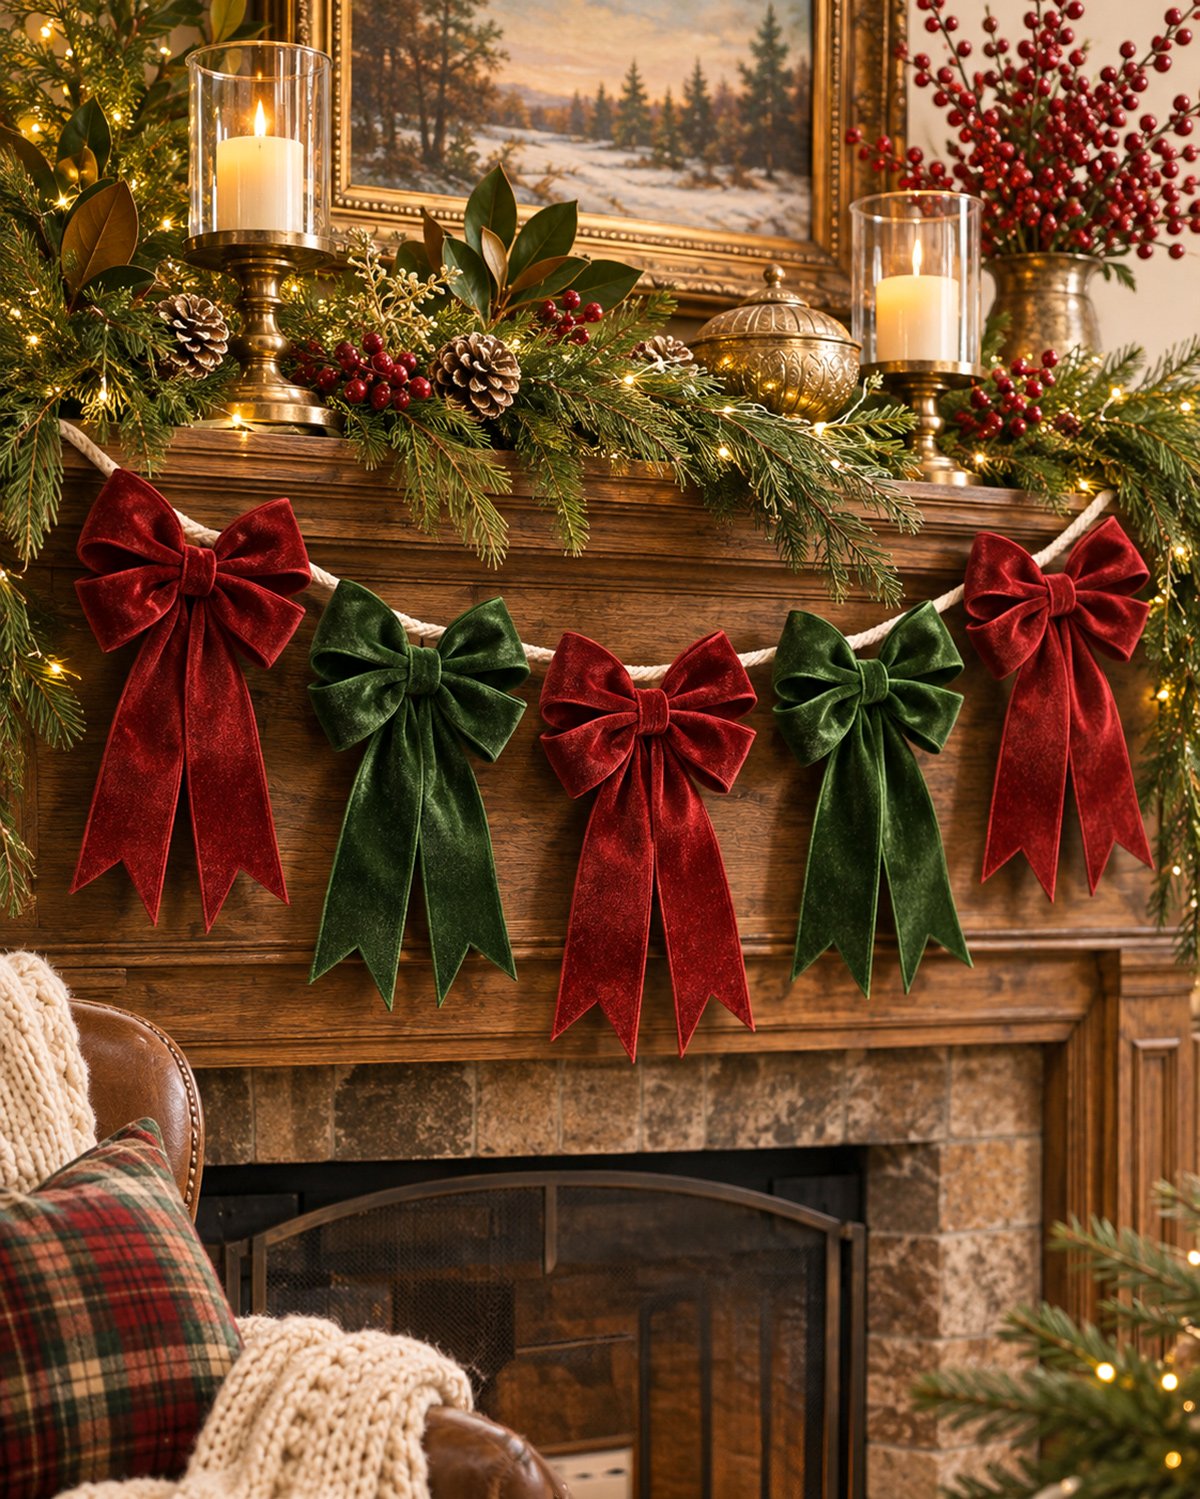
This one is especially pretty above a Christmas baby shower dessert table, a party backdrop, or a mantel. The project page explains how to cut and shape the velvet ribbon, make the separate tails, secure the bow centers, and space the five finished bows evenly.
Get the Christmas Ribbon Bow Garland Cutting Guide and Tutorial
Bonus: Simple Felt Christmas Chain Garland
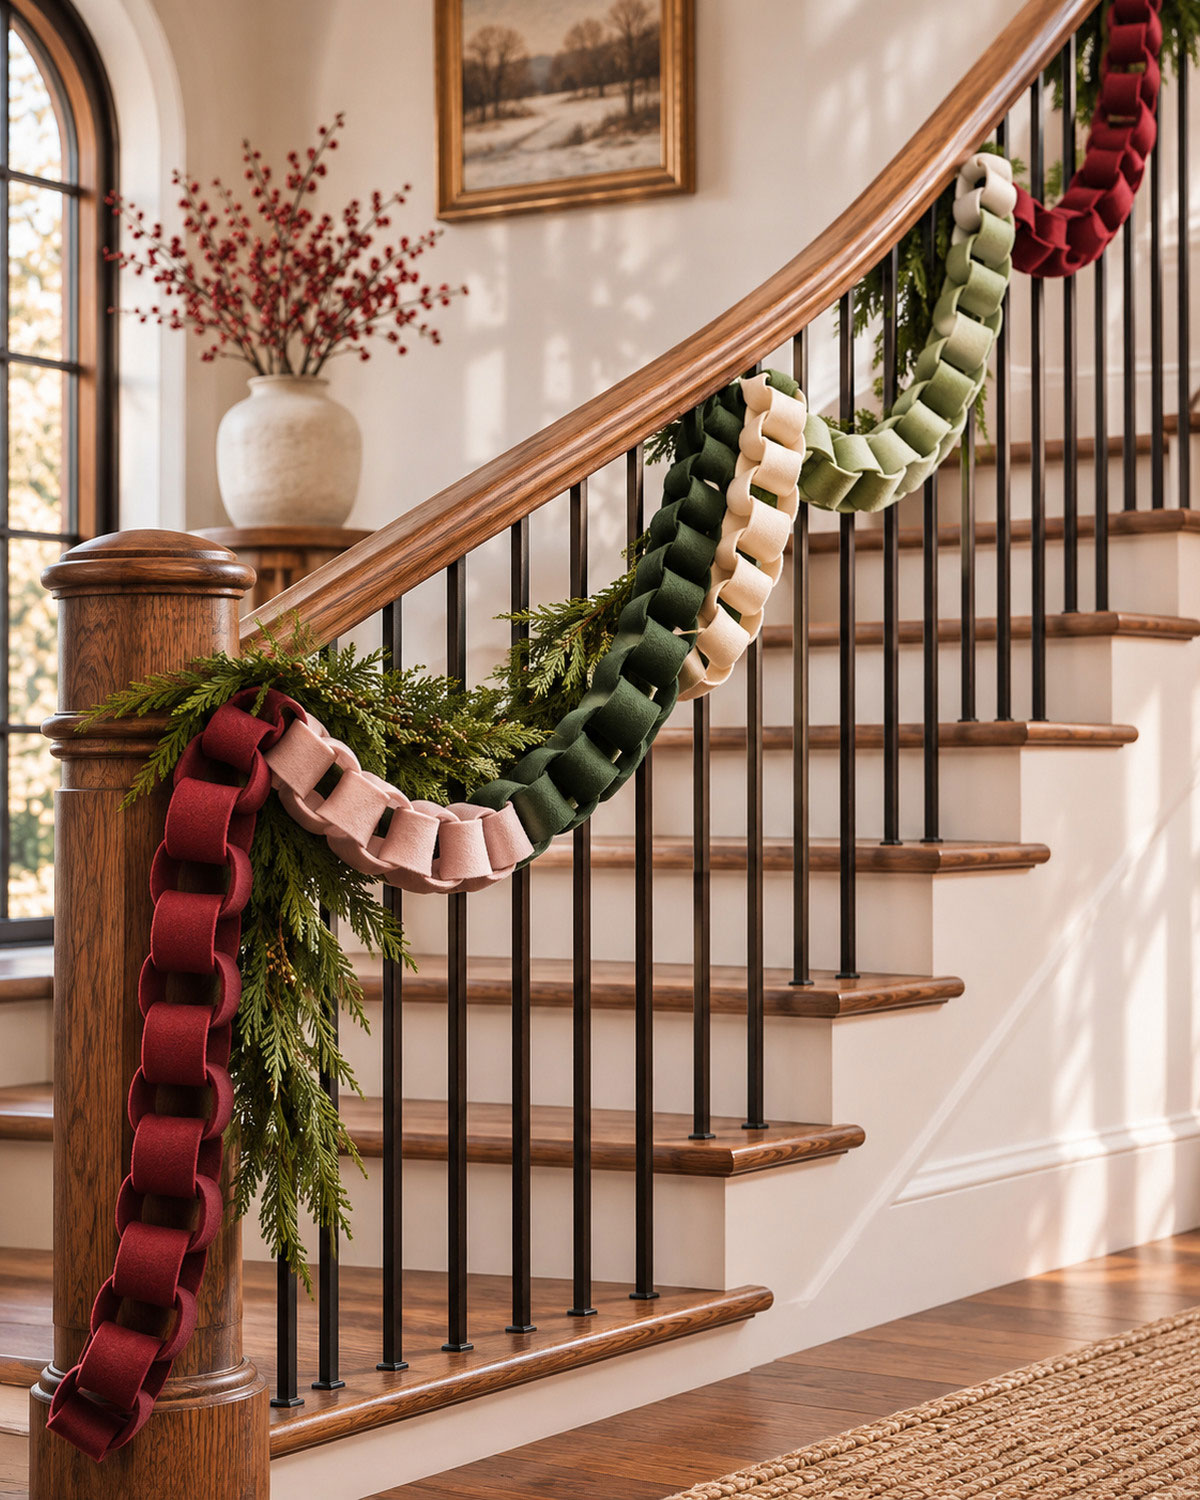
A felt chain is one of the easiest Christmas garlands you can make, and there's no reason it has to look like an ordinary paper chain. Choose a handful of pretty felt colors, make the loops a little wider, and hang the finished chain in generous curves. That's really all it takes.
I especially like burgundy, dusty pink, forest green, ivory, and sage green together. They look beautiful against dark wood, and you can use the chain again next Christmas instead of throwing it away after the party.
What You'll Need
- One 9 × 12-inch sheet of burgundy felt.
- One 9 × 12-inch sheet of dusty pink felt.
- One 9 × 12-inch sheet of forest green felt.
- One 9 × 12-inch sheet of ivory felt.
- One 9 × 12-inch sheet of sage green felt.
- Matching sewing thread.
- Hand-sewing needle.
- Fabric scissors or rotary cutter.
- Ruler and fabric marking pencil.
- Removable decorating ties for hanging.
I'd choose felt that is approximately 1 mm thick. It should bend into a loop without making a sharp crease. You don't need stuffing, wire, beads, or any special hardware.
Step 1: Cut the Felt Strips
Each chain link begins as a strip measuring 3/4 inch wide × 5 inches long.
- Lay your first felt sheet flat, with the 12-inch side running horizontally.
- Measure and mark strips 3/4 inch wide.
- Cut the strips into 5-inch lengths.
- Repeat with the remaining felt colors.
- Trim any uneven edges before assembling the chain.
You can cut up to 24 strips from one 9 × 12-inch sheet using this layout. The finished links will be approximately 1 1/2 inches across, depending on the felt thickness and how tightly you close them.
For the color arrangement in the example image, prepare 60 strips:
- 20 burgundy strips.
- 10 dusty pink strips.
- 10 forest green strips.
- 10 ivory strips.
- 10 sage green strips.
We'll use the burgundy twice, once at each end. That gives the chain a little balance without repeating every color in the same order.
Step 2: Sew the First Felt Loop
- Take one burgundy felt strip.
- Bend it into a circle without twisting the felt.
- Overlap the two short ends by 1/2 inch.
- Thread your needle with matching thread.
- Sew two short rows of small backstitches across the overlapping ends.
- Fasten the thread securely and trim the loose end.
That first loop is your starting point. It should hold its round shape when you pick it up, but it doesn't need to be perfectly stiff.
I would sew the links rather than rely on glue, particularly if you're planning to pack the chain away and reuse it. A few neat stitches are enough.
Step 3: Add the Remaining Felt Links
- Take a second burgundy strip and pass one end through the first completed loop.
- Bend the second strip into a circle.
- Overlap its ends by 1/2 inch.
- Sew the ends together with two short rows of backstitches.
- Continue adding one link at a time, always passing the new strip through the previous completed link before closing it.
- Check occasionally that the links move freely and the seams are securely stitched.
Keep the colors together in groups rather than alternating them one by one. Follow this order for the photographed design:
- 10 burgundy links.
- 10 dusty pink links.
- 10 forest green links.
- 10 ivory links.
- 10 sage green links.
- 10 burgundy links.
The large sections of color give the finished chain a more finished look. You can change the colors to match your decorations, but I'd stay with four or five shades rather than using every color in the felt drawer.
Step 4: Check the Garland Length
After you've joined the first 10 links, lay them on a table and measure the chain from end to end without pulling it tight. This gives you a useful estimate of how much length your felt and stitching method produce.
Continue adding links and check the length again before sewing the final color group. The number of links you need depends on the size of your loops and how much of a dip you want between the hanging points.
If you're making the chain for a staircase, measure the decorating route first. Allow extra length for the curves rather than stretching the felt links tightly between attachment points.
Length checkpoint: The sample layout uses 60 links. Treat that as a starting quantity, not a guaranteed finished length. Add or remove links until the chain fits the space you've measured.
Step 5: Hang Your Felt Christmas Chain
The chain looks lovely along a staircase, especially when you drape it in two or three generous curves instead of pulling it straight.
- Choose secure attachment points along the decorative side of the railing.
- Use removable ties to fasten the chain at the ends and at any points needed to support the draped sections.
- Keep the chain below or to the side of the handrail so it doesn't interfere with anyone using the stairs.
- Adjust the curves until the colors hang in a balanced arrangement.
- Check that no loops trail onto the steps or create a snagging hazard.
If you'd like to add evergreen greenery, attach it separately to the railing. Don't make the felt chain carry its weight.
Decoration note: Keep felt chains out of reach of babies and young children. Don't hang long loops where someone could pull them down, become tangled, or trip. Keep the felt away from candles and other sources of heat.
Step 6: Store the Chain for Next Christmas
Once Christmas is over, remove the hanging ties and gently lay the chain into a roomy storage box. Don't flatten the loops or pile heavy decorations on top.
And that's it. A few sheets of felt, some simple stitching, and a Christmas garland you can use again. Sometimes the easiest decorations turn out to be the prettiest.
Which DIY Christmas Garland Should You Make?
If you're trying to choose just one, I'd start with the materials you already have. The folded paper stars and gingerbread houses are good choices if you have cardstock and ordinary paper-crafting tools. The fabric stockings are a nice project for using leftover Christmas cotton, while the felt mittens are perfect when you're in the mood for a little hand embroidery.
The ribbon bow garland is my choice when I want something with a more dressed-up look. The velvet bows add plenty of Christmas color without needing to make lots of little decorations.
For a Christmas baby shower, I especially like the gingerbread houses over a dessert table, the ivory paper stars against a festive backdrop, and the red-and-green ribbon bows for a more traditional Christmas theme.
Tips for Decorating with Your Christmas Garlands
Before making your garland, measure the space where you'd like to hang it. A garland looks different when it's hanging in a gentle curve than when it's stretched straight across a wall, so allow a little extra length for the dip.
For a party, try hanging a garland above the dessert table, along a decorative wall, or over a gift display. You don't need to cover every surface with Christmas decorations. One handmade garland can be enough to give a small area a festive look.
If you're decorating for Baby's First Christmas, you could choose a project that can be stored and brought out again in future years. The fabric stockings and felt mittens are especially nice for that.
Decoration note: These handmade garlands are decorations, not baby toys. Keep hanging cords, ribbon loops, paper pieces, and felt decorations completely out of reach of babies and young children. Never attach a garland to a crib, bassinet, or other infant sleep space. Keep paper and fabric decorations away from candles, fireplaces, hot lights, and other heat sources.
When you click on links to various merchants on this site and make a purchase, this may result in this site earning a commission. This does not affect the price you pay.

UBGI Gold Standard 2026
Reviewed under the site's
editorial checklist.
Photos, decorating ideas, party setups and reader submissions are shared for inspiration unless a page is specifically presented as a pattern, tutorial, reference guide or step-by-step project. Follow the instructions, measurements, safety guidance and manufacturer directions provided for the particular project or product.
About Jan | Contact | Baby Nursery Ideas (Blog) | Site Map | Privacy Policy | Disclosure Policy | Disclaimer | Affiliate Disclosure | Earnings Disclosure | Facebook | Pinterest
I am a participant in the Amazon Services LLC Associates Program, an affiliate advertising program designed to provide a means for us to earn fees by linking to Amazon. As an Amazon Associate I earn from qualifying purchases.
Copyright © 2006-2026. All Rights Reserved.