Free Crochet Deer Appliqué Pattern for a Woodland Baby Blanket
By Jan Bay
This free crochet deer appliqué pattern makes a gentle baby fawn with shaped ears, a cream muzzle and embroidered facial details. Use the finished woodland deer on a baby blanket, nursery wall hanging, banner or handmade gift when you want a smaller crochet project instead of a full deer lovey.
Explore More Crochet Animal Patterns
Crochet Animal Appliqué Patterns
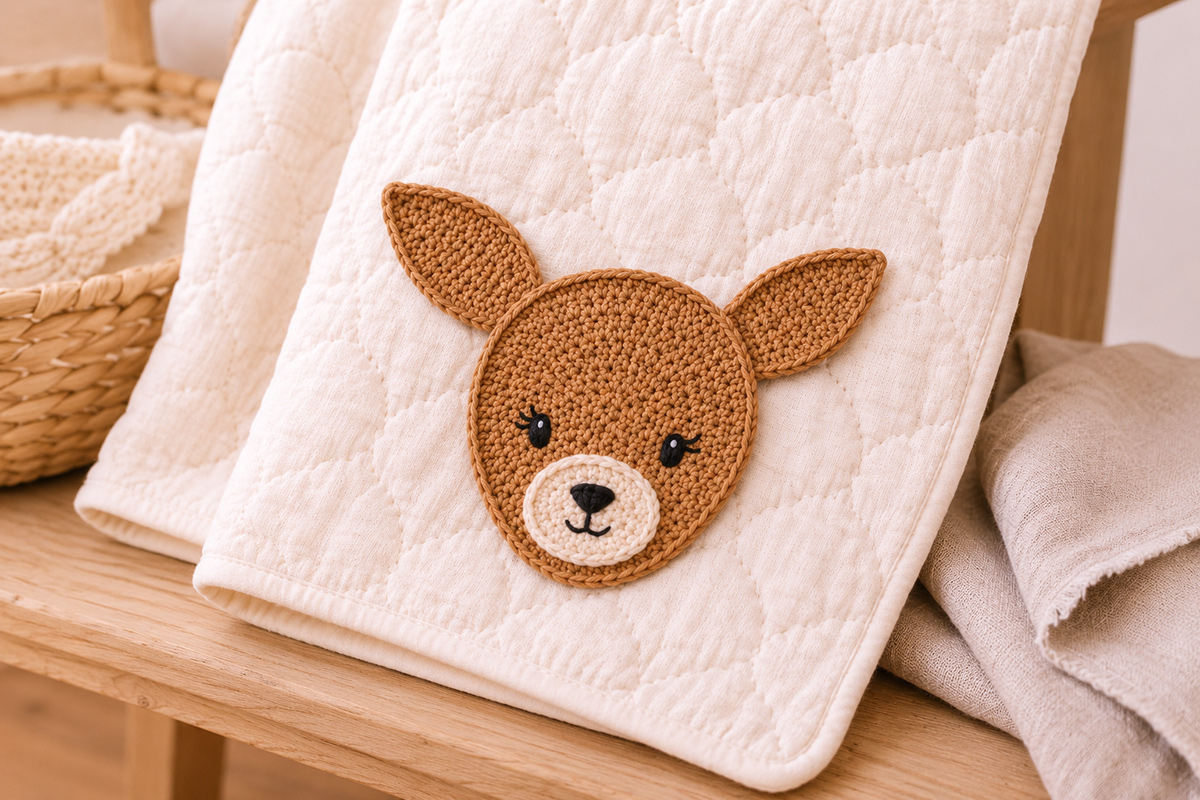
Crochet Supplies for This Deer Appliqué
Jump to:
Supplies for the Crochet Deer Appliqué Pattern
You don't need much yarn for this little fawn, so it's a good project for using leftovers from a blanket or another woodland crochet project. I'd keep the colors natural and fairly simple so the face doesn't get busy.
- Worsted weight #4 yarn in light brown or fawn, about 35 to 40 yards
- Worsted weight #4 yarn in cream or ivory, about 8 yards
- Small amount of black yarn or embroidery floss for the eyes and nose
- 4 mm crochet hook
- Yarn needle
- Scissors
- Rustproof pins for positioning and assembly
- Blocking mat or folded towel
Expected finished size: Approximately 5 inches tall from the bottom of the face to the ear tips and about 3 1/2 inches wide when made with worsted weight yarn and a 4 mm hook. Treat these as approximate measurements rather than exact gauge targets because yarn thickness and crochet tension will change the finished size.
Gauge: Gauge isn't critical for an appliqué. What matters more is keeping the stitches firm enough that the finished deer lies flat without feeling stiff.
If you're comparing yarn labels, the Craft Yarn Council Standard Yarn Weight System explains the numbered yarn categories and the usual hook and gauge ranges for each weight.
US crochet terms used:
- ch = chain
- sc = single crochet
- hdc = half double crochet
- dc = double crochet
- sl st = slip stitch
- inc = work 2 sc in the same stitch
The turning chain does not count as a stitch unless the instructions specifically say otherwise. There is no stuffing in this pattern. Every piece stays flat.
Skill level: Advanced beginner. You'll work simple rows, increases, an oval around both sides of a starting chain, basic embroidery and sewn assembly.
Construction: Crochet 4 flat pieces before assembly: 1 head, 1 cream muzzle and 2 ears. The facial features are embroidered after the crochet pieces are positioned.
Before assembly: You should have 1 head with 13 stitches across the wider top edge and 7 stitches across the narrow bottom edge, 1 cream muzzle with 20 stitches in its final round, and 2 matching ears with 19 stitches each. Lay all four pieces flat and make sure the ears match in size and shape. Choose one side of the head as the front before positioning the muzzle and embroidering the face, and keep yarn ends toward the back.
Crochet Deer Applique Pattern
The head is worked from the narrow lower face toward the wider forehead. That little bit of shaping is worth doing because it keeps the finished piece from looking like a round animal face with deer ears stuck on top.
Fawn Head
With light brown yarn:
Ch 8.
Row 1: Sc in the second ch from the hook and in each ch across. Turn. (7 sc)
Row 2: Ch 1. Inc in the first stitch, sc in the next 5 stitches, inc in the last stitch. Turn. (9 sc)
Row 3: Ch 1. Sc across. Turn. (9 sc)
Row 4: Ch 1. Inc in the first stitch, sc in the next 7 stitches, inc in the last stitch. Turn. (11 sc)
Row 5: Ch 1. Sc across. Turn. (11 sc)
Row 6: Ch 1. Inc in the first stitch, sc in the next 9 stitches, inc in the last stitch. Turn. (13 sc)
Rows 7 through 10: Ch 1. Sc across. Turn. (13 sc)
Fasten off, leaving a long tail if you plan to use it for sewing.
The wider edge is the top of the head. The narrow seven-stitch edge is the bottom.
If the side edges curl a little, don't add more stitches trying to correct them. Lay the head flat, shape it with your fingers and lightly block it before assembly.
Cream Muzzle
With cream yarn:
Ch 5.
Round 1: Work 2 sc in the second ch from the hook, sc in each of the next 2 chains, work 4 sc in the last chain. Continue along the unused loops on the opposite side of the starting chain. Sc in the next 2 loops and work 2 sc in the final loop. Join with a sl st. (12 sc)
Round 2: Ch 1. Inc in each of the next 2 stitches, sc in the next 2 stitches, inc in each of the next 4 stitches, sc in the next 2 stitches, inc in each of the final 2 stitches. Join with a sl st. (20 sc)
Fasten off and leave a tail for sewing.
You should have a small oval rather than a circle. If yours wants to twist, flatten it with your fingers before you sew it down.
Outer Ears
Make 2 with light brown yarn. Before making each ear, leave a beginning tail about 10 inches long for sewing.
Ch 9.
Starting in the second ch from the hook, work:
Sl st in the next ch, sc in the next ch, hdc in the next ch, dc in each of the next 3 chains, hdc in the next ch, then work 5 dc in the last chain.
Now work back along the unused loops on the opposite side of the foundation chain:
Hdc in the next loop, dc in each of the next 3 loops, hdc in the next loop, sc in the next loop and sl st in the final loop.
Fasten off and weave in the ending tail. The end with the 5 dc is the wider base of the ear, and the narrow end where you finished is the tip. Use the beginning tail at the wider base for sewing.
The ears should be long and fairly narrow. Don't stuff them and don't fold them into thick tubes. They need to stay flat against the finished project.
Make the second ear the same way. Keep the same side facing forward on both ears.
Face, Muzzle and Ear Details
Lay all of the pieces out before you sew. This little face looks sweetest when the features stay small, low and centered.
Place the cream muzzle on the lower center of the head. Center it from side to side and position it low enough that about 3/8 inch of brown still shows below the muzzle at the chin. You should also still see a little brown showing at both sides of the muzzle. Pin it in place if that helps.
Sew around the outside of the muzzle with cream yarn and small stitches placed close to the edge so the oval stays smooth and flat.
For the eyes, use black embroidery floss or black yarn and make each eye as a tiny vertical satin-stitch shape about 1/4 inch tall. Place the eyes slightly above the upper edge of the muzzle, with one eye on each side of the face. The inside edge of each eye should sit about 1/4 inch out from the nearest side of the muzzle, and the bottom of each eye should sit about 1/8 inch above the top edge of the muzzle. Keep the eyes small and evenly spaced. Oversized eyes make the fawn look confused instead of sweet.
For a softer expression, add one very short eyelash stitch at the outer top corner of each eye. Angle each lash slightly upward and outward. Keep the lashes tiny so they look delicate rather than dramatic.
Add one tiny white embroidery stitch near the upper inside edge of each black eye to create the small catchlight shown in the fawn's eyes. Keep each white stitch very small so it reads as a highlight rather than a separate eye detail.
Use black embroidery floss for the nose. Make a small filled triangle centered near the upper middle of the cream muzzle. Keep the nose modest in size, about 1/4 inch wide at most.
Bring one short straight stitch down from the bottom point of the nose. Then add one short curved stitch to the left and one to the right so the mouth turns very slightly upward. Do not angle the mouth downward. A small gentle smile gives the fawn a much sweeter expression.
Position one ear near each upper side of the head with the pointed ends facing upward and slightly outward. Place the base of each ear so it sits just below the top curve of the head, and sew only the lower 3/8 to 1/2 inch of each ear to the back of the head. Leave the rest of each ear flat.
For a cleaner fawn face you can skip the forehead spots if you like.
Assembly and Finishing
Finish the face before attaching the appliqué to a blanket, wall hanging or other project. It's much easier to adjust eye and muzzle placement while you can still turn the piece freely in your hands.
Once the muzzle, eyes, nose and ears are finished, weave in any tails that you won't be using for attachment.
Lay the completed deer where you want it and pin it in several places. Start by sewing around the head with matching brown yarn. Use small whipstitches and catch only enough of the background fabric to hold the appliqué securely.
Sew around the outer edges of both ears too. Don't leave the tips loose if the appliqué will be used on a baby item.
Check the muzzle again after the head is attached. If an edge has lifted, add another small cream stitch there.
Then turn the project over and look at the back. Make sure the yarn tails are woven in securely and there aren't any long floats or loops. Remove every positioning pin before the finished project is used, washed or given as a gift.
That's enough. You don't need glue, buttons, beads or other decorations to finish this one.
If the appliqué will go on a baby blanket, keep every part firmly sewn down and avoid loose embellishments that could be pulled free. In the United States, the U.S. Consumer Product Safety Commission safe sleep guidance says blankets and other loose items should be kept out of an infant's sleep space, so treat a handmade baby blanket as an awake-use or later-stage item rather than crib bedding for infant sleep.
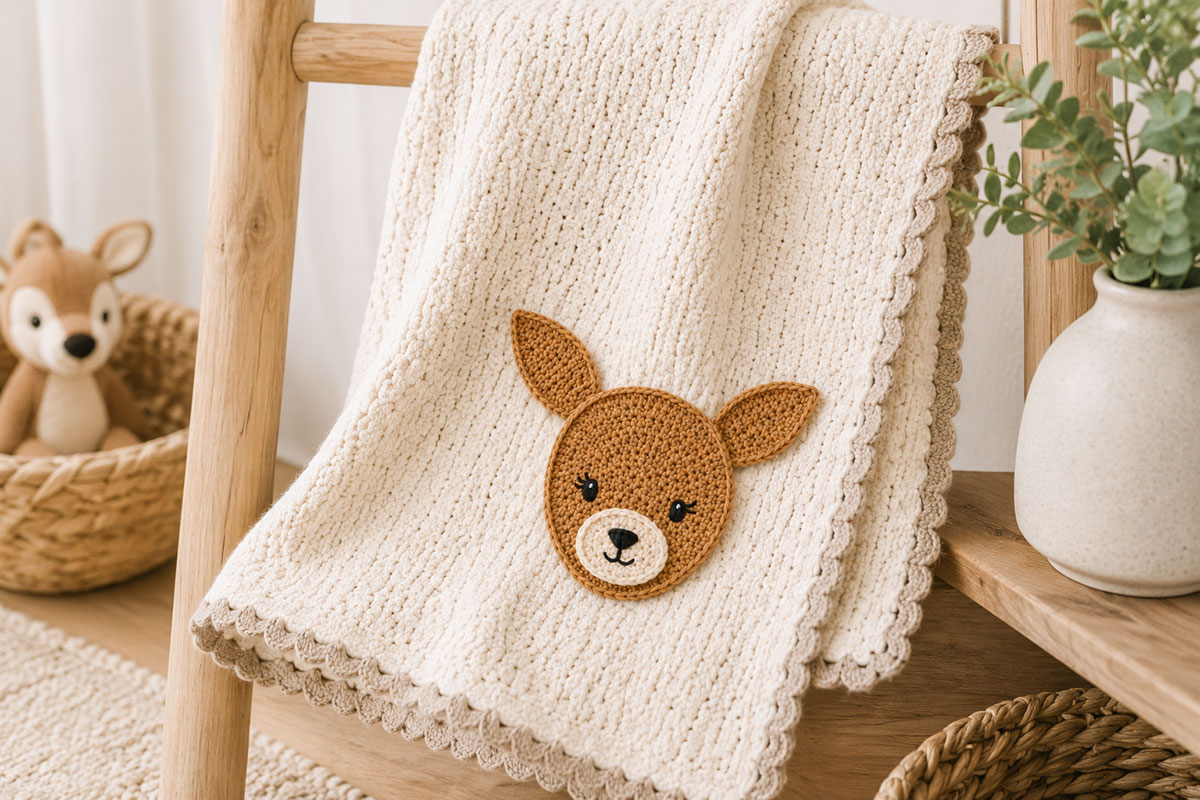
Ways to Use a Crochet Deer Appliqué
A small flat deer is easier to use than a larger stuffed crochet piece because you can add it almost anywhere without adding much bulk.
There is also a stand alone deer pattern you can make after you get the flat motif done. Your next project should be the whitetail buck deer crochet snuggler pattern that keeps the woodland theme but uses a softly stuffed head, branched antlers, a flat unstuffed body and long floppy limbs.
A baby blanket is the obvious choice. Place the fawn near one lower corner instead of directly in the center if you want the blanket itself to stay the main feature. If you're planning a larger woodland project, my deer baby quilt pattern has another way to work a deer motif into nursery bedding.
You can also sew the appliqué to a fabric wall hanging, crochet banner, handmade gift bag or framed textile piece. I'd keep the background fairly plain. The little face gets lost if you surround it with too many competing shapes.
For a whole room built around the same animal, the deer nursery ideas page has decorating directions that range from woodland to rustic.
The fawn also fits easily into a mixed woodland group. Pair it with foxes, rabbits or other forest animals rather than repeating deer on everything. My Forest Friends nursery ideas show how several woodland animals can share the room without making every surface match.
If you want to carry the fawn theme up to the nursery ceiling, my crochet deer baby mobile pattern uses three spotted fawns with acorns and sage leaves on a wooden ring.
If you're using the appliqué on something that will be washed often, sew around the entire outside edge rather than tacking it down at only a few points. Wash according to the care instructions for the yarn and the item underneath it.
Crochet Deer Appliqué FAQ
How big is the finished deer appliqué?
With worsted weight yarn and a 4 mm hook, expect the finished fawn to be approximately 5 inches tall including the ears and about 3 1/2 inches wide. Yarn thickness and crochet tension can change the finished size.
Can I make the deer appliqué smaller?
Yes. The easiest way is to use DK weight yarn with a smaller hook while keeping the stitch counts the same. Make all of the pieces with the same yarn weight so the muzzle and ears stay in proportion to the head.
Do I need to stuff the deer?
No. This pattern is meant to stay flat. The head, muzzle and ears are all unstuffed.
Can I use safety eyes instead of embroidery?
I wouldn't use safety eyes for this appliqué, especially if it's going on a baby blanket or another item a baby may handle. Embroidered eyes stay flat and keep the finished deer looking like an appliqué instead of a small stuffed animal face.
Why is the deer head worked in rows instead of rounds?
The rows make it easy to widen the upper face while leaving the lower face narrower. That gives the fawn more of a deer-shaped profile instead of a perfectly round head.
Can I use this appliqué on something other than a baby blanket?
Yes. Try it on a nursery wall hanging, crochet banner, handmade gift bag or another flat decorative project. Just match your attachment method to the item underneath and sew every edge securely when the finished piece will be handled.
When you click on links to various merchants on this site and make a purchase, this may result in this site earning a commission. This does not affect the price you pay.

UBGI Gold Standard 2026
Reviewed under the site's
editorial checklist.
Photos, decorating ideas, party setups and reader submissions are shared for inspiration unless a page is specifically presented as a pattern, tutorial, reference guide or step-by-step project. Follow the instructions, measurements, safety guidance and manufacturer directions provided for the particular project or product.
About Jan | Contact | Baby Nursery Ideas (Blog) | Site Map | Privacy Policy | Disclosure Policy | Disclaimer | Affiliate Disclosure | Earnings Disclosure | Facebook | Pinterest
I am a participant in the Amazon Services LLC Associates Program, an affiliate advertising program designed to provide a means for us to earn fees by linking to Amazon. As an Amazon Associate I earn from qualifying purchases.
Copyright © 2006-2026. All Rights Reserved.