Deer Baby Quilt Pattern for Woodland Nursery Crib Quilts
A deer baby quilt pattern is a perfect choice for a woodland nursery because it combines classic forest charm with a handmade keepsake that can be used in the crib, on the nursery rocker, or as a treasured baby gift. This deer baby quilt pattern features a sweet woodland-inspired design that works beautifully for baby boys, baby girls, or gender-neutral nursery themes while remaining beginner-friendly enough for confident new quilters.

This deer baby quilt pattern creates a charming woodland nursery quilt that works beautifully as a crib quilt or handmade baby shower gift.
Why This Deer Baby Quilt Pattern Works So Well
Sometimes a nursery starts with a paint color. Sometimes it starts with a crib. Every now and then it starts with a handmade quilt spread across a dining room table while someone tries to decide whether the deer should face left or right.
That's how many woodland nurseries come together. The quilt becomes the piece that quietly influences everything else.
This deer baby quilt pattern was designed around a single focal deer because that's what catches the eye from across the room. Tiny pieced details can look impressive in a pattern book, but they often disappear once the quilt is folded over a chair or hanging on a ladder display.
The goal here is different. The finished deer should still be recognizable from the doorway.
The best nursery quilts are the ones people actually finish.
That is why this pattern uses larger appliqué sections instead of dozens of tiny pieces.
If you're creating an entire woodland room, you'll also find ideas on my fox woodland nursery ideas page, these woodland decorating ideas, and this coordinating mountain patchwork crib quilt pattern.

The deer is built from simple fabric sections that remain easy to identify after quilting.
Why This Deer Baby Quilt Pattern Uses Fewer Pieces
Many deer quilt patterns use dozens of tiny sections, narrow antlers, intricate facial details, and complicated curves. They look impressive in a catalog but can become frustrating after a few evenings at the cutting table.
I wanted this design to remain recognizable while keeping the construction approachable.
The body uses larger template sections. The head is simplified. The spots are individual circles instead of complicated shapes. The trees use broad layers that are easy to cut accurately.
The finished quilt still looks like the deer shown in the example image, but the sewing process is much more manageable.
That difference becomes obvious once the first templates are cut.
Finished Size and Materials for This Deer Baby Quilt Pattern
Finished quilt size: 40 inches x 50 inches
Finished deer scene: approximately 24 inches x 28 inches
Skill level: Confident beginner
Construction method: Fusible appliqué with either blanket stitch finishing or quilting around the appliqué edges.
I prefer crib quilts that can continue serving a purpose after the crib years are over. At 40 x 50 inches, this size works on a nursery rocker, a toddler bed, or folded across a storage bench.
Material Requirements for the Deer Baby Quilt Pattern
- 1¼ yards cream background fabric
- ⅜ yard tan deer fabric
- Fat quarter ivory chest fabric
- Fat quarter ivory muzzle fabric
- Fat quarter cream spot fabric
- Fabric scraps for eye and nose
- ⅜ yard dark green tree fabric
- Fat quarter grass fabric
- ¾ yard border fabric
- ½ yard binding fabric
- 2¾ yards backing fabric
- 45" x 55" batting
- Fusible web
- Thread
Small prints work particularly well for this project because large novelty prints often lose their character when cut into appliqué pieces.
Printable Deer Baby Quilt Pattern Templates
Before printing any templates, print at 100% scale. Do not select fit-to-page or scaling options.
Verify the one-inch test square before cutting fabric. Thirty seconds spent checking scale can save several hours later.
This pattern uses six printable template sheets, with several smaller pieces grouped together for easier printing.
- Template A – Deer Body
- Template B – Deer Chest
- Template C – Deer Head
- Template D – Deer Muzzle
- Template E – Ear, Nose, Eyes, and Spots
- Template J – Large Pine Tree, Small Pine Tree, and Grass Cluster
Template Sheet Notes
The deer baby quilt pattern templates are grouped onto six printable JPG sheets. Smaller pieces such as the eyes, nose, spots, and woodland background shapes are combined onto shared sheets to keep printing simple.
Print all templates at 100% scale. Do not select fit-to-page or shrink-to-fit options. Verify the one-inch test square before cutting fabric.
The templates are intentionally oversized and uncomplicated. A deer quilt hanging in a nursery is viewed from several feet away, not from six inches away. Larger shapes create a cleaner finished result and make cutting much faster.
- Template A – Deer Body (JPG)
- Template B – Deer Chest (JPG)
- Template C – Deer Head (JPG)
- Template D – Deer Muzzle (JPG)
- Template E – Ear, Nose, Eyes, and Spots (JPG)
- Template J – Large Pine Tree, Small Pine Tree and Grass Cluster (JPG)


These templates are finished appliqué shapes for fusible appliqué. No seam allowance has been added.
The complete template set uses larger shapes that are practical for everyday quilting rather than tiny decorative pieces.
Deer Baby Quilt Pattern Placement Overview
Placement becomes much easier once the body is centered first. Nearly every remaining piece references that position.
The deer body acts as the anchor for the entire scene. Once it is positioned correctly, the remaining pieces become much easier to place.
- Deer body centered on the background panel
- Head positioned on the upper right side of the body
- Large tree on the left side of the scene
- Small tree on the right side
- Grass along the lower edge
- Spots placed across the upper back
- Tail positioned at the rear of the body
Once the body is in place, nearly every remaining piece has an obvious location.
Parents often notice this when helping arrange nursery artwork. The focal piece establishes the layout and everything else naturally supports it.
If you have not already printed the template files above, complete that step before beginning layout. Verifying scale now prevents placement problems later.

Centering the deer first makes the remainder of the layout straightforward and helps maintain balanced proportions throughout the quilt.
If you're planning a coordinated woodland celebration as well as a nursery, take a look at these woodland deer baby shower ideas which pair naturally with the quilt design.
Once the quilt design is finished, many parents continue the woodland theme with coordinating deer nursery bedding ideas, rustic deer themed nursery decor, and removable deer wall decals that help carry the woodland deer motif throughout the entire nursery.
A crocheted fawn security blanket makes a sweet companion project to layer with this quilt, and my crochet deer lovey pattern adds another handmade woodland baby piece in the same deer nursery theme. If you would rather make a silly, little floppy deer with long dangling legs for fun, use my whitetail buck deer crochet snuggler pattern.
To see the rest of the handmade pieces that can coordinate with this quilt, browse my woodland deer nursery projects collection.
Deer Baby Quilt Pattern Cutting Guide
Before cutting anything, gather all deer pieces together in a tray, basket, or small project box. It sounds like a minor detail until one tiny ear template disappears under a stack of fabric and suddenly the whole project pauses while you hunt for it.
Cut the background and border pieces first. Having the quilt foundation ready makes it much easier to visualize the final layout.
- Background panel: Cut 1 at 28½" x 32½"
- Inner border: Cut 2 at 2½" x 32½"
- Inner border: Cut 2 at 2½" x 32"
- Outer border: Cut 2 at 4½" x 36½"
- Outer border: Cut 2 at 4½" x 40"
- Binding: Cut 5 strips at 2½" x width of fabric
Trace the deer baby quilt pattern templates onto fusible web according to the manufacturer's directions.
Apply the fusible web to the wrong side of each fabric.
Cut directly on the traced lines.
Label each piece as it is cut.
The eye, nose, and spots are the pieces most often mixed up because several fabrics may appear similar once separated from the larger cuts.
Preparing the Background Panel
Press the background panel thoroughly before beginning layout.
Even a small wrinkle can affect placement measurements and make the finished scene look slightly off center.
Place the background panel on a table, design wall, or clean floor where you can step back several feet to evaluate the arrangement.
I still do this today. A layout that looks perfect from eighteen inches away can look completely different once viewed from across the room.
Checking the layout from several feet away helps maintain balanced proportions throughout the finished quilt.
How to Assemble the Deer Baby Quilt Pattern Appliqué
Begin with Template A, the deer body.
The body acts as the anchor for the entire scene. Once it is positioned correctly, the remaining pieces become much easier to place.
- Position the deer body.
- Add the chest section.
- Place the head.
- Add both ears.
- Position the muzzle.
- Add front and back legs.
- Attach the tail.
- Arrange the spots across the upper back.
- Add the eye.
- Add the nose.
Do not permanently fuse the pieces immediately.
Take a few minutes to stand back and look at the overall shape. The deer should appear balanced without looking stretched or crowded.
Once you're satisfied with the arrangement, fuse the pieces according to the fusible web manufacturer's instructions.
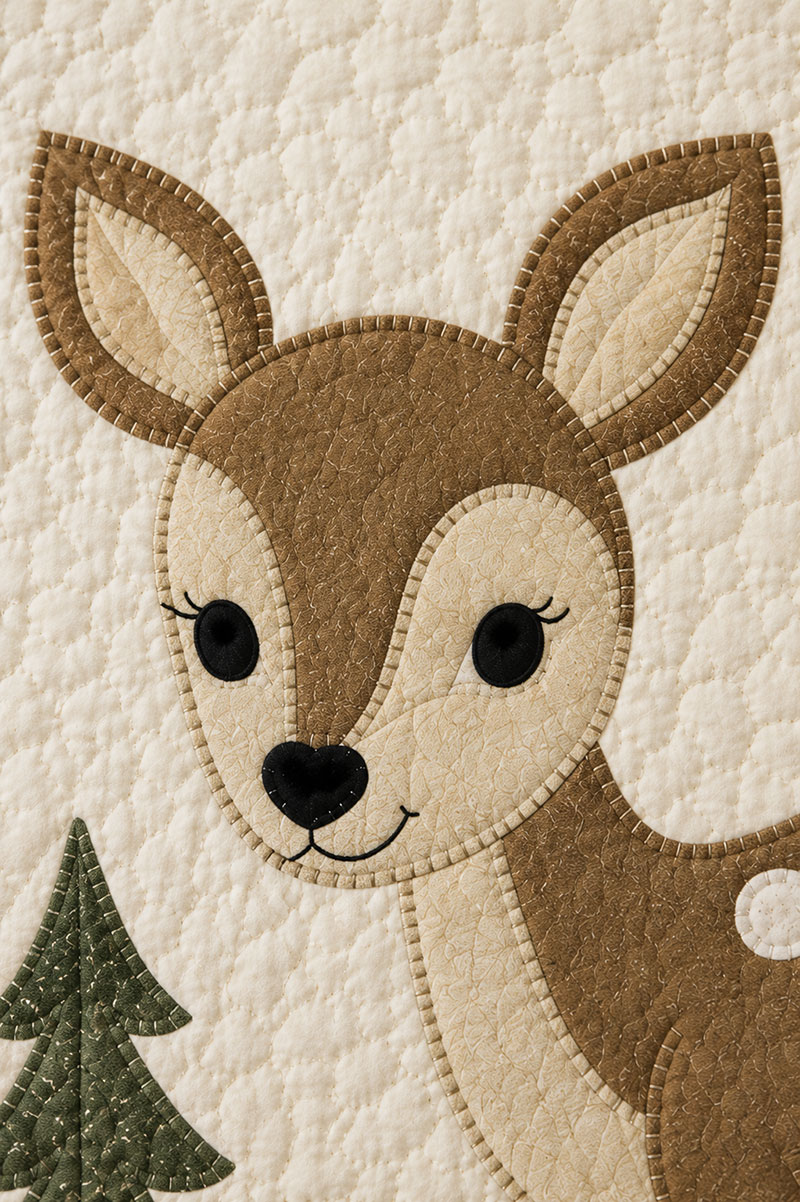
The deer uses uncomplicated shapes that remain recognizable without requiring difficult cutting techniques.
Adding the Woodland Elements
Once the deer is complete, begin placing the surrounding pieces.
- Large pine tree on the left side
- Small pine tree on the right side
- Grass cluster along the lower portion of the scene
The trees help define the woodland setting while keeping the deer as the primary focal point.
Many woodland quilts become visually crowded because every element tries to become the focal point. This design keeps attention centered on the fawn.
If you enjoy woodland-themed projects, my fox quilt pattern makes a nice companion quilt while maintaining a similar decorating style.
Building the Quilt Top
After all appliqué pieces have been fused into position, decide how you would like to secure them.
Option One: Blanket stitch around each appliqué piece.
Option Two: Secure the appliqué later during quilting by stitching around the perimeter of each shape.
Both methods work well for this deer baby quilt pattern. The choice comes down to whether you prefer the appearance of blanket stitching or a cleaner outline-quilted finish.
Blanket stitching creates a traditional handcrafted appearance that closely matches the example quilt shown on this page.
Quilting around the edges produces a cleaner look with fewer visible decorative stitches.
Once the appliqué is secured:
- Sew the inner side borders to the background panel.
- Press the seams.
- Add the top and bottom inner borders.
- Press again.
- Attach the outer side borders.
- Press.
- Add the remaining outer borders.
- Press the completed quilt top.
The completed quilt top should measure approximately 40½" x 50½".
After quilting and binding, the finished quilt measures approximately 40" x 50".
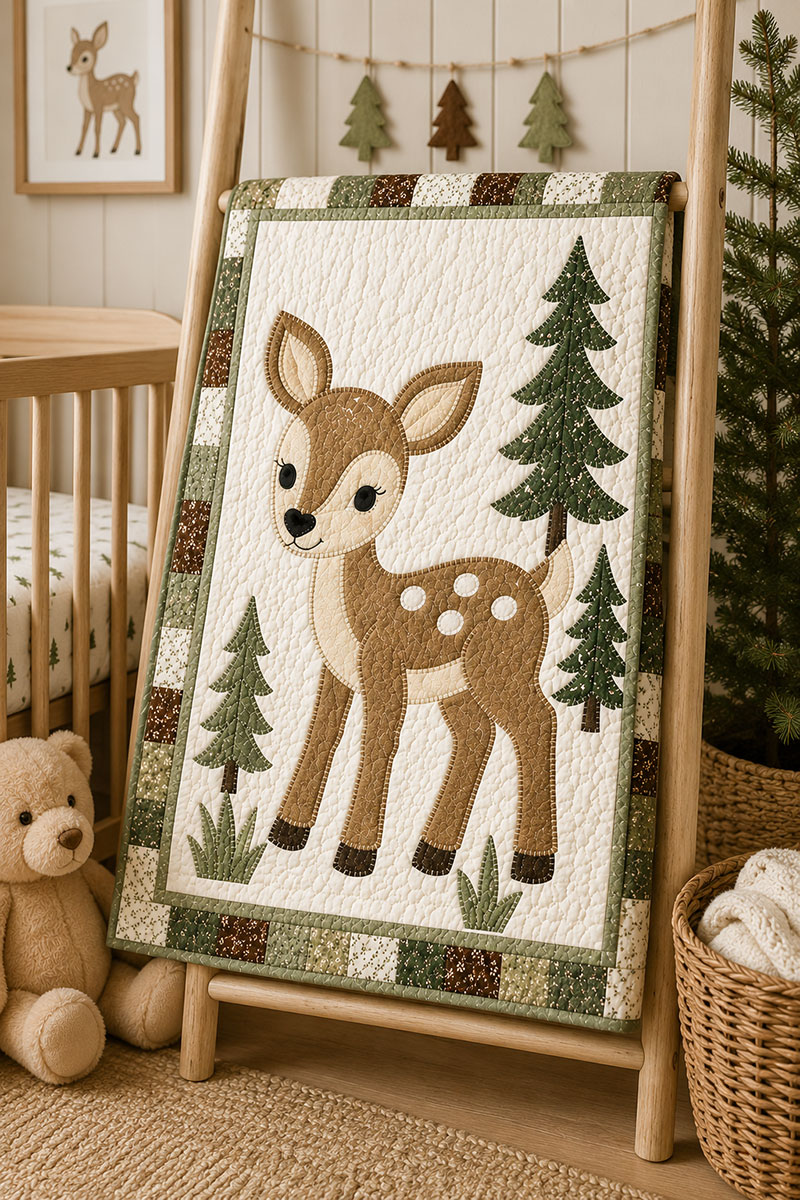
The completed quilt works as both nursery décor and an everyday keepsake that can remain useful long after the crib years.
If you're planning a complete woodland room, you'll also find coordinating inspiration in these baby boy nursery themes and woodland nursery decorating ideas.
How to Quilt the Deer Baby Quilt Pattern
Once the quilt sandwich has been assembled, begin quilting around the deer first. Securing the focal design before quilting the background helps maintain crisp edges and prevents shifting.
If you chose not to blanket stitch the appliqué pieces earlier, this quilting step becomes the method that permanently secures the deer, trees, and grass to the quilt top.
Quilt around:
- Deer body
- Chest piece
- Head
- Muzzle
- Ears
- Legs
- Tail
- Spots
- Trees
- Grass
After the outline quilting is complete, fill the remaining background areas using a simple meandering pattern, loops, gentle curves, or another low-density design of your choice.
Quilting around the deer first helps preserve the shape of the appliqué and keeps the focal design clearly defined throughout the quilting process.
For this project, quilting lines spaced approximately 2 to 3 inches apart provide good structure without making the quilt stiff.
Thread Recommendations
- 50 wt cotton thread for general quilting
- 40 wt cotton thread for more visible quilting lines
- Neutral cream thread for background quilting
- Brown thread for deer outline quilting
- Green thread for trees and grass if desired
Using a matching thread color around the deer creates a cleaner appearance, especially if the quilt will be displayed on a wall or ladder where viewers can study the details up close.
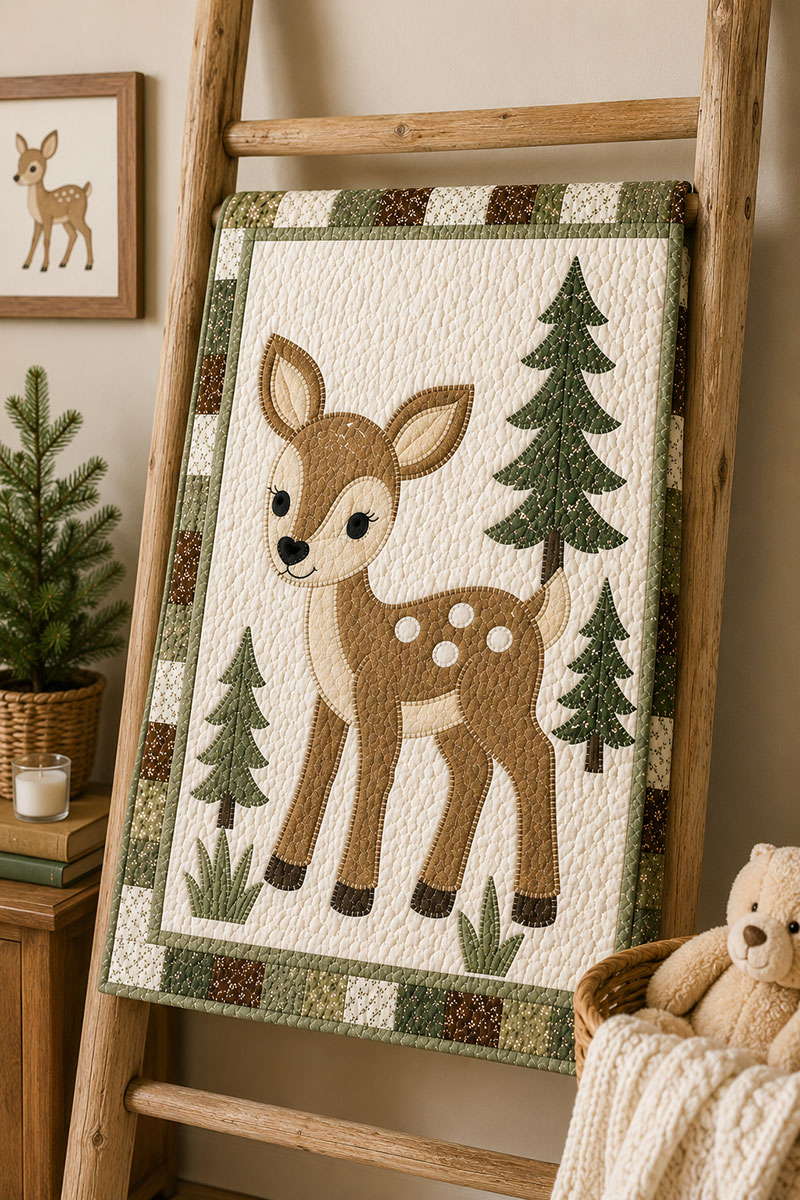
A quilt ladder display allows the deer design to remain visible even when the quilt is not being used every day.
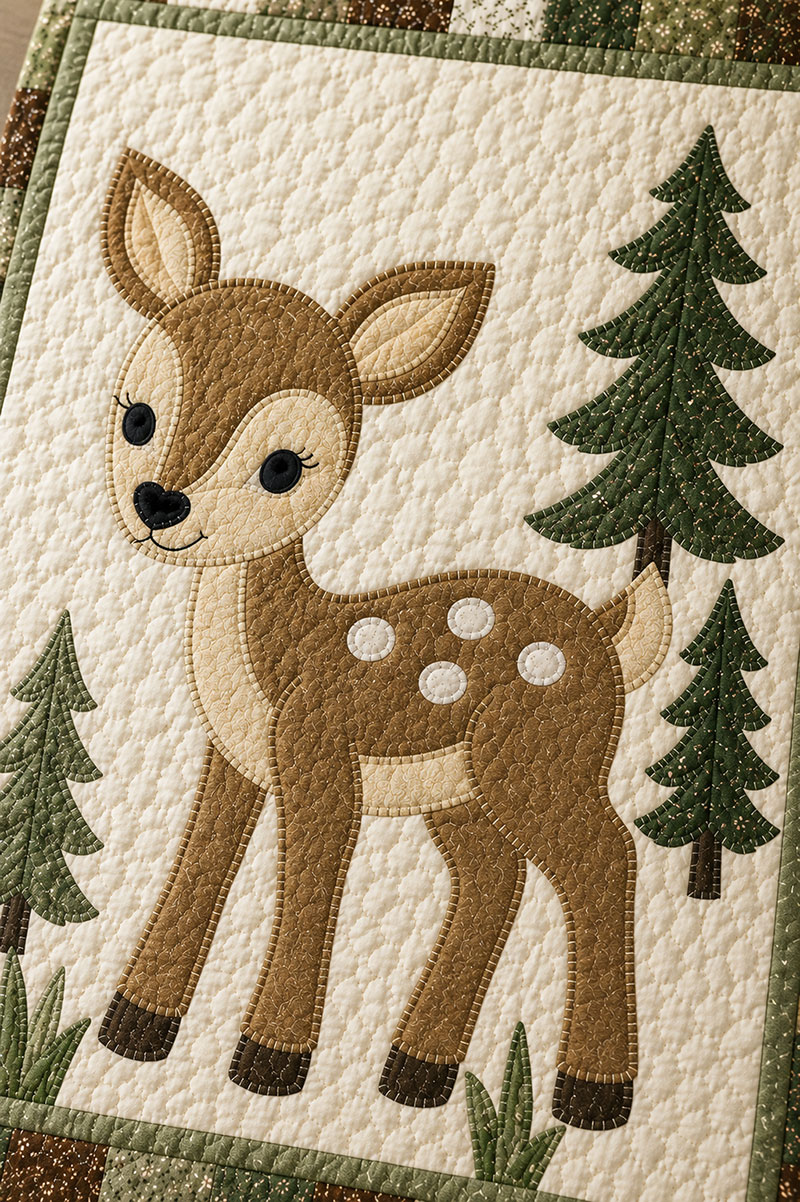
Close-up views reveal the quilting texture and appliqué details that often become favorite features years later.
Binding the Deer Baby Quilt Pattern
Join the binding strips end to end and press the strip in half lengthwise with wrong sides together.
- Attach binding to the front of the quilt.
- Miter the corners.
- Wrap the binding to the back.
- Secure using hand stitching or machine stitching.
The finished quilt should measure approximately 40 inches by 50 inches after binding.
Many nursery quilts spend years moving from room to room. A properly attached binding helps the quilt withstand repeated washing and handling.
Easy Ways to Personalize This Deer Baby Quilt Pattern
One advantage of using larger appliqué pieces is that small modifications are easy to make.
- Add the baby's name beneath the deer.
- Replace the pine trees with mountain silhouettes.
- Use gray fabrics instead of traditional brown tones.
- Add a birth date in one corner.
- Use plaid fabrics for a cabin-inspired look.
- Replace the outer border with patchwork blocks.
Small changes can help create a quilt that reflects your own nursery while maintaining the overall appearance of the original design.
The mountain version pairs especially well with this mountain patchwork crib quilt pattern if you're decorating around an outdoor theme.
Deer Baby Quilt Pattern Variations
The basic deer layout works surprisingly well with several nursery styles.
- Woodland nursery version using traditional browns and greens
- Mountain nursery version using gray deer and evergreen fabrics
- Rustic cabin version using plaid fabrics and darker borders
- Neutral nursery version using cream, taupe, and gray fabrics
- Baby girl woodland version using blush accents and floral prints
The deer remains recognizable while allowing the quilt to coordinate with a wide range of nursery themes.
Creating Your Own Version
Many quilters enjoy adapting a pattern to suit their own decorating style. Fabric selections, border treatments, quilting motifs, color placement, and personalized embroidery can all be changed while preserving the basic structure of the deer baby quilt pattern.
Those small adjustments often become the details family members remember years later.
I still see quilts where the fabric choices immediately remind me of a specific nursery, even when the underlying pattern is familiar.
If you're planning multiple handmade nursery projects, you'll find additional inspiration in these baby quilt patterns and coordinating deer baby shower ideas.
Ways to Display a Deer Baby Quilt in the Nursery
A handmade quilt often becomes part of the room long before it is needed as bedding.
- Folded across a nursery rocker
- Displayed on a quilt ladder
- Draped over a storage bench
- Used during milestone photographs
- Stored in the nursery for reading time
One of my favorite displays is a quilt ladder near a dresser. The design remains visible, the quilt stays accessible, and the room gains a focal point that changes very little as furniture evolves over time.
Deer Baby Quilt Pattern at a Glance
- Finished size: 40" x 50"
- Finished deer scene: Approximately 24" x 28"
- Skill level: Confident beginner
- Construction method: Fusible appliqué
- Printable template sheets required: 6
- Woodland nursery compatible: Yes
- Blanket stitch option: Yes
- Outline quilting option: Yes
- Finished quilt usable beyond crib years: Yes
This deer baby quilt pattern was designed to create a recognizable woodland focal point using larger appliqué pieces, straightforward assembly, and beginner-friendly construction techniques while remaining visually similar to the example quilt shown throughout this page.
For information about quilt care, laundering, and textile preservation, the American Quilter's Society offers additional quilting resources and educational materials.
Frequently Asked Questions About Deer Baby Quilt Patterns
Can a beginner make this deer baby quilt pattern?
Yes. The templates were intentionally simplified to reduce complicated cutting and assembly.
Do I have to use blanket stitching?
No. The appliqué can be secured using blanket stitching or by quilting around the edges of the appliqué pieces.
Can I hand stitch the appliqué?
Yes. Hand stitching works well if you prefer traditional appliqué methods and do not mind the additional time involved.
Can I enlarge the quilt?
Yes. Increase the border widths or add additional patchwork sections around the center panel.
Can I use flannel fabrics?
Yes. Flannel works well for nursery quilts, although it may create slightly more bulk in the appliqué layers.
How much backing fabric is required?
Approximately 2¾ yards of standard-width quilting fabric.
Should I blanket stitch or quilt around the appliqué?
Either method works well. Blanket stitching creates a traditional handcrafted appearance similar to the quilt shown in the photos, while quilting around the appliqué edges produces a cleaner finish with fewer visible decorative stitches.
Can I sell quilts made from this pattern?
Individual handmade quilts are commonly sold at local markets and craft events. Avoid copying another designer's branding, artwork, photography, or proprietary pattern materials. Personal fabric selections and quilting choices help create a finished quilt that reflects your own work.
If you're building an entire woodland-themed nursery, continue with these woodland nursery decorating ideas, explore additional baby quilt patterns, or browse these baby boy nursery themes for coordinating room ideas.
This deer baby quilt pattern was intentionally designed to balance appearance and practicality. The larger template pieces keep cutting manageable, the appliqué remains recognizable from across the room, and the finished quilt can continue serving a purpose long after the nursery furniture has changed.
When you click on links to various merchants on this site and make a purchase, this may result in this site earning a commission. This does not affect the price you pay.

UBGI Gold Standard 2026
Reviewed under the site's
editorial checklist.
Photos, decorating ideas, party setups and reader submissions are shared for inspiration unless a page is specifically presented as a pattern, tutorial, reference guide or step-by-step project. Follow the instructions, measurements, safety guidance and manufacturer directions provided for the particular project or product.
About Jan | Contact | Baby Nursery Ideas (Blog) | Site Map | Privacy Policy | Disclosure Policy | Disclaimer | Affiliate Disclosure | Earnings Disclosure | Facebook | Pinterest
I am a participant in the Amazon Services LLC Associates Program, an affiliate advertising program designed to provide a means for us to earn fees by linking to Amazon. As an Amazon Associate I earn from qualifying purchases.
Copyright © 2006-2026. All Rights Reserved.