Free Crochet Monkey Baby Mobile Pattern for a Jungle Nursery
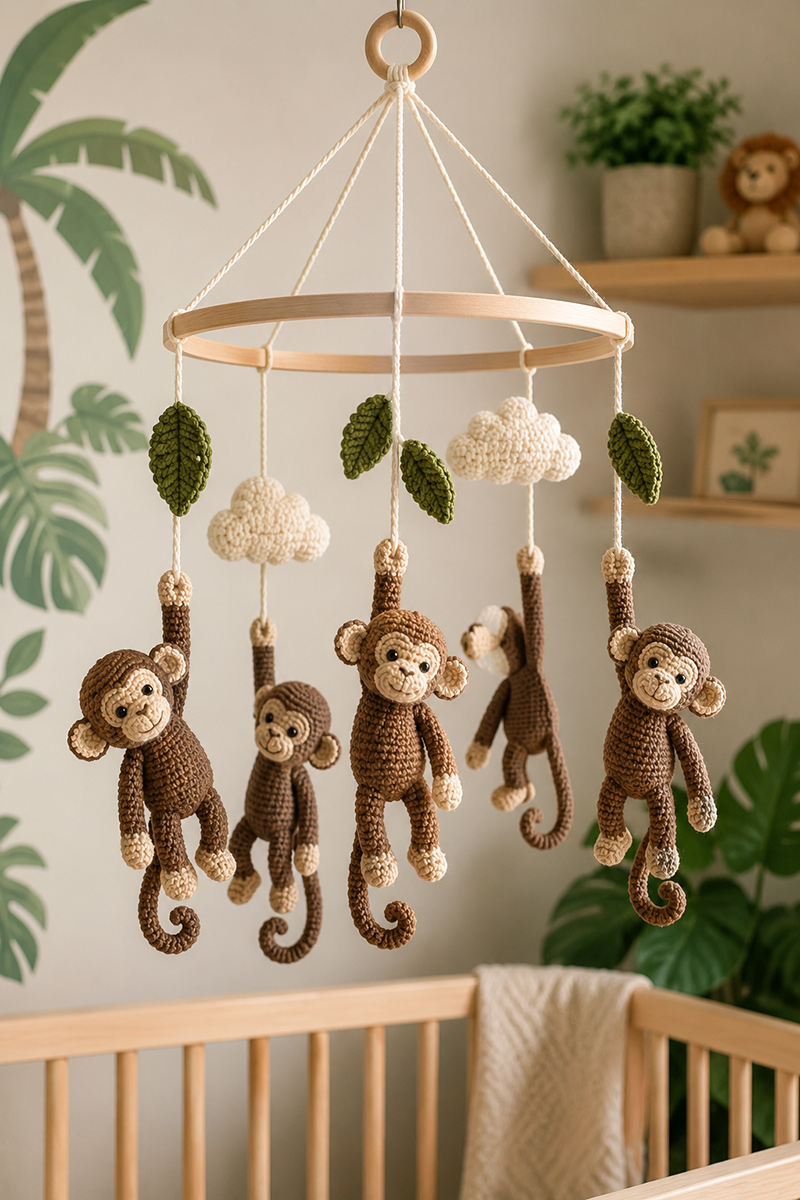
A crochet monkey baby mobile is a cute way to add handmade jungle nursery decor without making a full stuffed toy. This free monkey mobile pattern uses lightweight crochet monkey pieces, simple hanging cords and a nursery-safe display approach for a crib wall, changing area or reading corner.
A heavy stuffed toy does not work well for a mobile. A monkey crocheted for hanging nursery decor needs to be light, balanced and easy to secure, so this version stays flatter than a lovey or plush animal.
By Jan Bay
More handmade nursery ideas:
Free Baby Crochet Patterns Crochet Animal Appliqués Crochet Animal Loveys Jungle Nursery Ideas Safari Nursery Ideas
DIY Monkey Baby Mobile Supplies:
Crochet Monkey Mobile Pattern
This crochet monkey mobile pattern uses a flat, lightly stuffed monkey that is easier to hang than a round amigurumi toy. The shape is slim on purpose so the monkey stays lightweight, balances well on the mobile hoop and still has enough dimension to look handmade rather than flat paper décor.
For a monkey motif that is meant to be sewn onto another project instead of suspended from a hoop, use my crochet monkey applique pattern with its flat layered body and curled tail.
Quick answer: Make four lightweight crochet monkeys, attach each one to a 10-inch wooden mobile hoop with strong cotton cord, and hang the finished mobile where it stays completely out of a baby's reach.
Finished Monkey Size
- Finished monkey height: about 7 inches from hanging loop to feet
- Body style: flat, lightly stuffed panels
- Best mobile size: four monkeys on a 10-inch wooden hoop
- Skill level: advanced beginner
- Face: embroidered features
- Use: decorative nursery mobile only
Materials for One Monkey
- Worsted weight cotton yarn in medium brown
- Small amount of tan yarn
- Dark brown embroidery thread or yarn
- 4.0 mm crochet hook
- Yarn needle
- Stitch marker
- Small amount of fiberfill
- Scissors
Monkey Body Panels (Make 2)
Use medium brown yarn.
Ch 8.
Row 1: Sc in 2nd ch from hook and in each remaining ch. Ch 1, turn. (7 sts)
Row 2: Inc in first st, sc across to last st, inc in last st. Ch 1, turn. (9 sts)
Rows 3 and 4: Sc across. Ch 1, turn. (9 sts)
Row 5: Inc in first st, sc across to last st, inc in last st. Ch 1, turn. (11 sts)
Rows 6 through 10: Sc across. Ch 1, turn. (11 sts)
Row 11: Dec, sc across to last 2 sts, dec. Ch 1, turn. (9 sts)
Rows 12 and 13: Sc across. Ch 1, turn. (9 sts)
Row 14: Inc in first st, sc across to last st, inc in last st. Ch 1, turn. (11 sts)
Row 15: Inc in first st, sc across to last st, inc in last st. Ch 1, turn. (13 sts)
Rows 16 through 23: Sc across. Ch 1, turn. (13 sts)
Row 24: Dec, sc across to last 2 sts, dec. Ch 1, turn. (11 sts)
Row 25: Dec, sc across to last 2 sts, dec. Ch 1, turn. (9 sts)
Row 26: Sc across. (9 sts)
Fasten off both panels and weave in ends. The panels will be joined later with single crochet around the edge.
Rows 1 through 13 form the body while Rows 14 through 26 create the rounded head. The narrower body allows the finished monkey to hang naturally without looking bulky on the mobile.
Each completed body panel measures approximately 5¾ inches tall before assembly.
Monkey Arms, Make 2
Use medium brown yarn.
Ch 13.
Row 1: Sc in 2nd ch from hook and in each remaining ch. Ch 1, turn. (12 sts)
Rows 2 through 4: Sc in each st across. Ch 1, turn. (12 sts)
Fasten off and weave in ends.
Each finished arm measures approximately 3¼ inches long. Leave the arms flat so they stay lightweight and can be sandwiched between the two body panels during assembly.
Monkey Legs, Make 2
Use medium brown yarn.
Ch 15.
Row 1: Sc in 2nd ch from hook and in each remaining ch. Ch 1, turn. (14 sts)
Rows 2 through 4: Sc in each st across. Ch 1, turn. (14 sts)
Fasten off and weave in ends.
Each finished leg measures approximately 3¾ inches long. Leave the legs flat so the finished monkey hangs neatly from the mobile without extra bulk.
Hanging Loop
Use a doubled strand of strong cotton yarn approximately 10 inches long.
Fold it in half to form a loop about 2 inches long. Position the raw ends between the two body panels at the top center of the head before joining the monkey.
Secure the loop firmly as the body panels are joined so it becomes permanently enclosed inside the finished monkey.
After assembly, gently pull on the loop to confirm it is securely anchored before attaching the monkey to the mobile.
Monkey Ears, Make 4
Use medium brown yarn for the outer ears.
Ch 5.
Row 1: Sc in 2nd ch from hook and in each remaining ch. Ch 1, turn. (4 sts)
Row 2: Inc in first st, sc in next 2 sts, inc in last st. Ch 1, turn. (6 sts)
Row 3: Sc across. Ch 1, turn. (6 sts)
Row 4: Dec, sc in next 2 sts, dec. (4 sts)
Fasten off, leaving a sewing tail.
Inner Ear Patches, Make 2
Use tan yarn.
Ch 4.
Row 1: Sc in 2nd ch from hook and in each remaining ch. Ch 1, turn. (3 sts)
Row 2: Inc in first st, sc in next st, inc in last st. (5 sts)
Fasten off, leaving a sewing tail. Sew one tan patch to each front ear before attaching the ears to the monkey.
Monkey Muzzle, Make 1
Use tan yarn.
Round 1: Ch 5. Sc in 2nd ch from hook, sc in next 2 ch, 3 sc in last ch. Working along the opposite side of the foundation chain, sc in next 2 ch, 2 sc in last ch. Join with sl st. (10 sts)
Round 2: Ch 1. Inc in first st, sc in next 3 sts, inc in each of the next 2 sts, sc in next 3 sts, inc in last st. Join with sl st. (14 sts)
Round 3: Ch 1. Sc in each st around. Join with sl st and fasten off, leaving a long sewing tail. (14 sts)
Monkey Tail, Make 1
Use medium brown yarn.
Ch 21.
Row 1: Work 2 sc in the 2nd ch from hook and 2 sc in each remaining chain across. (40 sts)
Fasten off, leaving a sewing tail. The tail should curl naturally. Wrap it gently around a crochet hook before assembly if the curl needs shaping.
Assemble the Monkey
Lay the two body panels together with the wrong sides facing. Check that all edges align evenly before attaching the remaining pieces.
Position one arm on each side of the upper body at the shoulder, with the top edge of each arm centered across Rows 13 and 14. Insert approximately ½ inch of each arm between the two body panels.
Position one leg near each lower corner of the body, inserting approximately ½ inch of each leg between the body panels. Space the legs evenly so they hang straight below the body.
Insert the curled tail between the two body panels on one side of the lower body between Rows 4 and 5, positioning the tail about one stitch in from the outer edge.
Place the hanging loop between the two body panels at the top center of the head so only the loop extends above the finished monkey.
Position one ear on each side of the front head panel, with the top of each ear centered around Rows 19 and 20. Sew the two remaining ears to the back head panel in the same positions so the front and back edges line up before joining.
Join medium brown yarn near the lower left side of the body. Working through both body panels only, single crochet evenly around the entire monkey, securing the arms, legs, tail and hanging loop as you crochet.
Work 2 sc in each outside corner of the body and both upper head corners to help maintain smooth curves.
Leave an opening of approximately 2 inches along one side of the body. Add a small amount of fiberfill, placing a small amount in the body and slightly more in the head so the face keeps its rounded shape while the body remains lightweight.
Finish crocheting around the remaining opening. Join with a slip stitch, fasten off and weave in all yarn ends securely.
Gently shape the head and body with your hands so the stuffing is distributed evenly and the monkey hangs straight when suspended.
Attach the Muzzle and Embroider the Face
Center the muzzle on the lower head with the top edge sitting around Row 20. Sew it securely around the outside edge. Embroider two small eyes on Row 19, about 5 stitches apart, then add a small nose, one short vertical stitch and a gentle curved smile.
The finished monkey measures approximately 7 inches tall from the top of the hanging loop to the bottom of the feet and remains lightweight enough to hang freely from the mobile without twisting.
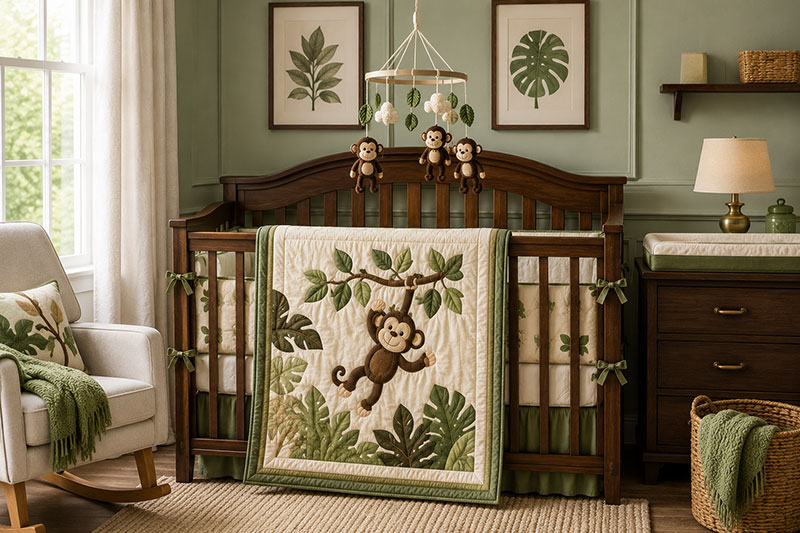
A coordinated monkey crib bedding set paired with a matching crochet monkey baby mobile creates a polished focal point for a jungle nursery.
The mistake I would avoid is making the monkeys too bulky. Four smaller monkeys usually look better than two oversized ones because the hoop stays balanced and the mobile has movement without looking crowded.
Assemble the Monkey Baby Mobile
After completing all of the monkeys, attach them to a smooth wooden mobile hoop using strong cotton cord. Space the monkeys evenly around the hoop so the finished mobile hangs level and each monkey can move freely without touching the others.
Finished mobile size: A 10-inch wooden hoop works well for four monkeys and creates a finished mobile approximately 20 inches tall from the hanging ring to the bottom of the monkeys.
Materials for the Mobile Assembly
- 10-inch wooden mobile hoop
- 4 completed crochet monkeys
- Strong cotton cord or crochet thread
- Yarn needle
- Scissors
- Wooden hanging ring, optional
Attach the Monkeys
Cut four pieces of cotton cord approximately 10 to 12 inches long.
Thread one cord through the hanging loop on each monkey and knot securely.
Tie the opposite end of each cord evenly around the wooden hoop. Adjust the knot positions until the monkeys are spaced equally around the hoop.
Trim the excess cord after the spacing is finalized.
Add the Top Suspension Cords
Cut four additional pieces of cotton cord approximately 14 inches long.
Tie one cord at each quarter point around the hoop.
Bring the four cords together above the center of the hoop and tie them securely into a single overhand knot.
If desired, thread the cords through a wooden hanging ring before tying the final knot.
Check that the hoop hangs level. Adjust individual cords if necessary until the mobile balances evenly.
Optional Decorations
Small crochet leaves, clouds or stars made from lightweight yarn can be tied between the monkeys for additional visual interest without making the mobile too heavy.
Colorful bird accents can also fit in a jungle or safari mobile, and my bird mobile ideas demonstrate another way to use lightweight hanging nursery pieces without overpowering the main monkey theme.
Avoid adding heavy embellishments that could cause the mobile to become unbalanced.
Nursery Safety
I like to position nursery mobiles near a changing area, reading chair or empty wall space, not low over the crib mattress. That gives you the handmade focal point without putting dangling pieces where a baby can pull on them.
For United States nursery product safety guidance, review the U.S. Consumer Product Safety Commission crib safety information before placing any decorative item near a baby's sleep space.
This crochet monkey baby mobile is intended for decorative use only.
Install the mobile well above and out of a baby's reach. Never position it where a child can grab, pull or become entangled in the hanging pieces or cords.
Hang the finished mobile securely from a ceiling hook or a nursery mobile arm so it remains completely out of a baby's reach. Remove the mobile once a child begins pushing up on hands and knees or can reach hanging objects.
Before displaying the mobile, check that every knot, hanging loop and sewn component is firmly secured.
Periodically inspect the mobile for loose yarn, stretched cords or worn attachment points and repair them before continued use.
Troubleshooting
My monkey twists while hanging.
Check that the hanging loop is centered at the top of the head and that the stuffing is distributed evenly inside both body panels.
The arms or legs pull out during assembly.
Insert each arm and leg at least ½ inch between the two body panels and crochet through all layers when joining the edge.
The mobile will not hang level.
Slide the cords around the wooden hoop until the weight is balanced. Small adjustments usually level the mobile without shortening any cords.
The head looks too flat.
Add a small amount of extra fiberfill to the upper head before closing the final opening. Avoid overstuffing the body.
The tail will not curl.
Wrap the finished tail loosely around a crochet hook or your finger before attaching it. The curl should hold its shape naturally.
My body panels do not match exactly.
Count the stitches after every increase and decrease row. Lightly blocking the completed panels before assembly can also help the edges line up.
Frequently Asked Questions
How many monkeys should I use on a monkey baby mobile?
Four monkeys create a balanced mobile on a 10-inch hoop, but three or five monkeys also work well depending on the overall design and any additional crochet decorations you add.
Can I use acrylic yarn instead of cotton?
Yes. Cotton yarn holds its shape slightly better, while acrylic yarn creates a softer finished monkey. Either works for decorative nursery mobiles.
Do the monkeys need to be heavily stuffed?
No. Add only enough fiberfill to gently round the head and body. Keeping each monkey lightweight allows the mobile to hang and move more naturally.
Can I make the monkeys in different colors?
Absolutely. Traditional brown monkeys work well for jungle nurseries, while gray, cream or soft neutral shades create a modern safari look.
Can this pattern be used for something besides a mobile?
Yes. Individual monkeys can be used as nursery garlands, wall hangings, gift toppers, seasonal decorations or ornaments by shortening the hanging loop.
Is this baby mobile safe above a crib?
This mobile is intended as nursery décor only. Always hang it completely out of a baby's reach and remove it once a child begins pushing up or can reach hanging objects.


When you click on links to various merchants on this site and make a purchase, this may result in this site earning a commission. This does not affect the price you pay.

UBGI Gold Standard 2026
Reviewed under the site's
editorial checklist.
About Jan | Contact | Baby Nursery Ideas (Blog) | Site Map | Privacy Policy | Disclosure Policy | Disclaimer | Affiliate Disclosure | Earnings Disclosure | Facebook | Pinterest
I am a participant in the Amazon Services LLC Associates Program, an affiliate advertising program designed to provide a means for us to earn fees by linking to Amazon. As an Amazon Associate I earn from qualifying purchases.
Copyright © 2006-2026. All Rights Reserved.