Free Printable Butterfly Stencil Pattern
By Jan Bay
This free printable butterfly stencil pattern gives you one original design in three sizes for crafts, painted signs, furniture, wall accents and other DIY projects. The stencil uses connected white bridges and veins between the black cutout areas, so the decorative wing details stay attached to the surrounding stencil sheet while you cut.
Explore More Printable Stencils
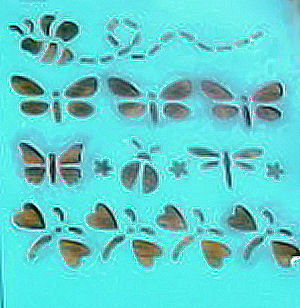
Reusable Stencil Sheets for Craft and Wall Projects
Free Printable Butterfly Stencil Pattern
The printable includes the same original butterfly design in three sizes, so you can choose the version that fits the project instead of trying to enlarge one tiny pattern after printing. Cut out the black areas and keep the white bridges and veins. Those white sections stay connected to the surrounding stencil sheet, so there are no loose interior islands to save or reposition.
Download the Free Butterfly Stencil
Printable Butterfly Stencil PDF
Includes small, medium and large butterfly patterns on three US-letter pages, with a 1-inch calibration square on each page.
Pattern note: This printable was created for this page. The dimensions below are the dimensions built into the files rather than measurements taken from a finished stencil.
Butterfly Stencil Sizes
- Small: approximately 3.5 inches wide × 2.19 inches high. A useful size for cards, small signs, boxes and craft projects.
- Medium: approximately 5.5 inches wide × 3.43 inches high. Try this size on a larger sign, storage box or furniture panel.
- Large: approximately 7.5 inches wide × 4.68 inches high. This size works better when the butterfly needs to read clearly from farther away.
For the PDF, choose Actual Size or 100% in the print settings. Do not use “Fit to Page” if you want the stated dimensions. Measure the 1-inch calibration square before cutting the stencil material. If that square does not measure exactly 1 inch, check the printer scaling and print again.
How to Make the Butterfly Stencil
You can use reusable stencil film when you want to paint the butterfly more than once. Heavy cardstock can work for a simple one-time craft, but it will not hold up as well once paint begins to soften the paper.
- Print the small, medium or large butterfly at 100%.
- Measure the 1-inch calibration square before using the pattern.
- Place the printed butterfly underneath clear stencil film or transfer the design to your stencil material.
- Secure the pattern so it cannot shift while you trace or cut.
- On a protected cutting surface, carefully cut away every area shown in black on the printable.
- Leave every white bridge and vein in place. These narrow white sections connect the decorative wing details to the surrounding stencil sheet.
- Work one opening at a time and check that the white bridges remain attached as you cut.
- Lay the finished stencil flat on the project before adding paint and make sure the cut openings and connecting bridges are intact.
How to Keep Stencil Paint From Bleeding
The easiest mistake to make is using too much paint. After loading a stencil brush or foam applicator, blot most of the paint onto scrap paper first. The applicator should feel almost dry before it touches the project. I can't stress this enough. Too much paint will not get the job done faster or better.
- Keep the stencil flat so paint cannot work underneath a lifted edge.
- Use low-tack tape or another surface-appropriate method to keep the stencil from shifting.
- Build the color with several light passes instead of one wet coat.
- Work from the stencil edge toward the open area rather than pushing wet paint underneath the edge.
- Test the paint and stencil on scrap material before working on the finished project.
- Lift the stencil straight away from the surface instead of sliding it across fresh paint.
If one pass looks a little pale, leave it alone for a moment and add another light pass. A wet brush may cover faster, but it also makes fuzzy stencil edges much more likely.
Ways to Use the Butterfly Stencil
The medium size is where I would start if I were unsure. It is large enough for the butterfly shape to read clearly, but it still fits many signs, boxes and furniture projects without taking over the whole surface.
- Wood signs: Use one butterfly as the main motif or repeat it with plenty of space between shapes.
- Storage boxes: Add a butterfly to the lid or front panel rather than covering every side.
- Furniture: Try one or two butterflies on a drawer front, small cabinet door or painted panel.
- Fabric projects: Transfer the outline or use the stencil with paint made for the fabric you are using.
- Embroidery or quilting: Use the printed outline as a transfer shape instead of cutting it into stencil film.
- Walls: Enlarge or repeat the butterfly for a small accent area rather than automatically filling an entire room.
If you are planning a larger painted wall project, my wall stenciling guide is the better place for general wall technique. This page stays focused on the butterfly pattern itself.
Pair the Butterfly With Other Stencil Shapes
A butterfly works naturally with a few other simple nature shapes, but I would keep the group restrained so the design does not become busy. Try it with a flower stencil or a leaf stencil for a garden-style project.
For all of the stencil designs in this collection, go back to my free printable stencil patterns.


When you click on links to various merchants on this site and make a purchase, this may result in this site earning a commission. This does not affect the price you pay.

UBGI Gold Standard 2026
Reviewed under the site's
editorial checklist.
About Jan | Contact | Baby Nursery Ideas (Blog) | Site Map | Privacy Policy | Disclosure Policy | Disclaimer | Affiliate Disclosure | Earnings Disclosure | Facebook | Pinterest
I am a participant in the Amazon Services LLC Associates Program, an affiliate advertising program designed to provide a means for us to earn fees by linking to Amazon. As an Amazon Associate I earn from qualifying purchases.
Copyright © 2006-2026. All Rights Reserved.