Free Crochet Duck Pattern for an Easy Plush Duck
By Jan Bay
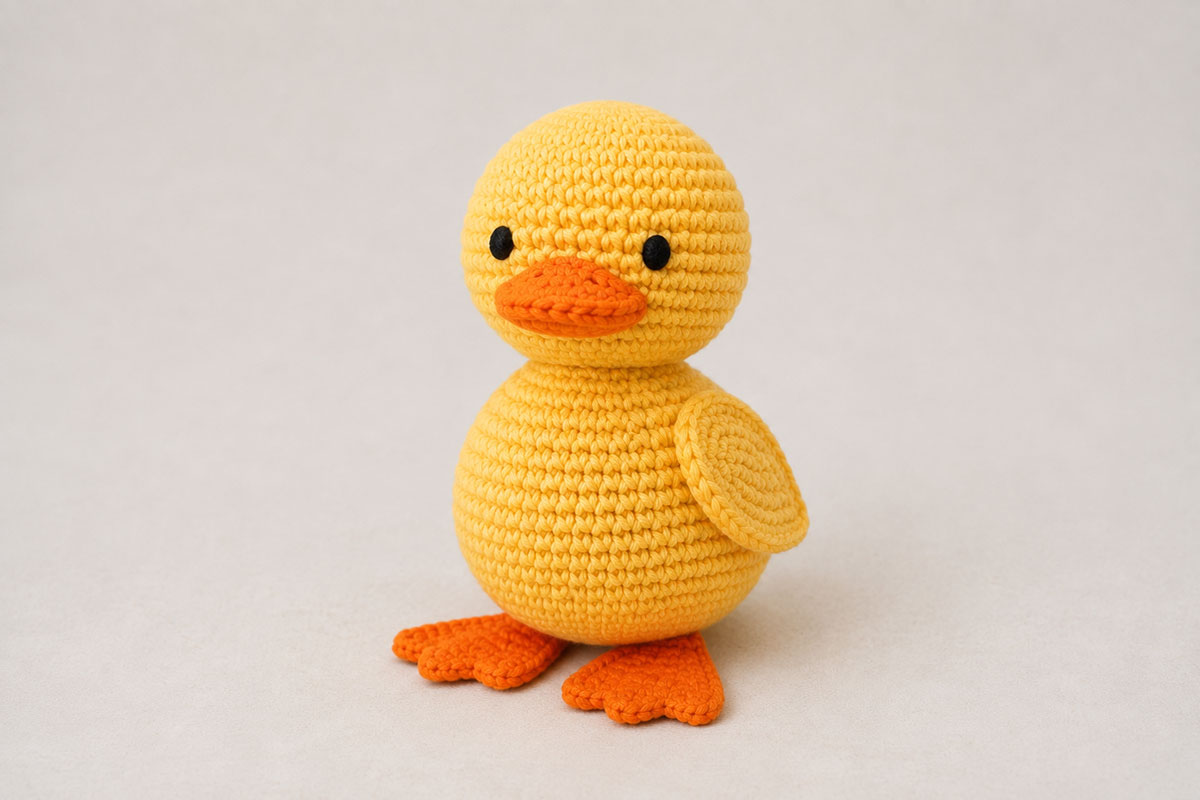
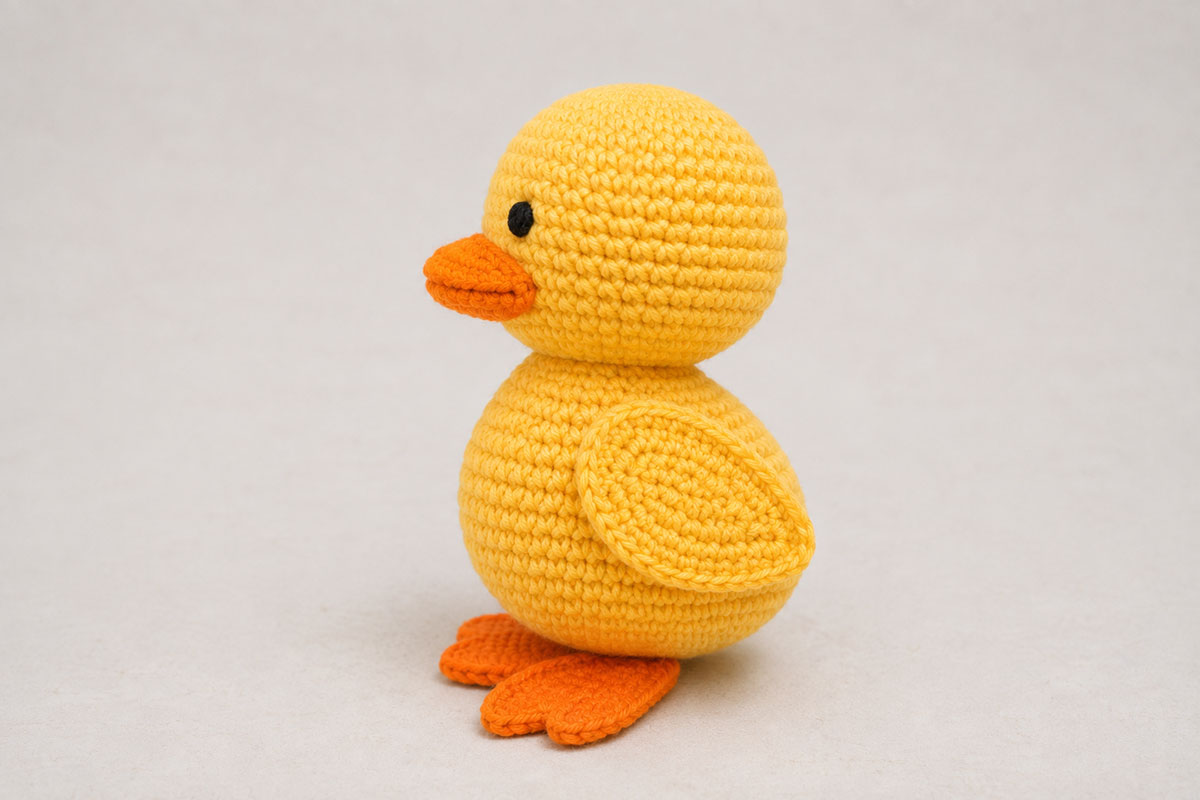
This free crochet duck pattern makes a soft freestanding yellow duck with a rounded body, gently shaped head, flat wings, orange bill, webbed feet and embroidered eyes. I designed the pieces to work together as one complete duck crochet pattern, so you can follow the shaping, assembly and finishing from start to finish without having to guess how the proportions are supposed to fit.
Explore More Free Crochet Baby Patterns
Crochet Duck Baby Blanket Pattern
Free Crochet Mallard Duck Pattern
See Crochet Yarn and Supplies for This Duck Pattern
Materials, Finished Size and Construction Notes
This duck is made with smooth worsted-weight yarn and a smaller hook than you might use for a blanket or garment. The tighter fabric helps the rounded body and head hold their shape and keeps the stuffing from showing between stitches. I prefer a smooth yarn for a project like this because it also makes the increases, decreases and assembly stitches easier to see.
Skill level: Confident beginner
Quick note: This is a confident beginner crochet duck pattern, not a first-time crochet project.
Finished size: Approximately 8 to 9 inches tall from the top of the head to the bottom of the feet when made to the gauge below. The body is approximately 3 to 3 1/2 inches across at its widest point.
Gauge: Approximately 19 single crochet stitches and 20 rounds = 4 inches in firm single crochet. Exact gauge is less important than making a dense fabric that does not show stuffing, but the body and head checkpoints below will help keep the finished duck close to the proportions shown in the main page image.
You will need:
- #4 worsted-weight yellow yarn, approximately 100 to 120 yards
- #4 worsted-weight orange yarn, approximately 20 to 30 yards
- Black embroidery floss for the eyes
- 3.5 mm crochet hook
- Polyester fiberfill, approximately 2 to 3 ounces
- Tapestry needle with a blunt tip
- Stitch marker
- Scissors
- Removable stitch markers or rust-resistant pins for assembly
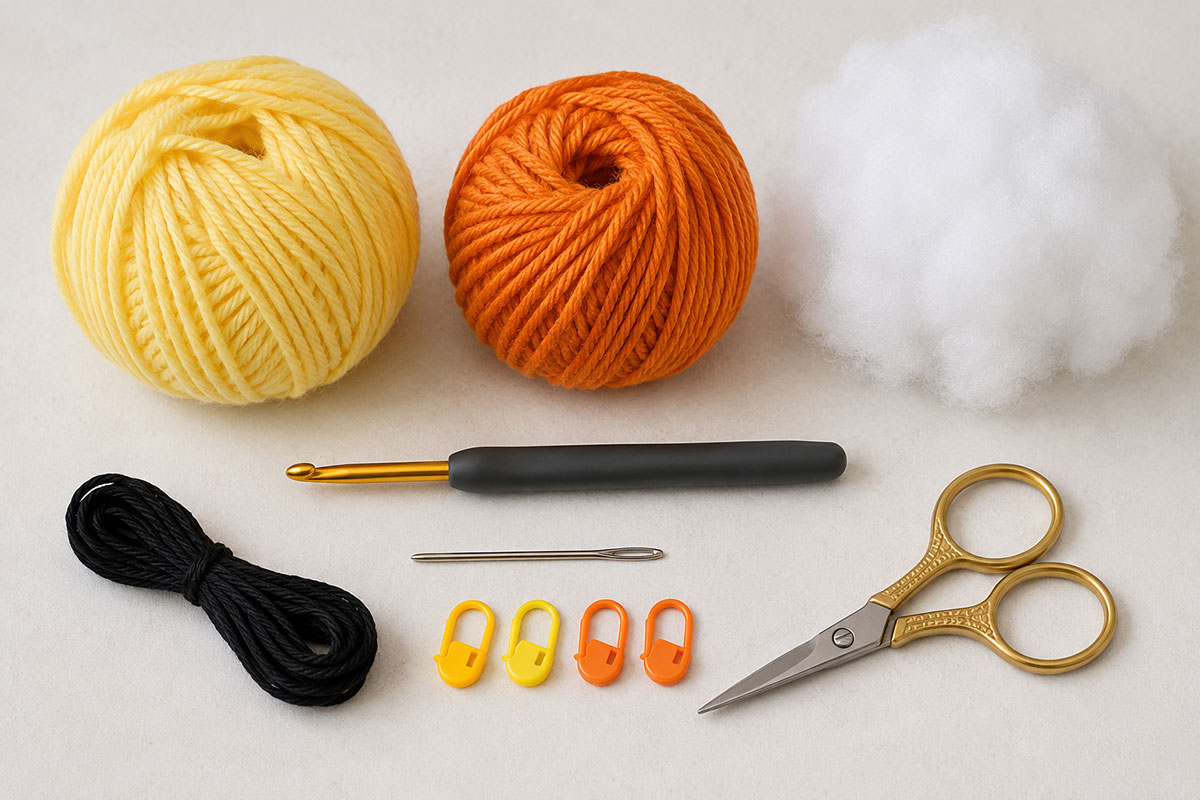
The yellow yarn forms the head, body and wings. Orange is used only for the bill and webbed feet, so you will not need a full skein unless you want extra yarn for another duck.
If you substitute yarn, use the same yarn weight for all of the crocheted pieces. A heavier yarn will make the duck larger and will also change the amount of stuffing you need. A lighter yarn will make a smaller duck.
Keep the stuffing soft enough that the duck still feels like a handmade yarn project. Packing the body until it is hard can spread the stitches, change the proportions and make the rounded bottom more difficult to shape into a stable base.
Finished Size and Pattern Checkpoints
The finished measurements give you useful checkpoints while you crochet. They are not meant to turn an amigurumi project into a measuring contest. Small differences in yarn and tension are normal.
- Body: approximately 4 1/2 to 5 inches tall before the head is attached
- Body width: approximately 3 to 3 1/2 inches at the widest point
- Head: approximately 3 to 3 1/2 inches from crown to neck opening
- Head width: approximately 2 3/4 to 3 1/4 inches
- Bill: approximately 2 to 2 1/2 inches wide
- Wings: approximately 2 1/2 to 3 inches long
- Feet: approximately 2 to 2 1/2 inches from heel to the ends of the toes
The head and body each finish with a 24-stitch opening. Those matching stitch counts are important. They let you join the two pieces stitch for stitch without gathering one side, stretching the other side or creating a crooked neck.
Crochet Abbreviations and Important Pattern Notes
- ch = chain
- sc = single crochet
- hdc = half double crochet
- inc = work 2 single crochet stitches in the same stitch
- dec = invisible single crochet decrease over the next 2 stitches
- sl st = slip stitch
- mr = magic ring
- fo = fasten off
Work the head, body, bill and wings in continuous rounds unless the instructions say otherwise. Do not join at the end of each numbered round. Place a stitch marker in the first stitch and move it up after every round.
For an invisible decrease, insert the hook through the front loop of each of the next 2 stitches. Yarn over and pull through the first 2 loops, then yarn over and pull through the remaining loops. If you prefer a standard single crochet decrease, you can use one, but the decrease line will be more visible.
If you do not use a magic ring, chain 2 and work the 6 beginning single crochet stitches into the second chain from the hook. Whichever method you choose, close the center securely before the piece is stuffed.
After completing the first few rounds of any piece that begins with a magic ring, pull the starting tail firmly. Thread that tail onto the tapestry needle and weave it through several stitches on the inside of the center. Reverse direction through nearby stitches before trimming. Do not depend on the tightened ring alone to hold the center closed.
The right side of the continuous-round pieces faces outward. The wrong side faces the stuffing. On the flat feet, choose the neater side as the visible upper surface before assembly.
Stuff with small pieces of fiberfill instead of pushing one large wad into the body or head. Small additions are easier to distribute and make it much easier to correct a flat area before the seam is closed.
Make both wings before attaching either one. Make both feet before attaching either one. Lay each matching pair side by side and compare the stitch counts, size and shape. Correcting a mismatched piece is much easier before it has been sewn onto the duck.
Free Crochet Duck Pattern for the Rounded Body
The body is worked from the bottom upward in continuous rounds. It increases to 48 stitches through the lower belly, stays full through the middle, then narrows gradually to a 24-stitch neck opening.
Use yellow worsted-weight yarn.
Round 1: Work 6 sc in a mr. You have 6 stitches.
Round 2: Inc in each stitch around. You have 12 stitches.
Round 3: Sc 1, inc in the next stitch. Repeat 6 times. You have 18 stitches.
Round 4: Sc 2, inc in the next stitch. Repeat 6 times. You have 24 stitches.
Round 5: Sc 3, inc in the next stitch. Repeat 6 times. You have 30 stitches.
Round 6: Sc 4, inc in the next stitch. Repeat 6 times. You have 36 stitches.
Round 7: Sc 5, inc in the next stitch. Repeat 6 times. You have 42 stitches.
Round 8: Sc 6, inc in the next stitch. Repeat 6 times. You have 48 stitches.
Rounds 9 through 15: Sc in each stitch around. Keep 48 stitches for 7 rounds.
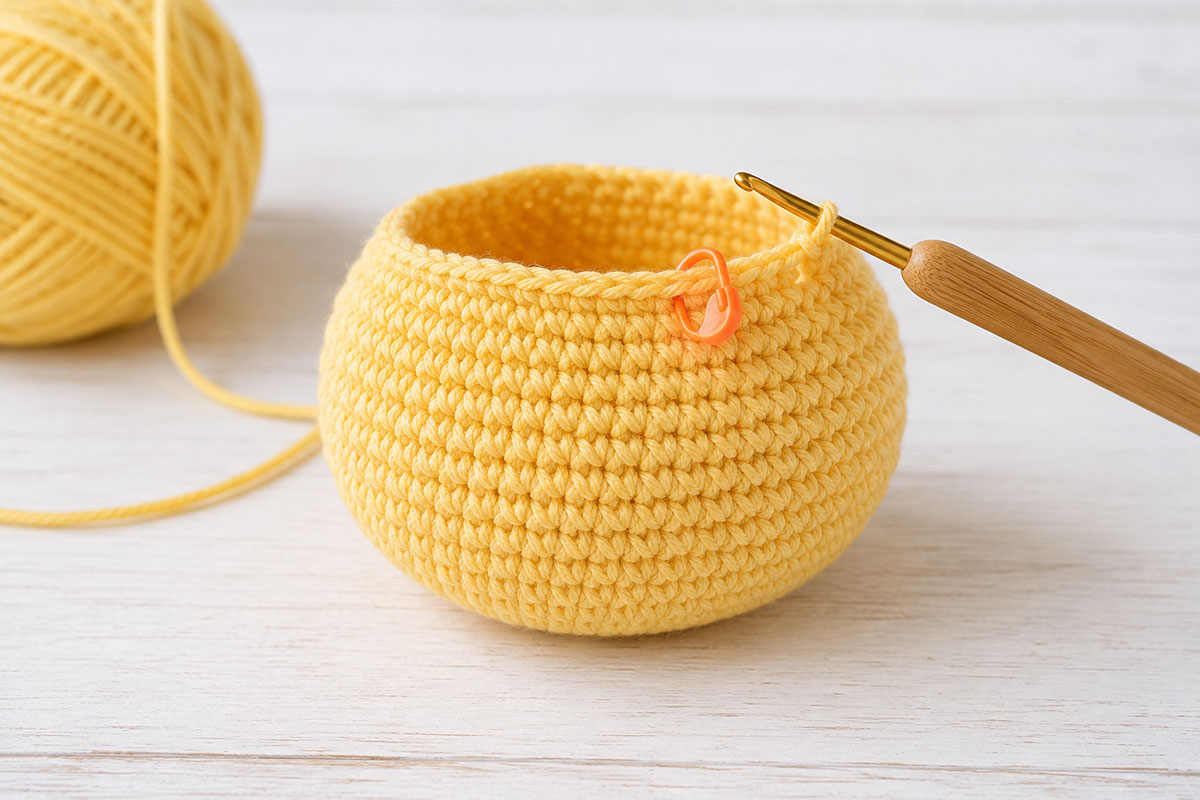
The lower body should now look like a rounded cup rather than a flat circle. Check that Round 15 still has 48 stitches before starting the decreases.
Round 16: Sc 6, dec over the next 2 stitches. Repeat 6 times. You have 42 stitches.
Round 17: Sc in each stitch around. Keep 42 stitches.
Round 18: Sc 5, dec over the next 2 stitches. Repeat 6 times. You have 36 stitches.
Round 19: Sc in each stitch around. Keep 36 stitches.
Round 20: Sc 4, dec over the next 2 stitches. Repeat 6 times. You have 30 stitches.
Round 21: Sc in each stitch around. Keep 30 stitches.
Begin stuffing the lower body. Add small pieces of fiberfill and distribute them around the belly rather than pushing one large piece into the center.
Set the body on a flat surface and press the rounded bottom gently against it. You are making a broad soft base, not a hard crease.
Round 22: Sc 3, dec over the next 2 stitches. Repeat 6 times. You have 24 stitches.
Rounds 23 and 24: Sc in each stitch around. Keep 24 stitches for 2 rounds.
Add enough stuffing to smooth the body, but keep the upper inch slightly softer than the belly so the neck seam will lie flat.
Fasten off with a tail at least 30 inches long. Leave the 24-stitch opening unclosed.
Body checkpoint: The body should measure approximately 4 1/2 to 5 inches tall and about 3 to 3 1/2 inches across at its widest point. Count the neck opening again. It must contain 24 stitches.
Crochet the Rounded Duck Head
Work the head from the crown downward with yellow yarn. It reaches 42 stitches at its widest point, which keeps it slightly smaller than the 48-stitch body.
Round 1: Work 6 sc in a mr. You have 6 stitches.
Round 2: Inc in each stitch around. You have 12 stitches.
Round 3: Sc 1, inc in the next stitch. Repeat 6 times. You have 18 stitches.
Round 4: Sc 2, inc in the next stitch. Repeat 6 times. You have 24 stitches.
Round 5: Sc 3, inc in the next stitch. Repeat 6 times. You have 30 stitches.
Round 6: Sc 4, inc in the next stitch. Repeat 6 times. You have 36 stitches.
Round 7: Sc 5, inc in the next stitch. Repeat 6 times. You have 42 stitches.
Rounds 8 through 12: Sc in each stitch around. Keep 42 stitches for 5 rounds.
Round 13: Sc 5, dec over the next 2 stitches. Repeat 6 times. You have 36 stitches.
Round 14: Sc in each stitch around. Keep 36 stitches.
Round 15: Sc 4, dec over the next 2 stitches. Repeat 6 times. You have 30 stitches.
Round 16: Sc 3, dec over the next 2 stitches. Repeat 6 times. You have 24 stitches.
Rounds 17 and 18: Sc in each stitch around. Keep 24 stitches for 2 rounds.
Fasten off with a tail at least 30 inches long. Leave the neck opening unclosed.
Stuff the crown first and work downward. Keep the head rounded from front to back and use slightly less stuffing directly behind the face.
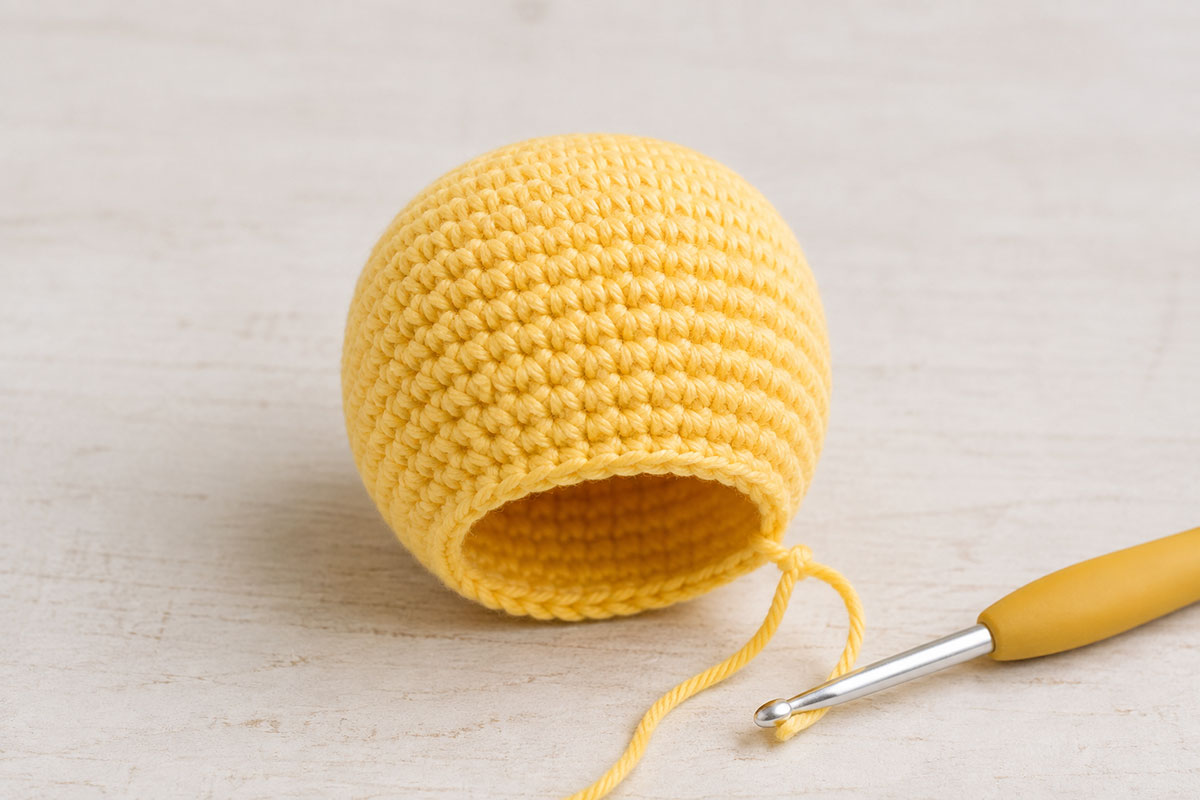
Head checkpoint: The neck opening must contain 24 stitches. Set the head above the body without sewing. The two openings should meet without stretching either piece.
Crochet the Shaped Orange Duck Bill
The bill is made as a shallow oval and flattened. Do not stuff it like a muzzle.
Use orange worsted-weight yarn.
Chain 7.
Round 1: Starting in the second chain from the hook, sc in the next 5 chains. Work 3 sc in the last chain. Continue along the unused loops on the opposite side of the foundation chain. Sc in the next 4 chains, then work 2 sc in the final chain. You have 14 stitches.
Round 2: Inc in the first stitch, sc in the next 4 stitches, inc in each of the next 3 stitches, sc in the next 4 stitches, then inc in each of the final 2 stitches. You have 20 stitches.
Round 3: Sc in each stitch around. Keep 20 stitches.
Fasten off with a tail at least 24 inches long.
Flatten the bill so the original foundation chain runs horizontally through the center. Align the 20-stitch opening as 10 paired stitches.
Whipstitch through both layers of those 10 paired stitches. Keep the remaining tail for attaching the bill to the head.
Bill checkpoint: The finished bill should be wider than it is tall and should remain flexible between your fingers.
Attach the Bill and Embroider the Duck Face
Complete the face while the neck opening is still accessible so all yarn and embroidery ends can be secured inside the head.
Choose the smoothest side of the head for the face and mark its center front.
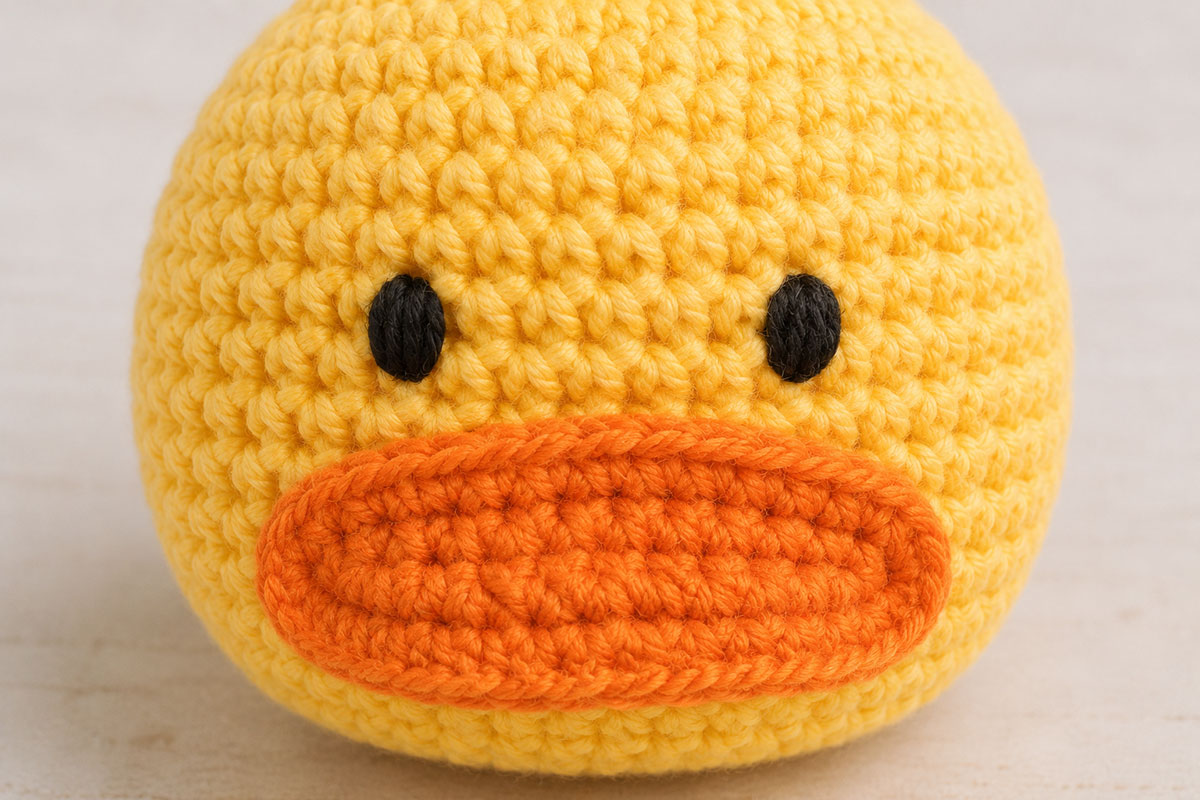
Center the bill across approximately Rounds 11 through 14. Pin the left and right ends first and check the head directly from the front before sewing.
Sew around the outer edge of the bill with small stitches. Pass through the surface stitches of the head without pulling deeply into the stuffing.
The bill does not need stuffing. If it looks completely flat after pinning, a very small wisp of fiberfill can be placed beneath the center before the final inch is closed. Do not make the bill round.
Secure the yarn inside the head and bury the tail.
Use black embroidery floss for the eyes. Do not use buttons, beads or plastic eyes.
Place the eyes approximately between Rounds 9 and 11. Position the inner edges about 5 stitches apart. Mark both positions before embroidering either eye.
Work several close vertical satin stitches over an area approximately 2 stitches wide and 2 rounds tall. Keep the embroidery snug without pulling a dent into the head.
Make the second eye the same approximate size. Secure both floss ends inside the open neck.
Crochet Two Flat Duck Wings
The wings are shallow two-layer ovals. They remain unstuffed so they can rest naturally against the body.
Use yellow worsted-weight yarn.
Chain 10.
Round 1: Starting in the second chain from the hook, sc in the next 8 chains. Work 3 sc in the last chain. Continue along the unused loops on the opposite side. Sc in the next 7 chains, then work 2 sc in the final chain. You have 20 stitches.
Round 2: Inc in the first stitch, sc in the next 7 stitches, inc in each of the next 3 stitches, sc in the next 7 stitches, then inc in each of the final 2 stitches. You have 26 stitches.
Round 3: Sc in each stitch around. Keep 26 stitches.
Fasten off with a tail at least 24 inches long.
Flatten the wing. Align the 26-stitch opening as 13 paired stitches and whipstitch the paired edge closed without gathering it.
Keep the remaining tail for assembly.
Make the second wing exactly the same way.
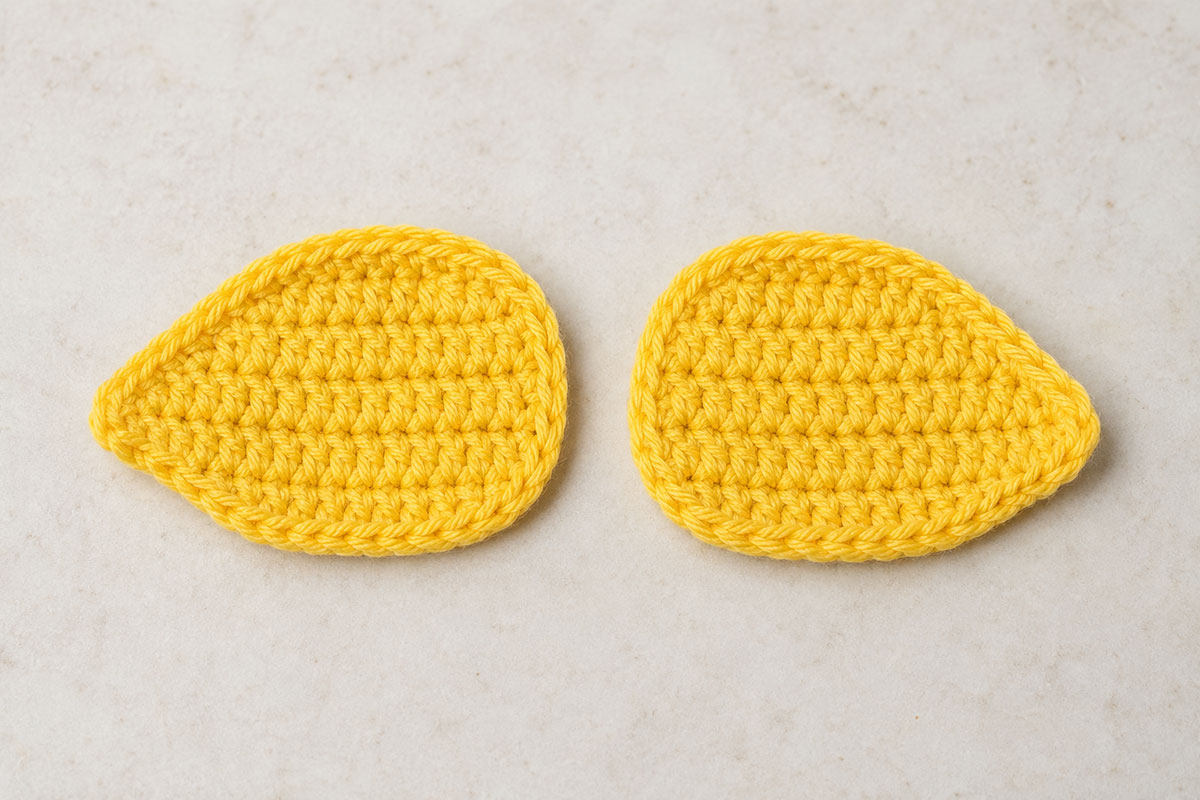
Lay both wings side by side before attaching them. Each should contain 3 rounds and a 13-pair closed edge.
Crochet Two Orange Webbed Feet
The feet are worked flat in rows. Three rounded fan sections form the webbed toe edge.
Use orange worsted-weight yarn.
Leave a starting tail approximately 24 inches long before making the slip knot. This tail will attach the heel to the body.
Chain 6.
Row 1: Starting in the second chain from the hook, sc across. You have 5 stitches.
Chain 1 and turn. The turning chain does not count as a stitch.
Row 2: Inc in the first stitch, sc in the next 3 stitches, inc in the final stitch. You have 7 stitches.
Chain 1 and turn.
Row 3: Inc in the first stitch, sc in the next 5 stitches, inc in the final stitch. You have 9 stitches.
Chain 1 and turn.
Rows 4 through 7: Sc in each stitch across. Keep 9 stitches in each row. Chain 1 and turn after Rows 4 through 6. After Row 7, turn without chaining.
Row 8: Sl st in the first stitch. Work 5 hdc in the next stitch. Sl st in the next stitch. Sc in the next stitch. Work 5 hdc in the next stitch. Sc in the next stitch. Sl st in the next stitch. Work 5 hdc in the next stitch. Sl st in the final stitch.
Fasten off. Weave in the finishing tail but keep the long starting tail at the heel.
Make a second foot the same way.
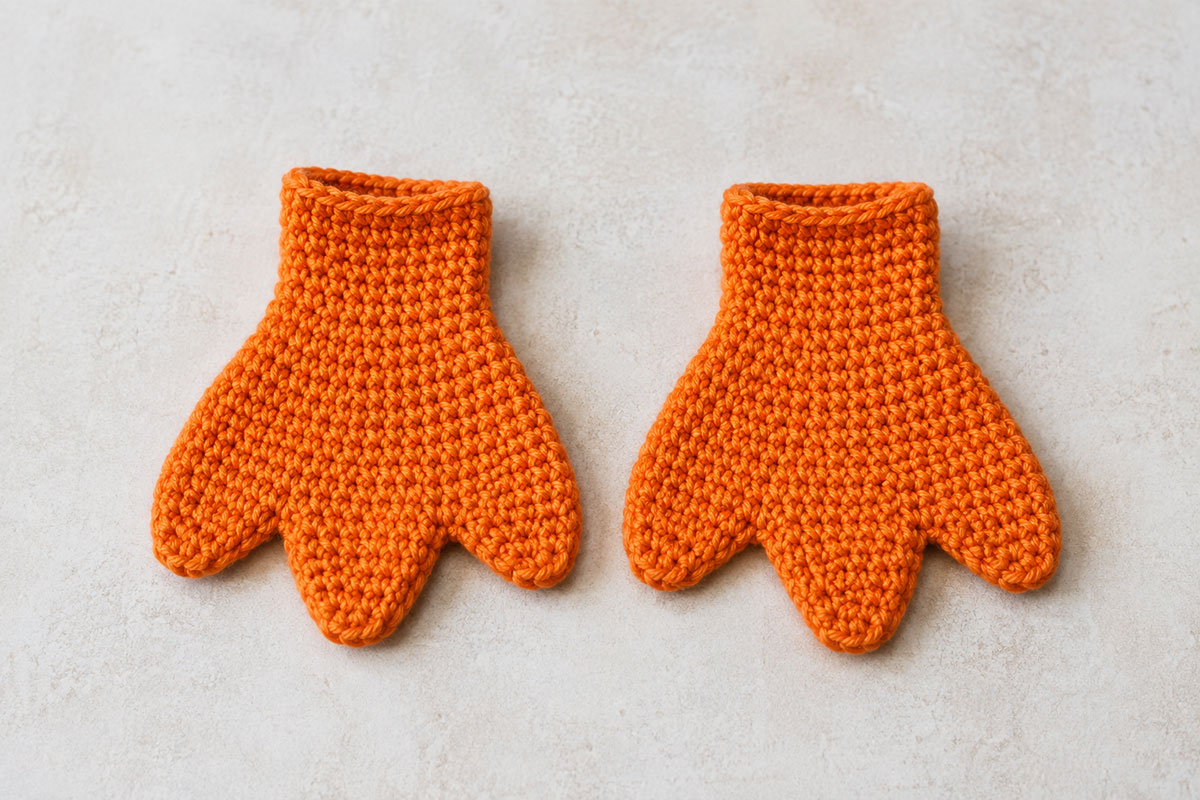
Lay the feet side by side. Each should have 7 straight rows followed by the same three-toe Row 8.
Assemble the Crochet Duck in the Correct Order
Finish all pieces before assembly. You should have one stuffed yellow body, one stuffed yellow head with the bill and eyes completed, two yellow wings and two orange feet.
1. Mark the body. Place a marker at the center front of the 24-stitch neck opening. Count 6 stitches and mark one side. Count 6 more and mark the center back. Count another 6 and mark the opposite side.
Mark the 24-stitch head opening into the same four 6-stitch sections. Use the center of the bill to establish the front.
2. Attach the feet before closing the neck. Place the first heel across approximately Body Rounds 4 through 6 with the toes pointing toward the front.
Place the second foot at the same height. Leave approximately 2 to 3 body stitches between the inner heel edges.
Set the body upright before sewing. The center toe of each foot should point forward.
Use the long starting tail to sew all 5 heel stitches firmly to the lower body. Sew across the heel a second time for reinforcement. Bury the remaining tail through the open neck.
Repeat for the second foot.
3. Join the head and body. Match the front, back and side markers. Each marked section contains 6 stitches on the head and 6 stitches on the body.
Use the long body tail to sew one head stitch to one body stitch all the way around.
After approximately 18 paired stitches are joined, stop and add a small amount of stuffing if either side of the neck feels hollow.
Finish the remaining seam. You should have joined 24 head stitches to 24 body stitches without skipping, gathering or doubling any stitch. Secure the body tail, pass it through the stuffed body and bring it out several inches away. Trim close to the surface so the cut end retracts inside.
Use the head tail for a second reinforcing pass around the neck seam. Keep the tension even so the neck does not gather. Secure the head tail, pass it through the stuffed head or body and bring it out several inches away. Trim close to the surface so the cut end retracts inside.
4. Attach the wings. Place one wing on each side approximately 2 rounds below the neck seam.
Angle each wing slightly backward as it runs down the body. The lower ends should finish at approximately the same height around the widest area of the belly.
Pin both wings before sewing either one.
Sew only the long closed edge of each wing to the body. Leave the rounded outer edge free so the wing can follow the curve of the belly. Secure each wing tail, pass it through the stuffed body and bring it out several inches away. Trim close to the surface so the cut end retracts inside.
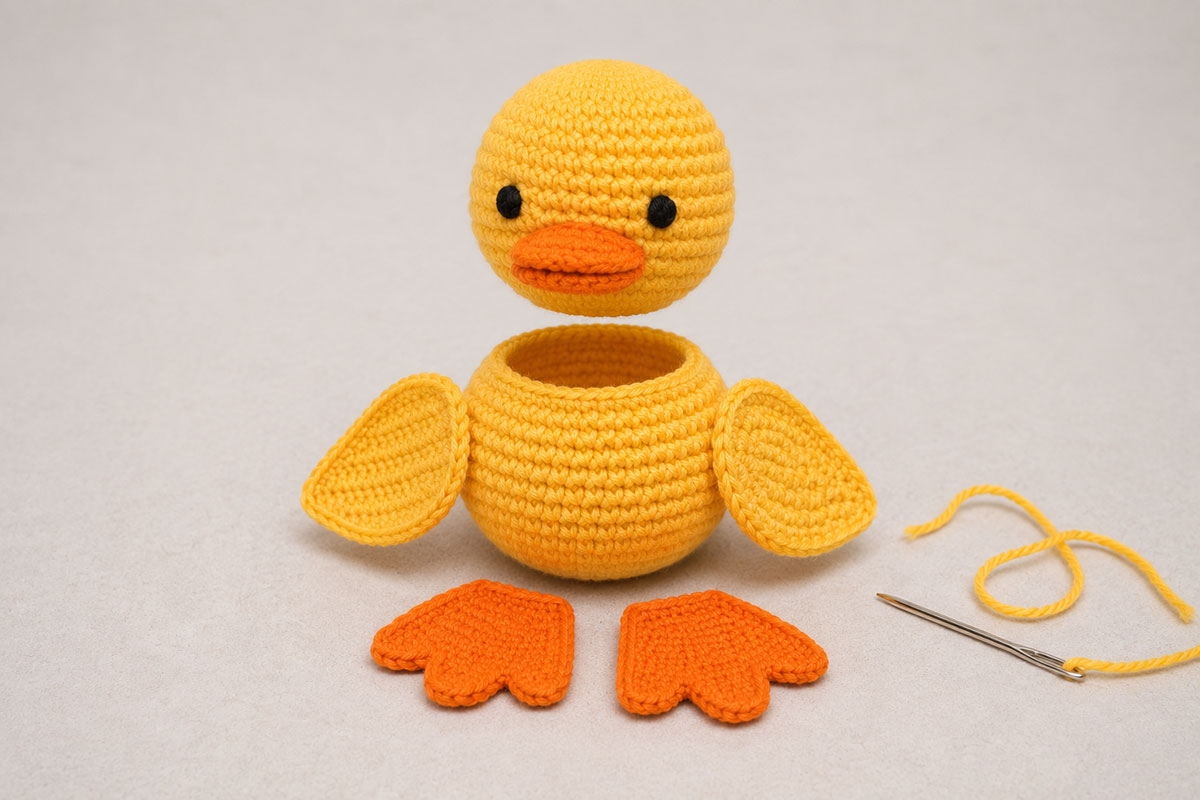
Assembly checkpoint: The center of the bill should line up approximately with the center gap between the feet. Both wings should begin at the same height, and the 24-to-24 neck seam should lie flat.
Shape and Finish the Freestanding Crochet Duck
Set the completed duck on a flat surface before making final adjustments.
Roll the head gently between your palms to smooth the crown. Do not squeeze the embroidered face.
Press the lower body lightly against the surface to restore its broad rounded base.
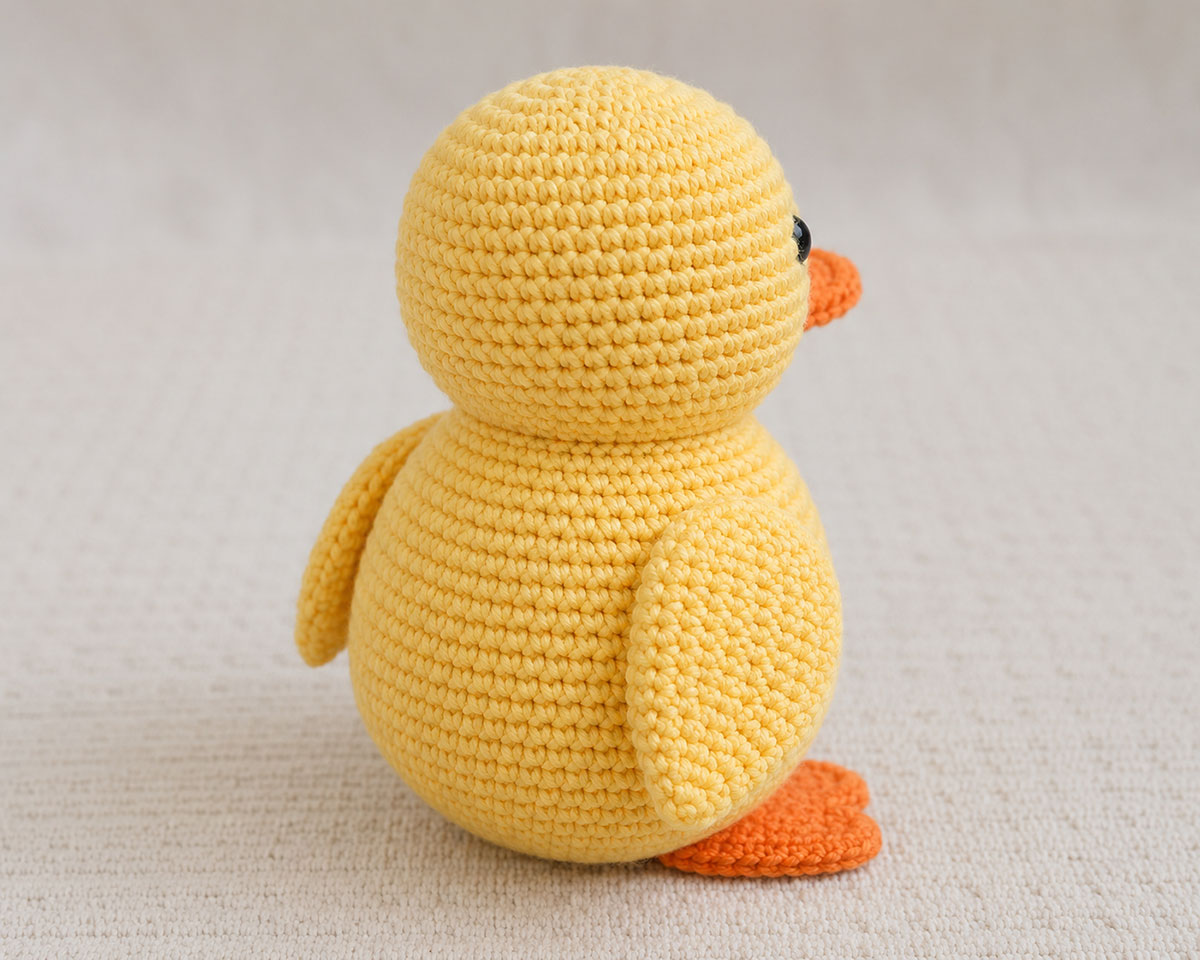
Smooth both wings downward and slightly backward. Their outer edges should remain free.
Arrange the feet so both center toes point toward the front.
Look at the duck directly from the front. The bill should sit level beneath the eyes, and its center should line up approximately with the center of the belly.
Now look from the side. The head should sit over the body rather than leaning far forward. The rounded belly can project slightly in front of the neck.
Run your fingers around the neck seam. Reinforce any spot where the head and body separate when gently moved.
Check both heel attachments and wing seams. The wings can move at their free edges, but the sewn edges should remain firmly attached.
Check the full edge of the bill and both embroidered eyes. There should be no loose loops, exposed knots or visible stuffing.
Remove and account for every pin, clip and stitch marker before the project is finished.
Baby Use and Safety for the Finished Crochet Duck
This pattern uses embroidered eyes and securely sewn crochet pieces instead of buttons, beads or plastic eyes. Check every seam and embroidered feature regularly if the duck will be handled by a child.
No loose or removable decoration belongs on a version made for a baby.
In the United States, the Consumer Product Safety Commission advises keeping toys with small parts away from children younger than age 3 and following age guidance appropriate to the child. See the U.S. Consumer Product Safety Commission toy safety guidance.
Keep this crochet duck out of an infant's crib, bassinet and other sleep space. The National Institutes of Health Safe to Sleep program recommends keeping stuffed toys and other soft objects out of a baby's sleep area. See the Safe to Sleep guidance for an infant sleep environment.
Remove the duck from use if a seam opens, stuffing becomes visible, an embroidered feature loosens or a wing, foot or bill begins to detach.
Free Crochet Duck Pattern FAQ
Can a beginner crochet this duck?
This is best for a confident beginner who already knows single crochet, increases, decreases and basic hand sewing. A first-time crocheter may want to practice those skills before starting the shaped pieces.
Why does the body reach 48 stitches while the head reaches only 42?
The difference gives the duck the rounded belly and slightly smaller head shown in the example image. Making both pieces the same maximum circumference would change the silhouette.
Why do the head and body both finish with 24 stitches?
The matching openings let you sew one head stitch directly to one body stitch. That keeps the neck even instead of gathering or stretching one piece to fit the other.
Does the orange bill need stuffing?
No. The bill is designed as a flattened two-layer oval. Extra stuffing can make it project too far from the face.
Are the duck wings stuffed?
No. Each wing is flattened and sewn closed. The two crocheted layers give it enough body while allowing it to lie close to the side.
How does the crochet duck stand?
The broad lower body provides the main base. The feet extend forward and complete the stance. The project does not use wire, cardboard, plastic canvas or another rigid support.
Can I use plush yarn instead?
You can substitute another yarn, but plush yarn will make the duck larger and can hide stitch placement. Keep the stitch counts unchanged and use a hook that produces dense fabric.
Can I make a smaller duck?
Use lighter yarn and a proportionately smaller hook instead of removing increase rounds from individual pieces. Changing the stitch counts can break the 24-stitch neck join and alter the proportions.
Can I use plastic safety eyes?
This pattern is written for embroidered eyes. Embroidery also produces the same face shown in the example image.
Is this a no-sew crochet duck pattern?
No. This is an amigurumi-style duck with separately made head, bill, wings and feet that are sewn securely to the body. The head and body both finish with 24-stitch openings, so the neck joins one stitch to one stitch without gathering either piece.
Can the crochet duck go in a baby's crib?
No. Keep stuffed toys and other soft objects out of an infant sleep space. Use the duck for supervised awake-time handling, display or as a handmade keepsake instead.
Crochet Duck Pattern Quick Reference
If you set the project aside and come back later, these are the counts worth checking before you continue. They also give you a quick way to catch a missed increase or decrease before the duck is stuffed and assembled.
| Piece | Largest Count | Finished Opening or Shape |
|---|---|---|
| Body | 48 stitches | 24-stitch neck opening |
| Head | 42 stitches | 24-stitch neck opening |
| Bill | 20 stitches | Flatten to 10 paired stitches |
| Each wing | 26 stitches | Flatten to 13 paired stitches |
| Each foot | 9 stitches across | Flat heel with three rounded toe sections |
The 24-stitch neck openings are the count I would check twice. They let the head and body join one stitch to one stitch without gathering either piece.
For placement, center the bill first and use it as the front reference for the rest of the duck. The eyes sit approximately between Head Rounds 9 and 11. The wings begin about 2 rounds below the neck seam. Position the heels around Body Rounds 4 through 6 with approximately 2 to 3 body stitches between their inner edges.
Look at the duck while it is standing before you make the final sewing stitches. Something that looks centered while the body is lying in your hand can look surprisingly different once the belly is upright.
Quick Troubleshooting and Care
If the duck leans forward: Check the stuffing before moving the feet. Massage a little filling away from the front of the head and upper belly, then press the rounded lower body gently against a flat surface again.
If the head tilts: Check the neck seam. Each of the 24 head stitches should match one of the 24 body stitches. Uneven sewing tension can also pull the head toward one side.
If the bill looks bulky: Remove any extra filling beneath it. The flattened two-layer crochet fabric supplies most of the shape it needs.
If a wing sticks out: Make sure only its closed inner edge is attached. The rounded outer edge should remain free so the wing can follow the curve of the body.
If a foot twists sideways: Check the heel attachment rather than pulling on the toes. The heel should run across the lower front of the body while the center toe points forward.
Check the yarn manufacturer's care instructions before washing the completed duck. If washing is permitted, reshape the head, belly, bill, wings and feet while the project is damp and allow it to dry completely.
Save a small amount of the yellow and orange yarn with the yarn names and hook size. That little bit of leftover yarn is much more useful later than trying to match a repair from a photograph.
A handmade duck does not need to come out mathematically identical every time. A slightly different belly or expression is fine. What matters is that the head and body are securely joined, the face is centered, the wings match, and both flat feet point toward the front.
More Crochet Duck Patterns and Related Projects
If you want a larger duck made for cuddling rather than standing, my free crochet duck lovey pattern uses plush yarn, flexible legs and a much softer body.
You can also browse the free crochet bird patterns for other bird shapes and handmade nursery projects.
For flat motifs that can be sewn onto blankets and other projects, continue with my crochet animal appliqué patterns.
And the free baby crochet patterns collection is the main hub for more blankets, loveys, appliqués and nursery projects.
When you click on links to various merchants on this site and make a purchase, this may result in this site earning a commission. This does not affect the price you pay.

UBGI Gold Standard 2026
Reviewed under the site's
editorial checklist.
Photos, decorating ideas, party setups and reader submissions are shared for inspiration unless a page is specifically presented as a pattern, tutorial, reference guide or step-by-step project. Follow the instructions, measurements, safety guidance and manufacturer directions provided for the particular project or product.
About Jan | Contact | Baby Nursery Ideas (Blog) | Site Map | Privacy Policy | Disclosure Policy | Disclaimer | Affiliate Disclosure | Earnings Disclosure | Facebook | Pinterest
I am a participant in the Amazon Services LLC Associates Program, an affiliate advertising program designed to provide a means for us to earn fees by linking to Amazon. As an Amazon Associate I earn from qualifying purchases.
Copyright © 2006-2026. All Rights Reserved.