Free Crochet Bear Rattle Pattern
By Jan Bay
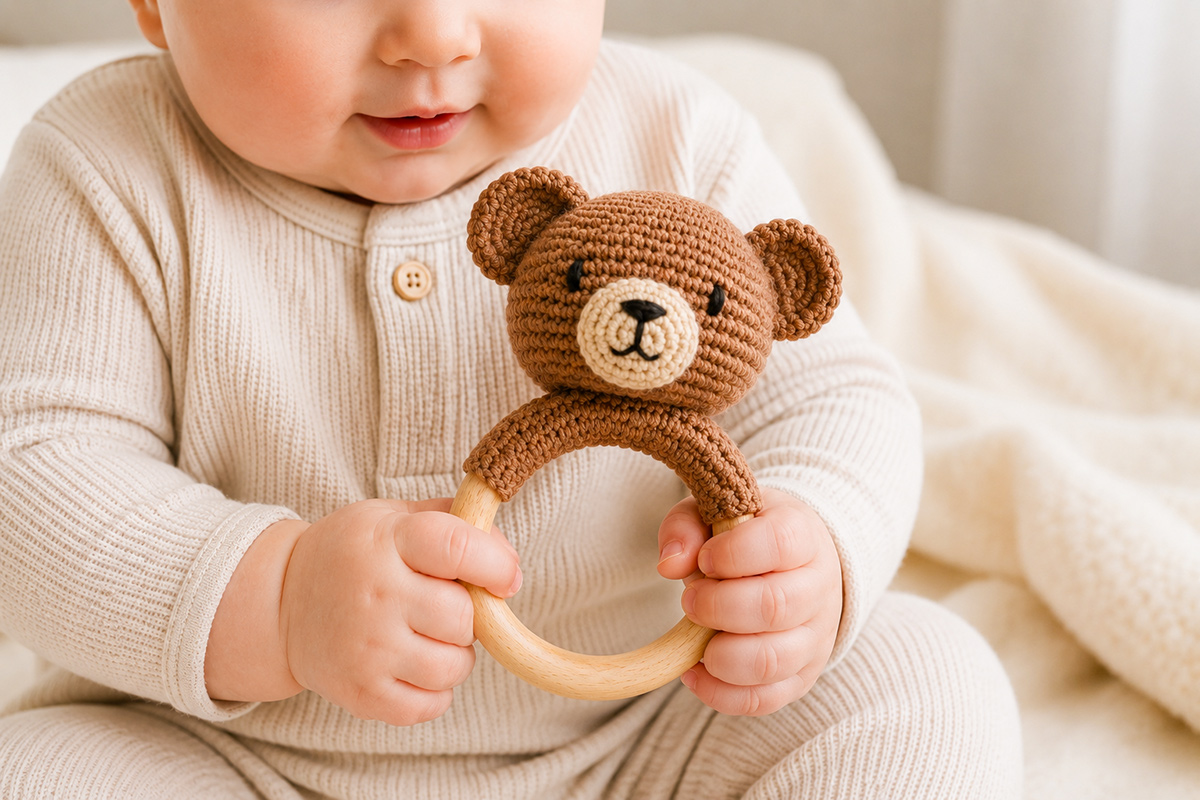
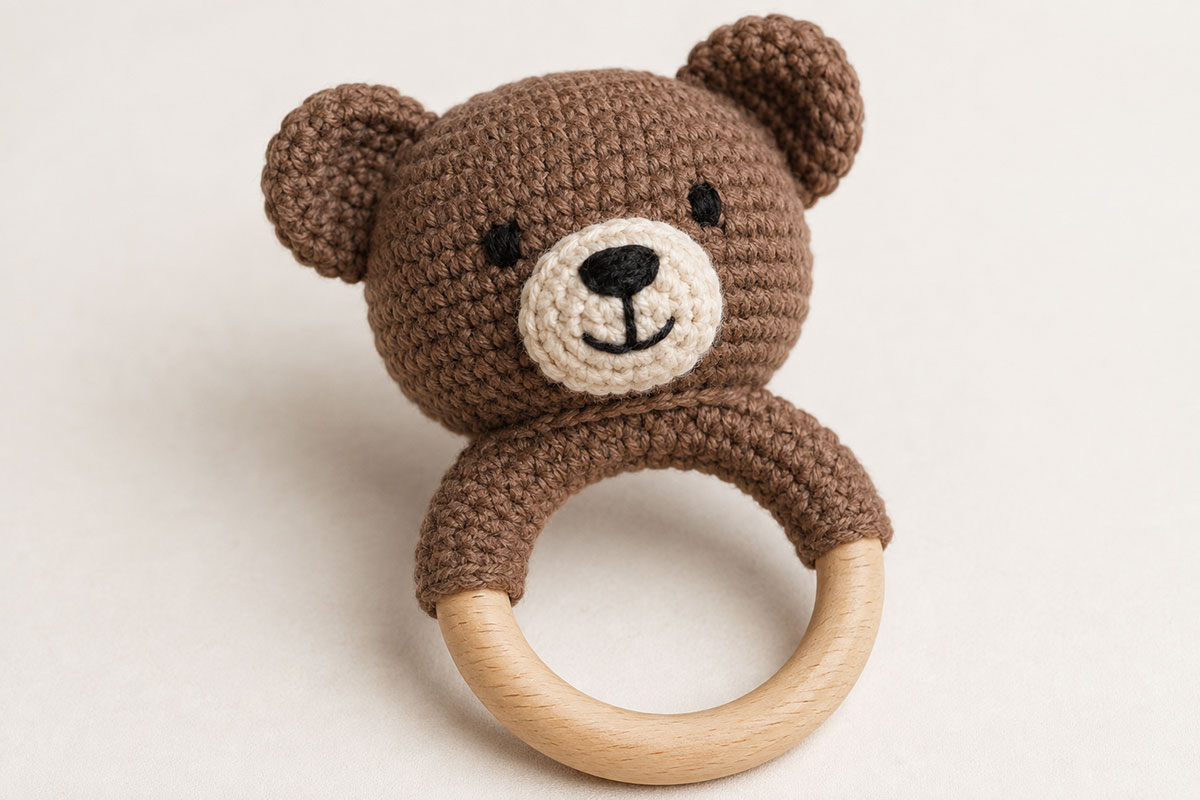
This free crochet bear rattle pattern makes a small teddy bear baby rattle with a rounded head, embroidered face, natural wooden ring handle and enclosed rattle insert. Work it in medium brown and warm ivory to coordinate with the bear blanket and bear hat for a matching handmade baby gift set.
Explore More Free Crochet Baby Patterns
Rattle Inserts for Crochet Toys
Jump to the Part You Need
Bear Rattle Pattern at a Glance
Materials, Gauge and Pattern Notes
Prepare the Wooden Ring Handle
Attach the Bear Head to the Ring
Rattle Construction and Safety Check
Free Crochet Bear Rattle Pattern at a Glance
This crochet baby rattle combines a small teddy bear head with a natural wooden ring handle. The lower part of the ring stays uncovered, while a narrow section at the top is wrapped with crochet stitches and used as the attachment point for the bear head.
I prefer to keep plenty of the wood visible. It gives the finished rattle a clean shape, keeps the handle easy to recognize, and prevents the bear head from looking as though it is sitting on another stuffed crochet piece.
The rattle sound comes from a purpose-made enclosed insert inside the bear head. Nothing loose goes inside the stuffing.
This is a rattle, not a teething toy. The wooden ring does not change that use boundary.
- Skill level: Advanced beginner
- Expected finished height: Approximately 5 1/2 to 6 inches from the top of the ears to the bottom of the wooden ring
- Expected bear head width: Approximately 2 1/2 to 3 inches
- Wooden ring: Approximately 70 mm or 2 3/4 inches outside diameter
- Construction: Continuous single crochet rounds with sewn assembly
- Face: Embroidered eyes, nose and mouth
- Rattle sound: One fully enclosed purpose-made rattle insert inside the head
- Crocheted pieces: One head, two ears and one muzzle
The expected finished measurements can vary with yarn, hook size and tension. Keep the bear head proportional to the 70 mm ring rather than trying to enlarge the head with extra rounds.
Materials, Gauge and Pattern Notes
Materials
- Approximately 45 to 60 yards worsted weight medium brown cotton or cotton-blend yarn
- Approximately 8 to 12 yards worsted weight warm ivory yarn
- 3.25 mm crochet hook
- One smooth single-piece hardwood ring approximately 70 mm or 2 3/4 inches outside diameter
- One purpose-made enclosed rattle insert approximately 24 to 28 mm
- Polyester fiberfill
- Black embroidery floss
- Yarn needle
- Embroidery needle
- Removable stitch marker
- Several locking stitch markers or pins for temporary positioning
- Scissors
- Measuring tape
Choose the wooden ring carefully. Use a smooth ring from a supplier that identifies the material and intended use. The surface should have no cracks, splinters, loose coating, rough seams or sharp areas. Do not assume that every unfinished craft ring sold online is intended for an infant product simply because it is made of wood.
Follow the ring manufacturer's directions for use, care and any permitted finish. Do not add paint, stain, varnish, oil or another coating unless the ring supplier specifically permits it for the intended application.
Abbreviations
- ch = chain
- sc = single crochet
- inc = work 2 sc in the same stitch
- dec = invisible single crochet decrease over the next 2 stitches
- st = stitch
- sts = stitches
Gauge
This pattern does not depend on a fixed numerical gauge. Use the 3.25 mm hook as a starting point and make a dense single crochet fabric that does not show fiberfill when gently stretched.
If your stitches leave visible gaps before stuffing, move down one hook size. If the fabric becomes so stiff that it distorts the rounded shape, move back up one size.
The finished measurements on this page are expected ranges rather than guaranteed dimensions. Yarn thickness and individual tension can change the final size.
Pattern Notes
- The bear head and ears are worked in continuous rounds unless stated otherwise.
- Place a removable stitch marker in the first stitch of each round and move it as you work.
- Do not join continuous rounds with a slip stitch.
- Keep the visible round-start line toward the back of the bear head.
- Secure each magic-ring center before the piece is attached or stuffed.
- The ears are not stuffed. The muzzle receives only a very small amount of fiberfill before its seam is closed.
- All facial features are embroidered.
- Do not substitute plastic safety eyes, buttons or beads.
- Use only a purpose-made enclosed rattle insert. Do not make an insert from a small container filled with loose beads, pellets or bells.
- The wooden ring remains visible except for the narrow crocheted section at the top.
Secure Every Magic Ring
After the second round of any piece that begins with a magic ring, pull the beginning tail firmly to close the center.
Thread the tail onto a yarn needle and pass it beneath several stitches on the inside of the piece. Reverse direction through a different group of stitches, then pull gently again.
Do not rely only on the tightened center loop to keep the magic ring closed.
Crochet the Bear Head
The head is worked from the top down. Leave the lower opening accessible long enough to attach the ears and muzzle, embroider the face, secure the embroidery ends and position the rattle insert.
Bear Head
With medium brown yarn:
Round 1: Work 6 sc into a magic ring. 6 sts.
Round 2: Inc in each stitch around. 12 sts.
Round 3: Sc 1, inc. Repeat around. 18 sts.
Round 4: Sc 2, inc. Repeat around. 24 sts.
Round 5: Sc 3, inc. Repeat around. 30 sts.
Round 6: Sc 4, inc. Repeat around. 36 sts.
Rounds 7 through 12: Sc in each stitch around. 36 sts in each round.
Check the shape before continuing. The upper half should have an even rounded curve rather than a pointed crown.
Choose the front of the head now. Keep the round-start line toward the back and place a removable marker at the center front between Rounds 9 and 10.
Round 13: Sc 4, dec. Repeat around. 30 sts.
Round 14: Sc 3, dec. Repeat around. 24 sts.
Pull up the working loop and secure it with a locking stitch marker while you make the ears and muzzle. Do not fasten off the head. After the muzzle is complete, place the working loop back on the hook, remove this locking marker and leave the head at 24 stitches until Round 15.
Bear Ears, Make 2
With medium brown yarn:
Round 1: Work 6 sc into a magic ring. 6 sts.
Round 2: Inc in each stitch around. 12 sts.
Round 3: Sc 1, inc. Repeat around. 18 sts.
Fasten off, leaving a sewing tail approximately 15 inches long.
Do not stuff the ears.
Secure the beginning tail on the back of each ear before trimming it.
Lay the two ears together. Both should finish with the same diameter and the same rounded outline.
Warm Ivory Muzzle
With warm ivory yarn, ch 5.
Round 1: Sc in the second chain from the hook. Sc in each of the next 2 chains. Work 3 sc in the final chain.
Rotate the work and continue along the unused loops on the opposite side of the foundation chain.
Sc in each of the next 2 loops. Work 2 sc in the final unused loop. 10 sts.
Round 2: Inc in the first stitch. Sc in each of the next 2 stitches. Inc in each of the next 3 stitches. Sc in each of the next 2 stitches. Inc in each of the final 2 stitches. 16 sts.
Fasten off, leaving a sewing tail approximately 18 inches long.
Thread the beginning tail beneath several stitches on the back of the muzzle, reverse direction beneath a different group of stitches, then trim it. Keep this tail-secured side against the bear head during assembly.
Lay the muzzle flat. The foundation chain should run from side to side so the finished piece forms a horizontal oval.
Position and Sew the Ears
Add a small amount of fiberfill to the upper half of the head. Use only enough to support the shape while you work.
Keep the lower opening clear so you can still reach the inside surface.
Place one ear on each upper side of the head. Position the lower attachment edge approximately across Rounds 4 through 6.
From the front, leave approximately 7 to 8 stitches between the inner edges of the ears.
Pin both ears before sewing either one permanently.
Check the head from the front and from both sides. The ears should sit at the same height and angle slightly outward.
Using each retained sewing tail, sew the lower third of the ear securely to the head. Catch solid stitches in the head with every pass.
Secure each sewing tail on the inside of the open head and trim it only after the ear cannot shift when gently moved.
Position and Sew the Muzzle
Center the warm ivory muzzle over the front marker.
Place the upper edge near Round 9 and the lower edge near Round 12. Keep the longer axis horizontal.
Pin the muzzle at the top, bottom, left and right.
Look at the head straight on. The amount of brown fabric visible on each side of the muzzle should be approximately equal.
Using the retained ivory tail, sew around most of the muzzle.
Before closing the final inch, place a very small amount of fiberfill beneath the center. The muzzle should have gentle dimension without becoming a separate round ball.
Finish the seam and secure the ivory tail inside the open head.
Embroider the Eyes
Mark the two eye positions between Rounds 8 and 9.
Leave approximately 5 unused crochet stitches between the two eye centers. Both eyes should sit just above the upper corners of the muzzle.
Remove the temporary markers before embroidering.
With black embroidery floss, make each eye as a short horizontal satin-stitch shape. Work several close stitches over approximately one crochet stitch of width.
Keep both eyes the same height and thickness.
Do not pull tightly enough to dent the head.
Embroider the Nose and Mouth
Use a temporary pin to mark the horizontal center of the muzzle, then remove the pin before stitching.
With black embroidery floss, make a small softly triangular nose across the upper center of the ivory muzzle.
Fill the nose with close satin stitches until the ivory yarn underneath is covered.
Bring one short vertical stitch down from the center of the nose.
From the bottom of that stitch, make one small diagonal or gently curved stitch toward each side to form the mouth.
Look at the face from the front before securing the embroidery. The nose should divide the muzzle evenly and the mouth should remain centered beneath it.
Secure every embroidery end on the inside of the open head. Pass the floss beneath several crochet stitches, reverse direction through a different group of stitches and trim the end only after it cannot pull back through the fabric.
Remove the center-front marker and any temporary face or muzzle pins now. Only the removable round marker should remain in the active crochet.
Add the Rattle Insert
Add fiberfill around the upper and side walls of the head.
Create a padded space in the center for the enclosed rattle insert.
Place the purpose-made rattle insert in the center of the head.
Add fiberfill around it so the hard insert does not sit directly against the crochet fabric at the front, back, sides or top.
Shake the partially stuffed head gently. The insert should make its normal sound while remaining cushioned inside the stuffing.
If you can feel the hard edge of the insert directly beneath the crochet fabric, add or redistribute fiberfill.
Round 15: Sc 2, dec. Repeat around. 18 sts.
Add the remaining fiberfill in small amounts. Keep the lower curve rounded without stretching the stitches.
Round 16: Sc 1, dec. Repeat around. 12 sts.
Round 17: Dec around. 6 sts.
Remove the removable round marker.
Fasten off, leaving a sewing tail at least 36 inches long.
Thread the tail through the front loops of the final 6 stitches and pull the opening closed.
Take one small anchoring stitch through two opposite stitches at the closed center and pull it snug. This locks the 6-stitch opening before the same tail is used for assembly.
Do not weave in or cut the remaining tail. It will be used to attach the head to the wooden ring.
Head checkpoint: The finished head should remain round, the face should look centered, the rattle insert should stay cushioned inside, and no fiberfill should show through the stitches.
Prepare the Wooden Ring Handle
The wooden ring is the handle, so it does not need a separate crocheted tube. Only the upper arc receives crochet stitches. Those stitches create a yarn-covered attachment area for the bear head while leaving most of the natural wood exposed.
This pattern is sized for a ring approximately 70 mm or 2 3/4 inches across the outside.
Inspect the Ring Before Crocheting
Run your fingertips around the entire wooden surface.
Do not use a ring with a crack, split, sharp edge, rough patch, loose coating or damaged surface.
Look at both faces and the inside edge as well as the outside edge.
If the ring supplier provides cleaning, care or use directions, keep those instructions with your project materials.
Mark the Crochet Area
Place the ring flat in front of you.
Choose the top center.
The crochet-covered section should span approximately 2 1/4 to 2 1/2 inches along the upper curve of the ring. Center that section over the top.
The remaining lower portion of the ring stays uncovered.
Work Single Crochet Directly Around the Ring
With medium brown yarn, make a slip knot and place it on the hook.
Hold the working yarn behind the wooden ring.
Insert the hook through the center of the ring from front to back.
Catch the working yarn and pull a loop forward around the wooden ring.
Yarn over and pull through both loops on the hook. One single crochet now wraps around the wood.
Repeat this process until you have worked 24 sc around the marked upper section.
Push the stitches gently together as you work. The 24 stitches should form a dense yarn-covered arc rather than spreading loosely around the ring.
If your exact yarn and ring combination causes 24 stitches to extend significantly beyond the 2 1/4 to 2 1/2-inch section, remove enough stitches to keep the cover centered at the top. If 24 stitches leave large gaps, add only enough stitches to make the covered section dense.
The measurement of the covered arc is more important than forcing a stitch count that does not suit a slightly different ring thickness.
Fasten off, leaving a 12-inch tail.
Thread the beginning tail beneath at least five wrapped stitches. Reverse direction beneath a different group of stitches and trim it.
Repeat with the finishing tail.
Slide the covered stitches back to the top center if they moved while you secured the tails.
Ring checkpoint: The crochet section should be centered over the top of the ring. Most of the wood should remain visible, and the wrapped stitches should sit closely together without exposing loose yarn loops.
Attach the Bear Head to the Wooden Ring
The head should be attached across a broad section of the crocheted ring cover rather than hanging from one tight center stitch.
Place the wooden ring flat with the crochet-covered section at the top.
Position the bear head above it.
Center the muzzle over the center of the ring opening.
Lower the head until its bottom curve overlaps approximately the upper 1/2 to 3/4 inch of the crocheted ring section.
The wooden ring should appear to continue naturally out from beneath the head.
Check the Placement Before Sewing
Use locking stitch markers to hold the lower head stitches temporarily to the crochet stitches wrapped around the ring.
Place one marker at the center and one near each outer side of the attachment area.
Look at the rattle from the front.
The center of the bear's nose and muzzle should line up with the center of the ring opening.
Turn it sideways.
The head should sit directly over the ring rather than leaning far toward the front or back.
Move the ring gently while the markers are still in place. Make any placement correction now.
Sew the First Attachment Pass
Thread the 36-inch tail from the bottom of the bear head onto the yarn needle.
Insert the needle at the closed center and pass it through the stuffed head, bringing it out through a solid stitch near one outer side of the attachment area. The yarn between those two points should remain hidden inside the head.
From that starting point, pass the needle beneath both top strands of one of the single crochet stitches that wraps around the wooden ring.
Do not attempt to pierce or sew through the wood.
Bring the needle back into the next solid stitch on the lower head.
Continue across the attachment area with small, closely spaced stitches.
Use approximately 10 to 12 of the wrapped ring stitches across the center of the covered section.
Keep the yarn firm enough to bring the two crochet surfaces together, but do not pull hard enough to flatten the bear head or distort the wrapped stitches.
Make a Second Attachment Pass
When you reach the opposite side, check the front alignment again.
Work back across the attachment area in the opposite direction.
Place the return stitches between the first set where possible.
This second pass should spread the attachment over the lower curve of the head instead of concentrating the strain at one point.
Add Side Anchors
At the left side of the join, pass the needle through a lower-side head stitch and beneath two adjacent wrapped ring stitches.
Repeat once.
Make the same two anchoring stitches on the opposite side.
Gently move the head toward the left, right, front and back.
The head should not pivot freely on the ring.
If the attachment still moves noticeably, add another row of stitches across the existing join.
Secure the Sewing Tail
Pass the yarn needle into the stuffed head through the attachment area.
Bring it out several inches away on the back of the head.
Reinsert the needle through a nearby stitch and bring it out again through the lower attachment area.
Pull gently so the yarn end settles beneath the surface.
Trim the yarn close to the crochet so the cut end retracts inside the head.
Confirm that the removable round marker, center-front marker, all locking stitch markers and every temporary pin have been removed.
Final Shape Check
Hold the rattle by the wooden ring and look at it straight on.
The ears should sit at matching heights. The muzzle should remain centered. The head should sit over the middle of the ring rather than drifting toward one side.
Shake the rattle gently.
The sound should come from inside the bear head.
Check that the wrapped crochet stitches have not spread apart or shifted significantly along the wooden ring.
Rattle Construction and Safety Check
A rattle intended for an infant needs more than a neat-looking seam. The finished object can be held, shaken, dropped and brought close to the mouth, so every component and attachment deserves a careful inspection.
The U.S. Consumer Product Safety Commission explains that rattles are subject to requirements intended to prevent choking and suffocation hazards. The federal rattle regulation includes requirements for the rattle to remain in one piece after specified testing and for its shape to prevent it from entering an infant's mouth far enough to block the throat.
You can review the current CPSC information about rattle requirements.
The 70 mm ring measurement in this crochet pattern is a construction measurement. It should not be interpreted as proof that a completed handmade rattle passes the federal rattle test. That test uses a specified fixture and includes checks after impact, torque, tension and compression testing.
A written crochet pattern also cannot certify a finished handmade item. The materials selected, construction quality, dimensions and finished-product testing all matter.
Check Every Component
- Use a purpose-made enclosed rattle insert rather than loose beads, pellets or bells.
- Use embroidered facial features rather than plastic safety eyes, buttons or beads.
- Use a smooth wooden ring with no cracks, splinters, damaged surface or loose coating.
- Follow the ring manufacturer's material, care and intended-use information.
- Keep the rattle insert fully surrounded by fiberfill inside the head.
- Secure the bear head across several wrapped ring stitches rather than one narrow attachment point.
- Secure every magic-ring center and yarn tail.
- Do not add ribbons, bows, charms, cords or detachable decorations.
Inspect the Finished Rattle
Look at every seam under good light.
Gently pull each ear in several directions.
Repeat the check on the muzzle and the head-to-ring attachment.
Inspect the wrapped stitches at the top of the wooden ring. They should remain close together and firmly connected to the bear head.
Check each magic-ring center. The center should remain tightly closed.
Look for gaps in the head that expose fiberfill.
Run your fingers around the entire wooden ring again. Stop using the finished item if the ring develops a crack, split, rough area or other damage.
Shake the rattle and inspect it again.
Stop using the item if a seam loosens, stitches break, stuffing becomes exposed, embroidery pulls free, the head begins separating from the ring or the internal rattle insert can be felt pushing through damaged crochet fabric.
If You Plan to Sell Finished Rattles
Do not describe a handmade rattle as compliant with federal requirements simply because it follows this pattern.
If you manufacture or import finished rattles for sale in the United States, CPSC guidance requires applicable third-party testing by a CPSC-accepted laboratory and certification in a Children's Product Certificate. Other requirements, including the mandatory toy standard and tracking labels, can also apply. Review the CPSC rattle business guidance before selling finished rattles.
Make a Matching Crochet Bear Baby Gift Set
The bear rattle was designed to coordinate easily with the other bear projects without turning the gift into three identical brown pieces.
Repeat two details and let the project shapes do the rest.
Use the same medium brown for the bear head and the same warm ivory for the muzzle. Those two colors are enough to visually connect the rattle with the crochet bear blanket pattern.
Add the crochet bear hat pattern for a three-piece handmade baby gift.
The natural wooden ring adds a different texture, which is useful in a coordinated set. The blanket supplies the larger field of color, the hat repeats the bear shape, and the rattle becomes the small finishing piece.
You do not need to force every color from the blanket into the rattle.
If the blanket includes sage, caramel or another accent, keep those shades on the blanket and let the rattle stay primarily brown, ivory and natural wood. The result still reads as a set because the bear face and main yarn colors repeat.
For a smaller, less labor intensive gift, pair the rattle with the teddy bear lovey crochet pattern instead.
If you want to make a similar style wooden-ring rattle for fall, try my free crochet pumpkin rattle pattern that creates a smiling pumpkin, stem, leaf and embroidered face.
A coordinated baby gift looks more intentional when the pieces share a few recognizable details without looking copied from one another.
Crochet Bear Rattle Troubleshooting
The Bear Head Looks Pointed
Recount Rounds 3 through 6. Each increase round must contain six evenly spaced increases.
If the stitch counts are correct, redistribute the stuffing toward the sides of the head rather than packing most of it beneath the top magic ring.
A small point can often be softened by rolling the stuffed head gently between your palms. A missing increase needs to be corrected in the crochet.
Fiberfill Shows Between the Stitches
Check the fabric before adding more stuffing.
If the stitches are naturally loose, use a smaller hook for the next head. Adding extra fiberfill can spread loose stitches even farther apart.
If the fabric was dense before stuffing, remove a small amount of fiberfill and reshape the head.
The Muzzle Looks Crooked
Check that the muzzle foundation chain runs horizontally across the face.
If the oval itself is even, remove the sewing stitches and pin the muzzle again at the top, bottom and both sides.
Compare the amount of brown fabric visible on the left and right before sewing again.
The Eyes Look Uneven
Measure the eyes from the center of the muzzle rather than from the ears.
If one satin-stitch eye is thicker than the other, remove that eye and restitch it. Adding more floss to the smaller eye can make both eyes heavier than intended.
The Rattle Insert Can Be Felt Through the Head
Open the lower rounds if necessary and reposition the insert.
There should be fiberfill between the insert and the crochet fabric on every side.
Do not leave one side unpadded simply to make the rattle louder.
The Rattle Sounds Too Quiet
Confirm that the enclosed insert made the expected sound before it was placed inside the head.
If the stuffing is packed extremely tightly, redistribute it while maintaining padding around the insert.
The sound does not need to be loud to confirm that the insert is working.
The Crochet Stitches Slide on the Wooden Ring
First check whether the wrapped stitches are packed closely together across the 2 1/4 to 2 1/2-inch covered section.
If they have spread, slide them gently back toward the top center.
After the bear head is attached, the assembly stitches should pass through several of the wrapped stitches and help hold the covered section in place.
If the entire crochet section still moves significantly, add additional head-to-ring stitches across the attachment area.
The Bear Head Wobbles
Check the width of the head attachment.
A secure join should use approximately 10 to 12 wrapped ring stitches across the center, followed by side anchors.
Add another sewing pass across the join if necessary.
Do not solve the problem by pulling one center stitch extremely tight. That can make the head pivot around a narrow attachment point.
The Head Sits Crooked on the Ring
Place the rattle on a flat surface and center the ring opening beneath the nose.
If the head was sewn off center, remove the attachment stitches rather than trying to twist the finished head into position.
Reattach it after marking the top center of both the ring and the head.
The Two Ears Do Not Match
Each ear should finish Round 3 with 18 stitches.
If both stitch counts are correct but one ear is visibly larger, compare the tension.
Remaking one small ear gives a cleaner result than trying to hide a noticeable difference during assembly.
The Wooden Ring Develops a Rough Area
Stop using the finished rattle.
Do not try to disguise a damaged ring with more crochet stitches or yarn.
For an infant item, replacing a questionable component is preferable to repairing around damage that remains part of the handle.
Free Crochet Bear Rattle Pattern FAQ
What size wooden ring does this crochet bear rattle use?
The pattern is designed around a wooden ring approximately 70 mm, or 2 3/4 inches, across the outside.
A small difference of a few millimeters should not require a change to the bear head. A substantially larger or smaller ring can change the proportions and the way the finished rattle fits together.
What should I look for when buying the wooden ring?
Look for a smooth single-piece hardwood ring from a supplier that provides information about the material and intended use.
Inspect the actual ring before using it. It should have no cracks, splinters, sharp areas, damaged finish or rough seams.
Do not assume that a generic craft ring is appropriate for an infant product simply because its listing uses words such as natural or unfinished.
Do I crochet over the entire wooden ring?
No. Only the upper 2 1/4 to 2 1/2 inches of the ring are covered with crochet stitches.
The lower portion stays exposed as the handle.
Why are the stitches crocheted directly around the ring?
Working the stitches around the wood creates a yarn-covered attachment area without adding a separate stuffed handle or bulky sleeve.
The bear head is sewn to those wrapped stitches rather than directly to the wood.
Can I use safety eyes?
No. Keep the eyes embroidered as written.
The nose and mouth are also embroidered, so the face does not require buttons, beads or other separate decorative pieces.
What type of rattle insert should I use?
Use a purpose-made fully enclosed rattle insert intended for handmade toys and follow its manufacturer's directions.
An insert approximately 24 to 28 mm fits the head proportions used in this pattern.
Do not improvise an insert with a small container filled with loose beads, pellets or bells.
Where does the rattle insert go?
The insert sits in the center of the stuffed bear head.
Place fiberfill between the insert and the crochet fabric on every side before closing the final decrease rounds.
Does the wooden ring make this a teething toy?
No. This pattern is written and described as a crochet rattle.
A wooden ring does not automatically make a handmade project a tested or certified teething product.
Can I omit the rattle insert?
Yes. The crochet construction and wooden-ring assembly can still be completed, but the finished project would no longer function as a rattle.
Can I use a larger wooden ring?
A small size difference is manageable, but I would not make a large change without reconsidering the head proportions and the completed rattle dimensions.
The bear head in this pattern was designed to sit neatly over a ring of approximately 70 mm.
How tightly should I stuff the head?
Stuff it firmly enough to hold the round shape and keep the insert cushioned in the center.
The head should not become hard or stretched. If the crochet stitches begin separating, remove some stuffing.
Can I make the bear in another color?
Yes. The shape and facial placement identify it as a bear, so brown is not required.
If you are making the rattle as part of the bear gift set, repeating the brown and warm ivory used in the other projects gives the pieces an easy visual connection.
How do I clean a crochet rattle with a wooden ring?
Follow the care instructions for every component, including the yarn, wooden ring and enclosed rattle insert.
Do not soak or machine wash the finished rattle unless the instructions for all components specifically allow that treatment.
After cleaning, allow the item to dry completely and inspect the wood, seams and crochet before use.
Can I sell finished crochet bear rattles made from this pattern?
If you manufacture or import finished rattles for sale in the United States, review the current CPSC rattle requirements before selling them. Applicable children's product rules can require third-party testing and a Children's Product Certificate, and other requirements can also apply.
Following a crochet pattern does not by itself demonstrate that a finished product complies with federal requirements.
What other bear projects can I make with this rattle?
Pair it with the free crochet bear blanket pattern and the crochet bear hat pattern for a coordinated three-piece gift.
You can also browse the free baby crochet patterns collection for more handmade projects.
When you click on links to various merchants on this site and make a purchase, this may result in this site earning a commission. This does not affect the price you pay.

UBGI Gold Standard 2026
Reviewed under the site's
editorial checklist.
Photos, decorating ideas, party setups and reader submissions are shared for inspiration unless a page is specifically presented as a pattern, tutorial, reference guide or step-by-step project. Follow the instructions, measurements, safety guidance and manufacturer directions provided for the particular project or product.
About Jan | Contact | Baby Nursery Ideas (Blog) | Site Map | Privacy Policy | Disclosure Policy | Disclaimer | Affiliate Disclosure | Earnings Disclosure | Facebook | Pinterest
I am a participant in the Amazon Services LLC Associates Program, an affiliate advertising program designed to provide a means for us to earn fees by linking to Amazon. As an Amazon Associate I earn from qualifying purchases.
Copyright © 2006-2026. All Rights Reserved.