Free Crochet Bear Hat Pattern for Babies with Easy Bear Ears
By Jan Bay
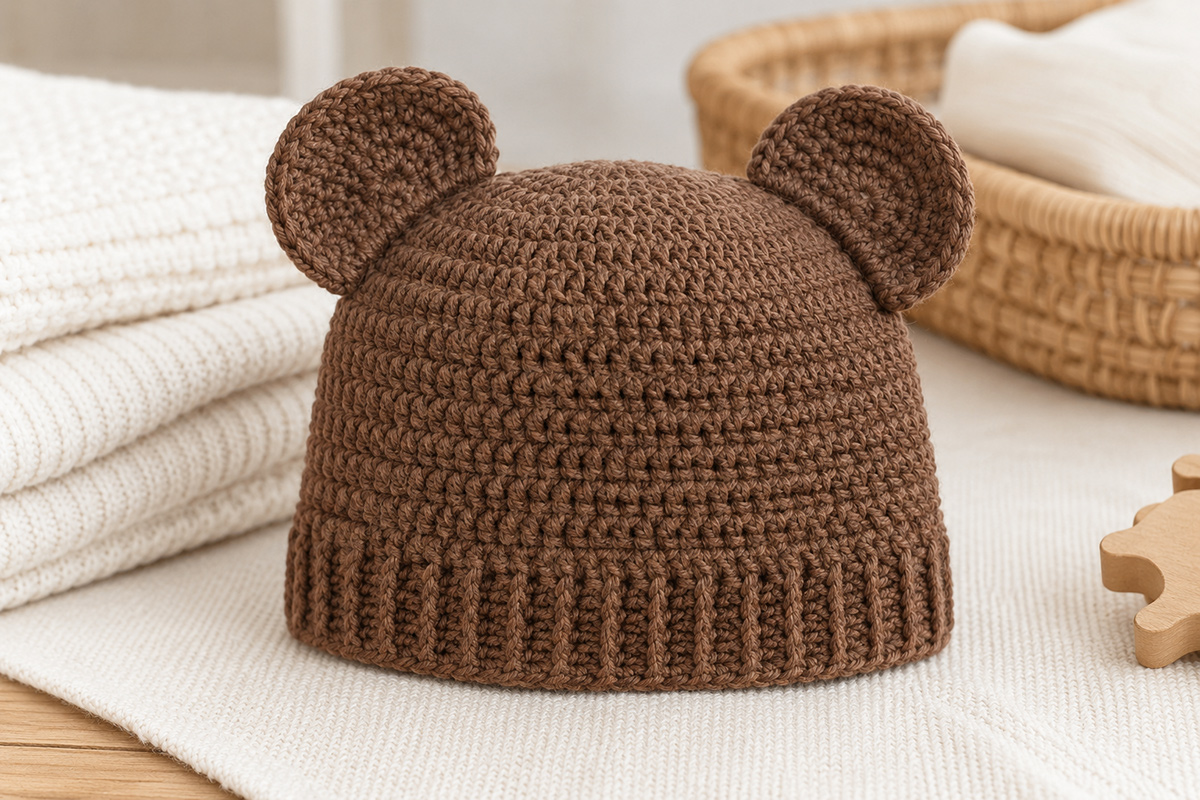
This free crochet bear hat pattern creates a simple fitted baby hat that is an unmistakable little bear with two rounded crochet ears. The pattern includes baby sizing, straightforward shaping and ear placement instructions so you can make a bear hat that works beautifully as a handmade baby gift, photo accessory or part of a matching crochet bear set.
Explore More Bear and Crochet Hat Patterns
Free Baby Crochet Hat Patterns
Free Baby Hat Patterns to Crochet and Knit
Get the crochet supplies for this project here
Jump to a Section
Crochet Bear Hat Sizes for Babies
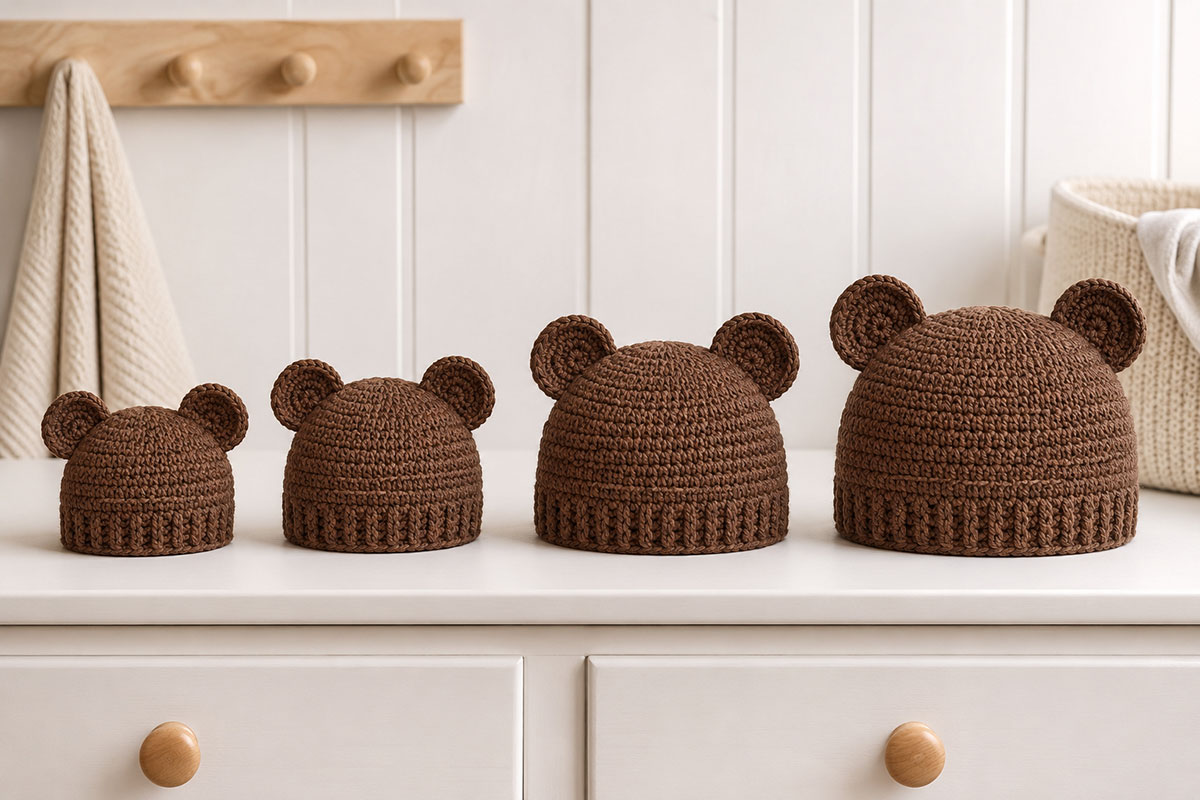
This crochet bear hat is sized to fit close to the head without making the ears look crowded. A little negative ease helps the hat stay in place, but the finished fabric should still stretch comfortably. Measure around the widest part of the baby's head, just above the eyebrows and ears, before choosing a size.
The finished measurements below are for the hat itself, not the baby's head. If the measurement falls between sizes, use the larger size unless your yarn is especially stretchy.
Crochet Baby Bear Hat Pattern Size Chart
| Size | Suggested Head Circumference | Finished Hat Circumference | Approx. Finished Height |
|---|---|---|---|
| Newborn | 13 to 14 in. | About 12 1/2 in. | About 5 1/4 in. |
| 0 to 3 months | 14 to 15 in. | About 13 3/4 in. | About 5 3/4 in. |
| 3 to 6 months | 15 to 16 in. | About 14 3/4 in. | About 6 1/4 in. |
| 6 to 12 months | 16 to 17 in. | About 16 in. | About 6 3/4 in. |
The bear ears stay the same size for all four hats. Their placement changes slightly with the hat size, which keeps the finished shape balanced instead of making the newborn version look crowded or the larger size look as though its ears are too small.
If you enjoy making small animal-themed projects, the crochet teddy bear pattern makes a natural companion to the hat. The two pieces can be made in matching yarn for a coordinated handmade gift.
Materials for the Crochet Bear Hat
The hat uses one main yarn color and does not require separate yarn for facial features. That keeps the design simple and lets the rounded ears provide the bear shape.
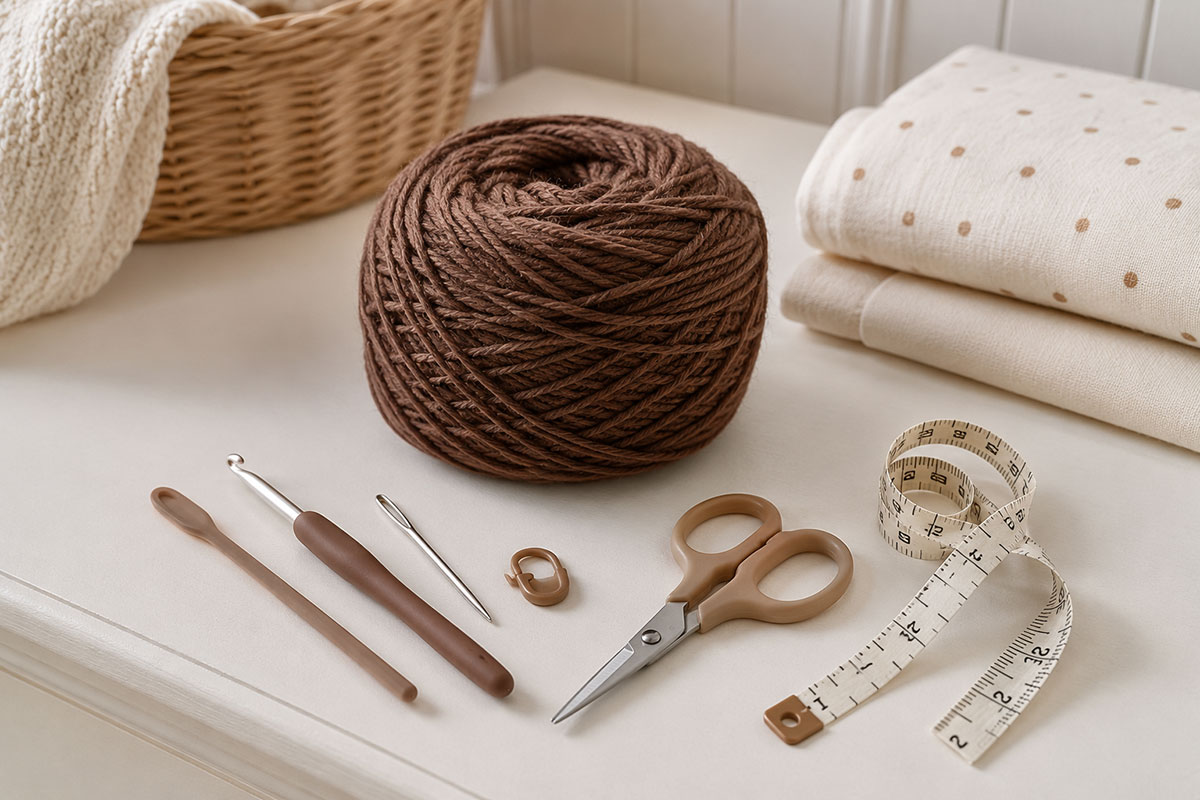
- Worsted weight yarn, category 4
- Approximately 70 to 120 yards, depending on size
- 5 mm (H-8) crochet hook, or the hook needed to match gauge
- Yarn needle with a blunt tip
- Stitch marker
- Small scissors
- Flexible measuring tape
A smooth, washable yarn makes the stitch definition easy to see and keeps the ears from becoming floppy. Acrylic, cotton blends and many washable wool blends can all work. Check the yarn label for care instructions before making a hat that will be given as a baby gift.
A very fuzzy yarn can hide the shaping around the crown and make the ear seams harder to place neatly. A highly textured novelty yarn can also change the gauge enough to affect the fit, so this pattern is easier to follow with a smooth worsted weight yarn.
For more projects made specifically for little heads, browse the free baby crochet hat patterns collection after you finish this one.
Gauge and Finished Measurements
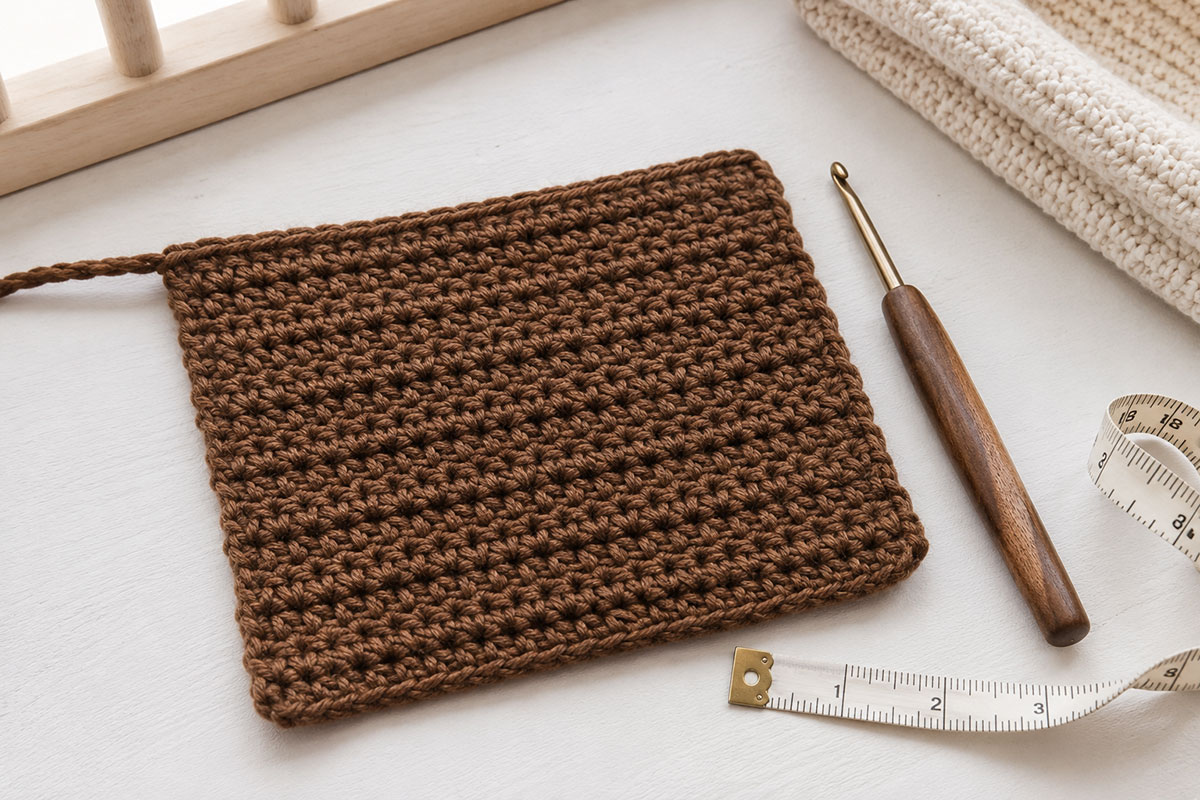
Gauge: 14 half double crochet stitches and approximately 9 rounds = 4 inches before blocking.
Check the stitch gauge before beginning the crown. Hat fit depends heavily on circumference, and even a difference of one stitch per inch can change a small baby hat noticeably.
If you have more than 14 stitches across 4 inches, your stitches are too tight. Try a larger hook. If you have fewer than 14 stitches, try a smaller hook.
The hat is worked from the crown downward in joined rounds. The body uses half double crochet. Two rounds of alternating front post and back post double crochet create the softly ribbed lower edge shown on the finished hat.
Pattern terminology: U.S. crochet terms are used throughout.
- ch = chain
- sl st = slip stitch
- hdc = half double crochet
- dc = double crochet
- fpdc = front post double crochet
- bpdc = back post double crochet
- inc = work 2 stitches into the same stitch
- st = stitch
- sts = stitches
- rnd = round
Important construction note: Chain 2 at the beginning of a half double crochet round does not count as a stitch. Join each round with a slip stitch to the first half double crochet unless the instructions say otherwise.
Place a stitch marker in the first stitch of each round. The marker makes the crown increases much easier to check, especially in the larger sizes where one missed increase can change the final circumference.
Do not rely on age alone when choosing a size. Babies of the same age can have quite different head measurements. A quick circumference measurement gives you a much better chance of making a hat that fits comfortably the first time.
Free Crochet Bear Hat Pattern
The hat begins at the center of the crown and grows outward in evenly spaced increases. After the crown reaches the correct stitch count for your size, work straight rounds to build the sides. The final two rounds form the ribbed lower edge.
Use the stitch count at the end of every round as a checkpoint. If the count is wrong, correct it before continuing. On a small hat, a few extra stitches can change both the fit and the placement of the bear ears.
Begin the Crown
Round 1: Make a magic ring. Ch 2, work 8 hdc into the ring. Join with a sl st to the first hdc. (8 sts)
Round 2: Ch 2. Work 2 hdc in each st around. Join. (16 sts)
Round 3: Ch 2. *Hdc in next st, 2 hdc in next st.* Repeat from * to * around. Join. (24 sts)
Round 4: Ch 2. *Hdc in next 2 sts, 2 hdc in next st.* Repeat from * to * around. Join. (32 sts)
Round 5: Ch 2. *Hdc in next 3 sts, 2 hdc in next st.* Repeat from * to * around. Join. (40 sts)
Newborn Bear Hat
Round 6: Ch 2. *Hdc in next 9 sts, 2 hdc in next st.* Repeat from * to * 4 times. Join. (44 sts)
Rounds 7 through 10: Ch 2. Hdc in each st around. Join. (44 sts)
Continue to the ribbed edging instructions below.
0 to 3 Month Bear Hat
After completing Round 5 with 40 stitches:
Round 6: Ch 2. *Hdc in next 4 sts, 2 hdc in next st.* Repeat from * to * around. Join. (48 sts)
Rounds 7 through 11: Ch 2. Hdc in each st around. Join. (48 sts)
Continue to the ribbed edging instructions below.
3 to 6 Month Bear Hat
After completing Round 5 with 40 stitches:
Round 6: Ch 2. *Hdc in next 4 sts, 2 hdc in next st.* Repeat from * to * around. Join. (48 sts)
Round 7: Ch 2. *Hdc in next 11 sts, 2 hdc in next st.* Repeat from * to * 4 times. Join. (52 sts)
Rounds 8 through 12: Ch 2. Hdc in each st around. Join. (52 sts)
Continue to the ribbed edging instructions below.
6 to 12 Month Bear Hat
After completing Round 5 with 40 stitches:
Round 6: Ch 2. *Hdc in next 4 sts, 2 hdc in next st.* Repeat from * to * around. Join. (48 sts)
Round 7: Ch 2. *Hdc in next 5 sts, 2 hdc in next st.* Repeat from * to * around. Join. (56 sts)
Rounds 8 through 13: Ch 2. Hdc in each st around. Join. (56 sts)
Ribbed Lower Edge for All Sizes
The ribbing is worked directly into the last half double crochet round. Do not fasten off before beginning it. The beginning ch 2 does not count as a stitch in either ribbing round.
Ribbing Round 1: Ch 2. *Fpdc around the post of the next st, bpdc around the post of the next st.* Repeat from * to * around. Join with a sl st to the first fpdc.
Ribbing Round 2: Ch 2. Work fpdc around each fpdc from the previous round and bpdc around each bpdc from the previous round. Join with a sl st to the first fpdc.
Fasten off and weave the yarn tail securely into the inside of the hat.
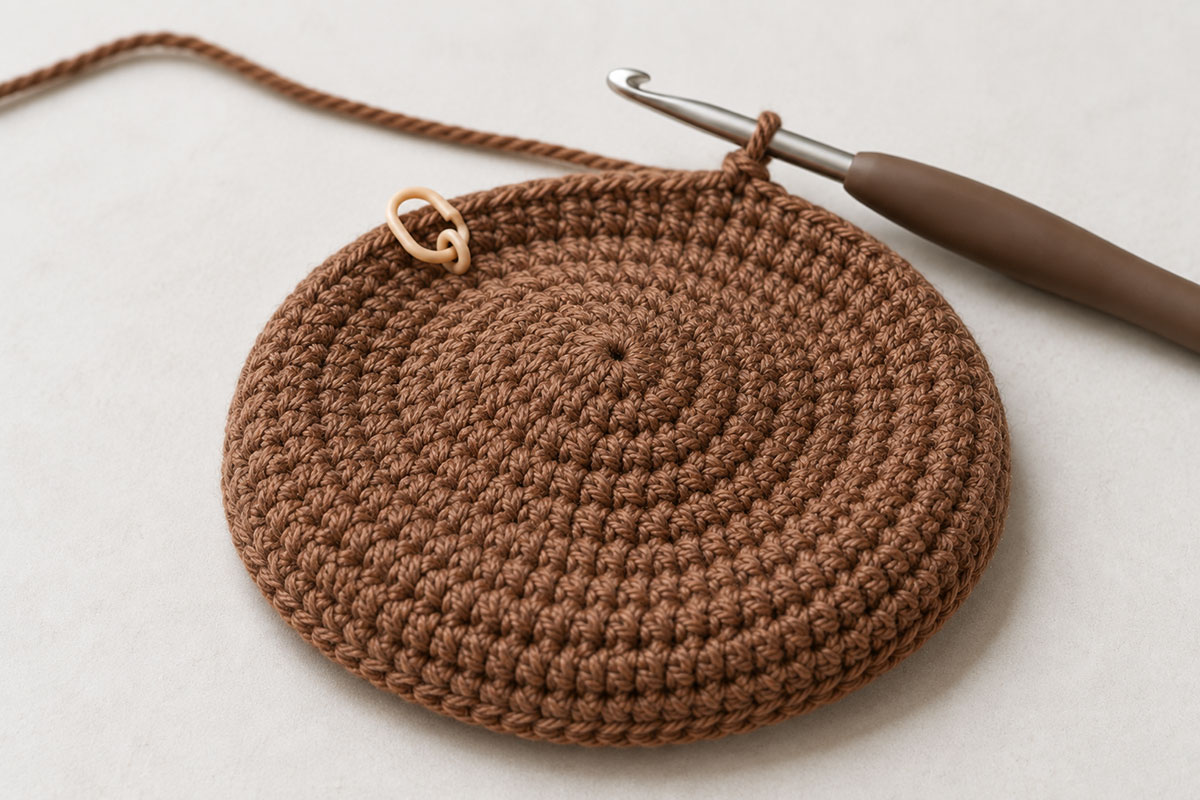
Before making the ears, lay the hat flat and check the overall shape. The crown should be rounded without obvious points, ripples or a puckered center. The sides should fall straight from the final increase round rather than flare outward.
If the lower edge looks loose before the ribbing is added, check your stitch count first. Do not remove stitches simply to tighten the brim because that can make the hat uncomfortable and distort the sides.
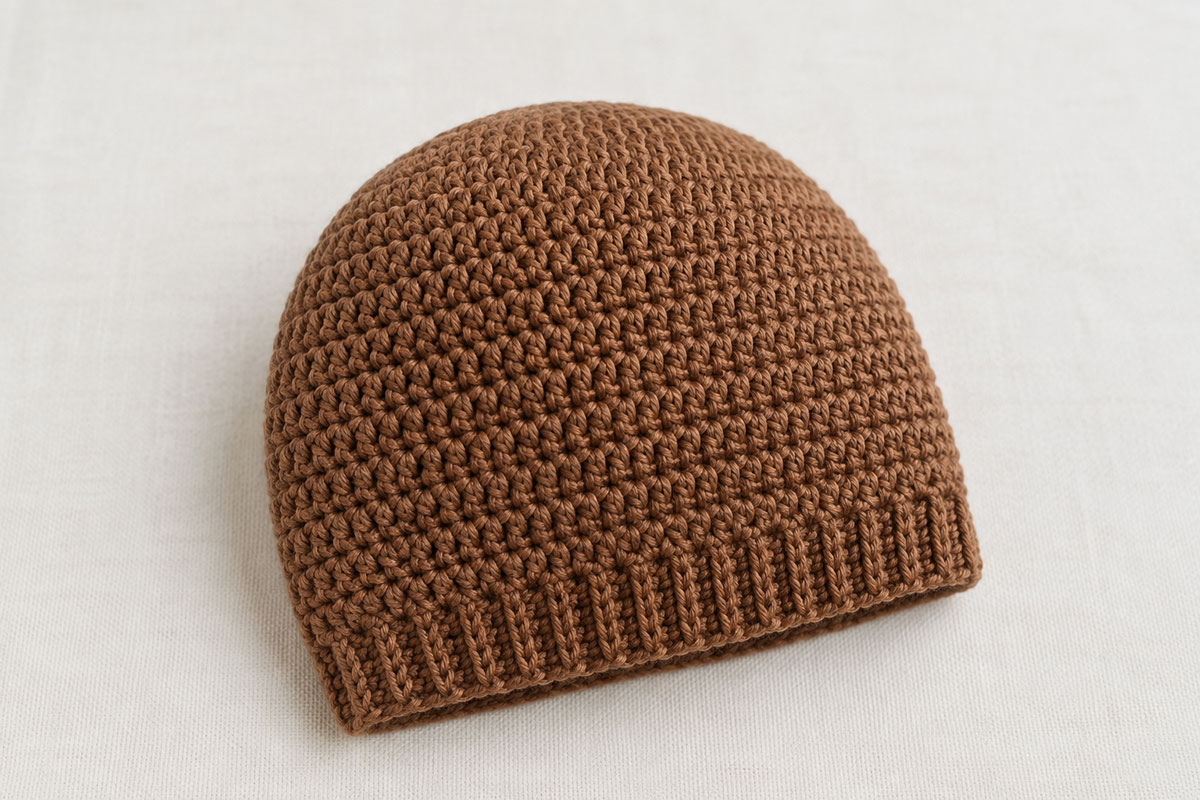
Crochet Bear Ears Pattern
The ears are small flat crochet circles that are folded slightly at the base before they are sewn to the hat. That little fold gives each ear a rounded bear shape without stuffing, wire or a hard insert.
Make two ears.
Easy Crochet Bear Ears for a Baby Bear Hat
Round 1: Make a magic ring. Ch 2 and work 8 hdc into the ring. Join with a sl st to the first hdc. (8 sts)
Round 2: Ch 2. Work 2 hdc in each st around. Join. (16 sts)
Round 3: Ch 2. *Hdc in next st, 2 hdc in next st.* Repeat from * to * around. Join. (24 sts)
Fasten off, leaving a sewing tail approximately 12 inches long.
Make the second ear the same way.
Each finished ear should measure approximately 2 1/4 to 2 1/2 inches across with the stated gauge. A small difference is fine as long as both ears match each other.
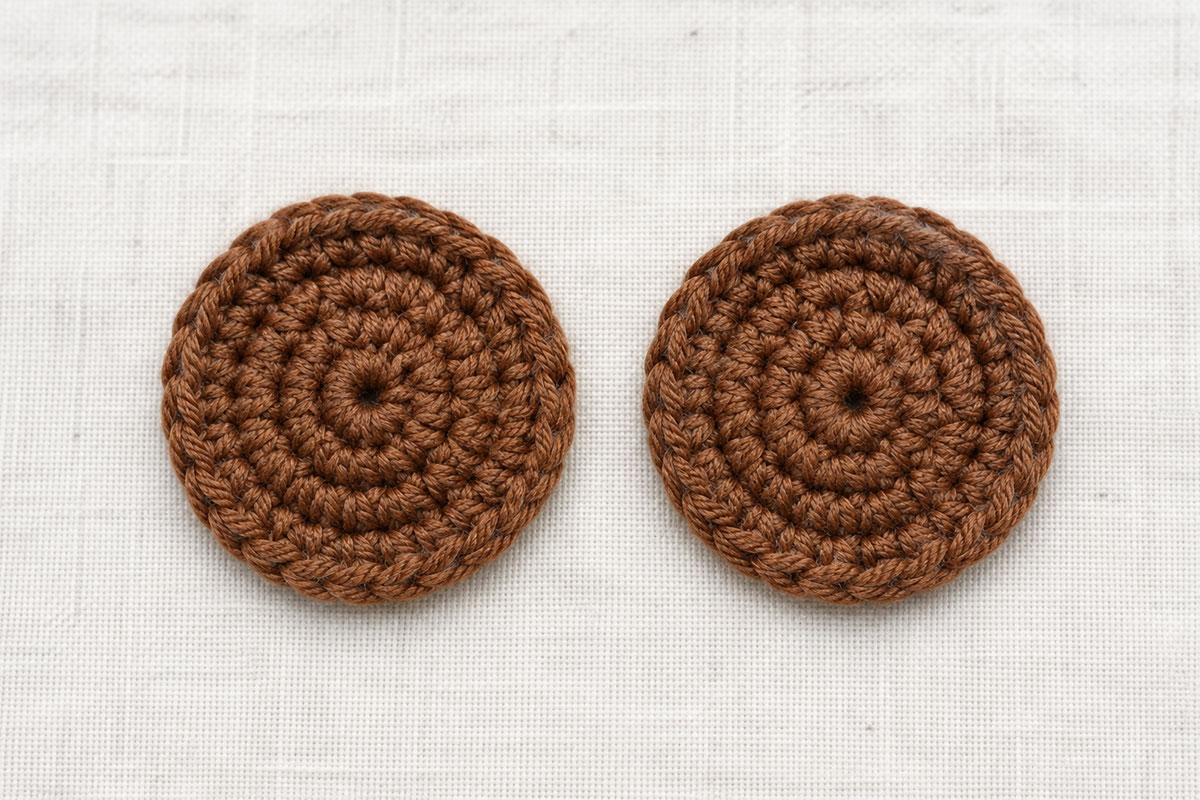
Do not stuff the ears. A stuffed ear becomes more like a plushie ear and can look heavy on a baby hat. Flat crochet circles with a softly pinched base give this design its simple rounded silhouette.
Thread the long yarn tail onto a yarn needle. Pinch approximately 1/2 inch of the lower edge of the circle inward. Take two or three small stitches through the folded base to hold the shape. Repeat with the second ear.
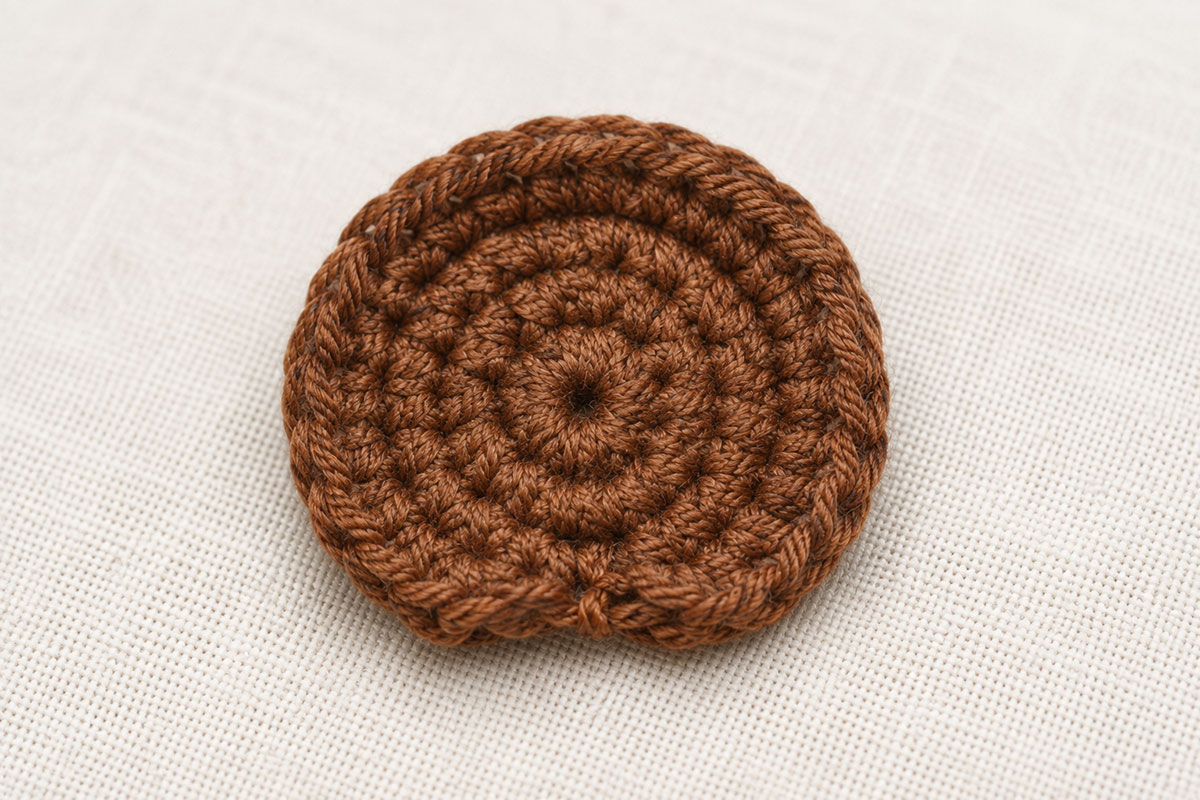
Before sewing either ear to the hat, compare them side by side. The folded bases should be the same width, and both ears should curve in the same direction. Making that small adjustment now is much easier than removing an ear after it has been sewn in place.
How to Attach the Bear Ears
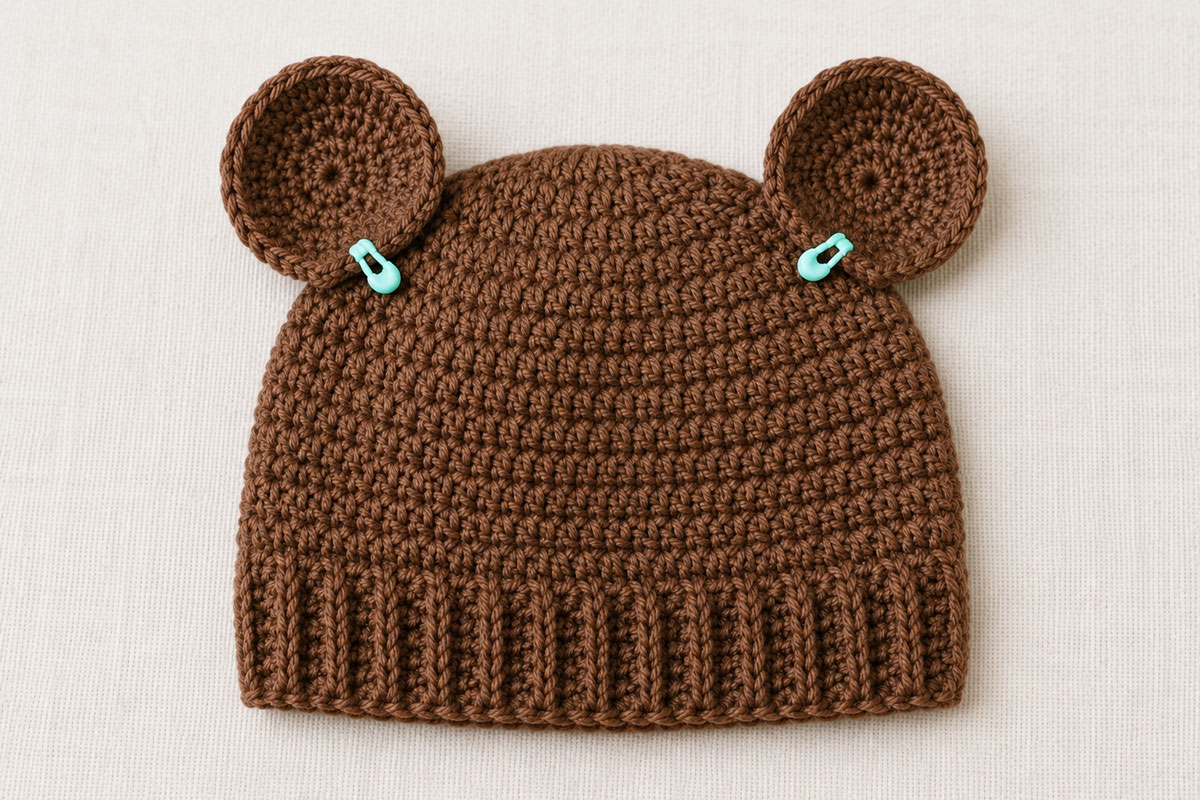
Ear placement changes the character of the finished hat more than almost any other detail. Set the ears too close together and the hat can look more like a cat. Place them too far down the sides and they disappear when the hat is worn. For a bear shape, keep them high on the crown with enough space between them to frame the top of the head.
Lay the hat flat with the joining seam centered at the back. Smooth the crown gently with your hands, but do not stretch it. Mark the exact center at the top of the crown. For each ear, measure along the outside curve of the hat from that center point to the midpoint of the folded ear base.
Use removable stitch markers to hold both ears in place before sewing.
- Newborn: Place the midpoint of each folded ear base approximately 2 1/4 inches from the center top of the crown.
- 0 to 3 months: Place the midpoint of each folded ear base approximately 2 1/2 inches from the center top.
- 3 to 6 months: Place the midpoint of each folded ear base approximately 2 3/4 inches from the center top.
- 6 to 12 months: Place the midpoint of each folded ear base approximately 3 inches from the center top.
These measurements are starting points because crochet tension can change the curve of the crown. Check the hat from directly in front before you sew. Both ear bases should sit the same distance from the crown center, and the ears should lean at matching angles.
I would keep the bear readable from the silhouette alone. If those two ears look balanced before you sew them down, the hat does not need a muzzle, pom-pom or extra trim to explain what it is.
Sew the Ears Securely
Thread the sewing tail from the first ear onto a yarn needle. Sew through the folded lower edge of the ear and the corresponding stitches on the hat.
Use small stitches that follow the base of the ear rather than long stitches that cross a large section of the crown. Work from one side of the ear base to the other, then sew back across the base once more. This second pass helps the ear remain upright without making the seam bulky.
Keep the needle within the crochet fabric and avoid pulling the yarn tightly enough to pucker the crown.
When the ear feels secure, bring the yarn tail to the inside of the hat. Weave it back and forth through several nearby stitches before trimming the excess.
Repeat the same process with the second ear.
Turn the hat so you can look at it directly from the front. If one ear leans farther outward than the other, adjust it before trimming the final yarn tail. Small changes in the base seam can make a noticeable difference in the finished expression.
A matching bear project can turn the hat into a more complete handmade gift. The brown bear lovey pattern keeps the same animal theme while giving you a different type of crochet project to pair with it.
Finishing the Baby Bear Hat
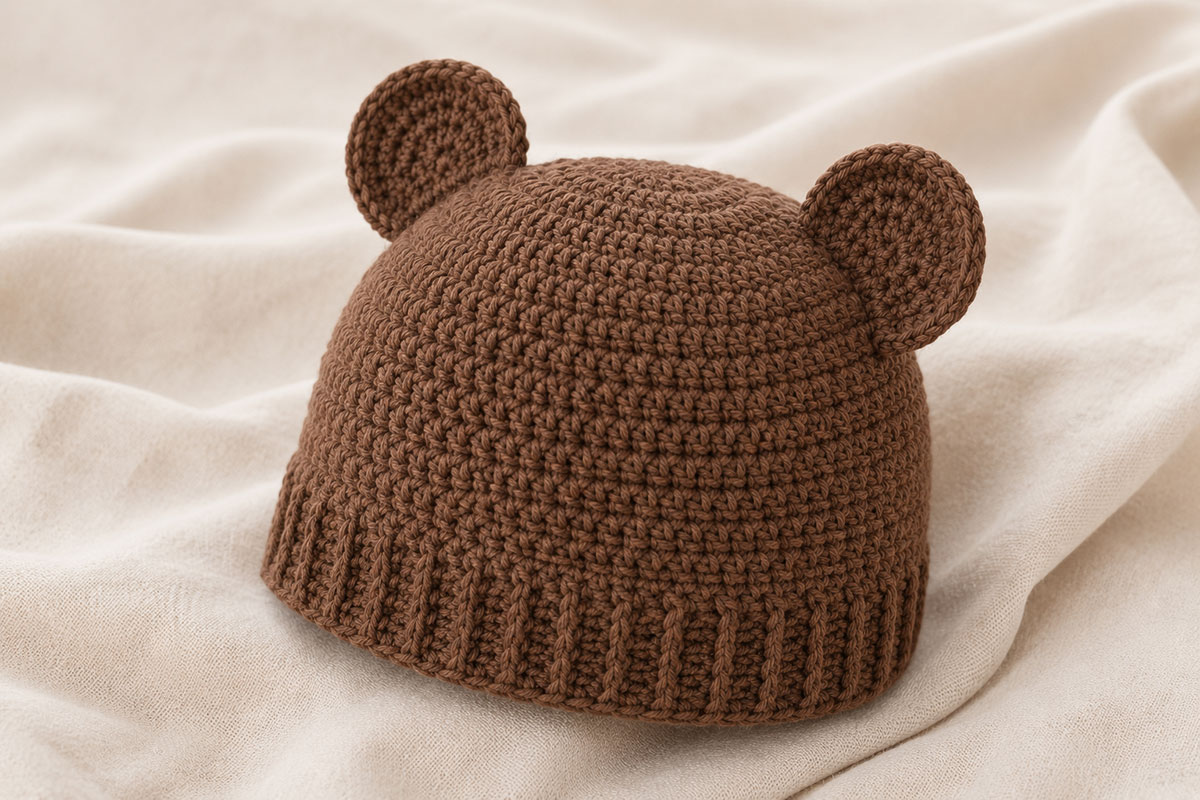
Once the ears are attached, check every seam and yarn tail before the hat is worn or given as a gift. The finished hat should feel flexible throughout, with no stiff knots or loose yarn ends inside.
Check the Crown and Brim
Run your fingers around the inside of the crown and over both ear seams. Make sure the yarn tails are woven securely and that no ends protrude where they could rub against the baby's head.
Check the ribbed edge next. It should stretch easily and return to shape without curling sharply upward. If the edging feels unusually tight, compare the finished circumference with the size chart before using the hat.
The finished hat does not need pom-poms, buttons, beads or other added decorations. The ears provide the design detail, and leaving off loose or detachable embellishments keeps the project cleaner and simpler.
Blocking and Washing
Blocking is optional for this hat. If the crown needs a little reshaping, lightly dampen the finished crochet and smooth it into shape on a clean towel. Do not stretch the ribbing wider than its natural resting size.
Follow the washing and drying directions printed on the yarn label. If you are making the hat as a gift, include the yarn care information so the recipient knows how to wash it without guessing.
This crochet bear hat is not sleepwear. Use it only while the baby is awake and supervised, and remove it before naps and nighttime sleep. As part of its guidance to prevent overheating, the American Academy of Pediatrics advises against putting hats on babies indoors once they are home from the hospital. You can review current infant sleep guidance from the American Academy of Pediatrics.
Crochet Bear Hat FAQ
Is this crochet bear hat pattern suitable for beginners?
Yes, if you are comfortable with half double crochet, simple increases, joined rounds and basic sewing. The post-stitch ribbing is the least familiar part for many newer crocheters, but it uses only alternating front post and back post double crochet.
Can I make the bear hat without the ribbed edge?
Yes. You can work additional half double crochet rounds until the hat reaches the desired finished height, then finish with one round of single crochet. The appearance will be simpler and the lower edge will have less texture than the version shown here.
Can I use a different yarn weight?
You can, but you will need to recalculate the stitch counts and finished measurements. This pattern is written for worsted weight yarn at the stated gauge. Switching to bulky or lightweight yarn while keeping the same stitch counts will change the size considerably.
Why are my crochet bear ears floppy?
First check your gauge. Loose stitches can make the ear fabric softer than intended. You can also make the ears with a hook one size smaller than the hook used for the hat while keeping the same stitch counts. Do not add wire, plastic or other rigid inserts to a baby hat.
Why does my hat crown ripple?
Rippling usually means the crown has too much fabric for the circumference. Count the stitches in each increase round and compare them with the pattern. A hook that is too large can also create a looser, wavier crown.
Why does the crown form a cup too early?
If the crown begins curving downward before you finish the required increase rounds, your gauge may be too tight or an increase may have been missed. Check both the stitch count and your 4-inch gauge measurement before continuing.
Can I make this bear hat in one color?
Yes. The entire hat and both ears use the same yarn color in the pattern shown here. You do not need a second color unless you want to create your own variation.
Do I need to stuff the bear ears?
No. The ears are intentionally left flat. Their folded lower edges give them enough shape to stand away from the crown without stuffing.
Can I add a bear face to the hat?
You can embroider simple features if you want a different look, but they are not required for this design. The finished pattern relies on the rounded ears and hat silhouette rather than a face. For a baby item, avoid buttons, plastic eyes and other detachable facial pieces.
How can I make both ears sit at the same angle?
Shape both ear bases before attaching either one. Then pin or mark them in position and view the hat from directly in front. Sew the first few stitches into each ear before finishing either seam completely. That gives you a chance to compare the angles and adjust them while the placement is still easy to change.
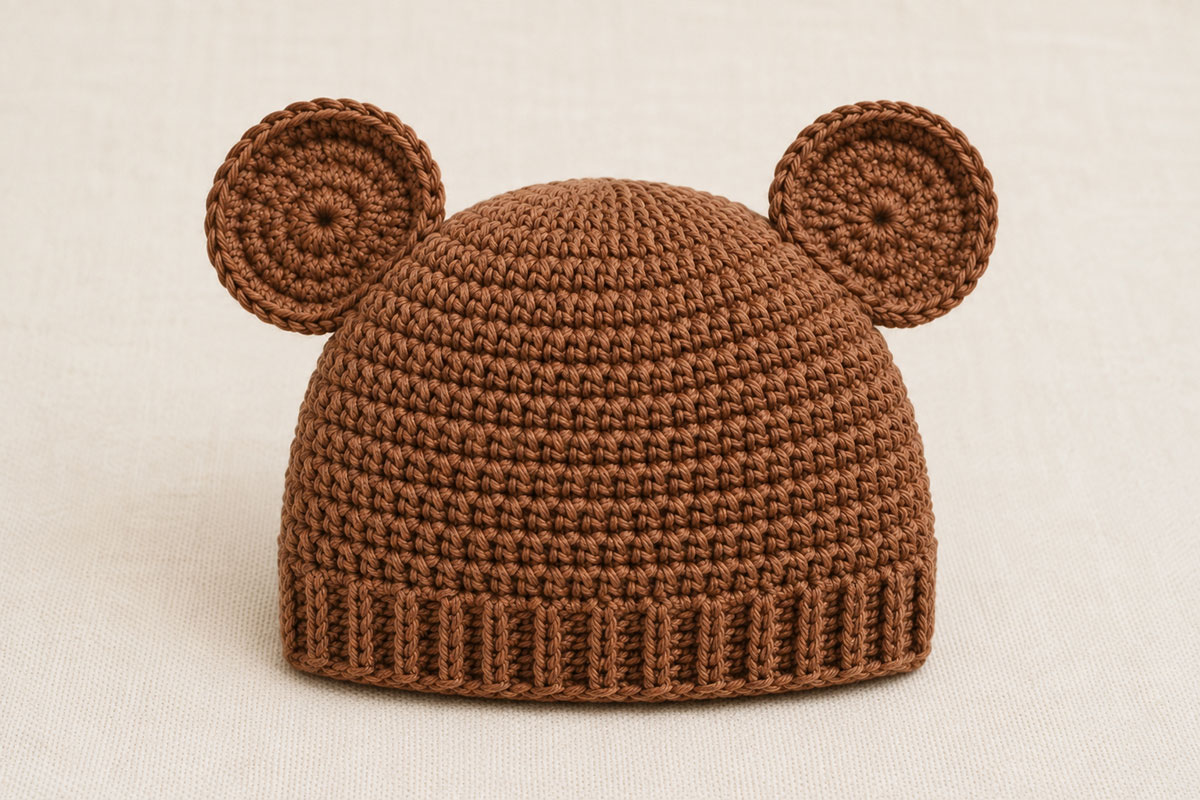
The charm of this little hat comes from keeping the construction uncomplicated: a well-shaped crown, a comfortable lower edge and two carefully placed ears. Once you have the sizing right, it is an easy design to repeat in different bear-inspired colors or coordinate with another handmade bear project.
More Bear Crochet Projects to Make
If you want another project to go with the hat, the free crochet teddy bear pattern makes a classic companion, while the brown bear lovey pattern gives you a flatter bear-themed project. You can also browse the crochet animal lovey patterns for other animal ideas.
If hats are what you enjoy making most, continue with the free baby crochet hat patterns collection.
How to Adjust the Bear Hat Fit Without Changing the Whole Pattern
Baby head measurements do not always land neatly inside a size chart. If the hat needs a small adjustment, change the length before changing the crown. That preserves the intended circumference and keeps the ear placement easier to manage.
If the Hat Needs to Be Slightly Taller
Add one plain half double crochet round before beginning the ribbed edge. At the stated gauge, one additional round adds roughly 3/8 to 1/2 inch of height.
For a larger adjustment, measure from the center top of the crown to the lower edge while the hat lies naturally on a flat surface. Stop adding plain rounds when the hat is approximately 3/4 inch shorter than the desired finished height. The two ribbing rounds will supply the remaining length.
If the Hat Is Too Tall
Remove one plain half double crochet round before making the ribbing. Do not shorten the hat by removing a crown increase round because that also changes the circumference.
If the Hat Is Slightly Too Wide
Check gauge before altering the stitch count. If the hat is consistently wider than the finished measurement in the size chart, a smaller hook is usually the cleanest correction.
If your gauge is correct but you need a custom circumference, use the written size chart as your first guide. The four sizes already include different amounts of negative ease depending on where the baby's head measurement falls within the stated range.
Do not reduce every head measurement by one fixed percentage. For example, the written 6 to 12 month size finishes at about 16 inches around for a suggested 16 to 17 inch head circumference.
If you need a size outside the written ranges, make a gauge swatch and calculate a complete custom size rather than changing only one crown round or applying a fixed percentage to the head measurement.
Keep the Bear Ears in Proportion
If you make only a minor fit adjustment, keep the ear pattern unchanged. Moving the ears slightly is usually enough to maintain the bear shape.
If you substantially enlarge the hat beyond the sizes written here, the ears may begin to look undersized. Rather than adding random stitches around the edge, make a gauge swatch and enlarge the ear circle proportionally so both ears remain identical.
Before sewing, fold the finished hat in half with the front centered. Mark the crown center, then place the ears the same distance from that point. Looking at the hat from several feet away can make uneven placement easier to spot than inspecting it close up.
That small pause before sewing is worth taking. Two neatly matched ears do more for the finished bear look than adding extra decorative details.
What the Finished Crochet Bear Hat Should Look Like
Before you call the project finished, look at the hat as a whole rather than judging individual stitches. The crown should have a softly rounded shape, the sides should fall evenly, and the ribbed edge should sit flat without pulling the fabric inward.
The ears should look like part of the hat rather than circles perched on top of it. Their folded bases create the slight forward curve that gives the design its bear shape.
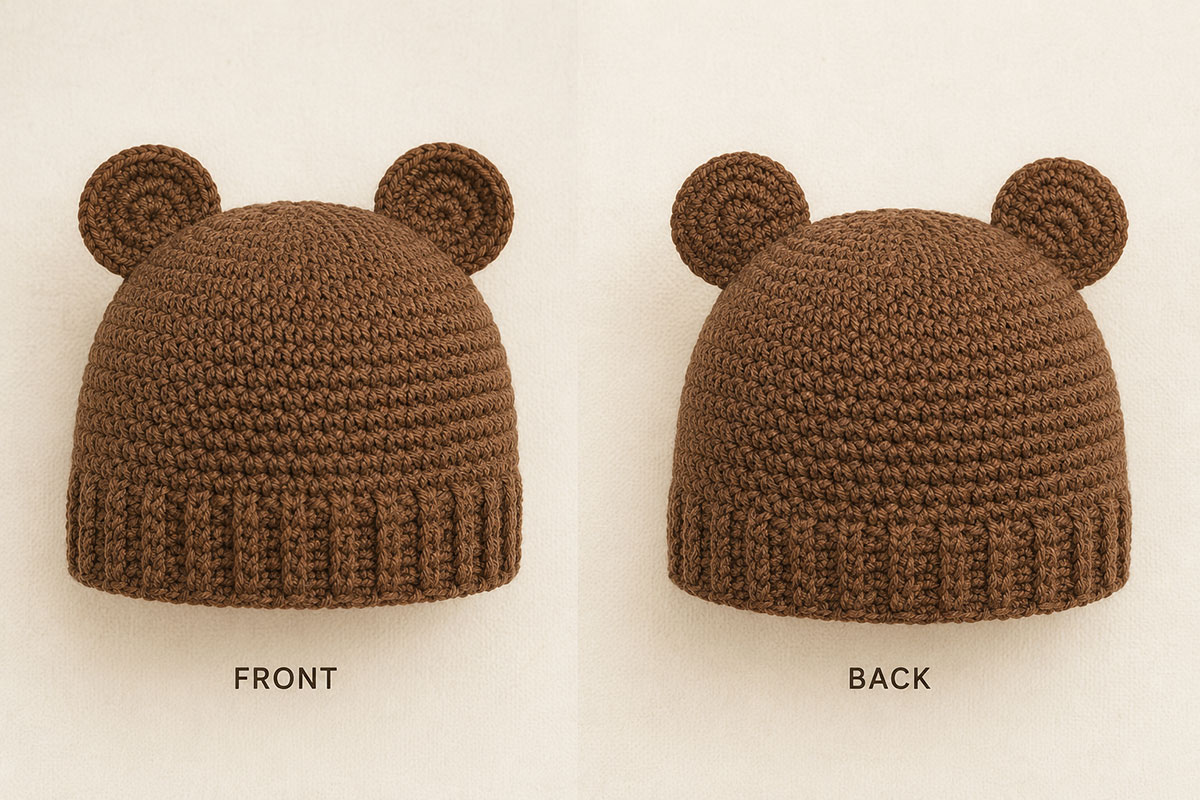
Check the Hat from the Front
- The two ears should be the same height.
- The space between the ears should be centered over the front of the hat.
- Neither ear should lean dramatically farther outward than the other.
- The crown should look rounded rather than pointed.
- The lower edge should appear level from side to side.
Check the Hat from the Back
The round joins form a subtle vertical line at the back of the hat. Keep that line centered when you attach the ears so it does not migrate toward one side.
The ear attachment stitches should also stay discreet when viewed from behind. If a long sewing stitch is visible across the crown, bring the yarn back through smaller sections of the crochet fabric and secure it again.
A Simple Way to Check Ear Placement
Set the hat upright on a clean folded towel or another soft support and look at it from several feet away. Close-up inspection makes tiny stitch differences look important, while a little distance lets you see whether the ears actually appear balanced.
If an ear needs a minor adjustment, you usually do not have to remove the entire seam. Undo only the stitches at one end of the ear base, shift that edge slightly, and sew it back into place.
I would keep the finished hat this simple. Rounded ears, good proportions and tidy crochet give it a recognizable teddy bear look without adding a muzzle, buttons, dangling ties or other details that compete with the shape.
Make the Bear Hat Part of a Handmade Baby Gift
This project uses relatively little yarn, which makes it useful when you have enough yarn left from a larger bear project to create one more matching piece. A hat made from the same yarn as a teddy or lovey looks coordinated even when the projects use different stitch patterns.
You do not have to make every item exactly the same shade. A medium brown hat beside a lighter oatmeal bear, for example, can still look like an intentional set when the yarns have a similar weight and texture.
For a classic pairing, make the crochet teddy bear alongside the hat. The brown bear lovey gives you another way to repeat the rounded-ear motif without making two stuffed projects.
For an even smaller coordinating project, the free crochet bear rattle pattern repeats the rounded bear head and embroidered face on a natural wooden ring handle.
Fold the finished hat rather than stuffing it full when you package it. That protects the ear seams and helps the ribbing keep its shape.
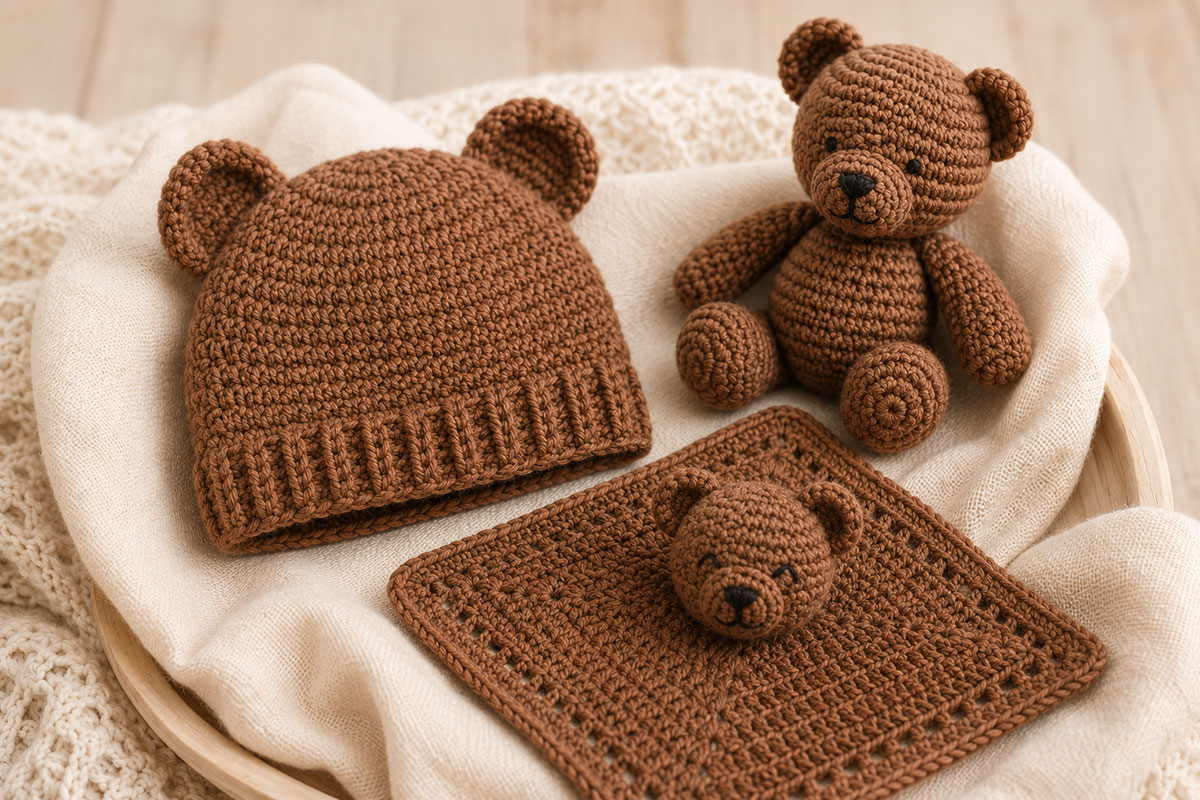
A small bear hat can carry plenty of personality without becoming fussy. Get the fit right, give the ears a little attention before you sew them down, and the finished shape does the rest.
Details That Give the Crochet Bear Hat a Neater Finish
A simple animal hat does not have many places for construction problems to hide. The rounded crown, ribbed lower edge and two ears are all easy to see, so a few small finishing choices can make the completed hat look noticeably more polished.
Keep the Round Join at the Back
Each joined round creates a subtle vertical join. Keep that join centered at the back as you crochet rather than letting the beginning of the round drift around the hat.
When you finish a round, join directly to the first half double crochet. Do not join into the beginning chain. The chain does not count as a stitch in this pattern, and joining into it can gradually add unwanted stitches.
Before beginning the next round, count the stitches if anything looks uneven. It takes less time to correct a round immediately than to discover several rounds later that the hat has begun to flare.
Avoid a Point at the Center of the Crown
Pull the magic ring closed firmly, but do not yank it so tightly that the center puckers. After weaving in the starting tail, smooth the first few rounds with your fingers.
A slight indentation at the center generally relaxes as the hat is handled or washed. A pronounced point usually comes from tight tension in the first round or a starting ring that has been pulled much tighter than the surrounding stitches.
Keep the Ribbing Flexible
Front post and back post stitches can become tighter than half double crochet because the hook travels around the stitch posts instead of through the tops of the stitches.
Do not pull the working yarn tightly after completing each post stitch. Let the loops sit naturally on the hook. The lower edge should stretch with the body of the hat rather than behaving like a rigid band.
If you consistently crochet post stitches tightly, using a hook one size larger for the two ribbing rounds can help. Check the finished edge against the size chart before fastening off.
Make the Two Bear Ears as a Pair
Make both ears during the same crochet session when possible. Changes in hand tension can make two small circles noticeably different even when their stitch counts match.
After completing both ears, stack them together before shaping the bases. Their outer edges should be nearly identical. If one ear is substantially larger, check the stitch count rather than trying to hide the difference during sewing.
Fold each ear base by approximately the same amount. A deeper fold creates a narrower, more cupped ear. A shallow fold leaves more of the round circle visible.
A Quick Crochet Bear Hat Pattern Check Before You Finish
Before you call the project finished, compare the hat with these points:
- The hat circumference matches the intended size closely.
- The crown is rounded rather than sharply pointed.
- The sides fall evenly without obvious flaring.
- The ribbing stretches comfortably and returns to shape.
- Both bear ears are the same approximate size.
- The ear bases are securely sewn with no loose attachment stitches.
- The ears appear balanced when the hat is viewed from the front.
- All yarn tails are woven securely into the inside of the fabric.
- No buttons, beads, plastic eyes or detachable decorations have been added.
If those details look right, the hat is finished. The pattern is intentionally uncomplicated, which makes the little bear ears easy to recognize and leaves plenty of room to change the yarn color without changing the construction.
For another small project after this one, the free baby crochet hat patterns page is the best place to continue browsing. If you would rather stay with the bear theme, the crochet teddy bear pattern gives you a larger matching project to make next.
When you click on links to various merchants on this site and make a purchase, this may result in this site earning a commission. This does not affect the price you pay.

UBGI Gold Standard 2026
Reviewed under the site's
editorial checklist.
Photos, decorating ideas, party setups and reader submissions are shared for inspiration unless a page is specifically presented as a pattern, tutorial, reference guide or step-by-step project. Follow the instructions, measurements, safety guidance and manufacturer directions provided for the particular project or product.
About Jan | Contact | Baby Nursery Ideas (Blog) | Site Map | Privacy Policy | Disclosure Policy | Disclaimer | Affiliate Disclosure | Earnings Disclosure | Facebook | Pinterest
I am a participant in the Amazon Services LLC Associates Program, an affiliate advertising program designed to provide a means for us to earn fees by linking to Amazon. As an Amazon Associate I earn from qualifying purchases.
Copyright © 2006-2026. All Rights Reserved.