Free Panda Crochet Pattern for a Black and White Stuffed Bear
By Jan Bay
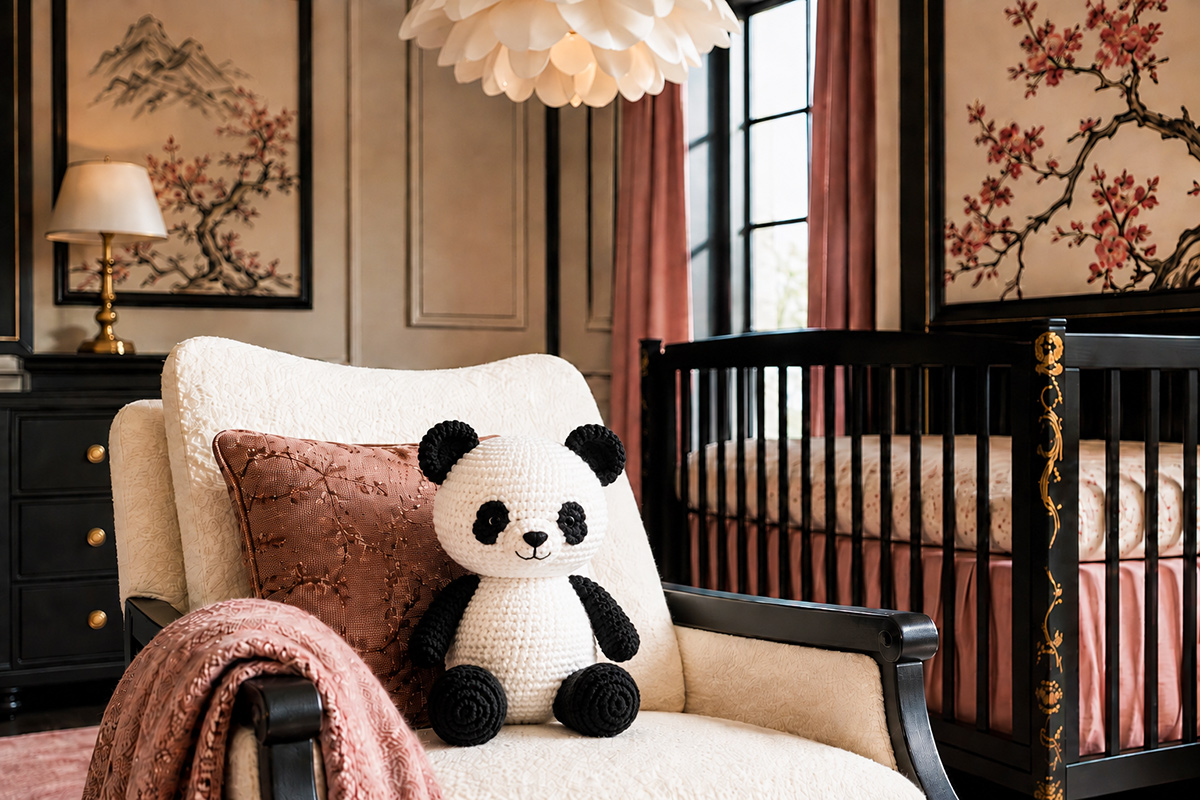
This free panda crochet pattern makes a compact black and white stuffed panda with a rounded white head, black ears and eye patches, black arms and legs, and embroidered facial features. The placement of the dark pieces matters as much as the crochet itself because small changes around the eyes and ears can quickly change whether the finished bear actually reads as a panda.
Explore More Free Bear Crochet Patterns
Yarn for This Panda Crochet Pattern
Jump to the Panda Crochet Pattern
Supplies for This Free Panda Crochet Pattern
This panda is worked with medium weight yarn and a smaller hook than you might use for a blanket. The tighter fabric helps the head and body keep their rounded shape and prevents the stuffing from showing between stitches.
- White worsted weight yarn, category 4: approximately 120 yards
- Black worsted weight yarn, category 4: approximately 90 yards
- 3.5 mm (E-4) crochet hook, or the hook size needed to make a firm fabric
- Polyester fiberfill: approximately 3 to 4 ounces
- Black embroidery floss: for the eyes, nose and mouth
- Yarn needle: for assembly and weaving in ends
- 2 removable stitch markers: one for marking the first stitch of each round and one for marking the center front of the head
- Straight pins: for checking the placement of the eye patches, ears and limbs before sewing
- Scissors
- Measuring tape
A smooth acrylic or cotton blend makes the black and white sections easier to see while you work. Very fuzzy yarn can soften the panda's markings so much that the eye patches lose their shape.
I prefer to choose the white and black yarns from the same yarn line when possible. Matching fiber content and thickness helps the ears, patches and limbs sit against the white pieces without looking heavier or looser.
The face is embroidered rather than made with plastic eyes. That keeps the front of the panda soft and avoids adding small detachable eye pieces.
If you want another small bear project after this one, the crochet bear appliqué pattern makes a flat bear that can be sewn to blankets and other handmade projects.
Finished Size and Gauge
Skill level: Advanced beginner. You should be comfortable making a magic ring, working single crochet in continuous rounds, increasing, decreasing, sewing crocheted pieces together and adding simple embroidery.
With worsted weight yarn and a 3.5 mm hook, expect a finished panda approximately 9 to 10 inches tall from the top of the ears to the bottom of the feet. Treat that as an expected finished size rather than an exact measurement. Yarn thickness, tension and stuffing can change the final dimensions.
Gauge: Exact gauge is not required for this stuffed project. Use the hook size that gives you a dense single crochet fabric with no obvious gaps for the stuffing to show through.
- Head checkpoint: after Round 15, the head has 48 stitches around and should form a broad rounded cup
- Body checkpoint: after Round 12, the lower body has 36 stitches around and should look rounded rather than cylindrical
- Expected finished height: approximately 9 to 10 inches with the listed yarn and hook, with individual results varying
If you can see large openings between the stitches before stuffing, move down one hook size. Do not crochet so tightly that inserting the hook becomes difficult. The goal is a dense, flexible fabric rather than a stiff shell.
Keep the stuffing fairly even. A tightly packed head beside a lightly stuffed body can make the panda look top-heavy even when every piece has the correct stitch count.
Crochet Abbreviations Used in the Pattern
This pattern uses U.S. crochet terminology and is worked mainly in continuous rounds. Move the stitch marker to the first stitch of each new round.
- ch = chain
- sc = single crochet
- inc = increase by working 2 single crochet stitches in the same stitch
- dec = invisible single crochet decrease
- sl st = slip stitch
- st = stitch
- sts = stitches
- rnd = round
- rep = repeat
Stitch totals are shown in parentheses at the end of the rounds where counting is especially useful. Count before moving to the next shaping round. A missed increase near the beginning of the head can shift the face later even though the mistake seems small when you make it.
Pattern notes: The head, body, arms, legs and ears are worked in continuous rounds unless a section says otherwise. Do not turn between rounds. Keep the same side of the fabric facing outward throughout each stuffed piece.
Secure every magic ring before stuffing or assembly. Pull the starting tail firmly to close the center, then weave that tail under several stitches on the inside of the piece and reverse direction through another group of stitches. Leave the secured tail inside stuffed pieces. On the unstuffed ears, weave the starting tail into the back of the crochet before trimming it.
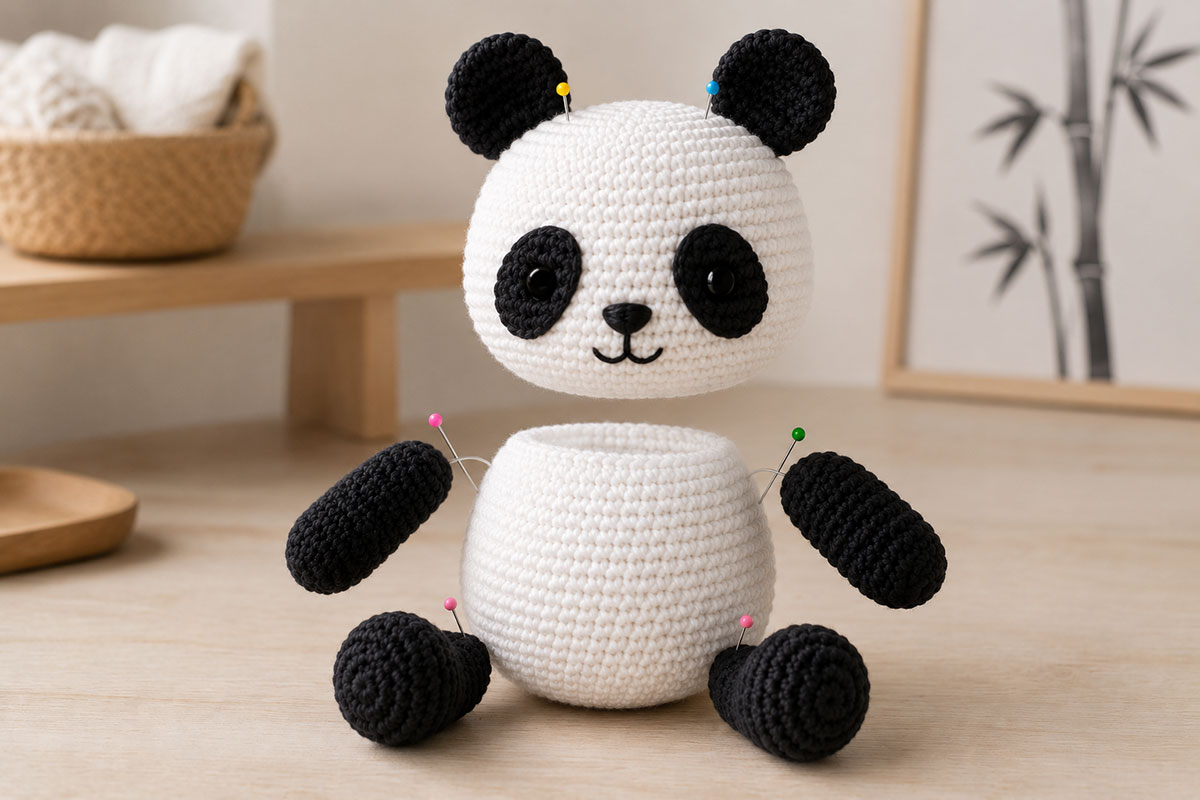
The complete panda has 10 crocheted pieces: 1 head, 2 eye patches, 2 ears, 1 body, 2 arms and 2 legs.
The Craft Yarn Council crochet abbreviations list is a useful reference if you want to compare these terms with standard U.S. crochet terminology.
Crochet the Panda Head
Use white yarn for the entire head. The head is worked from the top down in continuous rounds and shaped as a full rounded piece. Do not add the black markings while you crochet the head. Keeping the base completely white makes it much easier to adjust the eye patches before they are sewn in place.
Round 1: Make a magic ring and work 6 sc into the ring. (6)
Round 2: Inc in each st around. (12)
Round 3: [Sc in next st, inc in next st] 6 times. (18)
Round 4: [Sc in next 2 sts, inc in next st] 6 times. (24)
Round 5: [Sc in next 3 sts, inc in next st] 6 times. (30)
Round 6: [Sc in next 4 sts, inc in next st] 6 times. (36)
Round 7: [Sc in next 5 sts, inc in next st] 6 times. (42)
Round 8: [Sc in next 6 sts, inc in next st] 6 times. (48)
Rounds 9 through 15: Sc in each st around. (48)
The head should now have a broad rounded center rather than a pointed top. If your starting ring still leaves a small opening, close it securely with the beginning yarn tail before you continue.
Round 16: [Sc in next 6 sts, dec] 6 times. (42)
Round 17: [Sc in next 5 sts, dec] 6 times. (36)
Round 18: [Sc in next 4 sts, dec] 6 times. (30)
Round 19: [Sc in next 3 sts, dec] 6 times. (24)
Round 20: [Sc in next 2 sts, dec] 6 times. (18)
Begin stuffing the head. Add small pieces of fiberfill at a time and push them toward the upper sides as well as the center. Turn the head in your hands as you work so you can check the shape from the front, back and profile.
Keep the face area rounded rather than pressing it flat. The eye patches will add visual width later, so the white head itself does not need to be stretched sideways.
Round 21: [Sc in next st, dec] 6 times. (12)
Add the final stuffing before the opening becomes too small. The head should feel firm enough to hold its shape but should still compress slightly when pressed.
Round 22: Dec around. (6)
Fasten off, leaving a tail approximately 8 inches long. Thread the tail through the front loops of the remaining 6 stitches, pull the opening closed and secure the yarn. Weave the tail into the head.
Set the head on a flat surface before adding the panda markings. If it rolls toward one side, gently redistribute the stuffing with your fingers. It is easier to correct the basic shape now than after the ears and eye patches are attached.
Crochet the Panda Eye Patches and Ears
The eye patches and ears carry much of the panda's expression. Make each matching pair before attaching that pair to the head, and pin the pieces first so you can correct the spacing and angle without pulling out stitches.
Make 2 Black Eye Patches
Use black yarn.
Foundation: Ch 5.
Round 1: Sc in the second ch from the hook. Sc in the next 2 ch. Work 3 sc in the last ch. Turn the work so you can crochet along the unused loops on the opposite side of the foundation chain. Sc in the next 2 loops. Work 2 sc in the same foundation ch that holds the first sc. (10)
Round 2: Inc in the first st. Sc in the next 2 sts. Inc in each of the next 3 sts. Sc in the next 2 sts. Inc in each of the last 2 sts. (16)
Sl st in the next st and fasten off, leaving a long tail for sewing. Weave the short beginning tail securely into the back of the patch. Make the second patch the same way.
Gently flatten each patch with your fingers. Do not stretch the oval into a long narrow shape. The patches should look compact and slightly rounded.
Position the Eye Patches
Place the head with the closing point from Round 22 facing down and the top magic-ring center at the crown. Choose the center front of the head and place a removable stitch marker there. Use that marker as the centerline while you position the two eye patches and embroider the nose, and keep the same center front when the head is aligned with the body.
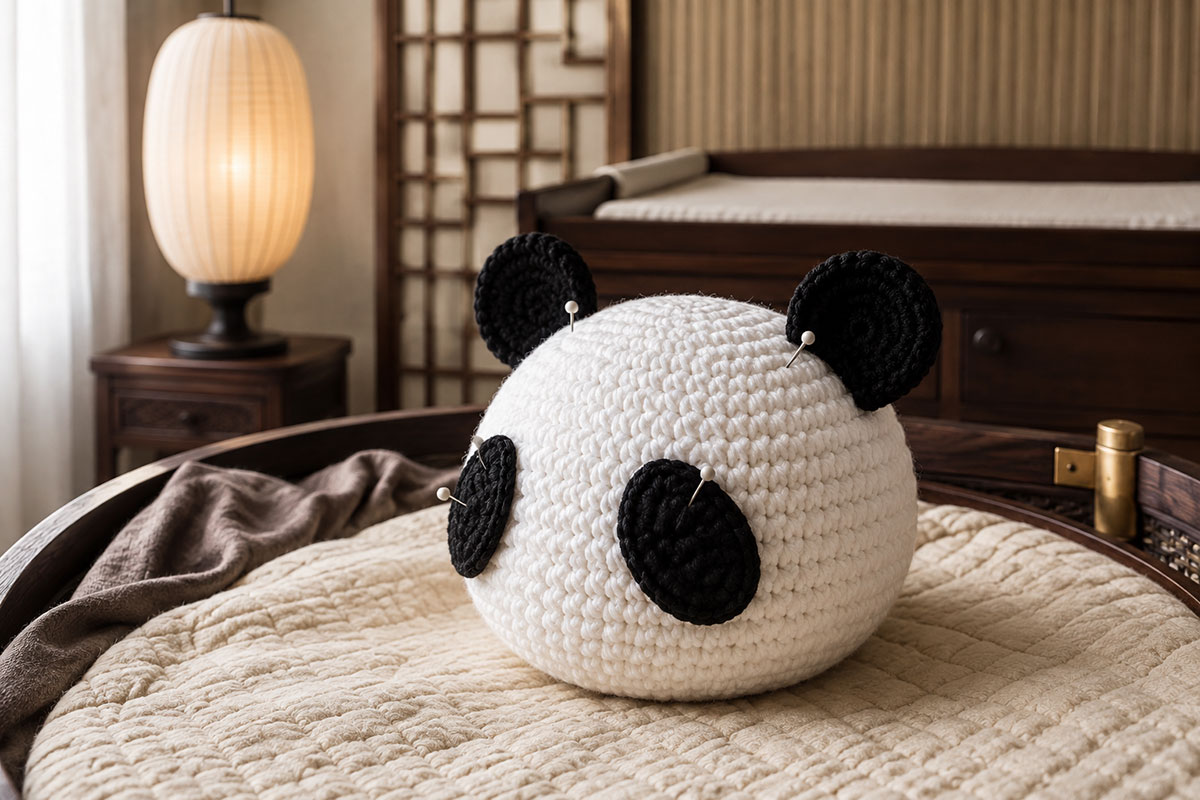
Pin one black oval on each side of the front of the face. Angle the top of each patch slightly outward and the lower end slightly inward toward the center of the face. Leave a clear strip of white crochet between the two patches.
The patches should not meet at the center and should not extend all the way to the ears. A little white space around each black oval keeps the face readable from several feet away.
Check the head from a three-quarter angle before sewing. If one patch appears higher, move the pin rather than trying to correct the difference while stitching.
When you are satisfied with the placement, keep the side that faced you while working Round 2 facing outward. Thread the long black sewing tail from one patch onto the yarn needle and sew around the outer edge of the patch. Take small stitches through the head fabric without pulling hard enough to make a dent. Secure the tail and hide the end inside the head. Repeat with the second patch.
Make 2 Black Ears
Use black yarn.
Round 1: Make a magic ring and work 6 sc into the ring. (6)
Round 2: Inc in each st around. (12)
Round 3: [Sc in next st, inc in next st] 6 times. (18)
Sl st in the next st and fasten off, leaving a tail approximately 10 inches long for sewing. Make a second ear.
Do not stuff the ears. They are flat circles, but they should be attached standing on their edges rather than laid flat across the top of the head.
Pin each ear near the upper side of the head. Let approximately the lower third of the circle touch the head and allow the rest of the ear to extend above and outside the head silhouette. Viewed from the front, the ears should frame the crown instead of looking like black circles pasted to the top.
The exact position can change the finished look more than a difference of one crochet stitch. Move both ears a little lower if the panda starts to resemble a mouse. Move them slightly outward if the head looks too narrow.
If you want to compare the ear placement again after the body is made, note the position and remove the pins before you continue handling or embroidering the head. Re-pin the ears during final assembly. Do not leave straight pins in the head between work sessions.
Crochet the Panda Body for This Free Panda Crochet Pattern
The body is worked in white yarn as a separate piece. It starts at the lower center, widens through the belly and then narrows toward the neck. The black arms and legs are added later, so there are no color changes in this section.
Keep the body a little narrower than the head. A panda with a broad head and compact body has a more recognizable stuffed-animal shape than one with a long cylindrical torso.
Use white yarn.
Round 1: Make a magic ring and work 6 sc into the ring. (6)
Round 2: Inc in each st around. (12)
Round 3: [Sc in next st, inc in next st] 6 times. (18)
Round 4: [Sc in next 2 sts, inc in next st] 6 times. (24)
Round 5: [Sc in next 3 sts, inc in next st] 6 times. (30)
Round 6: [Sc in next 4 sts, inc in next st] 6 times. (36)
Rounds 7 through 12: Sc in each st around. (36)
At this point the lower body should look rounded rather than flat. The beginning of the piece will eventually sit between the black legs, so a softly curved base is useful.
Round 13: [Sc in next 4 sts, dec] 6 times. (30)
Rounds 14 and 15: Sc in each st around. (30)
Round 16: [Sc in next 3 sts, dec] 6 times. (24)
Rounds 17 and 18: Sc in each st around. (24)
Round 19: [Sc in next 2 sts, dec] 6 times. (18)
Round 20: Sc in each st around. (18)
Begin stuffing the body. Add the fiberfill in small amounts and push it toward the lower sides first. This gives the belly some width without making the center hard.
Continue adding stuffing until the body holds its shape when you set it down. Keep the upper section a little softer than the lower belly because the head will be sewn directly over the neck opening.
Round 21: [Sc in next st, dec] 6 times. (12)
Round 22: Sc in each st around. (12)
Fasten off and leave a long yarn tail for attaching the head. Do not pull the final opening closed.
Add a small amount of stuffing through the opening if the shoulders look hollow. Stop when the body feels evenly filled but still has a little give.
Place the finished head over the opening without sewing it yet. The head should overlap the narrow upper body enough to hide the opening completely. If the body looks too tall, press some stuffing downward before assembly rather than folding the neck.
Crochet the Black Panda Arms and Legs
The arms and legs are worked entirely in black yarn. Keeping these pieces compact is important. Long limbs can turn the silhouette into a general teddy bear, while short dark limbs keep the white belly visually dominant.
Make 2 Black Arms
Use black yarn.
Round 1: Make a magic ring and work 6 sc into the ring. (6)
Round 2: Inc in each st around. (12)
Rounds 3 through 7: Sc in each st around. (12)
Round 8: [Sc in next 2 sts, dec] 3 times. (9)
Rounds 9 and 10: Sc in each st around. (9)
Add a small amount of fiberfill to the lower half of the arm. Leave the upper section mostly unstuffed so it can lie neatly against the side of the body.
Flatten the 9-stitch opening so the extra stitch sits at one side fold. Work 4 sc through both layers across the other 8 stitches to close the top.
Fasten off and leave a long tail for sewing. Thread that tail onto the yarn needle and catch the remaining fold stitch and the adjacent edge once so that side of the opening is also secure. Keep the same tail for attaching the arm to the body. Make the second arm the same way.
Each finished arm should be short and slightly rounded at the lower end. If the arms look like long tubes, remove some stuffing and press the upper section flatter before attaching them.
Make 2 Black Legs
Use black yarn.
Round 1: Make a magic ring and work 6 sc into the ring. (6)
Round 2: Inc in each st around. (12)
Round 3: [Sc in next st, inc in next st] 6 times. (18)
Rounds 4 through 6: Sc in each st around. (18)
Round 7: [Sc in next st, dec] 6 times. (12)
Add fiberfill. Fill the lower portion enough to make a rounded foot, but do not pack it tightly.
Round 8: Dec around. (6)
Fasten off and leave a long tail for sewing. Thread the tail through the front loops of the remaining stitches and pull the opening closed.
Make the second leg the same way.
Roll each leg lightly between your fingers after stuffing. The shape should be plump and compact, not pointed at either end.
Before sewing, place both legs against the lower body and set the panda upright. The legs should support the seated shape without spreading so far apart that the white belly disappears between them.
If you enjoy making compact bear-shaped crochet projects, the teddy bear lovey crochet pattern uses a different construction and turns the bear head into a soft blanket-style project.
Embroider the Panda Face
Finish the face before attaching the head to the body. It is much easier to hold and turn the head while you embroider when the rest of the panda is not attached.
Use black embroidery floss for the eyes, nose and mouth.
Embroider the Eyes
Place one eye near the center of each black eye patch. Do not place the eyes at the inner edges of the patches. A centered position keeps the black oval visible around the eye and prevents the face from looking crowded near the nose.
Make each eye with several short satin stitches placed close together. Keep the eye compact, approximately 1/4 inch wide. Work the stitches in the same direction on both sides.
Do not pull the embroidery floss tightly. The stitches should sit on the surface of the patch without sinking deeply into the crochet.
After making the first eye, look at the head straight on before stitching the second. Match the height and distance from the center of the face rather than counting only the stitches on the patches. Small differences in handmade pieces can make identical stitch counts appear uneven.
Embroider the Nose
Place the nose on the white area below and between the eye patches.
Make a small horizontal triangle or rounded wedge with black satin stitches. Begin with a short horizontal stitch and add several stitches beneath it, reducing the width slightly as you move down.
The nose should remain compact. A very large black nose competes with the eye patches and changes the expression of the face.
Add the Mouth
Bring the embroidery floss down from the center of the nose approximately 1/4 inch with one straight stitch.
From the bottom of that stitch, make one short diagonal stitch toward the left and another toward the right. Keep both sides shallow so the mouth reads as a small stitched smile rather than a wide curve.
Secure all embroidery ends inside the head. If you need to enter or exit through the back of the head, pull the final knot beneath the crochet fabric so it does not remain visible on the surface.
Set the head a few feet away and look at it again. The face should still read clearly without relying on tiny details. The white space between the eye patches, the compact nose and the high black ears are what give the panda its expression.
Assemble the Crochet Panda Bear
Lay out the head, body, two arms, two legs and two ears before sewing. Re-pin the ears in the positions you noted earlier. Assembly is easier when you decide the final positions first instead of attaching one piece and making the others fit around it.
Attach the Head
Center the head over the open neck of the body. The face should point directly forward and the center of the white belly should line up beneath the nose.
Pin the head in place at the front, back and both sides.
Thread the long white yarn tail from the body onto a yarn needle. The body opening has 12 stitches. Sew through the first neck stitch and then through a small section of the lower-head fabric directly above it.
Continue around the neck once, using each of the 12 body-opening stitches in order and taking a corresponding bite of lower-head fabric above each one. When you return to the first stitch, all 12 neck stitches should be secured with no skipped stitches. Pull each stitch firmly enough to close the seam, but do not cinch the neck inward.
Before completing the final few stitches, check the head from the front. If it leans, remove the nearest stitches and reposition it. Correcting the angle now gives a cleaner result than trying to reshape the finished panda with extra stuffing.
Secure the yarn and hide the end inside the body.
Attach the Ears
If the ears are not already sewn, place them high on the sides of the head with the circles standing upright on their edges.
Sew through only the lower section of each ear and the corresponding head stitches. Work across the attachment line twice if necessary so the ear remains upright.
Do not sew the entire circular ear flat against the head. Most of each ear should remain free and visible from the front.
Attach the Arms
Pin one arm to each side of the upper body just below the head.
Angle the arms slightly forward. The lower ends can rest beside the belly instead of pointing straight down.
Sew through the flattened top of each arm and the body underneath it. Make several passes across the top edge, then add one small anchoring stitch near the inner side of the arm if you want it to remain close to the body.
Repeat on the opposite side and compare both arms from the front before securing the yarn.
Attach the Legs
Place the two black legs at the lower front and sides of the white body. Orient each leg with the magic-ring end pointing forward and the Round 8 closed end resting against the body.
Pin both legs before sewing either one. Set the panda upright and adjust the positions until the body sits naturally between them.
The legs should point slightly forward and outward. Keep enough of each black leg visible that the panda has a clear seated base, but do not place them so far apart that they look detached from the body.
Thread the long sewing tail from the Round 8 closure onto the yarn needle. Sew around the upper and back portion of each leg where it meets the body. Leave the magic-ring end and rounded front of the foot free so it keeps its shape.
Secure all yarn tails and draw them into the body with the yarn needle.
Final Shaping and Finishing
Turn the completed panda slowly in your hands and check it from the front, both sides and the back. Final shaping is mostly about redistributing the stuffing and making sure the dark pieces form a balanced outline around the white head and body.
If the head looks flat at the front, press gently at the sides and back to move some stuffing forward. If the belly is too firm, massage the fiberfill toward the lower sides rather than opening the body again.
Check the ears next. They should remain upright and extend outside the head silhouette. If an ear folds backward, add a few small sewing stitches along its lower attachment edge.
Look at the eye patches as a pair. They do not need to be mathematically identical, but their overall height and angle should feel balanced. Avoid adding extra black embroidery around a patch simply to make it larger. That can make the two sides look heavier rather than more even.
Press the arms toward the body and shape the legs into short rounded feet. Set the panda upright. Adjust the legs until the body rests between them without tipping sharply to one side.
Run your fingers over every seam and check for loose yarn ends. Draw visible ends back into the stuffed pieces with a yarn needle. Remove all removable stitch markers and every straight pin before the panda is handled, displayed or given as a gift.
Because this is a handmade stuffed project, check the seams and embroidered features regularly if the panda will be handled. Repair loose stitching before continued use. If the panda is made for a baby, use it during awake, supervised time and keep it out of cribs, bassinets, play yards and other infant sleep spaces. The U.S. Consumer Product Safety Commission safe sleep guidance recommends a bare infant sleep space without toys or other soft objects.
For another bear project with a completely different shape, the crochet bear hat pattern turns the familiar round ears into a wearable baby-size crochet project.
Common Panda Crochet Problems and How to Fix Them
The Panda Looks More Like a Teddy Bear
Check the placement of the black pieces before changing the white body. The eye patches should be clearly visible, the ears should sit high and outward on the head, and the arms and legs should remain predominantly black.
A conventional teddy-bear look can also come from ears placed too low or limbs made too long. Shorten the visual length of the arms by sewing a little more of the upper section against the body.
The Eye Patches Look Too Large
The patches need a border of visible white crochet around them. If they reach close to the center of the face or nearly touch the ears, remove them and sew them back slightly closer to the center of their original positions without stretching the ovals.
The Head Tilts After Assembly
A tilted head can come from uneven sewing or from stuffing that has shifted near the neck. If the seam itself is level, massage the stuffing inside the lower head and upper body before removing stitches.
If the seam is visibly higher on one side, remove that section of stitching, center the head again and resew it.
The Stuffing Shows Through the Crochet
Visible stuffing usually means the fabric is too loose or the piece is packed too firmly. For a future piece, use a smaller hook. On the finished panda, redistribute the stuffing away from the area where it is pushing through the stitches.
The Panda Will Not Sit Upright
Check the legs before altering the body. If a leg needs to move, remove only the stitches holding that leg, reposition it slightly forward or closer to the other leg, and pin it in place. Test the panda on a flat surface. Sew the leg securely in the new position, then remove every straight pin used for the adjustment.
A very firm belly can also make the panda roll backward. Massage some of the stuffing toward the lower front of the body.
Frequently Asked Questions About the Panda Crochet Pattern
Is this panda crochet pattern suitable for beginners?
This is best treated as an advanced-beginner pattern. The crochet itself uses basic single crochet, increases and decreases, but the project also requires continuous-round shaping, sewing, careful feature placement and simple embroidery.
Can I make the panda with a different yarn weight?
Yes. A lighter yarn and smaller hook will make a smaller panda, while a thicker yarn and larger hook will make a larger one. Keep the hook small enough for the chosen yarn that the stuffing does not show through the stitches.
Can I use safety eyes instead of embroidered eyes?
If the panda is being made for a baby, keep the embroidered eyes as written rather than substituting plastic safety eyes. The black eye patches already create a dark background, so small satin-stitch eyes fit the design while avoiding separate plastic eye pieces.
Why are the eye patches crocheted separately?
Separate patches let you adjust the angle and spacing before sewing. That is useful on a panda because the position of the black markings has a large effect on the finished expression.
Should the panda ears be stuffed?
No. The ears are flat crochet circles. Sew only their lower edges to the head so the upper portions remain upright.
Can I make the panda larger for nursery display?
You can use thicker yarn and a matching larger hook to increase the finished size. Keep the same relative placement of the eye patches, ears and limbs so the proportions remain recognizable.
What can I make next with the same bear theme?
The crochet bear appliqué pattern is a good choice when you want a flat motif instead of another stuffed project. You can also browse the free baby crochet patterns for more handmade project ideas.


When you click on links to various merchants on this site and make a purchase, this may result in this site earning a commission. This does not affect the price you pay.

UBGI Gold Standard 2026
Reviewed under the site's
editorial checklist.
About Jan | Contact | Baby Nursery Ideas (Blog) | Site Map | Privacy Policy | Disclosure Policy | Disclaimer | Affiliate Disclosure | Earnings Disclosure | Facebook | Pinterest
I am a participant in the Amazon Services LLC Associates Program, an affiliate advertising program designed to provide a means for us to earn fees by linking to Amazon. As an Amazon Associate I earn from qualifying purchases.
Copyright © 2006-2026. All Rights Reserved.