DIY Silhouette Wall Art: Make a Child's Profile Portrait from a Photo
By Jan Bay
Silhouette wall art is one of the easiest ways to turn an ordinary photograph into personalized nursery wall decor. Start with a clear side profile of your child, baby or even a favorite pet, simplify the outline into one solid shape, then print, cut and frame it against a contrasting background. You do not need to know how to draw a portrait, and you can make the finished silhouette as traditional or colorful as you like.
Explore More DIY Nursery Patterns & Projects
Helpful Supplies for This Project
Jump to:
How to Make Silhouette Art from a Photo
Mount and Frame Your Silhouette Art
Baby Nursery Silhouette Art Ideas
Make Silhouette Art Without a Computer
What Is Silhouette Art?
Silhouette art creates an outline of a person, animal or object and a single solid shape. For a nursery portrait, that simplicity is exactly what makes it work. You aren't trying to reproduce every feature in a baby's face. There's no need to capture every curl of every hair on the child's head. The curve of the forehead, nose, lips, chin and hair does the work.
The traditional black profile on a white background is a beautiful classic and always appropriate, but you don't have to stay that traditional. A deep navy, cranberry, muted green or another color pulled from the nursery's color palette can be very attractive. You can also reverse it and use a light silhouette against a darker background.
Silhouette portraits have quite a history of their own. The Smithsonian American Art Museum's history of silhouettes explains that painted, hollow-cut and cut-and-pasted silhouettes were all used in early American portraiture. They were popular partly because they could capture a recognizable likeness much faster and less expensively than a painted portrait.
For what we're doing here, you don't need an artist or an antique cutting technique. A good side-view photo gives you the outline, and from there you can make a clean profile with paper, scissors and a printer.
How to Make Silhouette Wall Art from a Photo
The easiest way to make this type of personalized silhouette wall art is to start with a photograph rather than trying to draw the profile freehand. That also takes care of the hardest part, which is getting the shape of the nose, lips and chin to actually look like your child.
I would keep the first one simple. One profile. One background. One frame. You can always make others for a gallery wall arrangement later.
There are two good ways to turn the photo into a silhouette:
- Print, trace and cut it by hand. This is the easiest method if you don't want to fool with photo-editing software.
- Turn the profile into a solid shape digitally. Then you can print the finished silhouette or use the file with a cutting machine if you have one.
You don't need a cutting machine just to make one framed portrait. If you already own one, fine. If not, don't turn a very inexpensive craft into a shopping project. The process has been managed very successfully for centuries without the use of fancy tools and gadgets. You can manage this without them.
Supplies You Will Need
You can make the basic version with supplies you may already have:
- A clear side-profile photograph
- Printer and ordinary printer paper for the working copy
- Black or colored cardstock for a hand-cut silhouette
- White, ivory or colored cardstock for the background
- Small sharp scissors or a craft knife and cutting mat
- Pencil
- Glue stick, double-sided adhesive or another paper-safe adhesive
- Picture frame
A mat is optional. I like the breathing room it gives a small profile, but I wouldn't add one just because you think framed art is supposed to have it. A silhouette with enough open background around it can stand on its own.
If you're making several portraits for one wall, buy or choose the frames before you size the silhouettes. It is much easier to size the artwork to the opening than to finish three profiles and then hunt for frames that fit and look good in a grouping on your wall.
Step 1: Take the Right Profile Photo
Get the photograph right and the rest becomes much easier.
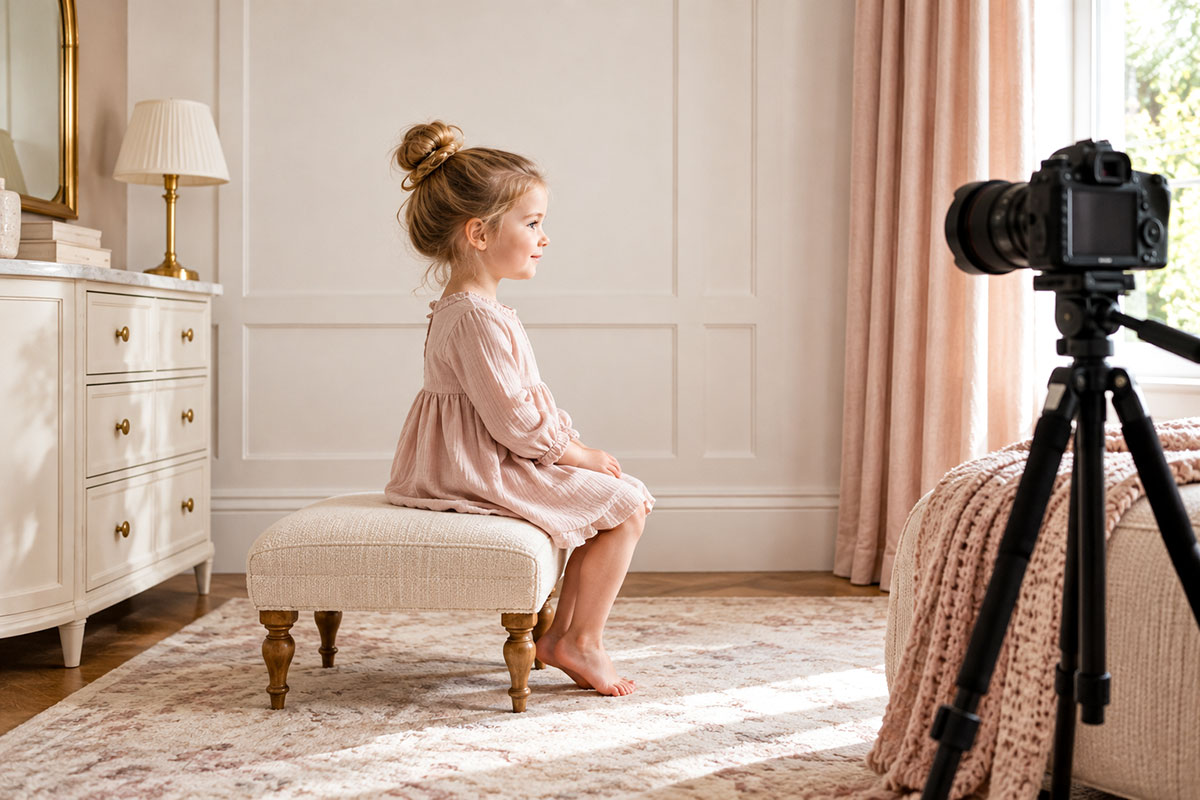
Have your child turn completely sideways rather than looking partly toward the camera. You want to see one clean line from forehead to nose, lips and chin. A three-quarter view may be prettier as a photograph, but it doesn't give you a true profile silhouette.
Use a plain background with good contrast between the background and the child's head. It doesn't have to be white, but avoid a busy room behind the subject. Natural side light is plenty. You mainly need a sharp edge around the head and hair.
Pay attention to the hair before you take the picture. A ponytail, curl, bow or little tuft can make a child's silhouette immediately recognizable, but loose wisps all around the head can turn into a ragged edge when you cut it. Keep the distinctive part and simplify the rest.
With a baby, don't worry about getting a formal sitting pose. Use a photograph where you already have a clear side profile if that's easier. The photograph is only your starting shape.
Step 2: Turn the Photo into a Silhouette
For the no-software method: print the profile at approximately the size you want the finished portrait. Lay the print over your silhouette paper and trace the outside profile, or trace the profile onto tracing paper first and transfer it to cardstock.
Don't trace every bump and strand of hair. You want the profile to still look like the child, but a silhouette needs a clean edge. Keep the recognizable shapes and smooth out the distractions.
The nose, lips and chin deserve a little patience. Tiny changes there can change the expression of the whole profile. If something looks odd, compare your tracing with the photograph before cutting your good paper.
For a digital silhouette: open the photo in an image editor that lets you remove or mask the background. Isolate the head and shoulders, then turn the remaining subject into one solid color. You don't need a particular brand of software. The commands vary, but the job is the same: remove the background, simplify the outline and fill the subject with a solid color.
You don't need a particular photo editor or a long list of software commands. Use whichever editor you already understand. The job is simply to isolate the profile, clean up the outline and turn the subject into one solid shape. The finished outline matters more than which software you used to make it.
Step 3: Print or Cut the Silhouette
Before you cut the final piece, print a plain-paper test and put it inside the frame. Stand back and look at it from across the room.
A profile that seems plenty large while you're holding the paper can disappear once it's surrounded by a frame and hanging on a wall. On the other hand, pushing the head almost to every edge makes the portrait feel cramped.
Leave clear space in front of the face. I would rather have a little extra room in the direction the subject is facing than center the profile mathematically in the frame. That small adjustment makes the composition look much better.
If you're cutting by hand, use small scissors and turn the paper as you cut instead of trying to steer the scissors around every curve. Take the nose and lips slowly. Long smooth cuts work better around the back of the head and shoulders.
If the silhouette includes the upper body, simplify the bottom into a clean bust shape rather than stopping it at a random point in the photograph. A gently curved shoulder line looks intentional and frames easily.
Step 4: Mount and Frame Your Silhouette Art
Lay everything out before you glue it down. Once the silhouette is against its background, shift it slightly left and right until the amount of open space feels right.
Leave a little more room in front of the face than behind the head. I prefer that to centering the profile perfectly in the frame. A face needs somewhere to look.
Traditional black on white gives you the clearest contrast, but nursery wall art doesn't have to stay black and white. A silhouette in cranberry, deep green, charcoal or another color already used in the room can look just as good. The important part is keeping enough contrast between the silhouette and its background that the profile remains easy to read.
If you're making portraits of siblings, keep the frame style, background and general scale related. The profiles themselves don't need to be exactly the same size. A baby's head and an older child's head don't have to be forced into identical proportions just to make the frames match.
You can see another way to work silhouettes into a nursery arrangement in this vintage nursery decorated on a budget. That room mixes silhouette-style pieces with other keepsake art rather than repeating the same image over and over.
Baby Nursery Silhouette Art Ideas
A child's profile is the classic choice, but you don't have to stop there.
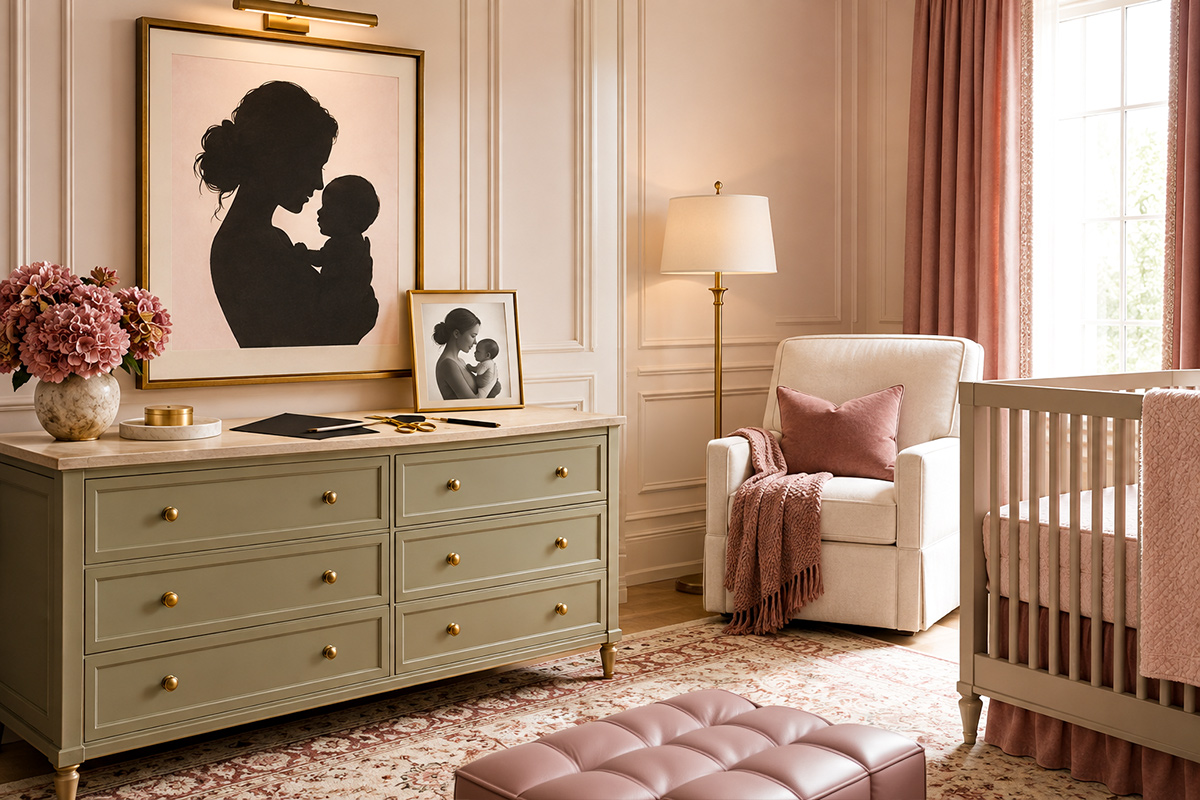
A mother-and-baby silhouette makes a lovely focal piece, especially when the two faces are shown in profile with a little clear space between them. You could also make sibling portraits, a parent-and-child pair or even a profile of the family dog or cat if the ears and muzzle give you a recognizable outline.
Baby footprints fit naturally with silhouette wall art too. If you have the baby's actual footprint, use it. A real print has meaning that a generic downloaded baby-foot shape simply doesn't. My baby footprint crafts and keepsake ideas page has more ways to turn those prints into framed nursery art.
For a small grouping, I would keep it to three related pieces rather than filling the wall just because silhouettes are easy to make. A child's profile, a footprint and one simple nursery-theme image are plenty.
If you'd rather mix the handmade portrait with finished artwork, take a look at my printable nursery wall art ideas. One personal silhouette beside one or two printed pieces can look much more interesting than three copies of essentially the same thing.
How to Make Silhouette Art Without a Computer
You can skip the computer completely.
The easiest way is the photo-and-trace method above. Print the profile, trace the outer edge and transfer that shape to the final cardstock.
There's also the old-fashioned shadow method. Place the subject where a strong light casts a clear side-profile shadow onto paper, then trace the outside edge of the shadow.
It sounds wonderfully simple until the subject moves.
With an older child or adult who can sit still, the shadow method can be fun. With a baby or a wiggly little one, I'd use a photograph. You can trace a photograph at your own pace without asking anybody to hold the same pose while you chase a moving outline with a pencil.
If you do use a shadow, trace only the outside profile. Smooth small bumps and irregularities before you transfer the outline to your good paper.
Silhouette Stencils and Templates for Nursery Art
If you want a decorative silhouette rather than a personal portrait, a stencil gives you a clean starting shape. You can enlarge one for wall art, reduce it for a frame or repeat the same shape on another project so the nursery decor feels connected.
I have several free printable designs that can work for silhouette-style nursery projects:
- Printable horse stencil
- Free bird stencil
- Printable butterfly stencils
- Printable flower stencils
- Printable leaf stencils
- Free alphabet stencils
You can also browse the full free printable stencil patterns collection if you want a subject that fits an existing nursery theme.
I would keep a downloaded or printable decorative silhouette separate from a true profile portrait. If you want a keepsake, use the child's actual outline. If you want a horse, bird or flower to coordinate with the room, use the stencil. They aren't really doing the same job.
Silhouette Art FAQ
What is the easiest way to make silhouette art from a photo?
Take a clear side-profile photograph, print it at the size you need, trace the outside edge onto cardstock and cut out the shape. You don't need photo-editing software for a basic framed portrait.
Does silhouette art have to be black?
No. Black on a light background is traditional and gives you excellent contrast, but colored silhouettes can work beautifully in a nursery. Just keep enough contrast between the profile and background that the outline remains obvious.
Should I use a baby's full body or just the head?
For a classic portrait, use the head, neck and a simple shoulder line. A full-body silhouette makes more sense when the pose itself is important, such as a dancer, child on a swing or parent holding a baby.
Can I make a silhouette of a pet?
Yes. Start with a clean side-view photograph just as you would for a child. Keep the features that make the animal recognizable, such as pointed ears, a long muzzle or a distinctive tail.
Do I need a Silhouette or Cricut-style cutting machine?
No. A cutting machine is handy if you already own one, but scissors, cardstock and a printer are enough to make a framed profile portrait.
How do I keep the silhouette from looking too small in the frame?
Make a plain-paper test first. Put it inside the frame or mat and look at it from several feet away. Enlarge it if the profile disappears, but leave enough open space around the head that it doesn't feel crowded.
What can I pair with a child silhouette in a nursery?
A real baby footprint, sibling profile, parent-and-baby silhouette, pet portrait or one simple image from the nursery theme can work well. Keep the frame style or background treatment related so the group looks intentional without making every piece identical.


When you click on links to various merchants on this site and make a purchase, this may result in this site earning a commission. This does not affect the price you pay.

UBGI Gold Standard 2026
Reviewed under the site's
editorial checklist.
About Jan | Contact | Baby Nursery Ideas (Blog) | Site Map | Privacy Policy | Disclosure Policy | Disclaimer | Affiliate Disclosure | Earnings Disclosure | Facebook | Pinterest
I am a participant in the Amazon Services LLC Associates Program, an affiliate advertising program designed to provide a means for us to earn fees by linking to Amazon. As an Amazon Associate I earn from qualifying purchases.
Copyright © 2006-2026. All Rights Reserved.