Free Crochet Turkey Stroller Toy Pattern
By Jan Bay
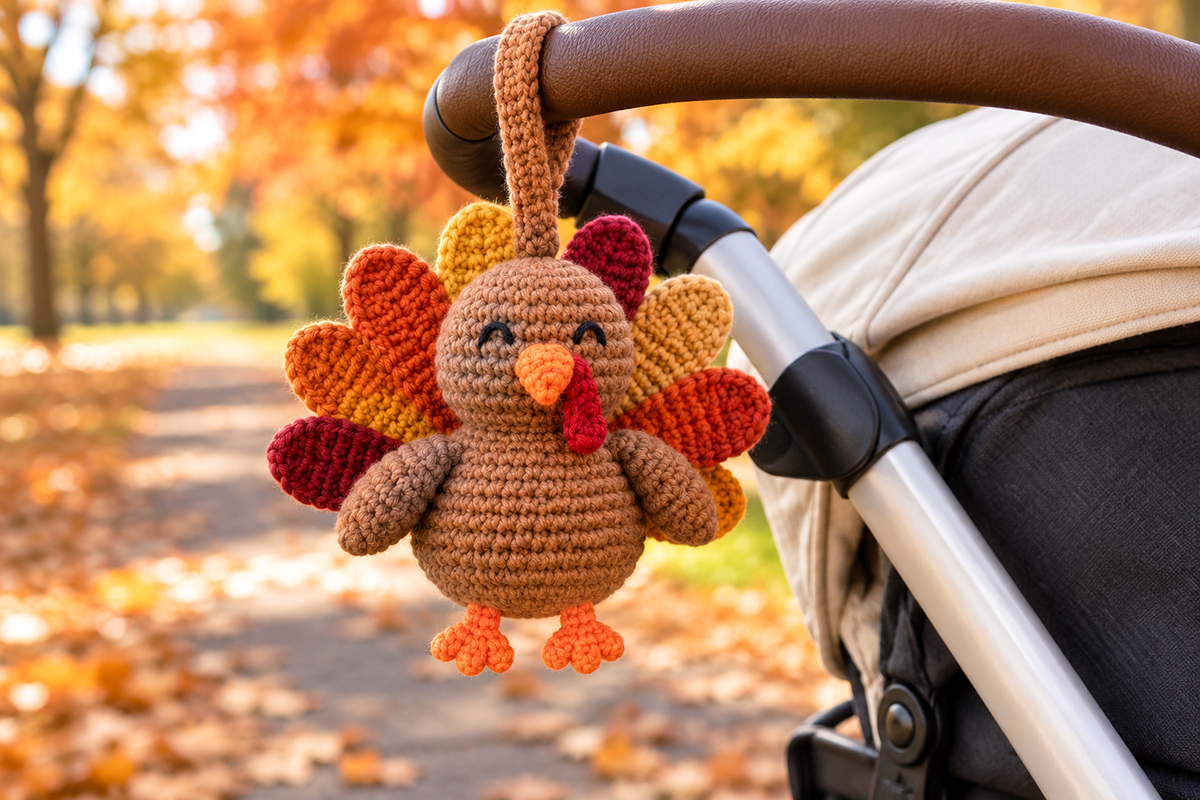
This free crochet turkey stroller toy pattern creates a small turkey that will be right at home surrounded by colorful leaves on strolls this fall. For supervised stroller play, this turkey is smaller than the one created in my full amigurumi turkey pattern, making it a good project for a crafter with a busy autumn schedule.
Explore More Turkey Crochet Patterns
Shop Crochet Supplies for This Project
Jump to the Pattern
Materials and Pattern Notes Crochet the Turkey Body Head and Face Tail Feathers Wings and Feet Stroller Attachment Strap Assembly and Finishing Stroller Toy Safety and Final CheckMaterials and Pattern Notes for the Crochet Turkey Stroller Toy Pattern
This little turkey is worked mostly in single crochet, and I'd keep the yarn fairly smooth so you can see what you're doing when the pieces get small. The finished toy is expected to measure about 7 to 7 1/2 inches from the top of the head to the bottom of the feet, not counting the stroller strap. The tail fan should finish close to 8 inches across.
The measurements are calculated from the stitch counts and gauge below. This pattern has not been physically test-made, so check your measurements as you go and make small adjustments if your gauge runs a little larger or smaller.
Materials
You'll need approximately 55 yards of medium brown worsted-weight yarn for the head, body, wings and attachment strap; small amounts of deep red, burnt orange or rust, mustard and golden tan for the eight tail feathers; about 10 yards of orange for the beak and feet; a small amount of deep red for the wattle; and black yarn or embroidery floss for the eyes.
You'll also need a 3.5 mm crochet hook, polyester fiberfill, stitch marker, yarn needle, scissors and two 1-inch pieces of sew-on hook-and-loop tape for the hidden stroller-strap closure. Don't substitute a button or bead for the closure on a baby toy.
Gauge: About 18 sc and 20 rows = 4 inches. More important, your stitches should be tight enough that the stuffing doesn't show between them. If you crochet loosely, drop down a hook size.
Abbreviations: ch = chain, sc = single crochet, inc = 2 sc in the same stitch, dec = invisible single crochet decrease, sl st = slip stitch, st/sts = stitch/stitches, rnd = round.
Turning chains: The ch 1 used at the beginning of a row does not count as a stitch. Work the first sc of the row into the first stitch.
Pieces: You'll make 17 crocheted pieces altogether: 1 body, 1 head, 2 wings, 8 tail feathers, 1 beak, 1 wattle, 2 leg-and-foot pieces and 1 stroller attachment strap.
The head and body are worked in continuous spirals, so don't join at the end of each round unless the instructions specifically tell you to. Move your stitch marker up at the end of every round. It saves a lot of counting backward later.
If you'd rather make another small turkey project before tackling the stroller strap, my crochet turkey rattle pattern uses the same Thanksgiving idea in a different baby project. You can also browse the broader Thanksgiving crochet patterns collection.
Crochet the Turkey Body
Start with brown yarn. The body is a rounded oval rather than a perfect ball. It gets wide through the middle, then narrows gradually toward the neck so the finished turkey has the same plump shape as the example image.
Rnd 1: Make a magic ring and work 6 sc into the ring. (6)
Rnd 2: Inc in each st around. (12)
Rnd 3: [Sc 1, inc] 6 times. (18)
Rnd 4: [Sc 2, inc] 6 times. (24)
Rnd 5: [Sc 3, inc] 6 times. (30)
Rnd 6: [Sc 4, inc] 6 times. (36)
Rnd 7: [Sc 5, inc] 6 times. (42)
Rnd 8: [Sc 6, inc] 6 times. (48)
Rnds 9-13: Sc in each st around. (48)
At this point the body should measure roughly 10 1/2 inches around before heavy stuffing and about 3 1/4 to 3 1/2 inches across. If yours is dramatically larger or smaller, correct that now rather than trying to make the other pieces compensate.
Rnd 14: [Sc 6, dec] 6 times. (42)
Rnd 15: [Sc 5, dec] 6 times. (36)
Rnd 16: [Sc 4, dec] 6 times. (30)
Rnd 17: [Sc 3, dec] 6 times. (24)
Begin stuffing. Fill the lower half firmly first and work the fiberfill into the sides so the body stays rounded. Don't pack the upper opening so tightly that you can't close it neatly.
Rnd 18: [Sc 2, dec] 6 times. (18)
Rnd 19: [Sc 1, dec] 6 times. (12)
Add the last bit of stuffing.
Rnd 20: Dec around. (6)
Fasten off, leaving a tail. Thread the tail through the front loops of the remaining 6 sts, pull closed and secure it. Weave the end into the body.
Set the body aside without adding the feathers yet. It's easier to line up that fan once all eight feathers are in front of you.
Crochet the Head, Beak and Embroidered Face
The head is a separate stuffed sphere with a slightly flatter lower edge once it's sewn to the body. Keep the same brown yarn and hook so the two pieces look like they belong together.
Head, Rnd 1: Make a magic ring and work 6 sc into the ring. (6)
Rnd 2: Inc in each st around. (12)
Rnd 3: [Sc 1, inc] 6 times. (18)
Rnd 4: [Sc 2, inc] 6 times. (24)
Rnd 5: [Sc 3, inc] 6 times. (30)
Rnd 6: [Sc 4, inc] 6 times. (36)
Rnds 7-9: Sc in each st around. (36)
Rnd 10: [Sc 4, dec] 6 times. (30)
Rnd 11: [Sc 3, dec] 6 times. (24)
Rnd 12: [Sc 2, dec] 6 times. (18)
Stuff the head firmly enough to keep its round shape.
Rnd 13: [Sc 1, dec] 6 times. (12)
Rnd 14: Dec around. (6)
Fasten off and close the opening the same way you closed the body. The head should finish near 2 3/4 inches across.
Orange Beak
Rnd 1: With orange yarn, make a magic ring and work 4 sc into the ring. (4)
Rnd 2: [Sc 1, inc] twice. (6)
Rnd 3: Sc around. (6)
Rnd 4: [Sc 2, inc] twice. (8)
Fasten off with a long sewing tail. Put only a tiny pinch of stuffing inside. The beak should remain small and pointed rather than becoming a round muzzle.
Center the beak on the lower half of the face and sew its 8-stitch base securely to the head.
Red Wattle
Row 1: Ch 2. Work 3 sc in the second ch from the hook. Turn. (3)
Row 2: Ch 1. Inc, sc 1, inc. Turn. (5)
Rows 3-5: Ch 1. Sc across. Turn. (5)
Row 6: Ch 1. Dec, sc 1, dec. Turn. (3)
Row 7: Ch 1. Sc3tog. (1)
Fasten off with a sewing tail. Attach the narrow end beside the beak and let the wider red section hang downward as shown in the example image.
Embroidered Eyes
Use black yarn or embroidery floss. Place the eyes across Rnds 8-10 of the head. Each eye should span roughly 3 stitches, with about 4 stitches between the inner ends. Make each eye as a short curved arc rather than a dot. Secure every embroidery end inside the head or bury it deeply through the stuffing.
No plastic eyes here. The stitched eyes are part of the locked design, not just a decorative alternative.
Make the Eight Fall-Colored Tail Feathers
The tail is what gives this turkey most of its color. Make eight separate flat feathers rather than one large fan. That keeps the layered look from the example image and lets you spread the colors instead of ending up with one solid semicircle.
Use the same instructions for every feather.
Row 1: Ch 2. Work 3 sc in the second ch from the hook. Turn. (3)
Row 2: Ch 1. Inc, sc 1, inc. Turn. (5)
Row 3: Ch 1. Inc, sc 3, inc. Turn. (7)
Rows 4-10: Ch 1. Sc across. Turn. (7)
Row 11: Ch 1. Dec, sc 3, dec. Turn. (5)
Row 12: Ch 1. Dec, sc 1, dec. Turn. (3)
Row 13: Ch 1. Sc3tog. (1)
Fasten off, leaving a long tail for sewing. The Row 13 end is the base of the feather and will be hidden behind the turkey when you attach the fan. Each feather should measure approximately 1 1/2 inches wide and 2 1/2 to 2 3/4 inches long.
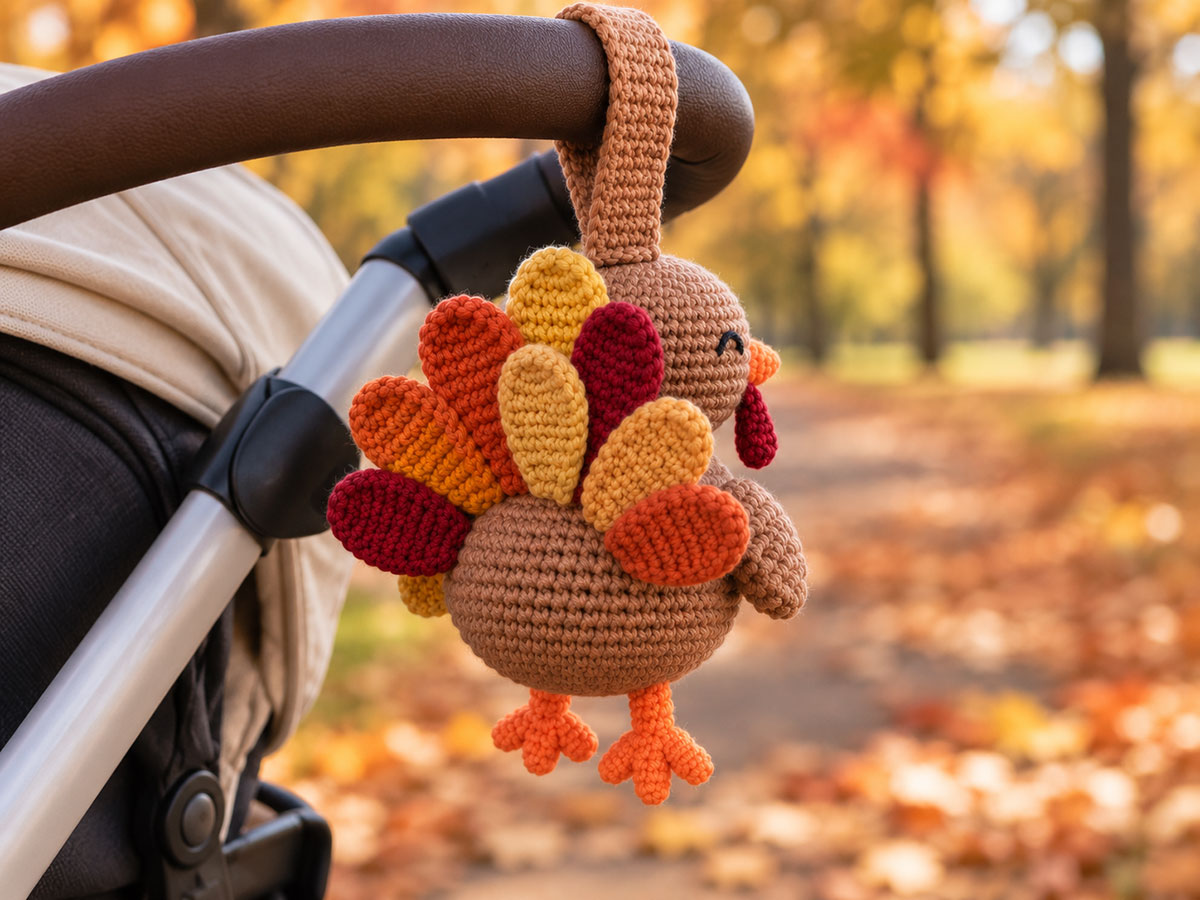
Make eight. Use this color order when you lay them out from the viewer's left to right: deep red, burnt orange, rust, mustard, deep red, golden tan, rust and mustard.
Don't sew them into a perfectly even rainbow. The example turkey has a more natural staggered fan. Place the two central feathers slightly higher, let the next pair sit a little lower, and angle the outer feathers farther sideways.
Overlap the lower 3/4 inch of the feathers behind the upper half of the body. Pin or baste all eight in place before sewing. Temporarily set the finished head in position above the body while you check the front. You should see a full fan around both sides of the head and body without the feather bases showing. Remove the head again before sewing the feathers in place.
Sew each feather to the body along its lower edge and approximately 1 inch up each side. Then make a second anchoring pass across the overlapping bases on the back. The feathers need to behave as one secure fan, even though they're eight separate pieces.
Crochet the Wings and Orange Feet
The wings are deliberately small. If you make them too long, the turkey starts looking more like a doll than the compact stroller toy in the example.
Wing, Row 1: With brown yarn, ch 2. Work 3 sc in the second ch from the hook. Turn. (3)
Row 2: Ch 1. Inc, sc 1, inc. Turn. (5)
Rows 3-6: Ch 1. Sc across. Turn. (5)
Row 7: Ch 1. Dec, sc 1, dec. (3)
Fasten off with a long sewing tail. Make a second wing.
Place one wing on each side of the body with the Row 7 end near the upper third of the body and the rounded Row 1 end pointing down. Sew the upper end and side edges securely to the body, leaving the rounded lower end free so the wing stands slightly away from the body as shown in the finished example.
Leg and Foot, make 2
With orange yarn, ch 5. Keep the first 4 chains as the leg. You are now at the bottom end where the toes begin.
Make the first toe: ch 3, sl st in the second ch from the hook and in the next ch, then sl st into the last ch of the original ch-5.
From that same base point, repeat the toe sequence twice more: ch 3, sl st in the second ch from the hook and in the next ch, then sl st into the same last ch of the original ch-5. You should now have three short toes spreading from one point.
To form the leg, sl st in each of the remaining 4 original chains, working back toward the starting end of the ch-5.
Fasten off with a long sewing tail. Make the second leg and foot the same way.
Use the sewing tail at the top of each leg to attach it to the underside of the body, placing the legs about 5 stitches apart. Take several stitches through the top of the leg and the body, secure the yarn well, then bury the end deeply inside the body. The feet should hang just below the body rather than sticking straight forward.
Make the Short Stroller Attachment Strap
The brown strap in the example image is broad and flat, not a skinny chain. That's worth keeping. A narrow cord would look wrong and would also give me less confidence in the attachment.
With brown yarn, ch 6.
Row 1: Sc in the second ch from the hook and in each ch across. Turn. (5)
Rows 2-28: Ch 1. Sc in each st across. Turn. (5)
Check the length before fastening off. The strap should be approximately 5 to 5 1/2 inches long and about 1 inch wide. If your row gauge is different, stop when you reach that measurement instead of blindly adding rows.
Fasten off with a long sewing tail.
Don't attach the strap to the turkey yet. Set it aside until the head has been sewn securely to the body in the assembly section below.
Sew one piece of hook-and-loop tape to the inside of the free end. Sew the matching piece to the outside of the strap near its attached end. Stitch completely around all four edges of both pieces. Nothing should peel up at a corner.
That lets the strap wrap around the stroller bar and close back onto itself while keeping the hardware out of the design. Keep the closure on the back side when the toy is hanging.
Assemble and Finish the Turkey Stroller Toy
By now most of the turkey is already assembled, but don't rush the head. Its position changes the whole expression.
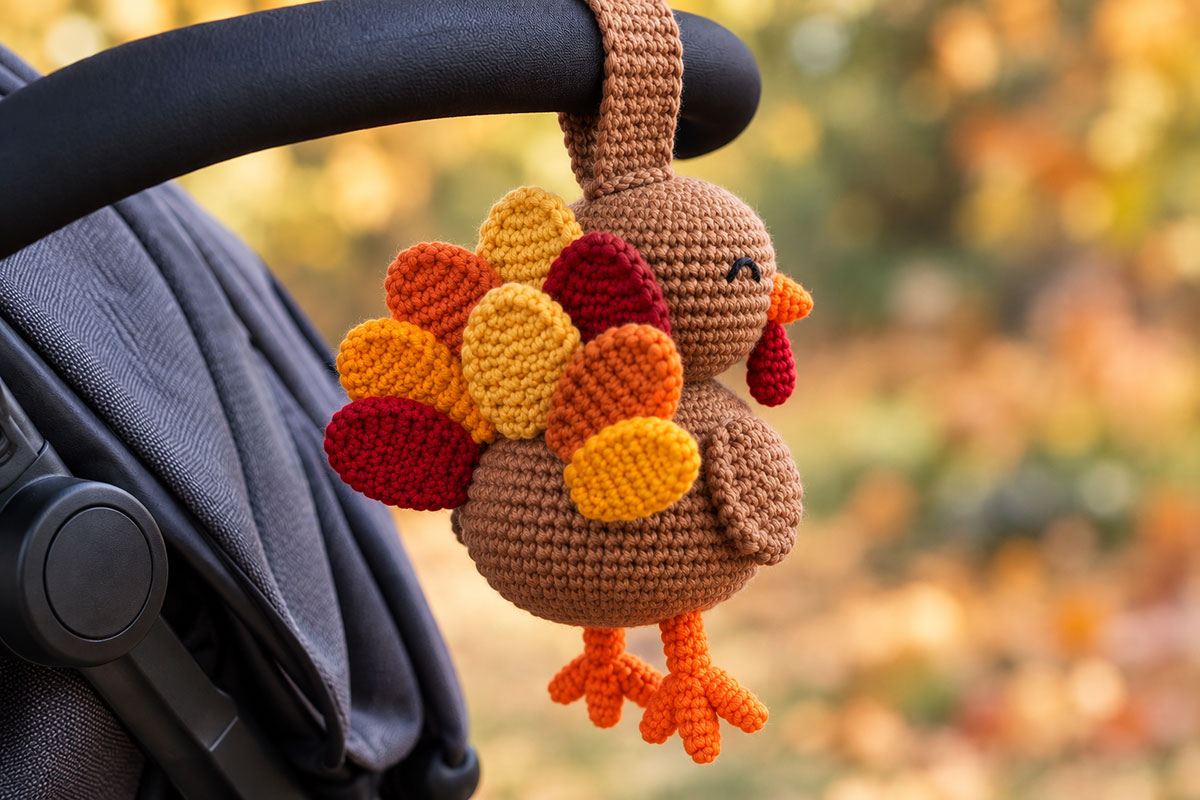
Set the head directly above the body with the beak facing forward. The bottom of the head should overlap the upper body slightly so there isn't a skinny neck between them. Pin it in place and look at the turkey from the front before you sew.
Using brown yarn, sew around the head-to-body connection twice. On the second pass, take a few stitches slightly deeper into both pieces. You don't want the head wobbling when the toy hangs from the stroller.
Now place one end of the stroller strap across the upper back. Sew it securely through the upper body fabric and across the reinforced head-to-body joining area, taking several firm stitches across the full width of the strap. Don't attach the strap to the crown of the head alone.
Check the tail next. Spread the eight feathers into the locked fan and make sure the outer pair hasn't folded inward while you handled the body. Add another hidden securing stitch anywhere a feather can twist at its base.
Check the wings, feet, beak and wattle one at a time. Tug gently on each piece. If anything shifts at its seam, sew it again now.
Weave in every yarn end through several inches of stuffed crochet before trimming it. Don't leave short clipped ends sitting immediately under the surface.
The finished turkey should be about 7 to 7 1/2 inches tall from the top of the head to the toes, approximately 4 inches across the stuffed body and close to 8 inches across the spread tail. Small differences are fine. A turkey that's substantially larger probably means your gauge changed enough that the strap and other proportions need checking too.
You can compare this project with my crochet turkey baby mobile pattern if you want the same Thanksgiving bird idea in a hanging nursery project rather than something attached to a stroller.
Stroller Toy Safety and Final Check
Use this turkey only as a supervised stroller hanging toy. Attach it to the adult push handle or another stroller location where both the turkey and its strap stay completely out of the baby's reach. Don't attach it to the baby's bumper bar or to a crib, bassinet, play yard or other sleep space.
Before each use, check the strap, hook-and-loop tape, embroidered eyes, beak, wattle, wings, feet and tail-feather seams. Stop using the toy if a seam opens, yarn breaks or any piece begins to loosen.
Keep the attachment strap short and secured around the stroller bar. The strap itself shouldn't be left loose for a baby to handle or chew. Don't lengthen it into a cord or add a dangling chain, bead, button, bell or removable clip. The U.S. Consumer Product Safety Commission cautions that strings and straps can create strangulation hazards for young children. You can read the CPSC toy safety guidance for more information.
Handmade doesn't mean the final check is optional. Remove every pin, temporary basting stitch and stitch marker, then give every stitched-on part a firm tug before the first stroller ride. Check the toy again regularly.
When you click on links to various merchants on this site and make a purchase, this may result in this site earning a commission. This does not affect the price you pay.

UBGI Gold Standard 2026
Reviewed under the site's
editorial checklist.
Photos, decorating ideas, party setups and reader submissions are shared for inspiration unless a page is specifically presented as a pattern, tutorial, reference guide or step-by-step project. Follow the instructions, measurements, safety guidance and manufacturer directions provided for the particular project or product.
About Jan | Contact | Baby Nursery Ideas (Blog) | Site Map | Privacy Policy | Disclosure Policy | Disclaimer | Affiliate Disclosure | Earnings Disclosure | Facebook | Pinterest
I am a participant in the Amazon Services LLC Associates Program, an affiliate advertising program designed to provide a means for us to earn fees by linking to Amazon. As an Amazon Associate I earn from qualifying purchases.
Copyright © 2006-2026. All Rights Reserved.