Baby Footprint Christmas Angel Keepsake with 2 Free Printable Backgrounds
By Jan Bay
Make a Baby Footprint Christmas Angel Keepsake using your baby's actual footprints as the angel's wings. I've created two free printable backgrounds, "Our Little Angel's First Christmas" and "Baby's First Christmas." Choose your favorite, add two tiny footprints beside the angel's shoulders, and frame your finished keepsake for a Christmas memory you can treasure year after year.
Explore More Baby Christmas Crafts and Keepsakes
Baby Footprint Crafts and Keepsakes
How to Get a Clear Baby Footprint
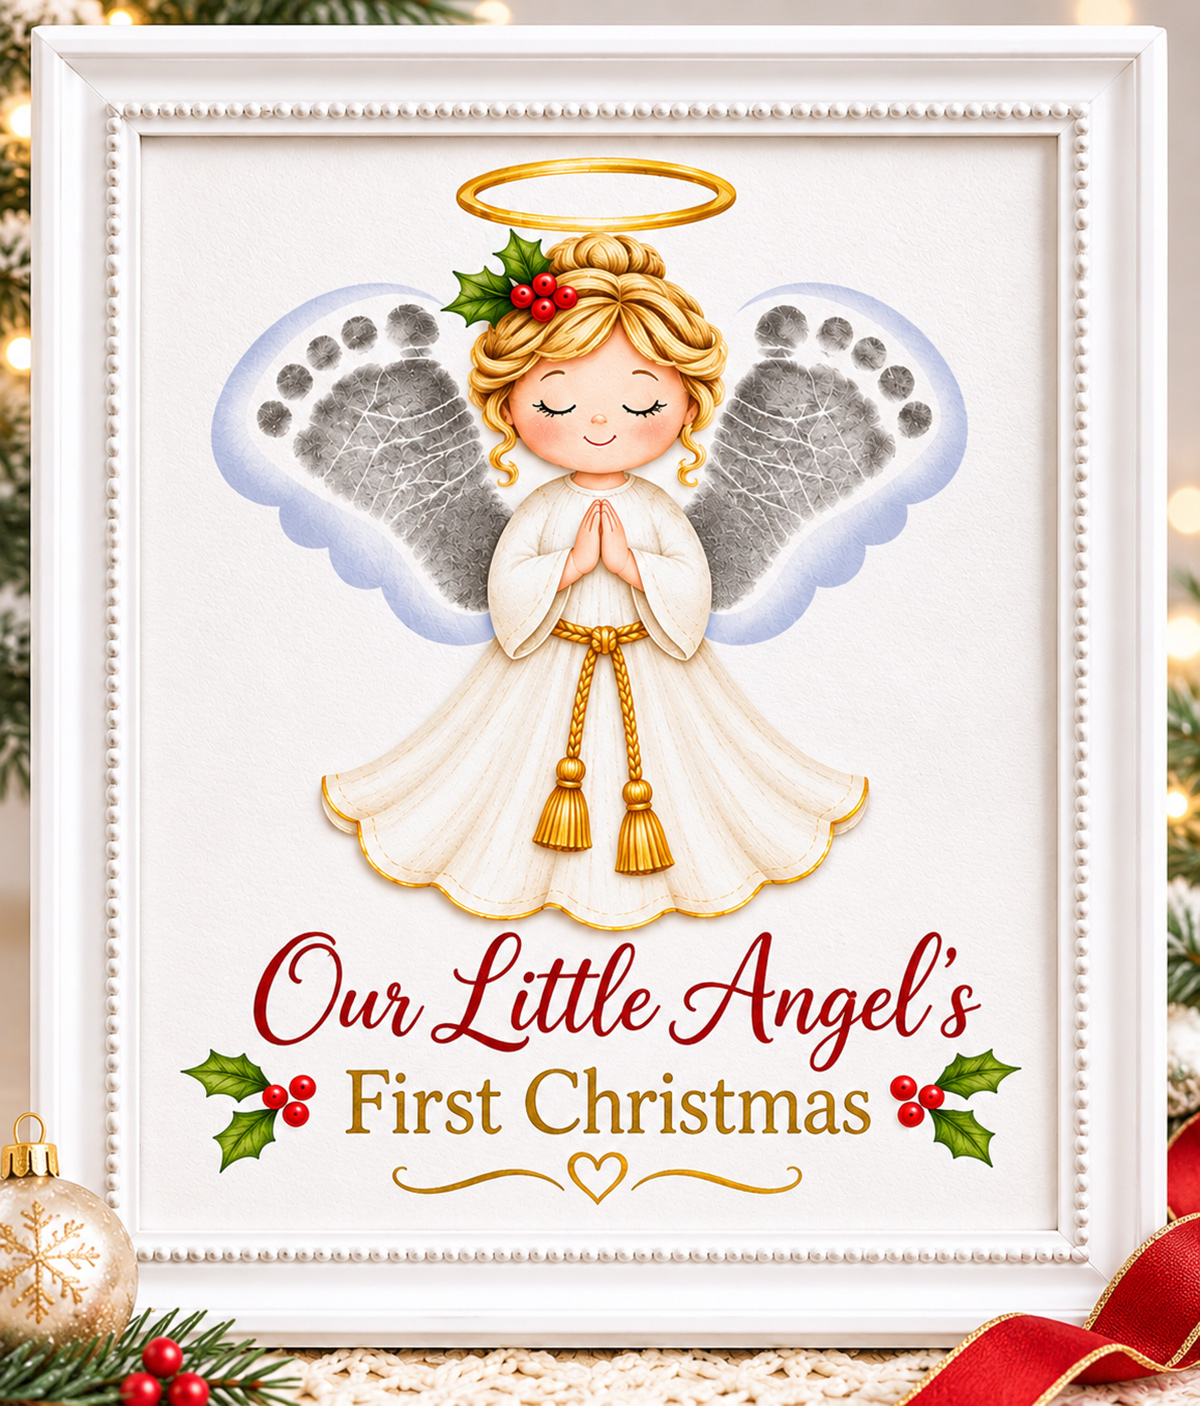
Finished design example. Your baby's own footprints will form the wings, so every keepsake will look a little different. The pale blue wing accents are part of the illustrated example.
See Supplies for This Project Here.
Free Baby Footprint Christmas Angel Keepsake Printables
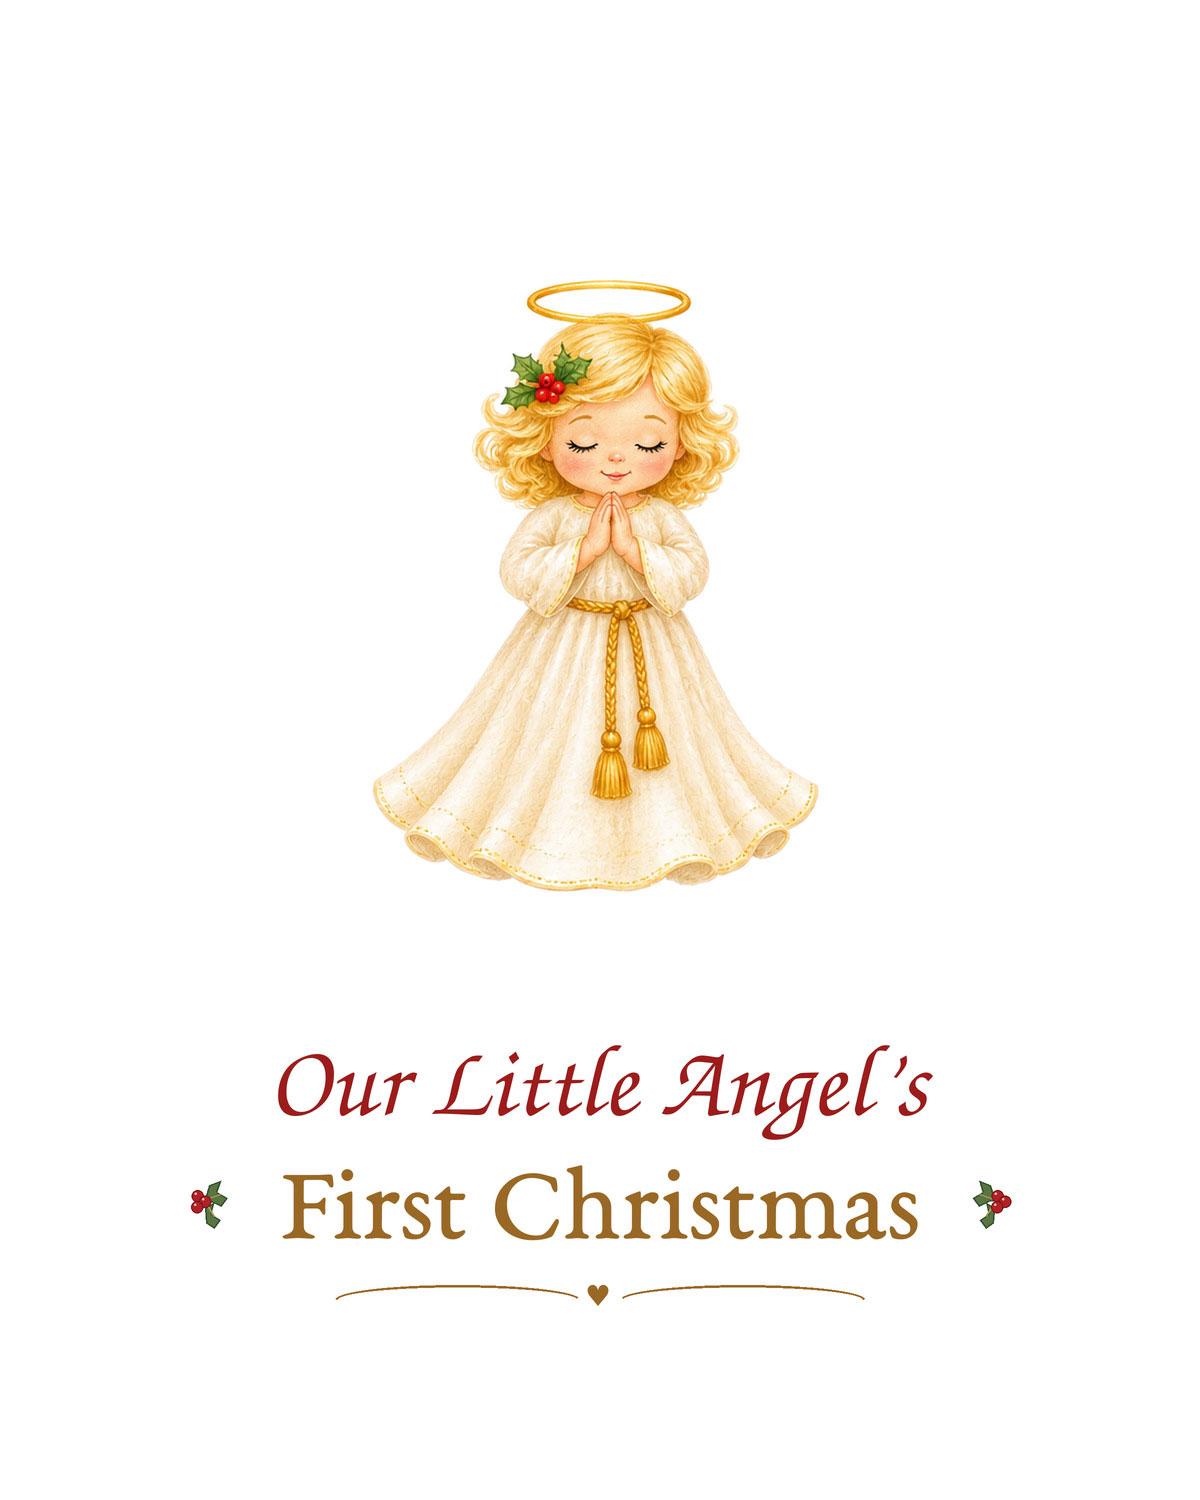
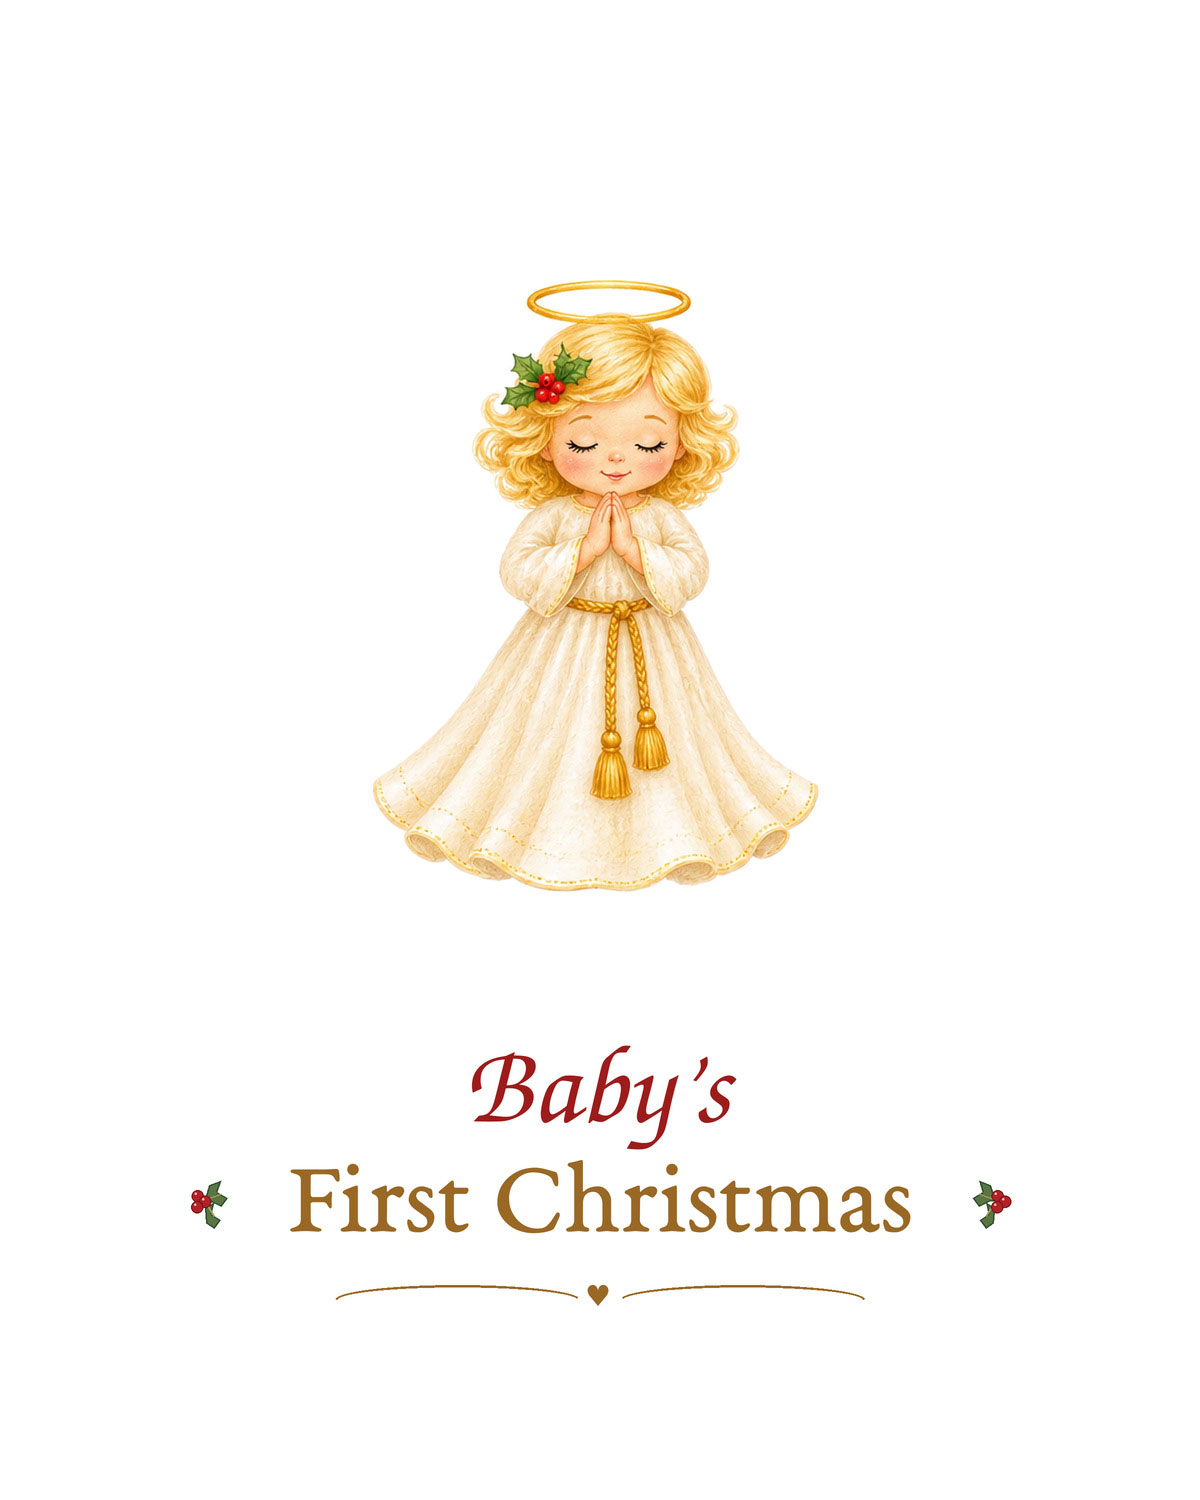
I've kept the angel artwork the same for both printables because I think the little angel is pretty enough without adding anything else. She has golden hair, a tiny sprig of Christmas holly, a cream gown, and a braided gold belt with tassels hanging down the skirt.
The difference is the wording. You can choose the one that feels right for your baby's first Christmas.
Printable 1: Our Little Angel's First Christmas
This is my favorite for the angel design. The words "Our Little Angel's First Christmas" make it especially sweet for a framed keepsake or a Christmas gift for Grandma.
The background has the angel centered on the page, with clear space on both sides of her shoulders. That's where you'll add your baby's actual footprints to make the wings.
Download Our Little Angel's First Christmas Printable (Free PDF)
Printable 2: Baby's First Christmas
If you'd rather have something a little more traditional, choose "Baby's First Christmas." It uses the same angel illustration, so you'll make the footprints exactly the same way.
I like having this option because it would also make a lovely gift from a baby to grandparents or other family members. You don't have to change the artwork to suit the occasion.
Download Baby's First Christmas Angel Printable (Free PDF)
How to Print Your Angel Background
Both designs are intended for an 8-by-10-inch finished keepsake, with the artwork centered on a standard U.S. letter-size sheet of paper (8.5 by 11 inches). Once the footprints are completely dry, you can trim the paper to 8 by 10 inches and slip it into your frame. Check the finished printable's measurements before cutting.
- Choose your favorite version and download the PDF.
- Open the PDF and select letter-size paper, 8.5 by 11 inches.
- Choose "Actual Size" or 100% in your printer settings. Don't use a setting that enlarges the artwork to fill the page.
- Print one copy on ordinary paper to check the size and placement.
- Make sure your baby's footprints will fit in the open spaces beside the angel before printing your final copy.
- Print the finished background on smooth, white cardstock that your printer accepts.
I'd print at least three copies. One for practice, one for the finished keepsake, and one extra. That's enough to give yourself another try without wasting a stack of paper.
Let the printer ink dry thoroughly before adding footprints. If you're using an inkjet printer, try a little of your chosen printing medium on a spare copy first. Some inks can run when they get wet.
A little tip: Don't trim the page to fit your frame just yet. Leave the full sheet intact while you're making the footprints. The extra paper gives you something to hold without touching the artwork.
Supplies You'll Need
You won't need much for this project, and I wouldn't spend money on fancy embellishments. The watercolor angel is already decorated with holly, a gold halo, and her little tassel belt. The footprints are what make the finished picture special.
Here's what I'd put on the table before starting:
- One free printable angel background: Choose either wording and print a few extra copies.
- White cardstock: Smooth, matte, printer-compatible cardstock, preferably around 65 to 80 lb if your printer supports it.
- A suitable footprint printing product: Choose a baby footprint product whose current label permits the exact way you'll use it with your baby's age and skin. A clean-touch kit is an alternative if you'd rather make the prints on separate paper.
- A small foam applicator: Only needed if you're using a product approved by its manufacturer for direct application to your baby's foot.
- A firm, flat board: Something sturdy enough to support the printed sheet without bending.
- Low-tack tape: To hold the paper in place while you work.
- Several pieces of scrap paper: For practice footprints and checking the wing positions.
- A damp washcloth, warm water, and a clean towel: Have them ready before you begin.
- A pencil and ruler: To check the footprint size and mark the placement lightly if needed.
- An 8-by-10-inch picture frame: I like white for this design, especially a frame with a little detail around the edge.
What Color Should the Footprints Be?
I'd choose a medium gray, like the finished example image. It looks lovely with the cream gown and gold details, and the individual toes still stand out clearly.
You can use another color if you prefer. A muted dusty rose or pale gray-blue would also work with the Christmas artwork, but I'd skip glitter paint. The footprints don't need sparkle when there's already gold on the angel.
Whatever color you choose, use a product suitable for the way you're making the prints. Don't substitute ordinary acrylic craft paint just because it comes in the shade you want.
Choose Your Footprint Product Before You Begin
Read the complete label, including age guidance and instructions for skin contact. "Washable" and "non-toxic" don't automatically mean that a paint can be applied directly to an infant's skin.
The American Academy of Pediatrics' guide to choosing children's art supplies explains why the product label and its intended use matter.
If the label doesn't clearly permit direct contact with your baby's feet at your baby's age, don't use it on the skin. You can make the prints separately with a suitable clean-touch kit and add copies of them to the background instead.
Keep all supplies away from your baby's mouth and eyes. Don't apply printing materials to irritated or broken skin. Have another adult help support your baby, and clean the feet promptly according to the product directions.
For more detail on choosing materials, see my paint for baby crafts guide. You can also use my guide to making a clear baby footprint if you're having trouble getting those little toes to print.
How to Make Your Baby Footprint Christmas Angel Keepsake
Now for the fun part! You're going to turn two tiny footprints into the angel's wings.
The trick is to get the footprints in the right position. Instead of having them stand straight up beside the angel, we'll angle them outward so they look like a pair of wings spreading from her shoulders.
I'd do a practice print before touching the good copy. You can get the arrangement worked out first, and then making the finished keepsake is much easier.
Step 1: Choose Your Background and Check the Size
Print your favorite angel background and lay it on a flat surface. Before making any footprints, check how much room you have between the angel and the edges of the artwork.
The finished design is intended for an 8-by-10-inch frame, but the size of your baby's feet matters more than the frame size at this stage.
Measure from the back of your baby's heel to the tip of the longest toe, without stretching or forcing the foot. You'll need enough room for that length on each side of the angel, with the footprints pointing diagonally outward.
If the feet are too large for the available space, don't squeeze them in. You can make the footprints separately and use smaller printed copies, or enlarge the artwork and use a larger frame.
Step 2: Make Two Practice Footprints
I'd start with ordinary white paper rather than the printed angel background.
Make one clear print of each foot using your chosen footprint method. If you're using a clean-touch kit, follow its instructions and make the prints on the paper supplied or recommended by the manufacturer.
If you're using an appropriately labeled skin-contact printing product, have one adult hold your baby comfortably while the other makes each print. Support the ankle and keep the foot in a natural position.
For a direct print, apply a thin, even layer of the approved printing material according to its directions. Bring the supported paper or board to the foot, touching the heel first, then the ball of the foot and toes. Lift the paper away without sliding it sideways.
Clean the first foot before working on the second. There's no reason to have two painted feet at once.
Let the practice prints dry completely.
Step 3: Work Out the Wing Arrangement
Cut around the two dry practice footprints, leaving a little white paper outside each print. Don't cut up the only original prints you want to save. Make photocopies first if needed.
Now lay the two footprints beside the angel. Turn them until the heels are close to her shoulders and the toes point up and away from her head.
Move them around until you're happy with the shape. You want them to look like wings, not two feet standing beside the angel.
Pay attention to three things:
- The heels should sit close to the upper outside edges of the angel's shoulders.
- The toes should spread outward and upward, creating the widest part of each wing.
- The footprints should frame the angel's head without covering her face, hair, or halo.
Once you have the position you like, make a tiny pencil mark on your practice background to show where each heel belongs. You'll use that as your guide for the finished print.
Step 4: Prepare the Finished Printable
Print a fresh copy of the angel background on your chosen cardstock. Let the printer ink dry thoroughly.
Place the cardstock on a firm board and secure the corners with small pieces of low-tack tape. Keep the tape outside the area that will be framed.
Set the practice arrangement next to you so you can see exactly where the footprints should go.
If you're using a wet printing product, test it on a spare printed sheet first. Make sure it doesn't cause the printer ink to bleed or the cardstock surface to lift.
Step 5: Add the First Footprint Wing
Choose whichever foot makes the best shape for the left wing as you look at the picture.
Have your helper hold the baby securely in a comfortable position. Prepare the foot only as permitted by your printing product's instructions.
Angle the paper or board so you can bring it to the baby's supported foot without twisting the ankle. The paper can turn. The baby's foot doesn't need to.
Lower the heel onto the marked position beside the angel's shoulder. Bring the rest of the foot into gentle contact with the paper, finishing with the toes.
Lift the paper straight away.
You'll have your first angel wing!
Clean the baby's foot promptly, following the product's instructions, before beginning the second print.
Step 6: Add the Second Footprint Wing
Repeat the process on the opposite side of the angel.
Use the second practice footprint to guide your placement. Try to keep the heels at about the same height, with the toes spreading outward in opposite directions.
The wings don't have to match perfectly. Your baby's feet may not make identical prints, and that's part of what makes this a personal keepsake.
Just keep the general direction the same on both sides. You want the finished pair to frame the angel rather than lean to one side.
Once both prints are in place, clean the second foot and put the artwork somewhere flat and out of reach to dry.
Step 7: Check the Finished Angel
Before adding anything else, take a good look at your Christmas angel.
You should have:
- Two complete footprints, one on each side of the angel.
- Heels tucked close to the shoulders.
- Toes angled outward and upward.
- The angel's face and halo clearly visible between the wings.
- Enough open space around the artwork for the Christmas wording to stand out.
If one footprint is a little lighter than the other, I'd leave it alone. Pressing the same foot down again can create a double print that looks worse than the original.
Let the picture dry completely before handling, adding lettering, trimming, or framing it. Follow the drying instructions for the material you used rather than guessing by the clock.
What if You're Using a Clean-Touch Footprint Kit?
You can still make this project without applying ink or paint directly to your baby's skin.
Make one footprint from each foot using a suitable clean-touch kit and its supplied paper. Allow both prints to dry.
Then choose one of these methods:
- Cut-and-mount method: Make copies of the footprints on white paper that closely matches your background. Cut neatly around each copied footprint, arrange them beside the angel, and attach them with an acid-free mounting product intended for paper. Keep the original footprints separately.
- Digital method: Scan both prints, remove the extra white background in an image editor, and position the two footprint images over the blank wing areas of the printable. Keep each print at its original size unless you've deliberately chosen to make a smaller reproduction. Print the completed design as one sheet.
I'd choose the cut-and-mount method if you don't want to work with editing software. The digital version is handy when you want several matching copies for gifts.
With either method, the finished artwork still features your baby's own footprints. The difference is that you're using copies rather than making direct impressions on the decorated background.
How to Position Baby's Footprints as Angel Wings
Take another look at the finished example image. The footprints aren't straight up and down, and they don't start down near the angel's waist.
Each footprint begins near a shoulder and opens diagonally outward. The heels form the narrower inner ends of the wings, while the toes make the rounded outer tips.
That's the arrangement we're going for.
Where the Heels Should Go
Start at the angel's shoulders, just outside the upper edges of her sleeves.
Position the narrow heel end of each footprint close to that area, roughly a quarter to half an inch away if your baby's print and the template size allow it.
The heels can sit partly behind the illustrated sleeves if you're arranging separate printed cutouts. If you're stamping directly on the background, keep the heel impressions just outside the sleeves so you don't cover the illustration.
Don't place the heels down beside the skirt or waist. That makes the prints look detached from the angel's upper body.
Which Direction Should the Toes Point?
The toes should point toward the upper outside corners of the artwork, not straight toward the top of the page.
For a starting point, angle the long centerline of each footprint roughly 35 to 45 degrees outward from vertical. Adjust that angle to suit your baby's foot size and the space around the angel's hair.
The toe impressions should be higher than the shoulders and spread out on either side of the head.
Leave a little open space between the toes and the angel's hair. The two wings should look balanced, but don't worry about lining up every toe perfectly.
A Simple Way to Check the Position
Lay your two practice footprints on the background and step back far enough to see the entire picture.
Ask yourself whether the shape still looks like an angel when you stop paying attention to the individual toes.
If the footprints look like two vertical feet, move their outer ends higher and farther apart. If they look disconnected, bring the heels closer to the shoulders.
Don't force the baby to match your chosen angle. Rotate the paper, move the practice cutouts, or use the separate-print method instead.
There isn't one perfect angle for every baby's feet. What matters is the relationship between the heels, shoulders, and toes.
Keep the Footprint Texture Visible
Those little creases and toe shapes give the wings their character. I'd rather have a slightly uneven print with visible detail than a solid blob of color.
If you're using an approved direct-contact printing product, use only the amount its instructions recommend. Too much wet material can fill the spaces between the toes and blur the delicate lines.
And don't outline each toe with a marker afterward. The natural footprint is the part worth preserving.
Personalizing and Framing Your Christmas Angel Keepsake
Once the footprints are dry, you have a finished Christmas angel. You can stop there if you like. I think the picture looks lovely with just the tiny gray wings, cream gown, gold details, and Christmas lettering.
If you want to add your baby's name, I'd keep it small. There's no need to compete with the angel or the footprints.
Adding Your Baby's Name
The two free backgrounds already have their Christmas wording, so you don't need to write anything else across the front.
If there's enough room beneath the printed lettering, you can add your baby's name in small, neat handwriting after everything has dried. Try the lettering on scrap paper first.
I'd use a fine-tip archival pen in a color that matches the artwork. Deep red, brown, or dark gray would look nice.
Or skip the lettering on the front and write the name on the back of the finished artwork. That's a good option if you want to keep the design exactly as shown.
You can also write the date the footprints were made on the back. Neither printable has a date printed on the front, so the artwork won't feel tied to a particular year when you bring it out again at Christmas.
Choosing a Frame
I prefer a white frame for this particular angel. It picks up the cream gown and light background without competing with the gray footprints.
A white frame with a narrow decorative edge looks especially pretty. The finished example uses a beaded-style frame, but a plain white frame would be just as nice.
If you're putting one together, here's what I'd do:
- Make sure the footprints and printer ink are completely dry.
- Trim the printed sheet to the intended 8-by-10-inch size, taking care not to cut into the lettering or illustration.
- Check that the artwork lies flat. Don't force a damp or curled sheet into the frame.
- Use acid-free backing or mounting materials suitable for paper artwork.
- Choose a frame with a spacer so the footprint surface doesn't press directly against the glass, or use a larger frame with a mat that leaves the full artwork visible.
- Close the frame and check that the angel, both wings, and Christmas wording are centered.
I'd also make a clear photograph or scan of the finished picture before framing it. That gives you a copy of those tiny footprints in case you want to make another keepsake later.
Making a Christmas Gift for Grandparents
Here's an idea I especially like. Make one original keepsake for your home, then use good-quality printed copies for the grandparents.
That way, you won't have to keep making new footprints every time you need another gift.
For a matching set, use the same frame color and artwork size. You can choose different wording for each copy if you like. "Our Little Angel's First Christmas" feels especially personal, while "Baby's First Christmas" works beautifully for a traditional keepsake.
I'd leave off extra glitter, stickers, and dangling decorations. The little feet are enough.
Keeping Your Christmas Angel for Years to Come
If you plan to display the picture every Christmas, store it somewhere dry and away from direct sunlight during the rest of the year.
Keep the original footprint artwork in its frame or in an acid-free storage sleeve. If you're storing the picture without a frame, place it flat where it won't get bent or rubbed against other decorations.
It's also worth saving a digital copy with your baby's name and the year in the filename. You'll know exactly which Christmas it belongs to, even though the year isn't printed across the front.
When you're ready for another little Christmas project, you might like my baby footprint Christmas ornament ideas. They give you another way to preserve those tiny feet without repeating the framed angel design.
Baby Footprint Christmas Angel Keepsake FAQ
Can I make this Christmas angel with a newborn?
Yes, provided you choose a footprint method whose manufacturer permits use at your baby's age. Have another adult help support your baby, and don't force the feet into an uncomfortable position. A clean-touch kit may be a better choice if you'd rather keep the printing material away from your baby's skin.
What if my baby's footprints are too big for the printable?
Make the footprints on separate paper first. You can scan them, reduce their size in an image editor, and add smaller reproductions to the background. Keep the original full-size prints separately. Or enlarge the angel background and use a larger frame if you want to preserve the actual footprint size in the finished picture.
Can I make the angel wings without putting paint on my baby's feet?
Yes. Use a suitable clean-touch footprint kit that keeps the marking material from touching the baby's skin. Follow the kit's directions, then copy or scan the finished prints and add them to the blank wing areas. The angel will still feature your baby's actual footprint shapes.
Why aren't the wings already printed on the free background?
Because your baby's footprints are the wings! I've left those spaces open so you can add your own prints rather than covering up a finished illustration. That's what turns the watercolor angel into a personal keepsake.
Can I use this printable for an older baby or toddler?
Yes, but check the footprint size before starting. Larger feet may not fit the 8-by-10-inch layout. You can enlarge the background or use smaller copies of separately captured footprints. Make sure the printing product is suitable for your child's age and follow its instructions.
Do I need to add a date to the Christmas angel?
No. Neither printable has a preprinted date. If you want to remember the exact Christmas, write your baby's name and the date on the back of the artwork. I'd keep the front just as it is.
And that's your little Christmas angel! Two tiny footprints, a pretty printable background, and a keepsake you can bring out every December. It's a lovely way to remember just how small those little feet once were.
When you click on links to various merchants on this site and make a purchase, this may result in this site earning a commission. This does not affect the price you pay.

UBGI Gold Standard 2026
Reviewed under the site's
editorial checklist.
Photos, decorating ideas, party setups and reader submissions are shared for inspiration unless a page is specifically presented as a pattern, tutorial, reference guide or step-by-step project. Follow the instructions, measurements, safety guidance and manufacturer directions provided for the particular project or product.
About Jan | Contact | Baby Nursery Ideas (Blog) | Site Map | Privacy Policy | Disclosure Policy | Disclaimer | Affiliate Disclosure | Earnings Disclosure | Facebook | Pinterest
I am a participant in the Amazon Services LLC Associates Program, an affiliate advertising program designed to provide a means for us to earn fees by linking to Amazon. As an Amazon Associate I earn from qualifying purchases.
Copyright © 2006-2026. All Rights Reserved.