Free Crochet Witch Lovey Pattern with a Removable Witch Hat
By Jan Bay
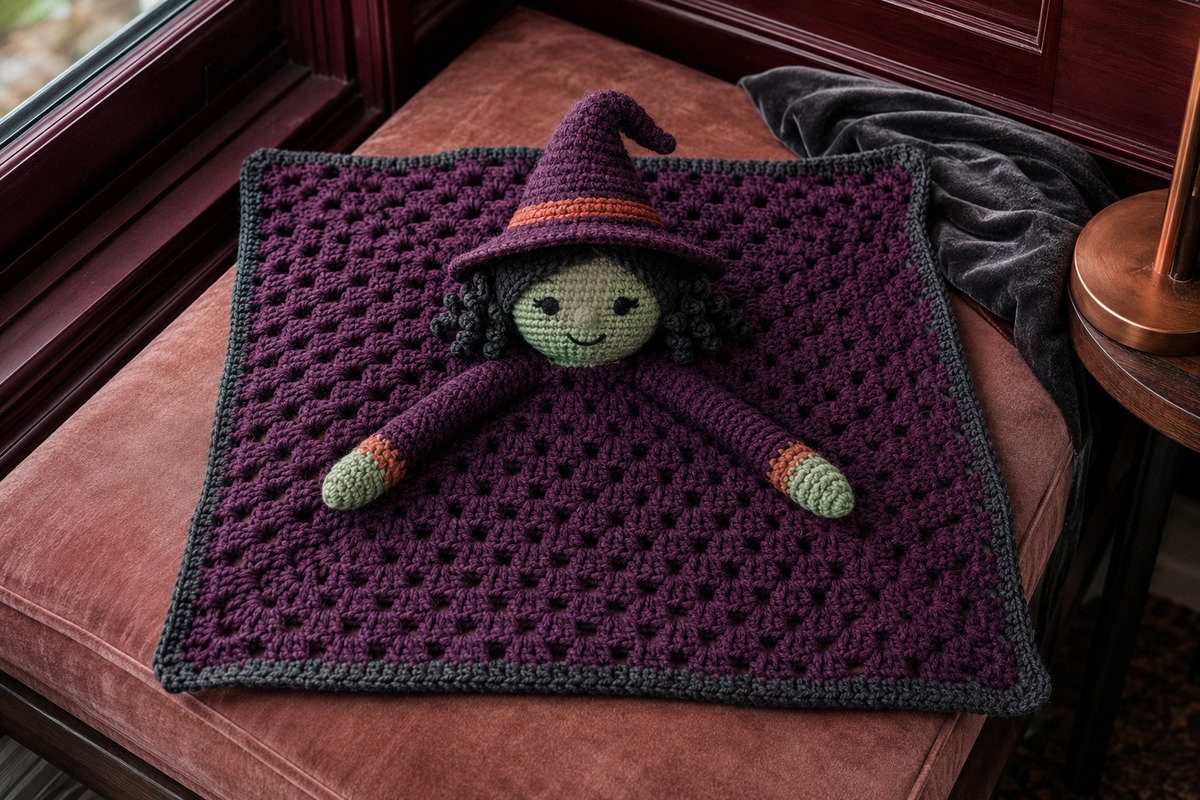
This free crochet witch lovey pattern creates a sweet little witch with a soft green face, embroidered features, a cuddly blanket body and her own removable pointed hat. This classic Halloween character becomes a friendly handmade companion, with the option to sew the hat permanently in place for a younger child.
Explore More Free Halloween Crochet Patterns
Crochet Supplies for This Witch Lovey
Jump to the Witch Lovey Pattern
Materials for the Free Crochet Witch Lovey Pattern
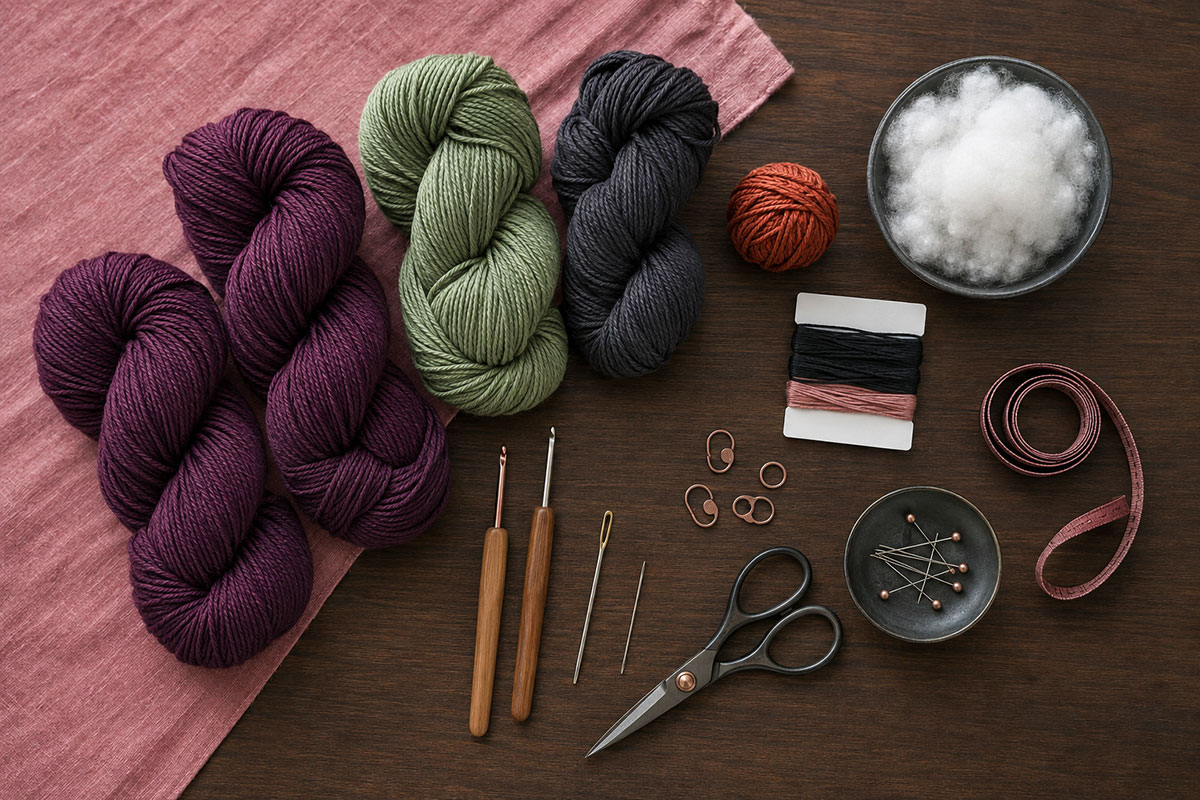
This witch lovey is made from CYC Medium 4 worsted-weight cotton or cotton-blend yarn. A smaller hook is used for the stuffed pieces than for the blanket. The closer stitches help keep the fiberfill inside the head and hands while still leaving the blanket soft enough to cuddle.
The finished witch has a muted green face, embroidered eyes, dark hair and a removable pointed hat. I chose deep plum instead of covering the project in solid black because it keeps the green face at the center of the design. The rust cuffs and hatband add enough Halloween color without making the little witch look harsh.
- Approximately 300 yards of deep plum worsted-weight cotton yarn for the blanket body
- Approximately 110 yards of deep plum worsted-weight cotton yarn for the sleeves and removable witch hat
- Approximately 75 yards of muted green worsted-weight cotton yarn for the head and hands
- Approximately 75 yards of black, charcoal or dark brown worsted-weight yarn for the hair cap, curls and blanket edging
- A small amount of muted gold or rust-colored yarn for the hatband and arm cuffs
- A small amount of black cotton embroidery floss for the eyes and mouth
- Polyester fiberfill for the head and arms
- Size G-6 (4 mm) crochet hook for the lovey blanket
- Size E-4 (3.5 mm) crochet hook for the head, arms and hat
- Yarn needle with a blunt tip
- Embroidery needle
- Stitch markers
- Scissors
- Flexible measuring tape
- Rustproof straight pins for positioning the pieces before sewing
Choose smooth yarn that makes the stitches easy to see. Fuzzy yarn can hide small gaps, but it also makes the facial embroidery and assembly more difficult. A washable cotton or cotton-blend yarn gives the witch a neat shape and handles repeated washing well.
Do not use plastic safety eyes, buttons, beads or glued decorations on a lovey intended for a baby or young child. Every facial feature in this pattern is embroidered, and the yarn ends are secured inside the head.
The pointed hat is designed to be removable for decoration or supervised play. Sew it permanently to the head when making the lovey for a baby or toddler. Do not place the lovey or any removable part in an infant’s sleep space.
Finished Size and Gauge
Before the contrasting edge is added, the granny-square blanket measures approximately 15 inches square. The two edging rounds bring the finished blanket to approximately 16 inches square. The stuffed head is about 4 inches tall, not including the pointed hat, and approximately 10 inches around at its widest point. At the stated gauge, the finished removable hat measures approximately 6 inches from its brim to the bent tip.
- Finished blanket: Approximately 16 by 16 inches after the contrasting edge is added
- Finished head: Approximately 4 inches tall
- Finished arm length: Approximately 5 inches each
- Finished hat: Approximately 6 inches tall with an opening measuring a little more than 5 inches across when laid flat
- Skill level: Confident beginner to intermediate
- Pattern terminology: Standard US crochet terms
Gauge for the head and arms: 18 sc and 20 rows measure approximately 4 inches in single crochet using the 3.5 mm hook.
Gauge for the blanket: After completing Round 4, the gently blocked granny square should measure approximately 4 inches across from side to side.
Exact gauge is more important for the stuffed pieces than it is for the blanket. The head and arms need firm stitches with no openings large enough for the fiberfill to show. If you can see stuffing between the stitches, change to a smaller hook and begin again.
The blanket measurement can vary slightly without affecting assembly. Add or remove a granny-square round if you want to adjust its size, remembering that a lovey is meant to remain much smaller than a crib blanket.
Crochet Abbreviations and Pattern Notes
- Approx: Approximately
- BLO: Back loop only
- Ch: Chain
- Ch-sp: Chain space
- Dc: Double crochet
- FLO: Front loop only
- Inc: Work 2 single crochet stitches in the same stitch
- Invdec: Invisible single crochet decrease
- MR: Magic ring
- Rep: Repeat
- Rnd: Round
- Sc: Single crochet
- Sl st: Slip stitch
- St or sts: Stitch or stitches
Three-double-crochet cluster: Work 3 double crochet stitches into the same chain space. Each stitch is completed separately. This is the cluster used throughout the lovey blanket.
Invisible decrease: Insert the hook through the front loop of each of the next 2 stitches. Yarn over and pull through both front loops. Yarn over again and pull through the 2 loops remaining on the hook.
The head and arms are worked in continuous rounds. Do not join at the end of these rounds unless the instructions specifically tell you to do so. Place a stitch marker in the first stitch and move it up as each round is completed.
The hat is also worked in continuous rounds until the brim. Its off-center bend is created with increases placed on one side of the cone rather than with wire or another stiff insert.
The blanket is worked in joined rounds. Slip stitch into the indicated stitch at the end of each round, then follow the turning instructions. Turning the blanket after each round helps keep the square from leaning in one direction.
The beginning ch 3 counts as the first dc in every granny-square round. The beginning ch 1 used for the hatband, hat brim, blanket edging and arm-closing row does not count as a stitch.
Numbers shown in parentheses at the end of a round give the total number of stitches or clusters after that round is complete. Read through each set of instructions before beginning so color changes, stuffing and embroidered features are added at the correct time.
Leave a tail of at least 6 inches when making each magic ring. After tightening the ring, weave the tail through several nearby stitches in one direction and then back through the stitches in the opposite direction before trimming it.
These instructions use the standard US crochet abbreviations published by the Craft Yarn Council.
Crochet the Witch Head and Embroider Her Face
Use the 3.5 mm hook and muted green yarn. The head is worked from the top down in a continuous spiral. Stuff it firmly enough to hold its rounded shape without stretching the stitches apart.
Round 1: Make 6 sc in a MR. (6)
Round 2: Inc in each st around. (12)
Round 3: [Sc in next st, inc in next st] 6 times. (18)
Round 4: [Sc in next 2 sts, inc in next st] 6 times. (24)
Round 5: [Sc in next 3 sts, inc in next st] 6 times. (30)
Round 6: [Sc in next 4 sts, inc in next st] 6 times. (36)
Round 7: [Sc in next 5 sts, inc in next st] 6 times. (42)
Round 8: [Sc in next 6 sts, inc in next st] 6 times. (48)
Rounds 9 through 16: Sc in each st around. (48)
Round 17: [Sc in next 6 sts, invdec] 6 times. (42)
Round 18: [Sc in next 5 sts, invdec] 6 times. (36)
Stop here to embroider the face while the back of the work is still accessible. Mark the center front of the head. Position the eyes between Rounds 12 and 13 with approximately 7 stitches between their inner edges.
A witch this small does not need a fussy face. Two neat satin-stitched eyes, a tiny nose and one curved smile give her all the expression she needs.
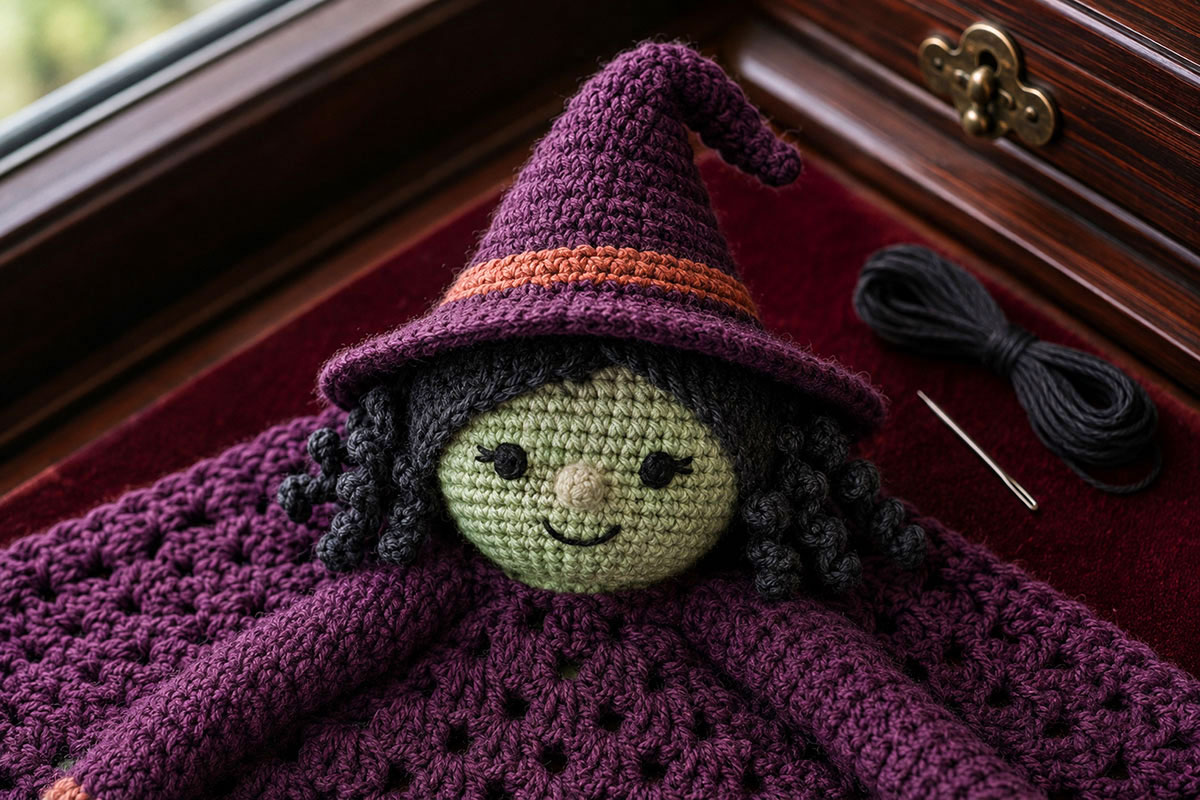
Thread an embroidery needle with black cotton floss. Make each open eye from 3 or 4 short, closely placed satin stitches. Keep the eyes small, matte and evenly spaced so they match the simple expression shown in the example image.
Add a tiny green horizontal stitch between Rounds 14 and 15 for the nose. Embroider a short curved mouth between Rounds 15 and 16 using black floss. Keep the default face free of plastic eyes, buttons, beads and raised decorations.
Carry embroidery ends through the inside of the head and knot matching ends together securely. Trim the excess floss so no loose ends remain near the stuffing.
Round 19: [Sc in next 4 sts, invdec] 6 times. (30)
Round 20: [Sc in next 3 sts, invdec] 6 times. (24)
Begin adding fiberfill in small pieces. Shape the cheeks and sides of the head as you work, taking care not to push the stuffing against the embroidered stitches.
Round 21: [Sc in next 2 sts, invdec] 6 times. (18)
Round 22: [Sc in next st, invdec] 6 times. (12)
Add the remaining fiberfill. The base should be firm and level because it will sit directly against the center of the blanket.
Round 23: Invdec around. (6)
Fasten off, leaving a 24-inch yarn tail for assembly. Thread the tail through the front loops of the final 6 stitches and pull the opening closed. Do not weave in the long assembly tail.
Make and Attach the Crocheted Witch Hair
The hair is made as a fitted cap with crocheted curls along the sides and back. This keeps the strands attached more securely than cut lengths of yarn and leaves a smooth crown beneath the removable hat.
Use the 3.5 mm hook and black, charcoal or dark brown yarn. Work the cap in continuous rounds.
Round 1: Make 6 sc in a MR. (6)
Round 2: Inc in each st around. (12)
Round 3: [Sc in next st, inc in next st] 6 times. (18)
Round 4: [Sc in next 2 sts, inc in next st] 6 times. (24)
Round 5: [Sc in next 3 sts, inc in next st] 6 times. (30)
Round 6: [Sc in next 4 sts, inc in next st] 6 times. (36)
Round 7: [Sc in next 5 sts, inc in next st] 6 times. (42)
Round 8: [Sc in next 6 sts, inc in next st] 6 times. (48)
Rounds 9 through 11: Sc in each st around. (48)
Fasten off after Round 11, leaving a 30-inch tail for attaching the cap. Place the cap on the head and mark 18 consecutive stitches across the front for the hairline. Remove the cap.
With the outside of the cap facing you, join the hair yarn with a sl st in the first unmarked stitch immediately after the front hairline. The remaining 30 stitches will be used to make 10 curls, with 3 cap stitches assigned to each curl.
First shorter curl: From the joined stitch, ch 11. Work 2 sc in the second ch from the hook and 2 sc in each remaining ch. Sl st in each of the next 2 cap stitches.
Middle curls: [Sl st in the next cap stitch, ch 15, work 2 sc in the second ch from the hook and 2 sc in each remaining ch, sl st in each of the next 2 cap stitches] 8 times.
Final shorter curl: Sl st in the next cap stitch, ch 11, work 2 sc in the second ch from the hook and 2 sc in each remaining ch. Sl st in each of the final 2 cap stitches.
Fasten off and weave in the curl yarn tail. The 10 curls now occupy all 30 side and back stitches, with shorter curls framing the face.
Return the cap to the head and check that the face is centered between the shorter curls. At the center of the forehead, position the existing cap edge approximately one head round lower than the rest of the front hairline to form a small widow’s peak. Do not crochet an additional cap round.
Pin the cap in place while maintaining the lower center point. Thread the original 30-inch tail onto the yarn needle and sew around the entire hairline with small whipstitches, passing through both the cap edge and the head. Add several hidden stitches through the crown so the cap cannot lift when the removable hat is taken off.
Secure each curl at its base with an extra stitch. Leave the curled lengths free only when the lovey is intended for decoration or supervised handling. For a young child, tack the bottom of each curl to the back of the head so the spirals cannot be pulled into long loops.
Crochet the Removable Pointed Witch Hat
The witch hat begins at the tip and widens into a soft cone. Two shaping rounds move the increases toward one side and the decreases toward the other, giving the point a natural bend without wire or a stiff insert.
If you want to make the same crooked witch-hat look in wearable sizes, my free crochet witch hat pattern is an excellent place to begin. The pattern includes several sizes for making a separate wearable Halloween hat.
Use the 3.5 mm hook and deep plum yarn. Work in continuous rounds until instructed to join.
Round 1: Make 4 sc in a MR. (4)
Round 2: Inc in each st around. (8)
Round 3: Sc in each st around. (8)
Round 4: [Sc in next st, inc in next st] 4 times. (12)
Round 5: Sc in each st around. (12)
Round 6: [Sc in next 2 sts, inc in next st] 4 times. (16)
Round 7, first shaping round: Inc in next st, sc in next 4 sts, inc in next st, sc in next 6 sts, invdec twice. (16)
Round 8: Sc in each st around. (16)
Round 9: [Sc in next 3 sts, inc in next st] 4 times. (20)
Round 10, second shaping round: Inc in next st, sc in next 5 sts, inc in next st, sc in next 9 sts, invdec twice. (20)
Round 11: Sc in each st around. (20)
Round 12: [Sc in next 4 sts, inc in next st] 4 times. (24)
Round 13: Sc in each st around. (24)
Round 14: [Sc in next 5 sts, inc in next st] 4 times. (28)
Round 15: Sc in each st around. (28)
Round 16: [Sc in next 6 sts, inc in next st] 4 times. (32)
Round 17: Sc in each st around. (32)
Round 18: [Sc in next 7 sts, inc in next st] 4 times. (36)
Round 19: Sc in each st around. (36)
Round 20: [Sc in next 8 sts, inc in next st] 4 times. (40)
Round 21: Sc in each st around. (40)
Round 22: [Sc in next 9 sts, inc in next st] 4 times. (44)
Round 23: Sc in each st around. (44)
Round 24: [Sc in next 10 sts, inc in next st] 4 times. (48)
Round 25: Sc in each st around. Join with a sl st in the first sc. (48)
Try the cone on the witch’s head after Round 25 and before adding the hatband. At the stated gauge, the 48-stitch opening should slide over the hair cap without covering the embroidered eyes. If the fit is incorrect, check the head and hat gauge before continuing. Changing the stitch count here would also require recalculating the hatband and brim rounds.
Add the Contrasting Hatband
Change to muted gold or rust-colored yarn.
Round 26: Ch 1. Working in the BLO, sc in each st around. Join with a sl st in the first sc. (48)
Round 27: Ch 1, sc in each st around. Join with a sl st in the first sc. Fasten off the contrasting yarn. (48)
Finish the Witch Hat Brim
Join the deep plum yarn in any stitch from Round 27.
Round 28: Ch 1. [Sc in next 5 sts, inc in next st] 8 times. Join with a sl st in the first sc. (56)
Round 29: Ch 1. [Sc in next 6 sts, inc in next st] 8 times. Join with a sl st in the first sc. (64)
Round 30: Ch 1, sc in each st around. Join with a sl st in the first sc. (64)
Fasten off and weave the yarn end back through several stitches on the wrong side. Shape the pointed tip with your fingers, directing the bend toward one side. Steam is not necessary and may flatten cotton stitches or change the fit.
The hat should remain soft and flexible. Do not add wire, pipe cleaners, buttons or beads. Instructions for sewing the hat permanently to the head are included in the finishing section.
Crochet the Lovey Blanket
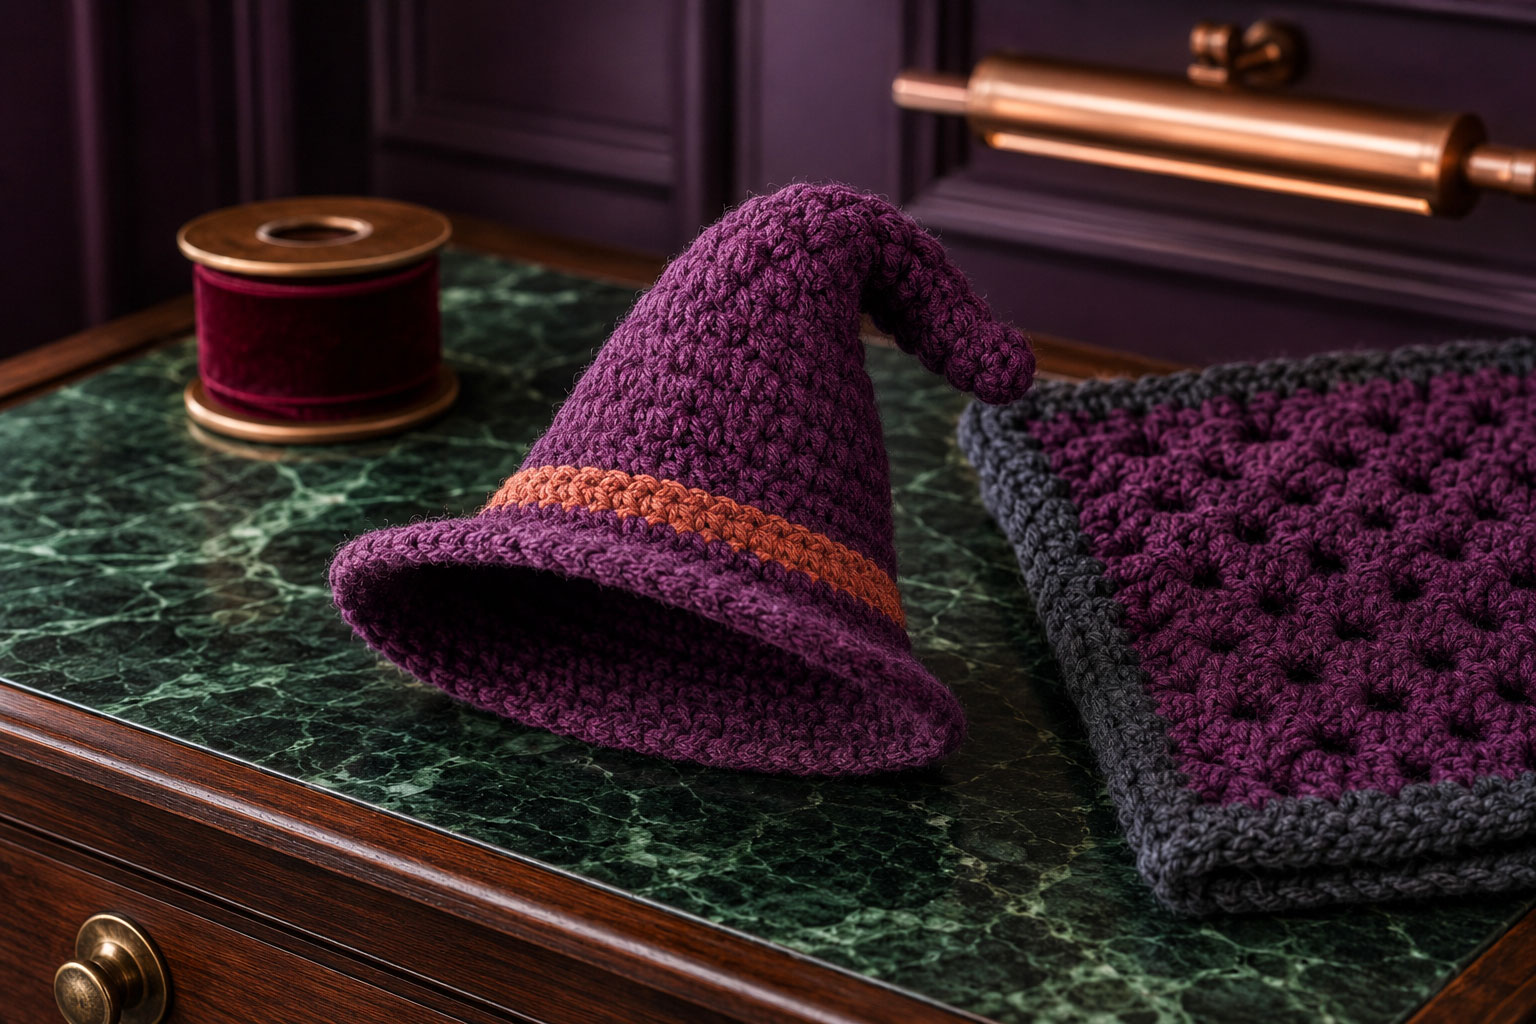
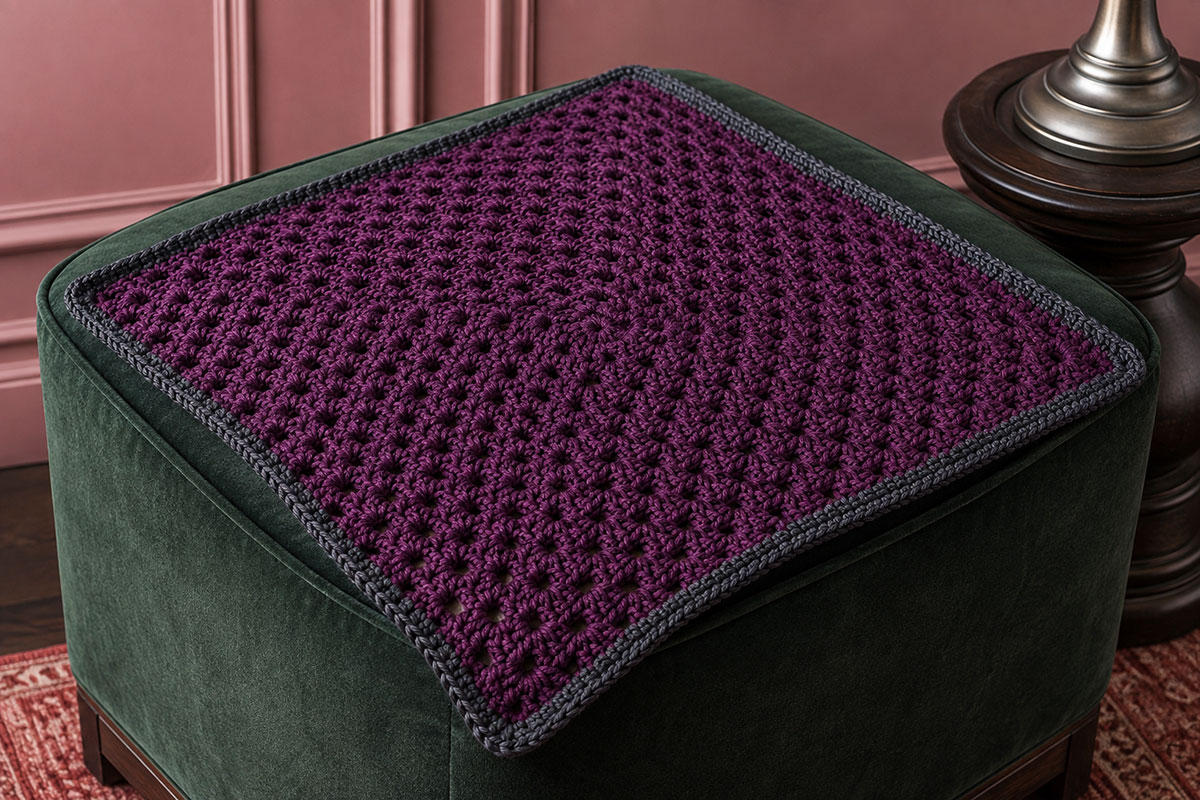
The blanket is a traditional granny square worked in joined, turned rounds. Use the 4 mm hook and the main blanket color. Turning after every round keeps the square balanced and gives both sides a similar appearance.
Each corner is made with 3 dc, ch 2 and 3 dc in the same corner space. The ch-1 spaces between clusters create the open texture.
Round 1: Make a MR. Ch 3, which counts as the first dc. Work 2 dc in the ring, ch 2, [3 dc in the ring, ch 2] 3 times. Join with a sl st in the top of the beginning ch 3. Pull the ring closed. (4 clusters and 4 corner spaces)
Turn the work.
Round 2: Sl st across the next 2 dc and into the first corner space. Ch 3, work 2 dc, ch 2 and 3 dc in the same corner space. Ch 1. In each remaining corner space, work 3 dc, ch 2 and 3 dc, placing ch 1 between corners. Join with a sl st in the top of the beginning ch 3. (8 clusters)
Turn the work.
Round 3: Sl st across the next 2 dc and into the first corner space. Ch 3, work 2 dc, ch 2 and 3 dc in the same corner space. Ch 1, work 3 dc in the next ch-1 space, ch 1. [Work 3 dc, ch 2 and 3 dc in the next corner space. Ch 1, work 3 dc in the next ch-1 space, ch 1] 3 times. Join with a sl st in the top of the beginning ch 3. (12 clusters)
Turn the work.
Rounds 4 through 15: Sl st across the next 2 dc and into the first corner space. Ch 3, work 2 dc, ch 2 and 3 dc in the same corner space. Ch 1. Work 3 dc in each ch-1 space across the first side, placing ch 1 between clusters. In the next corner space, work 3 dc, ch 2 and 3 dc.
Continue around the square by working 3 dc in every ch-1 space, ch 1 between clusters, and 3 dc, ch 2 and 3 dc in every corner space. Join with a sl st in the top of the beginning ch 3. Turn after every round.
Cluster totals: Round 4 has 16 clusters. Each following round adds 4 clusters: 20, 24, 28, 32, 36, 40, 44, 48, 52, 56 and 60 clusters at the end of Round 15.
After Round 15, place the blanket on a flat surface without stretching it. Before the contrasting edge is added, it should measure close to 15 inches square at the stated gauge. The two edging rounds will add approximately 1 inch to the overall width and height. If the square is substantially smaller or larger at this checkpoint, verify the gauge before adding or removing a granny-square round. Changing the number of rounds also changes the amount of yarn required.
Add the Contrasting Blanket Edge
Change to black, charcoal or dark brown yarn. Do not turn after the edging begins.
Edging Round 1: Join the edging yarn in any corner space. Ch 1. Work 2 sc, ch 2 and 2 sc in the same corner. Work 1 sc in each dc and 1 sc in each ch-1 space across the side. In each remaining corner, work 2 sc, ch 2 and 2 sc. Join with a sl st in the first sc. (252 sc and 4 ch-2 corner spaces)
Edging Round 2: Ch 1 and sc in each sc around. Work 2 sc, ch 2 and 2 sc in every corner space. Join with a sl st in the first sc. (268 sc and 4 ch-2 corner spaces)
Fasten off and weave the ends through the wrong side of the blanket. Block the square gently by smoothing it into shape on a clean towel. Avoid stretching the corners into long points because the head and arms still need to be attached.
Crochet Two Witch Arms
The arms begin with muted green hands and continue into long plum sleeves with narrow contrasting cuffs. Make 2 identical arms using the 3.5 mm hook.
Begin with muted green yarn and work in continuous rounds.
Round 1: Make 6 sc in a MR. (6)
Round 2: Inc in each st around. (12)
Rounds 3 through 6: Sc in each st around. (12)
Place a small amount of fiberfill inside the hand. Use only enough to round the end. The first 2 sleeve rounds will receive a very small amount of stuffing later, but the upper sleeve must remain unstuffed so it can be flattened for assembly.
Change to muted gold or rust-colored yarn for the cuff.
Round 7: Working in the BLO, sc in each st around. (12)
Round 8: Sc in each st around. (12)
Change to deep plum yarn for the sleeve.
Rounds 9 through 23: Sc in each st around. (12)
Push a very small amount of fiberfill into the first 2 rounds of the sleeve. Leave the upper portion unstuffed so it can lie flat against the blanket.
Flatten the final round so 6 stitches sit along the front and 6 along the back.
Closing row: Ch 1. Working through both layers, sc across the flattened opening. (6)
Fasten off, leaving an 18-inch tail for assembly. Make the second arm in the same way.
Measure both arms before attaching them. Each should be approximately 5 inches long. A small difference can usually be corrected by gently shaping the sleeves, but the two hands should contain the same amount of stuffing.
Assemble the Crochet Witch Lovey
Before sewing anything, place the blanket with the surface you like best facing up. Treat this as the right side of the blanket. Choose one straight edge as the front and keep that orientation throughout assembly.
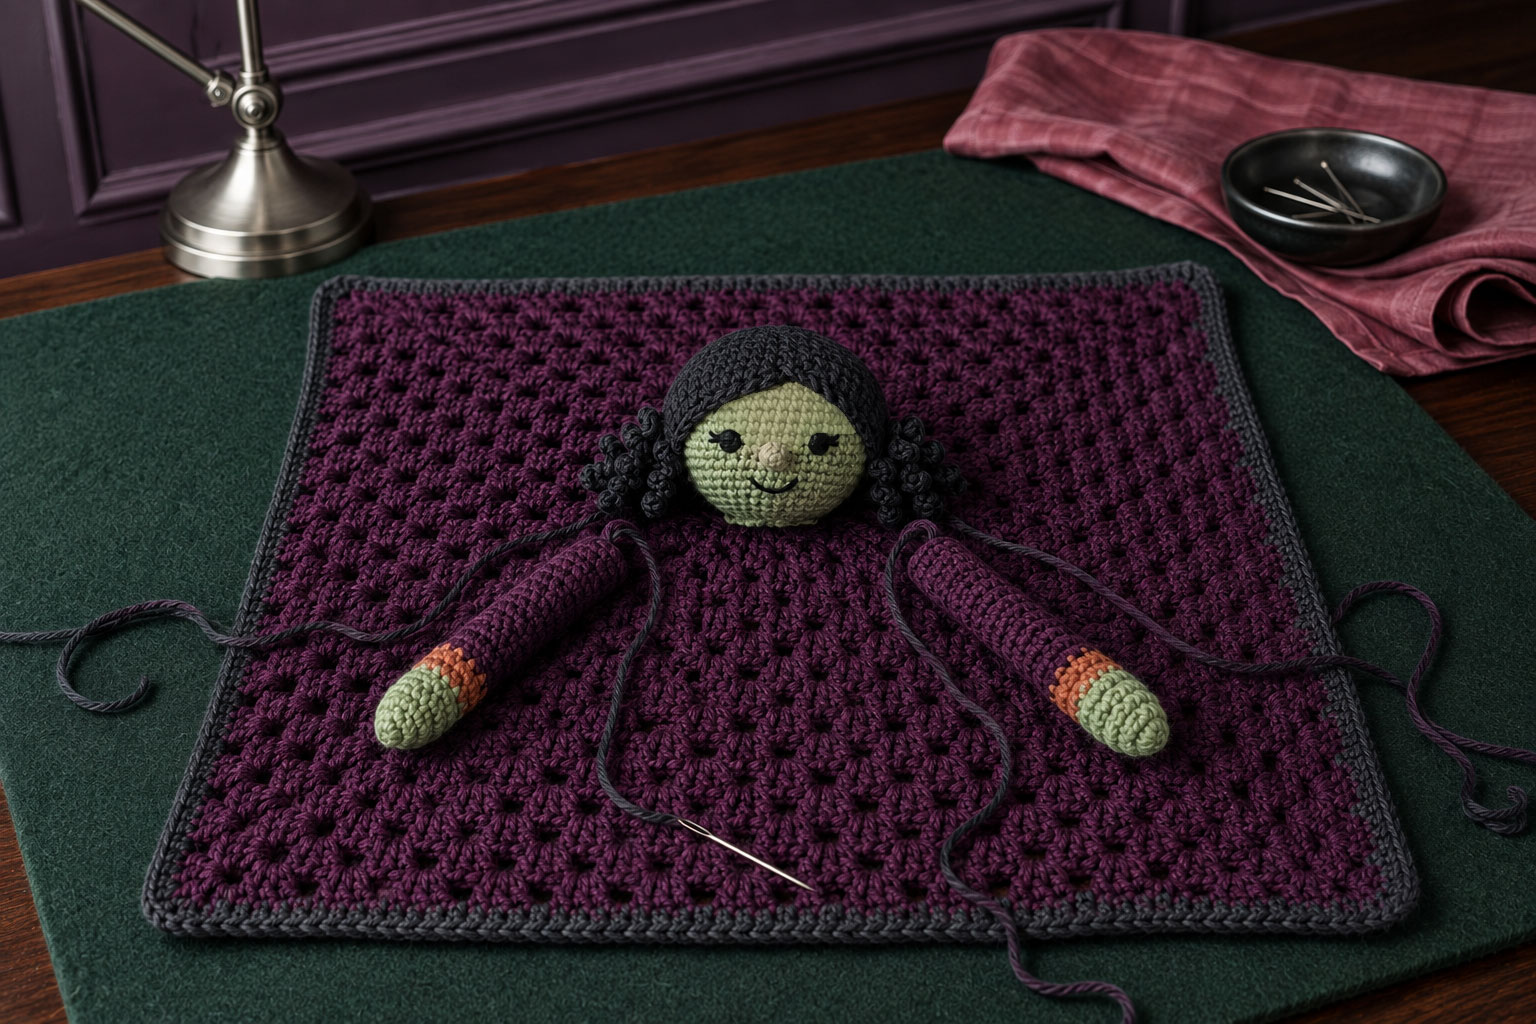
Arrange the head and both arms before attaching any piece. Turn the face toward the chosen front edge, with one arm extending diagonally toward each front corner. Check the placement from the front and both sides before picking up the yarn needle.
Position and Attach the Arms
Lay the blanket flat with the right side facing up and mark its center by counting the clusters from each edge.
Place one arm on each side of the marked center. The flattened upper ends of the sleeves should sit approximately 1 inch from the center ring, where they will later be covered partly by the base of the head. Angle the hands toward the two front corners of the blanket.
Pin both sleeves in place and compare their positions. The cuffs should fall at approximately the same distance from the blanket edge, and the same amount of each upper sleeve should extend beneath the planned head position.
Use the long plum tail to sew the flattened top of each sleeve to the blanket. Sew through both layers of the sleeve and through the blanket stitches beneath it. Work across the top once, return across it a second time and add a few stitches along each side of the sleeve for extra support.
Do not sew the full length of the arms to the blanket. Leaving the lower sleeves and hands free gives the lovey its cuddly shape.
Secure each arm tail on the wrong side of the blanket. Weave it through several stitches in different directions before trimming it close to the fabric.
Position and Attach the Head
Place the closed base of the head directly over the center ring, allowing it to cover the attached upper ends of both sleeves evenly.
Turn the face toward the edge you chose as the front. Pin the head in place at four evenly spaced points around its base. Check that the face is upright and that equal portions of the two sleeves remain visible.
Thread the long green assembly tail onto the yarn needle. Sew around the base of the head with small whipstitches, passing through a blanket stitch and then through a stitch near the bottom of the head. Catch the covered sleeve ends beneath the head where practical without pulling the head out of position.
Complete the first circle of stitches, then sew around the base a second time in the opposite direction. Gently tug the head after every few stitches to locate any loose areas. Add an extra stitch wherever the base lifts away from the blanket.
Pass the yarn through the head and bring it out on the opposite side of the base. Knot it securely around an existing stitch, draw the knot inside the head and trim the yarn.
Finish the Lovey and Choose a Hat Option
Check the entire lovey under bright light before calling it finished. Look closely at the head, hair, arms and edging. Pull gently on every attached piece and repair any stitch that shifts or opens.
Keep the Witch Hat Removable
I would keep the removable version for decoration or closely supervised play. For a lovey that a young child will handle, I prefer the hat sewn continuously beneath the brim so there is no loose fastening to find later.
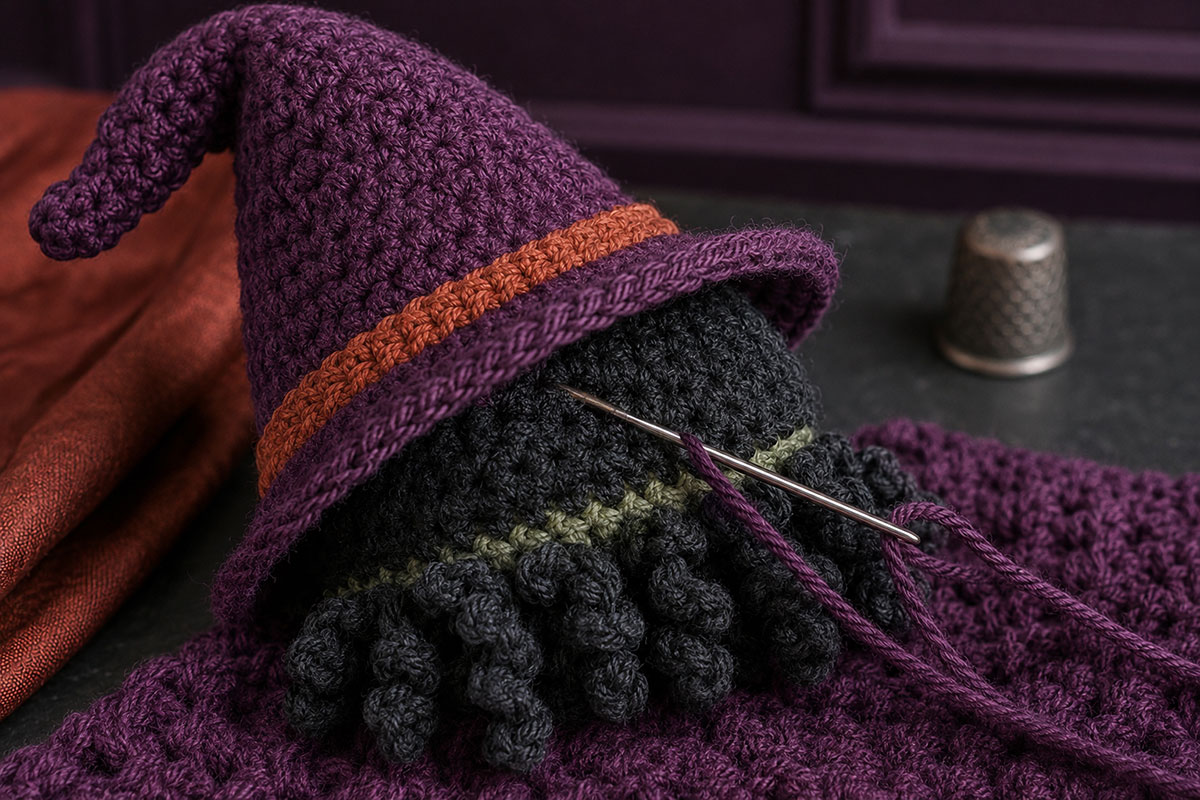
For a decorative lovey or supervised play piece, place the hat over the hair cap and shape the brim around the face. The fitted opening should hold it in place without ties, elastic or a chin strap.
Do not add buttons, snaps, beads or hook-and-loop tape to secure the removable hat. The hat should remain a simple separate piece that an adult can put on and remove easily.
Sew the Witch Hat Permanently in Place
For a lovey intended for a baby or toddler, place the hat on the head with the bent tip angled slightly to one side. Position the front brim above the embroidered eyes so the face remains uncovered.
Pin the brim to the hair cap at the front, back and both sides. Thread the yarn needle with a long length of matching plum yarn.
Sew continuously around the inside edge of the hat opening. Pass the needle through the hat, the crocheted hair cap and a shallow portion of the green head stitches. Keep each stitch small and close to the previous one so little fingers cannot lift the brim.
Complete a second circle of stitches beneath the first. Secure the yarn inside the head, bring the needle out through the back of the hair and trim the tail close enough for the end to disappear between the stitches.
Complete the Final Inspection
- Confirm that all embroidered features are firmly secured.
- Check that no fiberfill shows through the head or hands.
- Make certain the hair cap cannot lift away from the head.
- Test the head and both arms with a gentle pull.
- Remove every pin and stitch marker.
- Trim or weave in any visible yarn ends.
- Confirm that the blanket corners and edging lie flat.
Wash the finished lovey according to the care instructions printed on the yarn label. Place it inside a mesh laundry bag if machine washing is permitted. Reshape the head, hat and blanket while damp, then allow every stuffed section to dry completely before use or storage.
A lovey is not an infant sleep item. Keep this and other soft objects out of a baby’s sleep space. The American Academy of Pediatrics safe sleep guidance explains how to prepare an infant’s sleeping area.
Color and Style Ideas for Your Crochet Witch Lovey
A green face makes the witch immediately recognizable, but the shade changes her personality. Sage green feels soft and storybook-like. Olive gives her an earthy woodland look, while a clearer apple green creates a brighter Halloween character.
Keep enough contrast between the face and hair for the embroidered features to remain easy to see. Black floss may disappear against very dark green yarn, so test a few stitches before finishing the face.
The pointed hat and blanket do not have to match exactly. A plum hat looks pretty with a charcoal blanket, while a rust hat can be paired with deep brown edging. Midnight blue is another good choice when you want Halloween color without using solid black throughout the project.
For more seasonal characters and project ideas, browse my free Halloween crochet patterns for more pumpkins, ghosts, bats and other Halloween designs.
Try one of these color combinations:
- Muted green face, deep plum hat, charcoal hair and muted gold hatband
- Sage face, rust-orange hat, dark brown hair and golden-brown edging
- Olive face, midnight-blue hat, black hair and copper-colored hatband
- Soft green face, charcoal hat, plum blanket and dusty rose cheeks
The hatband can be left plain or made with a subtle row of surface slip stitches. Avoid buckles, buttons and dangling decorations when the lovey will be handled by a young child.
You can change the expression without changing the head pattern. Keep the eyes open and embroidered with short satin stitches, then adjust their angle slightly to change the expression. A small curved mouth gives the witch a friendly look without adding loose or raised facial pieces.
Keep the face simple enough to remain clear after washing. A few carefully placed embroidery stitches will hold their shape better than a collection of tiny decorative features.
Fix Common Witch Lovey Pattern Problems
The Head Has Visible Gaps
Change to a smaller crochet hook if the fiberfill shows between stitches. Do not pull each stitch excessively tight because that can make crocheting uncomfortable and distort the head. A smaller hook creates a closer fabric while allowing a natural, even tension.
The Head Looks Lopsided
Check the stitch total at the end of every increase and decrease round. Uneven stuffing can also push one side outward. Remove the fiberfill, separate it into small pieces and add it gradually while turning the head in your hands.
The Face Is Not Centered Beneath the Hat
Place temporary stitch markers where the eyes will go before embroidering them. Put the unfinished hair cap and hat on the head, then check the face from the front. It is much easier to move a marker than to remove several tight satin stitches.
The Witch Hat Will Not Bend
Locate the shaping side created in Rounds 7 and 10. Gently curve the point in that direction and hold it for several seconds. Cotton yarn may need to be shaped again after washing, but the cone should bend without wire or added stuffing.
The Hat Slips Over the Witch’s Eyes
The opening may be too large, or the cone may have been worked more loosely than the head. Thread matching yarn through the stitches at the base of the hatband and gently draw them inward. Distribute the adjustment evenly before securing the yarn.
The Granny Square Twists
Make certain the blanket is turned after every round. Count the clusters along all four sides and check that each corner contains 3 dc, ch 2 and 3 dc. A missing corner cluster will pull one section inward.
The Blanket Edge Ripples
Too many stitches around the border can make the edge flare. Work only 1 sc in each dc and 1 sc in each ch-1 space. If the corners still ruffle, replace the 2 sc, ch 2 and 2 sc corner with 1 sc, ch 2 and 1 sc.
The Attached Head Leans Forward
Add another circle of small stitches around the base of the head. Pass through the lower head stitches and the blanket rather than sewing only along the closed bottom. The additional attachment points will help the head sit upright without adding a separate neck piece.
Frequently Asked Questions About the Crochet Witch Lovey
Is this crochet witch lovey pattern suitable for beginners?
A confident beginner who can crochet in rounds, count stitches, change colors and sew pieces together should be able to complete it. The embroidered face, shaped hat and final assembly require more attention than the granny-square blanket.
Can I use acrylic yarn instead of cotton?
Yes. Choose a smooth, washable worsted-weight acrylic yarn and make a gauge sample before beginning. Acrylic may produce a slightly softer head and a more flexible hat, so you may need to use a smaller hook for the stuffed pieces.
How much yarn is needed for one witch lovey?
Plan on approximately 300 yards of deep plum yarn for the blanket, another 110 yards of deep plum for the hat and sleeves, 75 yards of green for the head and hands, and 75 yards of charcoal for the hair, curls and edging. Small amounts of rust yarn and black embroidery floss are used for the cuffs, hatband and facial features. Actual yardage varies with yarn, tension and any size adjustments.
Can the removable witch hat be made larger?
Yes, but changing the 48-stitch opening also requires recalculating the hatband and brim rounds. First check the head and hat gauge. If the completed head is larger because of yarn or tension, remake the hat with a slightly larger hook rather than changing only one round and leaving the later stitch counts unchanged.
Is the pointed witch hat wearable by a child?
No. The hat in this pattern is sized only for the crocheted witch head. A child-sized costume hat requires a separate pattern with head measurements, additional shaping and a much larger brim.
Should the witch hat remain removable?
Keep it removable only for decoration, collection or supervised play. Sew the hat continuously around the hair cap when making the lovey for a baby or toddler. Do not add ties, elastic loops, buttons or snaps.
Can I make the lovey blanket larger?
Yes. Continue the granny-square repeat until the blanket reaches the desired measurement, then add the contrasting edge. Remember that increasing the size also increases the amount of yarn required and changes the project from a small lovey toward a baby blanket.
How should the finished witch lovey be washed?
Follow the care directions for the yarn you selected. If machine washing is allowed, place the lovey inside a mesh laundry bag and use a gentle cycle. Reshape the head, hat and blanket while damp, and let the stuffed pieces dry completely.
Can this lovey be placed in a baby’s crib?
No soft lovey, blanket or stuffed crochet project should be placed in an infant’s sleep space. Keep it for awake, supervised use and follow current infant safe sleep guidance.
More Lovey and Baby Blanket Patterns to Make
The crooked little hat is what gives this witch her personality, but the soft blanket body keeps the project connected to the kind of handmade baby gifts readers come here to find.
For another small companion with a blanket body, browse the free crochet animal lovey patterns. The basic construction ideas can also help you plan different heads, ears and color combinations.
For another Halloween blanket-style character, this free crochet Jack-o'-lantern lovey pattern combines a ribbed pumpkin head with an embroidered Halloween face and orange granny-square blanket.
For another seasonal blanket-style character, the crochet pumpkin lovey pattern uses warm fall colors and a rounded pumpkin head, while the crochet bat lovey pattern gives you a darker Halloween design with a completely different silhouette.
If you decide to continue the granny-square rounds and turn this design into a larger project, visit the crochet baby blanket patterns for more sizes, textures and edging ideas.
Whether her hat stays removable or is sewn securely in place, this little green witch is ready to bring a friendlier face to Halloween crochet.
When you click on links to various merchants on this site and make a purchase, this may result in this site earning a commission. This does not affect the price you pay.

UBGI Gold Standard 2026
Reviewed under the site's
editorial checklist.
Photos, decorating ideas, party setups and reader submissions are shared for inspiration unless a page is specifically presented as a pattern, tutorial, reference guide or step-by-step project. Follow the instructions, measurements, safety guidance and manufacturer directions provided for the particular project or product.
About Jan | Contact | Baby Nursery Ideas (Blog) | Site Map | Privacy Policy | Disclosure Policy | Disclaimer | Affiliate Disclosure | Earnings Disclosure | Facebook | Pinterest
I am a participant in the Amazon Services LLC Associates Program, an affiliate advertising program designed to provide a means for us to earn fees by linking to Amazon. As an Amazon Associate I earn from qualifying purchases.
Copyright © 2006-2026. All Rights Reserved.