Free Crochet Bunny Hat Pattern with Upright Bunny Ears
By Jan Bay
This free crochet bunny hat pattern shows you how to make a smooth-yarn bunny ear beanie with a stretchy ribbed brim and tall structured ears. The pattern includes sizes from newborn through adult, along with fit measurements, optional contrast inner ears, ear placement and finishing instructions so you can make the same classic rabbit hat for babies, children or adults.
This is one complete bunny ear beanie pattern in six sizes, not a roundup of bunny hat ideas. Choose the head circumference first, then follow that size through the crown, brim and ear instructions.
Skill level: Advanced beginner. You should be comfortable with a magic ring, joined rounds, basic increases and decreases, front- and back-post double crochet, and simple sewing.
Explore More Bunny and Baby Crochet Patterns
Free Baby Crochet Hat Patterns
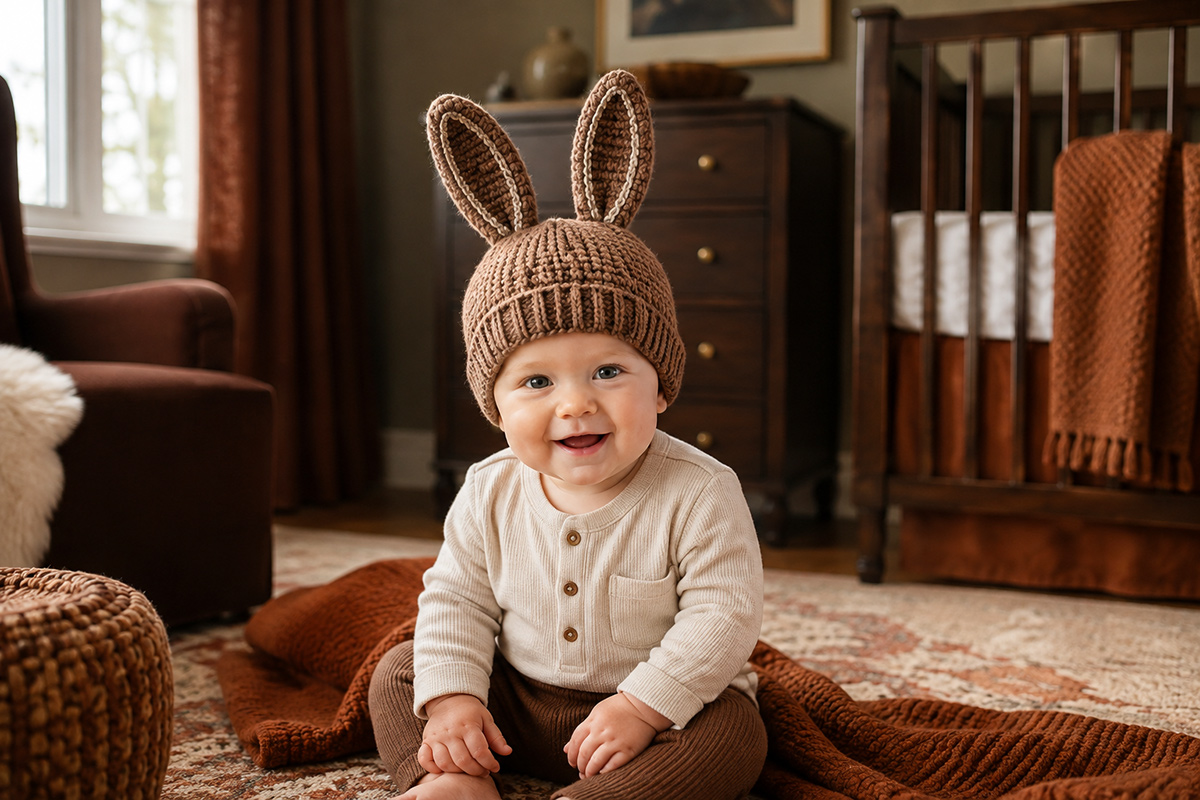
See smooth worsted-weight yarn for this crochet bunny hat pattern
Jump to the Bunny Hat Pattern
Free Crochet Bunny Hat Pattern: Size and Fit
This bunny hat is designed as a close-fitting beanie with a stretchy ribbed brim and tall upright rabbit ears. The smooth yarn keeps the stitches easy to see, while the double-layer ears give the hat its bunny shape without wire or another rigid insert.
The pattern includes newborn, 0 to 6 month, 6 to 12 month, toddler, child and teen or adult sizes. Choose the size from the wearer's actual head circumference whenever possible. Age ranges are useful starting points, but two people of the same age can need different hat sizes.
Measure around the fullest part of the head, across the forehead and above the ears. Keep the tape level and comfortably snug without pulling it tight.
The finished hat is intended to be slightly smaller than the actual head so the crocheted fabric can stretch into a comfortable fit. Do not add an extra crown increase simply because the unstretched hat looks a little smaller than the head measurement.
This is a top-down hat. You will increase the crown until you reach the stitch count for your selected size, work plain half double crochet rounds to build the depth, and finish the lower edge with a ribbed brim. The bunny ears are crocheted separately and sewn to the finished crown.
The hat does not need a face, buttons or dangling ties to read as a rabbit. The tall ears provide the main bunny detail while keeping the front of the beanie simple.
If you want another hat construction after this one, browse the free baby crochet hat patterns. For a completely different rabbit project, the free crochet bunny pattern makes a stuffed bunny rather than a wearable hat.
Materials for the Bunny Ear Beanie
Use a smooth worsted-weight yarn with enough body to support the ears but enough flexibility to make a comfortable beanie. A very drapey yarn can make the ears lean, while an unusually stiff yarn can make the hat less comfortable to wear.
Yarn and Tools for This Crochet Bunny Hat Pattern and Bunny Ear Beanie
- Smooth worsted-weight yarn, Craft Yarn Council category 4, in the main hat color
- Optional worsted-weight yarn in a contrast color for the inner ears
- 4.5 mm crochet hook, or the size needed to obtain the stated main-hat gauge, for the crown and main hat body
- Crochet hook approximately 0.5 mm smaller than the main-hat hook for the ribbed brim
- 4.0 mm crochet hook for the bunny ears; optional 3.5 mm crochet hook if the completed ear fabric is too soft
- Removable stitch markers
- Yarn needle
- Scissors
- Flexible measuring tape
Approximate main-color yarn amounts are:
- Newborn: 90 to 110 yards
- 0 to 6 months: 105 to 125 yards
- 6 to 12 months: 120 to 140 yards
- Toddler: 140 to 165 yards
- Child: 165 to 190 yards
- Teen or adult: 190 to 220 yards
If you are adding contrast inner ears, allow approximately 15 to 30 additional yards depending on the hat size.
Yardage is an estimate. Your yarn choice, tension, ear length and number of brim rounds can change the amount you use. If you are close to the end of a skein, allow extra yarn for sewing the double-layer ears securely to the hat.
I recommend making the ears entirely from crochet fabric rather than adding wire, pipe cleaners or plastic canvas. The double-layer construction and folded bases provide the structure.
For baby and young-child versions, leave off buttons, beads, plastic eyes and long chin ties. The rabbit shape is already clear without detachable decorations.
Gauge and Pattern Notes
Main hat gauge: approximately 15 hdc stitches and 10 rounds = 4 inches by 4 inches. Start with a 4.5 mm hook and change hook size if needed to obtain both the stated stitch gauge and round gauge.
Make a gauge swatch before choosing the final hat size. Stitch gauge controls the circumference, so even a small difference becomes more noticeable when multiplied around an entire round.
If you have more than 15 stitches in 4 inches, your stitches are tighter and the finished hat will be smaller. If you have fewer than 15 stitches, your stitches are looser and the hat will be larger. Change hook size as needed before beginning the hat.
For the ribbed brim, use a hook approximately 0.5 mm smaller than the hook that gave you the stated main-hat gauge. Work the bunny ear panels with the 4.0 mm hook as written unless the ear troubleshooting instructions direct you to use the 3.5 mm hook for all matching ear panels.
For general head-size measurements when you cannot measure the wearer directly, see the Craft Yarn Council head circumference chart.
Abbreviations Used in the Pattern
Terminology: This pattern uses U.S. crochet terms.
- ch: chain
- sl st: slip stitch
- sc: single crochet
- hdc: half double crochet
- dc: double crochet
- FPdc: front post double crochet
- BPdc: back post double crochet
- sc2tog: single crochet two stitches together
- sc3tog: single crochet three stitches together
- st: stitch
- sts: stitches
- FO: fasten off
Pattern Notes
- The crown and body are worked in joined rounds.
- Do not turn at the end of the hat rounds.
- The beginning chain does not count as a stitch.
- Join each round to the first actual stitch, not to the beginning chain.
- Use a stitch marker in the first stitch of each round if the join is difficult to see.
- Count the stitches after each crown increase round.
- Each crown increase round adds six stitches.
- After reaching the correct stitch count for your size, stop increasing and work plain body rounds.
- Add or remove plain body rounds to adjust hat depth. Do not add crown increases to make the hat deeper.
- The ribbed brim is worked after the main body is complete.
- The bunny ears are worked flat in rows and sewn together in pairs.
- Each finished ear uses two outer panels.
- Optional contrast inner ears are decorative and do not replace an outer panel.
- No wire or rigid insert is required.
Measure the hat while it is resting naturally rather than stretched flat. For circumference, measure around the lower body just above the ribbed brim. For depth, measure from the center of the crown straight down to the bottom edge.
Crochet Bunny Hat Size Chart
Use actual head circumference when you have it. The age labels below are guides, while the stitch counts and finished measurements are the working measurements for this pattern.
| Size | Head Circumference | Hat Stitch Count | Approx. Unstretched Hat Circumference | Main Body Before Brim | Approx. Finished Depth |
|---|---|---|---|---|---|
| Newborn | 13 to 14 inches | 48 sts | 12¾ inches | 4¼ inches | 5½ inches |
| 0 to 6 months | 14½ to 16 inches | 54 sts | 14½ inches | 4¾ inches | 6 inches |
| 6 to 12 months | 16½ to 18 inches | 60 sts | 16 inches | 5¼ inches | 6½ inches |
| Toddler, 1 to 3 years | 18 to 19 inches | 66 sts | 17½ inches | 5¾ inches | 7 inches |
| Child, 3 to 10 years | 19½ to 21 inches | 72 sts | 19¼ inches | 6¼ inches | 7½ inches |
| Teen or adult | 21 to 23 inches | 78 sts | 20¾ inches | 7 inches | 8¼ inches |
At the stated gauge of 15 hdc stitches per 4 inches, each stitch measures approximately 0.267 inch across. That is why the 48, 54, 60, 66, 72 and 78 stitch counts produce progressively larger hat circumferences.
Use plain body rounds to adjust the depth. Changing the number of crown increase rounds changes the circumference as well as the crown size.
Bunny Ear Length by Hat Size
- Newborn: approximately 4½ inches
- 0 to 6 months: approximately 5 inches
- 6 to 12 months: approximately 5½ inches
- Toddler: approximately 6 inches
- Child: approximately 6½ inches
- Teen or adult: approximately 7 inches
These ear lengths are measured from the open foundation edge to the tip before the base is folded for attachment.
Before you begin the hat instructions, decide which size you are making and write down its stitch count, body depth and ear length. That keeps you from accidentally following the next size when the crown increase rounds begin.
Crochet Bunny Hat Pattern Instructions
Make the hat first and add the rabbit ears afterward. Work the crown and main body with the hook that gave you the stated main-hat gauge, then change to a hook approximately 0.5 mm smaller for the ribbed brim. Do not turn the hat between rounds.
Choose your size before beginning. Each crown round adds six stitches. Stop increasing as soon as you reach the stitch count listed for your size.
Part 1: Crochet the Top-Down Hat Crown
Round 1: Make a magic ring. Ch 1, then work 12 hdc into the ring. Pull the ring closed and join with a sl st to the first hdc. (12)
Round 2: Ch 1. (Hdc in next st, 2 hdc in next st) around. Join with a sl st to the first hdc. (18)
Round 3: Ch 1. (Hdc in next 2 sts, 2 hdc in next st) around. Join. (24)
Round 4: Ch 1. (Hdc in next 3 sts, 2 hdc in next st) around. Join. (30)
Round 5: Ch 1. (Hdc in next 4 sts, 2 hdc in next st) around. Join. (36)
Round 6: Ch 1. (Hdc in next 5 sts, 2 hdc in next st) around. Join. (42)
Round 7: Ch 1. (Hdc in next 6 sts, 2 hdc in next st) around. Join. (48)
Newborn: Stop increasing after Round 7. Continue to Part 2 with 48 stitches.
Round 8: Ch 1. (Hdc in next 7 sts, 2 hdc in next st) around. Join. (54)
0 to 6 months: Stop increasing after Round 8. Continue to Part 2 with 54 stitches.
Round 9: Ch 1. (Hdc in next 8 sts, 2 hdc in next st) around. Join. (60)
6 to 12 months: Stop increasing after Round 9. Continue to Part 2 with 60 stitches.
Round 10: Ch 1. (Hdc in next 9 sts, 2 hdc in next st) around. Join. (66)
Toddler: Stop increasing after Round 10. Continue to Part 2 with 66 stitches.
Round 11: Ch 1. (Hdc in next 10 sts, 2 hdc in next st) around. Join. (72)
Child: Stop increasing after Round 11. Continue to Part 2 with 72 stitches.
Round 12: Ch 1. (Hdc in next 11 sts, 2 hdc in next st) around. Join. (78)
Teen or adult: Stop increasing after Round 12. Continue to Part 2 with 78 stitches.
Before moving on, count the complete round. This crown is shaped to form a rounded cup rather than a flat circle, so some cupping is expected before the plain body rounds begin. A pronounced ruffle can mean an extra increase was added. If the crown becomes unusually tight or sharply conical, check both the stitch count and the stated gauge before continuing.
Part 2: Work the Main Beanie Body
From this point forward, do not add any more increases.
Every body round: Ch 1, hdc in every stitch around, and join with a sl st to the first hdc. Keep the same stitch count on every round.
- Newborn: 48 hdc per round
- 0 to 6 months: 54 hdc per round
- 6 to 12 months: 60 hdc per round
- Toddler: 66 hdc per round
- Child: 72 hdc per round
- Teen or adult: 78 hdc per round
Continue the plain body rounds until the hat reaches the following depth, measured from the center of the crown straight down the side:
- Newborn: approximately 4¼ inches
- 0 to 6 months: approximately 4¾ inches
- 6 to 12 months: approximately 5¼ inches
- Toddler: approximately 5¾ inches
- Child: approximately 6¼ inches
- Teen or adult: approximately 7 inches
Measure after completing a round. If the hat is just short of the target depth, work another complete round rather than stopping halfway around. Record the total number of body rounds if you plan to make a second matching hat.
Do not add crown increases to gain extra hat depth. Additional increase rounds change the circumference. If you want a deeper hat, add plain body rounds only.
At this stage, the beanie should fit around the head but will still look unfinished at the lower edge. The ribbed brim adds approximately 1¼ inches of depth and gives the opening more stretch.
Part 3: Add the Ribbed Crochet Brim
Change to your brim hook, approximately 0.5 mm smaller than the hook used for the crown and main body. Keep the same number of stitches established for your hat size.
Brim Round 1: Ch 2. The ch 2 does not count as a stitch. Dc in every stitch around. Join with a sl st to the first dc. Do not turn.
Brim Round 2: Ch 2. Work FPdc around the next dc, then BPdc around the next dc. Repeat (FPdc around next dc, BPdc around next dc) around. Join with a sl st to the first FPdc.
Brim Round 3: Ch 2. FPdc around each FPdc from the previous round and BPdc around each BPdc from the previous round. Join with a sl st to the first FPdc.
Measure the brim without stretching it. It should be approximately 1¼ inches deep. If your row gauge produces a noticeably narrower brim, repeat Brim Round 3 once more, keeping every front post stitch over a front post stitch and every back post stitch over a back post stitch.
FO after the final brim round. Leave a tail long enough to weave securely through several stitches. Thread the tail onto a yarn needle, weave it through the wrong side in one direction, change direction, and weave through several more stitches before trimming.
The finished lower edge should stretch without flaring. If the brim pulls the hat opening inward so much that it no longer fits comfortably, the smaller hook is too small for your tension. Rework the brim with the same hook you used for the crown and main body rather than adding stitches around the edge.
Check the Hat Before Making the Ears
Lay the beanie flat with the round joins centered at the back. Measure the unstretched circumference around the lower body just above the ribbing and compare it with the size chart.
Then measure from the center of the crown to the bottom edge of the brim. The approximate finished depths are:
- Newborn: 5½ inches
- 0 to 6 months: 6 inches
- 6 to 12 months: 6½ inches
- Toddler: 7 inches
- Child: 7½ inches
- Teen or adult: 8¼ inches
If possible, check the fit before making the ears. The crown should sit neatly on the head, the ribbing should remain above the eyes, and the lower edge should stretch without feeling restrictive.
Once the basic beanie fits correctly, you can concentrate on the part that gives the pattern its personality: the tall crocheted rabbit ears.
Crochet Bunny Ears Pattern
Each finished bunny ear is made from two matching outer panels sewn together. That double layer gives the ear enough body to stand above the beanie without wire, plastic canvas or another rigid insert.
Make four outer ear panels total. Two panels are joined to make the first ear, and the remaining two panels make the second ear. Work all four panels with the 4.0 mm hook.
The ear width changes with the hat size so the newborn ears do not look heavy and the adult ears do not look too narrow. The length also increases gradually through the six hat sizes.
Outer Bunny Ear Panels: Make 4
Right side and wrong side: These flat single-crochet panels do not have an automatic right side. After each outer panel is complete, choose the smoother-looking face as the right side and mark it temporarily with a removable stitch marker. For the two front panels, sew the optional inner-ear panel to that marked side. When joining each front panel to a plain back panel, place the unmarked wrong sides together so the marked right sides face outward.
Turning chain: Ch 1 at the beginning of each row. The turning chain does not count as a stitch. Work the first sc into the first actual stitch and the final sc into the last stitch.
Newborn and 0 to 6 months: Ch 8.
6 to 12 months and toddler: Ch 10.
Child and teen/adult: Ch 12.
Row 1: Sc in the second ch from the hook and in each ch across.
- Newborn and 0 to 6 months: 7 sc
- 6 to 12 months and toddler: 9 sc
- Child and teen/adult: 11 sc
Row 2 and following straight rows: Ch 1, turn, and sc in every stitch across. Keep the same stitch count established in Row 1.
Continue the straight section until the panel measures approximately:
- Newborn: 3¾ inches from the foundation edge
- 0 to 6 months: 4¼ inches
- 6 to 12 months: 4½ inches
- Toddler: 5 inches
- Child: 5¼ inches
- Teen or adult: 5¾ inches
Finish a complete row before measuring. Record the number of straight rows you worked on the first panel. Use that exact row count for the remaining three panels so both finished ears match.
Taper the Small Bunny Ears
Use these taper rows for the newborn and 0 to 6 month sizes. Begin with 7 stitches.
Taper Row 1: Ch 1, turn, sc2tog, sc in next 3 sts, sc2tog. (5)
Taper Row 2: Ch 1, turn, sc2tog, sc in next st, sc2tog. (3)
Taper Row 3: Ch 1, turn, sc3tog. (1)
FO.
The completed panel should measure approximately 4½ inches for newborn or 5 inches for 0 to 6 months.
Taper the Medium Bunny Ears
Use these taper rows for the 6 to 12 month and toddler sizes. Begin with 9 stitches.
Taper Row 1: Ch 1, turn, sc2tog, sc in next 5 sts, sc2tog. (7)
Taper Row 2: Ch 1, turn, sc2tog, sc in next 3 sts, sc2tog. (5)
Taper Row 3: Ch 1, turn, sc2tog, sc in next st, sc2tog. (3)
Taper Row 4: Ch 1, turn, sc3tog. (1)
FO.
The completed panel should measure approximately 5½ inches for 6 to 12 months or 6 inches for toddler.
Taper the Large Bunny Ears
Use these taper rows for the child and teen/adult sizes. Begin with 11 stitches.
Taper Row 1: Ch 1, turn, sc2tog, sc in next 7 sts, sc2tog. (9)
Taper Row 2: Ch 1, turn, sc2tog, sc in next 5 sts, sc2tog. (7)
Taper Row 3: Ch 1, turn, sc2tog, sc in next 3 sts, sc2tog. (5)
Taper Row 4: Ch 1, turn, sc2tog, sc in next st, sc2tog. (3)
Taper Row 5: Ch 1, turn, sc3tog. (1)
FO.
The completed panel should measure approximately 6½ inches for child or 7 inches for teen/adult.
If the first completed outer panel is more than about ¼ inch shorter or longer than the target measurement, undo the taper, add or remove straight rows, and work the taper again. Do not add rows after the one-stitch tip. Once the first panel is within about ¼ inch of the target, record its exact straight-row count and use that same count for the remaining three outer panels so all four panels match.
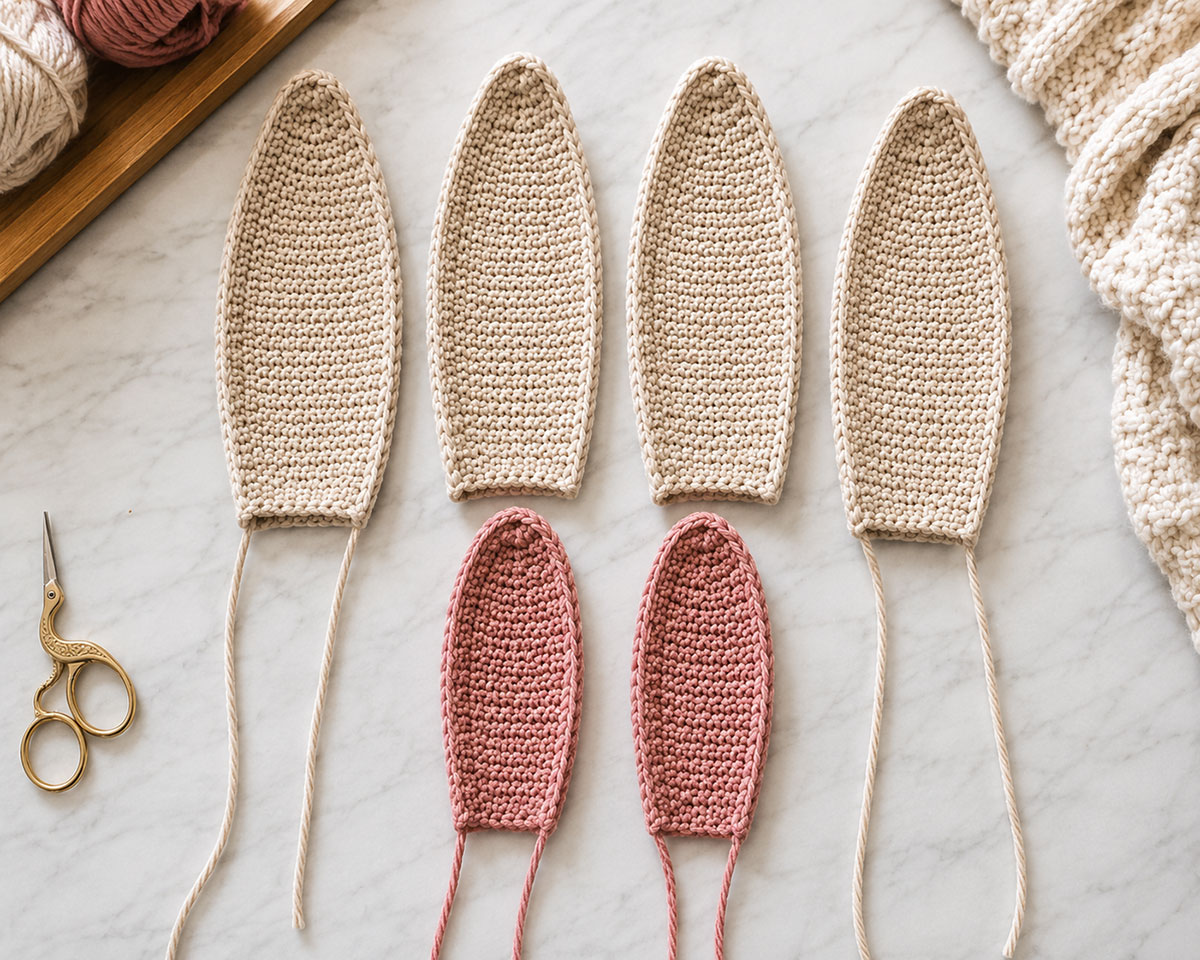
Optional Contrast Inner Ear Panels
The inner ear is decorative, so it does not need to be as large as the outer panel. Make two, one for the front of each finished ear.
Use the 4.0 mm hook and your contrast worsted-weight yarn.
Newborn and 0 to 6 months: Ch 6. Sc in the second ch from the hook and in each remaining ch across. (5 sc)
6 to 12 months and toddler: Ch 8. Sc in the second ch from the hook and in each remaining ch across. (7 sc)
Child and teen/adult: Ch 10. Sc in the second ch from the hook and in each remaining ch across. (9 sc)
Row 2 and following straight rows: Ch 1, turn, and sc in every stitch across. Continue until the straight section measures approximately:
- Newborn: 3¼ inches
- 0 to 6 months: 3¾ inches
- 6 to 12 months: 4 inches
- Toddler: 4½ inches
- Child: 4¾ inches
- Teen or adult: 5¼ inches
Then taper both edges:
Taper Row 1: Ch 1, turn, sc2tog, sc across until 2 sts remain, sc2tog.
Repeat that taper row until 3 stitches remain.
Final Row: Ch 1, turn, sc3tog. FO and leave a long sewing tail.
After the taper, measure from the foundation edge to the tip. The finished inner panel should measure approximately:
- Newborn: 3¾ inches
- 0 to 6 months: 4¼ inches
- 6 to 12 months: 4¾ inches
- Toddler: 5¼ inches
- Child: 5¾ inches
- Teen or adult: 6¼ inches
Each finished inner panel should be approximately ¾ inch shorter than its outer ear panel. If the first inner panel is more than about ¼ inch from the target, undo the taper, add or remove straight rows, and work the taper again. Record the straight-row count and use the same count for the second inner panel.
Center one inner panel on the right side of one outer panel. Leave an even border of the main color visible along both sides and around the tip. Keep the lower edge of the inner panel approximately ½ inch above the foundation edge of the outer ear.
Thread the long sewing tail from the inner panel onto a yarn needle. Beginning at the tip, sew down the first side to the lower corner, across the entire lower edge, and up the opposite side until you return to the tip. Keep the stitches just inside the edge of the inner panel and do not pull tightly enough to cup the outer ear. Bring the tail to the wrong side of the outer panel, weave it through several nearby stitches in two directions, and trim.
Repeat for the second ear. The other two outer panels remain plain because they form the backs.
Before joining the ear layers, weave in and trim every yarn tail that will not be used for sewing. On all four outer panels, secure the foundation tail and the tail at the tapered tip. If you made the optional inner panels, secure each remaining foundation tail as well. Do not leave unsecured yarn tails trapped between the two outer layers.
Join the Double-Layer Bunny Ears
Place one front outer panel and one back outer panel together with their wrong sides facing. If you made the optional contrast inner ears, use a decorated panel for the front and a plain panel for the back. If you omitted the contrast inner ears, choose one outer panel as the front and one as the back. Match the foundation edges, side edges and tapered tips.
Thread a yarn needle with a generous strand of the main-color yarn. Beginning at one lower corner, sew through both layers along the first side, around the tip and down the second side. When you reach the second lower corner, leave enough yarn uncut to shape the folded base and later sew twice across the ear attachment.
Leave the foundation edge open. Keep the remaining main-color yarn at the second lower corner as the attachment tail.
Keep the seam close to the outer edge. The ear should lie flat after sewing. If it twists, loosen the seam and realign the two panels rather than trying to straighten the ear by pulling on it.
Repeat with the remaining two outer panels.
Shape the Ear Bases So They Stand Upright
Lay one finished ear flat with the front facing up. At the open foundation edge, bring the two outer corners slightly toward the center to make a shallow pleat. Do not fold the ear completely in half.
For newborn and 0 to 6 months, overlap the base edges by approximately ¼ inch.
For 6 to 12 months and toddler, overlap the base edges by approximately ⅜ inch.
For child and teen or adult, overlap the base edges by approximately ½ inch.
Thread the long main-color attachment tail onto a yarn needle. Starting at the lower corner where the tail exits, sew across the entire folded foundation edge to the opposite corner, passing through every layer of the pleat. Reverse direction and sew back across the same folded edge to the starting corner. Do not trim the tail. Leave the remaining yarn attached for sewing the ear to the hat in the next section. The folded base should feel compact and firm without puckering the ear.
Shape the second ear as a mirror image of the first. Stand both ears on a flat surface before attaching them to the hat. Their tips should point in the same general direction, and the bases should be similar in width.
A small amount of natural lean is fine. These are crocheted ears, not rigid costume ears, and a slight curve keeps the finished hat from looking stiff.
How to Attach Bunny Ears to the Beanie
Finish both ears before sewing either one to the hat. The placement matters because even well-shaped crochet bunny ears can look uneven if one base sits farther forward or closer to the center than the other.
Do not attach the ears while the beanie is folded flat from front to back. A hat changes shape when it is worn, so first open the crown into its natural rounded shape. If possible, check the fit on the intended wearer, then remove the hat before using any pins or stitch markers for ear placement. Use a head form close to the correct circumference if you want support while positioning and pinning the ears.
Mark the Center of the Hat Before You Pin the Ears
- Turn the hat so the round joins are centered at the back.
- Mark the center front of the brim with a removable stitch marker.
- Mark the center back directly opposite it.
- Find the top center of the crown between those two points and place another removable marker there.
- Use that crown marker as your reference point when positioning both ears.
The ears should sit on the upper crown rather than along the side of the beanie. Placing them too far apart makes them look more like side decorations. Moving them too close together can make the two bases crowd each other and pull the crown into a ridge.
Suggested Spacing Between the Bunny Ear Bases
Measure the open space between the inner edges of the two folded ear bases:
- Newborn: approximately ¾ inch
- 0 to 6 months: approximately 1 inch
- 6 to 12 months: approximately 1¼ inches
- Toddler: approximately 1½ inches
- Child: approximately 1¾ inches
- Teen or adult: approximately 2 inches
Use these measurements as placement guides rather than rigid rules. Yarn thickness, ear-base width and the wearer's head shape can change how the ears look once the hat is on.
I recommend pinning both ears before sewing either one, then viewing the hat from the front, sides and back. Make any small spacing or angle adjustments while both ears are still removable. A quarter-inch change at the base can be much more noticeable at the tip of a tall ear.
Set the Ear Angle
Place each folded ear base so its long axis runs roughly from side to side across the crown, with the broad front of each ear facing forward. The ear should rise upward from that base rather than turning edge-on toward the front.
Angle the tops very slightly away from each other. Do not force them into a wide V shape. The double-layer construction already gives each ear some natural movement, and a gentle outward angle keeps the finished bunny ear beanie looking balanced from the front.
If you want a more upright rabbit look, keep the bases nearly parallel. If you prefer a softer look, rotate each base outward by a small amount before pinning. You can change the expression of the hat without changing a single crochet row.
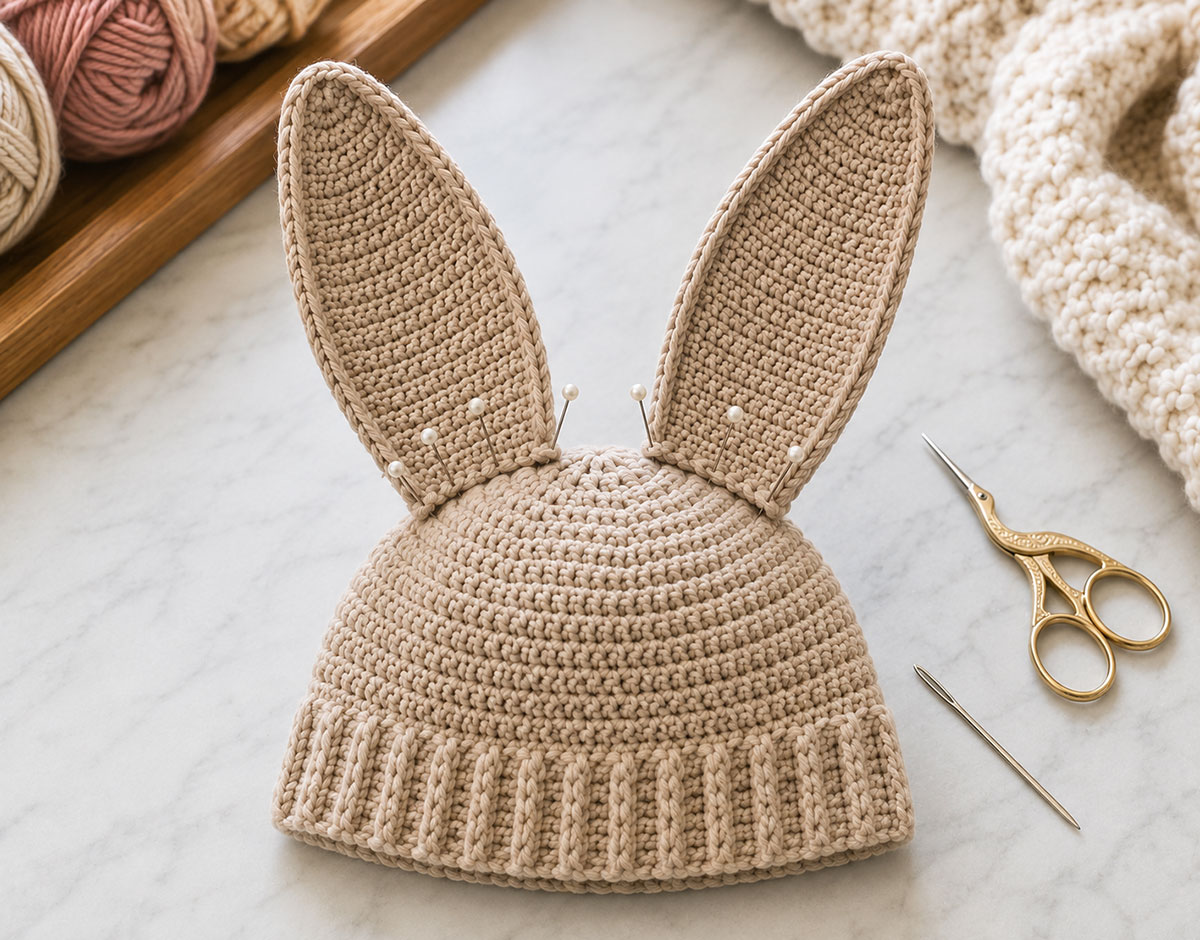
Sew the First Bunny Ear to the Hat
- Thread the long main-color tail from the ear base onto a yarn needle.
- Keep the ear pinned in its final position.
- Insert the needle through the hat fabric directly beneath one end of the folded ear base.
- Bring the needle back through the folded base, catching all layers without pulling the yarn through to the outside of the ear front.
- Continue across the entire base with small, closely spaced stitches.
- When you reach the opposite side, reverse direction and sew back across the base a second time.
- Check that the crown fabric remains smooth and is not gathered under the ear.
- Bring the yarn to the inside of the hat and weave it through nearby stitches in two different directions before trimming.
That second sewing pass is useful because the base carries the weight of a double-layer ear. Do not simply tack the ear at its two corners. Secure the full width of the folded foundation edge.
Match the Second Ear
Leave the second ear pinned while you sew the first one. After the first ear is secure, compare the second ear with it again before stitching.
Check three things:
- both inner base edges are the same distance from the crown center;
- both ear bases sit the same distance forward or backward on the hat;
- both ear tips lean at approximately the same angle.
Sew the second ear with the same two-pass method used for the first.
After both ears are attached, hold the hat upright rather than flat on the table. Look at it from the front and then from the back. If one ear appears noticeably taller, first check whether its base is folded differently. The actual crochet panels may be identical even when the base folds make them appear different.
If the Bunny Ears Lean Too Much
Do not add wire after the hat is assembled. First check the crochet construction.
If an ear folds directly at the attachment point, add several more stitches through the folded base and the hat crown. Keep those reinforcement stitches confined to the base so the rest of the ear can move naturally.
If the ear fabric itself is too soft, treat the smaller-hook change as a full-pair adjustment rather than remaking only one ear. Remake all four outer ear panels with a 3.5 mm hook instead of the 4.0 mm ear hook. If you are using contrast inner panels, remake both of them with the 3.5 mm hook as well. Keep the target finished ear length for your size the same and use the same hook for every matching panel so the two finished ears remain symmetrical.
You can also omit the contrast inner panel if it makes an especially soft yarn too heavy. The inner color is decorative and is not required for the ear structure.
Do not apply glue, fusible adhesive or a rigid insert to make the ears stand. The pattern is designed to keep the hat soft and washable with crochet and sewing alone.
If you like the rabbit theme but want a completely different kind of baby project, the crochet bunny lovey pattern uses floppy ears intentionally, while this hat keeps the ears taller so they remain easy to recognize when the beanie is worn.
Bunny Hat Assembly and Finishing
Once both ears are secure, the hat should be fully wearable without any additional decorations. I like stopping here. The ribbed brim and tall ears give the beanie enough rabbit character, and leaving off a crocheted face keeps the design useful for babies, older children and adults.
Final Shape Check
- Place the hat on a head form or gently shape the crown with your hands.
- Center the back join so the front of the hat is easy to judge.
- Check that the brim sits level from side to side.
- Look at the two ear bases from the front and confirm that they are equally spaced from the center.
- Turn the hat to each side and compare how far forward the ears sit.
- Check the back view to make sure neither ear base is pulling the crown fabric into a ridge.
- Remove every pin and removable stitch marker before the hat is worn or gifted.
If an ear needs a small adjustment, correct the base rather than bending or stretching the ear panel. A few carefully placed reinforcement stitches can change the angle without remaking the entire piece.
Secure Every Yarn Tail
Turn the hat inside out and inspect the crown, brim and both ear attachment areas.
Thread each remaining yarn tail onto a yarn needle and weave it through several nearby stitches. Change direction and weave through another group of stitches before trimming. Avoid making a large knot against the inside of the hat because a bulky knot can be uncomfortable against the head.
Pay particular attention to the tails at the ear bases. Those attachment points take more movement than an ordinary decorative seam.
Check the Ribbed Brim
Stretch the brim gently with both hands and let it return to its resting shape. The ribs should open and close without a section of the edge feeling noticeably tighter than the rest.
If one section puckers, inspect the post stitches in that area. A skipped post stitch or an accidental extra stitch can interrupt the ribbing and change the lower-edge fit.
The brim should hug the head without leaving a deep pressure line. If you are making the hat for a baby or child, fit matters more than matching an age label exactly.
Check the Bunny Ears After Assembly
Gently hold each ear near the tip and move it from side to side. The ear can flex, but the attachment seam should remain stationary against the crown.
Next, hold the ear close to its base and give it a light upward tug. Stop and reinforce the seam if you see stitches separating or the crown fabric stretching around a single attachment point.
Do not try to make the ears completely rigid. A little movement keeps the hat comfortable and prevents the crown from carrying unnecessary weight.
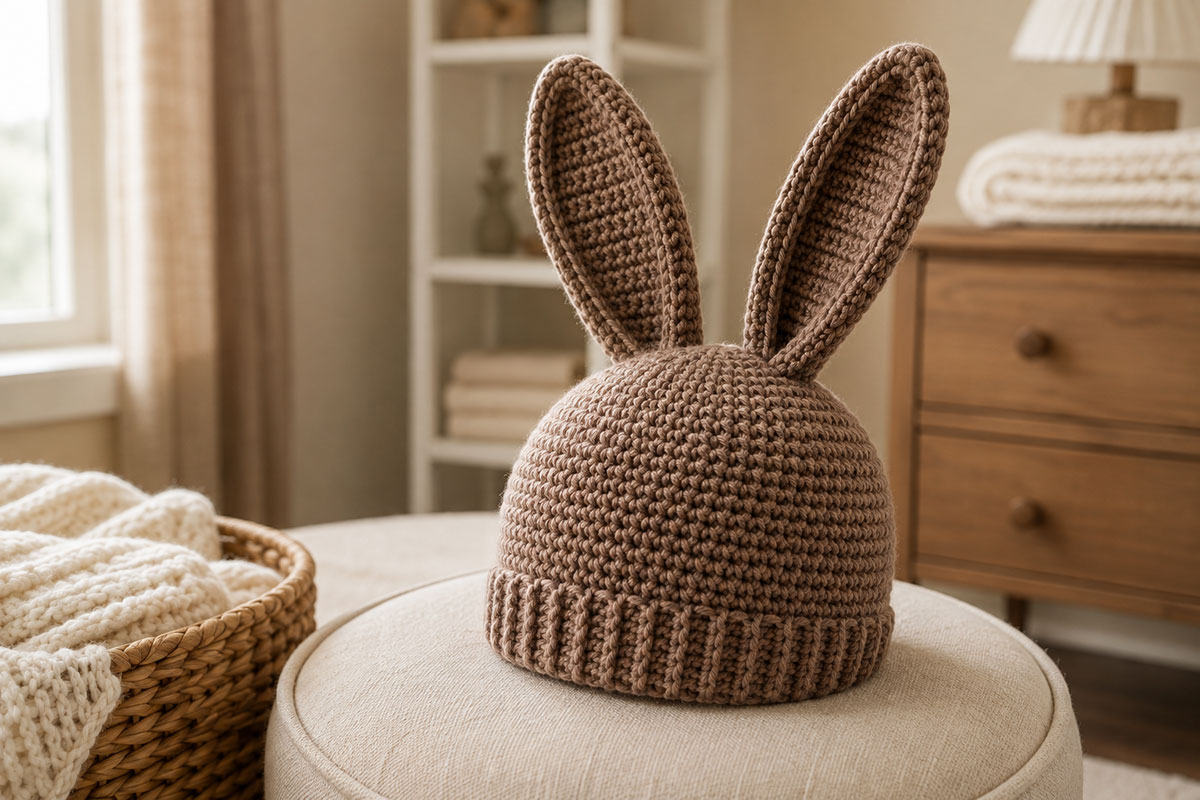
Washing and Reshaping the Bunny Hat
Follow the care instructions printed on the yarn label. If the yarn is machine washable, place the hat in a mesh laundry bag before washing so the ears are less likely to catch on other items.
After washing, reshape the hat while it is damp. Smooth the crown, straighten the ribbing and arrange both ears so the bases remain symmetrical.
If the yarn label allows machine drying, use only the recommended setting. Otherwise, lay the hat flat to dry and shape the ears by hand.
Do not iron the ears or press them with high heat. Heat can flatten crochet texture and can damage some synthetic yarns.
Using the Crochet Bunny Hat for Easter and Spring
The rabbit shape naturally works for Easter, but I would keep the hat itself season-neutral. A plain ivory, gray, rose, green or other solid-color beanie can be worn long after an Easter outfit has been packed away.
For a spring version, the inner ears are an easy place to add a second color without changing the construction. You can also make the entire hat in one color and leave the inner panels off for a cleaner rabbit silhouette.
If the hat is part of a handmade Easter gift, pairing it with the crochet bunny basket pattern gives you two different projects that belong together without repeating the same design.
The same bunny hat can also coordinate with a nursery gift set. A hat, blanket or small handmade rabbit can share a color family without every piece needing matching ears and faces.
That little bit of restraint keeps a bunny theme sweet instead of turning the whole gift into one giant rabbit.
Wear and Safety Notes for Babies and Young Children
- Use the hat only when the size fits comfortably and the brim remains above the eyes.
- Do not add chin cords, long ties, beads, buttons or detachable decorations.
- Inspect the ear seams and woven-in yarn ends regularly.
- Stop using the hat if an ear seam loosens or a yarn tail becomes accessible.
- Remove the hat when the child no longer needs it for warmth or dress-up.
- Do not use the hat as sleepwear for an infant.
I have intentionally left chin cords and long ties off this bunny hat. For additional information about drawstring hazards in children's clothing, see the U.S. Consumer Product Safety Commission guidance on drawstrings in children's clothing.
A handmade hat should still be treated like clothing rather than nursery decor. Fit it, check it and take it off when the situation calls for it.
Crochet Bunny Hat FAQ
Is this crochet bunny hat pattern beginner friendly?
Yes, if you are comfortable with basic increases, half double crochet, single crochet and simple post stitches. The hat itself follows a predictable top-down construction, and the ears are worked flat in rows. The step that deserves the most attention is ear placement because the two bases need to sit evenly on the rounded crown.
Can I make this bunny beanie without the contrast inner ears?
Yes. The inner ear panels are decorative. Leave them off if you want a one-color bunny beanie or a lighter ear. Each finished ear should still use two matching outer panels because the double layer helps it keep its shape.
How do I make crochet bunny ears stand up without wire?
Use a slightly smaller hook for the ears, join two outer panels for each finished ear and make a shallow fold at the base before sewing it to the crown. Secure the full width of the folded base with two sewing passes. Those details give the ear support while keeping the finished hat soft and washable.
If your yarn has a lot of drape, make one outer ear panel before crocheting all four. If that panel is too soft for the intended upright shape, remake it with a 3.5 mm hook instead of the 4.0 mm ear hook. If you switch to the 3.5 mm hook, use it for all four outer panels and for both optional inner panels if you include them. Keep the target finished ear length for your size the same so the two finished ears match.
Can I make floppy ears instead of upright bunny ears?
Yes. Leave the foundation edge of each finished ear completely unfolded. Pin the full foundation edge flat against the crown, then use the same two-pass attachment method described above: sew from one end of the full base to the other and back again before securing the yarn inside the hat. If you want more drape, add the same number of straight sc rows to all four outer panels before beginning the taper.
Keep this as an ear-only variation. Do not change the crown stitch count or body depth just because the ears are softer.
What yarn is best for a crochet bunny ear hat?
A smooth worsted-weight yarn with moderate body is a practical choice because it gives you visible stitches, comfortable stretch and enough structure for the ears. Very slippery or extremely drapey yarn can make the ears softer, while a very stiff yarn can make the beanie less comfortable.
Whatever yarn you choose, use the gauge rather than the yarn label alone to determine whether it is a suitable substitute.
Can I use chunky yarn for this crochet bunny hat?
Not with the stitch counts as written. Chunky yarn changes both the circumference and the height of the hat. You would need to recalculate the crown increases, finished stitch count, body depth and ear proportions for the new gauge.
If you want to use a different yarn weight, make a gauge swatch first and treat it as a separate sizing calculation rather than simply changing the hook.
How do I know which bunny hat size to make?
Measure around the widest part of the head and compare that measurement with the size chart. Choose by head circumference first and age second. Then use the body-depth measurement to fine-tune the vertical fit.
If you cannot measure the wearer directly, the Craft Yarn Council head circumference chart provides general head-size measurements for babies, children and adults.
If the measurement falls between two sizes, consider how much stretch your yarn has and how snug you want the finished beanie to fit. Do not increase the crown only to make the hat deeper.
Can I make the adult bunny hat with shorter ears?
Yes. The adult ear length is a proportion rather than a fit requirement. Stop the straight section earlier, then work the same large-ear taper. Make all four outer panels with the same row count so the two finished ears match.
Can I make longer bunny ears?
Yes. Add straight single crochet rows before beginning the taper. Do not add rows after the tapered tip. Record the added row count and repeat it on all four outer panels.
Longer ears also place more weight on the crown, so reinforce the attachment base carefully and make sure the hat still sits comfortably when worn.
Why are my bunny ears twisting?
First compare the two outer panels before sewing them together. Their row counts and widths should match. When joining them, align the foundation edges and tapered tips before sewing around the sides.
If the finished ear twists only after attachment, the base may have been folded unevenly or one side may be sewn farther forward on the crown. Correct the base placement rather than stretching the ear into shape.
Why is the top of my crochet hat ruffling?
Check the crown stitch count. An accidental extra increase can create a ripple that becomes more obvious as the crown grows. Also confirm that you are not working into the beginning chain or slip stitch as if either were an additional hat stitch.
If the stitch count is correct but the crown still ruffles significantly, check your gauge. Looser stitches can create a larger crown than the pattern measurements expect.
Why does my bunny hat look too pointed at the crown?
This pattern intentionally forms a rounded cup rather than a flat crown. The shape should soften as the plain body rounds are added. If it stays sharply pointed, count the last increase round for your size and compare your stitch and round gauge with the pattern.
Do not add another increase round unless you are intentionally moving to the next size, because another increase round also changes the finished circumference.
Can I add a bunny face to the hat?
You can embroider a simple face if you want a more costume-like version, but it is not required for this pattern. The tall ears already make the rabbit shape clear, and leaving the front plain gives the beanie a cleaner look that works across the full size range.
If you add facial details to a baby or young child's hat, use securely embroidered yarn or embroidery floss rather than buttons, beads or plastic eyes.
Can this free crochet bunny hat pattern be used for Easter?
Yes. The rabbit-ear shape makes it an easy Easter or spring project, but the construction is not tied to one holiday. Make it in a season-neutral color and it can be worn whenever the weather calls for a crocheted beanie.
If you want to make another bunny project after the hat, my crochet bunny basket pattern gives you a very different Easter-friendly project, while the crochet bunny lovey pattern is a softer blanket-style baby gift.
Can I make matching bunny hats in different sizes?
Yes. Follow the stitch count and body depth for each wearer rather than making one size and simply adding more rows. The same yarn colors and ear style can tie the hats together even though the crown counts are different.
That makes this pattern useful for sibling sets, parent-and-child hats or a group of Easter photos without forcing every head into the same proportions.
More Ways to Use This Bunny Hat Pattern
Once you have the basic beanie and ear construction working at your gauge, there is plenty of room to change the look without turning it into a different pattern. A solid-color hat with matching ears has a simple everyday feel, while contrast inner ears give the rabbit shape a little more definition.
You can also make a coordinated baby gift without repeating the same project. Pair the hat with the bunny baby quilt pattern for a handmade set that mixes crochet and quilting, or use colors pulled from a bunny nursery theme so the hat feels connected to the room without matching every detail.
Before gifting the hat, check the fit one more time, inspect both ear seams and make sure every yarn end is fully secured. Then shape the crown and ears by hand so the finished beanie is ready to wear.
When you click on links to various merchants on this site and make a purchase, this may result in this site earning a commission. This does not affect the price you pay.

UBGI Gold Standard 2026
Reviewed under the site's
editorial checklist.
Photos, decorating ideas, party setups and reader submissions are shared for inspiration unless a page is specifically presented as a pattern, tutorial, reference guide or step-by-step project. Follow the instructions, measurements, safety guidance and manufacturer directions provided for the particular project or product.
About Jan | Contact | Baby Nursery Ideas (Blog) | Site Map | Privacy Policy | Disclosure Policy | Disclaimer | Affiliate Disclosure | Earnings Disclosure | Facebook | Pinterest
I am a participant in the Amazon Services LLC Associates Program, an affiliate advertising program designed to provide a means for us to earn fees by linking to Amazon. As an Amazon Associate I earn from qualifying purchases.
Copyright © 2006-2026. All Rights Reserved.