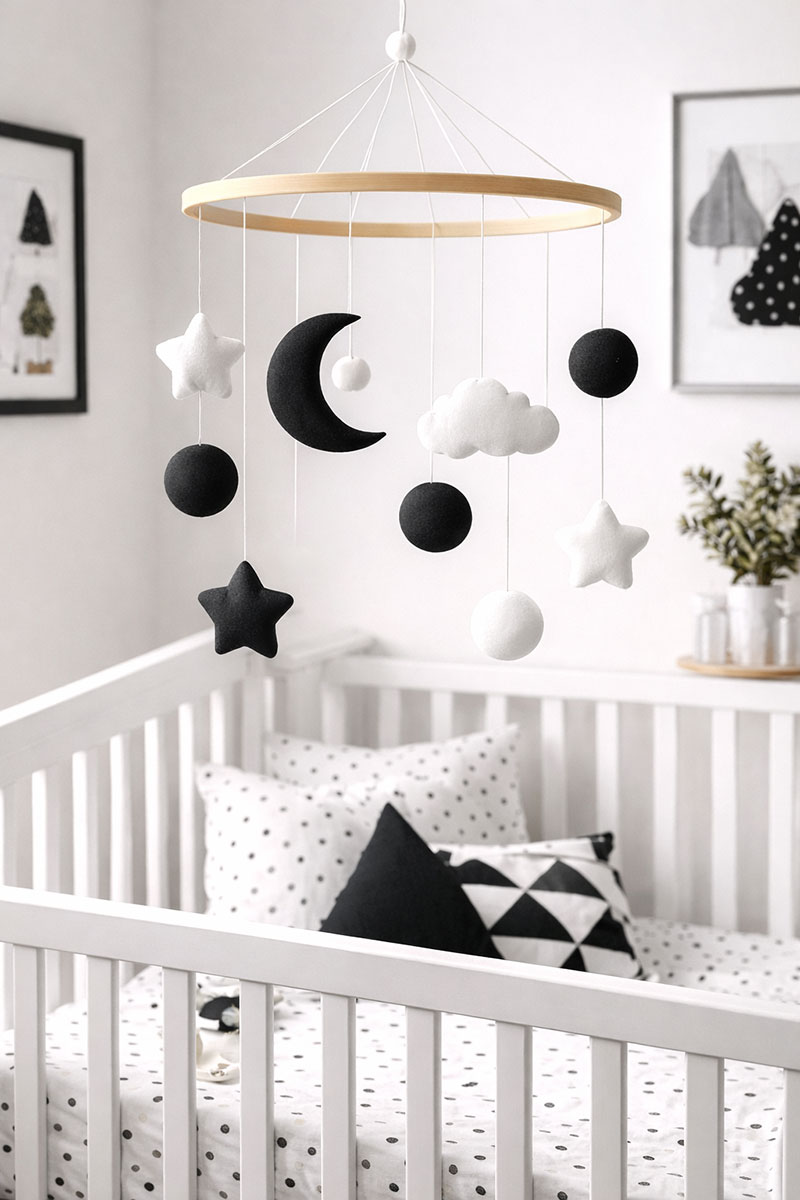
DIY Black and White Crib Mobile for a High Contrast Baby Nursery
DIY black and white crib mobile designs are one of the easiest ways to add a high contrast visual to your baby’s nursery without buying a commercial version. In this guide, I’ll show you how to make a simple felt crib mobile using bold black and white shapes that newborns can actually see and focus on. It’s quick to put together, budget-friendly, and gives you a clean, modern look that works beautifully in a high contrast baby nursery.
Plan your crib mobile and nursery look:
Jump to what you need:
Even beginners to crafts can make a black and white crib mobile that has a clean, high contrast look by keeping the shapes simple and the spacing balanced.
Why Black and White Mobiles Work
Black and white crib mobiles are more than just a design choice. They are based on how a newborn actually sees the world in the first weeks of life. At birth, a baby’s vision is still developing, which means they respond best to strong contrast rather than soft colors or detailed patterns.
High contrast shapes like black and white circles, stars, and moons are easier for babies to focus on. This makes a simple mobile not only visually appealing in a modern nursery, but also more engaging for your baby during those early stages when their eyesight is still improving.
Another benefit of using a black and white mobile is that it creates a calm, uncluttered look above the crib. Instead of overwhelming the space with bright colors or busy designs, a high contrast mobile keeps the area feeling clean while still adding movement and interest.
This is why many parents choose simple shapes instead of detailed characters. A few well-spaced elements that gently move are more effective than a crowded mobile filled with too many objects. The goal is not to entertain with complexity, but to support visual focus while keeping the nursery peaceful.
When you combine that function with a simple DIY approach using felt, you end up with a crib mobile that looks sophisticated, works with almost any nursery style, and is easy to customize without adding unnecessary cost or clutter.
For a warm, storybook-style version using the same simple felt craft skills, try my bear crib mobile ideas to see how soft cuddly bears can create a cozy focal point above the crib.
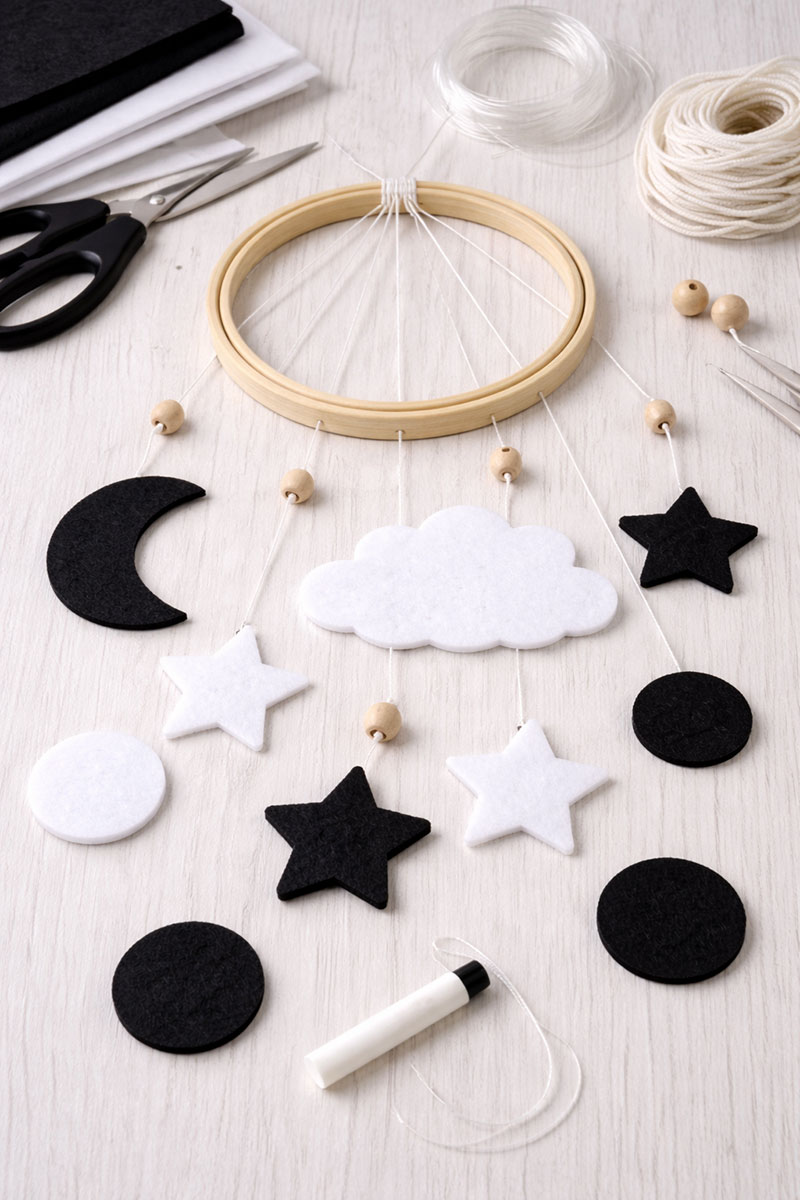
Materials You’ll Need
You do not need many supplies to make this DIY black and white crib mobile, which is one reason it works so well for a high contrast baby nursery. The easiest version starts with felt, a simple hoop, string, and a few bold shapes that are easy for newborn eyes to notice. Keeping the materials simple also makes the finished mobile look cleaner and more modern once it is hanging over the crib.
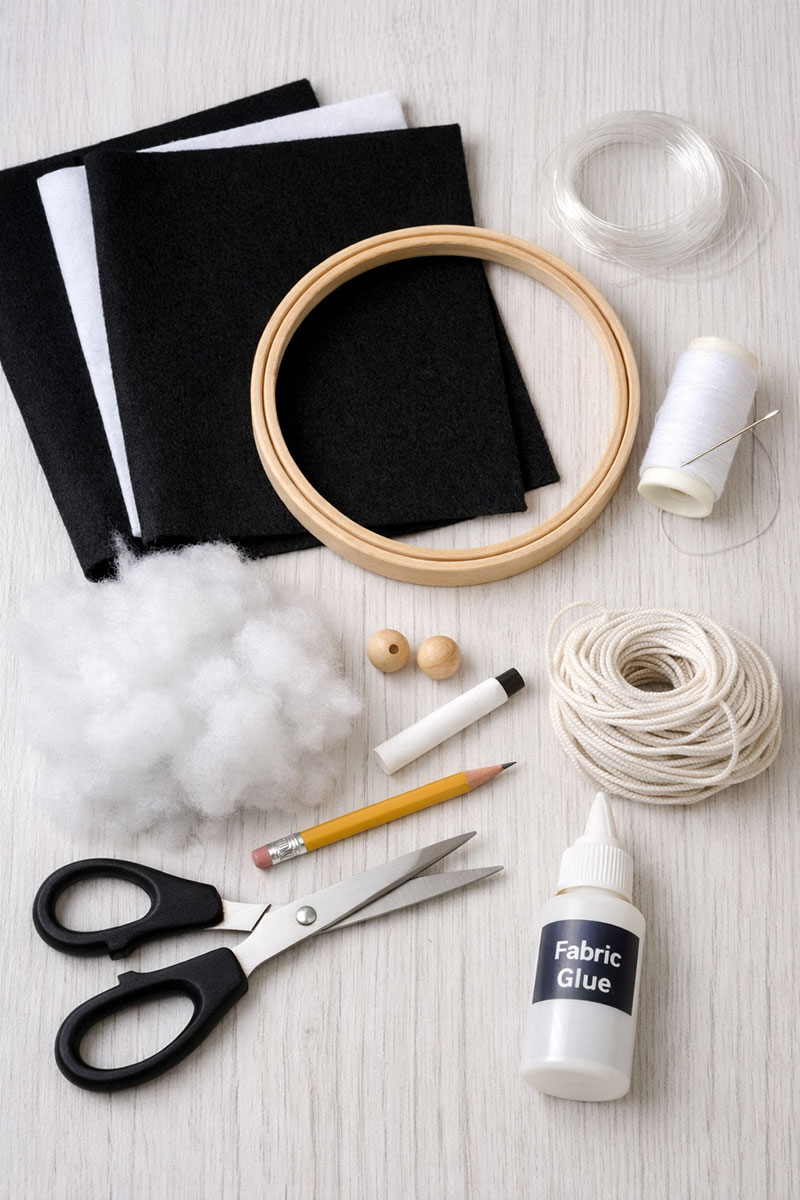
For the base, use black felt and white felt in a soft but sturdy thickness that will hold its shape without looking stiff. A wooden embroidery hoop or smooth wooden ring gives the mobile a clean, natural frame. You will also need white thread, strong scissors, a pencil or chalk for tracing shapes, stuffing if you want lightly padded pieces, and clear fishing line or thin white string for hanging everything evenly.
- Black felt
- White felt
- Wooden embroidery hoop or wooden ring
- White thread and sewing needle or fabric glue
- Sharp scissors
- Pencil, chalk, or fabric marker
- Polyfill stuffing (optional)
- Fishing line or thin white string
- Optional: small wooden beads
How to Make a Black and White Crib Mobile
This DIY black and white crib mobile is easier to make than it looks and is one of the simplest ways to add a high contrast visual to your baby’s nursery. The shapes are intentionally minimal so they are easy for newborns to see while still creating a clean, modern look above the crib.
Newborns are naturally drawn to strong contrast in the early weeks, which is one reason simple black and white shapes work so well in a crib mobile. You can read more about early visual milestones at HealthyChildren.org.
Step 1: Choose your shapes.
Pick four to seven simple shapes such as a crescent moon, stars, circles, and one cloud. This keeps the mobile balanced and easy for a baby to focus on.
Simple Shape Templates
To make this mobile even easier, you can use these simple shape templates as a guide. The goal is not perfect precision, but clean, bold shapes that are easy to cut and easy for your baby to see.
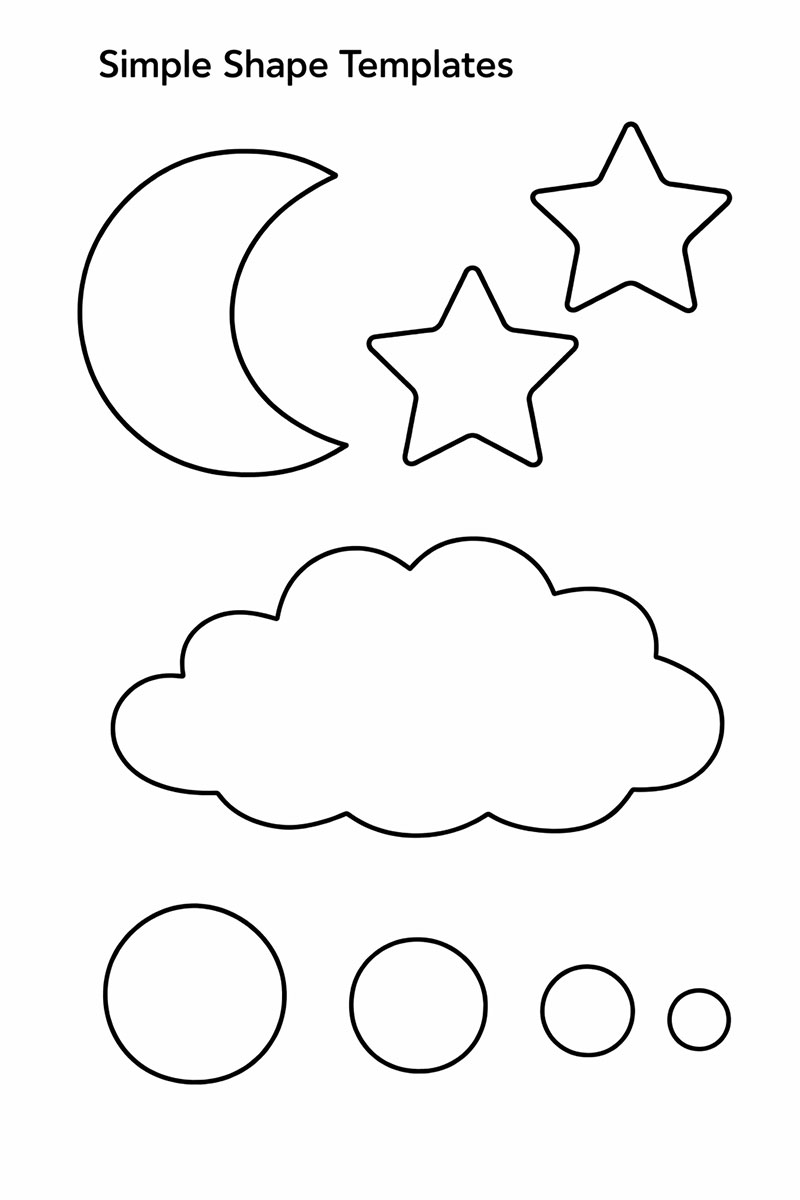
You can trace these shapes directly onto felt using chalk or a fabric marker. Slight variations actually make the finished mobile look more natural, so do not worry about making every piece identical.
Keeping the number of shapes low helps prevent the mobile from feeling cluttered and makes it more visually effective for newborns.
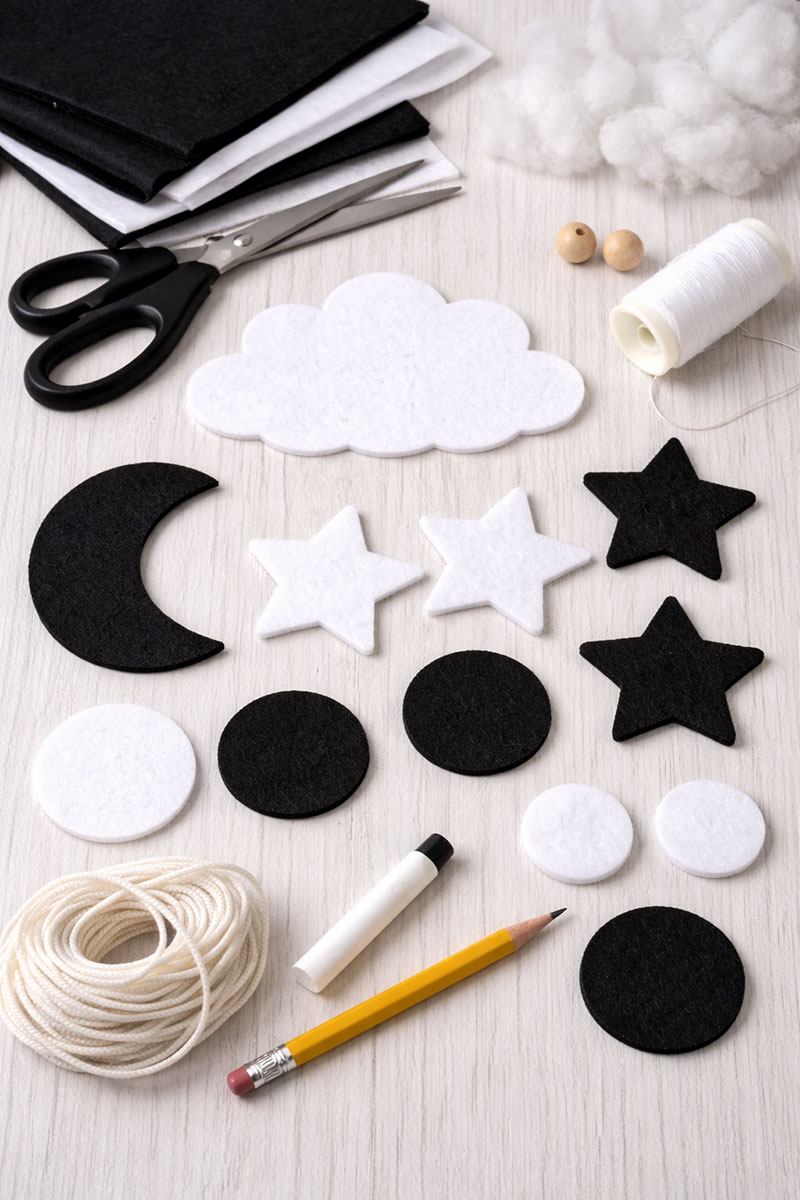
Step 2: Cut out the felt pieces.
Trace your shapes onto black and white felt and cut them out carefully. Use one layer for a flat modern look or two layers with a small amount of stuffing for a slightly fuller finish.
Step 3: Assemble the shapes.
Sew or glue the pieces together neatly. Lightly stuff only the moon, stars, or cloud if needed. Circles usually look best left flat.
Step 4: Plan your layout.
Lay everything out before attaching. Place the largest shape slightly off center and balance the rest around it so the mobile does not look uneven.
Step 5: Attach the hanging strings.
Cut strings at different lengths so the shapes hang at varied heights. Attach each shape and spread them evenly so they can move freely.
Step 6: Add top support strings.
Tie four equal strings to the hoop and bring them together at the top. Adjust until the hoop hangs level.
Step 7: Adjust spacing.
Hang the mobile and fine-tune the spacing. Trim strings if needed so everything looks balanced and calm.
Step 8: Hang safely.
Always hang the mobile well out of your baby’s reach. It should be a visual feature, not something a baby can grab.


When you click on links to various merchants on this site and make a purchase, this can result in this site earning a commission. Affiliate programs and affiliations include, but are not limited to, Amazon and the eBay Partner Network such as the ones to your left on this page. Please see our Affiliate Disclosure page for more information.
More UBGI: RSS Feed | Facebook
About Jan | Contact | Baby Room Ideas (Blog) | Site Map | Privacy Policy | Disclaimer | Affiliate Disclosure | Earnings Disclosure
I am a participant in the Amazon Services LLC Associates Program, an affiliate advertising program designed to provide a means for us to earn fees by linking to Amazon.
Copyright © 2006-2026. All Rights Reserved.