Free Polar Bear Crochet Lovey Pattern
By Jan Bay
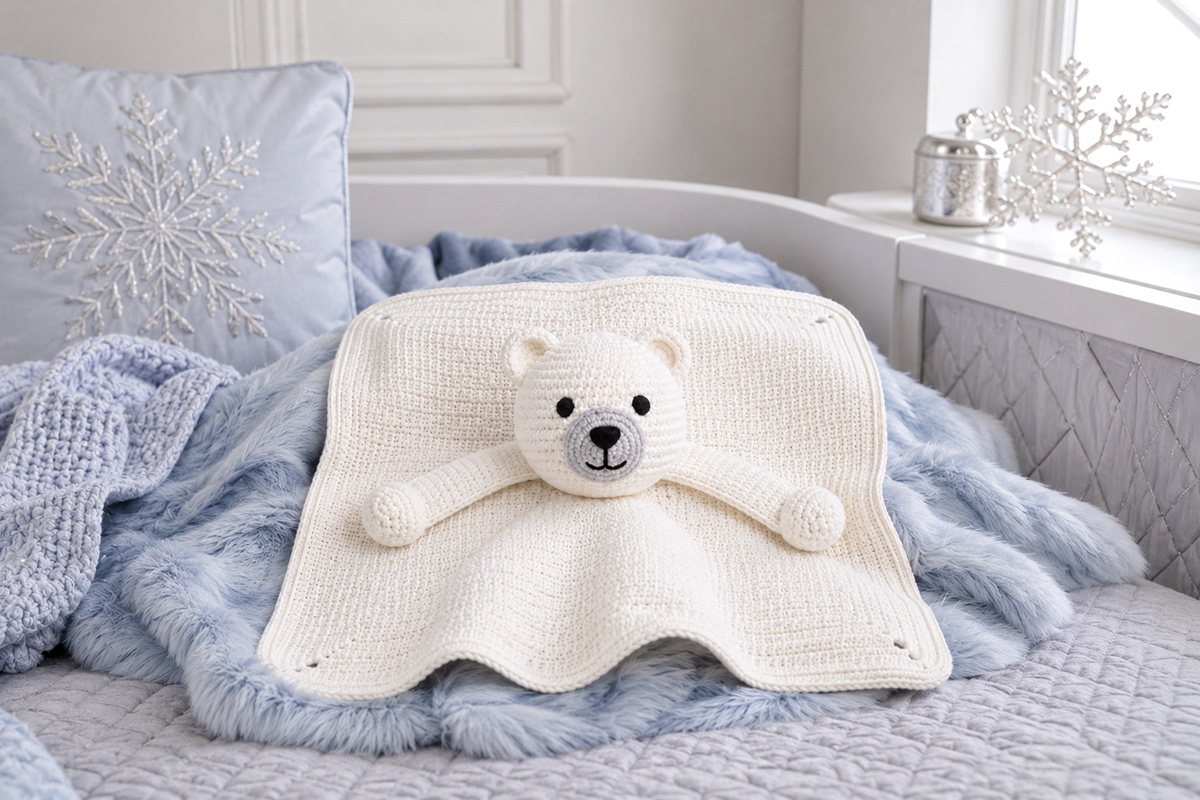
This free polar bear crochet lovey pattern combines a square blanket with a small white bear head, rounded ears, an embroidered face and two easy arms. The finished lovey has a cozy polar bear look that fits right in with Arctic animal projects, winter baby gifts and handmade Christmas keepsakes.
Supplies for This Polar Bear Lovey
A smooth, washable worsted weight number 4 white yarn works well for the blanket and bear pieces because it keeps the stitches easy to see and gives the finished lovey a clean, soft look. You do not need the exact yarn in the link; use any comparable yarn that produces a firm fabric without visible stuffing.
Jump to the Polar Bear Crochet Lovey Pattern
Finished Size and Skill Level Supplies and Gauge Crochet the Lovey Blanket Crochet the Polar Bear Head Muzzle and Ears Crochet the Arms Face and Assembly Baby Safety Polar Bear Lovey FAQWhy This Polar Bear Lovey Is Built This Way
The blanket is worked as a solid square in joined half double crochet rounds. The polar bear head and arms are crocheted separately, then sewn securely to the center of the finished blanket.
For this pattern, I kept the blanket square and the bear simple. The white yarn does most of the visual work, while the light gray muzzle keeps the face from disappearing into the head. I also keep the upper part of the arms unstuffed so they lie softly against the blanket instead of sticking out like stuffed doll arms.
Expected Finished Size
- Blanket: approximately 13 1/2 to 14 1/2 inches square
- Bear head: approximately 3 1/2 to 4 inches across
- Arms: approximately 4 1/2 to 5 inches long
With the listed yarn weight and hook sizes, expect the finished lovey to fall close to these measurements. Your finished size may vary with yarn, hook size and tension.
Skill Level
Advanced beginner. You should be comfortable making a magic ring, working single crochet and half double crochet, increasing, decreasing, working in both joined and continuous rounds and sewing crochet pieces together.
Supplies
- Approximately 300 to 350 yards of smooth worsted weight number 4 white yarn
- Small amount of light gray worsted weight yarn for the muzzle
- Small amount of black embroidery floss or smooth black yarn for facial features
- 4 mm crochet hook for the blanket
- 3.5 mm crochet hook for the head, muzzle, ears and arms
- Polyester fiberfill
- Yarn needle
- Removable stitch marker
- Straight pins for placement
- Scissors
- Measuring tape
Gauge
Gauge is not critical for this project, but the head and arms should have a firm fabric so the stuffing does not show through the stitches. If your stitches are loose, use a smaller hook for the stuffed pieces.
Crochet Abbreviations
- ch: chain
- sc: single crochet
- hdc: half double crochet
- sl st: slip stitch
- inc: work 2 stitches in the same stitch
- dec: single crochet 2 stitches together
- st: stitch
- sts: stitches
Pattern Notes
- This pattern uses U.S. crochet terminology.
- The blanket is worked in joined rounds without turning.
- The beginning chain does not count as a stitch.
- The head, muzzle, ears and arms are worked separately. The muzzle and ears attach to the head; the finished head and arms attach to the blanket.
- The head, muzzle, ears and arms are worked in continuous rounds unless an instruction specifically says to flatten or stop. Place a stitch marker in the first stitch of each continuous round and move it upward as you work.
- Do not substitute plastic safety eyes or buttons for the embroidered facial features if the lovey is being made for a baby.
Crochet the Square Lovey Blanket
Use the 4 mm hook and white yarn.
Round 1
Make a magic ring. Ch 2. Work [3 hdc, ch 2] four times into the ring. Join with a sl st to the first hdc. Pull the center ring closed.
Stitch count: 12 hdc and 4 ch-2 corner spaces.
Round 2
Sl st across to the next ch-2 corner space. Ch 2. Work (2 hdc, ch 2, 2 hdc) in the same corner space. Hdc in each stitch across to the next corner. Work (2 hdc, ch 2, 2 hdc) in the next corner space.
Repeat around, working one hdc in every stitch along each side and (2 hdc, ch 2, 2 hdc) in every corner. Join with a sl st to the first hdc.
Stitch count: 28 hdc and 4 ch-2 corner spaces.
Rounds 3 through 12
Sl st across to the next ch-2 corner space. Ch 2. Work (2 hdc, ch 2, 2 hdc) in that corner. Hdc in every stitch across each side. Work (2 hdc, ch 2, 2 hdc) in each ch-2 corner space. Join with a sl st to the first hdc.
Each new round adds 16 hdc.
- Round 3: 44 hdc
- Round 4: 60 hdc
- Round 5: 76 hdc
- Round 6: 92 hdc
- Round 7: 108 hdc
- Round 8: 124 hdc
- Round 9: 140 hdc
- Round 10: 156 hdc
- Round 11: 172 hdc
- Round 12: 188 hdc
Each round also has 4 ch-2 corner spaces.
Make the Blanket Larger
This step is optional. If you want a larger polar bear lovey, add the extra blanket rounds now, before beginning the border. Work each additional round exactly like Rounds 3 through 12.
Each extra blanket round adds 16 hdc while keeping the same four ch-2 corner spaces.
If you add extra rounds, the fixed border stitch counts below will change. If your final blanket round contains N hdc, Border Round 1 will contain N + 8 sc and Border Round 2 will contain N + 16 sc.
Add the Simple Blanket Border
Border Round 1
Ch 1. Sc in every hdc around. In each ch-2 corner space work (sc, ch 2, sc). Join with a sl st to the first sc.
Stitch count: 196 sc and 4 ch-2 corner spaces.
Border Round 2
Ch 1. Sc in every sc around. Work (sc, ch 2, sc) in each ch-2 corner space. Join with a sl st to the first sc.
Stitch count: 204 sc and 4 ch-2 corner spaces.
Fasten off and weave in the yarn ends.
Crochet the Polar Bear Head
Use the 3.5 mm hook and white yarn. Work in continuous rounds.
- Round 1: 6 sc in a magic ring. 6 sts.
- Round 2: Inc in each stitch around. 12 sts.
- Round 3: [Sc 1, inc] around. 18 sts.
- Round 4: [Sc 2, inc] around. 24 sts.
- Round 5: [Sc 3, inc] around. 30 sts.
- Round 6: [Sc 4, inc] around. 36 sts.
- Round 7: [Sc 5, inc] around. 42 sts.
- Round 8: [Sc 6, inc] around. 48 sts.
- Rounds 9 through 14: Sc in each stitch around. 48 sts.
- Round 15: [Sc 6, dec] around. 42 sts.
- Round 16: [Sc 5, dec] around. 36 sts.
- Round 17: [Sc 4, dec] around. 30 sts.
- Round 18: [Sc 3, dec] around. 24 sts.
Begin stuffing the head evenly. Keep the shape rounded but do not pack the stuffing so firmly that the stitches stretch apart.
- Round 19: [Sc 2, dec] around. 18 sts.
- Round 20: [Sc 1, dec] around. 12 sts.
Do not work Round 21 yet. Remove the hook and place a removable stitch marker through the working loop so it cannot unravel. Leave the yarn attached and keep the 12-stitch opening accessible while you attach the muzzle, embroider the face and sew on the ears.
Crochet the Polar Bear Muzzle
Use light gray yarn and the 3.5 mm hook.
Ch 6.
Round 1
Sc in the second chain from the hook and in the next 3 chains. Work 3 sc in the final chain. Continue along the opposite side of the foundation chain. Sc in the next 3 chains and work 2 sc in the remaining chain.
Stitch count: 12 sc.
Round 2
Inc, sc in the next 3 sts, inc in each of the next 3 sts, sc in the next 3 sts, inc in each of the final 2 sts.
Stitch count: 18 sc.
Round 3
[Sc 1, inc], sc in the next 3 sts, [sc 1, inc] three times, sc in the next 3 sts, [sc 1, inc] twice.
Stitch count: 24 sc.
Fasten off, leaving a long tail for sewing. Do not stuff the muzzle.
Crochet Two Rounded Polar Bear Ears
Use white yarn and the 3.5 mm hook. Make 2.
- Round 1: 6 sc in a magic ring. 6 sts.
- Round 2: Inc around. 12 sts.
- Round 3: [Sc 1, inc] around. 18 sts.
Fasten off, leaving a long sewing tail. Do not stuff the ears.
Crochet Two Polar Bear Arms
Use white yarn and the 3.5 mm hook. Make 2.
- Round 1: 6 sc in a magic ring. 6 sts.
- Round 2: Inc around. 12 sts.
- Round 3: [Sc 1, inc] around. 18 sts.
- Rounds 4 through 6: Sc around. 18 sts.
- Round 7: [Sc 1, dec] around. 12 sts.
Lightly stuff the rounded paw now. Keep the stuffing below Round 7 so the long upper portion of the arm remains flat and flexible.
- Rounds 8 through 15: Sc around. 12 sts.
Flatten the open end. Sc through both layers across the top using 6 sc. Fasten off and leave a long tail for attachment.
Piece Count Before Assembly
At this point you should have 7 crochet pieces: 1 blanket, 1 head, 1 muzzle, 2 ears and 2 arms.
Embroider the Polar Bear Face
Choose one side of the head as the front. With the open 12-stitch section at the bottom, center the gray muzzle on the lower front of the head and pin it in place before sewing.
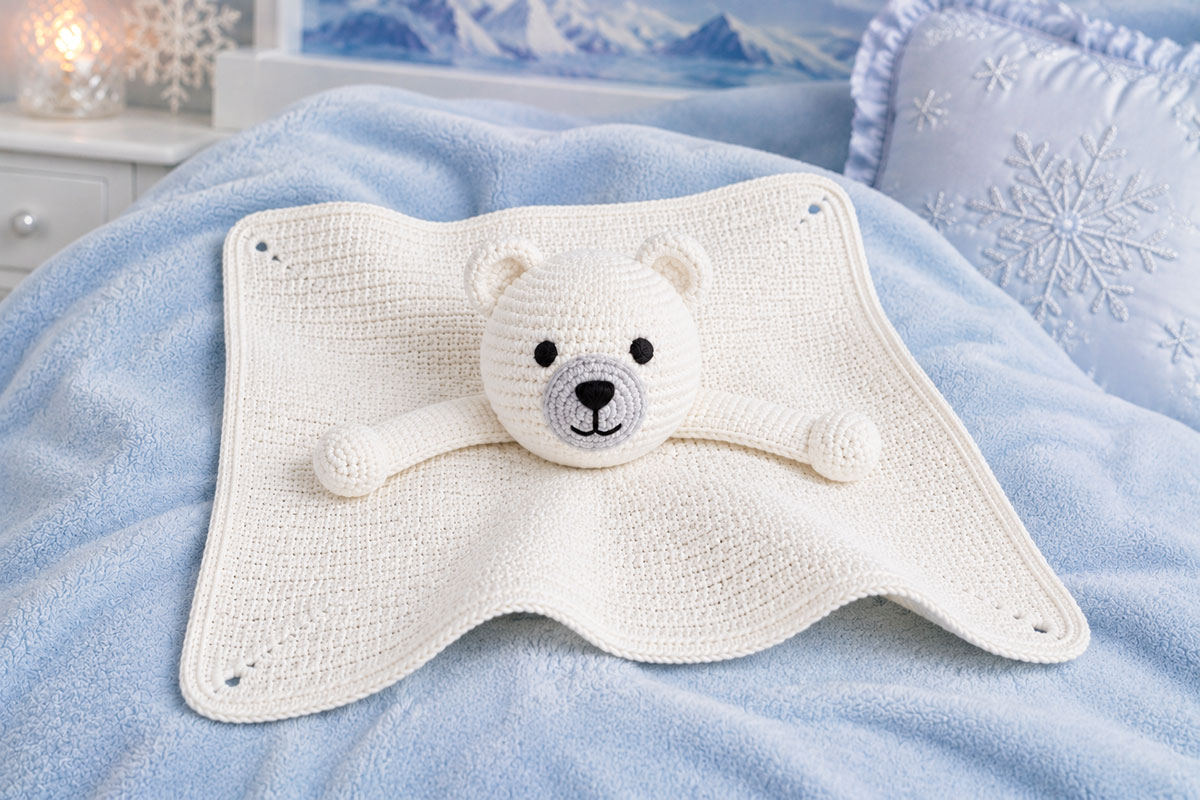
The top of the muzzle should sit approximately between Rounds 10 and 11, with the lower edge reaching approximately Round 16. Starting at the lower center of the muzzle, sew around the complete outer edge and return to the starting point. Bring the yarn tail through the open bottom of the head and secure it inside.
Use black embroidery floss or smooth black yarn to make two short satin stitch eyes above the muzzle. Place the center of each eye around Round 9, approximately one round above the muzzle, with the eye centers 7 to 8 stitches apart. Keep both eyes level.
Embroider a small black nose near the upper center of the gray muzzle. Add a short vertical stitch beneath the nose and two small curved mouth stitches.
Bring every embroidery tail through the open lower part of the head and secure it inside before the head is closed.
Attach the Ears
Flatten each ear slightly at the bottom. Position the ears near the upper sides of the head, approximately between Rounds 4 and 8.
Starting at the front edge of one ear base, sew across the complete flattened base to the back edge. Reverse direction and sew back across the same attachment area to the starting point. Bring the remaining yarn tail through the open bottom of the head and secure it inside. Repeat for the second ear.
Close the Head
Before closing the head, confirm that the muzzle, eyes, nose, mouth and both ears are secure and that their knots and yarn tails are inside the head.
Remove the stitch marker, return the working loop to the 3.5 mm hook and add the final small amount of stuffing. Keep the head rounded without packing it firmly.
Round 21: Dec around. 6 sts.
Fasten off, leaving a long tail. Thread the tail through the remaining 6 stitches and pull the opening closed securely. Weave the tail deeply through the stuffed head before trimming.
Assemble the Polar Bear Lovey
Attach the Head
Lay the blanket flat and locate its center. Position the finished polar bear head directly over the center.
Using white yarn and a yarn needle, sew through the lower stitches of the head and through the blanket fabric around a circle approximately 1 1/4 to 1 1/2 inches across.
Work all the way around the attachment area, then make a second complete pass for extra security. Knot the yarn securely on the underside and weave the end through several blanket stitches before trimming.
Attach the Arms
Position one arm on each side of the head so the paws point slightly down and outward. Keep the upper flattened ends tucked close to the head.
Sew across each flattened arm top, then sew back across the same attachment line a second time. Weave in every yarn end securely.
Finishing
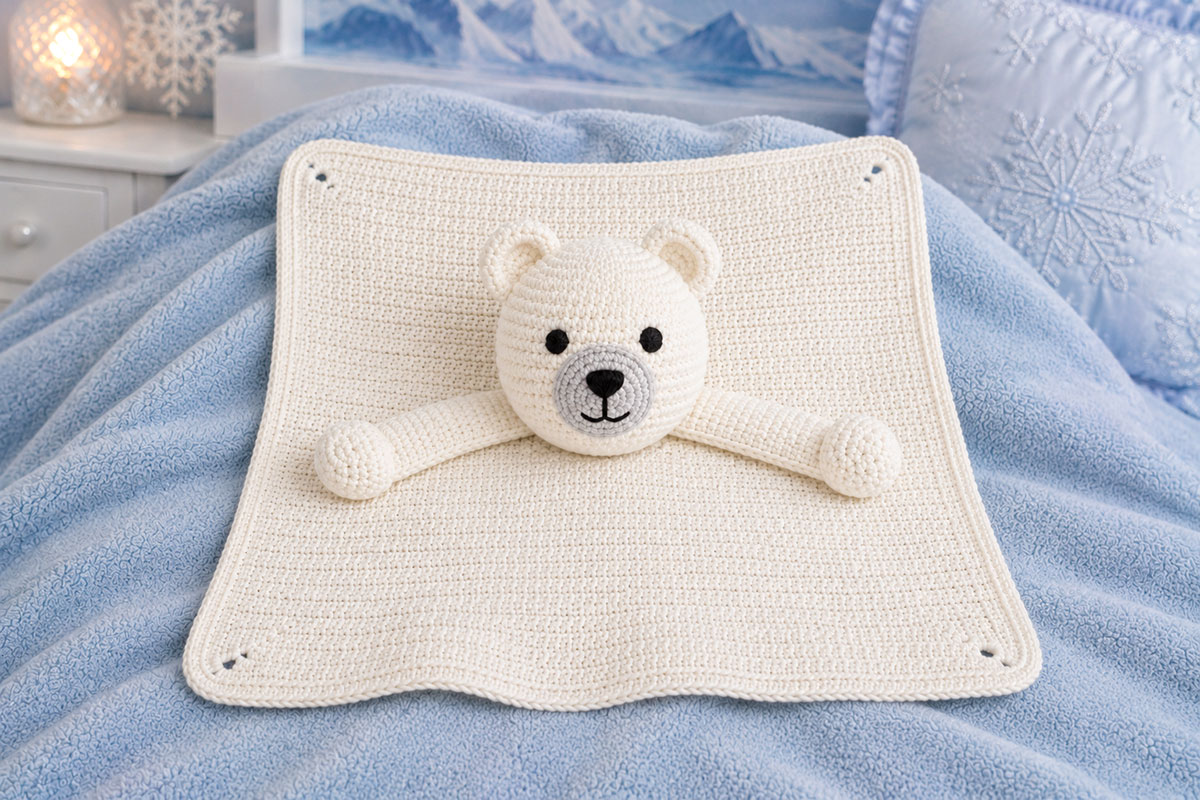
Confirm that the removable stitch marker and all placement pins have been removed. Check the blanket for loose yarn ends, open seams or stretched stitches. Gently shape the square by hand and make sure all four corners are even.
Check the head, muzzle, ears and both arms one more time. None of the attached pieces should lift easily when gently pulled. Confirm that no pins, temporary markers, loose yarn tails or exposed knots remain.
Baby Safety
This is a comfort lovey, not an infant sleep blanket.
This pattern uses embroidered facial features instead of plastic safety eyes, buttons or other hard pieces. Secure every yarn tail and attachment seam before giving the lovey to a child.
For families in the United States, the U.S. Consumer Product Safety Commission safe sleep guidance says to keep a crib, bassinet or play yard bare except for a fitted sheet. Keep this lovey out of an infant sleep space and use it as a supervised comfort item instead.
Try Another Bear Lovey
For another small comfort blanket with a more traditional teddy bear look, use the teddy bear lovey crochet pattern.
Polar Bear Crochet Lovey FAQ
What yarn is best for a polar bear crochet lovey?
A smooth, washable worsted weight yarn works well because it gives the blanket enough softness while keeping the embroidered face and crochet pieces easy to see. Avoid novelty yarn around the face because it can hide the stitches and make secure assembly more difficult.
Can I use safety eyes on the polar bear?
No. This baby-oriented version is designed with embroidered eyes rather than plastic safety eyes. Use the satin stitch eye instructions given in the pattern so the finished face matches the intended construction.
Can I make the lovey blanket bigger?
Yes. Add extra blanket rounds before beginning the border. Each additional blanket round adds 16 hdc while keeping four ch-2 corner spaces. If the final blanket round contains N hdc, Border Round 1 will contain N + 8 sc and Border Round 2 will contain N + 16 sc.
How should I wash a crochet polar bear lovey?
Follow the care directions for the yarn you used. After washing, reshape the blanket and bear pieces while damp and allow the lovey to dry completely before storing or using it.
When you click on links to various merchants on this site and make a purchase, this may result in this site earning a commission. This does not affect the price you pay.

UBGI Gold Standard 2026
Reviewed under the site's
editorial checklist.
Photos, decorating ideas, party setups and reader submissions are shared for inspiration unless a page is specifically presented as a pattern, tutorial, reference guide or step-by-step project. Follow the instructions, measurements, safety guidance and manufacturer directions provided for the particular project or product.
About Jan | Contact | Baby Nursery Ideas (Blog) | Site Map | Privacy Policy | Disclosure Policy | Disclaimer | Affiliate Disclosure | Earnings Disclosure | Facebook | Pinterest
I am a participant in the Amazon Services LLC Associates Program, an affiliate advertising program designed to provide a means for us to earn fees by linking to Amazon. As an Amazon Associate I earn from qualifying purchases.
Copyright © 2006-2026. All Rights Reserved.