Free Bird Stencil Printable for Nursery Walls and Crafts
By Jan Bay
This printable free bird stencil gives you a paired bird design for nursery walls, signs, upcycled furniture, canvas art and other adult craft projects. Print the PDF at actual size, cut out the black areas and paint the birds in colors that fit your room.
Explore More Bird Nursery and Stencil Ideas
Stencil Cutting and Painting Supplies
Jump to:
Free Bird Stencil Download
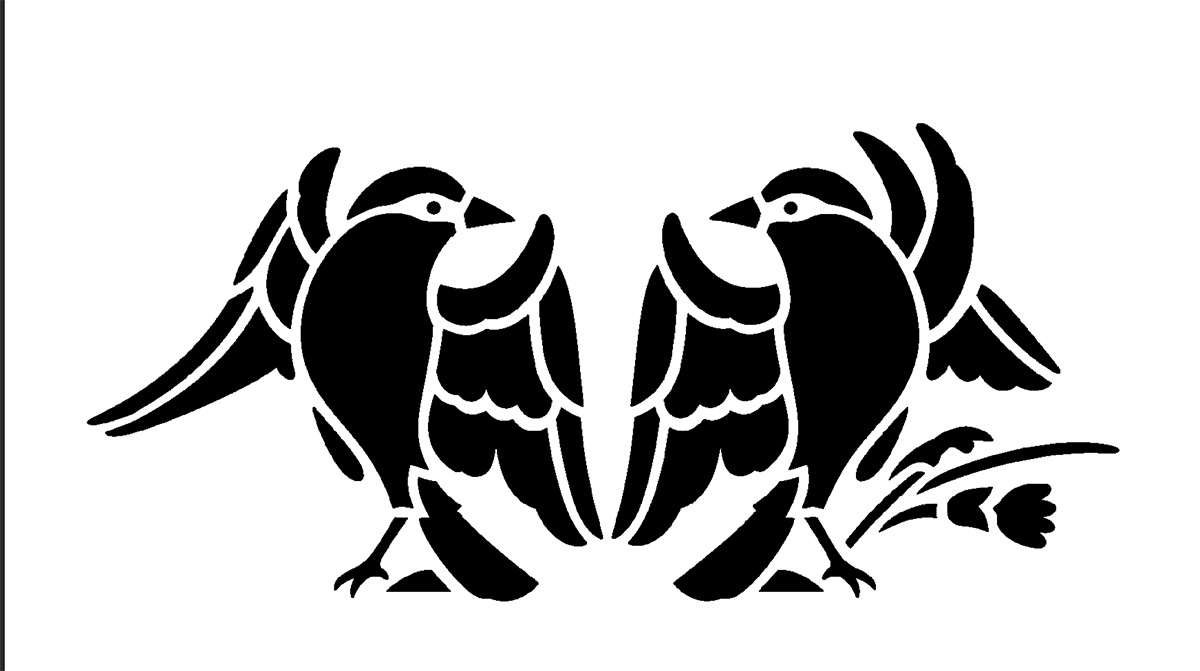
The printable gives you the two facing birds as one complete design, with the feather shapes, tails and small branch detail already arranged for you. I like the pair together because it looks finished without needing extra vines, flowers or lettering around it.
Print the stencil at 100% or Actual Size and cut out the black areas only. The white areas stay in place as the stencil material, including the narrow bridges that keep the interior details connected.
Download the Free Bird Stencil
Open the Printable Bird Stencil PDF
Print at 100% or choose Actual Size in your printer settings. Avoid “Fit to Page” if you want the stencil to remain at the size provided.
If you only want one bird, you don't need a separate single-bird template. Mask the bird you don't want with scrap paper and painter's tape, then stencil the remaining bird by itself.
You can also enlarge the design for a wall or reduce it for a small sign, but I wouldn't shrink it too far. The feather openings and stencil bridges need enough room to remain easy to cut and paint cleanly.
What You Need to Use the Bird Stencil
You don't need a long list of supplies. Pick the stencil material according to how many times you expect to use the design.
- Printed bird stencil: print the PDF on regular paper for tracing, cardstock for a simple one time stencil or use it as the cutting guide for reusable stencil film.
- Cutting mat: use one underneath the stencil if you're cutting with a craft knife.
- Sharp craft knife: this is easier than scissors for the smaller interior feather shapes.
- Painter's tape: use it to hold the stencil firmly in position and to protect nearby areas.
- Stencil brush or dense foam pouncer: either one works as long as you keep the paint load light.
- Paint: use paint suited to the surface you're decorating. Wall paint works well on a painted wall, while acrylic craft paint is an easy choice for many unfinished or properly prepared craft surfaces.
- Scrap paper: keep some nearby for masking and for testing the amount of paint on your brush before you touch the stencil.
If I'm making one sign, I'd use cardstock and keep it simple. If I wanted to repeat the birds around a room or use the stencil again later, I'd transfer the design to reusable stencil film instead.
Keep craft knives and other sharp cutting tools away from children, and follow the directions on the paint you're using. If you're in the United States and you're working on an older painted wall, read the EPA information for DIY projects in pre-1978 homes before sanding, scraping or otherwise disturbing the existing paint.
How to Use the Bird Stencil Without Fuzzy Edges
Cutting the template carefully matters, but the amount of paint on the brush matters even more. Too much paint is what usually creeps underneath the stencil and softens all those nice feather details.
- Print the template. Use 100% or Actual Size unless you intentionally want to resize the birds.
- Cut the stencil. Place the sheet on a cutting mat and cut out the black areas only. Work slowly around the feather details and leave every narrow white bridge intact. Those connections are part of the stencil.
- Prepare the surface. Start with a clean, dry surface. If you're painting a wood sign, sand and finish the surface as needed before positioning the stencil.
- Position the birds. Use small pieces of painter's tape around the outside edge. Make sure the center of the pair is level before you start painting.
- Remove most of the paint from the brush. Load a stencil brush or foam pouncer, then dab the excess onto scrap paper. The brush should look almost too dry.
- Build the color gradually. Apply the paint with light up and down taps instead of brushing sideways across the openings. Add another light pass if you want deeper color.
- Lift the stencil carefully. Remove it while the paint is still fresh enough that the stencil isn't stuck to the surface. Lift upward rather than dragging it across the design.
- Let the design dry. Follow the drying and recoating directions for the paint you chose.
Don't try to get solid color in one heavy coat. Two light passes are much easier to control than one wet one.
Bird Stencil Project Ideas That Actually Suit the Design
This pair has enough detail to stand on its own, so I wouldn't surround it with a lot of extra decoration. Give the birds some open space and let the shape do the work.
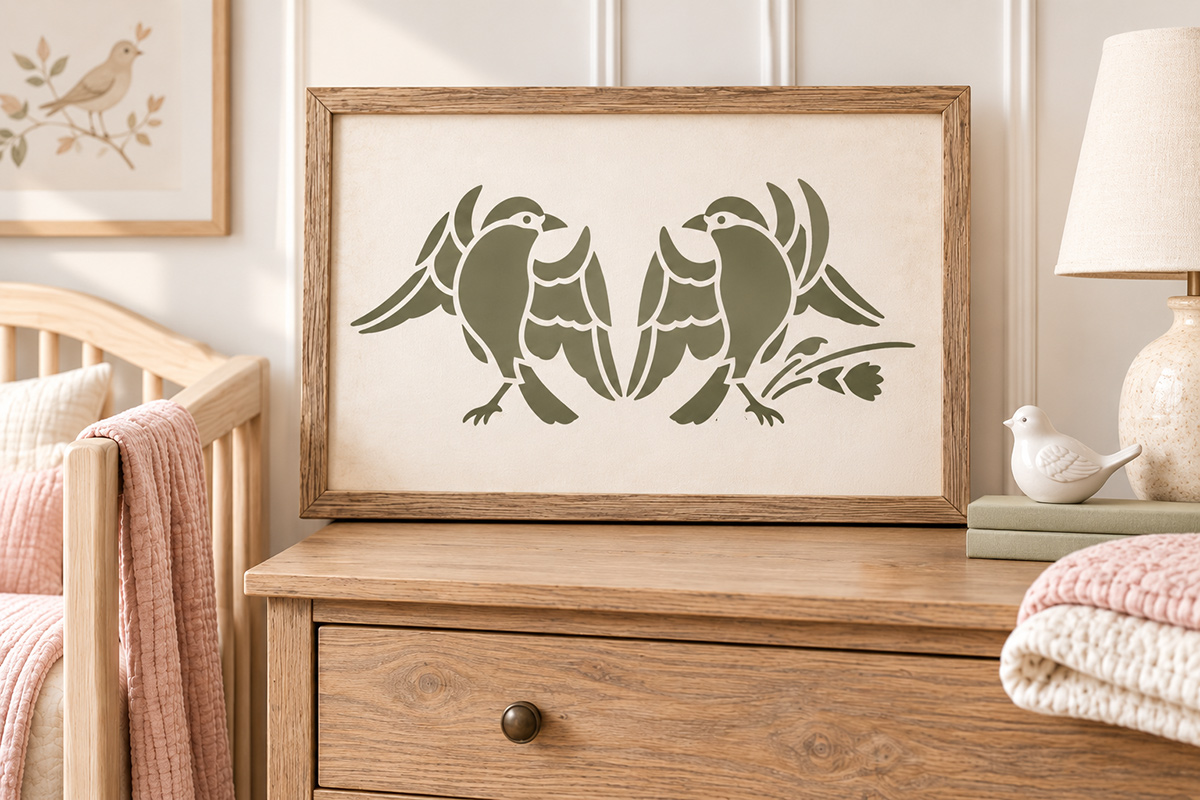
A framed nursery sign is my first choice. Paint the birds in muted sage, dusty rose, warm taupe, charcoal or another color already used in the room. A simple wood frame keeps the finished piece from looking too sweet or busy.
A painted furniture panel is another good use. Center the pair on the front of a toy chest, storage bench or wide drawer rather than repeating the motif across every available surface.
A small feature above a dresser can work without turning the whole wall into a mural. Enlarge the pair, stencil it once and stop there.
A canvas or wood panel is a good choice if you like the look of painted wall art but don't want to stencil directly onto the wall. It also makes the project movable if you rearrange the nursery later.
If you're using the design outside a nursery, it can work just as well on a wooden box, craft room sign or other adult craft project. The birds don't depend on baby wording or a particular nursery color scheme.
Using the Stencil in a Bird Nursery Without Overdoing the Theme
If the stencil is going into a bird themed nursery, I'd choose one main place for the paired birds and repeat the theme more quietly elsewhere. You don't need birds on the wall, bedding, rug, curtains and every accessory in the room.
The framed bird sign in the main page image is enough to establish the motif. From there, you might add one coordinating piece such as a simple bird nursery mobile near the crib or changing area.
If you're still deciding how much of the theme you want to use, my bird baby nursery decor ideas page has more ways to carry birds through the room without making every piece match.
Color changes the personality of this stencil quite a bit. Sage and warm taupe keep it quiet. Charcoal makes the feather shapes more graphic. Dusty rose gives it a softer look without changing the actual design.
I would keep the background simple whichever color you choose. The birds already have layered wings, long tails and small interior details. A busy painted background competes with them.
If you'd rather browse another printable design before deciding, you can go back to my free printable stencil patterns.


When you click on links to various merchants on this site and make a purchase, this may result in this site earning a commission. This does not affect the price you pay.

UBGI Gold Standard 2026
Reviewed under the site's
editorial checklist.
About Jan | Contact | Baby Nursery Ideas (Blog) | Site Map | Privacy Policy | Disclosure Policy | Disclaimer | Affiliate Disclosure | Earnings Disclosure | Facebook | Pinterest
I am a participant in the Amazon Services LLC Associates Program, an affiliate advertising program designed to provide a means for us to earn fees by linking to Amazon. As an Amazon Associate I earn from qualifying purchases.
Copyright © 2006-2026. All Rights Reserved.