Free Crochet Elf Baby Hat Pattern & Photo Shoot Ideas
By Jan Bay
The free crochet elf baby hat patterns you’ll find online inspired me to create my own version, which I call my Santa Claus Peppermint Swirl crochet baby hat. I wanted a ribbed hat with a long, whimsical tail, an oversized pom-pom and red, green and white stripes for a classic Christmas feel. I even used white sparkly yarn left over from a Santa Claus baby hat and beard I made the year before, which is where the peppermint idea really started for me.
Explore More Free Baby Hat Patterns
Free Crochet Santa Hat Pattern for Baby
Santa Crochet Patterns Collection
Free Baby Hat Patterns to Crochet and Knit
Free Baby Crochet Hat Patterns
Free Crochet Pumpkin Baby Hat Pattern
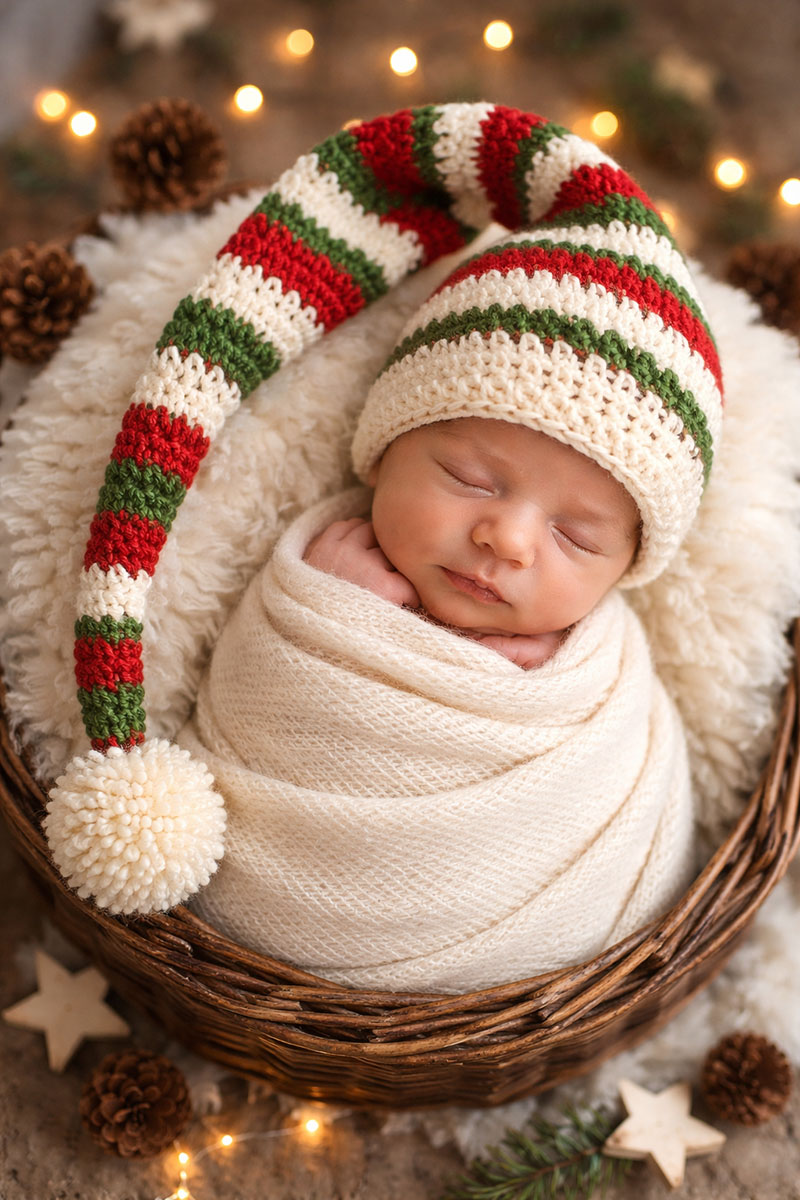
Styled photo-session image. This long-tail hat is a supervised photo prop, not sleepwear. Remove it before naps or nighttime sleep.
Crochet Elf Baby Hat Pattern with a Long Tail
This crochet elf baby hat was designed as a fun, photo-ready accessory that still feels soft and comfortable for a newborn. I wanted something whimsical for holiday pictures, but simple enough that it could be crocheted without complicated shaping or advanced techniques. The long tail and oversized pom-pom give it that classic elf look, while the ribbed band helps the hat stay in place during a photo session.
This pattern is worked mostly in the round and is beginner-friendly if you are comfortable with basic stitches. I’ve included notes for adjusting the size so you can easily make this hat slightly larger for older babies if needed.
Finished Size & Fit
This version is written as a newborn-size photo prop. At the stated gauge, the fitted hat body is expected to measure about 13 1/3 inches around before the ribbed band draws it in slightly.
From the narrow tip of the elf tail to the lower edge of the ribbed band, the finished hat is expected to measure about 20 1/2 inches before the pom-pom is added.
These are expected measurements calculated from the gauge and round counts rather than measurements taken from a physically test-crocheted sample. Measure the baby's head and use the finished circumference as your guide instead of relying on the age label by itself.
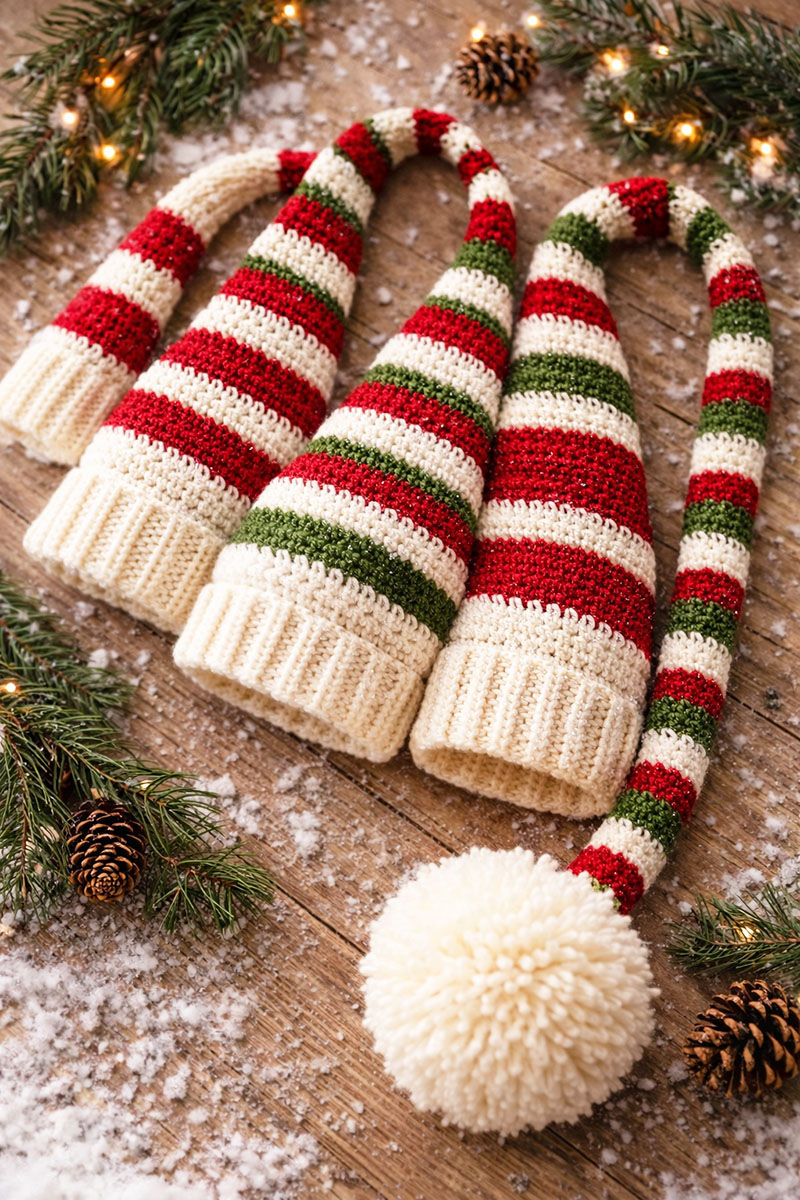
Yarn, Hook & Supplies Used
For the striped version shown here, use soft size 4 worsted-weight yarn in red, green and white. Sparkle yarn works nicely for a Christmas photo prop, but it isn't required. The white yarn is used for several stripes, the ribbed band and the pom-pom, so I wouldn't plan this one around a tiny leftover ball.
- Red yarn: size 4 worsted-weight yarn
- Green yarn: size 4 worsted-weight yarn
- White yarn: size 4 worsted-weight yarn, with extra available for the ribbed band and pom-pom
- Expected total yarn: approximately 250 to 300 yards across the three colors, including the pom-pom
- Crochet hook: size H (5.0 mm), or the size needed to obtain gauge
- Yarn needle
- Scissors
- Removable stitch marker
- Pom-pom maker or cardboard template, optional
The yarn amount is an expected working allowance rather than a physically measured test-skein total. A very full pom-pom can use considerably more yarn than a small one.
Gauge
12 double crochet stitches = 4 inches
7 double crochet rounds = about 4 inches in height
Check gauge before starting. The beginning ch 2 does not count as a stitch anywhere in the pattern.
Stitches & Abbreviations (US Terms)
- ch – chain
- sl st – slip stitch
- dc – double crochet
- FPDC – front post double crochet
- BPDC – back post double crochet
The ribbed band is created using alternating front post and back post double crochet stitches. This gives the hat a stretchy, knit-like ribbing without needing to know how to knit.
Skill Level
This pattern is suitable for confident beginners. If you have crocheted in the round before and are comfortable counting stitches, you should be able to complete this project without difficulty.
Step-by-Step Crochet Elf Baby Hat Instructions
The long tail is part of the hat itself. Start at the narrow tip and work downward, increasing gradually until the piece is wide enough to fit around the baby's head. This is what gives the finished hat the soft tapered elf shape instead of making a regular beanie with a narrow strip attached to the top.
Color sequence:
- Rounds 1 through 3: red
- Rounds 4 through 6: green
- Rounds 7 through 9: white
- Rounds 10 through 12: red
- Rounds 13 through 15: green
- Rounds 16 through 18: white
- Rounds 19 through 21: red
- Rounds 22 through 24: green
- Rounds 25 through 27: white
- Rounds 28 through 30: red
- Rounds 31 through 33: green
- Rounds 34 through 36: white ribbed band
At each color change, finish the current round and fasten off that color. Join the new color with a sl st in the first stitch of the previous completed round, then begin the next round with the ch 2 given in that round's instructions. Treat this joining line as the center back of the hat and keep each new color change at that line. Weave each tail securely through stitches of the same color on the inside of the hat.
Long Tapered Elf Hat
Round 1: With red, make a magic ring. Ch 2. Work 6 dc into the ring. Pull the ring closed and join with a sl st to the first dc. 6 sts.
Rounds 2 through 4: Ch 2. Dc in each st around. Join. 6 sts.
After Round 3, change to green as listed in the color sequence. Secure the starting magic-ring tail on the inside before trimming it.
Round 5: Ch 2. Work 2 dc in each st around. Join. 12 sts.
Rounds 6 through 8: Ch 2. Dc in each st around. Join. 12 sts.
Round 9: Ch 2. *Dc in the next st, 2 dc in the next st.* Repeat around. Join. 18 sts.
Rounds 10 through 12: Ch 2. Dc in each st around. Join. 18 sts.
Round 13: Ch 2. *Dc in each of the next 2 sts, 2 dc in the next st.* Repeat around. Join. 24 sts.
Rounds 14 through 16: Ch 2. Dc in each st around. Join. 24 sts.
Round 17: Ch 2. *Dc in each of the next 3 sts, 2 dc in the next st.* Repeat around. Join. 30 sts.
Rounds 18 through 20: Ch 2. Dc in each st around. Join. 30 sts.
Round 21: Ch 2. *Dc in each of the next 4 sts, 2 dc in the next st.* Repeat around. Join. 36 sts.
Rounds 22 through 24: Ch 2. Dc in each st around. Join. 36 sts.
Round 25: Ch 2. *Dc in each of the next 8 sts, 2 dc in the next st.* Repeat from * to * 4 times. Join. 40 sts.
Rounds 26 through 33: Ch 2. Dc in each st around. Join. 40 sts each round.
At the stated gauge, the fitted body should now measure about 13 1/3 inches around. From the narrow tip down through Round 33, the hat should measure about 18 7/8 inches long before the ribbed band is added. This is an expected measurement calculated from the stated round gauge, so a small difference is normal.
Optional Slightly Larger Fit
If you need a little more room, make this one change after Round 25. Instead of working Round 26 even, ch 2 and work *dc in each of the next 9 sts, 2 dc in the next st.* Repeat from * to * 4 times. Join. 44 sts.
Then work Rounds 27 through 33 even at 44 sts. At the stated gauge, this gives an expected circumference of about 14 2/3 inches. Continue with the ribbed band below using 44 stitches.
White Ribbed Band
Change to white.
Round 34: Ch 2. *FPDC around the next st, BPDC around the next st.* Repeat around. Join with a sl st to the first FPDC. 40 sts, or 44 sts for the larger fit.
Rounds 35 and 36: Ch 2. Work FPDC around each FPDC and BPDC around each BPDC around. Join. 40 sts, or 44 sts for the larger fit.
Fasten off. Weave every remaining yarn tail securely into the inside of the hat.
Pom-Pom Finish
Make a white yarn pom-pom approximately 3 1/2 to 4 inches across. Tie the center very firmly with two long strands of yarn held together. Keep the two yarn ends on each side paired together so you have two paired attachment tails, each about 18 inches long.
Thread one paired attachment tail through one side of the narrow tip and the second paired tail through the opposite side. Pull the pom-pom firmly against the tip and tie the two paired tails securely together on the inside. Separate the four yarn ends, weave each end through several nearby stitches in different directions, and trim the excess.
Give the pom-pom a firm tug before using the hat. The completed project has 2 finished pieces: 1 continuous striped elf hat and 1 securely attached pom-pom.
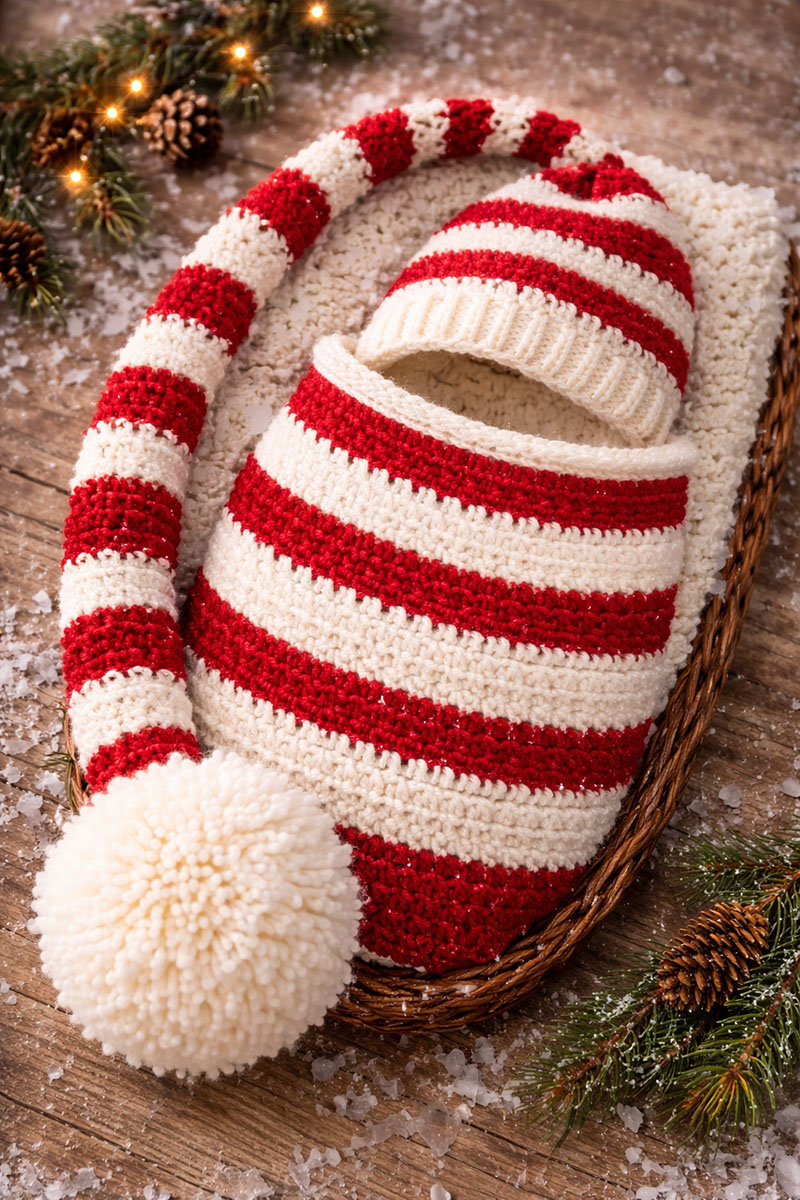
Use This Long-Tail Hat as a Supervised Photo Prop
This extra-long elf hat is a photo prop, not sleepwear. Use it only for brief, directly supervised photographs while the baby is awake. Position the ribbed band comfortably above the baby's eyes and arrange the long tail and pom-pom away from the face, nose, mouth and neck. Do not allow the baby to pull on or mouth the pom-pom or loose yarn strands. Remove the hat immediately if the baby becomes drowsy, uncomfortable or begins pulling at the decorations.
Check the pom-pom attachment before every use and repair it before using the hat again if anything has loosened. Remove the hat before naps or nighttime sleep. The American Academy of Pediatrics safe sleep guidance also advises against indoor hats after a baby is home from the hospital because head coverings can contribute to overheating.
Styling Ideas for Baby Photo Shoots
This crochet elf baby hat works beautifully as a holiday photo prop, especially when paired with simple blankets or a matching cocoon. I originally considered adding embroidered snowflakes, but leaving the design clean makes the hat more versatile — it can easily be reused for Valentine’s Day or winter-themed photos.
For a complete look, I often pair this hat with matching accessories like Christmas crochet baby booties or a coordinating crochet baby bunting.
More Crochet Projects You May Enjoy
For more holiday projects, browse my free Christmas crochet patterns collection.
If you enjoy making baby hats like this one, browse my free baby crochet hat patterns for more crochet styles, or compare both crochet and knitting projects in my free baby hat patterns collection.
For another handmade keepsake idea, you might also enjoy exploring my baby quilt patterns, which pair beautifully with crochet accessories for newborn photography.
Thanks for visiting Unique Baby Gear Ideas. I hope this crochet elf baby hat pattern inspires you to create something special for a holiday photo shoot or a memorable first Christmas.
When you click on links to various merchants on this site and make a purchase, this may result in this site earning a commission. This does not affect the price you pay.

UBGI Gold Standard 2026
Reviewed under the site's
editorial checklist.
Photos, decorating ideas, party setups and reader submissions are shared for inspiration unless a page is specifically presented as a pattern, tutorial, reference guide or step-by-step project. Follow the instructions, measurements, safety guidance and manufacturer directions provided for the particular project or product.
About Jan | Contact | Baby Nursery Ideas (Blog) | Site Map | Privacy Policy | Disclosure Policy | Disclaimer | Affiliate Disclosure | Earnings Disclosure | Facebook | Pinterest
I am a participant in the Amazon Services LLC Associates Program, an affiliate advertising program designed to provide a means for us to earn fees by linking to Amazon. As an Amazon Associate I earn from qualifying purchases.
Copyright © 2006-2026. All Rights Reserved.