Crochet Baby Booties: Free Patterns for Newborns and Beginners
By Jan Bay
Crochet baby booties are one of those little projects that can be practical, giftable and surprisingly quick to make. This collection brings my free crochet baby booties patterns together in one place, with simple newborn booties, easy beginner styles, one-piece construction and more decorative designs when you want something with a little personality.
Explore More Free Crochet Baby Patterns
Free Crochet Baby Booties Pattern 0–3 Months
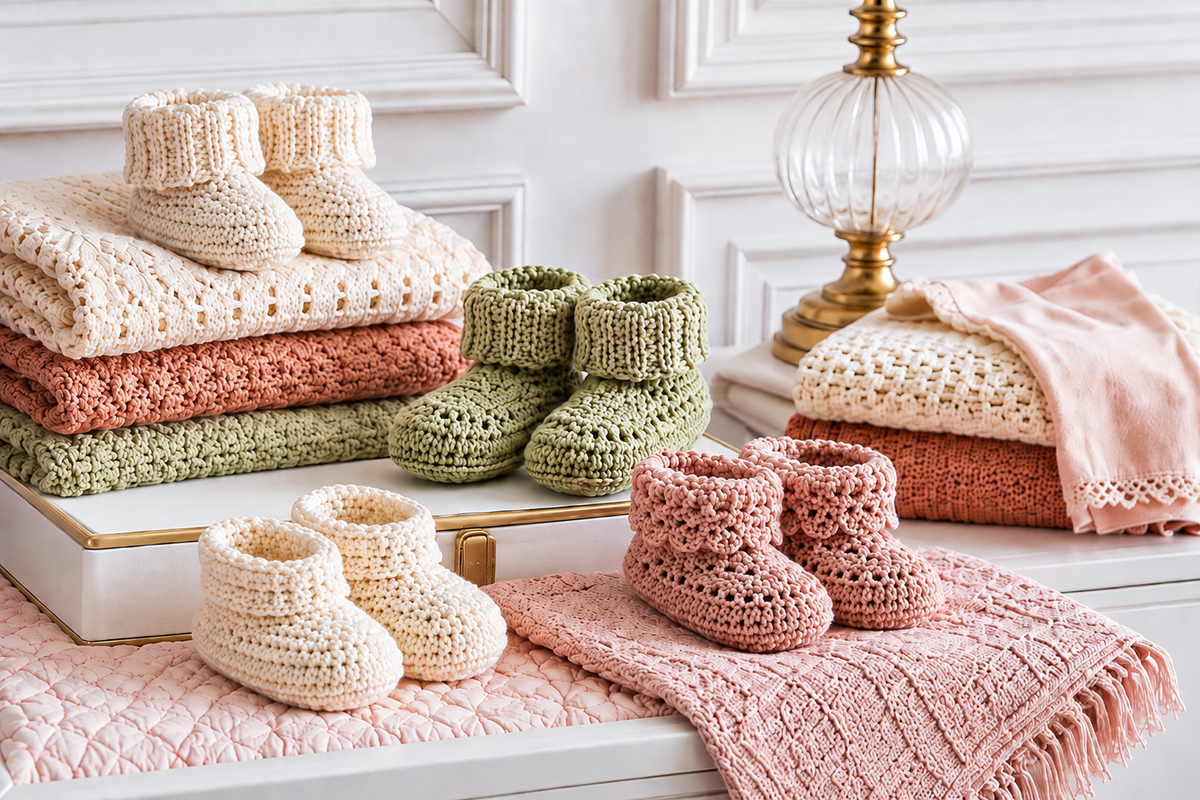
Smooth Baby Yarn for Crochet Booties
Check the yarn weight called for by the individual pattern before ordering. The bootie patterns on this page don't all use the same yarn weight.
Jump to Crochet Baby Booties Patterns
Free Crochet Baby Booties Patterns: Start With the Right Type
Before you pick a crochet baby booties pattern, decide what you actually want to make. A plain crib bootie, a one-piece beginner bootie and a little western boot may all fit under the same general name, but they aren't the same project.
Some crocheted booties are really little more than substantial crib socks as far as construction goes. They don't need to be! It's not like a newborn is going to put a lot of wear and tear on the soles, is it? But they can be made to be more attractive. That's where my patterns come in handy. They turn those simple little socks into something a whole lot cuter.
If you're fairly new to crochet, I'd start with something really simple. My free crochet baby booties pattern has a rounded sole, closed toe and plain ankle. Each bootie is worked from the sole upward, so you aren't making several little pieces and trying to line them up afterward. That's a problem many of us struggle with: making two booties that are exactly alike.
That matters more than fancy trim. A tiny bootie can become surprisingly fiddly once you add separate cuffs, straps, ties, flowers or decorative pieces. The plain pattern lets you concentrate on the part that makes or breaks the project: getting two booties the same size.
If you want a pair for the holiday season, my Christmas crochet baby booties pattern uses a taller elf-style shape. That pattern also shows an optional bell version for photos, but I'd leave the bells off any pair meant for regular wear. The plain booties are cute enough and every elf-like without them.
I wouldn't choose a pattern just because the title promises that the booties can be finished in 10 or 15 minutes. Quick is nice, but clear construction is better. If you're stopping every few stitches to figure out where the toe starts or which stitch gets the next decrease, it isn't really a quick project anymore. Not to mention that 10 or 15 minutes seems pretty unrealistic to me. What are we, machines? Or crafters who actually want to enjoy the project and every stitch along the way?
For a first pair, look for four things: a clearly defined sole, a simple toe, an uncomplicated ankle and instructions that tell you what the finished size should be. That's plenty.
Easy Crochet Baby Booties for Beginners
The easiest crochet baby booties aren't necessarily the ones with the fewest rounds. I would rather have a couple of extra plain rounds than a shorter pattern filled with awkward joins, tiny separate pieces or decorative details that have to land in exactly the right spot.
A beginner-friendly bootie should let you see what you're doing. Smooth yarn helps. So does using one color for the first pair. You can always make the next pair more interesting after you understand how the sole, toe and ankle come together.
Fuzzy yarn has its place, but the fuzz can hide stitch tops. Very bulky yarn can turn a tiny bootie into a thick little lump if the pattern wasn't designed for it. Fine yarn can look beautiful, but it also means more stitches and more opportunities to lose your place. None of those yarns are wrong. I just wouldn't choose them for the first pair unless the pattern was written specifically for them.
I'd also skip buttons, beads and dangling decorations on a simple baby bootie. They aren't needed to make the booties cute, and leaving them off gives you fewer pieces to attach and fewer details to worry about. If one comes loose, it can also become a choking hazard.
If you're learning, pay more attention to matching the second bootie than to making the first one quickly. Use the same yarn, the same hook and the same tension. Count the stitches instead of deciding that a round "looks about right." Tiny differences show up fast on a project this small.
Once you've made a plain pair successfully, you've learned the basic shape behind a lot of other baby bootie styles. From there, a cuff, taller ankle or decorative upper makes much more sense.
Newborn and 0–3 Month Crochet Baby Booties
Newborn is one of the first sizes people look for, but I wouldn't rely on the age label by itself. Babies, just like adults, don't all have the same size feet, and yarn tension can change the finished bootie even when two people follow the same stitch counts.
The better number to watch is the finished sole length given in the pattern. If you're making the booties for a baby you know, compare that finished measurement with the baby's foot whenever possible. If they're a shower gift and you can't measure, follow the pattern size rather than trying to enlarge or shrink it by eye halfway through.
My 0–3 month crochet baby booties pattern is the place to go if you want the complete stitch-by-stitch directions for the plain newborn style shown in this collection. That page includes the yarn, hook, gauge, sole construction, toe shaping, ankle rounds and finishing instructions.
Keep both booties together while you're working. After the first one is finished, make the second before switching yarn or starting another project. It's much easier to reproduce your tension while the first bootie is still fresh in your mind.
If the second sole is noticeably longer or wider than the first, fix it there. Don't keep crocheting and hope the ankle will somehow pull the two booties into matching shapes. It won't.
One-Piece Crochet Baby Booties and How They're Built
One-piece crochet baby booties are a good choice when you don't want a lot of assembly. "One piece" doesn't mean the entire pair is crocheted without fastening off. It means each individual bootie is built as one continuous piece instead of making a sole, upper, cuff and other sections separately and sewing them together afterward.
The basic construction is easy to understand once you see the order.
Start with the sole. The foundation chain runs through the center of the sole. Stitches are worked along one side, around the end of the chain and back along the other side to create an oval.
Build the sides. Once the sole has the right length and width, the work turns upward. These rounds give the bootie its depth rather than continuing to make the sole larger.
Shape the toe. Decreases remove stitches across the front of the bootie while the heel and sides stay comparatively stable. Keeping those decreases centered is what gives the toe a neat shape instead of pulling it toward one side.
Finish the ankle. After the toe has been reduced, the remaining stitches form the opening around the ankle. A plain ankle is easiest. Cuffs and taller boot shapes add another design choice after the basic bootie is established.
Fasten off and repeat. The second bootie should use the same pattern, yarn, hook and stitch counts as the first. You shouldn't need separate left-foot and right-foot instructions for a symmetrical plain bootie.
That's the construction in plain English. For the exact stitch counts and round-by-round directions, use the complete one-piece crochet baby booties pattern rather than trying to turn this overview into a pattern by guessing at the numbers.
Crochet Baby Booties Sizes: Use the Sole, Not Just the Age
Baby bootie sizes can get confusing because patterns may be labeled newborn, 0–3 months, 3–6 months or simply baby. Those labels are useful for sorting patterns, but the finished sole measurement tells you much more.
If a pattern gives a finished sole length, use it. If it also gives gauge, don't skip that part and assume a tiny project is too small to bother with gauge. A small difference across several stitches can change the whole fit because there isn't much room for error in a baby-size sole.
Changing only the hook size isn't my first choice for turning a newborn pattern into a larger baby size. A larger hook changes the fabric as well as the dimensions. The bootie may become looser, wider and more open instead of simply becoming a neatly scaled-up version of the original.
The same problem comes up when you substitute a much heavier yarn. If a pattern was designed around a lighter baby yarn, chunky yarn can change the proportions of the sole, toe and ankle all at once.
If you're comparing yarn labels and aren't sure what terms such as DK, light worsted or medium mean, the Craft Yarn Council Standard Yarn Weight System is a useful reference for the numbered yarn-weight categories.
Keep the pattern, yarn weight and gauge together. If you change one of them, expect the finished size to change too.
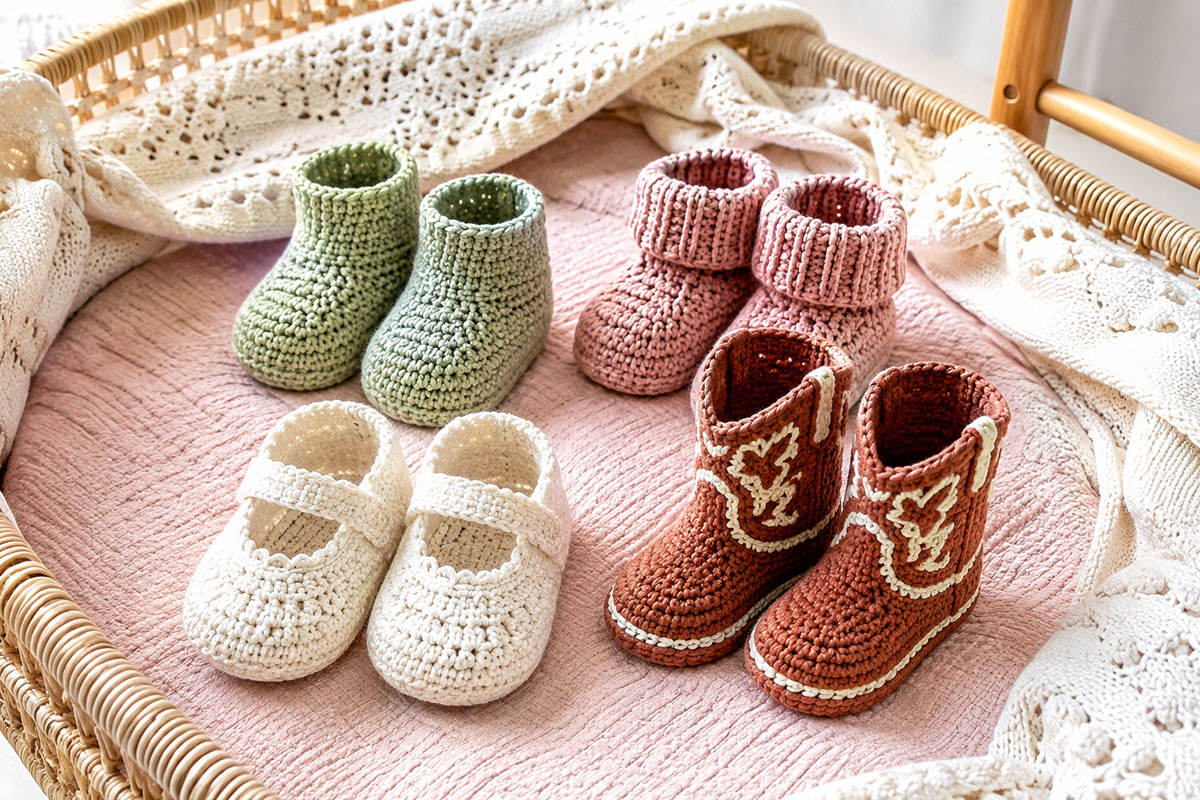
Crochet Baby Booties Styles: Plain, Cuffed, Mary Jane and Western
Once the basic fit is settled, the fun part is choosing the shape.
A plain ankle bootie keeps everything simple and lets the yarn do most of the work. I like this type for a first project because there isn't much to distract from the shape of the sole and toe.
A cuffed bootie adds more texture around the ankle. It can make a simple pattern look more substantial without changing the entire construction, although you'll want to check whether the cuff is worked as part of the bootie or added afterward.
Mary Jane-style booties have a lower shoe shape with a strap across the top. They're pretty, but the strap adds another placement decision. If you're making them for a baby, I would choose a pattern that doesn't depend on a loose decorative piece just to keep the shoe together.
Western booties are a different project altogether. Instead of stopping at a short ankle, the upper continues into a tiny boot shaft. If that's the look you're after, go straight to my crochet baby cowboy boots pattern ideas rather than trying to turn a plain crib bootie into a cowboy boot after you've already made it.
Sneaker-style booties can be cute too, but I'd keep them generic rather than copying the logos, markings or exact details of a branded athletic shoe. The crochet shape is enough to get the idea across.
You don't need every style in one project. Pick the shape first, then choose the yarn and details that suit it.
How to Choose a Crochet Baby Booties Pattern
If I'm comparing two baby bootie patterns, I look past the finished photo and check how the bootie is actually made.
Check the finished size. A pattern that tells you the intended sole length gives you something concrete to work toward. An age range without a finished measurement leaves more guessing than I like.
Check the construction. Sole-up, one-piece booties are easy to understand once you've made one. Patterns with separate soles, uppers, cuffs and straps may be perfectly good projects, but they involve more joining and more opportunities for the two booties to end up slightly different.
Check the yarn weight before buying yarn. Don't assume that every yarn with "baby" on the label is interchangeable. Yarn thickness matters. So do fiber, twist and texture.
Check whether gauge is provided. You can get away with ignoring gauge on some decorative crochet projects. Footwear is different because the measurement is part of the point.
Read the toe shaping before you start. If the pattern doesn't make it clear where the decreases belong, I'd choose another pattern. A vague decrease section on something this small can leave you with a toe that twists to one side.
Look at the finishing. Decide whether you're happy sewing pieces together, attaching straps or adding decorative parts. If not, choose the simpler construction from the beginning.
For a straightforward place to start, use the easy crochet baby booties pattern. If you'd rather browse beyond footwear, my free baby crochet patterns collection includes more small baby projects, blankets, loveys, mobiles and accessories.
And if you're putting together a matching handmade set, you can browse the free baby crochet hat patterns separately instead of trying to make one bootie page cover every baby accessory.
That's really the choice: match the pattern to the size, construction and amount of detail you want, then let the individual pattern handle the stitch counts. I'd rather make one pair that fits and matches than rush through three pairs because somebody promised they were unbelievably fast.
When you click on links to various merchants on this site and make a purchase, this may result in this site earning a commission. This does not affect the price you pay.

UBGI Gold Standard 2026
Reviewed under the site's
editorial checklist.
Photos, decorating ideas, party setups and reader submissions are shared for inspiration unless a page is specifically presented as a pattern, tutorial, reference guide or step-by-step project. Follow the instructions, measurements, safety guidance and manufacturer directions provided for the particular project or product.
About Jan | Contact | Baby Nursery Ideas (Blog) | Site Map | Privacy Policy | Disclosure Policy | Disclaimer | Affiliate Disclosure | Earnings Disclosure | Facebook | Pinterest
I am a participant in the Amazon Services LLC Associates Program, an affiliate advertising program designed to provide a means for us to earn fees by linking to Amazon. As an Amazon Associate I earn from qualifying purchases.
Copyright © 2006-2026. All Rights Reserved.