Baby Handprint Christmas Ornament Ideas for Baby's First Christmas
By Jan Bay
A baby handprint Christmas ornament captures the shape of that tiny hand at one Christmas and turns it into a keepsake you can bring back to the tree every year. These ideas use an actual baby's handprint or impression, with simple options for clay, dough and painted ornaments that keep the little fingers recognizable instead of burying them under too much decoration.
Explore More Baby Handprint and Christmas Keepsakes
Baby's First Christmas Ornament Ideas
Baby Footprint Christmas Ornament Ideas
Baby Handprint Crafts and Keepsake Ideas
Baby Handprint Ornament Craft Supplies
Jump to Baby Handprint Christmas Ornament Ideas
Choose a Handprint Ornament Method
How to Make a Baby Handprint Christmas Ornament
How to Get an Open Baby Handprint
Choose Baby-Safe Craft Materials
Clay and Dough Handprint Ornaments
Painted Handprint Ornament Ideas
Choose a Handprint Ornament Method Before You Start
There are two basic ways to save a baby's hand on a Christmas ornament. You can press the hand into a soft material for an impression, or make a flat print and use that as the decoration. A third option is to capture the handprint on paper first and transfer it later.
The paper-first method is worth considering if opening the baby's fingers long enough for one clean print is difficult. I'd rather get one usable handprint on paper and work from that than keep repeating the process directly on ornament blanks.
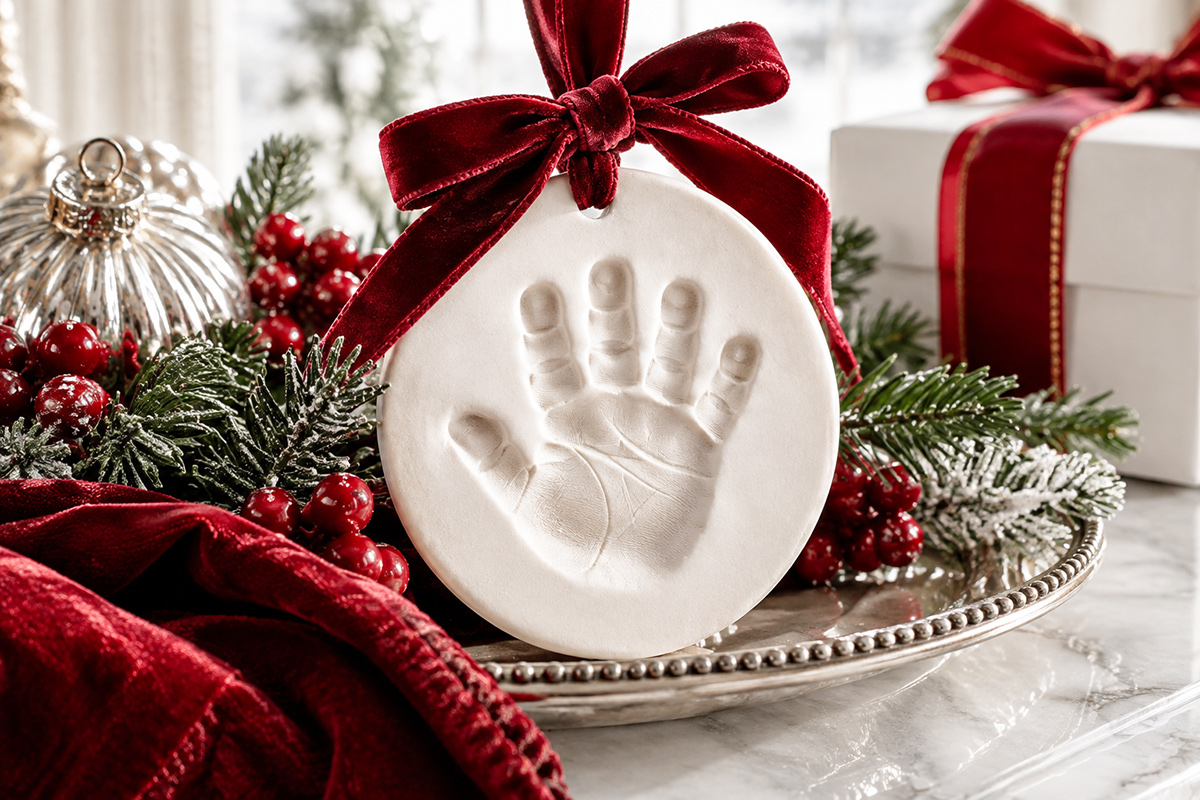
A pressed clay or dough ornament gives you the shape of the palm and fingers in relief. It works best when the ornament is large enough that none of the fingertips are pushed against the edge.
A painted print is flatter and easier to turn into a Christmas design. You can leave the print alone with the baby's name and Christmas year, or add a few details after it dries.
Don't choose the method by how elaborate the finished ornament could be. Choose it by the handprint you actually want to save.
How to Make a Baby Handprint Christmas Ornament
You don't need many supplies, but you do need them within reach before you start. A baby with an open hand is not going to wait while you look for the ornament blank.
For a basic baby handprint ornament, gather:
- A flat ornament blank or soft clay or dough large enough for the baby's entire hand
- A marking product specifically suitable for the way you plan to use it if making a printed handprint
- Plain paper for practice or for capturing the original handprint
- A small applicator or sponge if needed
- Warm water and a soft cloth for cleanup
- A suitable craft marker for the baby's name and Christmas information after the ornament is dry
- Ribbon or cord for hanging
- A compatible sealer only if the finished material needs one
Set the ornament on a stable surface or have another adult hold it securely. Trying to hold the baby, spread five little fingers and steady a moving ornament at the same time makes the job harder than it needs to be.
With a printed handprint, use a thin, even amount of the suitable marking product. Too much fills the spaces between the fingers. Too little can leave the palm missing even when the fingertips show.
Bring the palm down first, then help the fingers make contact without dragging them across the surface. Lift the hand straight up once the print is made.
Now look at the whole hand, not each fingertip. If the palm is clear and the little fingers are recognizable, you probably have the keepsake you came for.
You can stop there.
How to Get an Open Baby Handprint Without Fighting the Fingers
The challenge with a baby handprint is not really the ornament. It's getting the palm and fingers open at the same time.
Don't force curled fingers flat. If the hand keeps closing, stop and try again at another time or use the paper-first method. A keepsake isn't improved by turning the print-making part into a wrestling match.
Have the blank positioned before you open the hand. Support the wrist and gently guide the palm onto the surface. Once the palm makes contact, help each finger touch down without sliding sideways.
If one fingertip doesn't print perfectly, look at the handprint as a whole before deciding it failed. A slightly bent finger still records the actual shape of that tiny hand at that moment.
If the print really is too smeared to recognize, start again on a fresh blank or rework the clay or dough while the material still permits it. Repeatedly touching up a wet painted print usually makes the edges less clear, not more.
For handprint projects that aren't tied to Christmas, my baby handprint crafts page has more year-round ideas. You can also browse my baby handprint and footprint keepsakes if you want to preserve both together.
Choose Baby-Safe Craft Materials Before Anything Touches the Hand
The handprint may come from the baby, but the ornament itself is an adult craft project. Keep paints, dough, clay, markers, sealers, ribbon and small craft pieces out of the baby's mouth and reach.
Don't assume that “washable” or “non-toxic” means a craft product is meant to be spread on skin. Read the product label and use it on a baby's hand only when the manufacturer says that use is appropriate. Poison Control's safe-use guidance for art products also recommends following the label and not using an art product for skin painting unless it is labeled safe for that purpose.
If the label doesn't support skin contact, skip it. Use a product intended for capturing handprints or make the keepsake from a previously captured paper handprint instead.
Clean the baby's hand as soon as the print is finished. Move the baby away from the craft area before you add permanent markers, sealers, ribbon or other finishing pieces.
Clay and Dough Baby Handprint Ornaments
A pressed hand impression doesn't need much decorating. The five fingers and little palm already give you the detail.
Make the blank generously larger than the baby's hand. Leave open material beyond the fingertips, thumb and heel of the palm so the finished ornament doesn't look as though the hand was squeezed into the available space.
Plan the hanging hole before making the impression. Keep the hole far enough from the edge and the handprint that there is a solid band of material around it. If the material needs to be pierced before drying or baking, do that while it is still workable.
Press the palm into the material first. Then bring the fingers down gently enough to leave an impression without driving them through the clay or dough. Try to lift the hand straight back up rather than peeling it sideways across the surface.
If the impression is badly distorted and the material can still be safely reworked, smooth it and try again. Once you have a recognizable palm and fingers, leave them alone.
Follow the drying, curing or baking directions for the exact material or recipe you're using. Clay and dough products are not interchangeable, so there isn't one drying time that belongs on every handprint ornament.
After the ornament is completely dry or cured, you can leave the impression natural, lightly accent it or add the baby's name and Christmas year. I'd keep the decoration away from the hand itself. Tiny fingers don't need much help being the focal point.
Painted Baby Handprint Christmas Ornament Ideas
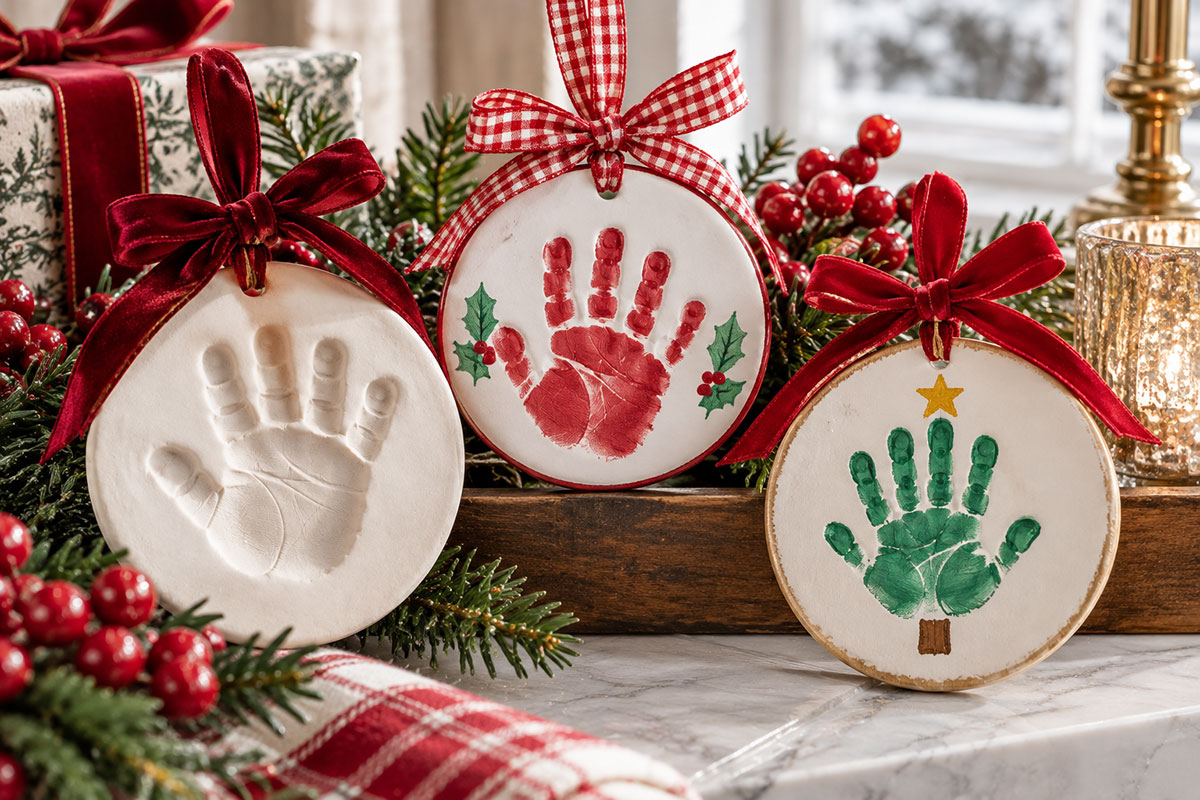
A flat handprint gives you two good directions. Keep it as a plain handprint keepsake, or turn the shape into one simple Christmas design after the print is completely dry.
The plain version is hard to improve on. One handprint in a color that shows clearly against the ornament, the baby's name and the Christmas year are enough.
If you want something more playful, the fingers can become part of the design rather than disappearing under it. A green handprint can become a simple Christmas tree shape once you add a small trunk and a few restrained details. A white handprint can become a snowy holiday design. You can also use the palm and fingers as the starting shape for a Santa or other Christmas motif, provided the original handprint remains recognizable.
Pick one idea. Don't turn every finger into a different decoration just because there's room.
There's another advantage to capturing the handprint on paper first. You can trace or transfer that exact print to several ornament blanks without repeating the skin-contact step. If you're making keepsakes for grandparents, everyone can receive the same little hand rather than six slightly different attempts.
If you like that approach but prefer feet, my baby footprint Christmas ornament ideas show the same basic choices with footprint impressions, painted prints and paper-first transfers.
What to Add to a Baby's First Christmas Handprint Ornament
Start with the information you would still want if the ornament turned up in an unmarked box many Christmases from now.
I'd include the baby's name and Christmas year somewhere permanent. If the handprint fills the front, put the identifying information on the back rather than squeezing tiny lettering between the fingers.
You can add a birth date, age or short first-Christmas message when there is room, but none of those should crowd the print. The hand is the part you can't recreate later.
If you're making a grandparent ornament, a short relationship message can be sweet, but keep the baby's actual name too. “Grandma's First Christmas With Me” means more when the ornament still identifies whose tiny hand it was.
Don't decorate away the evidence.
For handprints, photos and other first-Christmas keepsakes, my baby's first Christmas ornament ideas page brings the different ornament styles together so you can compare them.
Finish and Store the Handprint Ornament Carefully
Let the ornament dry or cure completely before adding ribbon or wrapping it for storage. If the material still feels cool, soft, tacky or damp when it shouldn't, give it more time according to its instructions.
If you use a sealer, make sure it is compatible with both the ornament material and whatever you used for the print and lettering. Test it first when there is any chance it could make paint or marker bleed.
Check the hanging hole before putting the ornament on the tree. A heavy clay or dough ornament needs enough solid material around the hole that the ribbon isn't pulling against a thin, fragile edge.
After Christmas, wrap handmade ornaments separately and keep heavier decorations from pressing against them. Raised hand impressions and dried dough edges can chip if they're stored loose with harder ornaments.
Write the identifying information on the ornament itself rather than only on a gift tag or storage box.
The box may disappear. The name shouldn't.
Baby Handprint Christmas Ornament FAQ
What is the easiest way to make a baby handprint Christmas ornament?
A flat ornament made from one clear handprint is one of the simplest options. Capture the handprint with a product suitable for the intended use, let it dry completely, then add the baby's name and Christmas year.
What if my baby keeps closing their hand?
Don't force the fingers open. Try again at another time or capture one usable handprint on paper first and transfer that shape to the ornament later. The paper-first method also lets you make several keepsakes from one print.
Does every finger need to show clearly?
No. Look at whether the print still reads as the baby's hand. One faint fingertip doesn't automatically ruin a keepsake, especially when the palm and overall shape are clear.
How large should the ornament blank be?
Use the baby's actual hand to choose the blank rather than relying on an age-based measurement. The entire palm, thumb and fingertips should fit with some open space around them. Trace the handprint or measure a paper print before buying blanks if necessary.
Can I use ordinary craft paint on a baby's hand?
Only use a product on the baby's skin when its label permits that use. “Washable” or “non-toxic” by itself does not mean the product is intended for skin painting. If the label doesn't support skin contact, use a suitable handprint product or make the ornament from a paper print instead.
Can I make matching handprint and footprint Christmas ornaments?
Yes. They can make a nice pair as long as each ornament has enough room for the full print. Use my baby footprint Christmas ornament guide for the footprint version rather than trying to squeeze both prints onto one small ornament.
Keep the Original Handprint Too
If you make the original print on paper, don't throw it away after the ornament is finished. Label it with the baby's name and date and keep it with the other baby keepsakes.
That one sheet of paper can outlast the craft supplies. You can use the same handprint later for framed art, another keepsake or simply save it exactly as it is.
For other ideas that aren't limited to Christmas, visit my baby handprint crafts. If you're ready for another holiday project instead, browse my baby Christmas crafts.
When you click on links to various merchants on this site and make a purchase, this may result in this site earning a commission. This does not affect the price you pay.

UBGI Gold Standard 2026
Reviewed under the site's
editorial checklist.
Photos, decorating ideas, party setups and reader submissions are shared for inspiration unless a page is specifically presented as a pattern, tutorial, reference guide or step-by-step project. Follow the instructions, measurements, safety guidance and manufacturer directions provided for the particular project or product.
About Jan | Contact | Baby Nursery Ideas (Blog) | Site Map | Privacy Policy | Disclosure Policy | Disclaimer | Affiliate Disclosure | Earnings Disclosure | Facebook | Pinterest
I am a participant in the Amazon Services LLC Associates Program, an affiliate advertising program designed to provide a means for us to earn fees by linking to Amazon. As an Amazon Associate I earn from qualifying purchases.
Copyright © 2006-2026. All Rights Reserved.