Baby Halloween Crafts That Become Beautiful Keepsakes
By Jan Bay
Baby Halloween crafts do not have to mean paper ghosts, googly eyes or decorations that get tossed away in November. These projects start with something worth saving. A tiny handprint, clay impression, baby photo, name or date can be turned into Halloween nursery art, framed keepsakes and handmade gifts that still look beautiful after fall is over.
Explore More Halloween Baby Crafts & Ideas
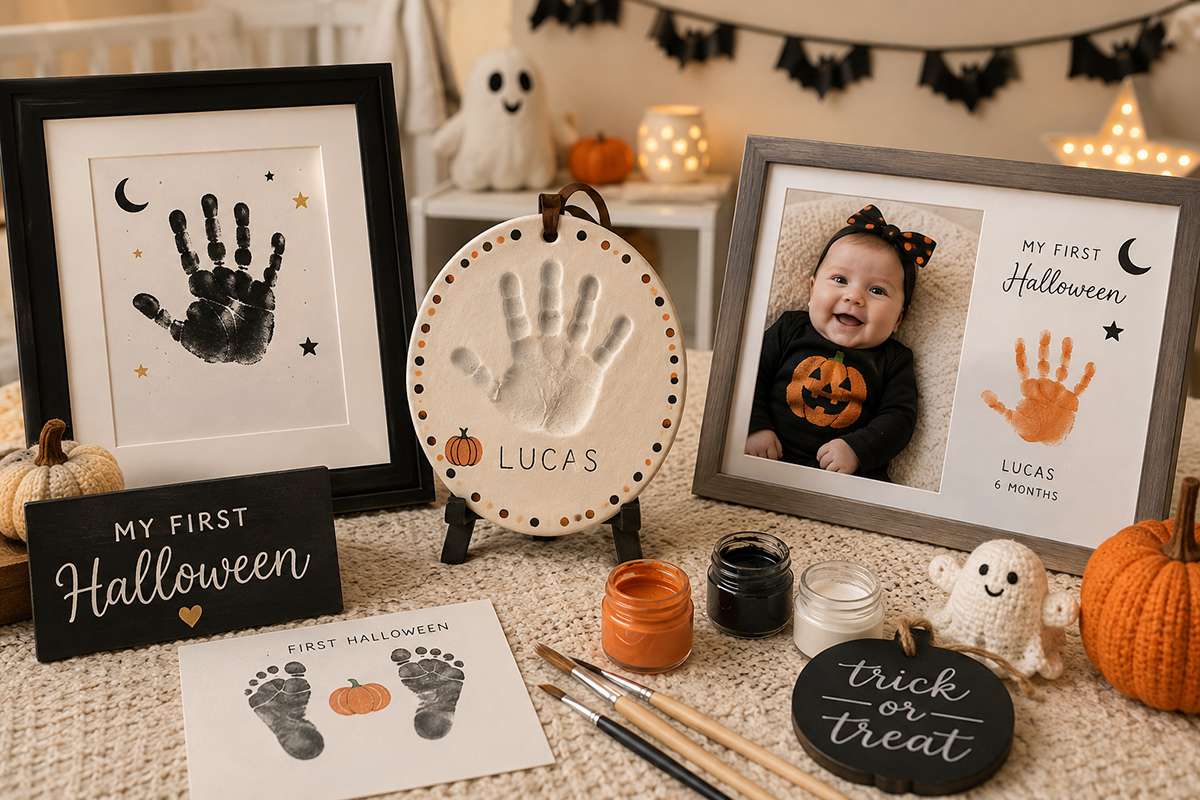
Before using any paint for a baby handprint, read the label for intended use, age guidance, warnings and cleanup directions. Washable or non-toxic wording alone does not mean a product is intended for infant skin.
Baby Halloween Keepsake Ideas Worth Bringing Out Again
The easiest way to keep a Halloween baby craft from looking like a school project is to decide what you want to save before adding the Halloween theme. The handprint, impression, photograph, name or date should still be the reason the finished piece matters.
A little black, rust, muted pumpkin orange or deep plum can make the piece feel seasonal without covering it in bats and jack-o'-lantern faces. I prefer one clear Halloween reference and plenty of space around the baby's print. A tiny crescent moon, a simple pumpkin shape, a few painted stars or an October date can be enough.
Think about the finished object, too. Archival paper in a simple frame, a small clay plaque, a shadow box or a good-quality canvas can turn the same baby handprint into something that belongs with the nursery rather than the party decorations.
If you want more ways to preserve the actual print, the baby handprint crafts page includes additional framed art, impression and gift ideas that can be adapted to different seasons.
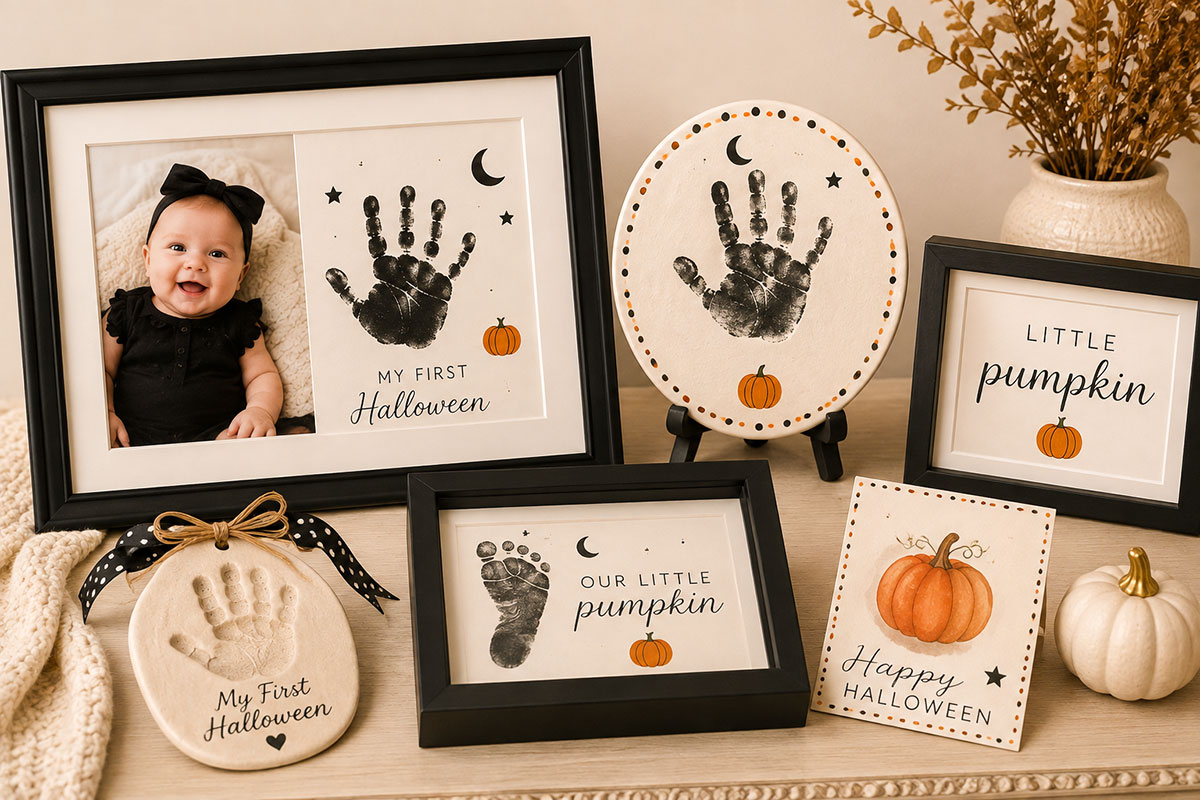
Before you begin, choose one project and gather everything first. Babies are not known for waiting patiently while someone searches for a clean sheet of paper.
Halloween Handprint Art with a More Refined Finish
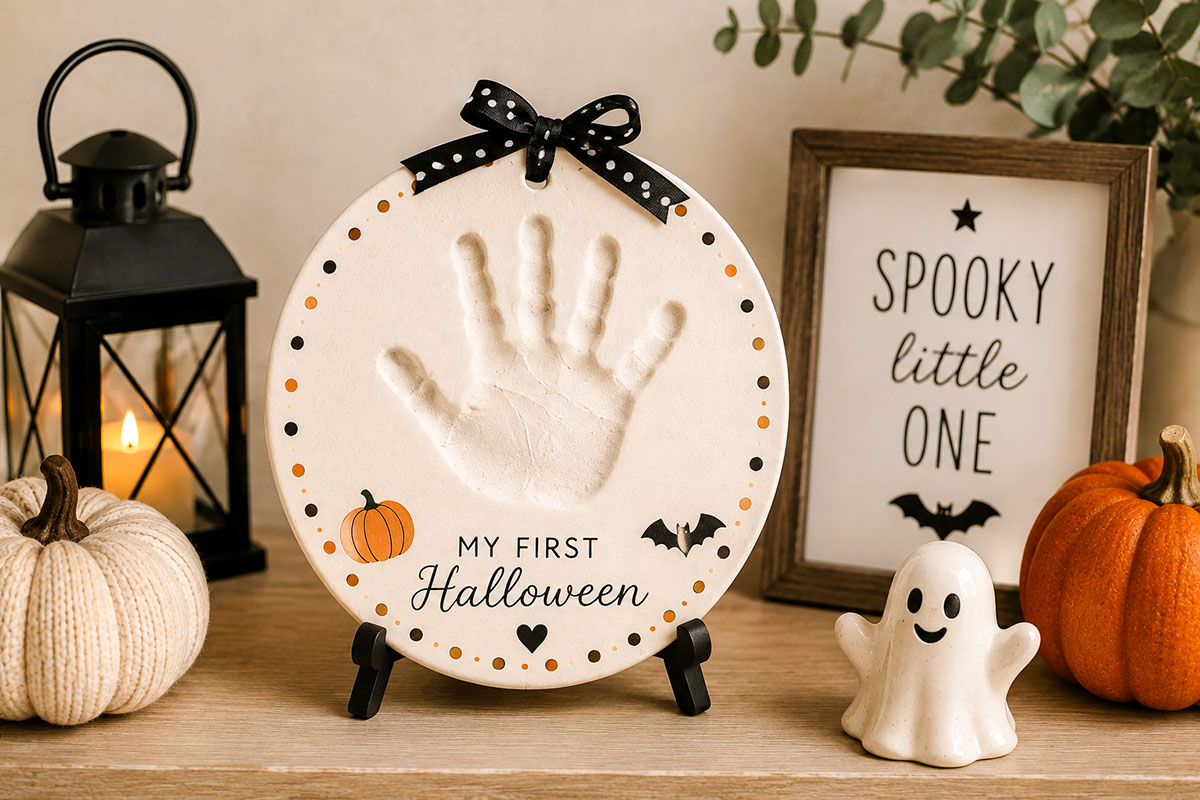
A baby handprint can carry the Halloween theme without being turned into a cartoon character. Start with the print itself, then add only enough seasonal detail to make the piece feel intentional. A black handprint on white paper with a small October date, a rust-colored print with a thin painted pumpkin stem or a deep plum print beneath a simple crescent moon can all work beautifully.
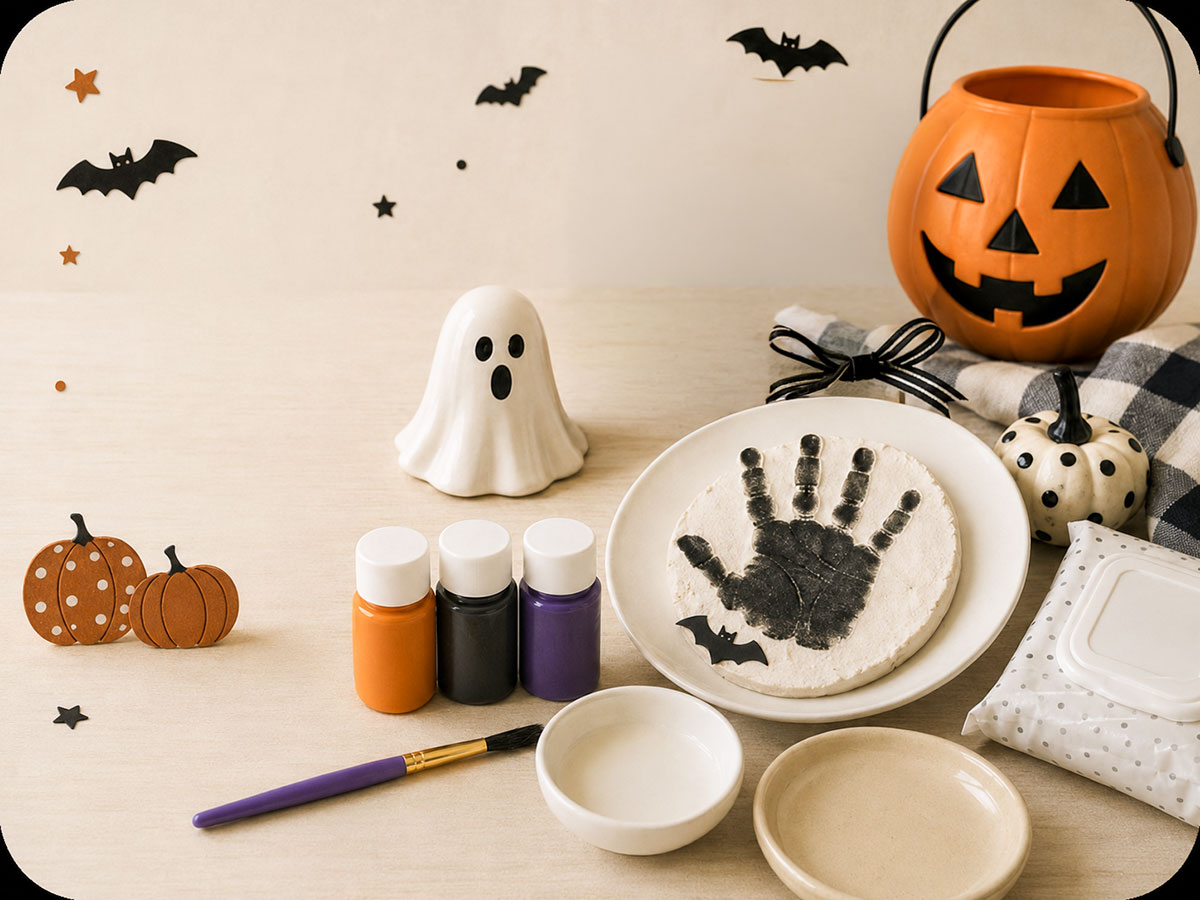
For this project, use heavyweight acid-free paper or watercolor paper, a washable craft paint whose label directions permit the intended skin-contact use, a shallow dish or foam brush, a damp cloth, a second clean sheet for practice, a fine paintbrush for small additions and a frame with a mat.
How to Make Framed Halloween Handprint Art
- Prepare the paper first. Cut the paper to fit the frame and decide where the handprint will sit. Leave enough open space for a name, date or one small Halloween accent.
- Set up before bringing the baby over. Pour a small amount of paint into a shallow dish, place the practice paper beside the final sheet and keep the damp cloth within reach.
- Apply a thin, even coat of paint. A foam brush can make it easier to cover the palm and fingers without leaving heavy blobs of paint between them.
- Make a practice print. Press the hand gently onto the spare paper so you can see how much paint you are using. If the print is muddy around the fingers, use a little less paint on the next try.
- Make the final print. Lower the hand straight onto the paper, press lightly across the palm and fingers, then lift it straight back up. Do not slide the hand across the surface.
- Clean the baby's hand right away. Wash away the paint according to the product directions before moving on to the decorative part of the project.
- Let the print dry completely. Add the baby's name, age or date only after the paint is dry. Keep any Halloween addition small enough that the handprint remains the focal point.
- Frame the finished art. A generous mat gives the print breathing room and makes even a very simple design look more finished.
If you are choosing between washable paint, ink or another print-making material, see the baby-safe paint for crafts guide before starting.
Do not worry if every finger does not print perfectly. A slightly imperfect baby handprint often looks more natural than one that has been retouched until it no longer resembles the original print.
Clay Baby Handprint Keepsakes for Halloween
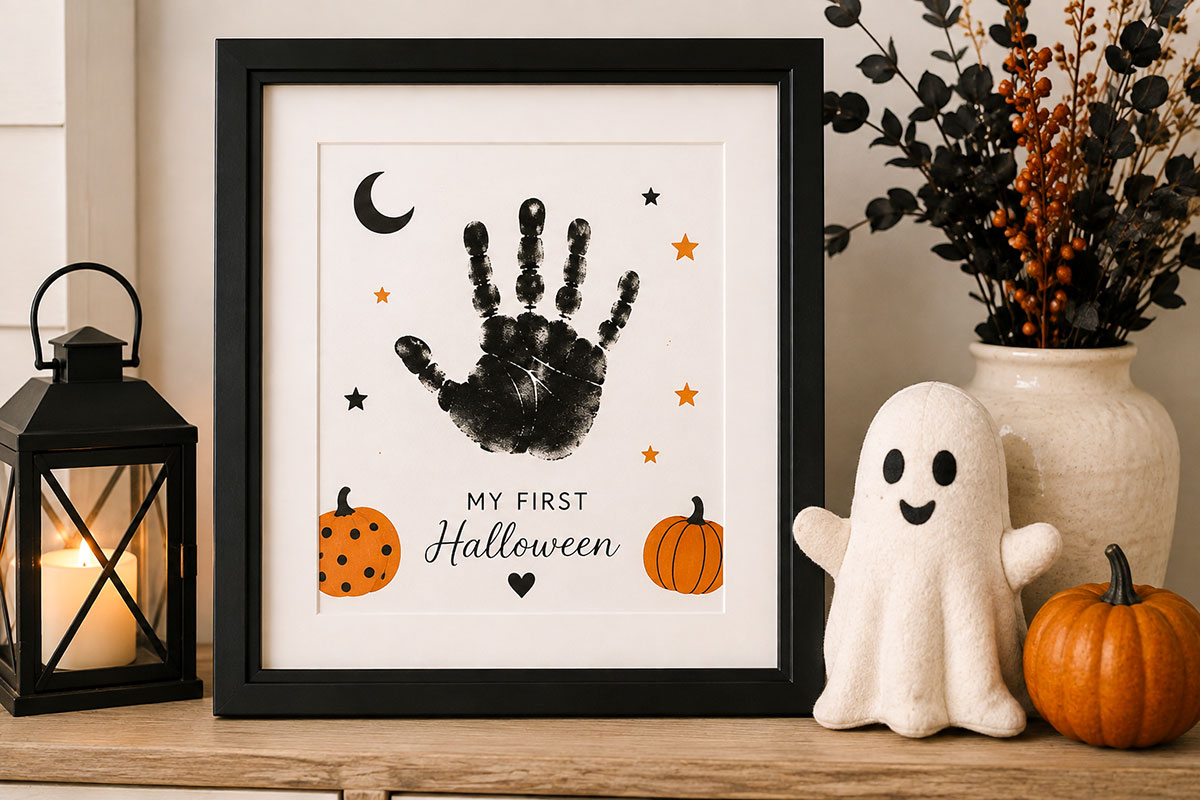
A clay impression gives Halloween baby crafts a completely different look from painted handprints. Instead of adding lots of seasonal decoration, you can let the shape of the baby's hand do most of the work and bring in Halloween through color, a small painted motif or the way the finished plaque is displayed.
For a simple October keepsake, use white air-dry clay and finish it with a narrow charcoal, muted orange or deep plum painted border. Another option is to leave the clay natural and add only the baby's name and the date beneath the impression. A tiny moon or pumpkin beside the date is enough to make it seasonal.
Materials
- Air-dry clay or impression material whose label directions permit the intended direct skin-contact use
- Rolling pin or smooth cylindrical roller
- Parchment paper
- Round bowl, plate or template for shaping the plaque
- Craft knife for adult use only
- Fine-grit sandpaper
- Non-toxic craft paint for the finished, fully dried plaque
- Small paintbrush
- Pencil or fine paint pen for adding the baby's name and date
- Picture easel, shadow box or secure wall display for the finished keepsake
How to Make the Clay Handprint Plaque
- Condition the clay. Knead it until it is smooth and easy to roll. Work on parchment paper so the soft clay can be moved without stretching it.
- Roll an even slab. Make it thick enough to hold a clear impression without becoming fragile after drying. Follow the clay manufacturer's directions for recommended thickness.
- Shape the plaque. Use a bowl, plate or paper template to mark a circle, oval or softly arched shape. An adult should do any cutting or trimming.
- Prepare for the handprint. Place the clay on a firm, comfortable work surface and have another adult help position the baby if needed. The baby's hand should be clean and dry.
- Press the hand into the clay. Gently press the palm first, followed by each finger. Lift the hand straight away rather than dragging it across the surface.
- Try again while the clay is soft if necessary. If the impression is too shallow or badly smeared, smooth and reroll the clay rather than trying to repair each finger individually.
- Add the name and date. These can be lightly impressed into the wet clay or added with paint after the plaque has dried. Keep the lettering simple so it does not compete with the handprint.
- Allow the plaque to dry completely. Follow the manufacturer's drying instructions. Turn or support the piece as directed so it dries as evenly as possible.
- Refine the edges. Once completely dry, an adult can lightly sand rough edges and wipe away the dust.
- Add the Halloween finish. Paint a narrow border, tiny moon, simple pumpkin stem or other small seasonal accent. Let all paint dry completely before displaying the piece.
Keep the finished plaque as a display piece rather than something for the baby to handle. Air-dry clay can chip or break, and any easel, frame, hanging cord or other display hardware should remain securely out of reach.
For more ways to preserve both hands and feet, see these baby hand and footprint keepsake ideas.
Halloween Baby Photo Keepsakes That Still Feel Like Nursery Decor
A Halloween baby photo becomes much more useful as a keepsake when the costume is not doing all the work. Choose one photograph with a clear expression, simple clothing and an uncluttered background, then pair it with a small seasonal element rather than surrounding it with Halloween graphics.
A black-and-white photo can look especially good beside a tiny handprint or footprint in muted pumpkin orange, charcoal or deep plum. Another option is to use a color photograph and keep everything around it nearly neutral. Add the baby's name, age and the date in small lettering so the piece still feels personal when the Halloween decorations are packed away.
Simple Framed Halloween Photo Keepsake
- One printed baby photograph
- Heavyweight acid-free backing paper
- Small handprint or footprint, if desired
- Archival photo corners or another photo-safe mounting method
- Fine-tip archival pen for the name and date
- Frame with a wide mat
- Choose the photograph first. Use a picture that would still be worth framing even without a Halloween caption or decoration.
- Plan the layout before attaching anything. Place the photo slightly off center if you are adding a handprint, footprint or short line of text beside it.
- Keep the seasonal accent small. A tiny painted moon, a single pumpkin shape, a few stars or the word October can establish the Halloween connection without crowding the photograph.
- Add the identifying information. Include the baby's name, age or first Halloween date where it can be read without becoming the main feature.
- Mount and frame the piece. Photo-safe materials and a generous mat help the finished keepsake look more like nursery art than a scrapbook page.
If you are planning a Halloween celebration as well as a keepsake, the Halloween baby shower ideas page has more seasonal inspiration for colors, decorations and presentation.
A photograph also solves a practical problem. Some babies simply will not cooperate with a perfect handprint, and there is no reason to turn the afternoon into a contest with five tiny fingers. A good photo, one small print and the date can tell the story just as well.
Baby Halloween Keepsakes to Give Grandparents and Family
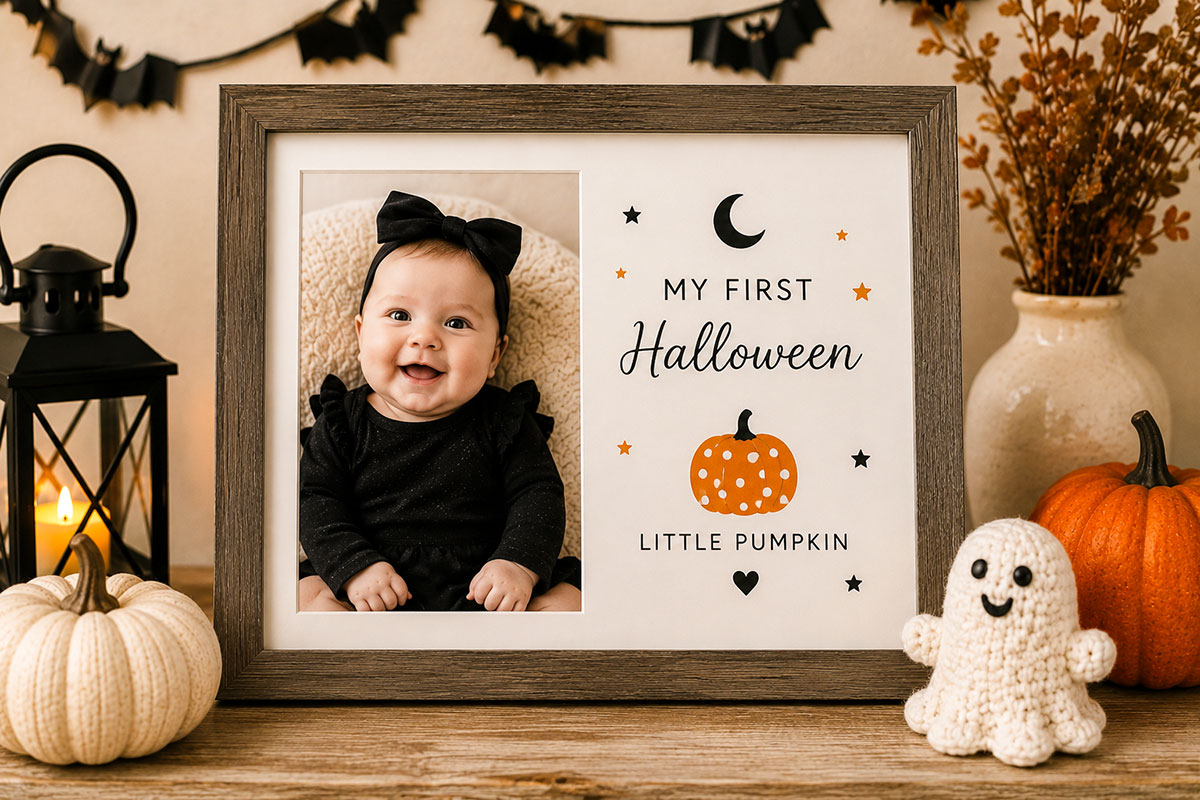
A small Halloween keepsake can make a lovely gift when the design stays focused on the baby rather than the holiday. Grandparents do not need another plastic pumpkin. A framed handprint, clay impression or photograph with the baby's name and date feels personal without becoming something that has to be packed away with party decorations.
For a grandparent gift, I would keep the design especially simple. Use one handprint or footprint, a short line such as "My First Halloween," the baby's name and the date. A black, white, charcoal or muted pumpkin palette keeps the finished piece easy to display in different rooms.
Easy Halloween Keepsake Gift Ideas
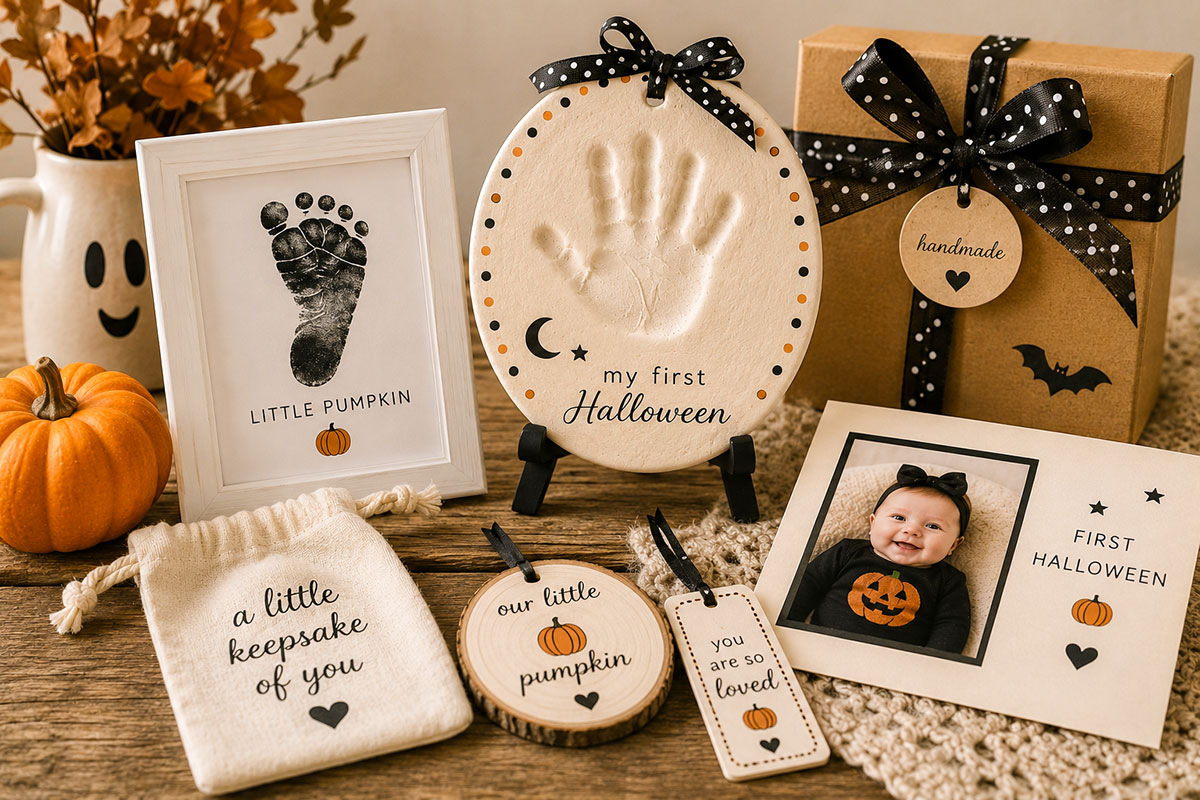
- Framed handprint and photo. Place a small baby photograph beside one handprint and add the date underneath.
- Clay handprint plaque. Add the baby's name and October date with just one small painted pumpkin, moon or star.
- Handprint card in a frame. Make the card from heavyweight paper so the recipient can frame it instead of storing it in a drawer.
- First Halloween shadow box. Combine a photograph, handprint and a small paper label with the baby's name, age and date. Keep loose decorations out of the design.
- Matching family prints. Make several prints from the same session and frame them individually for grandparents, parents or other close family members.
If someone in the family prefers handmade yarn gifts, the Halloween crochet patterns collection has seasonal projects that can be made alongside the keepsake.
There is no need to make every gift identical. The same handprint can be framed one way for a grandparent and paired with a photograph for the baby's own nursery. Using the same print in different layouts also saves you from trying to get several perfect impressions from one very small and possibly very wiggly hand.
Adding Names, Dates and a Finished Display
The baby's name and the date are often what turn a pretty Halloween craft into a real keepsake. Keep them easy to read and small enough that the handprint, photograph or impression remains the focus.
You can include the baby's full name, first name only, age, birth date or the date the craft was made. For a first Halloween keepsake, the year may be all you need. If the piece is meant as a gift, adding "First Halloween" can give it context without covering the artwork with extra wording.
Keep the Lettering Simple
Before writing directly on a finished piece, test the pen or paint on scrap paper first. A fine archival pen works well on paper, while fully dried clay can be lettered with a suitable paint pen or fine brush. Avoid large decorative lettering that competes with the baby's print.
Placement matters, too. A name and date tucked beneath the handprint often look cleaner than text placed across it. On a photo keepsake, leave a narrow area below or beside the photograph rather than putting words over the image.
Choose a Display That Fits the Keepsake
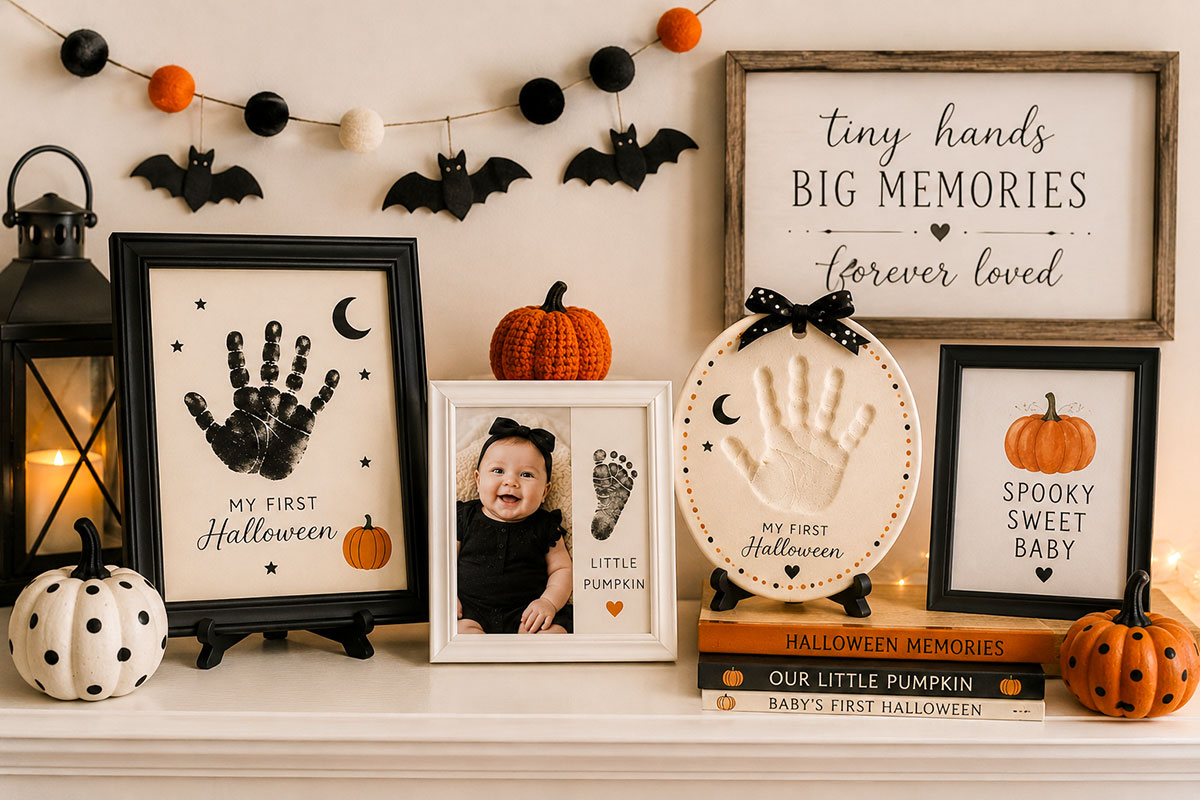
- Matted frame: A good choice for handprints, footprints and photographs on paper.
- Shadow box: Useful when combining a flat print with a clay impression or another dimensional keepsake.
- Small display easel: Works well for a clay plaque on a dresser or shelf that is safely out of reach.
- Gallery wall frame: A simple frame can let the Halloween piece stay with other baby photographs and nursery art instead of looking like temporary holiday decor.
Do not feel that Halloween means everything needs to be orange and black. Charcoal with soft rust, white with deep plum or natural clay with one small black accent can feel seasonal without taking over the room.
I would also leave enough open space around the baby's print. A tiny hand already says plenty. It does not need six pumpkins, three bats and a spider web competing for attention.
Baby Craft and Display Safety
Baby Halloween crafts involve materials that were not made to become toys, so I would treat every finished project as a keepsake for adults to make and display. Paint, clay, pens, frames and decorative pieces should stay out of the baby's mouth and away from curious fingers once the project is finished.
Choose art materials that are clearly labeled for their intended use and follow the manufacturer's directions. The U.S. Consumer Product Safety Commission explains that art materials sold in the United States are subject to labeling requirements and recommends reading product labels when choosing supplies for children's crafts. You can read the CPSC guidance on art materials before choosing paint, clay or other craft supplies.
While Making the Keepsake
- Have an adult handle all paint, clay, cutting tools, pens and other craft materials.
- Use only a paint, ink or print-making material whose label directions permit the intended skin contact, use only the amount needed for the print and clean the baby's skin promptly as directed.
- Do not use paint or another material on irritated, broken or damaged skin.
- Keep scissors, craft knives, paint pens, small embellishments and containers out of reach.
- Follow the drying, curing and cleanup directions provided with each product.
- Stop if the baby becomes uncomfortable rather than trying repeatedly for a perfect print.
Display the Finished Craft Safely
A framed handprint or clay plaque belongs on a wall, shelf or dresser where the baby cannot reach it. Glass frames, breakable clay pieces, hanging cords, small decorations and detachable hardware can all create hazards if they become accessible.
Do not hang a framed keepsake, plaque or decoration over the crib where it could fall into the sleep space. Keep cords and ribbons well away from the crib and changing area, too.
The keepsake does not need to survive playtime. Its job is to preserve the print and look beautiful on display.
Frequently Asked Questions About Baby Halloween Crafts
What Halloween crafts can I make with a baby?
Good choices include framed handprints, footprints, clay impressions, photo keepsakes and simple name-and-date artwork. For a keepsake you may want to display after Halloween, keep the seasonal decoration secondary to the baby's actual print, photograph or impression.
What can I turn a baby handprint into for Halloween?
A handprint can become a simple pumpkin-inspired print, moon-and-stars nursery art, framed October keepsake or part of a handprint-and-photo display. It does not have to become a ghost, spider or character. Leaving more of the original handprint visible gives the finished piece a cleaner look.
How do I get a clear handprint from a baby?
Have the paper and supplies ready before you begin. Apply a thin, even layer of the chosen print material, press the palm and fingers gently onto the surface and lift the hand straight back up. Make a practice print first when possible. If the baby is tired or unhappy, try again another time rather than repeatedly pressing the hand.
Should I use a handprint or footprint for a Halloween keepsake?
Either can work. Footprints are sometimes easier to capture because babies tend to curl and move their fingers. Handprints show more of the baby's tiny proportions, though, which can make them especially meaningful in framed art. You can also use one of each without turning the design into a busy collage.
Can I make a Halloween keepsake with a newborn?
Yes, but keep the project simple and choose materials carefully. A photograph, footprint or gently made impression may be easier than trying to produce a perfectly open newborn handprint. Follow the directions for every craft material you use and clean the baby's skin promptly after making a print.
What should I put on a baby's first Halloween keepsake?
The baby's name, the year and a handprint, footprint or photograph are enough. You can add "First Halloween" if you want the occasion identified clearly. A small pumpkin, moon or October reference can provide the seasonal touch without covering the part you really want to save.
How can I make a baby Halloween craft look less homemade?
Use fewer decorative elements and better display materials. Heavy paper, simple lettering, a wide mat, a quality frame and a limited color palette can change the entire look. Leave some empty space around the baby's print instead of filling every corner with Halloween decorations.
Can baby Halloween crafts stay up after Halloween?
They can when the Halloween theme is subtle. A handprint dated in October, a natural clay impression or a framed baby photograph with one small seasonal accent can fit easily with other nursery keepsakes after the holiday has passed.
More Handmade Halloween Ideas for Baby
If you want to keep making things for the season, you can take the same simple approach beyond handprints and clay. Choose projects that have a purpose after they are finished, whether that means nursery art, a family keepsake or something handmade to give.
The Halloween crochet patterns collection includes handmade seasonal projects for baby, while baby handprint crafts has more ideas for turning those tiny prints into framed art and gifts.
Halloween gives you plenty of room to play with color and theme. You just do not have to use every bat, ghost and pumpkin at once. Start with the part you want to remember, then let the Halloween touches frame it rather than cover it.
When you click on links to various merchants on this site and make a purchase, this may result in this site earning a commission. This does not affect the price you pay.

UBGI Gold Standard 2026
Reviewed under the site's
editorial checklist.
Photos, decorating ideas, party setups and reader submissions are shared for inspiration unless a page is specifically presented as a pattern, tutorial, reference guide or step-by-step project. Follow the instructions, measurements, safety guidance and manufacturer directions provided for the particular project or product.
About Jan | Contact | Baby Nursery Ideas (Blog) | Site Map | Privacy Policy | Disclosure Policy | Disclaimer | Affiliate Disclosure | Earnings Disclosure | Facebook | Pinterest
I am a participant in the Amazon Services LLC Associates Program, an affiliate advertising program designed to provide a means for us to earn fees by linking to Amazon. As an Amazon Associate I earn from qualifying purchases.
Copyright © 2006-2026. All Rights Reserved.