Quick One-Row-Repeat Crochet Baby Blanket Pattern
By Jan Bay
This quick one-row-repeat crochet baby blanket pattern is for an evening when you want to keep your hands busy without keeping the instructions in your lap. After the setup row, each short single crochet marks the next placement, so the blanket grows through one dependable row of single crochet, half double crochet and double crochet groups. The finished fabric is textured, flexible and much denser than an open shell blanket.
Explore More Free Crochet Baby Patterns
Free Crochet Baby Blanket Patterns
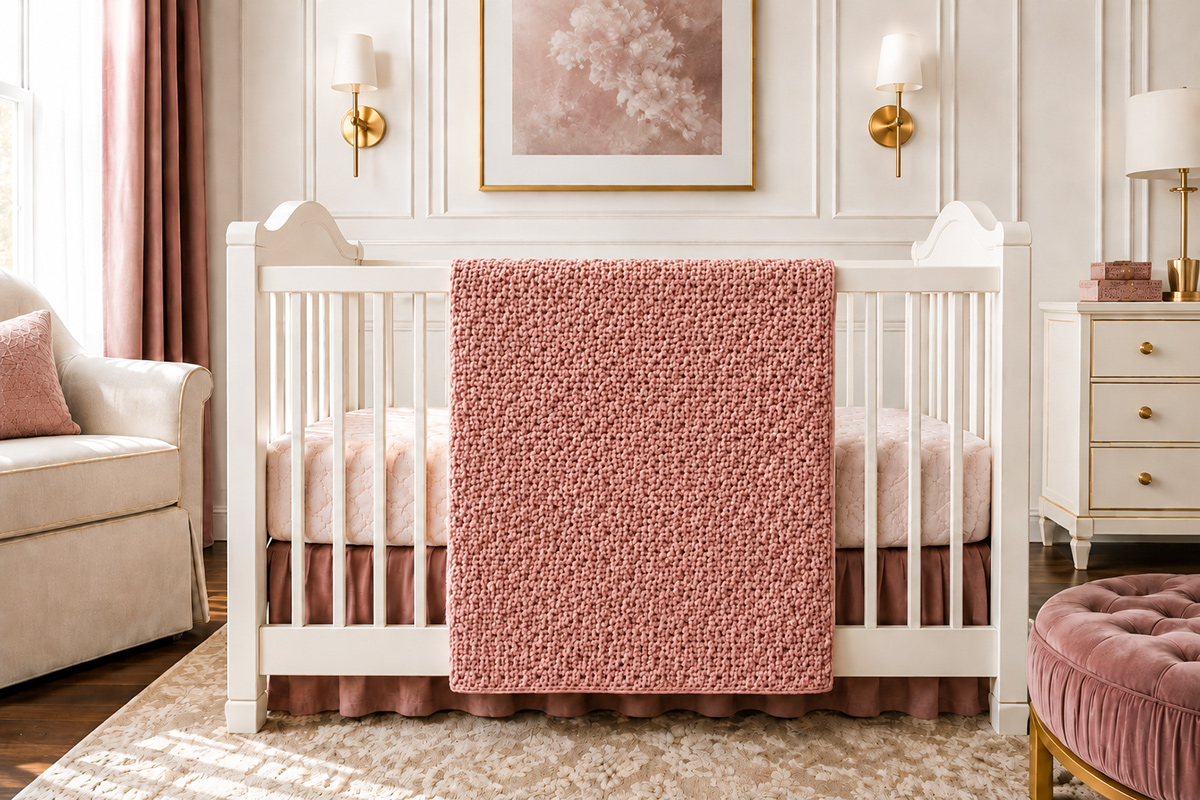
Jump to the Quick One-Row-Repeat Crochet Baby Blanket Pattern
- Pattern at a Glance
- Why This One-Row Repeat Is Easy to Remember
- How Long the Blanket Takes to Crochet
- Yarn, Hook and Supplies
- Finished Baby Blanket Size
- Gauge
- Stitches and Abbreviations
- How to Crochet the Mixed-Height Three-Stitch Group
- One-Row-Repeat Baby Blanket Instructions
- How to Keep the Blanket Edges Straight
- Optional Easy Border
- How to Change the Blanket Size
- Finishing and Care
- Frequently Asked Questions
Quick One-Row-Repeat Crochet Baby Blanket Pattern at a Glance
Project Details
Skill level: Confident beginner
Estimated crochet time: Approximately 7 to 10 hours, depending on experience and pace
Finished size: Approximately 30 by 36 inches before the optional border
Yarn: Approximately 1,050 yards of size 4 worsted-weight yarn
Hook: 6.5 mm crochet hook, or the size needed to match gauge
Main stitches: Single crochet, half double crochet and double crochet
Foundation chain: 74 chains
Finished stitch count: 73 stitches in every completed row
Foundation-chain multiple: Any multiple of 3 plus 2
Pattern repeat: One row repeated until the blanket reaches the desired length
Construction: Worked back and forth from the bottom edge
Use note: This is a baby-size blanket for supervised awake use, not loose bedding for an infant sleep space.
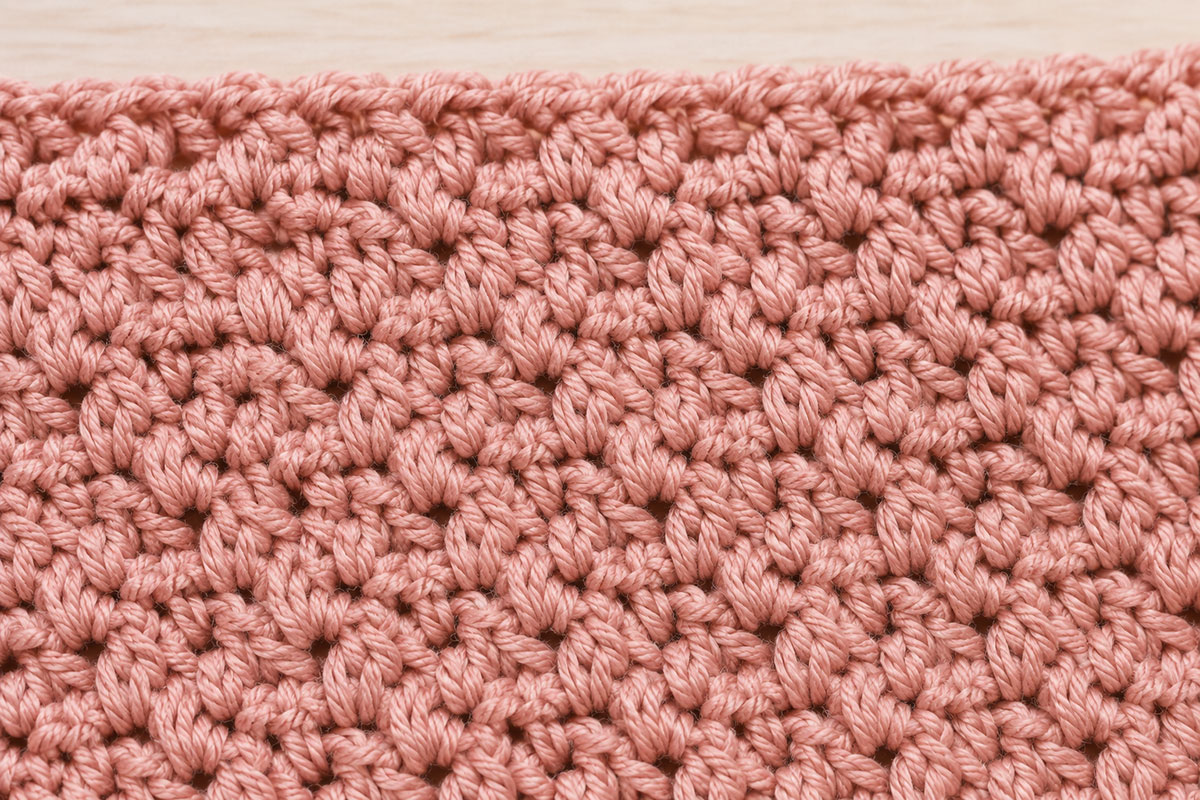
The textured surface comes from placing a single crochet, half double crochet and double crochet together in the same stitch. The different stitch heights create compact groups that settle into a softly pebbled pattern with gentle directional movement.
After the setup row, you will skip the half double crochet and double crochet from the previous row and place the next group in the single crochet. Those single crochets become easy-to-find landmarks across the fabric.
A one-row repeat should make the work easier to follow, not leave you guessing where the next hook placement belongs. This pattern gives you both the short repeat and a clear visual guide.
Why This One-Row Crochet Blanket Repeat Is Easy to Remember
Every completed row begins and ends with a single crochet. Across the center, the half double crochet and double crochet from the previous row are skipped, and the next three-stitch group is worked into the following single crochet.
The short single crochet is the landmark. Once you can see that stitch between the two taller stitches, the placement becomes much easier to recognize without rereading the instructions.
I believe the easiest pattern to finish is not always the one with the fewest rows. It is the one you can put down, pick up and recognize again.
The Entire Repeat in Plain Language
Work one single crochet, one half double crochet and one double crochet in the first single crochet. Skip the next half double crochet and double crochet. Work the same three-stitch group in the next single crochet. Continue across, then skip the final half double crochet and double crochet and work one single crochet in the last single crochet.
The texture makes the blanket convenient to stop and restart. Finish the row, secure the working loop with a locking marker and return later without trying to identify which part of a long stitch sequence came next.
This is a comfortable project for television time, appointments or the hours spent waiting through practices and games. Keep an eye on the two edge stitches, and the middle of the row can move along at a pleasant rhythm.
Leave it beside your favorite chair and add a few rows whenever the day gives you an opening.
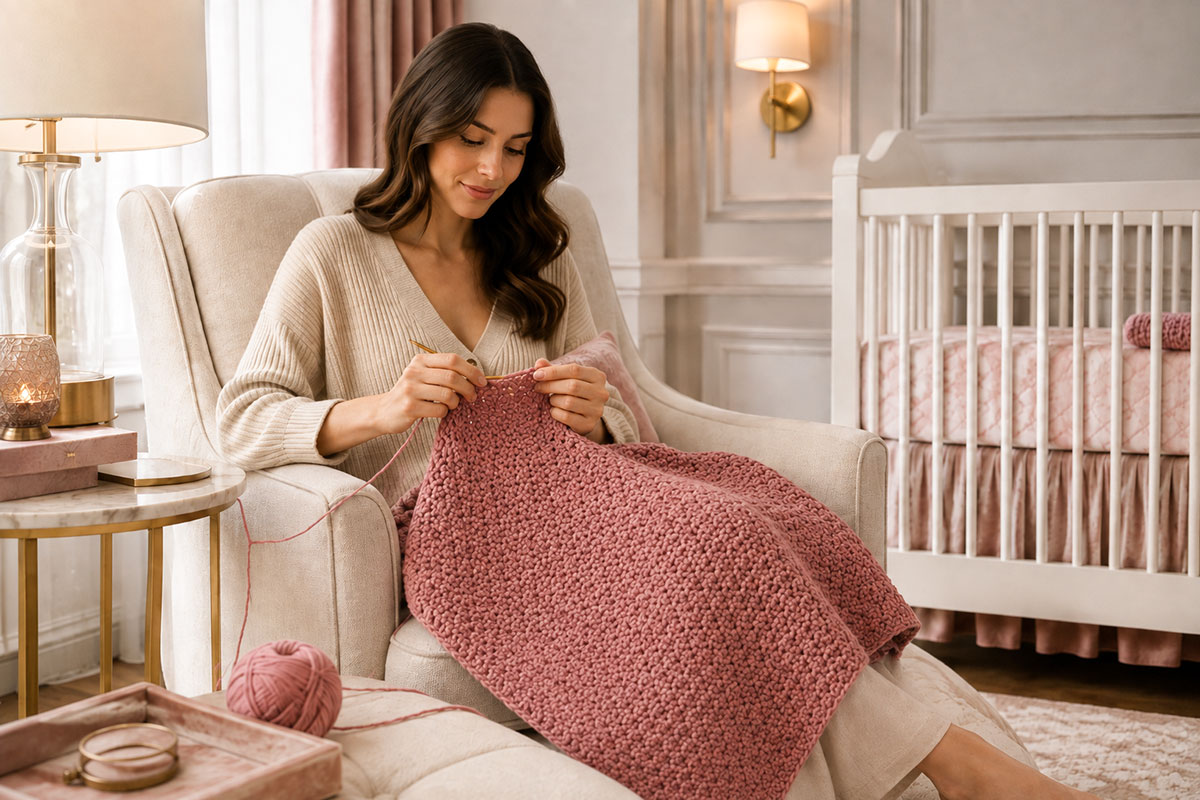
How Long the One-Row-Repeat Baby Blanket Takes to Crochet
An experienced crocheter may complete the 30 by 36-inch blanket in approximately 7 to 10 hours. A beginner should allow additional time for checking stitch placement, counting groups and becoming comfortable with the larger hook.
The first few rows may feel slower because the pattern has not yet developed enough texture to make the single crochets obvious. After several rows, the stitch groups begin to lean in the same direction and the landmarks become much easier to see.
The word “quick” describes the uncomplicated construction and steady progress rather than promising that every crocheter will finish within an exact number of hours. Yarn texture, hand movement, tension and the number of interruptions all affect the completion time.
You could finish the blanket during one long crafting day, but two or three relaxed evenings may be a more comfortable plan. There is no advantage in rushing through the rows and discovering later that the edges have lost stitches.
Yarn, Hook and Supplies for the One-Row-Repeat Blanket
- Approximately 1,050 yards of size 4 worsted-weight yarn for the blanket
- An additional 75 to 100 yards if adding the optional border
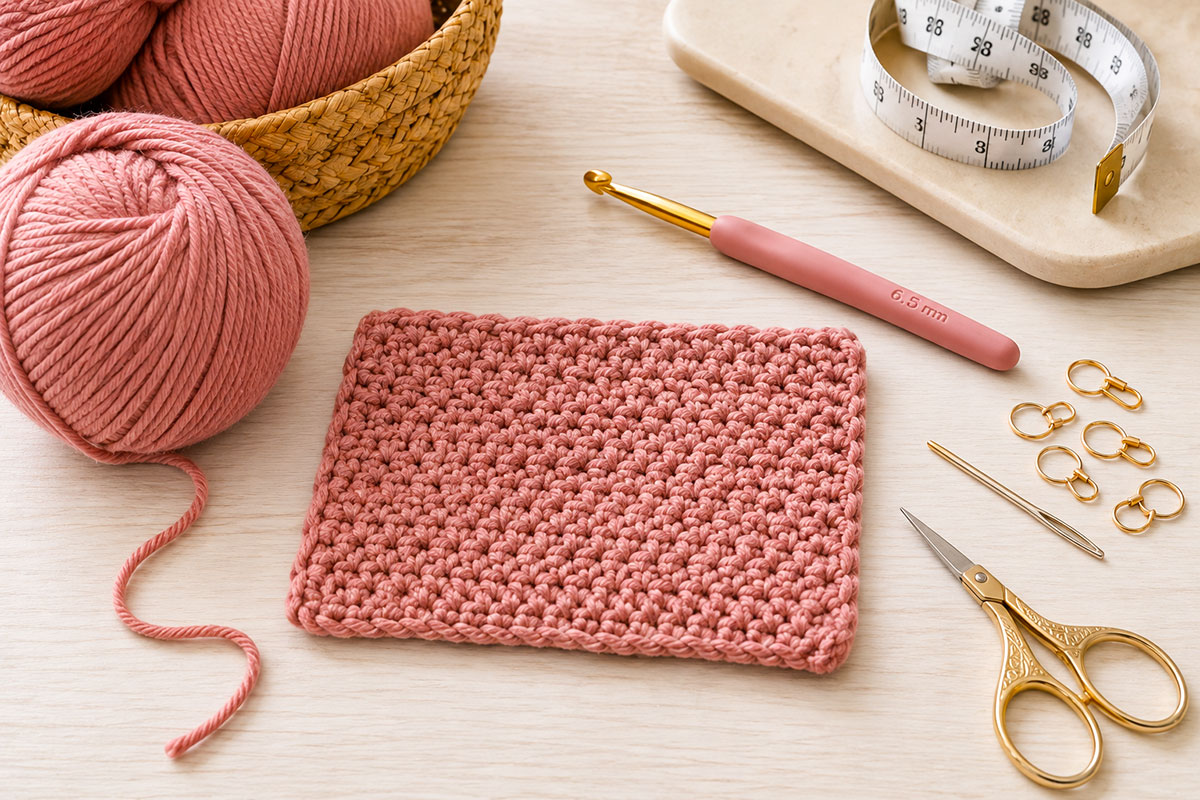
- 6.5 mm crochet hook, or the size needed to match gauge
- Optional 7 mm hook for the foundation chain
- Two locking stitch markers
- Large-eye yarn needle
- Scissors
- Flexible measuring tape
Check the yardage on the yarn label before deciding how many skeins to purchase. Skeins within the same yarn-weight category may contain very different amounts.
A smooth acrylic, cotton-acrylic blend or washable wool blend will make the single crochet landmarks easier to see. Highly textured boucle yarn and fuzzy chenille may hide the stitches that guide the repeat.
A solid color shows the raised pattern clearly and keeps the project free of additional yarn ends. Muted coral, deep rose, spruce green, plum, terracotta and rich lavender would all give the blanket a distinctive nursery look.
Self-striping yarn can also be used, but choose one with gradual color changes. Frequent short changes may compete with the small stitch texture rather than showing it off.
Size 4 is identified as the medium category in the Craft Yarn Council yarn-weight system. The 6.5 mm hook is intentionally generous for this pattern because the extra space helps the fabric drape rather than becoming stiff.
The lightweight crochet baby blanket pattern is another option when you prefer a more open design made with finer yarn.
Yarn for the One-Row-Repeat Blanket
This pattern requires approximately 1,050 yards of smooth size 4 worsted-weight yarn, or up to about 1,150 yards when adding the optional border. Divide the total yardage by the yards in one skein and round up to the next whole skein. Check the fiber, washing instructions, dye lot, package quantity and current availability before ordering.
Check Current Details for Size 4 Worsted-Weight Yarn
As an Amazon Associate I earn from qualifying purchases.
Finished One-Row-Repeat Baby Blanket Size
At the stated gauge, the blanket is designed to measure approximately 30 inches wide by 36 inches long before the optional border. Your finished measurements may vary according to the yarn, hook and tension.
The fabric should feel flexible rather than rigid. The three-stitch groups create texture without producing the heavy weight of a super bulky blanket.
Measure the width after completing five or six rows. A foundation chain can curl or contract before the stitch pattern is established, so it does not always provide an accurate preview by itself.
Lay the blanket flat without pulling the corners or stretching the stitch groups. Measure through the center in both directions.
The 30 by 36-inch dimensions work well for supervised cuddling, floor time, stroller outings or a handmade shower gift. The baby blanket guide explains other common sizes and practical uses.
Gauge for the One-Row-Repeat Texture
Gauge: Approximately 10 stitches and 7 rows measure 4 inches in the established pattern.
Make a swatch with a foundation chain of 29. The foundation follows the same multiple of 3 plus 2 used for the full blanket and provides enough width to form several complete groups.
Follow the setup row and repeating row given below. Work at least 9 rows before measuring.
If more than 10 stitches fit within 4 inches, your stitches are smaller than the pattern gauge. Change to a larger hook.
If fewer than 10 stitches fit within 4 inches, your stitches are larger. Change to a smaller hook.
Row gauge is easier to adjust because you can continue repeating the pattern until the blanket reaches 36 inches. Stitch gauge matters more because it controls the finished width and affects the yardage required.
Do not stretch the swatch while measuring. The staggered groups have some natural movement, and pulling them open can make the gauge appear looser than it is.
Stitches and Abbreviations Used in the Pattern
This pattern uses standard United States crochet terminology.
- ch: chain
- sc: single crochet
- hdc: half double crochet
- dc: double crochet
- sl st: slip stitch
- st: stitch
- sts: stitches
Single crochet: Insert the hook into the indicated stitch, yarn over and draw up a loop. Yarn over again and pull through both loops on the hook.
Half double crochet: Yarn over and insert the hook into the indicated stitch. Yarn over and draw up a loop. Yarn over again and pull through all three loops on the hook.
Double crochet: Yarn over and insert the hook into the indicated stitch. Yarn over and draw up a loop. Yarn over and pull through two loops. Yarn over again and pull through the final two loops.
Three-stitch group: Work one single crochet, one half double crochet and one double crochet in the same stitch.
Turning chain: Chain 1 before turning. The chain does not count as a stitch.
How to Crochet the Mixed-Height Three-Stitch Group
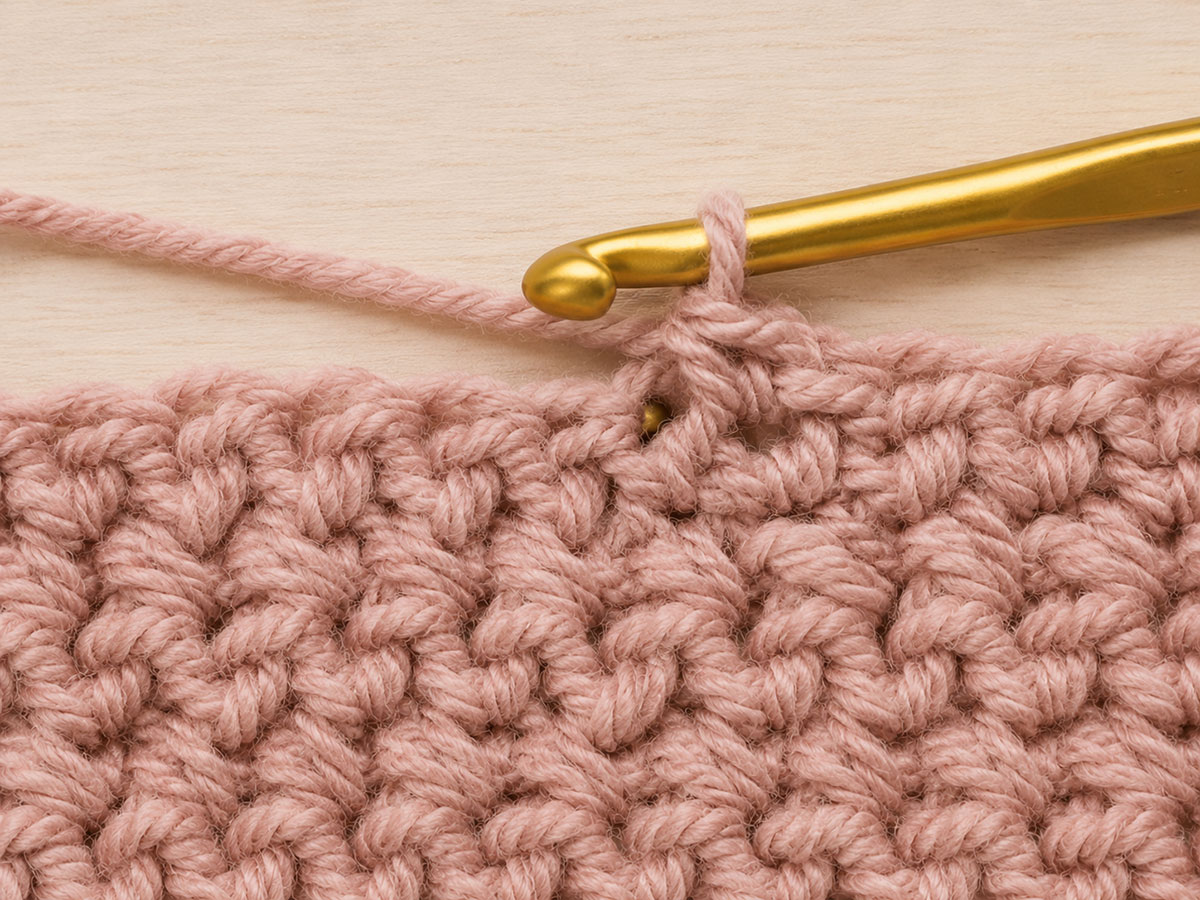
The texture is made by working one single crochet, one half double crochet and one double crochet into the same single crochet. These are three complete stitches placed together, not a puff stitch, joined cluster or traditional crochet shell.
Because the stitches increase in height, each group leans gently toward the double crochet. The groups remain compact, producing a softly pebbled fabric with only small spaces between them.
The shorter single crochet is the landmark in every group. Find that stitch, and the rest of the row falls back into place.
- Locate the first single crochet from the previous row.
- Work one single crochet, one half double crochet and one double crochet in that first single crochet.
- Skip the following half double crochet and double crochet.
- Insert the hook into the next single crochet.
- Work one single crochet, one half double crochet and one double crochet in that same single crochet.
- Repeat the skip-two-and-work-three sequence across the center of the row.
- After the final three-stitch group, skip the following half double crochet and double crochet.
- Work one single crochet in the last single crochet.
Place one locking marker in the first single crochet and another in the final single crochet. The markers separate the true edge stitches from the nearby mixed-height groups.
Quick One-Row-Repeat Crochet Baby Blanket Instructions
Foundation chain: Chain 74 loosely.
The foundation chain follows a multiple of 3 plus 2. If your chains tend to tighten, make the foundation with the optional 7 mm hook and change back to the 6.5 mm hook before starting Row 1.
Row 1: Work one single crochet, one half double crochet and one double crochet in the second chain from the hook.
Skip the next 2 chains. Work one single crochet, one half double crochet and one double crochet in the next chain.
Continue repeating the skip-two-and-work-three sequence across until 3 chains remain.
Skip the next 2 chains and work one single crochet in the final chain. You should have 73 stitches. Chain 1 and turn.
Row 2: Work one single crochet, one half double crochet and one double crochet in the first single crochet.
Skip the following half double crochet and double crochet. Work one single crochet, one half double crochet and one double crochet in the next single crochet.
Continue repeating the skip-two-and-work-three sequence across until 3 stitches remain.
Skip the following half double crochet and double crochet. Work one single crochet in the final single crochet. You should have 73 stitches. Chain 1 and turn.
Rows 3 through 63: Repeat Row 2.
After Row 63, measure the blanket while it is resting flat. Continue repeating Row 2 if additional length is needed to reach approximately 36 inches.
Every completed row contains 73 stitches: twenty-four mixed-height three-stitch groups and one final single crochet.
Count the stitches or three-stitch groups every five rows. The texture can disguise a missed edge stitch for several rows, so a regular count is worth the minute it takes.
On the final blanket row, work the last single crochet but do not chain 1 or turn unless you plan to add the optional border.
If adding the border, chain 1 and turn, then continue with the border instructions below. If leaving the blanket unbordered, cut the yarn with an 8-inch tail after the final single crochet and pull the tail through the final loop.
The One-Row Repeat in Plain Language
Work one single crochet, one half double crochet and one double crochet in the first single crochet. Across the center, skip the previous half double crochet and double crochet, then work the same three-stitch group in the next single crochet. Continue until 3 stitches remain. Skip the final half double crochet and double crochet and work one single crochet in the last single crochet.
How to Keep the Baby Blanket Edges Straight
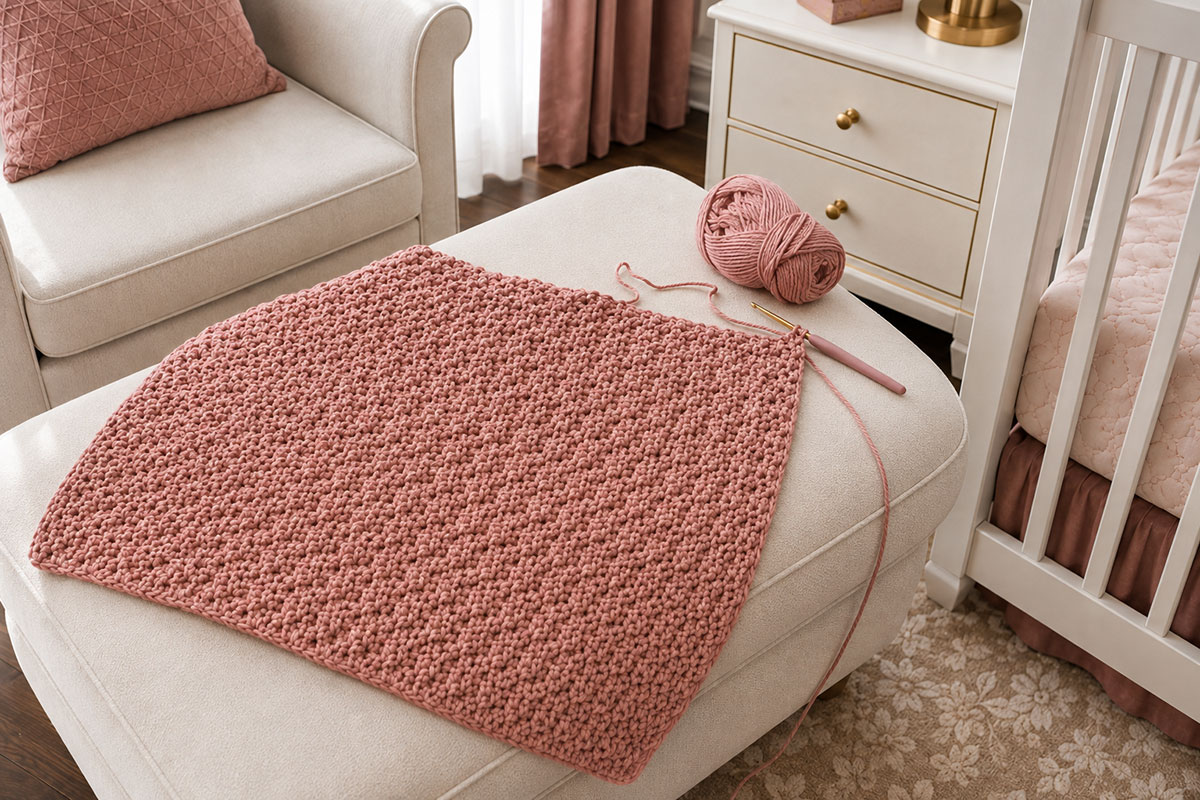
The beginning and ending single crochets deserve a little more attention than the middle of the row. A missed edge stitch changes the count and causes the blanket to narrow gradually.
Keep a locking marker in the first single crochet of the row and move it upward as you work. Place a second marker in the final single crochet.
The chain-1 turning chain does not count as a stitch. Work the first single crochet, half double crochet and double crochet group directly into the marked first single crochet.
At the opposite edge, skip the final half double crochet and double crochet and work one single crochet in the last marked single crochet. Do not work into the turning chain.
If the edge begins leaning inward, stop and count before continuing. Every completed row should contain 73 stitches.
The two edge markers are not fussy little extras. They keep an easy evening project from becoming a blanket that narrows one missed stitch at a time.
A border can neaten a mild wobble. It cannot put missing stitches back into the blanket.
Optional Easy Single-Crochet Border
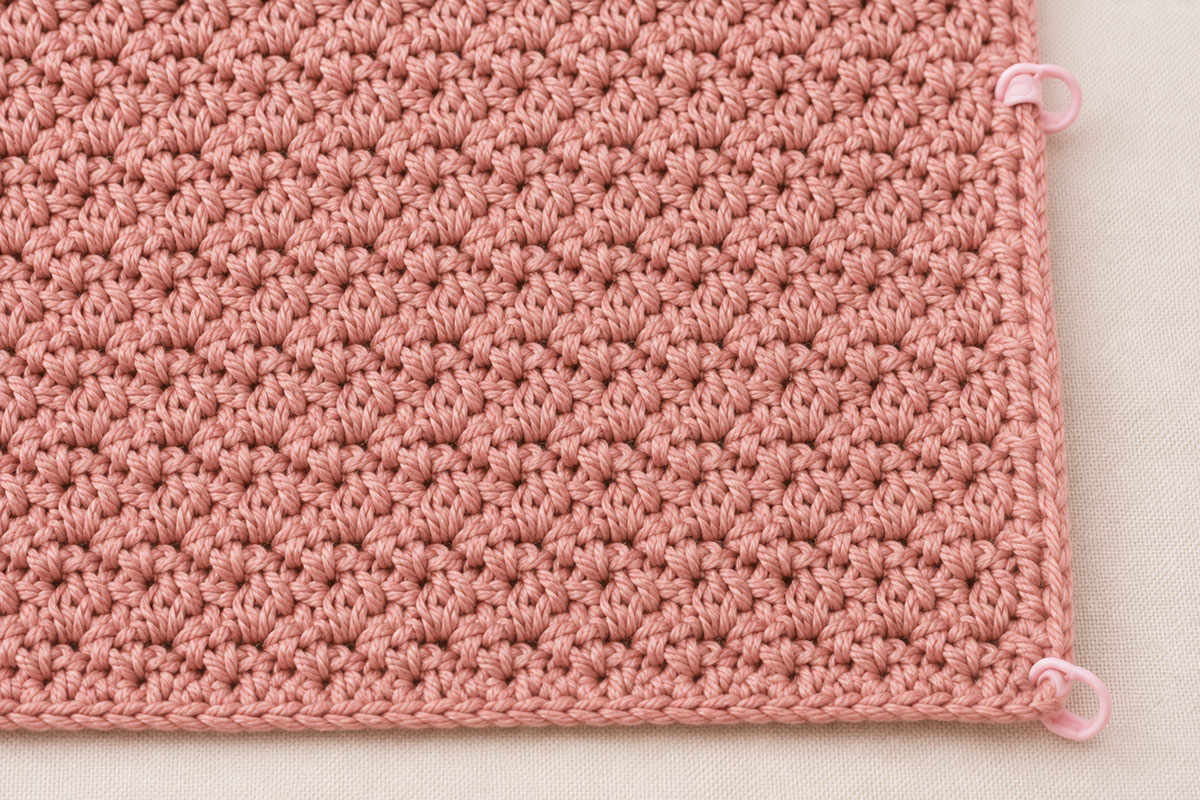
The blanket can be finished without a border. The small staggered groups already create a gently textured top and bottom edge.
Add a border when you prefer a more defined frame or want to smooth minor variations along the sides.
Border round: After completing the final blanket row, keep the chain 1 and turn already made at the end of Row 2. Do not chain again. The chain 1 does not count as a stitch.
Work 3 single crochet stitches in the first stitch. Work 1 single crochet in each stitch across until the final stitch remains. Work 3 single crochet stitches in the final stitch.
Rotate the blanket and work down the first side edge, distributing approximately 10 single crochet stitches across every 7 row ends. Work 3 single crochet stitches in the bottom corner.
Work single crochet stitches evenly across the foundation edge. Use the spacing across the top edge as your guide rather than forcing a stitch into every visible chain loop. Work 3 single crochet stitches in the next bottom corner.
Work up the second side edge at approximately the same rate used on the first side. The starting corner already contains its 3 single crochet stitches.
If the border ripples, remove a few side or foundation-edge stitches. If it pulls the blanket inward, add a few stitches along the affected edge.
Join to the first single crochet with a slip stitch. Fasten off and leave an 8-inch tail for weaving.
Using the same yarn keeps the staggered texture as the main feature. A contrasting border can be attractive, but it creates another set of ends and makes the corner placement more noticeable.
How to Change the One-Row-Repeat Blanket Size
The foundation chain must follow a multiple of 3 plus 2. Add or remove groups of 3 chains while keeping the final plus-2 allowance.
The chart is based on the stated gauge and should be treated as a starting point. Yarn and tension can change the finished measurements.
| Blanket Size | Approximate Dimensions | Foundation Chain | Approximate Rows |
|---|---|---|---|
| Small lovey | 18 by 18 inches | 47 | 32 |
| Small baby blanket | 24 by 30 inches | 62 | 53 |
| Baby blanket | 30 by 36 inches | 74 | 63 |
| Stroller blanket | 30 by 40 inches | 74 | 70 |
| Receiving blanket | 36 by 36 inches | 92 | 63 |
| Small throw | 45 by 55 inches | 113 | 96 |
Complete at least five rows before making a final decision about the width. The foundation chain and first row may not lie as evenly as the established texture.
Larger versions require additional yarn and will take considerably longer than the baby blanket. Purchase enough yarn at the beginning so that the color remains consistent across the project.
More designs made with a range of stitches and yarn weights are gathered on the free crochet baby blanket patterns page.
Finishing, Washing and Caring for the Blanket
Before weaving in the yarn tails, choose the face you prefer as the right side of the blanket. The opposite face becomes the wrong side. Thread each tail through a large-eye needle and weave it through several nearby stitches on the wrong side. Change direction at least once before trimming the excess.
Do not rely on a short knot near the edge. The fabric will move and stretch during washing, and a longer woven tail is less likely to work free.
Wash and dry the blanket according to the care instructions printed on the yarn label. Yarn weight describes thickness rather than fiber content, so two worsted-weight yarns may require different care.
Wash the completed blanket before giving it as a gift. Reshape it on a flat surface and allow it to dry fully before folding or wrapping.
Check the blanket periodically for pulled loops, loose yarn ends or damaged stitches. Set it aside for repair if any section opens or begins to unravel.
Infant Sleep Safety Reminder
Do not place a loose handmade blanket in an infant’s crib, bassinet or play yard. The U.S. Consumer Product Safety Commission recommends a firm, flat sleep surface with a fitted sheet and no blankets, pillows, toys or other soft items. Review the current CPSC infant safe-sleep guidance before using or gifting baby bedding.
Reserve the blanket for supervised cuddling, floor time, stroller outings or nursery display away from an occupied crib.
The baby blanket guide includes more information about blanket uses, materials and infant sleep considerations.
Frequently Asked Questions
Is this really a one-row-repeat crochet pattern?
Yes. Row 1 establishes the stitch placement. Row 2 is repeated for the remainder of the blanket.
Can a beginner crochet this baby blanket?
A beginner who knows single crochet, half double crochet and double crochet can make the blanket. Practice the repeating row on a small swatch before beginning the full foundation chain.
Where do I place each new stitch group?
Skip the half double crochet and double crochet from the previous row. Place the new single crochet, half double crochet and double crochet together in the following single crochet.
Why can I not find the single crochet?
Look for the shorter stitch immediately before each raised half double crochet and double crochet pair. Gently spread the fabric with your fingers without stretching the working loop.
Why is my blanket getting narrower?
The first or last single crochet may have been missed. Mark both edge stitches and confirm that every completed row contains 73 stitches.
Why does the blanket look different from the example?
Yarn twist, fiber content, hook size and tension all affect the texture. Make a gauge swatch and choose a smooth yarn if you want the individual stitch groups to remain clearly visible.
How many skeins of yarn will I need?
Use the yardage printed on the yarn label rather than relying on a general skein count. Divide 1,050 yards by the yards in one skein and round up to the next whole skein. Use approximately 1,150 yards in the calculation if you plan to add the optional border. Purchase the skeins from the same dye lot when possible.
Can I use bulky yarn instead of worsted-weight yarn?
Yes, but you will need a larger hook and fewer foundation chains. Make a swatch, measure the width of several repeats and use a foundation-chain multiple of 3 plus 2.
Can I use blanket yarn?
You can, although plush blanket yarn may hide the single crochets that guide the pattern. Use stitch markers or a smooth practice yarn until the repeat feels familiar.
Can the blanket be made in stripes?
Yes. Change colors after completing a row so every new shade begins at the side edge. Wide bands create fewer ends and allow the textured groups to remain visible.
Does the blanket need a border?
No. The repeating stitch produces an attractive fabric without one. Add the single-crochet border when you prefer a more defined outline or need to smooth the side edges.
Is this faster than a chunky baby blanket?
The repeat is easy to memorize, but worsted-weight yarn creates smaller stitches than bulky or super bulky yarn. The blanket may take longer than a chunky design while producing a lighter fabric with more drape. For a direct comparison, my simple chunky crochet blanket free pattern uses category 5 bulky yarn and one repeating half double crochet row.
Can the blanket be placed in a crib?
Do not place a loose blanket in an infant’s sleep space. Use the finished blanket only for supervised activities and follow current infant safe-sleep guidance.
Where can I find more free crochet projects?
Browse the free baby crochet patterns collection for additional blankets, loveys, nursery decorations and handmade gift ideas.
When you click on links to various merchants on this site and make a purchase, this may result in this site earning a commission. This does not affect the price you pay.

UBGI Gold Standard 2026
Reviewed under the site's
editorial checklist.
Photos, decorating ideas, party setups and reader submissions are shared for inspiration unless a page is specifically presented as a pattern, tutorial, reference guide or step-by-step project. Follow the instructions, measurements, safety guidance and manufacturer directions provided for the particular project or product.
About Jan | Contact | Baby Nursery Ideas (Blog) | Site Map | Privacy Policy | Disclosure Policy | Disclaimer | Affiliate Disclosure | Earnings Disclosure | Facebook | Pinterest
I am a participant in the Amazon Services LLC Associates Program, an affiliate advertising program designed to provide a means for us to earn fees by linking to Amazon. As an Amazon Associate I earn from qualifying purchases.
Copyright © 2006-2026. All Rights Reserved.