Free Printable Leaf Stencils for Crafts and Painting
By Jan Bay
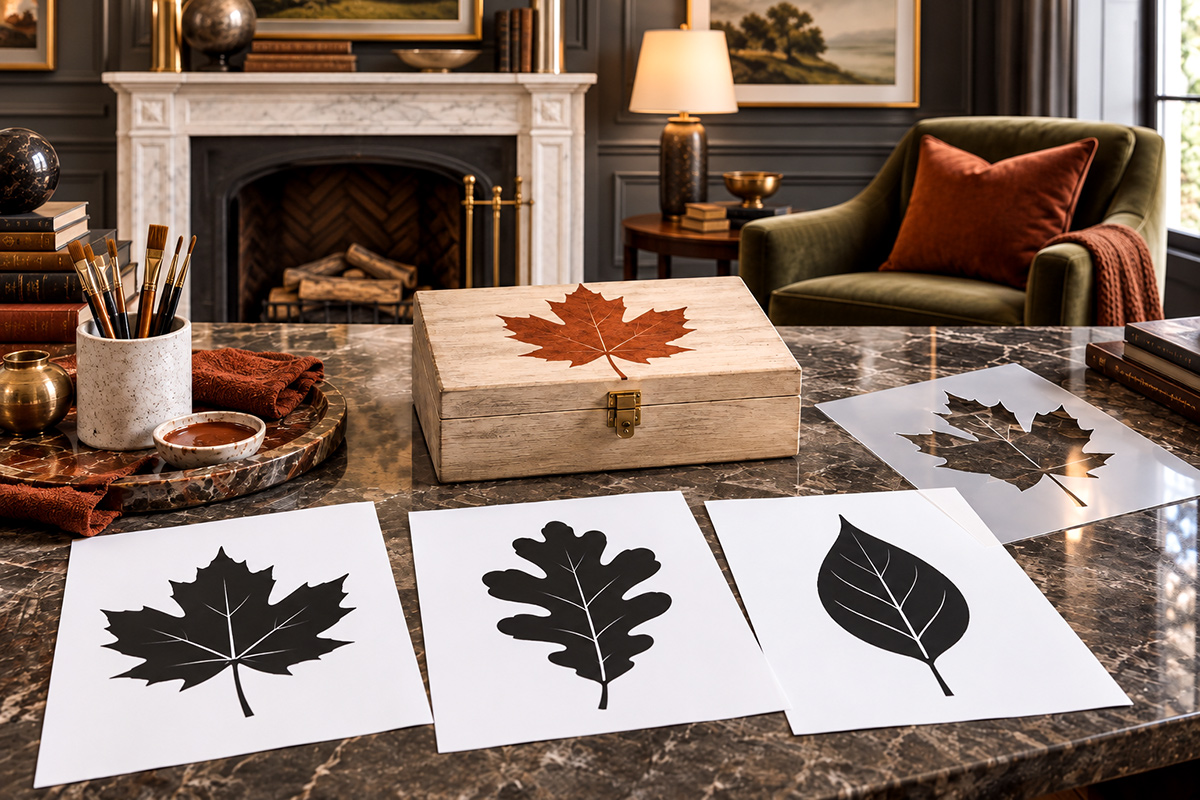
These free printable leaf stencils give you three original leaf designs to use for painted signs, craft projects, storage boxes, furniture, wall accents and seasonal decorating. The set includes a maple-style leaf, an oak-style leaf and a simple pointed leaf, with clean cutout areas and connected bridge channels so each pattern can be transferred to reusable stencil material and resized for the project you have in mind.
Explore More Free Printable Stencils
Reusable Stencil Sheets for Craft and Painting Projects
Jump to:
Free Printable Leaf Stencils to Print and Use
I wanted this set to give you three genuinely different leaf shapes rather than the same leaf enlarged and reduced a few times. You can choose the shape that suits the project, then change the print size if you need something smaller for a card or larger for a sign or furniture panel.
The set includes a maple-style leaf, an oak-style leaf and a simple pointed leaf. They aren't meant to be botanical illustrations. They're stencil patterns, so the shapes use simplified cutting lines and connected interior bridge channels instead of loose enclosed sections.
Maple-Style Leaf Stencil
The maple-style leaf is the one I'd choose when I want the leaf itself to be the main feature. It has the familiar spread-out shape and pointed lobes that read clearly from across the room, which makes it a good choice for a painted sign, a larger storage box or a single furniture accent.
Because those points are part of what gives the leaf its character, don't make this one too tiny. At a very small size, the narrow spaces between the lobes become fussier to cut and the tips are easier to bend or tear. Medium and larger sizes make much more sense for this design.

Download the Free Printable Maple Leaf Stencil PDF
The printable PDF includes the maple leaf stencil in multiple sizes so you can choose the one that fits your project.
Oak-Style Leaf Stencil
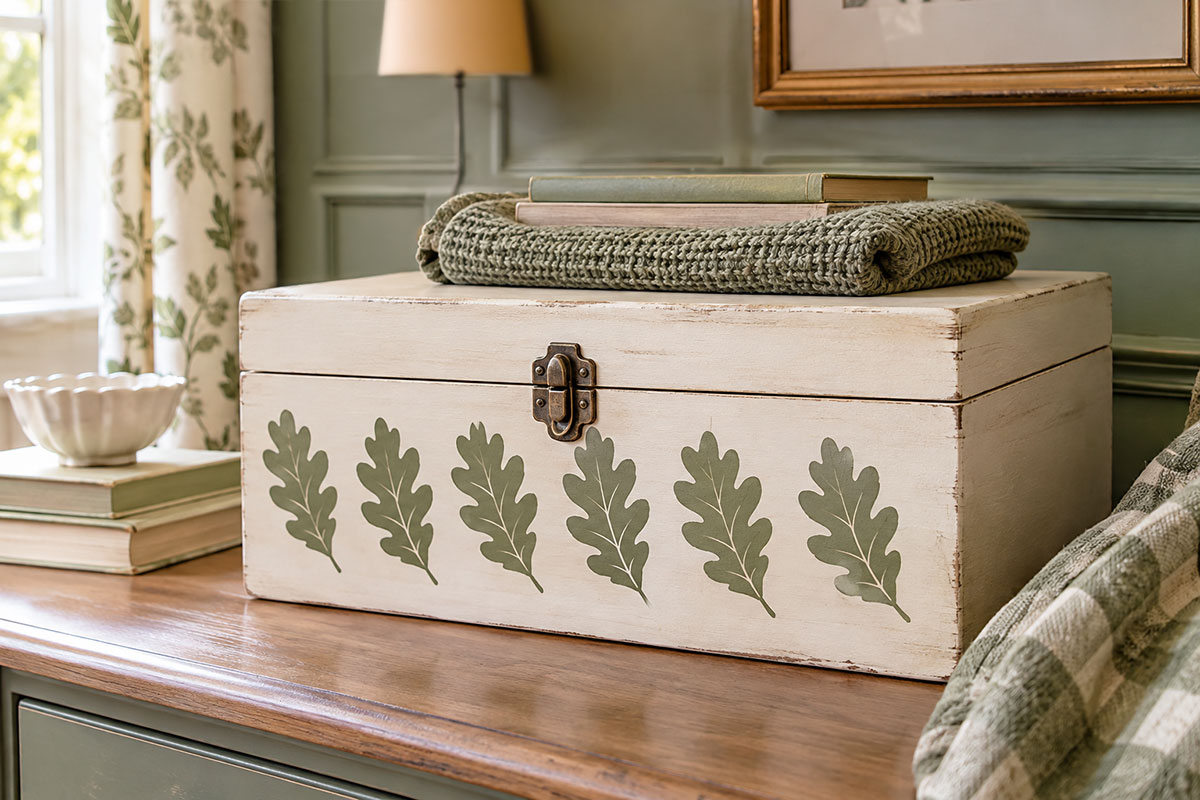
The longer oak-style leaf works differently. Its narrower shape makes it easier to repeat several leaves in a row, turn them slightly in different directions or use them along the edge of a project without taking over the whole surface.
I like this shape for borders, long wooden signs, drawer fronts and nature-themed projects where you want more than one leaf. If you're making a fall project, you can repeat the same stencil in several paint colors instead of adding more shapes just for the sake of variety.

Download the Free Printable Oak Leaf Stencil PDF
The printable PDF gives you the oak-style leaf pattern ready to print and use as a cutting guide for craft and painting projects.
Simple Pointed Leaf Stencil
The simple pointed leaf is the least seasonal of the three, and that's deliberate. It can work on a woodland nursery project, a handmade gift, a storage box or a piece of furniture just as easily as it can on an autumn sign.
It's also the easiest choice if you're new to cutting stencil material. There are fewer tight turns and narrow sections to work around, so I'd start here before tackling the more detailed maple-style leaf.

Download the Free Printable Pointed Leaf Stencil PDF
The printable PDF gives you the simple pointed leaf pattern ready to print and use as a cutting guide for craft and painting projects.
You don't need all three designs on one project. Pick the leaf that fits the space and use that one well. A single leaf repeated with abandon at different angles, but with consistent spacing, can look much better than squeezing several different shapes into a small area. If that idea feels confusing, go outside and look at an actual tree. You'll get it, and probably feel better, too. We all need a little visit with nature every now and again.
Print and Resize Your Leaf Stencils
Each leaf has its own printable PDF. I would print the pattern on ordinary paper first and check it against the surface you want to decorate before transferring it to reusable stencil material.
If the leaf is the right size as downloaded, print the PDF at 100 percent or Actual Size. Printer settings vary, so check the printed pattern with a ruler before cutting your stencil material if the finished size matters for your project.
Smaller Leaf Stencils for Crafts
For a smaller card, gift tag, box or little wooden project, reduce the print percentage in your printer settings. Keep the proportions locked so the leaf becomes smaller without becoming stretched or squashed.
The simple pointed leaf is the easiest of the three to reduce. The maple-style design has more narrow points and spaces between its lobes, so I would keep that one large enough that those areas are still comfortable to cut.
Larger Leaf Stencils for Signs and Furniture
For a larger sign, furniture panel or wall accent, enlarge the pattern in an image or page-layout program before printing, or have it printed at the size you need at a local print shop. Check the finished paper pattern against the project before cutting reusable stencil material.
One useful rule: size the leaf for the space first. Don't automatically make it as large as the surface will hold. Leaving some open space around the motif usually makes the shape easier to see.
How to Cut a Leaf Stencil Without Losing the Details
You can print these patterns on ordinary paper for a one-time transfer, but reusable stencil film makes more sense if you plan to repeat the leaf. Trace or transfer the design onto the stencil material before cutting.
A craft knife gives you better control around the narrow points and inside curves than scissors. Put the stencil material on a cutting mat and turn the material as you work instead of trying to force the knife around every curve from one direction.
Cutting stencil film with a craft knife is an adult craft task. Keep the blade capped or stored safely when you're finished.
Cut the Broad Areas First
Start with the larger, easier cutout areas. That lets you get comfortable with the material before you reach the narrow stem and pointed sections.
Use several light passes with the knife if the stencil material doesn't cut cleanly on the first pass. Pushing harder isn't necessarily better. It can make the blade jump past a corner or slice through a bridge you meant to keep.
Leave the Stem and Narrow Points Until Last
I would cut the narrow stem last. It has less material around it, so cutting it early gives you more chances to bend or tear it while you're turning the rest of the stencil.
The maple-style leaf deserves the same treatment around its pointed lobes. Work toward each point instead of pulling the knife sideways through it. On the oak-style leaf, take your time around the inward curves between the lobes.
Don't Cut Through the Stencil Bridges
The connecting bridges are there on purpose. They hold the inner parts of the design to the surrounding stencil sheet so everything stays together after the cutout areas are removed.
If you're used to cutting ordinary leaf outlines, those little connections may look unnecessary at first. Don't remove them. Without the bridges, an enclosed section can simply drop out and the stencil won't produce the intended design.
Once the cutting is finished, place the stencil flat and check every edge. Trim any tiny piece that is still attached, but don't keep fussing with a clean edge just to make it look perfect. A smooth, usable opening matters more than a microscopic difference in the cut line.
How to Paint with a Leaf Stencil and Keep the Edges Clean
The biggest mistake with stenciling is usually too much paint. You need much less on the brush or sponge than you'd use for ordinary painting.
Secure the stencil before you begin. Low-tack painter's tape works well around the outside. Repositionable stencil adhesive can be useful on a larger or more detailed stencil, especially around narrow leaf tips that want to lift away from the surface.
Dip the stencil brush or sponge lightly into the paint, then remove most of that paint on a scrap piece of paper or another disposable surface. The tool should feel almost dry before it touches the stencil.
Apply several light coats instead of one wet coat. With a stencil brush, use a straight up-and-down pouncing motion or a very light circular motion rather than sweeping a loaded brush underneath the stencil edge.
Near a narrow point or stem, work from the stencil edge toward the opening. That helps keep paint from being pushed underneath the delicate edge.
Before You Lift the Stencil
Take a quick look for any spot that needs another light coat, then lift the stencil straight up as carefully as you can. Don't drag it across the fresh paint.
If you're repeating the same leaf in a border, check the underside before moving to the next position. A smear of wet paint on the back can transfer to the project even if the front of the stencil looks perfectly clean.
For repeated motifs, I'd mark the spacing before painting the first leaf. Two little pencil reference marks can save you from reaching the far end of a border and realizing the last space is half the size of all the others.
Choosing Paint for the Project
Choose paint that is made for the surface you're decorating and follow the paint manufacturer's preparation, drying and curing directions. Wood, fabric, walls and previously painted furniture don't necessarily need the same product or preparation.
If the finished project is going into a child's room or will be handled by a child, read the product label rather than assuming every craft paint is meant for every use. The U.S. Consumer Product Safety Commission's information about art materials explains the labeling and hazard requirements that apply to art supplies.
Leaf Stencil Project Ideas Beyond Fall Crafts
Leaves fit autumn projects easily, but I wouldn't pack these stencils away with the pumpkins in November. The shapes are simple enough to use in woodland, nature and everyday decorating too.
Paint One Large Leaf on a Wooden Sign
For the maple-style leaf, I'd keep the project simple. Center one larger leaf on a small wooden sign and let the shape do the work. You can use an autumn color if you want a seasonal sign, but the same pattern in muted green or another room color doesn't have to look like fall at all.
Repeat the Oak-Style Leaf as a Border
The oak-style leaf is the one I'd use when I want a repeating pattern. Try a row along the front of a storage box, a furniture panel or the lower edge of a wooden sign.
Before painting, lay out the whole row with light pencil marks. Decide whether every leaf will point the same way or alternate directions. Make that decision before the paint comes out.
Use the Pointed Leaf for a Woodland Accent
The simple pointed leaf works well when a project needs a little detail rather than a large focal point. A few spaced leaves can add a woodland touch to a nursery storage box or decorative wall piece without turning the project into an autumn display.
I'd also choose this one if you want to combine a leaf with another motif. Its simpler outline won't fight with a more detailed design.
Make a Loose Scatter of Leaves
You don't have to line every stencil up in a row. On a larger sign or panel, turn the leaf between impressions and vary the spacing. Keep enough empty space between the motifs that you can still see each individual leaf.
If you're using more than one of the three designs, I'd limit the paint colors. Three leaf shapes plus five or six colors can get busy fast. A small coordinated palette lets the different silhouettes provide the variety.
Pair Leaves with Another Stencil Motif
If you want a nature-themed project with a little more detail, pair one leaf shape with a flower or butterfly rather than covering the entire surface with leaves. You can find more choices in the free printable stencil patterns collection.
For a softer botanical combination, use one of the free flower stencils. If you want a separate focal motif instead, the free butterfly stencil works without turning the leaf page into a mixed-pattern collection.
Leaf Stencil Tips for Points, Stems and Clean Edges
Leaf stencils have a couple of fussy spots that don't show up as much on a big block letter or a round shape. The stems are narrow, the tips can lift, and some of the curves change direction quickly. A few small adjustments make those areas much easier to manage.
If a Leaf Tip Keeps Lifting
Secure the tip before you paint around it. A tiny piece of low-tack tape can sometimes hold an outside edge. For an interior point, repositionable stencil adhesive is often more practical because it supports the stencil without covering the opening.
Use less paint around that spot, not more. A wet sponge pressing against a loose point is an easy way to push paint underneath it.
If Paint Bleeds Under the Edge
First, check the amount of paint on your brush or sponge. If it's wet enough to leave a heavy coat in one pass, there's probably too much.
Also check whether the stencil is lying flat. A perfectly dry brush can't give you a crisp shape if part of the stencil is bowed away from the surface.
If you do get a small bleed, let the paint dry before trying to correct it. Wiping wet paint around the edge can turn one tiny mistake into a much larger smear.
If a Stem Feels Too Delicate to Cut
Don't automatically make the stem thinner because the original leaf has a fine stem in nature. This is a stencil, not a botanical drawing. The stem needs enough width to survive cutting, positioning, painting and lifting.
If you're reducing the entire stencil substantially, check the stem before you cut. At very small print sizes, it may make more sense to use the simple pointed leaf rather than forcing the more detailed pattern into a size it wasn't meant to handle.
If You Want a Crisp Repeating Border
Measure the usable width of the project first. Then decide how many leaves you want and roughly how much space should sit between them.
For an odd number of leaves, mark the center of the project and place the middle leaf first. Work outward from there. For an even number, mark the center gap and work outward on both sides.
That little bit of measuring is worth doing. Guessing the spacing leaf by leaf is how a tidy border turns into three nice leaves followed by one squeezed into the corner.
Clean the Stencil Before Paint Dries Heavily on It
Follow the directions for the paint and stencil material you're using. Don't scrape aggressively at thin bridges or pointed areas just to remove every trace of dried color. A reusable stencil only needs to stay flat and keep its cut edges clear enough to produce the next impression.
Let it dry flat before storing it. If you have several stencil sheets, keeping a piece of plain paper between them makes it easier to separate the designs later without catching one narrow cut edge on another.
Choose the Leaf That Fits the Job
If you want one bold focal leaf, use the maple-style design. For a border or repeated pattern, I'd choose the oak-style leaf. For small crafts, woodland accents or the easiest cutting, use the pointed leaf.
That's really enough. You don't need a folder full of almost identical leaf shapes when three noticeably different designs cover the jobs these stencils are meant to do.
For another project, return to the free printable stencil patterns page and choose the motif that fits what you're making.
When you click on links to various merchants on this site and make a purchase, this may result in this site earning a commission. This does not affect the price you pay.

UBGI Gold Standard 2026
Reviewed under the site's
editorial checklist.
Photos, decorating ideas, party setups and reader submissions are shared for inspiration unless a page is specifically presented as a pattern, tutorial, reference guide or step-by-step project. Follow the instructions, measurements, safety guidance and manufacturer directions provided for the particular project or product.
About Jan | Contact | Baby Nursery Ideas (Blog) | Site Map | Privacy Policy | Disclosure Policy | Disclaimer | Affiliate Disclosure | Earnings Disclosure | Facebook | Pinterest
I am a participant in the Amazon Services LLC Associates Program, an affiliate advertising program designed to provide a means for us to earn fees by linking to Amazon. As an Amazon Associate I earn from qualifying purchases.
Copyright © 2006-2026. All Rights Reserved.