Free Crochet Clown Pattern for a Vintage Circus Doll
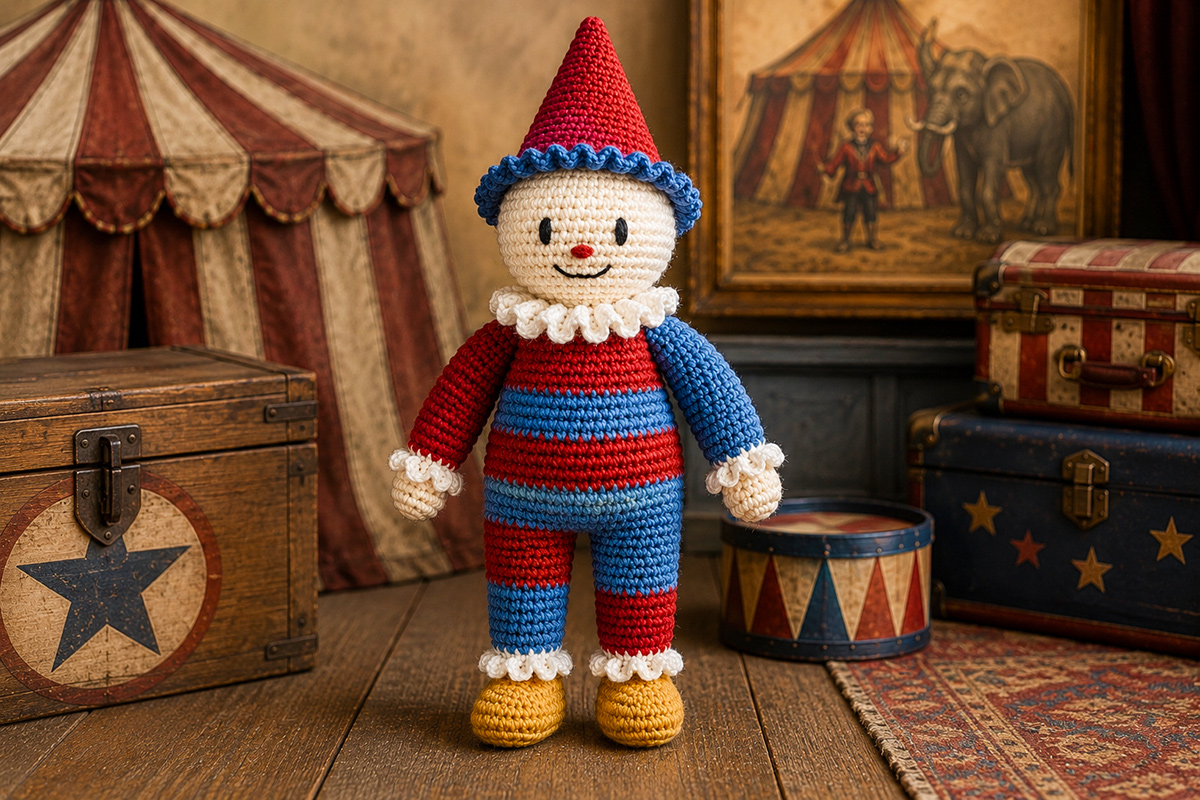
This free crochet clown pattern makes a vintage circus doll with a pointed hat, ruffled collar and embroidered face. The finished clown has a classic big top look without the exaggerated features of a scary clown, making it a distinctive handmade project for circus nursery decor, baby shower gifting or a keepsake collection.
Explore More Free Crochet Baby Patterns
Yarn for the Crochet Clown
Jump to the Crochet Clown Pattern
Materials and Supplies for the Crochet Clown
This clown is made with medium weight yarn and a smaller hook than you might use for a blanket. The tighter fabric helps the stuffing stay inside and gives the face, hands and hat a clean shape. The head and body are crocheted as one continuous piece, so there is no separate neck seam to sew.
- Approximately 60 yards #4 medium/worsted yarn in warm ivory or another skin tone
- Approximately 80 yards #4 medium/worsted yarn in deep circus red
- Approximately 70 yards #4 medium/worsted yarn in dusty blue
- Approximately 35 yards #4 medium/worsted yarn in warm mustard for the shoes
- Approximately 30 yards #4 medium/worsted yarn in white for the cuffs and ruffled collar
- Small amounts of black yarn or embroidery floss for the eyes and mouth
- Small amount of muted red or rose yarn or embroidery floss for the nose
- 3.5 mm crochet hook, or the size needed to make firm fabric without visible gaps
- Polyester fiberfill, approximately 3 to 4 ounces
- Yarn needle
- Embroidery needle if using embroidery floss
- Stitch marker
- Scissors
- Straight pins or locking stitch markers for checking placement before sewing
If your yarn label uses numbered yarn weights, look for a #4 medium yarn. You can compare yarn categories with the Craft Yarn Council yarn weight system. The 3.5 mm hook in this pattern is intentionally smaller than the hook often used for ordinary worsted weight projects because the doll needs a dense fabric.
Color Key
- Color A: warm ivory or chosen skin tone
- Color B: deep circus red
- Color C: dusty blue
- Color D: warm mustard
- Color E: white
You do not need to match these colors exactly. What matters is the balance. Keep the face simple, use two contrasting suit colors, and reserve white for the collar and cuffs. The pointed hat, mismatched sleeves and broad color bands carry the circus theme without requiring an exaggerated clown face.
Before You Start
This pattern is written in U.S. crochet terms. Unless a step says otherwise, work through both loops and work in continuous rounds. Place a stitch marker in the first stitch of every round and move it as you work.
Keep your tension firm enough that the fiberfill does not show through the stitches. Do not pull so tightly that the fabric becomes difficult to shape. Stuff the head more firmly than the upper arms and legs so the doll keeps its proportions.
The face uses embroidery instead of plastic eyes or buttons. The hat is crocheted and sewn in place, and the collar is worked directly into the neck loops. There are no loose decorative pieces needed to create the finished look.
If you would like another project to coordinate with this one, browse the free baby crochet patterns for blankets, mobiles and other handmade nursery projects.
Finished Size and Gauge
The finished crochet clown measures approximately 12 1/2 inches from the tip of the pointed hat to the bottom of the shoes when made with #4 medium yarn and a 3.5 mm hook. Small differences in yarn thickness, tension and stuffing can change the final measurement.
- Finished height: approximately 12 1/2 inches including hat
- Head width: approximately 3 1/4 inches
- Body width: approximately 2 3/4 to 3 inches at the widest point
- Arm length: approximately 3 inches
- Leg and shoe length: approximately 3 1/2 inches
Gauge
Approximately 18 single crochet stitches and 20 rounds equal 4 inches in firmly worked single crochet.
Exact gauge is less important than the fabric itself. Stretch a small section between your fingers before you continue. If you can clearly see spaces large enough for fiberfill to work through, change to a smaller hook. If the stitches are difficult to enter, go up one hook size.
Keep the same hook and tension throughout the head, body and limbs. A sudden change in tension can make one arm or leg noticeably larger than the other.
The doll is intentionally narrow through the body with a slightly larger round head. Avoid adding too much stuffing to the torso. A very firm torso can push the body outward and hide the vintage doll proportions.
Crochet Abbreviations Used in This Pattern
- MR: magic ring
- ch: chain
- sc: single crochet
- dc: double crochet
- inc: work 2 single crochet stitches in the same stitch
- dec: single crochet decrease over the next 2 stitches
- sl st: slip stitch
- st: stitch
- sts: stitches
- BLO: back loop only
- FLO: front loop only
Numbers in brackets show the stitch count at the end of the round. Instructions followed by a repeat count are repeated that number of times around.
An invisible single crochet decrease is useful on the head and body because it reduces the little openings that can appear beside an ordinary decrease. If you prefer a standard single crochet decrease, you can use it throughout as long as your fabric remains firm.
Free Crochet Clown Pattern Instructions
The construction keeps the major shapes uncomplicated while giving the finished doll several details that make it recognizable. The head and body are one piece. The collar grows from loops left at the neckline. The hat leaves a separate sewing line under the brim. The two sleeves and trouser legs reverse colors, so the clown looks intentionally mismatched rather than randomly striped.
Head and Body
Begin with Color A. Work in continuous rounds.
Round 1: Make 6 sc in a MR. [6]
Round 2: Inc in each st around. [12]
Round 3: (Sc in next st, inc in next st) 6 times. [18]
Round 4: (Sc in next 2 sts, inc in next st) 6 times. [24]
Round 5: (Sc in next 3 sts, inc in next st) 6 times. [30]
Round 6: (Sc in next 4 sts, inc in next st) 6 times. [36]
Round 7: (Sc in next 5 sts, inc in next st) 6 times. [42]
Rounds 8 through 14: Sc in each st around. [42]
Round 15: (Sc in next 5 sts, dec) 6 times. [36]
Round 16: (Sc in next 4 sts, dec) 6 times. [30]
Round 17: (Sc in next 3 sts, dec) 6 times. [24]
Round 18: (Sc in next 2 sts, dec) 6 times. [18]
Begin stuffing the head. Add small pieces of fiberfill at a time and push them toward the outer curve of the head before adding more. Keep the front of the face rounded rather than pointed.
Round 19: Sc in each st around. [18]
Change to Color B.
Round 20: Working in BLO, (sc in next 2 sts, inc in next st) 6 times. [24]
Do not crochet into the unused front loops from Round 19. Those 18 loops will be used later for the ruffled collar.
Round 21: (Sc in next 3 sts, inc in next st) 6 times. [30]
Round 22: (Sc in next 4 sts, inc in next st) 6 times. [36]
Round 23: Sc in each st around. [36]
Change to Color C.
Rounds 24 through 27: Sc in each st around. [36]
Change to Color B.
Rounds 28 and 29: Sc in each st around. [36]
Round 30: (Sc in next 4 sts, dec) 6 times. [30]
Round 31: Sc in each st around. [30]
Change to Color C.
Round 32: (Sc in next 3 sts, dec) 6 times. [24]
Round 33: (Sc in next 2 sts, dec) 6 times. [18]
Stuff the body. Fill the shoulder and neck area well enough to support the head, then use slightly less stuffing through the lower torso. Shape the body with your hands before closing the opening.
Round 34: (Sc in next st, dec) 6 times. [12]
Round 35: Dec 6 times. [6]
Fasten off. Thread the tail through the front loops of the remaining 6 stitches, pull the opening closed and bury the yarn end inside the body.
Arms
Make 2. Begin each arm with Color A.
Round 1: Make 6 sc in a MR. [6]
Round 2: Inc in each st around. [12]
Rounds 3 through 5: Sc in each st around. [12]
Round 6: (Sc in next st, dec) 4 times. [8]
Change to Color E.
Round 7: Sc in each st around. [8]
Round 8: Working in BLO, sc in each st around. [8]
For the first arm, change to Color B. For the second arm, change to Color C.
Rounds 9 through 16: Sc in each st around. [8]
Stuff the hand and lower part of the sleeve lightly. Leave the top 2 rounds unstuffed so the arm can lie neatly against the body.
Flatten the opening. Work 4 sc through both layers to close the top. Fasten off and leave a long tail for sewing.
To make the white wrist ruffle, join Color E with a sl st in any unused front loop of Round 7. Work 3 dc in the next unused front loop. (Sl st in the next unused front loop, 3 dc in the next unused front loop) 3 more times. Join with a sl st to the first sl st. Fasten off and weave in the ruffle ends.
The different sleeve colors are deliberate. They break up the broad body stripes and give the clown a collected vintage circus look without adding extra sewn decorations.
Legs and Shoes
Make 2. Begin with Color D. Each shoe starts around both sides of a foundation chain to create an oval toe.
Round 1: Ch 5. Sc in the second ch from the hook and in the next 2 ch. Work 3 sc in the last ch. Turn the foundation chain so you can work along the unused loops on the opposite side. Sc in the next 2 ch. Work 2 sc in the final ch. [10]
Place the stitch marker in the first stitch and continue in rounds.
Round 2: Inc in the next st, sc in the next 2 sts, inc in each of the next 3 sts, sc in the next 2 sts, inc in each of the final 2 sts. [16]
Round 3: Working in BLO, sc in each st around. [16]
Round 4: Sc in each st around. [16]
Round 5: Sc in the next 4 sts, dec 4 times, sc in the final 4 sts. [12]
Round 6: Sc in the next 4 sts, dec 2 times, sc in the final 4 sts. [10]
Change to Color E.
Round 7: Sc in each st around. [10]
Round 8: Working in BLO, sc in each st around. [10]
For the first leg, change to Color B.
First leg, Rounds 9 through 13: Sc in each st around with Color B. [10]
Change to Color C.
First leg, Rounds 14 through 18: Sc in each st around with Color C. [10]
For the second leg, reverse the colors.
Second leg, Rounds 9 through 13: Sc in each st around with Color C. [10]
Change to Color B.
Second leg, Rounds 14 through 18: Sc in each st around with Color B. [10]
Stuff each shoe firmly enough to keep its oval shape. Add a smaller amount of stuffing through the lower leg. Leave the upper 2 rounds unstuffed.
Before closing the top, turn the leg so the shaped toe formed by the decreases in Rounds 5 and 6 points straight forward. Without twisting the leg, flatten the upper opening from side to side. Work 5 sc through both layers to close the top. Fasten off and leave a long tail for sewing.
To make the white ankle ruffle, join Color E with a sl st in any unused front loop of Round 7. Work 3 dc in the next unused front loop. (Sl st in the next unused front loop, 3 dc in the next unused front loop) 4 more times. Join with a sl st to the first sl st. Fasten off and weave in the ruffle ends.
Pointed Circus Hat
Begin with Color B. Do not stuff the hat.
Round 1: Make 4 sc in a MR. [4]
Round 2: Sc in each st around. [4]
Round 3: (Sc in next st, inc in next st) 2 times. [6]
Round 4: Sc in each st around. [6]
Round 5: (Sc in next 2 sts, inc in next st) 2 times. [8]
Round 6: Sc in each st around. [8]
Round 7: (Sc in next 3 sts, inc in next st) 2 times. [10]
Round 8: (Sc in next 4 sts, inc in next st) 2 times. [12]
Round 9: (Sc in next 5 sts, inc in next st) 2 times. [14]
Round 10: (Sc in next 6 sts, inc in next st) 2 times. [16]
Round 11: (Sc in next 7 sts, inc in next st) 2 times. [18]
Round 12: (Sc in next 2 sts, inc in next st) 6 times. [24]
Round 13: Sc in each st around. [24]
Round 14: (Sc in next 3 sts, inc in next st) 6 times. [30]
Round 15: Sc in each st around. [30]
Round 16: (Sc in next 4 sts, inc in next st) 6 times. [36]
Change to Color C.
Round 17: Working in FLO, (sc in next st, inc in next st) 18 times. [54]
Round 18: Sc in each st around. [54]
Fasten off and weave in the final end. The unused back loops from Round 16 form a hidden sewing line under the brim. Leave them accessible until the hat is attached.
Do not pack the hat with fiberfill. Pinch the upper cone gently with your fingers if you want the tip to lean slightly to one side.
Ruffled White Collar
Turn the doll so you can see the 18 unused front loops at the neckline from Round 19. Join Color E to any front loop.
Collar Round 1: Ch 2. Work 2 dc in each unused front loop around. Join with a sl st to the first dc. [36]
Collar Round 2: Ch 1. (Sc in the next st, skip the next st, work 5 dc in the next st, skip the next st) 9 times. Join with a sl st to the first sc.
Fasten off and weave the ends into the underside of the collar.
Use your fingers to separate the 9 scallops so the collar circles the neck evenly. It should flare away from the body instead of folding upward over the face.
Embroider the Clown Face
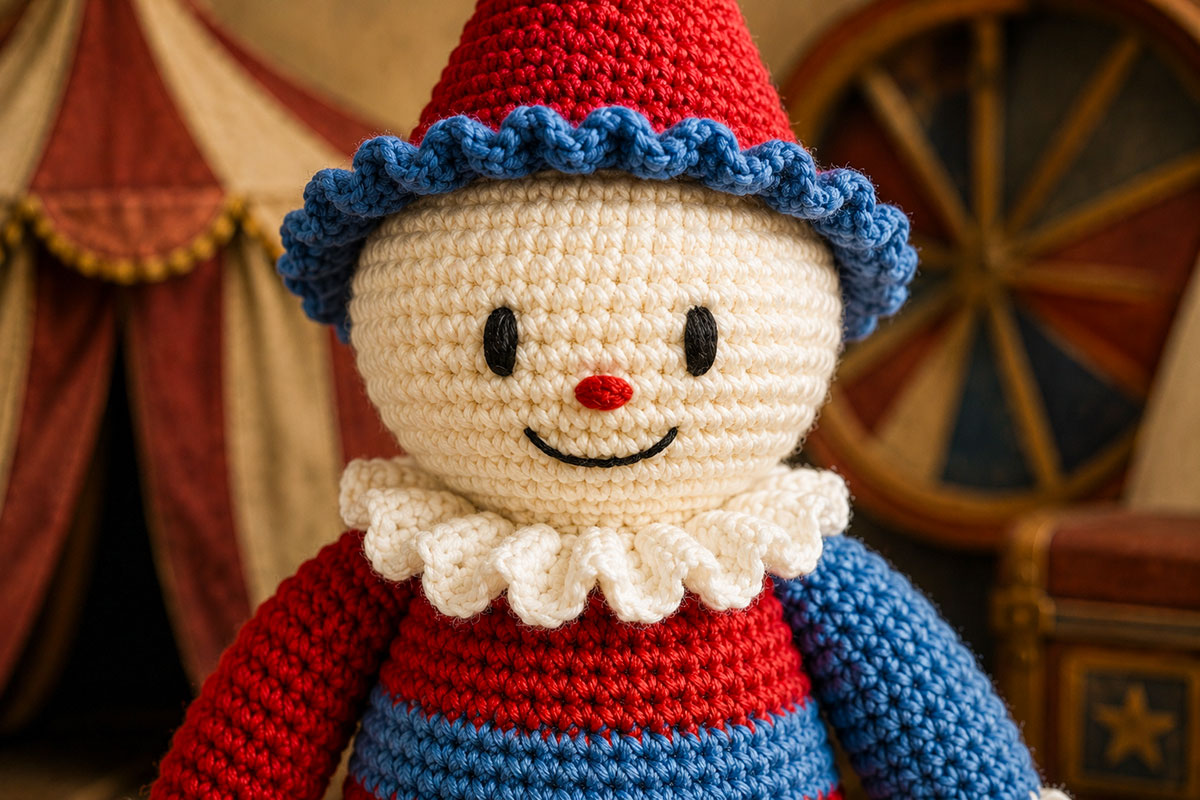
Keep the facial features smaller than the hat and collar details. The goal is a friendly vintage circus doll, not a painted stage clown with oversized features.
Before you thread the embroidery needle, turn the doll so the color changes and any visible round jogs sit toward the back. Use removable stitch markers to test the eye positions before making permanent stitches.
Eye Placement
Place the eyes between approximately Rounds 10 and 12 of the head. Keep the centers about 7 stitches apart.
Using black embroidery floss or a split strand of black yarn, make 3 or 4 vertical satin stitches for each eye. Each finished eye should be approximately 2 rounds tall and about 1 stitch wide.
Keep both eyes the same height. If one looks lower, remove it and reposition it before adding the nose. A difference of even one round is easy to see on a small embroidered face.
Nose
Center the nose between the eyes at approximately Round 13. Use muted red or rose yarn or embroidery floss.
Make 3 or 4 short horizontal satin stitches across an area about 2 stitches wide. Keep the nose small and rounded. Do not pull the stitches tightly enough to dent the head.
Mouth
Use black embroidery floss or yarn. Bring the needle out approximately 1 round below the nose and 2 stitches to one side. Take the thread into the center below the nose, then repeat from the center toward the opposite side.
This creates a shallow stitched smile with only two main lines. Add one tiny anchoring stitch at the center if the threads lift away from the crochet fabric.
When each facial feature is complete, bring its two thread ends out through the same stitch opening at the back of the head. Tie the ends in a secure double knot. Thread one end back onto the needle, insert the needle beside the knot and pull gently so the knot slips just inside the stuffed head. Bury both tails through the stuffing, bring them out several stitches away and trim them only after the knot is secure.
Assemble the Crochet Clown Doll
Before you begin assembly, check that you have the finished head and body with its collar and embroidered face, 2 arms, 2 legs and 1 pointed hat.
Pin the arms, legs and hat in place before sewing anything permanently. Look at the doll from the front and from both sides. The pieces should feel balanced even though the sleeve and leg colors do not match.
1. Attach the Legs
Place the flattened top of each leg against the lower body around Rounds 31 through 33. Leave approximately 4 to 5 stitches between the inside edges of the legs.
Check that both shoes point forward. Sew through the flattened top of the first leg and into the body. Repeat across the attachment line, then work back across it once more for a secure seam.
Attach the second leg the same way. Set the doll upright on a flat surface before burying the yarn tails. Adjust the second leg if one shoe sits noticeably farther forward than the other.
2. Attach the Arms
Place the flattened top of each arm against the sides of the body around Rounds 22 through 24, just below the collar.
Angle the arms slightly downward instead of attaching them straight out from the shoulders. Sew across each flattened top, then return across the seam once more.
The red sleeve and blue sleeve should sit on opposite sides. There is no need to make the lower leg beneath each arm the same color. The reversed color arrangement is part of the circus suit design.
3. Attach the Hat
Place the hat on the head with the front brim sitting comfortably above the embroidered eyes. The brim should frame the face without covering the top of either eye.
Thread a yarn needle with about 36 inches of Color B. Align the 36 unused back loops from Round 16 of the hat with the 36 stitches of Round 6 of the head, keeping the hat centered over the embroidered face. Sew one hat back loop to one stitch of Head Round 6 all the way around. Keep the blue brim free. Knot the sewing yarn securely and bury both ends inside the head.
Work around the head a second time if needed. The hat should remain attached when the tip is moved gently from side to side.
Shape the upper point with your fingers. A slight lean gives the hat more character than a perfectly upright cone.
4. Check the Collar
Spread the 9 collar scallops evenly around the neck. If one section wants to flip upward, use a small matching yarn stitch underneath that scallop to hold it against the shoulder area.
Keep any securing stitches underneath the ruffle so they are not visible from the front.
5. Final Shaping
Roll the head gently between your palms to distribute the fiberfill. Shape the body the same way, then check the neck from the side.
If the head tips too easily, thread a doubled strand of Color A through the stitches around the base of the head near Round 19. Pull only enough to support the neck. Knot securely and bury both ends inside the body.
Before the doll is used or displayed, remove every straight pin, stitch marker and temporary placement marker. Check the arm, leg, hat and collar attachments, and resecure any loose seam or yarn end.
Do not add wire, beads, bells, loose pompoms or removable ornaments to a clown that might be handled by a young child.
If this clown is made for a baby, use it for supervised play or display and keep it out of the crib, bassinet, play yard or other infant sleep space.
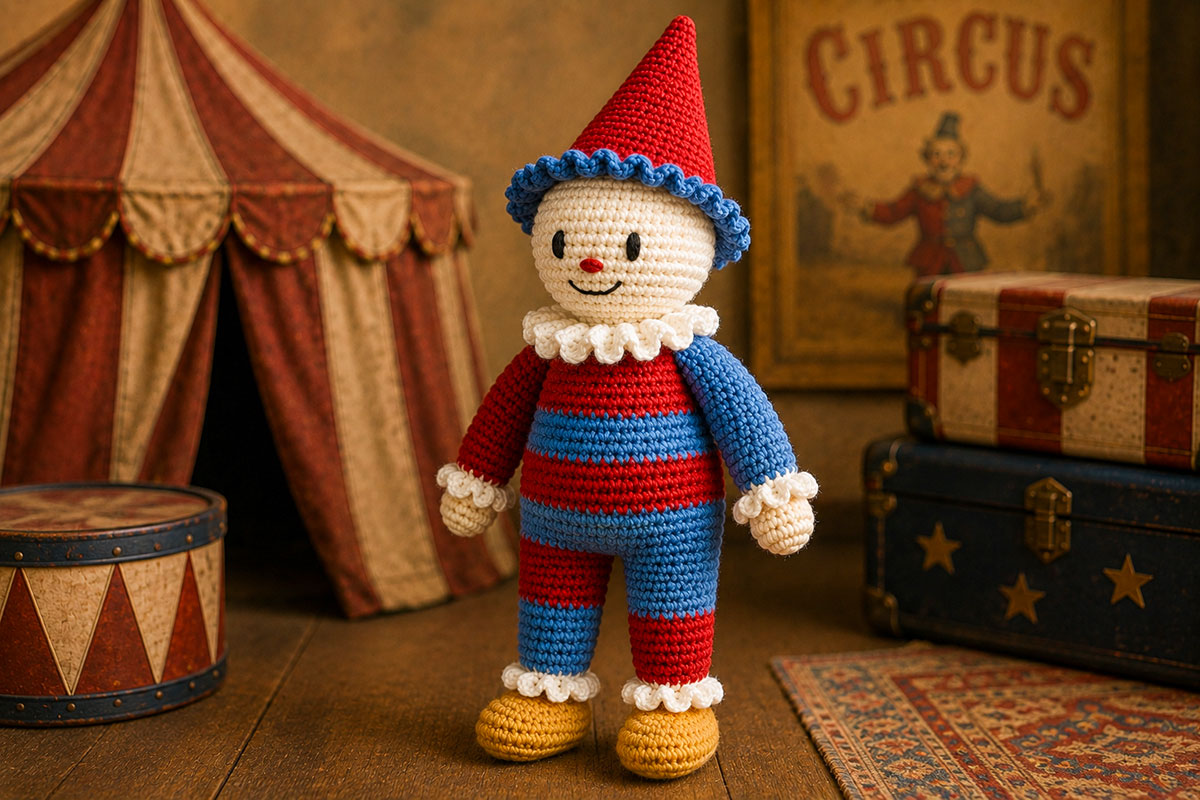
The finished clown can also become part of a larger handmade circus theme. The circus nursery decor ideas show how vintage tents, animals and big top details can be used without turning the whole room into a novelty display.
For another crochet project in the same theme, see the circus popcorn baby blanket pattern or the crochet circus drum baby blanket pattern.
A clown, a blanket and a few well chosen circus details are enough to build a handmade theme without making every object in the room match.
Crochet Clown Pattern FAQ
Is this crochet clown pattern suitable for a beginner?
A confident beginner who already knows single crochet, increases, decreases and working in rounds should be able to make it. The individual stitches are simple. The parts that require more attention are the oval shoes, color changes, face placement and final assembly.
Can I make the clown with cotton yarn?
Yes. A smooth #4 cotton yarn can be used in place of acrylic. Cotton often produces a firmer doll and may change the finished size slightly. Check your fabric before continuing because some cotton yarns have less stretch and may require a different hook size.
Why does the pattern use embroidered eyes instead of safety eyes?
The embroidered face avoids adding hard eye pieces to the doll and works especially well with the vintage style of this design. If a handmade item will be given to a young child, pay careful attention to every attached part and check the finished item regularly for wear.
The U.S. Consumer Product Safety Commission provides small parts and choking hazard guidance for toys and children's products. Anyone making items for sale should also review the requirements that apply to the finished product.
Can I make the crochet clown larger?
Yes. Use a thicker yarn with a hook that still produces firm fabric. The same stitch counts will create a larger doll. Keep in mind that the amount of yarn and fiberfill will increase, and the hat, arms and legs will all grow in proportion with the body.
If you want only a slightly larger clown, changing from a 3.5 mm hook to a 4 mm hook with the same yarn may be enough. Check that the stuffing cannot show through the stitches before making the entire doll.
Can I use different circus colors?
Yes. Deep green, burgundy, navy, rust and mustard can make the clown feel more vintage. Brighter red, turquoise and yellow create a more traditional big top look.
Keep white or another light contrast at the collar and cuffs so those details do not disappear into the suit. The two sleeve colors and reversed trouser colors are worth keeping even if you change the palette.
Why is my clown's head leaning?
First check the stuffing at the neck. The head should be firmly filled through its lower curve, and the upper body should support the neck from below.
If more support is needed after the doll is complete, run a doubled strand of matching yarn through the stitches around the base of the head near Round 19. Pull the strand gently until the neck firms up, knot it securely and bury the ends. Stop before the stitches begin to pucker.
Can I make the suit in one color?
Yes. Work the body from Round 20 through Round 35 in one suit color, and use that same color for both sleeves and the trouser sections of both legs. Keep the white collar and cuffs, the Color D shoes and a contrasting hat brim so the clown details remain easy to see.
The alternating body bands are not required for construction. They are included because they give the doll a circus identity even when the embroidered face stays small and simple.
How should I clean the finished crochet clown?
Follow the care instructions for the yarn and stuffing you used. For a doll that needs regular cleaning, choose washable materials before you begin. Secure every yarn tail inside the doll and inspect the seams after washing.
When you click on links to various merchants on this site and make a purchase, this may result in this site earning a commission. This does not affect the price you pay.

UBGI Gold Standard 2026
Reviewed under the site's
editorial checklist.
Photos, decorating ideas, party setups and reader submissions are shared for inspiration unless a page is specifically presented as a pattern, tutorial, reference guide or step-by-step project. Follow the instructions, measurements, safety guidance and manufacturer directions provided for the particular project or product.
About Jan | Contact | Baby Nursery Ideas (Blog) | Site Map | Privacy Policy | Disclosure Policy | Disclaimer | Affiliate Disclosure | Earnings Disclosure | Facebook | Pinterest
I am a participant in the Amazon Services LLC Associates Program, an affiliate advertising program designed to provide a means for us to earn fees by linking to Amazon. As an Amazon Associate I earn from qualifying purchases.
Copyright © 2006-2026. All Rights Reserved.