Crochet Spider Lovey Pattern with a Friendly Amigurumi Spider
By Jan Bay
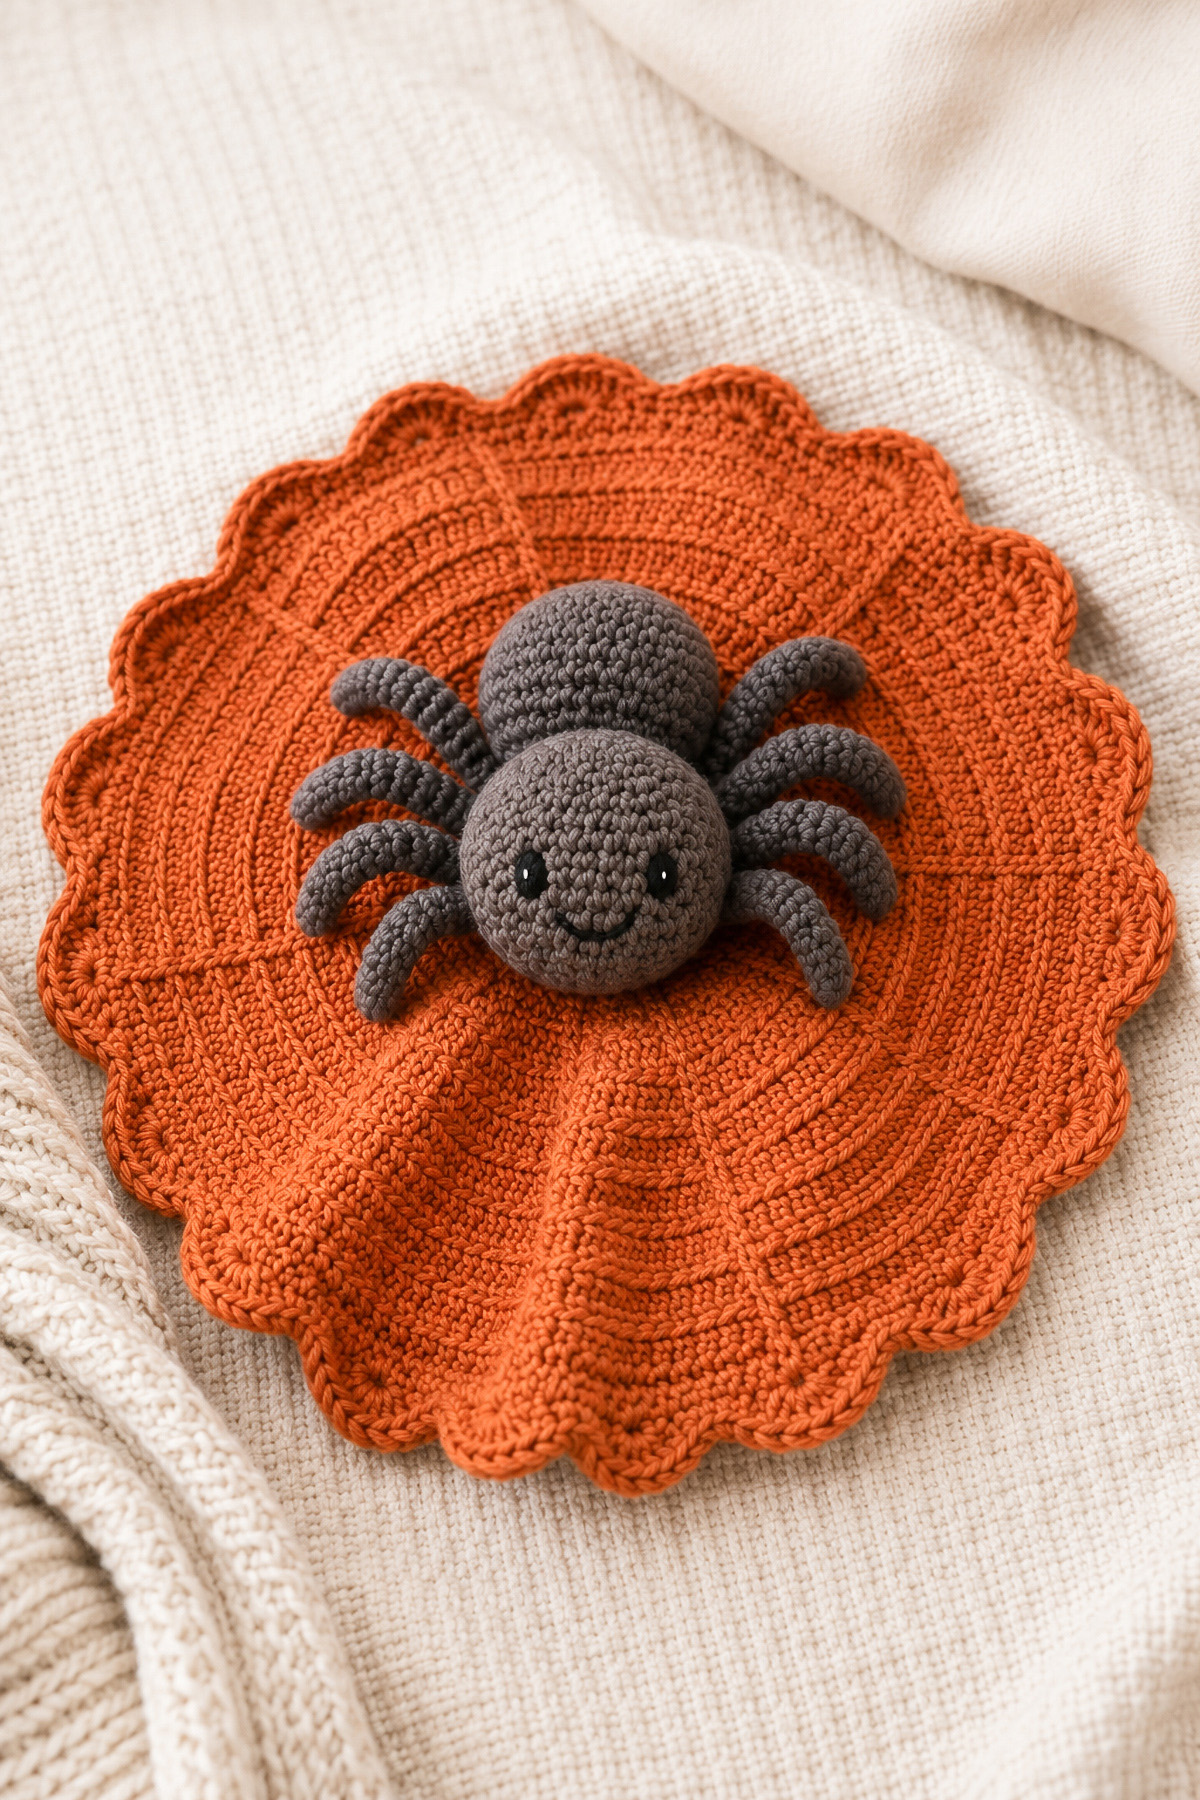
This free crochet spider lovey pattern pairs a friendly amigurumi spider with a small textured blanket for a handmade Halloween project that looks playful rather than frightening. The spider has eight crocheted legs, a securely stuffed body and open eyes embroidered with black floss, making it a cheerful choice for a fall baby gift, seasonal nursery display or special keepsake.
Explore More Free Crochet Baby Patterns
See Crochet Hooks, Yarn and Stuffing Supplies for This Project
Jump to a Section
Crochet Spider Lovey Pattern Details
This crochet spider lovey is made in three sections: a round spider head and body, eight short crocheted legs and a small textured blanket. The finished spider is sewn firmly to the center of the blanket after every piece has been completed. The pattern uses worsted-weight yarn so the stitches are easy to see and the spider keeps its rounded shape. Choose washable acrylic or cotton-blend yarn with a smooth finish. Fuzzy yarn may hide the stitches, make counting difficult and allow small fibers to loosen with repeated handling. Skill level: Confident beginner Crochet terminology: US terms Standard finished blanket size: Approximately 16 inches across Finished spider size: Approximately 5 inches long from the front of the head to the back of the body, not including the legs Construction: Pieces are worked separately and sewn together Gauge: Exact gauge is not essential, but the stitches should be tight enough to keep the stuffing from showing Special stitches used: Magic ring, single crochet, double crochet, increases, invisible decreases and slip stitches The spider in this pattern has a rounded charcoal body, eight curled plum legs and a pumpkin-colored blanket. Those colors give it a Halloween look without making the finished project feel too dark. Deep teal, rust, lavender, burgundy and warm gray are equally good choices.Materials and Crochet Supplies
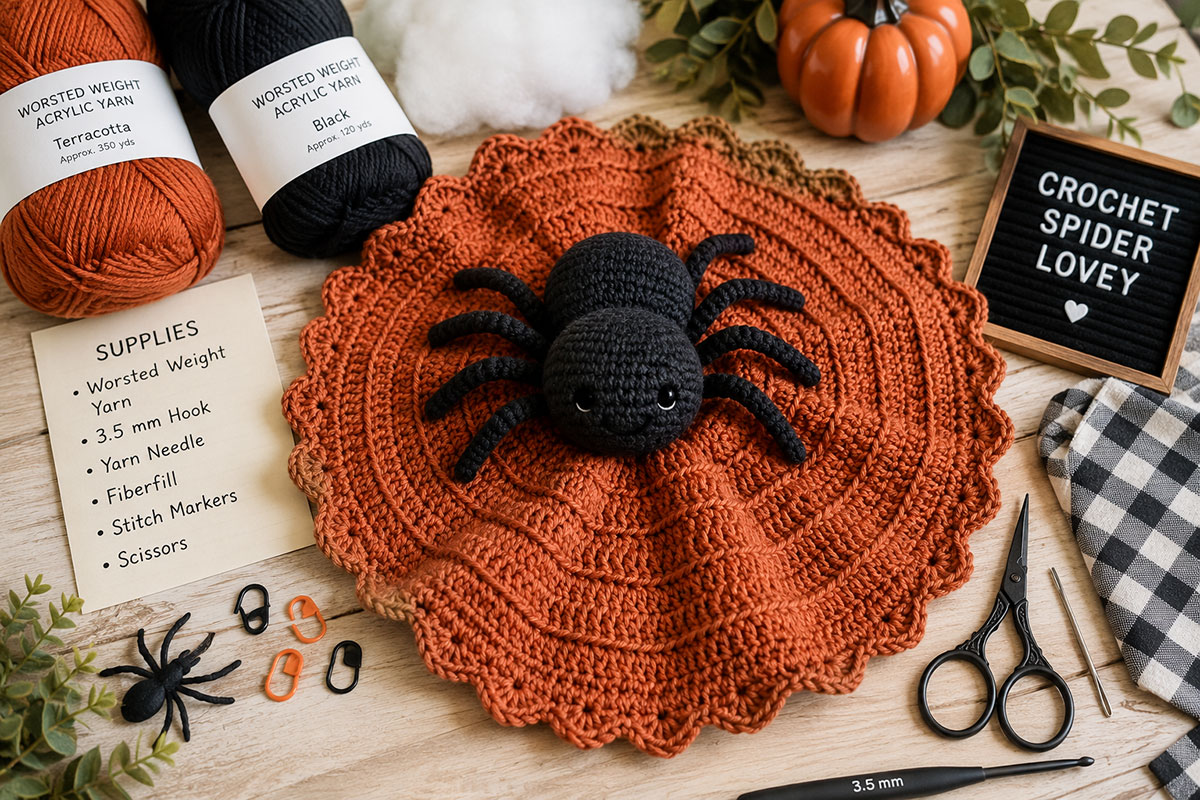
- Approximately 250 yards of worsted-weight yarn for the standard-size lovey blanket
- Approximately 75 yards of worsted-weight yarn for the spider head and body
- Approximately 40 yards of worsted-weight yarn for the eight legs
- Small amount of black embroidery floss for the eyes and mouth
- Small amount of white embroidery floss for the tiny eye highlights
- Size H-8, 5 mm crochet hook for the blanket
- Size G-6, 4 mm crochet hook for the spider
- Polyester fiberfill
- Yarn needle with a blunt tip
- Embroidery needle
- Stitch markers
- Scissors
- Measuring tape
Crochet the Spider Head and Body
The head and body are crocheted separately in continuous rounds. Place a stitch marker in the first stitch of each round and move it upward as you work. Do not join the rounds unless the instructions specifically say to do so. Abbreviations- ch: chain
- dc: double crochet
- sc: single crochet
- inc: work 2 single crochets in the same stitch
- inv dec: invisible single crochet decrease
- sl st: slip stitch
- st or sts: stitch or stitches
- MR: magic ring
Crochet the Spider Head
Use the 4 mm crochet hook and the yarn selected for the spider.Crochet the Spider Body
The body is slightly larger than the head and has several straight rounds through the middle. This gives you enough room to attach all eight legs without crowding the stitches.Join the Head to the Body
Position the head against one end of the body with the closed openings facing each other. The lower portion of the head should overlap the body slightly rather than sitting on top like a separate ball. Use the long head yarn tail to sew through both pieces with small, closely spaced stitches. Work around the joining area twice. Gently tug the head after the first round of sewing so you can spot any section that needs reinforcement. Secure the yarn inside the body and weave the remaining tail through several stitches before trimming it.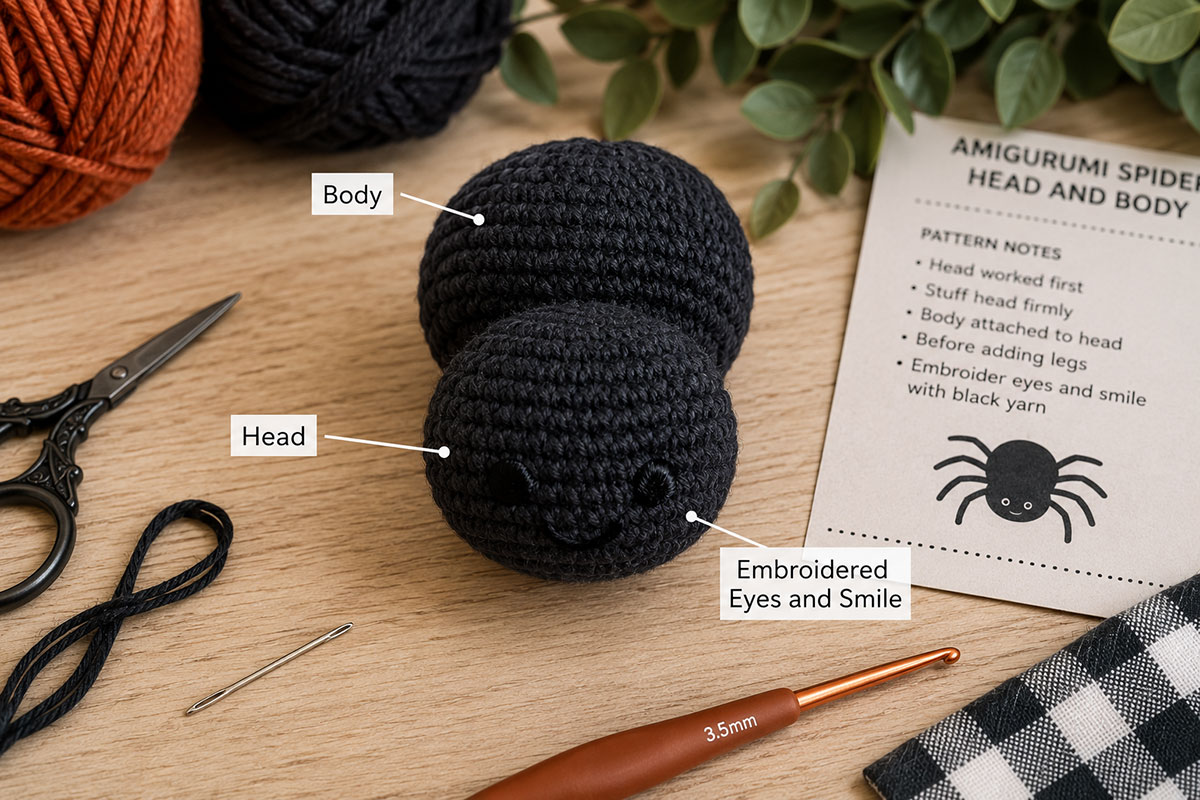
Crochet and Attach the Eight Spider Legs
Each leg is crocheted as a narrow tube so it stays flexible without wire or a hard insert. Make all eight legs before attaching any of them. Laying the finished pieces beside one another makes it easier to compare their length and correct an obvious mismatch. Use the 4 mm crochet hook and the leg color.Make Eight Legs
Position the Legs Before Sewing
Place the spider body on a flat surface with the head pointing away from you. Arrange four legs along each side of the body. Position the front pair near the head and the back pair near the rounded end of the body. Leave a small space between each attachment point so the legs do not bunch into one thick row. Pin the flattened end of each leg in place with removable stitch markers. Check the spider from the front, back and both sides before sewing. The legs do not need to form a perfectly straight line, but the pairs should look balanced.Sew Each Leg Securely to the Body
Thread the yarn tail from the first leg onto the yarn needle. Sew through the flattened end of the leg and several body stitches. Work across the attachment area once, then sew back across it in the opposite direction. Pass the yarn through the body to secure it, weave through several nearby stitches and trim the excess. Attach the remaining seven legs in the same manner. After every leg has been sewn in place, hold the body in one hand and gently pull each leg with the other. Add another row of stitches wherever the attachment shifts or opens.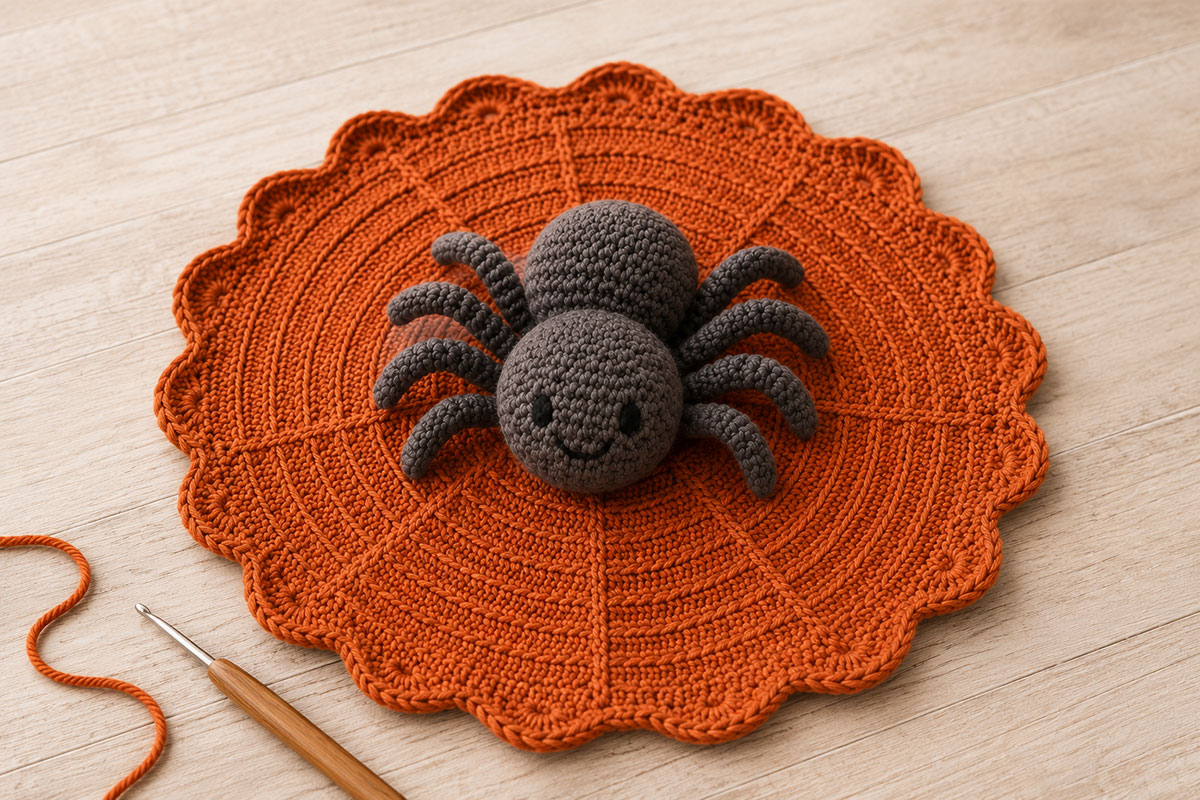
Embroider the Friendly Spider Face
The expression keeps this spider on the playful side of Halloween. Open embroidered eyes are visible in photographs and remain flat against the crocheted fabric. Thread an embroidery needle with black embroidery floss. Use all six strands for bold features or separate the floss into three strands for finer lines.Mark the Eye Placement
Position the eyes between Rounds 7 and 9 of the head, approximately five stitches apart. Use two short pieces of contrasting yarn or removable stitch markers to test the placement before embroidering. View the head from directly in front. Eyes placed too far around the sides can disappear when the spider is attached to the blanket.Stitch the Open Eyes
Bring the needle out at the lower edge of the first eye. Work several short satin stitches side by side to create a narrow vertical oval. Keep the stitches smooth and close enough that the crocheted fabric does not show between them. Pass the needle through the head and repeat for the second eye. Check that the eyes are similar in height and width before securing the black floss. Using white embroidery floss, add one tiny straight stitch near the upper edge of each black eye. Keep both highlight stitches small and place them at the same height. For a simple mouth, make one shallow curved line two rounds below the eyes. Use two or three small backstitches rather than one long loose strand. Secure the floss inside the head. Pass the needle through the stuffed piece and bring it out at a distant point. Pull gently, clip the floss close to the surface and allow the cut end to settle back inside. Do not add buttons, beads, plastic eyes or glued decorations.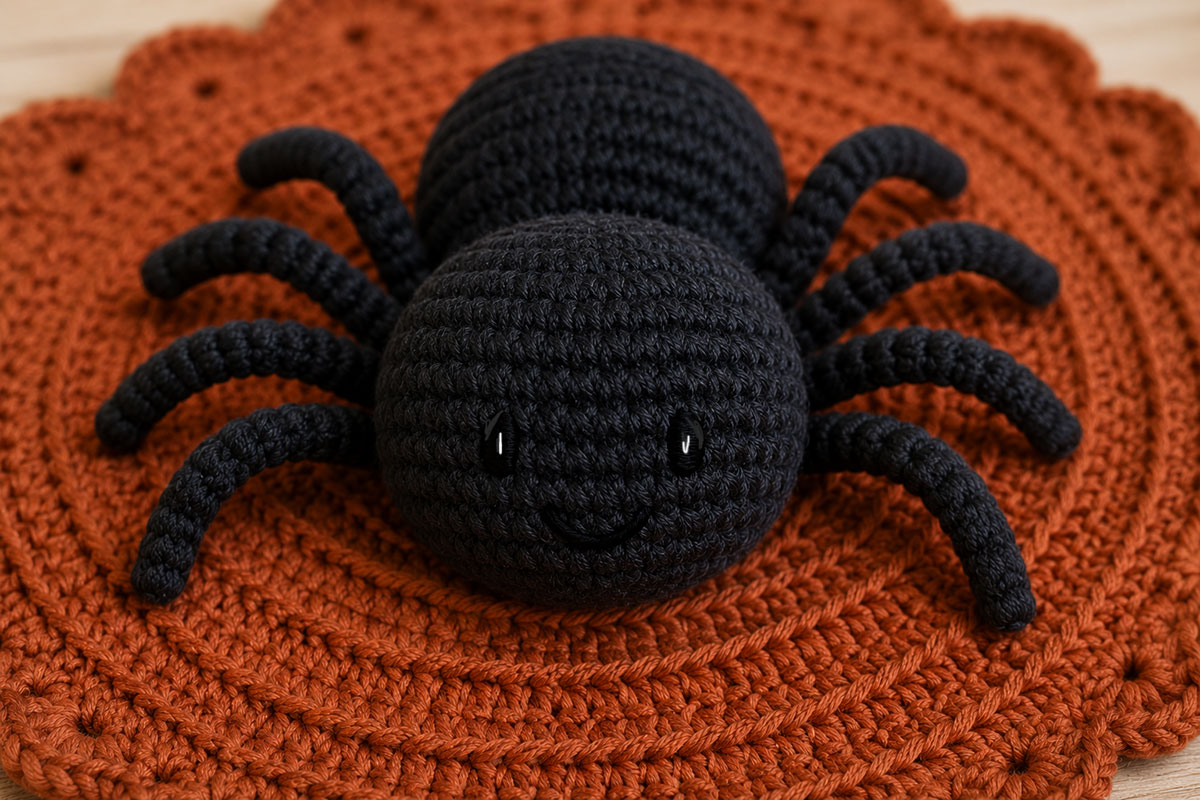
Crochet the Round Lovey Blanket
The blanket is worked from the center outward in joined rounds. Several rounds are crocheted through the back loops to form shallow rings that suggest a spider web without leaving large openings. Use the 5 mm crochet hook and the blanket color. Join each round with a slip stitch in the top of the beginning chain. The beginning chain 3 counts as the first double crochet. Do not turn at the end of the rounds. Keep the right side of the blanket facing you throughout. Keep the center opening snug. If a magic ring feels difficult with this amount of yarn, chain 4 and join with a slip stitch to form a small ring instead.Begin the Center of the Blanket
Continue the Expanding Rounds
Add the Simple Scalloped Border
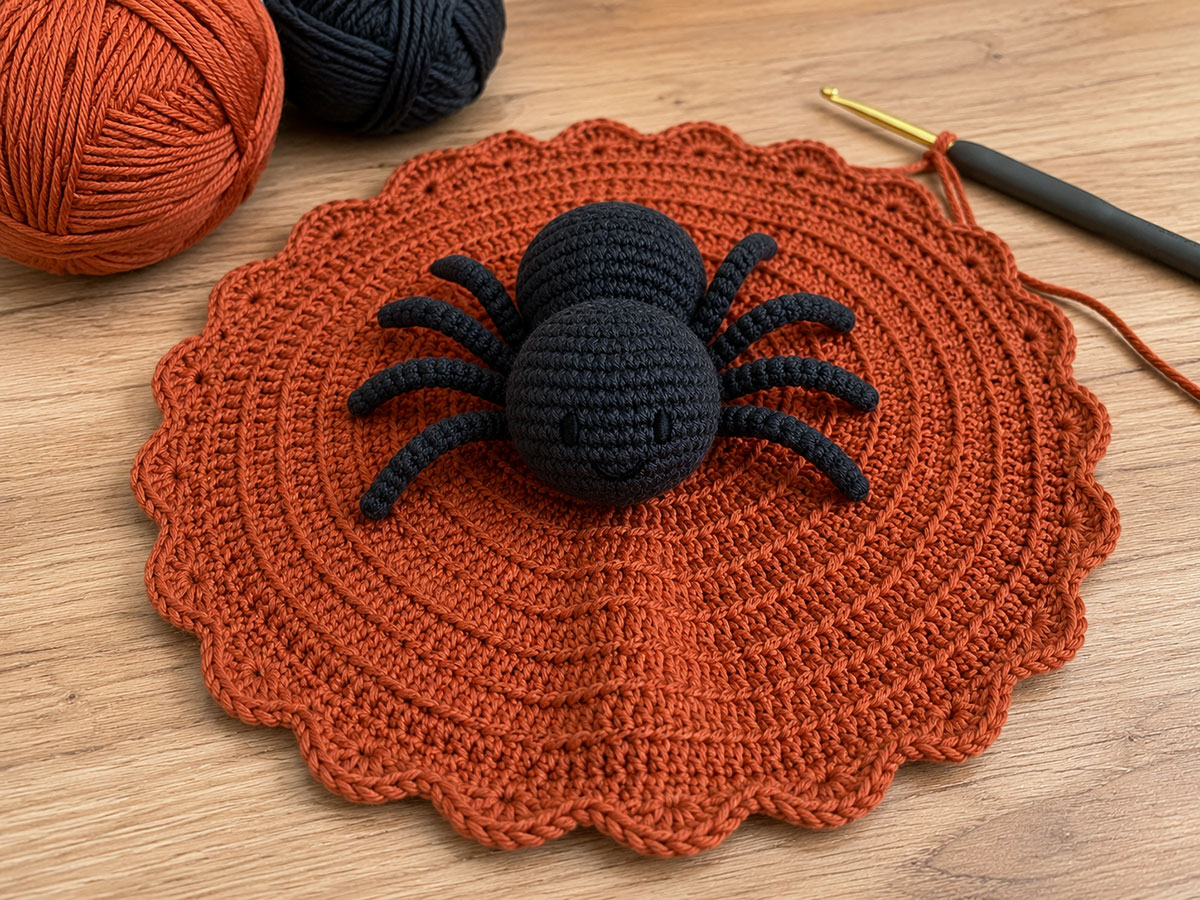
Shape and Check the Finished Blanket
Spread the blanket on a clean towel and smooth it into a circle with your hands. Adjust the scallops so they sit evenly around the edge. Steam should not be pressed directly onto acrylic yarn because excessive heat can flatten or damage the fibers. Follow the care instructions printed on the yarn label when washing or shaping the finished piece. Check the center closely before attaching the spider. The magic ring must be completely closed, and the starting tail should be woven back and forth through several nearby stitches rather than trimmed beside the opening.Attach the Spider to the Lovey Blanket
The spider should sit directly over the center of the blanket with its head facing one of the scalloped sections. Place it on the blanket before threading the needle and turn the project in several directions to check the position. The body should cover the center ring completely. Arrange the legs so four extend toward each side rather than folding underneath the spider.Pin the Spider in Place
Use several removable stitch markers to hold the underside of the body against the blanket. Lift each leg while pinning so it remains free. Only the stuffed body is sewn to the blanket. Leaving the legs unattached allows them to keep their curved shape and makes the finished spider easier to recognize. Turn the blanket over and check the placement from the back. The spider should be centered over the starting circle rather than leaning toward one edge.Sew Around the Base of the Body
Thread a yarn needle with approximately 36 inches of matching spider yarn. Knot the end and bring the needle up through the blanket beneath the body so the knot remains hidden. Sew through a stitch near the lower edge of the spider body, then pass the needle back through a blanket stitch directly below it. Continue around the base using small stitches spaced approximately one-quarter inch apart. Catch complete crochet stitches rather than individual yarn strands, which may stretch or split under pressure. After completing the first round, sew around the body a second time in the opposite direction. Fill any visible gaps between the attachment stitches. The head may touch the blanket, but it does not need to be sewn down unless it tips forward. If extra support is needed, add three or four small stitches along the underside of the head where it meets the blanket.Secure and Hide the Yarn Tail
Bring the needle out beneath the body after the final stitch. Make a small knot around a nearby blanket stitch, pass the needle through the stuffed body and bring it out several inches away. Pull gently and trim the yarn close to the surface so the end slips back inside. Remove the stitch markers and lift the project by the spider body. The blanket should remain attached without opening a gap around the base.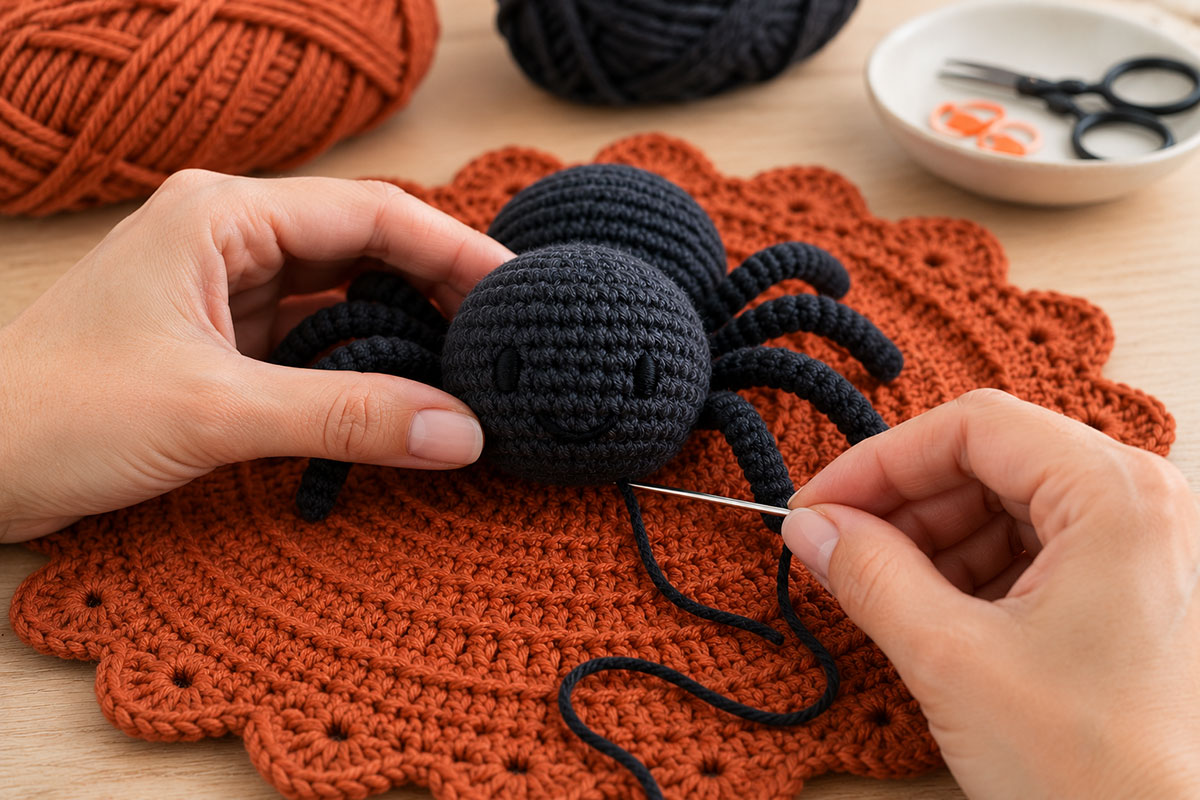
Finish and Inspect the Crochet Spider Lovey
A final inspection deserves more than a quick glance. Press each stuffed section between your fingers, check every seam and look at the project from both sides before calling it complete.- Pull gently on all eight legs and reinforce any attachment that shifts.
- Check the join between the spider head and body for visible gaps.
- Confirm that the center of the blanket is tightly closed.
- Trim or weave in any yarn tail that can be pulled free.
- Look between the stitches for exposed fiberfill.
- Check that every embroidered feature lies flat against the head.
- Remove all pins, stitch markers and loose threads.
Color Ideas and Easy Ways to Personalize the Spider Lovey
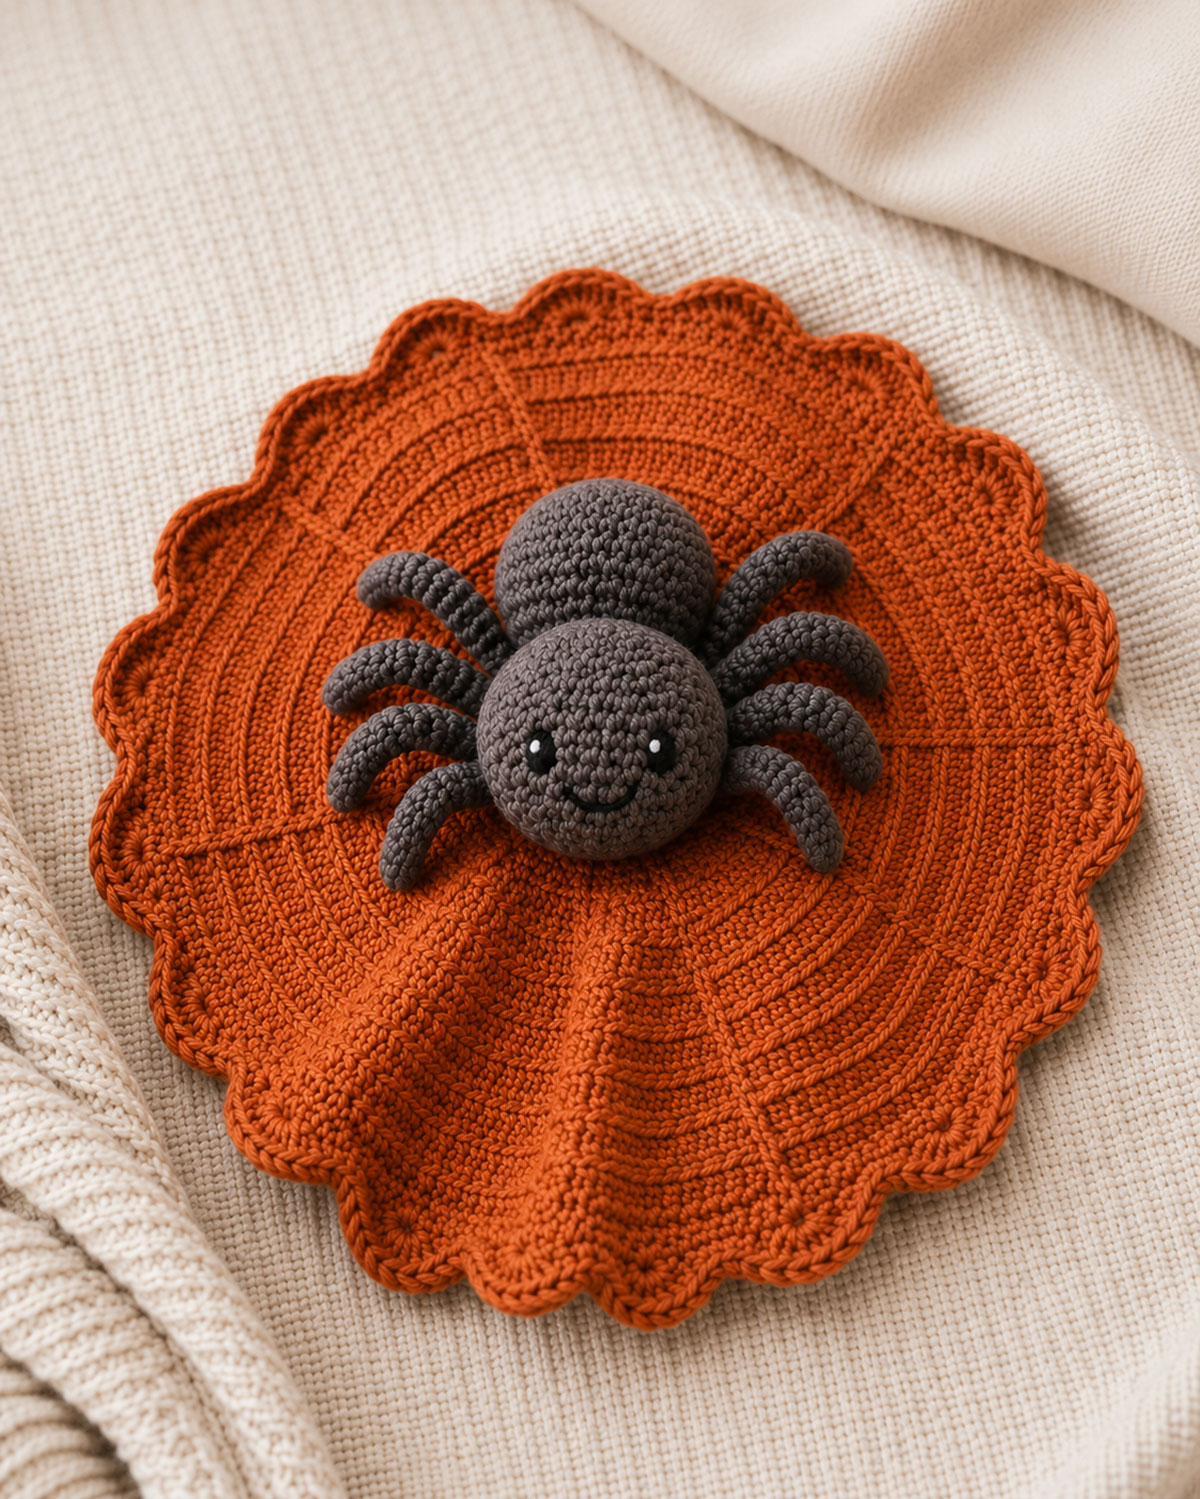
Black and orange give this project an unmistakable Halloween look, but they are not the only choices that suit the pattern. A deep plum spider on a smoky gray blanket feels seasonal without leaning heavily on traditional holiday colors. Rust, charcoal, burgundy, muted teal and lavender also photograph beautifully and keep the stitched face easy to see. For a lighter version, try a medium gray spider with pumpkin-colored legs and an ivory blanket. Avoid using very pale yarn for the head if the black embroidered eyes do not show clearly against it. You can also change the look by using two blanket colors. Work Rounds 1 through 6 in the first color, change yarn at the join and complete the remaining rounds in the second color. Weave the old and new yarn tails securely through the wrong side before attaching the spider.Make a Smaller Spider Lovey
To make a lovey closer to 12 inches across, stop the blanket after Round 8 and work the following border rounds instead of the standard-size border.Make the Spider as a Separate Amigurumi
The spider can be completed without the blanket. Add the legs and embroidered face as written, then leave the body unattached. For a stand-alone spider, flatten the bottom of the body slightly while stuffing so it rests more evenly on a shelf or table. This version is still intended for supervised handling and decorative use rather than an infant sleep space.Add Subtle Web Details
For a little more texture, surface crochet a few short lines between the raised blanket rounds. Use a contrasting yarn and keep every line close to the fabric. Avoid long floats across the front or back of the blanket. Loose strands can catch on fingers, jewelry or other objects. The spider already carries the theme, so the blanket does not need an elaborate web motif to make the design recognizable.More Halloween Crochet Lovey Patterns
A handmade spider fits neatly into a collection of fall projects. The crochet bat lovey pattern has the same playful Halloween spirit with wings instead of eight legs. For a rounder seasonal design, continue with the crochet pumpkin lovey pattern. The crochet candy corn lovey pattern adds brighter stripes and another embroidered face.The complete Halloween crochet pattern collection makes it easier to compare this spider with the ghost, bat, pumpkin, black cat and candy corn projects in one place.
You can also browse the full collection of crochet animal lovey patterns when you are ready to move beyond Halloween colors and characters. Sometimes the next project chooses itself once several finished loveys are lined up together.Frequently Asked Questions About the Crochet Spider Lovey
Is this crochet spider pattern suitable for beginners?
A beginner who is comfortable making single crochet stitches, increases and decreases should be able to complete the spider. The narrow legs require a little patience because each round contains only six stitches. A stitch marker is especially helpful when working those small tubes. The blanket uses basic double crochet rounds and a simple scalloped border. Count the stitches at the end of every increase round so the circle stays flat.Can I make the spider without the lovey blanket?
Yes. Complete the head, body, legs and embroidered face as written, then leave off the blanket. The finished amigurumi spider measures approximately 5 inches long from the front of the head to the back of the body, not including the legs. A separate spider can be used as supervised seasonal décor or included with another handmade Halloween gift.Why are my crochet spider legs different lengths?
Narrow crocheted tubes can look uneven when the beginning stitch shifts slightly from one round to the next. Count six stitches after every round and avoid adding a stitch into the slip knot or stitch marker space. Compare the legs after every four rounds rather than waiting until all eight are finished. A leg that is noticeably longer can be unraveled and corrected before the yarn tail is cut.Do the spider legs need stuffing?
No. Leaving the legs unstuffed keeps them flexible and prevents the sides from bulging between stitches. The flattened ends are also easier to sew securely to the body. Do not add wire, pipe cleaners or other rigid materials inside the legs.Can I use blanket yarn for the spider?
Blanket yarn can be used, but it will create a much larger spider and may hide the embroidered facial details. You will need a larger hook, more fiberfill and a larger blanket to keep the proportions balanced. Worsted-weight yarn is easier to count and gives the eight legs a neater shape. It is the more practical choice for the pattern as written.What should I do if the lovey blanket ripples?
A small amount of movement around the edge is normal before the blanket is washed and shaped. Deep waves generally mean there are too many stitches or the increases are being worked too loosely. Check the stitch count for the last completed round. When the count is correct, try using a slightly smaller hook for the remaining rounds. Do not remove increases at random because that can create flat spots around the circle.Can I use plastic safety eyes?
This pattern uses embroidered eyes rather than plastic safety eyes. Embroidery keeps the features flat and eliminates separate eye pieces that could loosen. Use closely packed satin stitches and secure the floss inside the stuffed head. Check the eyes again after washing the finished project.How do I keep the spider from tipping forward?
Attach the body over the exact center of the blanket and keep the underside slightly flat while stuffing. If the head still leans forward, add three or four hidden stitches between the lower head and the blanket. Avoid sewing the outer portions of the legs to the blanket. They should remain free to curve around the body.How should I wash the finished spider lovey?
Follow the washing directions printed on the yarn label. Place the lovey in a mesh laundry bag, use a gentle cycle and reshape it while damp. Let the spider and blanket dry completely before storing or gifting the project. Check the seams, legs and embroidered face after every wash.Is a crochet spider lovey safe for a baby to sleep with?
No stuffed lovey, blanket or crocheted toy should be placed in an infant sleep space. Keep the project outside the crib and use it only for supervised play, seasonal photographs, gift presentation or decorative display.A Playful Halloween Project to Make Your Own
The little spider has enough character to carry the design without extra decorations. Eight curved legs, a clearly stitched face and a blanket with raised circular texture give the project all the detail it needs. Choose colors that suit the person receiving it, check every attachment carefully and do not rush the final sewing. Those last reinforcement stitches may not be the exciting portion of the pattern, but they are what hold the finished project together. Once the spider is complete, the pumpkin, bat and candy corn loveys make a cheerful next set of projects for the same season.When you click on links to various merchants on this site and make a purchase, this may result in this site earning a commission. This does not affect the price you pay.

UBGI Gold Standard 2026
Reviewed under the site's
editorial checklist.
Photos, decorating ideas, party setups and reader submissions are shared for inspiration unless a page is specifically presented as a pattern, tutorial, reference guide or step-by-step project. Follow the instructions, measurements, safety guidance and manufacturer directions provided for the particular project or product.
About Jan | Contact | Baby Nursery Ideas (Blog) | Site Map | Privacy Policy | Disclosure Policy | Disclaimer | Affiliate Disclosure | Earnings Disclosure | Facebook | Pinterest
I am a participant in the Amazon Services LLC Associates Program, an affiliate advertising program designed to provide a means for us to earn fees by linking to Amazon. As an Amazon Associate I earn from qualifying purchases.
Copyright © 2006-2026. All Rights Reserved.