Free Crochet Bow Baby Hat Pattern
By Jan Bay
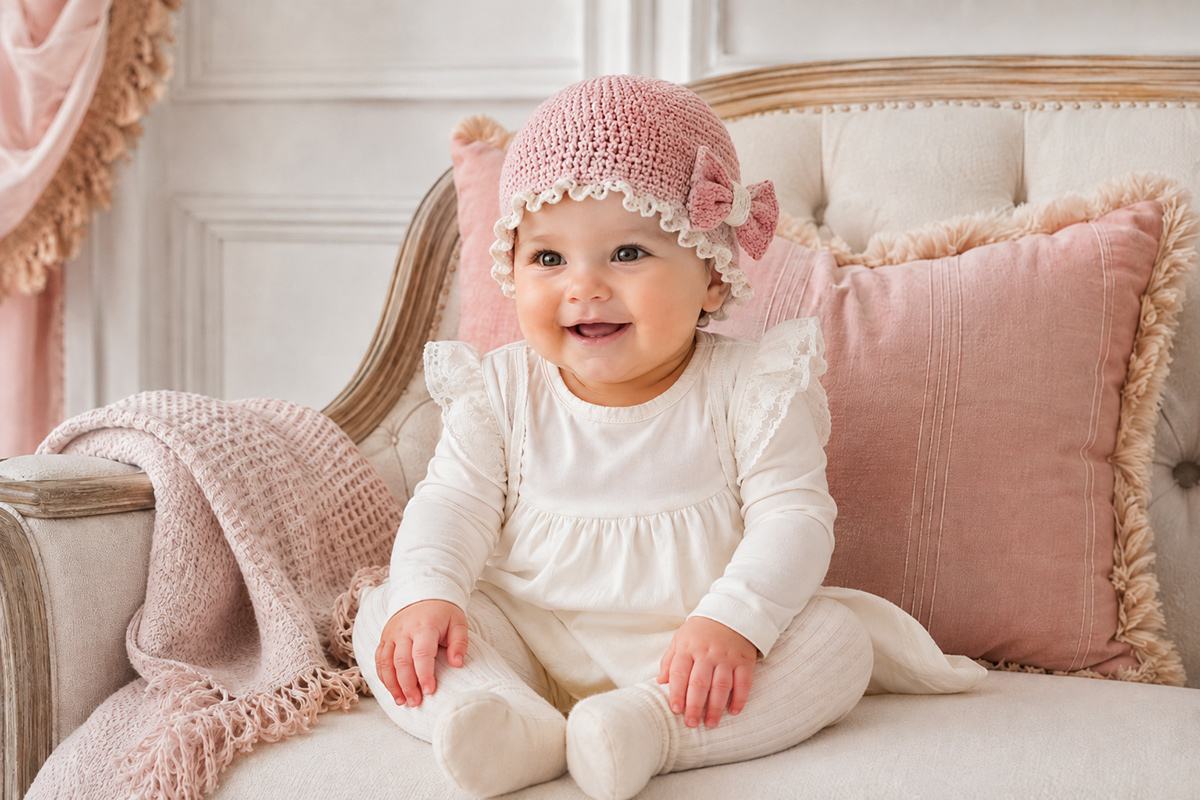
This free crochet bow baby hat pattern turns a simple fitted beanie into a more playful baby accessory with a side bow and a contrasting ruffled edge. The pattern keeps those two details as the defining features while giving the hat clear sizing, gauge, construction and finishing instructions.
Explore More Free Crochet Baby Patterns
Free Baby Hat Patterns to Crochet and Knit
Free Baby Crochet Hat Patterns
Worsted Weight Yarn for Crochet Baby Hats
Jump to:
Crochet Bow Baby Hat Sizes
I'd choose the size from the baby's actual head measurement instead of relying on the age label by itself. The Craft Yarn Council head circumference chart gives 14 to 16 inches as its broad baby range, but a fitted crochet hat needs a little more precision than that.
| Pattern Size | Use for a Head Measuring About | Expected Hat Circumference | Expected Fitted Body Height Before Ruffle |
|---|---|---|---|
| 0 to 3 months | 14 to 15 inches | 13 1/3 inches | About 4 5/8 inches |
| 3 to 6 months | 15 to 16 inches | 14 2/3 inches | About 5 1/8 inches |
| 6 to 12 months | 16 to 17 1/2 inches | 16 inches | About 5 3/4 inches |
The fitted-body measurements above are expected measurements calculated from the gauge and round counts. They are not measurements taken from a physically test-crocheted sample. The ruffled edge extends below that fitted body, so I wouldn't use the outer tip of a ruffle when checking the hat height.
If the baby's head falls between sizes, look at the finished circumference as well as the age range. The hat should stretch gently without feeling rigid. A bow this size needs a hat that actually fits. If the beanie is too loose, the bow will pull it sideways.
Materials and Gauge
The older version of this design used worsted-weight yarn with a 5.5 mm hook, and I'm keeping that combination. Use a soft, washable size 4 yarn for the hat and bow, then bring in the second yarn for the ruffled edge and bow center.
- Main-color yarn: size 4 worsted-weight yarn, approximately 90 (105, 120) yards for 0 to 3 months (3 to 6 months, 6 to 12 months)
- Contrast or multicolored yarn: approximately 25 to 35 yards of size 4 worsted-weight yarn for the ruffle and bow center
- Crochet hook: 5.5 mm (I-9), or the size needed to obtain gauge
- Yarn needle
- Scissors
- Removable stitch markers
The yarn amounts are expected working amounts based on the stitch counts, not measured test-skein totals. Check the yardage on the label instead of assuming that every skein of the same weight contains the same amount of yarn.
Skill level: Advanced beginner. The hat itself uses straightforward joined rounds, but the separate bow, ruffled edge and sewn attachment add a few finishing steps.
Gauge
12 double crochet stitches = 4 inches
7 double crochet rounds = about 4 inches in height
That's the same horizontal gauge as 6 double crochet stitches per 2 inches. If you're getting more than 12 stitches across 4 inches, the hat will come out smaller. If you're getting fewer, it will come out larger.
Fix the gauge before changing the stitch count. Adding or removing stitches just to make the hat fit can throw off the bow placement and the even repeat used for the ruffled edge.
Abbreviations
- ch = chain
- dc = double crochet
- sc = single crochet
- sl st = slip stitch
- st/sts = stitch/stitches
- rnd = round
US crochet terminology is used throughout.
How the Hat Is Built
The beanie is worked from the crown down in joined double crochet rounds. The beginning ch 2 does not count as a stitch. Join each hat round with a slip stitch to the first double crochet and do not turn.
Once the fitted hat body is finished, fasten off the main yarn and add one contrasting ruffled round directly to the lower edge.
The bow is made separately from a flat rectangle. The short ends are joined at the back to make one closed loop. Pinching the center forms the two bow loops, and a contrasting crochet band wraps around that pinch. The finished bow is then sewn securely to the side of the hat.
Finished piece count: 3 pieces total: 1 hat with attached ruffle, 1 bow loop piece and 1 bow center band.
Free Crochet Bow Baby Hat Pattern
The numbers are written for 0 to 3 months (3 to 6 months, 6 to 12 months). Where only one number appears, it applies to all three sizes.
Crown
Round 1: Make a magic ring. Ch 2. Work 12 dc into the ring. Pull the ring closed and join with a sl st to the first dc. 12 sts.
Round 2: Ch 2. Work 2 dc in each st around. Join. 24 sts.
Round 3: Ch 2. *Dc in the next st, 2 dc in the next st.* Repeat from * to * around. Join. 36 sts.
Thread the starting magic-ring tail onto a yarn needle. On the inside of the crown, weave it securely back and forth through several nearby stitches, then trim the excess.
Round 4: Choose Your Size
0 to 3 months: Ch 2. *Dc in each of the next 8 sts, 2 dc in the next st.* Repeat from * to * 4 times. Join. 40 sts.
3 to 6 months: Ch 2. *Dc in each of the next 3 sts, 2 dc in the next st, dc in each of the next 4 sts, 2 dc in the next st.* Repeat from * to * 4 times. Join. 44 sts.
6 to 12 months: Ch 2. *Dc in each of the next 2 sts, 2 dc in the next st.* Repeat from * to * around. Join. 48 sts.
Stop increasing after Round 4. Once the next round is worked even, the crown should start curving downward instead of continuing to spread flat.
Hat Body
0 to 3 months, Rounds 5 through 8: Ch 2. Dc in each st around. Join. 40 sts each round.
3 to 6 months, Rounds 5 through 9: Ch 2. Dc in each st around. Join. 44 sts each round.
6 to 12 months, Rounds 5 through 10: Ch 2. Dc in each st around. Join. 48 sts each round.
Before adding the ruffle, measure from the center of the crown straight down to the fitted lower edge. You should be close to 4 5/8 (5 1/8, 5 3/4) inches at the stated gauge.
If the circumference is correct but the fitted body is slightly short, add one more even double crochet round now. Do it before the ruffle. If the circumference is wrong, an extra round won't fix it. Go back and correct the gauge or size.
Fasten off the main-color yarn and weave the tail securely into the inside of the hat.
Add the Contrasting Ruffled Edging
This is the little detail I'd keep. A plain edge would make the bow hat look like almost any other beanie with a decoration sewn onto it. The contrasting ruffle gives the lower edge its own shape without competing with the bow.
With the outside of the hat facing you, join the contrast or multicolored yarn with a sl st in any stitch at the back joining line.
Ruffle Round: Ch 1. *Sc in the next st, 3 dc in the next st.* Repeat from * to * around. Join with a sl st to the first sc.
You will make 20 (22, 24) small ruffled sections around the lower edge.
Fasten off and weave the contrast-yarn tails into the inside of the hat.
Lay the hat flat for a quick check. The fitted body should still lie smoothly, while the lower edge should flare into small soft ruffles. The ruffle is supposed to spread. The body above it is not.
Crochet the Side Bow
Use the main-color yarn for the bow itself. I want this bow noticeable without making it look oversized on a baby's head. At the bow gauge below, the finished bow should be about 2 3/4 to 3 inches across after it is folded, pinched and wrapped at the center.
Bow gauge: About 14 sc stitches and 14 sc rows = 4 inches. This is a separate check for the bow because the hat gauge is measured in double crochet.
Main Bow Piece
Row 1: Ch 22. Sc in the second ch from the hook and in each ch across. 21 sts.
Rows 2 through 6: Ch 1, turn. Sc in each st across. 21 sts.
The rectangle should be about 6 inches long and 1 3/4 inches high at the stated bow gauge. These are expected measurements calculated from the stitch and row counts rather than measurements taken from a physically test-crocheted sample.
Fasten off, leaving a yarn tail about 24 inches long for closing the back of the bow.
Turn the Rectangle Into Bow Loops
Lay the rectangle flat with the side you want facing outward against the table. Bring both short ends toward the center of the back. Let one short end overlap the other by about two stitches.
Thread the long yarn tail onto a yarn needle and sew through both overlapped short ends from top to bottom. Take several small stitches along that overlap so the seam can't pull apart.
Weave the remaining seam tail and the starting tail securely into the back of the bow and trim them.
Turn the piece so the seam sits at the center back. Flatten it gently. You should now have one closed loop with the seam hidden at the back.
Pinch the middle of the loop into three small accordion folds. Hold that pinch while you make the center band.
Contrasting Bow Center Band
Use the same contrast or multicolored yarn that you used for the ruffle.
Row 1: Ch 3. Sc in the second ch from the hook and in the next ch. 2 sts.
Rows 2 through 7: Ch 1, turn. Sc in each st across. 2 sts.
Fasten off, leaving a tail about 10 inches long.
Wrap the strip snugly around the pinched center of the bow with both short ends meeting at the back. Use the 10-inch tail to sew those ends together.
Take two more small stitches through the center band and the back layer of the bow so the band can't slide sideways. Weave the remaining sewing tail and the starting tail securely through the band and trim them.
Before attaching the bow, check that the two loops are reasonably even and that the center band sits straight. If one loop is noticeably larger, adjust the folds before sewing anything to the hat.
Attach the Bow to the Baby Hat
The bow needs to sit above the ruffle instead of crushing it. Put it too low and the ruffled edge disappears. Put it too far forward and the bow starts crowding the baby's face.
Lay the hat flat with the joining line centered at the back. Decide which side will hold the bow.
Starting at the back joining line, count along the fitted lower round toward the chosen side:
- 0 to 3 months: mark the 12th stitch from the back
- 3 to 6 months: mark the 13th stitch from the back
- 6 to 12 months: mark the 14th stitch from the back
Use the same count if you want the bow on the opposite side.
Move straight upward from the marked stitch and position the center of the bow approximately over the second fitted body round above the ruffled edge. Use removable stitch markers to hold it there temporarily.
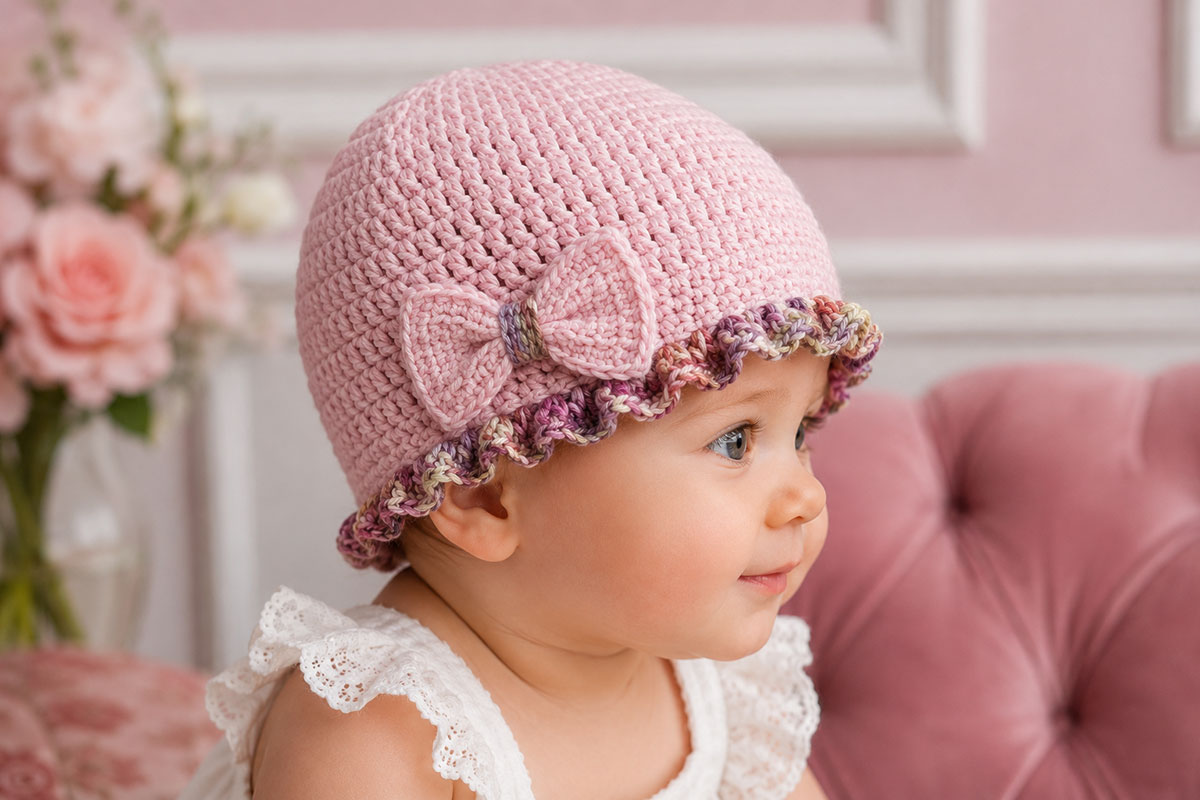
Look at the hat from the front before sewing. The bow should be easy to see, but its center shouldn't sit directly over the forehead or push into the eye area.
Sew the Bow Securely
Cut about 30 inches of main-color yarn and thread it onto a yarn needle.
Working from inside the hat, bring the needle through the hat and catch the back of the bow center band. Take several small stitches around that center area until the bow no longer shifts when you move it gently.
Then add 4 concealed anchoring stitches: one near the upper inside edge and one near the lower inside edge of each bow loop. Keep those stitches close to the center rather than sewing through the outer tips of the loops.
Turn the hat inside out and check for long loose strands. Weave the attachment ends securely through several nearby stitches and trim them.
Remove every temporary stitch marker.
Finishing and Fit
Put the finished hat flat on the table. The crown should be rounded, the fitted body should fall straight, the ruffle should spread evenly around the lower edge, and the bow shouldn't pull one side of the hat upward.
Final Check
- The finished circumference still agrees reasonably well with the size you intended to make.
- The fitted lower edge stretches comfortably beneath the ruffle.
- The ruffle is decorative rather than tight enough to gather the hat body.
- The bow stays to the side instead of dropping toward the baby's eye.
- The bow center and all four loop anchors remain secure when moved gently by hand.
If a fit problem shows up now, remove the bow before altering the hat. Length adjustments belong in the fitted hat body, while a hat that is too wide or too narrow needs a gauge or size correction.
Washing the Finished Hat
Follow the care instructions for the yarn you used. After washing, reshape the fitted beanie, spread the ruffles with your fingers and straighten both bow loops while the yarn is still damp. Let the hat dry in the shape you want.
Don't press a hot iron directly onto the crochet. Different fibers react differently to heat, and the bow doesn't need pressing to hold its shape.
Use the Hat While Baby Is Awake
This is a decorative baby hat, not sleepwear. The American Academy of Pediatrics safe sleep guidance advises against hats indoors after you're home from the hospital because head covering can contribute to overheating. Remove the hat before naps or nighttime sleep.
The bow is also a separately attached decoration. Use the hat while the baby is awake and supervised, check the attachment before each use, and repair it before the hat is worn again if any part has loosened.
If you'd rather make the decoration the entire focal point instead of pairing a bow with a ruffled edge, my crochet baby hat with a large flower pattern takes that idea in a different direction. For more styles, the free baby hat patterns hub keeps the crochet and knit hats together.
When you click on links to various merchants on this site and make a purchase, this may result in this site earning a commission. This does not affect the price you pay.

UBGI Gold Standard 2026
Reviewed under the site's
editorial checklist.
Photos, decorating ideas, party setups and reader submissions are shared for inspiration unless a page is specifically presented as a pattern, tutorial, reference guide or step-by-step project. Follow the instructions, measurements, safety guidance and manufacturer directions provided for the particular project or product.
About Jan | Contact | Baby Nursery Ideas (Blog) | Site Map | Privacy Policy | Disclosure Policy | Disclaimer | Affiliate Disclosure | Earnings Disclosure | Facebook | Pinterest
I am a participant in the Amazon Services LLC Associates Program, an affiliate advertising program designed to provide a means for us to earn fees by linking to Amazon. As an Amazon Associate I earn from qualifying purchases.
Copyright © 2006-2026. All Rights Reserved.