Boho Macrame Wall Hanging Pattern (Easy Rainbow Design)
A boho macrame wall hanging pattern recently solved a decorating problem for me that had been bothering me for a long time. One wall in the nursery kept looking unfinished no matter what I tried, and the second I hung this piece in place, I knew I had made the right choice. The project was simple to make, didn’t cost much, and is really attractive, so I wanted to share it here in case you have a room that needs that same kind of finishing touch.
Try Another Nursery Wall Project
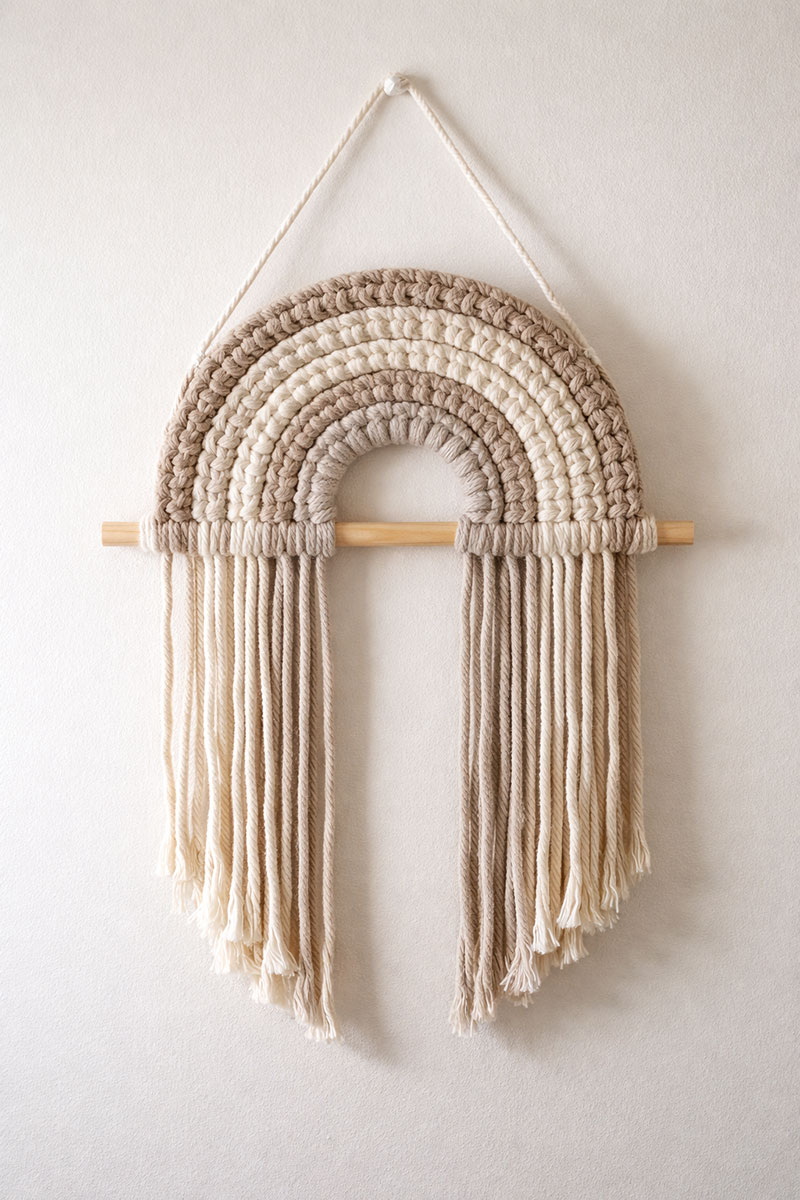
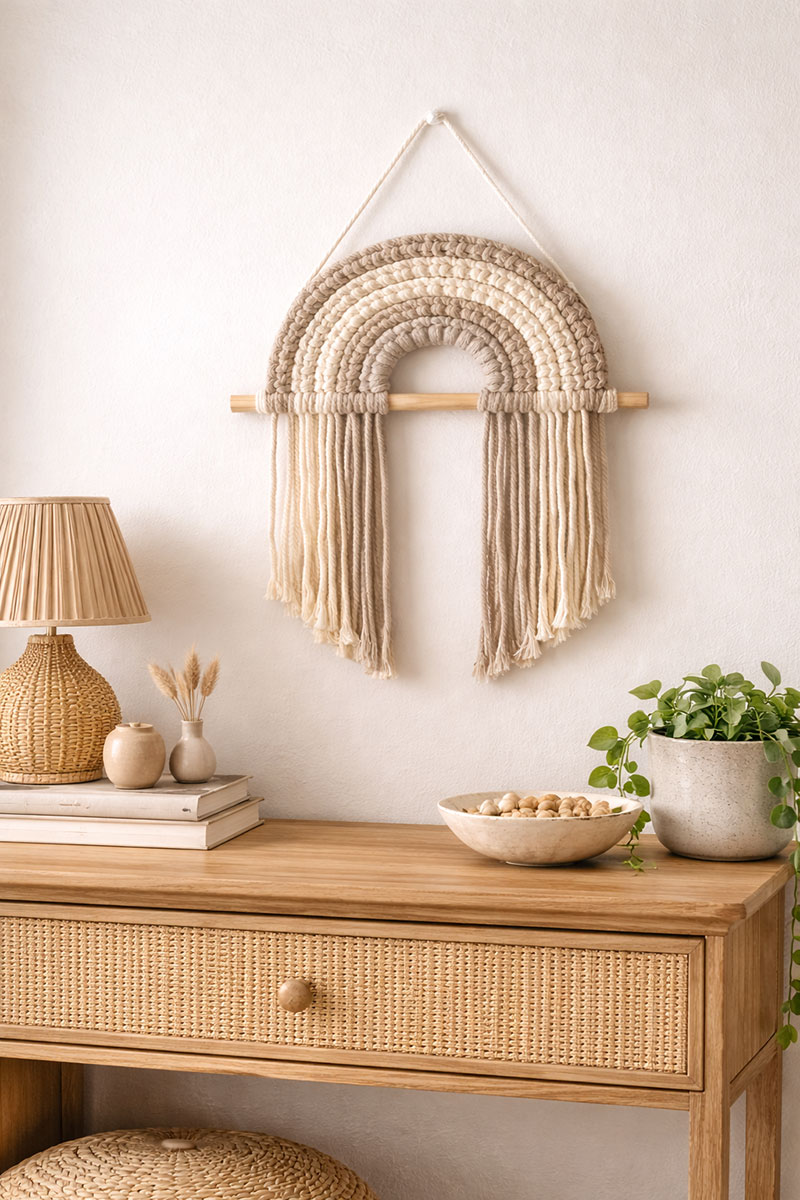
I love how this macrame wall hanging finishes the nursery without making the room feel cluttered or busy.
Jump to what you need
Quick answer Materials needed Step by step pattern How to shape and trim it Where it works in a nursery Easy variations FAQSee preferred natural cotton macrame cord for wall hanging
Quick answer: A boho macrame wall hanging pattern is a simple cord project built row by row on a dowel so the finished piece adds shape, texture, and visual balance to a nursery wall without making the room feel crowded.
No matter how many framed pieces are on a wall; it can look unfinished. Sometimes that is the part of the nursery that bugs you every time you walk by. You set up the crib, fold the blankets, put the useful things where you can reach them, and that one wall keeps bothering you. That is why I am including this boho macrame wall hanging pattern here. It was what I chose to fill a space that had been bothering me for months. When it was finally hung it felt just right and I want you to have that same feeling. It's one of the easier nursery decor projects to make yourself and I think you'll find the steps to be easy and clear.
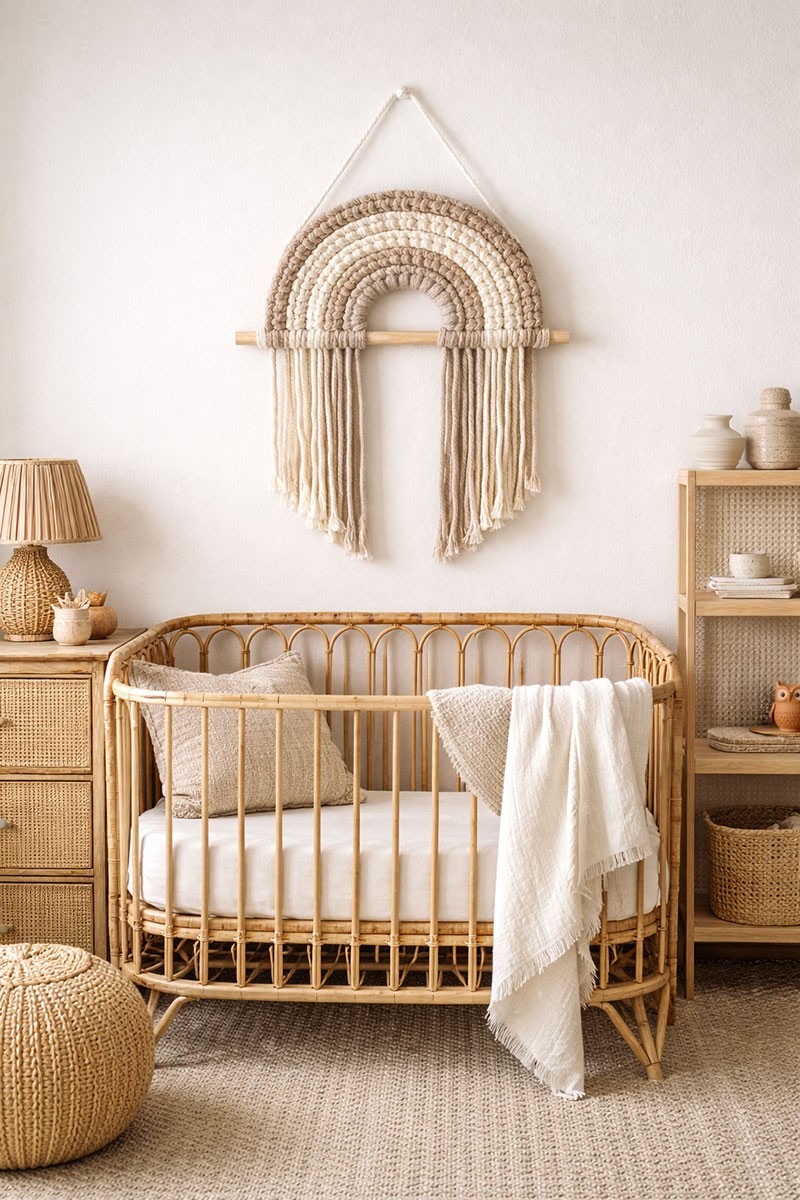
A wall piece like this can finish the room without visual overload.
Materials Needed for a Boho Macrame Wall Hanging Pattern
Most people get frustrated before they even start knotting because the wrong supplies make the whole project harder than it needs to be. The cord matters more than the knot count. If it is too limp, the arcs collapse. If it is too stiff, the piece fights you the whole time and can be hard on your hands.
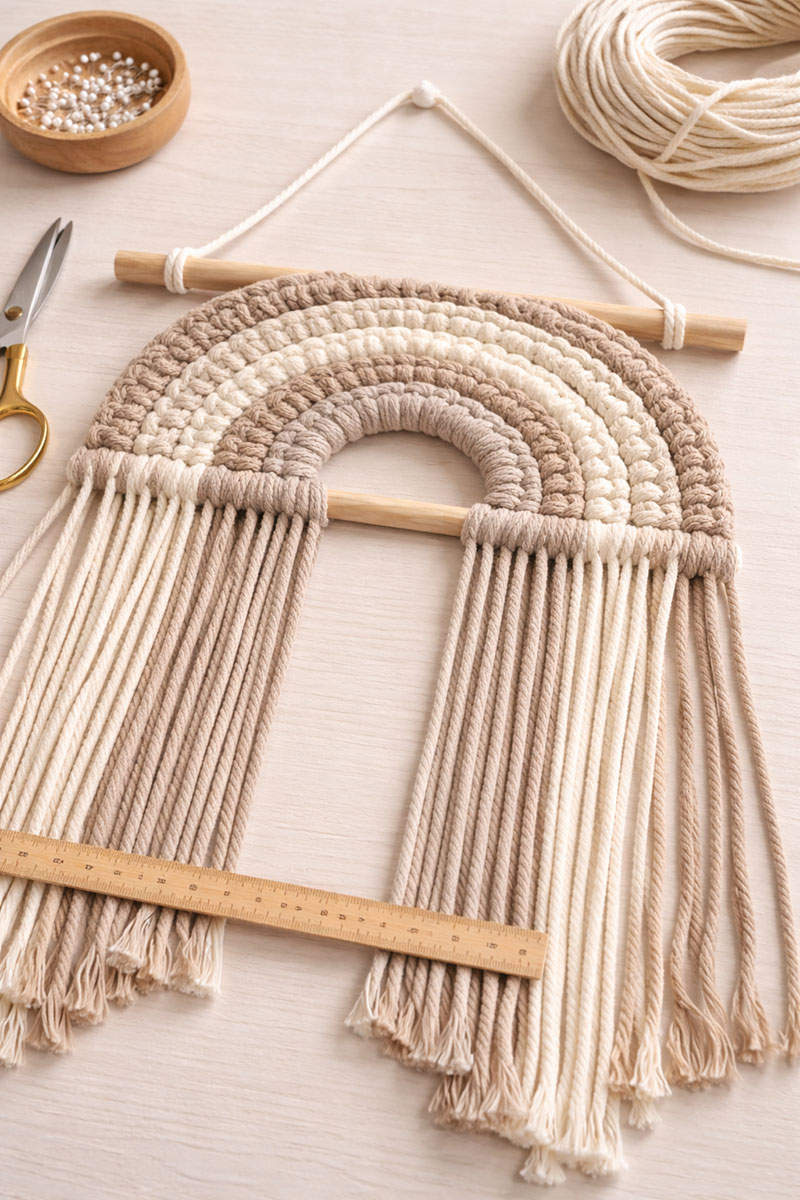
You will need: a wooden dowel, cotton macrame cord in a size that holds shape well, sharp scissors, a measuring tape, and a comb if you want a brushed fringe at the bottom.
For most nursery wall hangings, 4mm or 5mm cotton cord works well because it has enough body to keep the lines defined. A dowel around 12 to 18 inches wide is usually enough for a piece that fits comfortably above a crib or dresser.
I have learned that sharp scissors save more time than any other tool in this project. When the ends are rough, the whole piece can start looking messy even if the knotting is done well.
Step by Step Pattern Instructions
People get frustrated fast when a pattern skips over steps or assumes the crafter is more advanced than they actually are, so I wrote this one in a straight line from start to finish. If you follow the sequence and check your spacing as you go, the shape should build in a way that makes sense.
Step 1. Cut your main cords first. For a medium nursery wall hanging, cut enough cords so they can fold over the dowel and still leave plenty of length for knotting and trimming. A simple starting point is 10 to 14 cords cut to the same length, then folded in half over the dowel.
Step 2. Attach each cord to the dowel with a lark's head knot. Slide them close enough together to look connected, but not so tight that they bunch. The spacing you set here controls the whole project, so take an extra minute and line them up before moving on.
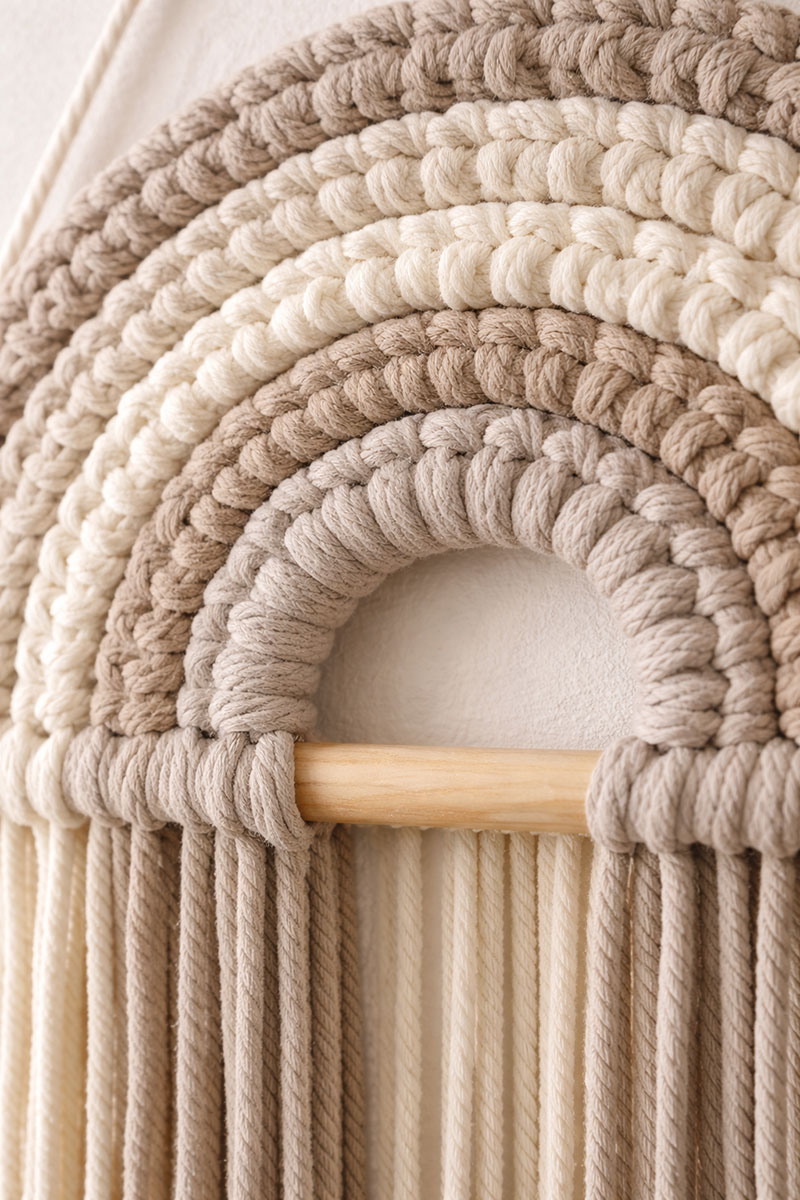
Step 3. Make your first full row across the hanging. Use the same knot all the way through so the top edge reads as one clean band. This first row is your anchor row. If it sits crooked, every row below it will show that problem.
Step 4. Start building the first arc by working from the outer side toward the center on both sides. Leave the center section slightly lower than the outer edges if you want that layered curve to show clearly once the piece is hanging.
Step 5. Repeat the same process for the next row, but move inward a little more. That is what creates the curved shape. You are not forcing the cords into an arc. You are creating the arc by changing where the row begins and ends.
Step 6. Continue adding rows in the same pattern, each one slightly shorter than the row before it if you want stacked arcs. Keep checking both sides as you go. One side can drift faster than you think, especially if you are knotting while the piece is lying flat on a table.
Here is one small detail that matters a lot. The first time many people lift the project up, they realize one side has more weight than the other. That is normal. Hang it up for a minute before you panic. A lot of shape issues are easier to see and fix while it is vertical.
How to Shape and Trim the Finished Pattern
This is where the project starts to look the way you hoped it would. Once the rows are done, hang the piece before trimming anything. Looking at it on the wall it is much easier to get an idea of how to get a balanced finish when gravity is doing its job.
Step 7. Decide how you want the lower edge to look. You can trim it into a shallow curve, a straight line, or a center point. A shallow curve is often the easiest to live with because it echoes the arc pattern above without looking too edgy and sharp.
Step 8. Trim a little at a time and assess the situation. Do not make one big cut. Trim, step back, and look again. Your patience will pay off in the final result.
Step 9. If you want a softer fringe, comb the bottom lightly and trim again. If you want more structure, skip the combing and leave the ends as they are.
Not every finished piece will look exactly like the original example, and that is actually part of what makes this kind of project special. Small differences in spacing, trimming, or tension give each wall hanging its own look without changing the core pattern.
One unique trick that helps keep this design from looking too much like every other version online is to change the row spacing slightly or vary the final trim line by a small amount. Quilters do this kind of thing all the time with layout and proportion, and it works for other crafts, too. Tiny changes make the finished piece feel more personal without changing the basic pattern.
Keep the shape simple. That is a lot of the beauty of this rainbow.
Where This Pattern Works Best in a Nursery
A lot of nurseries have the same problem once the furniture is in place. The room does not need more stuff. It needs one or two pieces that make the space feel settled. That is where this hanging earns its keep.
Above a crib, it should be placed high enough to stay well out of reach and treated strictly as wall decor, not something a baby can reach or interact with. Above a dresser or changing area, it can help break up a blank wall and connect the rest of the room visually.
I believe this kind of piece works especially well in smaller rooms because it adds vertical interest without taking up floor space. That is one reason it fits naturally with small nursery layout ideas and broader nursery ideas that focus on using each part of the room well.
If you are still deciding where wall decor belongs in relation to the crib, this pairs well with where to put a crib in a nursery. If you are building the whole room around one look, it also fits naturally into baby nursery themes.
Easy Variations That Keep the Pattern Yours
Once you make your own rainbow, it becomes obvious how much the look can change with very small adjustments. A wider dowel gives the hanging more spread. Shorter rows create a tighter center. Slightly different cord thickness changes the whole feel on the wall.
You can also shift the color direction depending on what your room needs. A neutral version tends to age well, but a more colorful version often catches the eye faster in nursery photos and inspiration boards. That does not mean the pattern has to be loud. It just means the cords can carry more of the visual interest when the room around them stays simple.
That balance is part of why this project holds up over time. Even when the bedding changes or the dresser gets restyled, the wall hanging still makes sense because the form is straightforward.
FAQ About This Boho Macrame Wall Hanging Pattern
Is this a beginner project?
Yes. The pattern is beginner friendly because it relies on repeating the same knot sequence and changing the row width gradually.
How long does it take to make?
Most people can finish a medium size version in one evening or over a weekend afternoon if they stop and check spacing carefully.
What size works best above a crib?
A width of around 12 to 18 inches usually fits well, but placement matters more than exact size. Keep it high on the wall and fully out of reach.
Can I change the shape without changing the whole pattern?
Yes. The easiest ways are to adjust the row spacing, narrow or widen the arcs, and trim the bottom edge differently.
Will this still work if I change the room later?
Yes. That is one of the best things about this design. Because the structure is simple, it usually still fits when the rest of the room shifts over time.
For crib area safety, follow the U.S. Consumer Product Safety Commission safe sleep guidance and keep all decor secure and fully out of reach.
When you click on links to various merchants on this site and make a purchase, this may result in this site earning a commission. This does not affect the price you pay.
UBGI Gold Standard 2026
Verified for performance, SEO,
and accessibility compliance.
Photos, decorating ideas, party setups, and reader submissions are shared for inspiration only and are not intended as step-by-step decorating, construction, or DIY instructions.
About Jan | Contact | Baby Room Ideas (Blog) | Site Map | Privacy Policy | Disclosure Policy | Disclaimer | Affiliate Disclosure | Earnings Disclosure | Facebook | Pinterest
I am a participant in the Amazon Services LLC Associates Program, an affiliate advertising program designed to provide a means for us to earn fees by linking to Amazon.
Copyright © 2006-2026. All Rights Reserved.