Bear Crib Mobile Ideas for a Cozy Teddy Bear Nursery (Storybook Style)
Here are some creative bear crib mobile ideas that can completely shape the look and feel of a nursery. If you are going for a soft, cozy teddy bear style, the right mix of gentle colors, simple shapes, and a few well-chosen details can make the room feel calm, warm, and thoughtfully put together. Whether you’re planning to buy one or make your own, a bear crib mobile can become a sweet focal point above the crib that ties the whole nursery together without overwhelming the space.
More baby mobile ideas:
Jump to what you need:
Teddy Bear Crib Mobile Ideas That Look Soft and Handmade
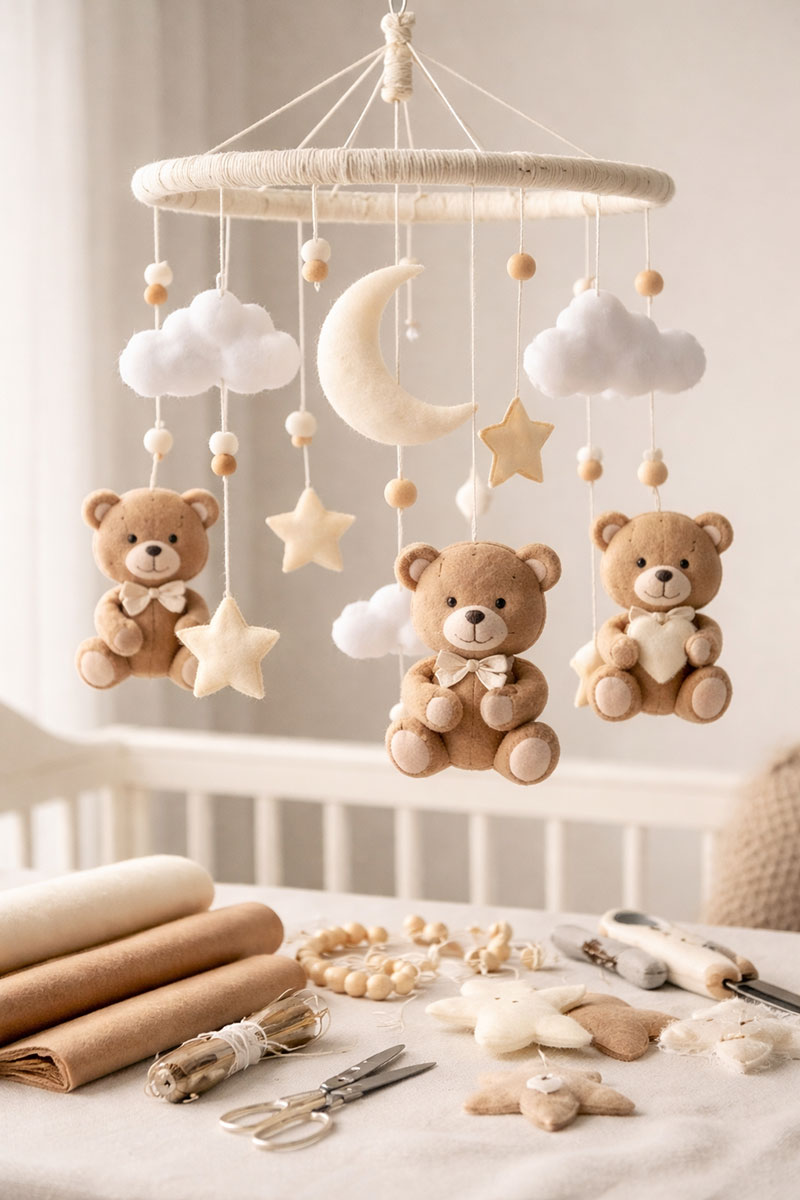
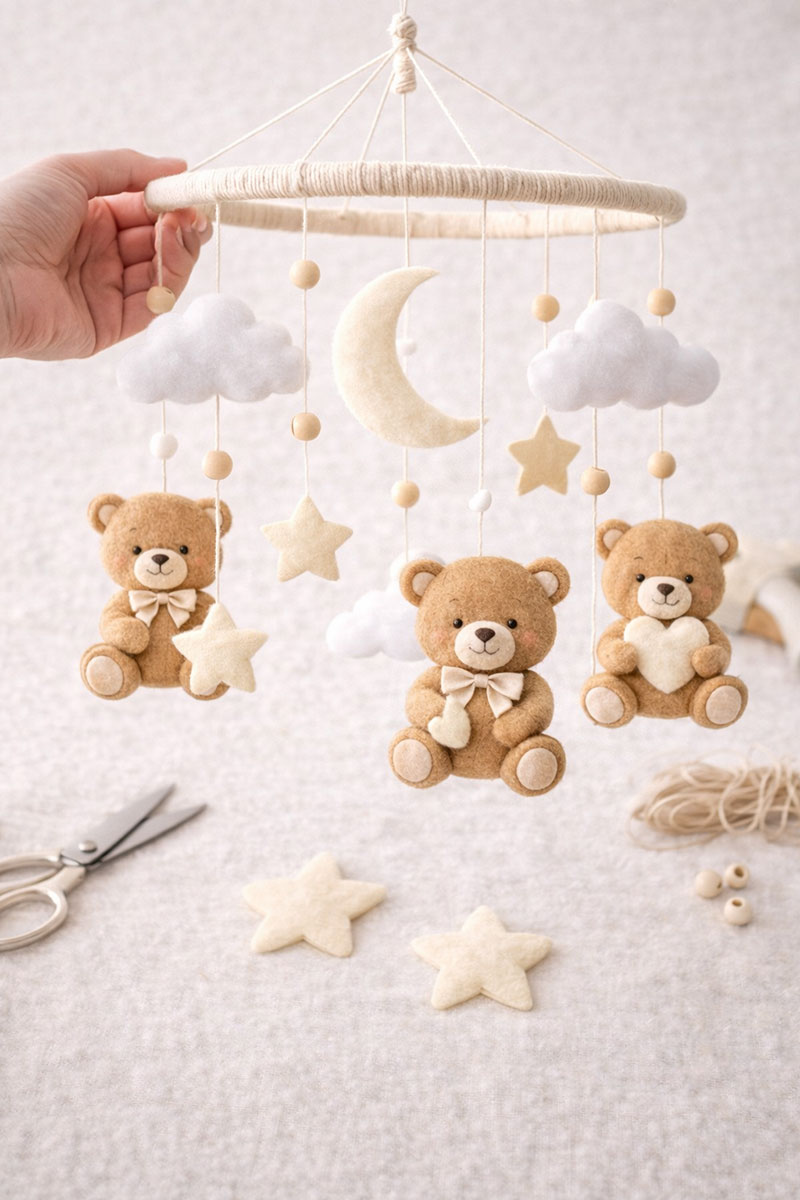
A teddy bear crib mobile works best when it feels sweet and simple instead of crowded. The version below uses soft felt bears, a wrapped hoop, a few clouds and stars, and light neutral colors that fit beautifully into a cozy teddy bear or storybook nursery. This style is especially nice for beginners because the shapes are easy to cut, the pieces are light enough to hang evenly, and the finished mobile looks polished without needing advanced sewing skills.
If you have never made a nursery mobile before, this is a very forgiving project to start with. You do not need special crafting experience, and you do not have to make it perfect for it to turn out beautifully. Once the felt pieces are cut, the rest is mostly simple assembly, spacing, and tying everything in a balanced way so the mobile hangs evenly above the crib.
DIY Bear Crib Mobile Materials List
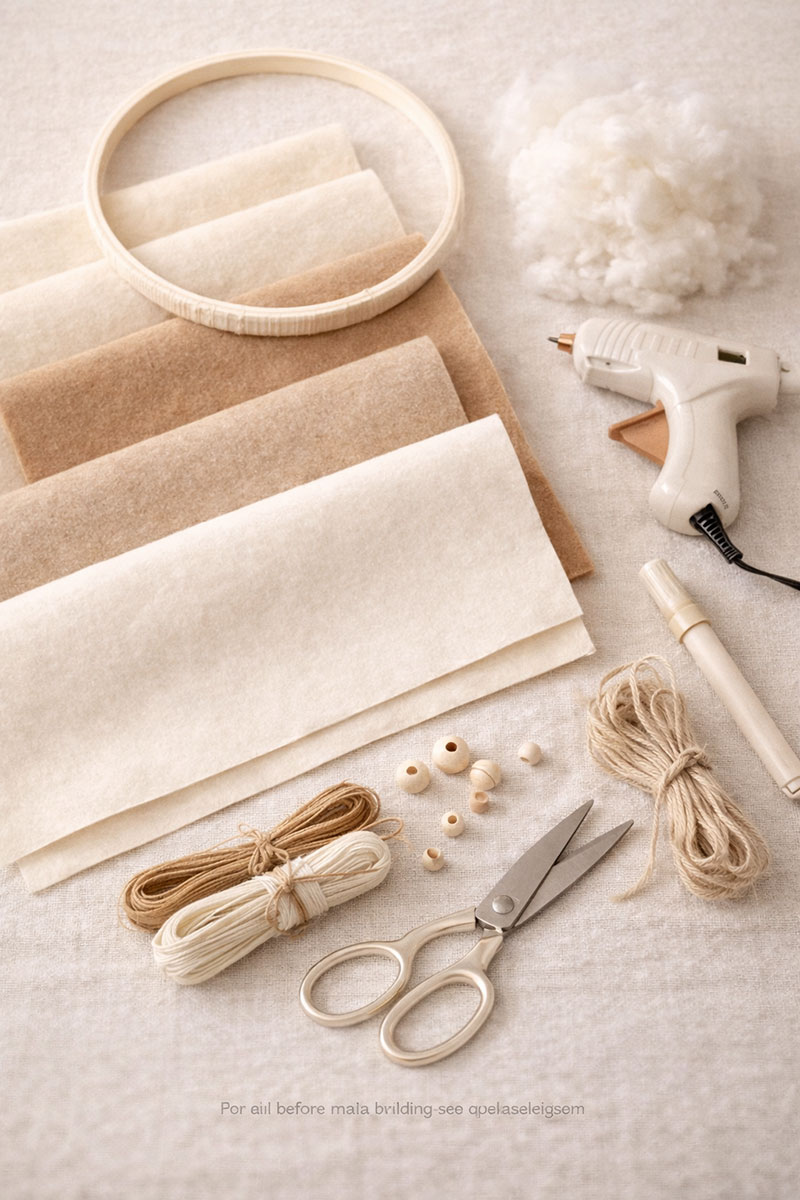
You do not need many supplies for this project, which is one reason this bear crib mobile works so well as a beginner DIY. Try to keep everything lightweight so the hoop stays balanced and the mobile moves gently instead of swinging heavily.
- One wooden or bamboo craft hoop, about 8 to 10 inches wide
- Cream, tan, beige, brown, and white felt sheets
- Poly fill stuffing if you want lightly padded bears or clouds
- Embroidery floss or matching thread
- Sharp fabric scissors
- Hot glue gun or craft glue
- String, thin cord, or embroidery thread for hanging pieces
- Wooden beads if you want a soft decorative detail
- Pencil or fabric marker for tracing templates
- Ruler or measuring tape
- Needle for simple hand stitching
If you want the easiest version, skip any complicated extras and work with three main shapes only: teddy bears, stars, and clouds. That is enough to create a mobile that looks full and charming without becoming difficult to assemble. You can add a moon if you want a slightly more storybook look, but it is completely optional.
Pattern Templates for the Bear Crib Mobile
Printable Bear Crib Mobile Pattern Templates
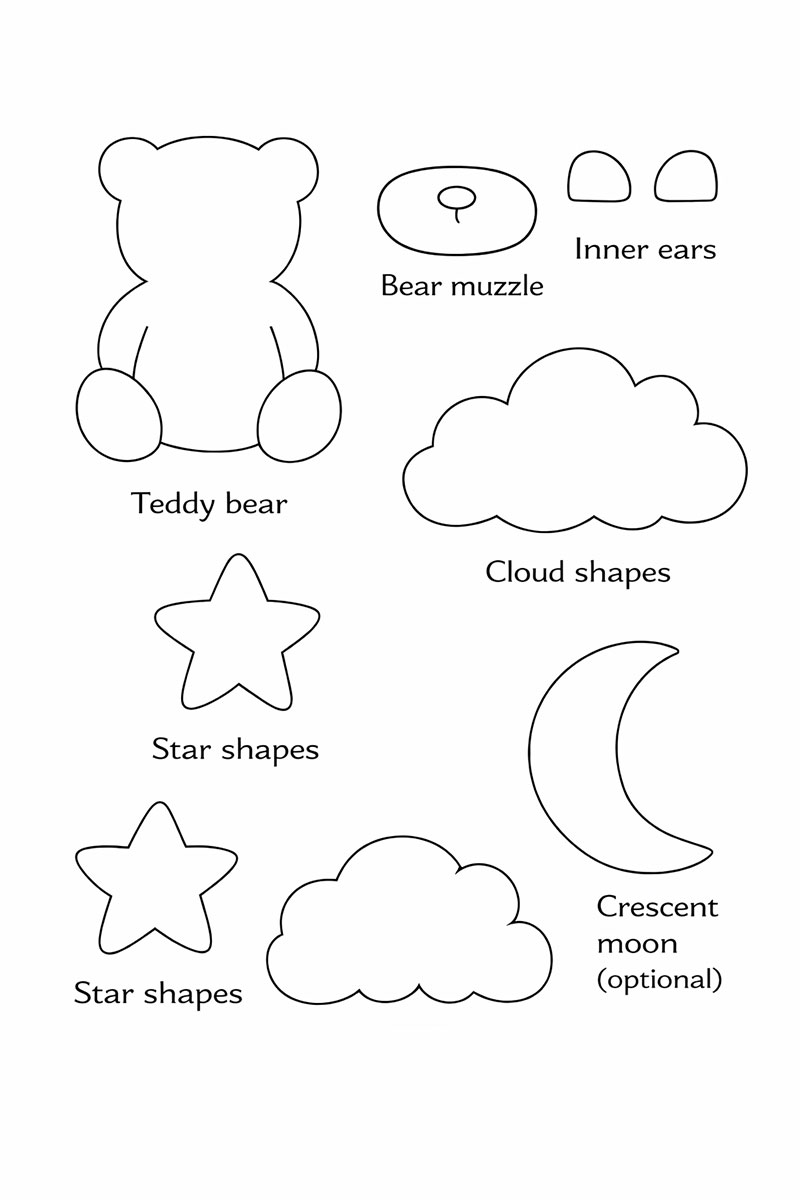
Use these simple shapes to create a balanced and beginner-friendly mobile. You can sketch them yourself or print and trace them onto felt. Keep the sizes consistent so the mobile hangs evenly.
- Teddy bear (main piece): About 4–5 inches tall with rounded ears and a soft oval body
- Bear muzzle: Small oval for the face center
- Inner ears: Two small half-circle shapes
- Star shapes: 2–3 inches wide, slightly rounded points
- Cloud shapes: Soft 3-bump cloud about 3–4 inches wide
- Crescent moon (optional): About 4 inches tall for a storybook look
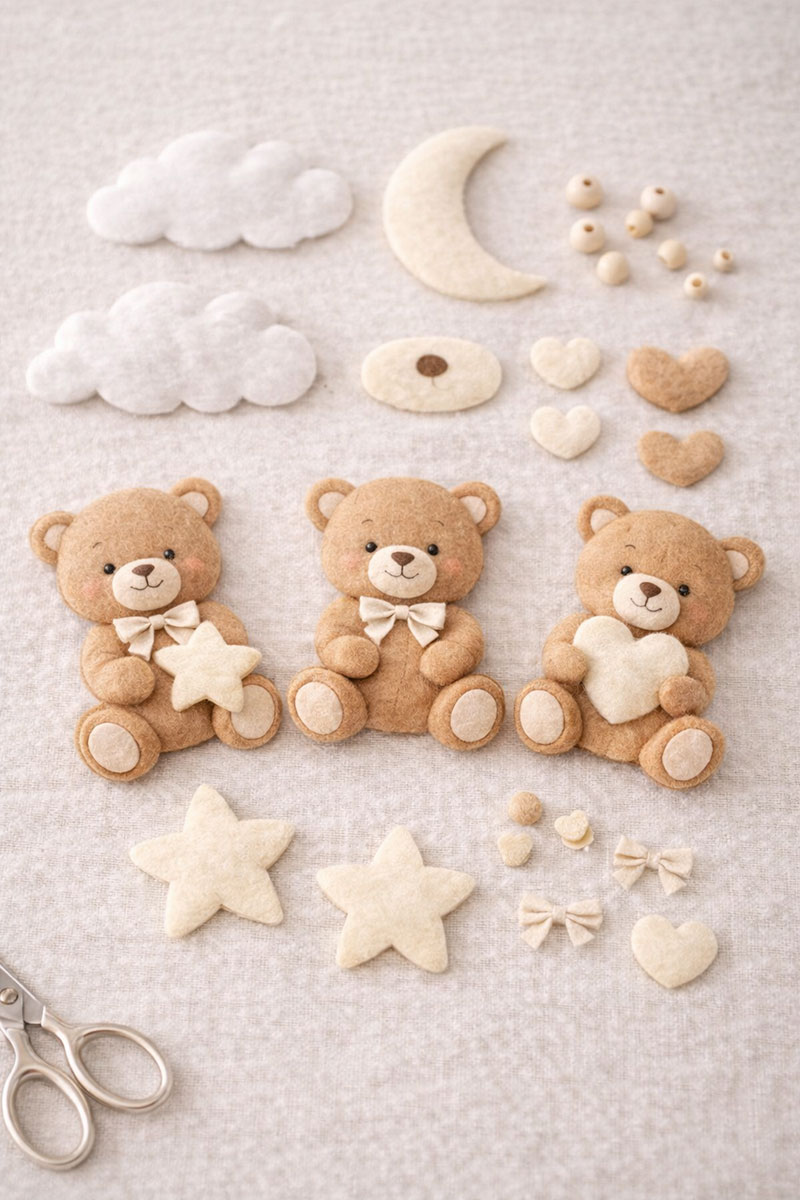
For each shape, cut two matching felt pieces so you can glue or lightly stuff them for a soft, finished look. Keep all pieces lightweight so the mobile stays balanced.
Tip: Before cutting felt, arrange your paper templates on a table to preview spacing. The teddy bears should be the largest elements, with stars and clouds filling in around them.
The simplest way to make this project look neat is to use paper templates first. Draw each shape on plain paper or lightweight cardstock, cut it out, and use those pieces to trace your felt. This keeps the mobile more uniform and makes it much easier to cut duplicate shapes for front and back layers.
For each teddy bear, make one body shape with rounded ears and a softly oval belly area. Then make small separate pieces for the muzzle, inner ears, and any little heart or bow detail you want to add. Stars and clouds can stay very basic. A slightly rounded five-point star and a puffy three-bump cloud both work well in felt and are easy for beginners to cut.
A good beginner template set looks like this:
- 3 teddy bear templates
- 4 to 6 star templates in two sizes
- 2 cloud templates
- 1 optional crescent moon template
Before cutting felt, lay the paper pieces on your table together and make sure the sizes feel balanced. The bears should be the biggest hanging elements, while the stars and clouds act as softer filler pieces around them.
How to Cut the Felt Pieces
Trace each template onto the felt using a pencil or fabric marker. Cut slowly and keep your scissors moving in smooth curves, especially around the ears and rounded bear bodies. For each hanging shape, you will usually want two matching felt pieces so you can glue or stitch them together for a cleaner finished look.
If you want a flatter, simpler mobile, glue the front and back felt layers together with no stuffing. If you want the shapes to look softer and a little more dimensional, leave a small opening, add a tiny amount of poly fill, and close the edge with a few hand stitches. Do not overstuff them. Mobile pieces should stay light.
Need an easier option?
If cutting and assembling the teddy bear shapes feels like more than you want to take on, there is a simple shortcut that still looks beautiful. Small pre-made bear decorations can be used in place of felt pieces and are much quicker to work with.
These lightweight decorations can be attached directly to your strings and spaced around the hoop the same way as the felt shapes, giving you a similar finished look with much less effort.
Use this simple order for the bear faces:
- Glue or stitch the muzzle in place first
- Add the inner ears next
- Use tiny stitched eyes and nose or a simple embroidered face
- Add a bow or small heart only if you want one accent detail
Keeping the faces simple usually gives the best result. Too many tiny details can make the bears look messy, especially when they are hanging and viewed from below.
Assembling the Mobile Step by Step
Once all of your felt pieces are ready, wrap the hoop in yarn or cord if you want a softer finished look. This small step makes the mobile feel more custom and helps it coordinate with the nursery. Secure the beginning and ending ends of the wrap neatly with glue so they do not loosen later.
Step 1: Cut your hanging strings first. It helps to prepare all of them before attaching anything. Use a few different lengths so the mobile has dimension, but do not make the drops too long. Short to medium lengths usually look the most balanced above a crib.
Step 2: Plan the layout before attaching pieces. Place your three teddy bears where they will hang, then fill in the empty spaces with clouds, stars, and the optional moon. Try to spread the weight evenly around the hoop.
Step 3: Attach the felt pieces to the strings. You can knot the string through a stitched loop, glue it between felt layers, or sew it into the top of each shape. For beginners, sandwiching the string between two felt layers is often the easiest method.
Step 4: Add beads if you want them. Slide one or two wooden beads onto a string above a bear or star for a soft finished detail. Keep this minimal so the mobile does not look busy.
Step 5: Tie each string to the hoop. Start with the three bears, then add clouds, stars, and the moon around them. Step back often and check the spacing. This is where the finished look really comes together.
Step 6: Create the top hanging point. Tie three or four equal lengths of cord to the hoop and bring them together at the top. Knot them securely so the hoop hangs level.
After the mobile is assembled, hold it up and look at it from several angles. If one side dips too much, shift a heavier piece slightly or shorten one string until the whole design hangs more evenly.
No-Sew Bear Crib Mobile (Beginner-Friendly Option)
If you like the look of this mobile but do not want to sew anything, you can still create a soft, high-end version using a simple no-sew method. This approach works especially well for beginners and can be finished quickly with clean, polished results.
Instead of stitching the felt pieces together, cut two matching shapes for each design and use a small amount of craft glue to seal the edges. Leave a tiny opening, add a light pinch of stuffing if you want a softer look, then close the edge with glue. Press gently and allow each piece to dry before handling.
Another easy option is to keep the shapes completely flat. Glue the string between two felt layers, press them together, and let them set. This creates lightweight pieces that hang evenly and move gently without swinging too much.
- Use fabric glue or a low-temp glue gun for better control
- Apply glue in a thin line to avoid bulky edges
- Work one piece at a time so everything stays neat
- Let each shape dry fully before attaching to the hoop
This no-sew version gives you the same soft teddy bear look without needing any stitching, making it a great choice if you want a quicker project that still feels handmade and thoughtfully put together.
If you are new to crafting or using adhesives, you can also review these general craft project tips and techniques to help you work more confidently and safely.
Beginner Tips for a Better Finished Mobile
The easiest mistake to make is adding too many pieces. If you keep wondering whether the mobile needs one more bear, one more cloud, or more stars, it probably does not. A cleaner layout almost always looks better. Three bears, a few stars, and a couple of clouds are usually enough to make the mobile feel full.
Another good tip is to stay with a small color palette. Tan, cream, white, and soft brown are perfect for a teddy bear nursery. If you want more warmth, add one muted accent like dusty caramel or soft taupe. This keeps the whole project calm and coordinated instead of busy.
You can also adapt this same tutorial for different nursery styles. A more classic teddy bear nursery can use bows, hearts, and soft beige tones. A more rustic or woodland version can swap in darker browns, a moon, and a few more natural wood beads. The basic structure stays exactly the same.
When the project is finished, the result is a sweet handmade bear crib mobile that looks soft, thoughtful, and nursery-ready. It is simple enough for a beginner to make in an afternoon, but polished enough to look like a custom decor piece once it is hanging in place.
If you want this project to feel even more complete, pair it with other gentle teddy bear nursery details like framed storybook animal art, a soft crib sheet, or one or two bear accents elsewhere in the room. That gives the nursery a connected look without making everything too matchy or overdone.
When you click on links to various merchants on this site and make a purchase, this may result in this site earning a commission. This does not affect the price you pay.
UBGI Gold Standard 2026
Verified for performance, SEO,
and accessibility compliance.
Photos, decorating ideas, party setups, and reader submissions are shared for inspiration only and are not intended as step-by-step decorating, construction, or DIY instructions.
About Jan | Contact | Baby Room Ideas (Blog) | Site Map | Privacy Policy | Disclosure Policy | Disclaimer | Affiliate Disclosure | Earnings Disclosure | Facebook | Pinterest
I am a participant in the Amazon Services LLC Associates Program, an affiliate advertising program designed to provide a means for us to earn fees by linking to Amazon.
Copyright © 2006-2026. All Rights Reserved.