Free Crochet Baby Christmas Dress Pattern with Appliqués
By Jan Bay
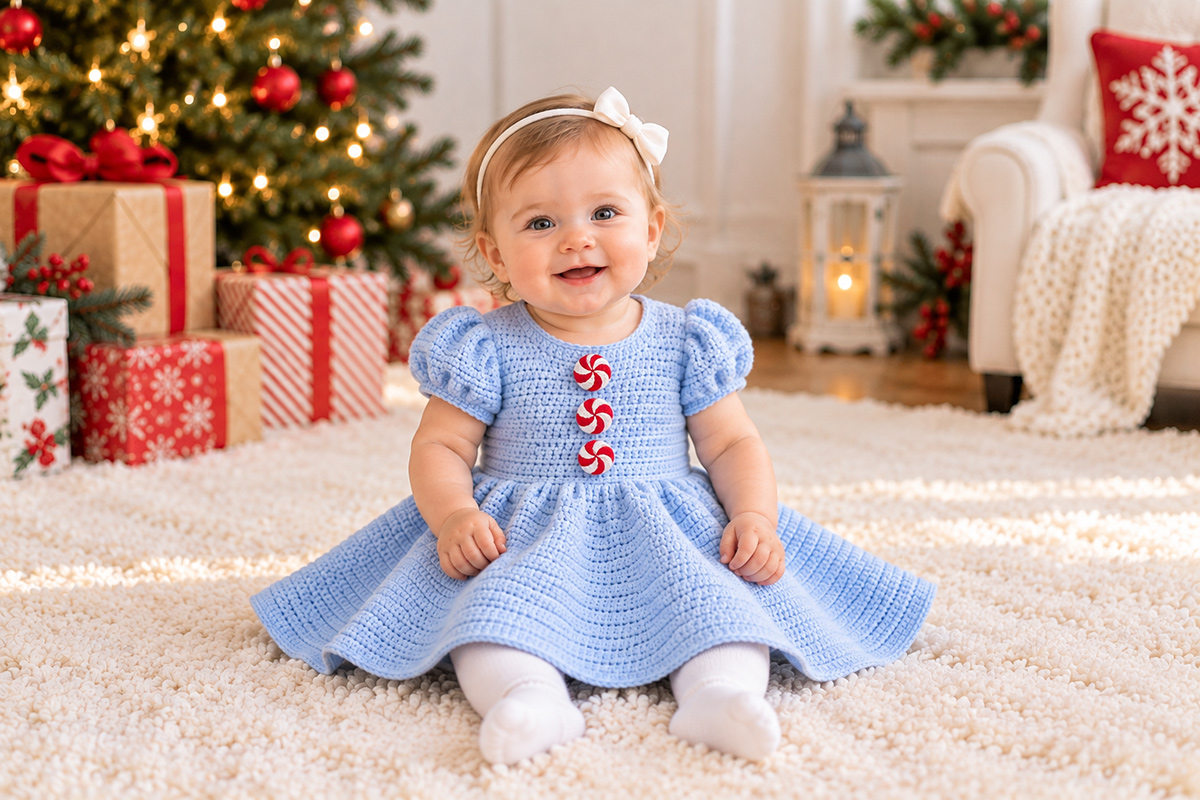
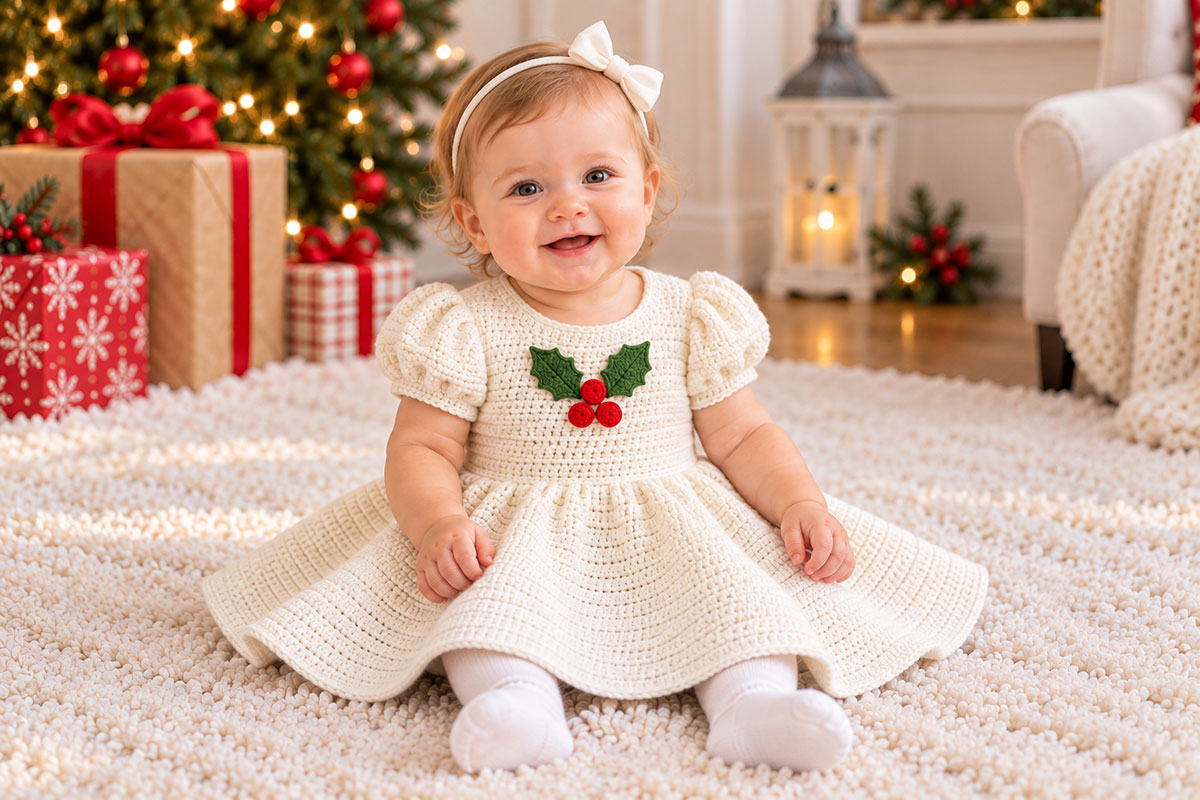
This free crochet baby Christmas dress pattern features a softly flared skirt, sweet little puff sleeves and two ways to jazz it up with my Christmas appliqués. I'm making the main version in pale blue with three little red-and-white peppermint candies down the front, and the pattern includes sizes for babies and young toddlers from 6 to 24 months. If peppermint isn't quite what you had in mind, I'll show you how the same dress looks in ivory with a small holly-and-berries appliqué instead.
Explore More Free Crochet Baby Girl Patterns
Crochet Baby Tutu and Diaper Cover Pattern
Free Ruffled Crochet Diaper Cover Pattern
Crochet Peppermint Candy Applique Pattern
See Supplies for This Project Here.
Jump to the Free Crochet Baby Christmas Dress Pattern
More Crochet Baby Girl Outfit Patterns
If you enjoy making little dresses and handmade outfits for baby girls, these two projects are worth a look. One has a full, tutu-style crochet skirt, while the other features three rows of soft ruffles across the back.
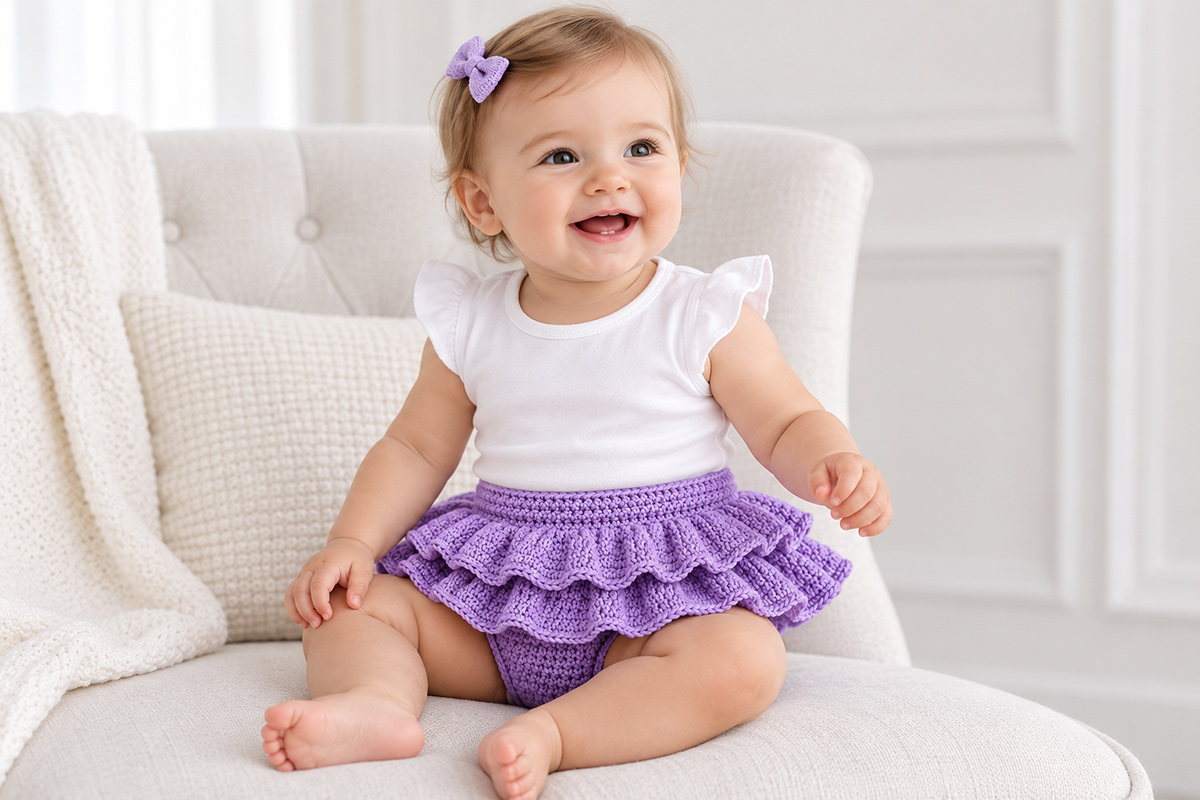
Free Crochet Baby Tutu Diaper Cover Pattern
Make a pretty little tutu with two full crochet skirt tiers attached to a fitted diaper cover. The pattern includes three baby sizes from newborn through 12 months.
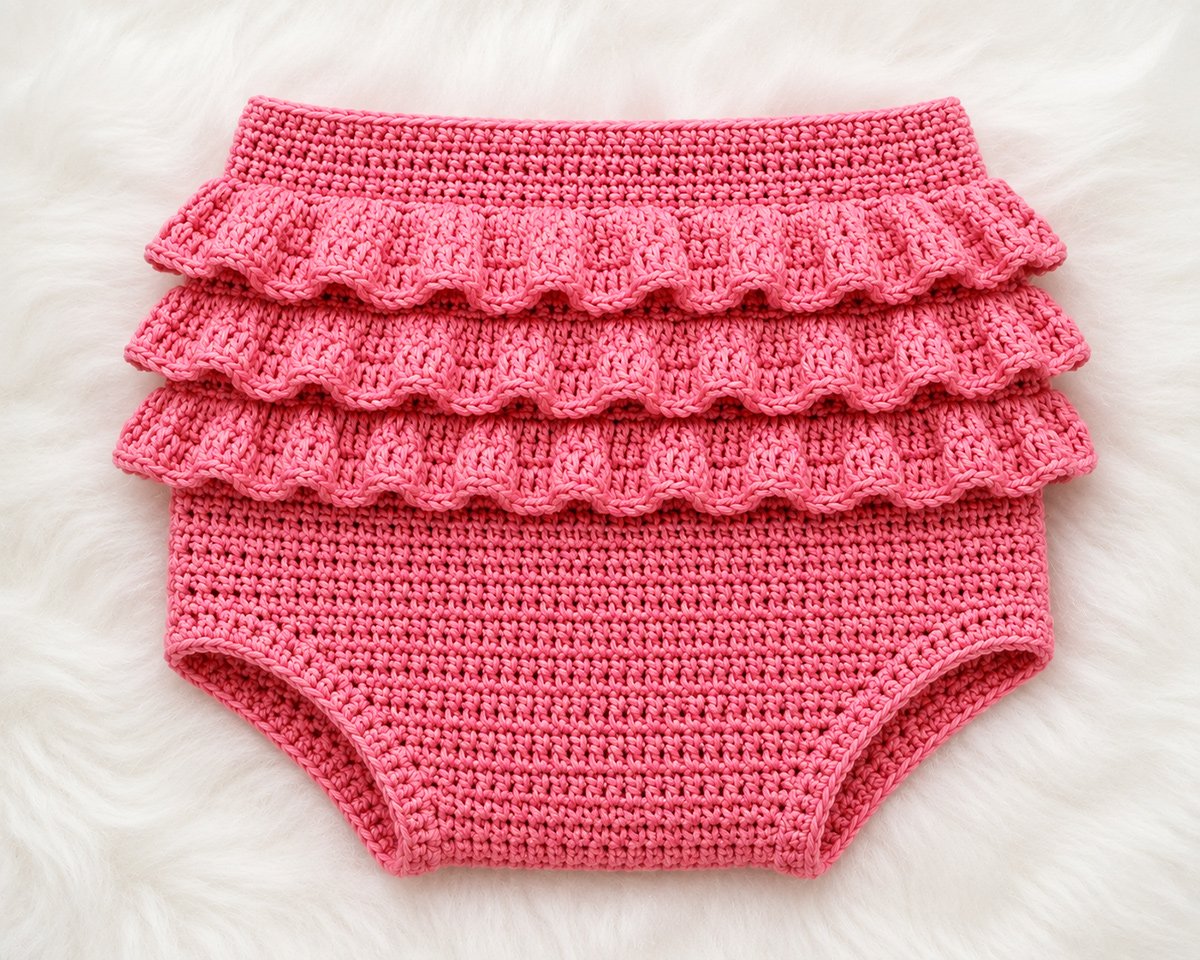
Free Ruffled Crochet Diaper Cover Pattern
This sweet baby diaper cover has three rows of overlapping crochet ruffles and a comfortable shaped fit. Includes instructions for newborn, 3–6 months and 6–12 months.
Two Pretty Versions of the Crochet Baby Christmas Dress
One simple dress pattern gives you two lovely Christmas outfits! Make the baby-blue version with three little red-and-white peppermint candy appliques arranged down the front, or choose the ivory dress with a small cluster of holly leaves and red berries centered on the bodice. Both dresses have the same rounded neckline, softly puffed sleeves and gently flared skirt. Only the colors and embellishments change.
If you're looking for another holiday project after making the dress, you'll find more ideas in my free Christmas crochet patterns collection.
Crochet Baby Christmas Dress Sizes and Finished Measurements
You can make this dress in three sizes: 6–12 months, 12–18 months and 18–24 months. The skirt is meant to flare away from the body, but the upper part should fit comfortably over a lightweight shirt or onesie.
Before choosing a size, measure around baby's chest. Age labels are only a starting point, especially when you're making something that needs to fit for Christmas pictures.
| Measurement | 6–12 Months | 12–18 Months | 18–24 Months |
|---|---|---|---|
| Finished chest | 20" | 21" | 22" |
| Bodice length | 6" | 6⅓" | 7" |
| Skirt length | 8" | 9" | 10" |
| Approximate total length | 14" | 15⅓" | 17" |
These are calculated finished measurements based on the pattern gauge. They aren't measurements from a physically completed dress. The Craft Yarn Council has a useful baby size chart if you want to compare standard chest and armhole measurements before starting.
I'd choose the size by chest measurement first. If the dress is a little longer than expected, that's much easier to live with than a bodice that won't fit over a shirt.
Yarn, Materials and Gauge
The baby-blue version needs one main color and small amounts of red and white for the three peppermint candies. The ivory dress uses the same base instructions, with green holly leaves and flat red berries instead.
Main Dress Materials
- Soft DK weight yarn, Category 3, in baby blue or ivory
- Approximately 450–550 yards for 6–12 months
- Approximately 550–650 yards for 12–18 months
- Approximately 650–800 yards for 18–24 months
- 4.0 mm crochet hook, or size needed to obtain gauge
- 3.5 mm crochet hook for a firmer neckline and cuff edging, if needed
- Yarn needle and scissors
- Removable stitch markers
- Measuring tape
- Two securely sewn garment snaps for the concealed back opening
- Small pieces of soft woven twill tape to reinforce the snap attachment areas
The yardage estimates include a little allowance for swatching and finishing. You may need more if your yarn is heavy for its category or if you decide to lengthen the skirt.
Decorative Appliqué Materials
- Small amount of fine cotton or sport-weight yarn in white or ivory
- Small amount of cranberry-red yarn or embroidery floss
- Small amount of holly-green yarn for the ivory dress
- 2.75 mm crochet hook for the miniature decorations, adjusted if necessary
- Embroidery needle for the peppermint swirl details
Keep the decorations flatter and firmer than the dress fabric. A soft skirt can move and drape, but those little peppermint candies need to stay round when they're sewn to the front.
Gauge
With the main dress yarn and 4.0 mm hook:
16 half double crochet stitches and 12 rows = 4 inches.
Make a swatch larger than 4 inches, wash and dry it according to the yarn label, then measure the center. Don't stretch it when measuring.
If you have too many stitches in 4 inches, try a larger hook. If you have too few, try a smaller one. Row gauge matters too because it controls the bodice length and the depth of the armholes.
Don't skip the swatch. An inch of extra width might not sound like much, but it matters on a little dress.
Crochet Stitches and Pattern Notes
This pattern uses U.S. crochet terminology.
- ch = chain
- sc = single crochet
- hdc = half double crochet
- dc = double crochet
- tr = treble crochet
- sl st = slip stitch
- st/sts = stitch/stitches
- hdc2tog = half double crochet two stitches together
- RS = right side
- WS = wrong side
- rnd = round
Turning chains: Ch 2 before a new row of hdc. This turning chain does not count as a stitch. Work the first hdc into the first actual stitch.
Size instructions: Numbers are given in the order 6–12 months (12–18 months, 18–24 months). Follow one size consistently.
Construction: Make the front and back bodice separately, leaving a short opening at the upper center back. Sew the shoulders and lower side seams, leaving the armholes open. Add the gathered sleeves, then crochet the skirt downward from the waist.
Right side: Choose the smoother-looking face of your hdc fabric for the outside of the dress. Keep that same face outward on the front, back and sleeves.
Color: Work the entire dress in baby blue or ivory. The decorations are made separately and sewn on after the dress is finished.
You'll get a cleaner result by keeping the dress itself simple. The puff sleeves and gathered skirt already give it plenty of shape, so there is no need to add extra stripes, contrasting bodice panels or more appliqués.
Free Crochet Baby Christmas Dress Pattern
Start with the bodice. It's made in two pieces, which makes it easier to shape the rounded neckline without adding bulky seams across the front.
The front has a deeper neckline, while the back has a short opening that makes dressing baby easier. Both pieces have the same width at the waist.
Front Bodice
With baby-blue or ivory DK yarn and your main hook, ch 42 (44, 46).
Row 1: Hdc in the third chain from the hook and in every remaining chain. Turn. 40 (42, 44) hdc.
Rows 2–12 (13, 15): Ch 2, hdc in every stitch across. Turn. Keep 40 (42, 44) stitches in every row.
The front is now ready for the neckline. You'll work the two shoulders separately, leaving the center stitches unworked.
Shape the Front Neckline
Work the first shoulder from its outside edge toward the center of the neckline. For the second shoulder, turn the piece over as needed and work a mirror image, so the decreases are always along the neckline rather than the armhole edge.
Neckline Row 1: Ch 2 and work 13 (14, 15) hdc from the outside edge toward the center. Turn. Leave the next 14 center stitches unworked and reserve the remaining 13 (14, 15) stitches for the opposite shoulder.
Neckline Row 2: Ch 2, hdc2tog over the first 2 stitches, then hdc in each of the remaining 11 (12, 13) stitches. Turn. 12 (13, 14) sts.
Neckline Row 3: Ch 2, hdc in the next 10 (11, 12) stitches, then hdc2tog over the last 2 stitches. Turn. 11 (12, 13) sts.
Neckline Row 4: Ch 2, hdc2tog over the first 2 stitches, then hdc in each of the remaining 9 (10, 11) stitches. Turn. 10 (11, 12) sts.
Neckline Row 5: Ch 2, hdc in the next 8 (9, 10) stitches, then hdc2tog over the last 2 stitches. Turn. 9 (10, 11) sts.
Neckline Row 6: Ch 2, hdc evenly across the remaining 9 (10, 11) stitches. Fasten off, leaving a sewing tail.
These six neckline rows are overall bodice Rows 13–18 (14–19, 16–21).
Return to the opposite outside edge and attach the yarn to the 13 (14, 15) stitches reserved for the second shoulder. Repeat Neckline Rows 1–6, mirroring every decrease so it faces the center of the dress.
Front neckline checkpoint: Both shoulders should finish with 9 (10, 11) stitches. The opening between their upper ends should span 22 stitches, approximately 5½ inches at the stated gauge. The deeper central scoop is formed by the four graduated decreases on each side.
Lay the piece flat and check that both sides of the neckline are symmetrical. If one shoulder is longer than the other, correct it before continuing.
Back Bodice
The back starts with the same foundation width as the front. The upper portion is split into two halves for the dressing opening.
Ch 42 (44, 46).
Row 1: Hdc in the third chain from the hook and in each remaining chain. Turn. 40 (42, 44) hdc.
Rows 2–7: Ch 2, hdc across. Turn. Maintain 40 (42, 44) stitches.
Make the Center-Back Opening
From Row 8 onward, work the left and right halves separately. Do not join them across the center. This opening will be finished and closed with concealed garment snaps after the dress is assembled.
Row 8, first half: Ch 2, work 20 (21, 22) hdc. Turn, leaving the remaining half unworked.
Continue the first half: Work evenly in hdc through overall Row 16 (17, 19). Each row has 20 (21, 22) stitches.
Attach yarn at the center of Row 7 to begin the second half. Work Row 8 across the remaining 20 (21, 22) stitches toward the opposite outside edge. Continue through overall Row 16 (17, 19), keeping the same stitch count.
You now have two separate upper-back sections. Keep the center edges straight and the two halves the same length.
Shape the Back Neckline and Shoulders
Work the last two rows separately on each back half. If your yarn is at the center-back edge, fasten off and rejoin it at the outside shoulder edge before beginning the next row.
Next row, overall Row 17 (18, 20): Starting at the outside shoulder edge, ch 2 and work 9 (10, 11) hdc. Leave the remaining 11 neckline-side stitches unworked. Turn.
Final row, overall Row 18 (19, 21): Ch 2, hdc across the 9 (10, 11) shoulder stitches. Fasten off, leaving a sewing tail.
Repeat on the other back half, keeping the 9 (10, 11) stitches at the outside shoulder edge.
The back should now have 9 (10, 11) stitches on each shoulder and a shallower neckline than the front. The center-back slit stays open below the neckline.
Join the Bodice
Place the front and back with right sides facing each other. Match the shoulder edges and sew each shoulder seam across all 9 (10, 11) stitches.
Next, match the two side edges at the waist.
Sew the lower 7 (7, 8) row ends together on each side, beginning at the waist. Leave the remaining upper 11 (12, 13) row ends open on each side for the sleeves.
At the stated row gauge, each armhole opening measures approximately 3⅔ (4, 4⅓) inches vertically when laid flat. The full opening includes both the front and back edges.
Turn the bodice right side out and check the shoulders and armholes. The bodice should be symmetrical, with the front scoop lower than the back neckline.
Don't close the back opening yet. It will be easier to finish the neckline and sew the concealed fasteners after the skirt and sleeves are attached.
Crochet Puff Sleeves
Those little puff sleeves are worth making carefully. They give the dress its Christmas-party look without needing lace, bows or extra decorations around the shoulders.
Each sleeve begins at the cuff and gradually widens toward the top. When you sew the upper edge into the armhole, you'll ease the extra fullness into soft gathers, concentrating them near the shoulder.
Make 2 identical sleeves.
Sleeve Instructions
With the main dress color, ch 30 (32, 34).
Row 1: Hdc in the third chain from the hook and in each remaining chain. Turn. 28 (30, 32) hdc.
Row 2: Ch 2, work 2 hdc in the first stitch, hdc across until one stitch remains, then work 2 hdc in the last stitch. Turn. 30 (32, 34) sts.
Row 3: Repeat Row 2. 32 (34, 36) sts.
Row 4: Ch 2, hdc evenly across. Turn. Maintain 32 (34, 36) sts.
Row 5: Ch 2, work 2 hdc in the first stitch, hdc across until one stitch remains, then work 2 hdc in the last stitch. Turn. 34 (36, 38) sts.
Row 6: Ch 2, hdc in every stitch across. Turn. 34 (36, 38) sts.
Row 7: Ch 2, work 2 hdc in the first stitch, hdc across until one stitch remains, then work 2 hdc in the last stitch. Turn. 36 (38, 40) sts.
Row 8: Ch 2, hdc in every stitch across. Turn. 36 (38, 40) sts.
Row 9: Ch 2, work 2 hdc in the first stitch, hdc across until one stitch remains, then work 2 hdc in the last stitch. 38 (40, 42) sts. For 6–12 months, fasten off, leaving a long sewing tail. For the two larger sizes, turn.
Row 10: For 12–18 and 18–24 months only, ch 2 and work hdc in every stitch across. 40 (42) hdc. Fasten off, leaving a long sewing tail.
The narrower foundation edge forms the cuff. The wider final row forms the gathered upper sleeve edge.
Join the Sleeve Seam
Fold the sleeve with right sides together, matching the two short side edges. With a separate length of matching yarn, sew the row ends together from the cuff to the wider upper edge, forming a short sleeve tube. Keep the long sewing tail from the final sleeve row available for attaching the sleeve to the armhole.
Turn the sleeve right side out. The upper opening should measure approximately 9½ (10, 10½) inches around before gathering.
Repeat for the second sleeve.
Attach the Puff Sleeves
Turn the bodice wrong side out and leave the sleeve right side out. Slip the sleeve inside the bodice through the armhole, bringing the right sides of the sleeve and bodice together. Align the wider upper sleeve edge with the armhole opening. Keep the reserved sewing tail ready for attachment after the gathers have been arranged.
Match the sleeve seam to the underarm seam. Mark the midpoint of the sleeve's upper edge and match it to the shoulder seam.
The sleeve top is deliberately wider than the armhole. Distribute the extra fabric into small, even gathers, keeping most of the fullness across the upper part of the shoulder. Leave the lower underarm area as smooth as possible.
Sew the sleeve edge securely around the entire armhole, adjusting the gathers as you go. The sleeve should curve outward gently rather than form a stiff ridge at the shoulder.
Repeat on the other side. Check that both sleeves have approximately the same fullness and sit at the same height.
Finish the Sleeve Cuffs
Join the main yarn at the underarm seam on the foundation edge of a sleeve.
Ch 1 and work one sc into each foundation stitch around the cuff. Join with a sl st to the first sc. You should have 28 (30, 32) sc.
Fasten off and weave in the ends.
Repeat on the other sleeve. The cuff should sit comfortably around the upper arm without pulling tightly.
If the sleeve looks too flat, redistribute the upper gathers before securing the final stitches. If it looks stiff or bulky, check whether you've gathered too much fabric into one small area.
Crochet the Flared Christmas Dress Skirt
Now for the skirt. This is the part that gives the dress that sweet little Christmas outfit shape.
You'll work directly into the unused foundation loops around the waist of the finished bodice. The first skirt round adds fullness all the way around, and two later increase rounds widen the skirt toward the hem.
Turn the dress right side out. With the neckline at the top, locate the unused foundation loops along the lower edge of the front and back bodice.
Join the main yarn at one side seam.
Skirt Round 1: Add the Waist Fullness
Work around the combined lower edges of the front and back. You have 80 (84, 88) foundation stitches available in total.
Round 1: Ch 2. Repeat [1 hdc in next foundation stitch, 2 hdc in next foundation stitch] all the way around. Join with a sl st to the first hdc. 120 (126, 132) hdc.
Those extra stitches form the fullness immediately below the waist. Keep the increases spread evenly rather than bunching them near the side seams.
For all remaining skirt rounds, ch 2 at the beginning. The chain does not count as a stitch. Join each round with a sl st to the first hdc. Move the beginning-of-round marker up as you work.
Rounds 2–9: Hdc in each stitch around. Maintain 120 (126, 132) sts.
Skirt Round 10: First Flare Increase
For 6–12 months: Repeat [hdc in next 9 sts, 2 hdc in next st] 12 times. 132 sts.
For 12–18 months: Repeat [hdc in next 8 sts, 2 hdc in next st] 14 times. 140 sts.
For 18–24 months: Repeat [hdc in next 10 sts, 2 hdc in next st] 12 times. 144 sts.
Join the round.
Rounds 11–18: Hdc evenly around, keeping 132 (140, 144) stitches in every round.
Skirt Round 19: Second Flare Increase
For 6–12 months: Repeat [hdc in next 10 sts, 2 hdc in next st] 12 times. 144 sts.
For 12–18 months: Repeat [hdc in next 9 sts, 2 hdc in next st] 14 times. 154 sts.
For 18–24 months: Repeat [hdc in next 11 sts, 2 hdc in next st] 12 times. 156 sts.
Join the round.
Complete the Skirt Length
6–12 months: Work Rounds 20–24 evenly with 144 hdc in each round.
12–18 months: Work Rounds 20–27 evenly with 154 hdc in each round.
18–24 months: Work Rounds 20–30 evenly with 156 hdc in each round.
At the stated gauge, the skirt should measure approximately 8 (9, 10) inches from the waist to the lower edge, before the final edging.
Check the length before fastening off. If you're making this for a particular child, you can add or remove even rounds to adjust the skirt length. Keep the final stitch count unchanged.
Finish the Hem
After the last hdc round, ch 1 and work one sc in each stitch around. Join with a sl st to the first sc.
Fasten off and weave in the ends securely.
The skirt should flare gently, with a smooth, neat hem. The width comes from the waist and skirt increases rather than from a bulky ruffle stitched onto the bottom.
Spread the dress on a flat surface. Smooth the skirt into shape without stretching it and check that the increases are distributed evenly. If the hem looks wavy before washing or blocking, check the stitch counts first.
Baby-Blue Christmas Dress with Three Peppermint Appliqués
For the baby-blue dress, I wanted the peppermint candies to be little accents rather than one enormous decoration covering the front. Three small candies, lined up neatly down the bodice, are plenty.
The candies are made separately from fine yarn, then sewn flat to the dress. They're decorations, not working buttons, and there are no buttonholes on the front.
If you've already made my crochet peppermint candy appliqué, you'll recognize the red-and-white pinwheel look. That larger version is approximately 3½ inches across, though, so I've included a much smaller variation here.
Miniature Crochet Peppermint Appliqués
Make exactly 3.
Use fine white or ivory cotton yarn and a 2.75 mm hook, or a smaller hook if necessary to obtain the approximate size.
Round 1: Make a magic ring. Work 6 sc into the ring. Pull the ring firmly closed. Join with a sl st to the first sc. 6 sc.
Round 2: Ch 1, work 2 sc into each stitch around. Join with a sl st to the first sc. 12 sc.
Round 3: Ch 1, repeat [sc in next st, 2 sc in next st] 6 times. Join with a sl st to the first sc. 18 sc.
Fasten off, leaving a long white sewing tail. Each little candy should lie flat and measure approximately ¾ to 1 inch across. This size is a target, so check the first candy before making the other two.
Add the Red Peppermint Swirls
Thread an embroidery needle with cranberry-red yarn or several strands of red embroidery floss.
Mark six evenly spaced positions around the outer edge of the white circle. With 18 stitches in the last round, the positions will be three stitches apart.
Starting near the center, embroider six short, tapered red wedges extending toward those marked positions. Angle every wedge slightly clockwise to give the candy a gentle peppermint-swirl appearance. Use close, flat stitches to fill the wedges, leaving white spaces between them.
Keep the center neat and the outside edge round. Don't pull the embroidery so tightly that the candy cups or wrinkles.
Secure the red thread ends on the wrong side, weaving them through several stitches. Repeat the same arrangement on the other two candies so all three match.
These miniature decorations use a crocheted white base with red surface embroidery. They aren't scaled-down copies of the twelve separately crocheted wedges in the larger peppermint pattern.
Position the Three Peppermint Candies
Lay the finished blue dress flat with the front facing up. Find the exact center of the bodice.
Arrange the three candies in one straight vertical line, with the first just below the front neckline, the second beneath it and the third above the gathered waist.
As a starting point, place the centers approximately 1⅛ to 1¼ inches apart. Adjust the spacing slightly for the size of your candies and the length of the bodice.
Leave some clear blue fabric between the neckline and the first candy, and between the third candy and the waist. None of the decorations should overlap the skirt seam or disappear into the neckline edging.
Once the spacing looks even, sew around the entire outside edge of each peppermint with its white sewing tail. Add a few discreet anchoring stitches through the center, then secure and weave in every end on the inside of the bodice.
And stop there. The approved blue dress has exactly three peppermint candies, with no holly leaves or other appliqués mixed in.
Ivory Crochet Baby Christmas Dress with Holly and Berries
The ivory version has a completely different look, even though the dress itself is exactly the same. Rather than putting several decorations down the front, use one small holly cluster centered on the upper bodice.
I'd keep the leaves a rich Christmas green and the berries cranberry red. Against the ivory yarn, that little bit of color is enough.
Use the same bodice, puff-sleeve and flared-skirt instructions, substituting ivory for baby blue throughout.
Crochet the Small Holly Leaves
Make 2 matching leaves.
These are smaller versions of the flat leaves in my crochet holly leaf pattern with berries. Use fine green cotton or sport-weight yarn and a 2.75 mm hook to reduce their size for the dress.
Ch 10.
Round 1: Sc in the second chain from the hook and in each of the next 7 chains. Work 3 sc in the last chain.
Rotate the work and crochet along the opposite side of the foundation chain. Work 1 sc into each of the 8 unused chain loops. Do not join. 19 sc total.
Round 2, first side: Repeat the following sequence twice: sl st in next st, sc in next st, work (hdc, dc, ch 2, sl st in second chain from hook, dc, hdc) in next st, sl st in next st.
Leaf tip: Sc in next st. In the following stitch, work (hdc, dc, tr, ch 3, sl st in second chain from hook and in next chain, tr, dc, hdc). Sc in next st.
Round 2, second side: Repeat the same four-stitch side-point sequence twice. Join with a sl st to the first slip stitch at the base of Round 2.
Fasten off, leaving a long sewing tail.
For the center vein, join green yarn at the base on the right side and work loose surface slip stitches along the center foundation line toward the leaf tip. Fasten off and secure the ends on the wrong side.
Make both leaves alike. Gently shape their points with your fingers. If they need blocking, use rustproof pins and remove every pin before sewing the leaves onto the dress.
Flat Red Crochet Holly Berries
Make 3.
With fine cranberry-red yarn, make a magic ring.
Round 1: Work 5 sc into the ring. Pull closed and join to the first sc. 5 sc.
Round 2: Ch 1, work 2 sc in each stitch around. Join to the first sc. 10 sc.
Fasten off, leaving a sewing tail.
Keep each berry flat. Do not stuff it or shape it into a ball. Pull the starting ring securely closed and weave in the starting tail.
Arrange the Holly Cluster
Position the two holly leaves on the upper ivory bodice, with their pointed tips angled diagonally upward and outward, one toward the left shoulder and the other toward the right. Overlap their stem ends slightly at the center of the bodice.
Place the three red berries together over the center where the leaves meet.
The complete decoration should be centered on the bodice, clear of the neckline and waist. With the finer yarn, aim for a cluster roughly 2½ to 3 inches wide, adjusting the hook if necessary after making the first leaf.
Sew every leaf around its outside edge, including the points. Secure the overlapping bases with additional green stitches.
Sew each flat berry completely around its circumference and add one anchoring stitch through its center. Fasten the tails securely inside the bodice.
That's the ivory dress finished as far as decoration goes. No peppermint candies, no additional holly scattered around the skirt and no little red buttons.
Finish the Neckline, Back Opening and Christmas Dress
The dress is almost finished. Before adding the fasteners, check that the shoulders are even, the sleeve seams sit under the arms and the skirt hangs smoothly from the waist.
Finish the Rounded Neckline
With the dress right side out, locate the bottom of the center-back opening. Work one continuous edging from the bottom of one slit edge, around the neckline and down the opposite slit edge.
Join the main yarn at the bottom of the first slit edge. Ch 1 and work sc evenly up that edge, placing approximately three sc across every two vertical hdc row ends.
Continue around the back neckline, across the shoulder seam, around the curved front neckline and over the opposite shoulder. Work one sc into each available horizontal neckline stitch and approximately three sc across every two vertical hdc row ends.
Adjust the spacing slightly around the curves so the neckline lies smooth without puckering. Keep both sides of the neckline symmetrical.
Continue down the opposite center-back slit edge, working the same number of sc as on the first edge. Fasten off at the bottom of the slit and weave in the ends. Do not join the first and last edging stitches together, since the center-back opening must remain open.
Attach the Concealed Back Fasteners
The center-back opening should be long enough to make it easier to slip the dress over baby's head without stretching the neckline out of shape.
Reinforce the inside of the two slit edges with narrow pieces of soft woven twill tape, sewn securely through the crochet fabric. Trim and turn under the tape ends so there are no loose or scratchy edges.
Make a short underlap using an additional narrow strip of twill tape, securely sewn behind one side of the opening. It should extend far enough behind the opposite side to support the snap fasteners when the slit is closed.
Position two sew-on garment snaps along the opening, one near the top and the other farther down. Sew each snap through its reinforced attachment area using several secure stitches. Keep the working snap surfaces aligned so the back closes without twisting or bunching.
Close both snaps and check that the back edges meet neatly. The underlap should be concealed beneath the opening, with no exposed rough edges against the child.
Before the dress is worn, pull gently but firmly on each fastener to check the attachment. If a snap shifts or comes loose, remove and replace it before use.
Final Dress Check
Turn the dress inside out and check every seam and yarn tail. Pay particular attention to the shoulder seams, underarms, neckline and center-back opening. Remove every temporary stitch marker and blocking pin, then check the entire dress again for loose threads or anything that could come detached.
For the peppermint version, check that all three candies are sewn firmly around their outer edges. For the ivory version, check every holly leaf point and flat berry.
Nothing should be hanging loosely or attached by only one or two stitches. Skip beads, decorative buttons, detachable bows and any other small accessories that could come loose.
Wash and dry the dress according to the yarn label, then lay it flat and check the measurements again. A light reshaping may be all the skirt needs.
I'd dress baby in a soft shirt or onesie underneath if the yarn texture feels at all scratchy. And once the Christmas pictures are finished, change her into comfortable sleep clothing rather than leaving a dress or its decorations on for sleep.
Which Christmas Dress Would You Make?
The baby-blue peppermint dress has a playful Christmas look, while the ivory version with holly is a little more traditional. Both use the same pattern, so you don't have to learn two different dress constructions.
If you're making one as a gift, I'd choose the color first, check the baby's measurements and make the dress before starting the appliqués. It's easier to decide exactly where the decorations belong when the finished bodice is lying in front of you.
And if you've been enjoying the dress pattern, you might like making a matching crochet baby tutu and diaper cover for another special occasion. That gives you a different little outfit without changing the Christmas dress design.
Pattern review note: This pattern has been reviewed mathematically for stitch counts, shaping and calculated measurements, but it has not been physically test-crocheted. Check gauge and fit carefully before making a dress for a child.


When you click on links to various merchants on this site and make a purchase, this may result in this site earning a commission. This does not affect the price you pay.

UBGI Gold Standard 2026
Reviewed under the site's
editorial checklist.
About Jan | Contact | Baby Nursery Ideas (Blog) | Site Map | Privacy Policy | Disclosure Policy | Disclaimer | Affiliate Disclosure | Earnings Disclosure | Facebook | Pinterest
I am a participant in the Amazon Services LLC Associates Program, an affiliate advertising program designed to provide a means for us to earn fees by linking to Amazon. As an Amazon Associate I earn from qualifying purchases.
Copyright © 2006-2026. All Rights Reserved.