Free Crochet Baby Play Mat Pattern for a Giant Flower Nursery Rug
By Jan Bay
This free crochet baby play mat pattern creates a giant flower nursery rug with a big round center and oversized petals that really stands out on the floor. The finished mat is designed for supervised tummy time and floor play, with a fun floral shape that can stay in the room beyond the baby years as handmade nursery decor.
Explore More Free Crochet Baby Patterns
See 5mm Braided Cord for the Crochet Baby Play Mat Here
Jump to Crochet Baby Play Mat Pattern
Free Crochet Baby Play Mat Pattern
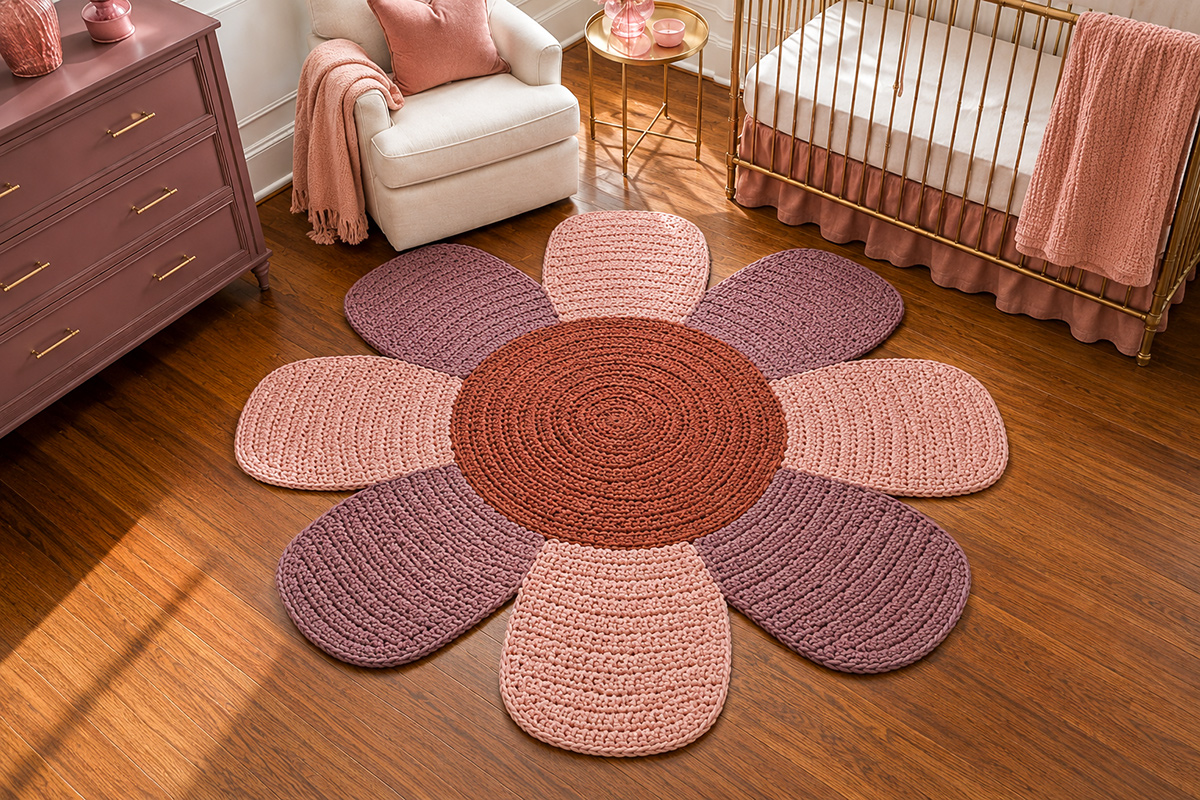
This is the pattern for the big retro flower shown above. The center is worked as one flat circle, then all eight petals are crocheted directly onto the outside edge. There are no separate petals to sew on, and there aren't any buttons, beads or other loose decorations added to the surface.
At the stated gauge, the finished flower is expected to measure about 44 inches across from one petal tip to the opposite petal tip. The round center is about 23 inches across, so there's a generous flat area in the middle instead of a tiny flower center surrounded by huge petals.
Pattern development note: The stitch counts, dimensions and cord estimates for this pattern were calculated and checked for internal consistency. The finished measurements and material use are expected targets rather than measurements from a physically test-crocheted sample, so check your gauge and make sure the center lies flat before continuing to the petals.
I'd keep the colors bold enough that the flower stays funky and retro and really stands out in the room, but that's just my personal taste. You can certainly change the colors and might even prefer a white and yellow daisy for a light and airy look. In my opinion, the warmer 1970s era colors make it read more clearly as a play mat or crochet flower rug instead of a little bath mat. But it does make a pretty cool bathroom rug, too. The example uses a terracotta center with four blush pink petals and four mauve petals, alternating around the flower.
Construction: one continuous single crochet center with eight half double crochet petals worked directly onto the final round.
Skill level: Easy if you're comfortable crocheting in the round, counting increases and making a basic half double crochet decrease.
Finished pieces to assemble: None. The petals are attached as they're crocheted.
If you're using the flower for tummy time or floor play, put it on a clean, flat floor and stay with the baby during use. This is a floor play mat and decorative rug, not a place for sleeping. If the baby falls asleep, move the baby to a crib, bassinet or play yard intended for infant sleep. You can review current guidance at the U.S. Consumer Product Safety Commission Safe Sleep Center.
Crochet Play Mat Supplies and Yarn
I would use 5mm braided cotton cord for this one. Regular worsted yarn won't give the flower enough weight or definition, and fuzzy blanket yarn would hide too much of the petal shaping. Braided cotton cord gives you a chunky crochet look while still making a fairly flat surface.
The pattern is written for the 100 m / 108 yd version of Bobbiny Premium 5mm Braided Cord. Bobbiny also sells some Premium 5mm colors in shorter 50 m / 54.7 yd rolls, so check the length on the listing before ordering. A 9mm crochet hook is a good starting point. Bobbiny recommends an 8mm to 10mm tool range for this cord, so you have a little room to adjust your hook if your gauge is off.
For the three color flower shown:
- Color A, Terracotta: 2 rolls Bobbiny Premium 5mm Braided Cord, 100 m / 108 yd each
- Color B, Blush: 2 rolls Bobbiny Premium 5mm Braided Cord, 100 m / 108 yd each
- Color C, Mauve: 2 rolls Bobbiny Premium 5mm Braided Cord, 100 m / 108 yd each
- Hook: 9mm crochet hook
- Large eye tapestry needle that will accept the cord
- At least 9 locking stitch markers
- Sharp scissors
- Measuring tape
- Optional separate nonslip rug pad if the finished flower will be used on a hard floor
These are purchase quantities, not a claim that all six rolls will be used. Based on the stated gauge and Bobbiny's published planning estimate for 5mm braided cord, the 23 inch center is expected to use roughly 170 to 185 meters. Each set of four petals is expected to use roughly 105 to 120 meters once the side and tip edging is included. Those are calculated planning allowances rather than physically measured cord usage, and your tension can change them. Buying two 100 meter rolls of each color gives you enough margin to keep each color in the same dye lot rather than risking a second order halfway through the rug.
If you substitute another cord, match the 5mm diameter and the finished gauge rather than relying only on a yarn weight number. I'd also choose a soft braided cord instead of a stiff utility rope or a loose twisted macrame cord. You're making something that will lie on the floor, not a basket that needs rigid sides.
US crochet terms used: ch = chain, sc = single crochet, hdc = half double crochet, inc = 2 stitches worked into the same stitch, hdc2tog = half double crochet 2 stitches together, sl st = slip stitch, st/sts = stitch/stitches.
Hdc2tog: Yarn over, insert the hook into the next stitch, yarn over and pull up a loop. Yarn over, insert the hook into the following stitch, yarn over and pull up a loop. Yarn over and pull through all 5 loops on the hook.
Finished Size and Gauge
The measurements below are calculated targets based on the stitch counts and gauge. With a project this large, a small difference in tension can add or subtract several inches by the time you reach the outside of the petals.
- Center diameter: approximately 23 inches
- Petal length: approximately 10 to 10 1/2 inches from the center edge to the tip
- Petal width at the base: approximately 8 1/2 inches
- Overall finished diameter: approximately 44 inches from petal tip to opposite petal tip
- Number of petals: 8
Center gauge: approximately 7 single crochet stitches across = 4 inches, and 7 rounds measured from the center outward = 4 inches.
Petal gauge: approximately 7 half double crochet stitches across and 6 rows tall = 4 inches.
Check the center while you're working it. It should lie flat without having to be stretched into shape. Light blocking can sometimes smooth out a small uneven spot in regular yarn, but don't count on stretching 5mm braided cord to correct a center that's cupping or ruffling. If it starts cupping upward, your stitches are probably too tight for the increase rate. Try the next larger hook. If the center develops obvious waves or ruffles, try the next smaller hook.
Don't chase an exact 23 inch measurement at the expense of a flat circle. A center that measures 22 or 24 inches and lies nicely is more useful than one that's exactly 23 inches and won't stay flat.
Crochet the Giant Flower Center
Work the center in a continuous spiral. Do not join at the end of each round. Place a locking stitch marker in the first stitch of every round and move it up as you work.
It's better to stagger the increases on the even numbered rounds instead of stacking every increase directly above the one below it. That small change keeps the large center looking more circular and less like a six sided shape.
If a magic ring feels awkward with 5mm cord, ch 2 and work the first 6 sc into the second chain from the hook instead.
Round 1: Make 6 sc in a magic ring. [6]
Round 2: Inc in each stitch around. [12]
Round 3: (Sc 1, inc) 6 times. [18]
Round 4: Sc 1, inc, (sc 2, inc) 5 times, sc 1. [24]
Round 5: (Sc 3, inc) 6 times. [30]
Round 6: Sc 2, inc, (sc 4, inc) 5 times, sc 2. [36]
Round 7: (Sc 5, inc) 6 times. [42]
Round 8: Sc 3, inc, (sc 6, inc) 5 times, sc 3. [48]
Round 9: (Sc 7, inc) 6 times. [54]
Round 10: Sc 4, inc, (sc 8, inc) 5 times, sc 4. [60]
Round 11: (Sc 9, inc) 6 times. [66]
Round 12: Sc 5, inc, (sc 10, inc) 5 times, sc 5. [72]
Round 13: (Sc 11, inc) 6 times. [78]
Round 14: Sc 6, inc, (sc 12, inc) 5 times, sc 6. [84]
Round 15: (Sc 13, inc) 6 times. [90]
Round 16: Sc 7, inc, (sc 14, inc) 5 times, sc 7. [96]
Round 17: (Sc 15, inc) 6 times. [102]
Round 18: Sc 8, inc, (sc 16, inc) 5 times, sc 8. [108]
Round 19: (Sc 17, inc) 6 times. [114]
Round 20: Sc 9, inc, (sc 18, inc) 5 times, sc 9. [120]
Cut Color A, leaving about an 8 inch tail, and make an invisible join into the first stitch of Round 20. Do not add another border round. The 120 stitches around this edge are exactly what we need for the eight petals.
Now count carefully before you start the petals. Beginning at the first stitch of Round 20, place a marker in stitches 1, 16, 31, 46, 61, 76, 91 and 106. Each marked stitch begins a 15 stitch petal section.
You should have eight equal groups of 15 stitches and no unused stitches left over. Check that now. It's much easier to fix the count before the first petal is attached.
Crochet the Oversized Flower Petals
The petals are worked directly into the 120 stitches around the center, 15 center stitches for each petal. Petals 1, 3, 5 and 7 use Color B. Petals 2, 4, 6 and 8 use Color C.
Work one complete petal before moving to the next 15 stitch section. The ch 1 at the beginning of each row does not count as a stitch.
Petal Row 1: With the right side of the center facing you, join the petal color in the first marked stitch. Ch 1. Hdc in the same stitch and in the next 14 center stitches. [15]
Row 2: Ch 1, turn. Hdc across. [15]
Row 3: Ch 1, turn. Hdc2tog, hdc 11, hdc2tog. [13]
Row 4: Ch 1, turn. Hdc across. [13]
Row 5: Ch 1, turn. Hdc2tog, hdc 9, hdc2tog. [11]
Row 6: Ch 1, turn. Hdc across. [11]
Row 7: Ch 1, turn. Hdc2tog, hdc 7, hdc2tog. [9]
Row 8: Ch 1, turn. Hdc across. [9]
Row 9: Ch 1, turn. Hdc2tog, hdc 5, hdc2tog. [7]
Rows 10 through 12: For each row, ch 1, turn and hdc across. Complete Rows 10, 11 and 12 the same way. [7 sts in each row]
Row 13: Ch 1, turn. Hdc2tog, hdc 3, hdc2tog. [5]
Row 14: Ch 1, turn. Hdc across. [5]
Row 15: Ch 1, turn. Hdc2tog, hdc 1, hdc2tog. [3]
Fasten off.
Round the petal tip: With the right side of the petal facing you, join the same petal color at the right hand base of the petal. Working up the first side, place 1 sc in each row end, except work 2 sc instead of 1 in the 4th, 8th and 12th row ends. [18 sc along the first side] Across the three stitches at the tip, work 2 sc in the first stitch, 3 sc in the center stitch and 2 sc in the last stitch. Work down the opposite side the same way, placing 1 sc in each row end except work 2 sc in the 4th, 8th and 12th row ends counted from the tip. [18 sc along the second side] You should have 43 sc around the exposed petal edge. Fasten off at the base. Do not crochet across the bottom edge because that edge is already attached to the flower center.
Repeat these instructions over each remaining 15 stitch section, alternating Colors B and C.
Take a quick look at the flower after every second petal. The bases should meet neatly around the center without overlapping. If one petal suddenly looks wider or narrower than the others, recount its first row before going any farther.
Finish the Flower Play Mat
Turn the flower over and weave every cord end securely into the back of stitches of the same color. With thick braided cord, I would weave each tail in one direction, turn and weave it back through several more stitches before trimming it. A short tail can work loose much more easily in a floor piece.
Lay the flower flat and shape the petals with your hands. Check that all eight tips extend roughly the same distance from the center. You don't need ruler perfect petals. You do want the overall flower to look balanced.
Before using the mat, remove every locking stitch marker and inspect both sides for loose cord ends, gaps at the petal bases or edging that has worked loose. Fix anything you find before the mat goes back on the floor.
If a petal edge wants to curl slightly, dampen that petal, flatten it into the intended shape and let it dry completely before judging it. Don't stretch one petal longer than the others just to hit the expected 44 inch measurement.
Use It as a Play Mat or Crochet Nursery Rug
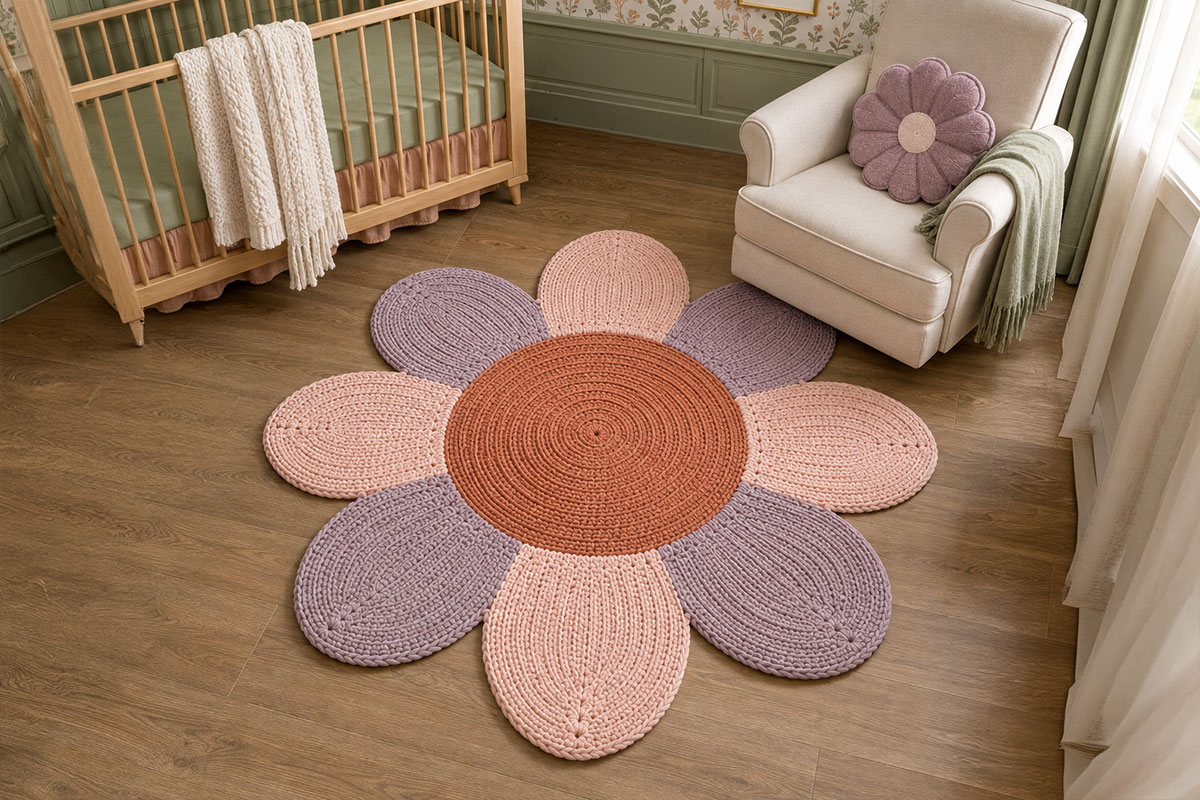
I wouldn't put all this work into a big flower that only has one job. Once the baby is past the floor play stage, leave it right where it is to function as a crochet nursery rug, bedroom rug or playroom floor mat.
If you're deciding where to use it once it becomes part of the room, the nursery rug size, materials and placement guide has more help with round rugs, rug pads and floor placement.
If you want another handmade floor project with a completely different shape, my free crochet star rug pattern makes a large five-point star for celestial nurseries and supervised floor play.
The flower shape also makes it perfectly reasonable to use this as a crochet flower rug somewhere else in the house. And yes, if you want a giant retro flower in the bathroom, use it as a bathroom rug. There's no rule saying a crochet baby play mat has to spend the rest of its life in a nursery and there's something about it that brightens any room it's in.
On a slick hard floor, put a separate nonslip rug pad underneath it. I prefer that to painting or gluing a permanent rubber coating onto the back because the crochet itself stays unchanged and the pad can be replaced when needed.
If you make this version for baby floor play, keep the surface plain. I would skip pom poms, buttons, beads, tassels and raised decorations. The oversized shape and color blocking are enough.
If what you really need is something soft to wrap around a baby rather than something substantial for the floor, you'll find those projects with the free crochet baby blanket patterns. This flower is deliberately built more like a rug.
How to Care for the Finished Mat
Check the care directions for whatever cord you actually use because a substitute fiber may need different treatment.
For Bobbiny cord, the manufacturer recommends gentle hand washing in slightly warm water at about 30 degrees C with a mild detergent rather than machine washing. Bobbiny also suggests vacuuming the cord when it only needs dust removed. You can read the current manufacturer instructions in the Bobbiny cord care FAQ.
A wet cotton mat gets heavy, so support the whole flower when you lift it. Don't pick it up by one petal. Press out excess water gently with towels instead of twisting or wringing the crochet.
Lay it flat to dry, straighten the center and reshape all eight petals while they're still damp. Let it dry completely before putting it back on the floor.
If you're using it as a bathroom rug, don't leave the cotton cord sitting damp between uses. Hang or spread it where air can reach it and let it dry thoroughly.
Crochet Baby Play Mat FAQ
Can I use a different 5mm cord for this crochet baby play mat pattern?
Yes. Look for a soft braided cord with similar thickness and make a gauge sample before committing to the whole center. A stiffer rope can make the finished flower rigid, while a much softer cord can make the petals flop more than the example.
Can I make this with regular worsted weight yarn?
Not with the instructions exactly as written. The 120 stitch center would come out much smaller, the petals would be smaller and the yardage would change completely. You could redesign the pattern for several strands held together, but for this version I'd stay with the 5mm braided cord.
What about chenille or blanket yarn?
I would skip it for this particular design. The big attraction here is the crisp flower silhouette and those wide shaped petals. Plush yarn would make the surface fuzzier and much softer, but it would also hide some of the shape that makes this project different from an ordinary round mat. If you prefer something fluffier, I'll save that idea for a future project that's actually designed for plush yarn.
Why are the petals crocheted onto the center instead of sewn on later?
Working each petal directly into its own 15 stitch section keeps the bases evenly spaced and eliminates eight separate attachment seams. Once the 120 stitch center is divided correctly, every petal has its place already marked.
Can I make the flower larger?
You can change the final size by changing cord thickness or hook size, but make a gauge sample first. The written pattern is calculated around a 120 stitch center divided into eight 15 stitch petal bases. If you add center rounds, you'll also need to recalculate those bases and the petal shaping rather than simply adding random stitches.
How do I keep the flower petals from curling?
First check your gauge. Very tight stitches can pull the shaped sides inward. The single crochet edging around each petal also helps settle the edge. After finishing, damp shape the flower and let it dry flat before deciding that a petal needs to be redone.
Can this play mat be used as a baby sleep mat?
No. This pattern is intended as a floor play mat and decorative crochet rug. It is not designed or presented as an infant sleep surface.
When you click on links to various merchants on this site and make a purchase, this may result in this site earning a commission. This does not affect the price you pay.

UBGI Gold Standard 2026
Reviewed under the site's
editorial checklist.
Photos, decorating ideas, party setups and reader submissions are shared for inspiration unless a page is specifically presented as a pattern, tutorial, reference guide or step-by-step project. Follow the instructions, measurements, safety guidance and manufacturer directions provided for the particular project or product.
About Jan | Contact | Baby Nursery Ideas (Blog) | Site Map | Privacy Policy | Disclosure Policy | Disclaimer | Affiliate Disclosure | Earnings Disclosure | Facebook | Pinterest
I am a participant in the Amazon Services LLC Associates Program, an affiliate advertising program designed to provide a means for us to earn fees by linking to Amazon. As an Amazon Associate I earn from qualifying purchases.
Copyright © 2006-2026. All Rights Reserved.