Free Butterfly Quilt Pattern: Blooming Hearts Butterfly Quilt
By Jan Bay
This free butterfly quilt pattern features the Blooming Hearts Butterfly Quilt, a 42-inch appliqué quilt designed for quilters who love hearts, flowers, butterflies and pretty pastel fabrics. It has a large floral butterfly center medallion, four Blooming Hearts appliqué blocks, two round flower blocks and six full-block pinwheels surrounding the center design. The printable PDF includes the cutting information, layout guide, appliqué templates and construction details needed to create this garden-inspired baby quilt.
Explore More Free Baby Quilt Patterns
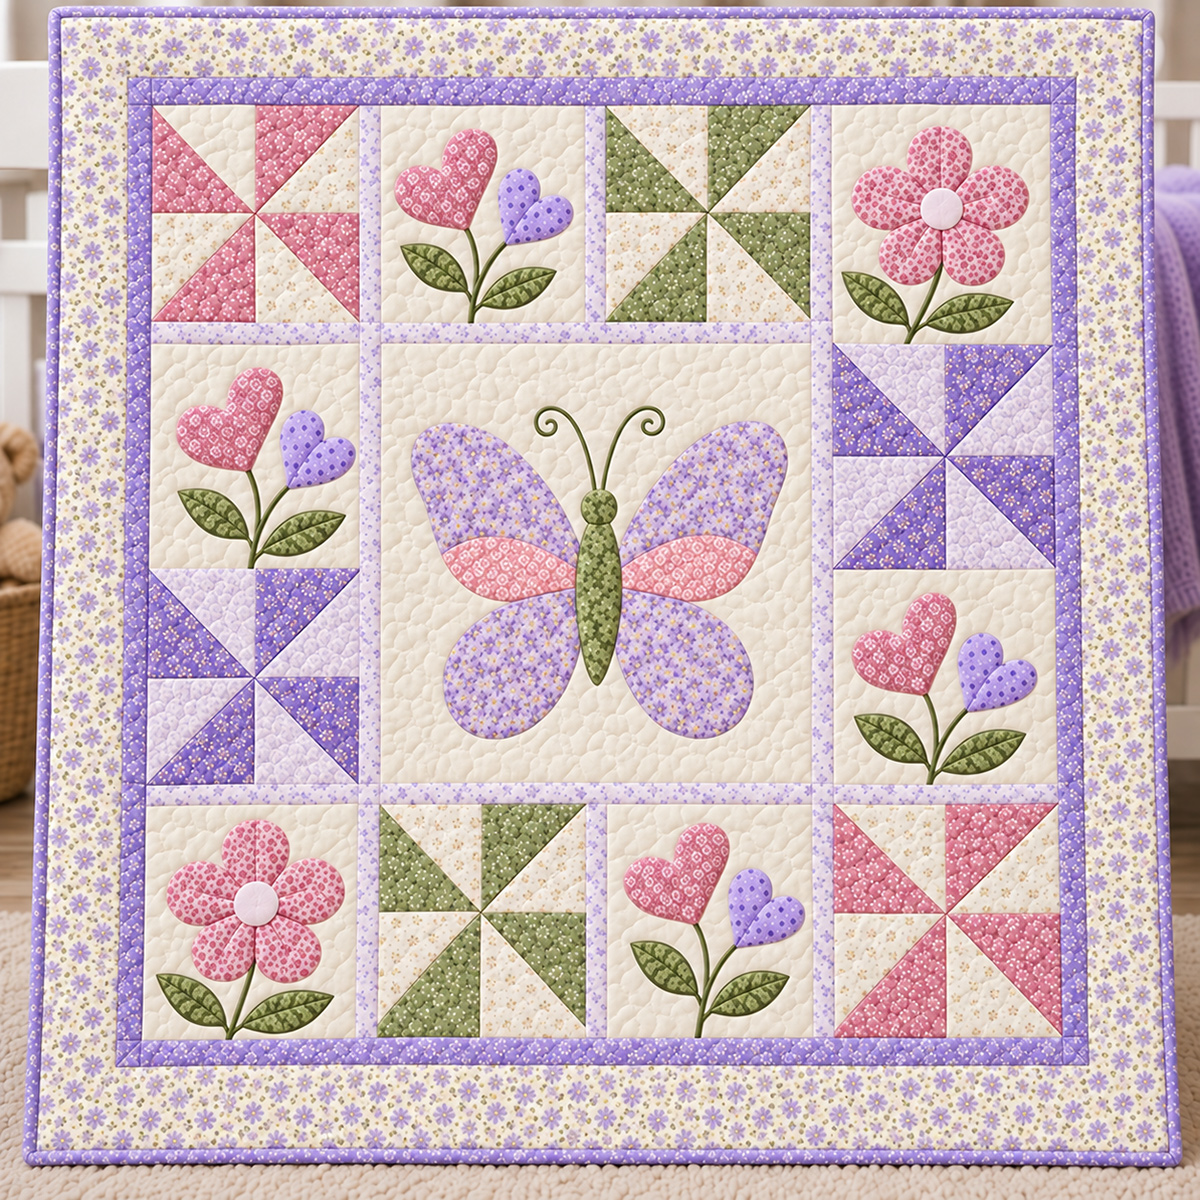
The Blooming Hearts Butterfly Quilt finishes at 42" × 42" and combines a central butterfly appliqué panel with heart flowers, round flowers, pastel pinwheels, narrow floral sashing and a floral outer border.
Lightweight Sewable Fusible Web
Jump to:
What Makes This Butterfly Quilt Different
Finished Quilt Size and Layout
What Is Included in the Free PDF
What Makes This Free Butterfly Quilt Pattern Different
The first thing I wanted to keep from getting lost in this design was the butterfly itself. It needed to be large enough to hold the center of the quilt visually, rather than looking like one more small appliqué block tucked into a grid. So the butterfly gets an 18 1/2" finished center panel while the surrounding blocks finish at 9".
The rest of the quilt grows outward from that center. Four Blooming Hearts blocks repeat the same large dusty-pink heart blossom, smaller lavender heart blossom, curved sage stem and two leaves. I like that repetition because it gives the quilt a recognizable motif without filling every open space with another butterfly.
The two round flower blocks are different on purpose. Each one has five dusty-pink petals, a pale center, a sage stem and two leaves. They break up the heart shapes just enough while still looking as though they belong in the same little garden.
Then there are the six pinwheels. These are full 9" finished pinwheel blocks, not small pinwheels floating inside cream squares. The colored triangles run right to the block edges. Two are dusty pink, two are sage and two are lavender, which carries the same three main colors around the butterfly without making the layout too busy.
The narrow floral sashing is only 1/2" finished. I would keep it narrow. A wider sash would start chopping the design into separate boxes, while this little strip gives each block a boundary without pulling your eye away from the appliqué.
The result is a butterfly quilt with a definite structure: one large butterfly, four heart-flower blocks, two round flowers and six full-block pinwheels. Nothing has to be added just to fill space.
The finished example and the printable pattern use the same block arrangement and construction dimensions. The pattern was digitally engineered and checked for dimensional consistency, but it has not been physically test-sewn. Before cutting your final fabric, print the templates at 100% or actual size, check the 1" test squares and paper-fit the appliqué pieces as directed in the PDF.
Finished Quilt Size and Layout
The Blooming Hearts Butterfly Quilt finishes at 42" × 42". That's a useful size for a baby quilt, stroller quilt or decorative nursery quilt without making the appliqué pieces so small that they're fussy to work with.
The basic blocks finish at 9" square. The butterfly takes the space of four of those blocks, giving it an 18 1/2" × 18 1/2" finished panel in the middle of the quilt. Narrow floral sashing separates the blocks and the butterfly panel, then a slim lavender inner border and wider floral outer border finish the top.
Here is the block arrangement used in the pattern:
Top row: dusty-pink pinwheel, Blooming Hearts block, sage pinwheel, round flower.
Middle left: Blooming Hearts block over a lavender pinwheel.
Center: the large butterfly panel.
Middle right: lavender pinwheel over a Blooming Hearts block.
Bottom row: round flower, sage pinwheel, Blooming Hearts block, dusty-pink pinwheel.
That gives you six pinwheels, four Blooming Hearts motifs, two round flowers and one large butterfly. The arrangement also spreads the pink, lavender and sage around the quilt instead of bunching one color in a single area.
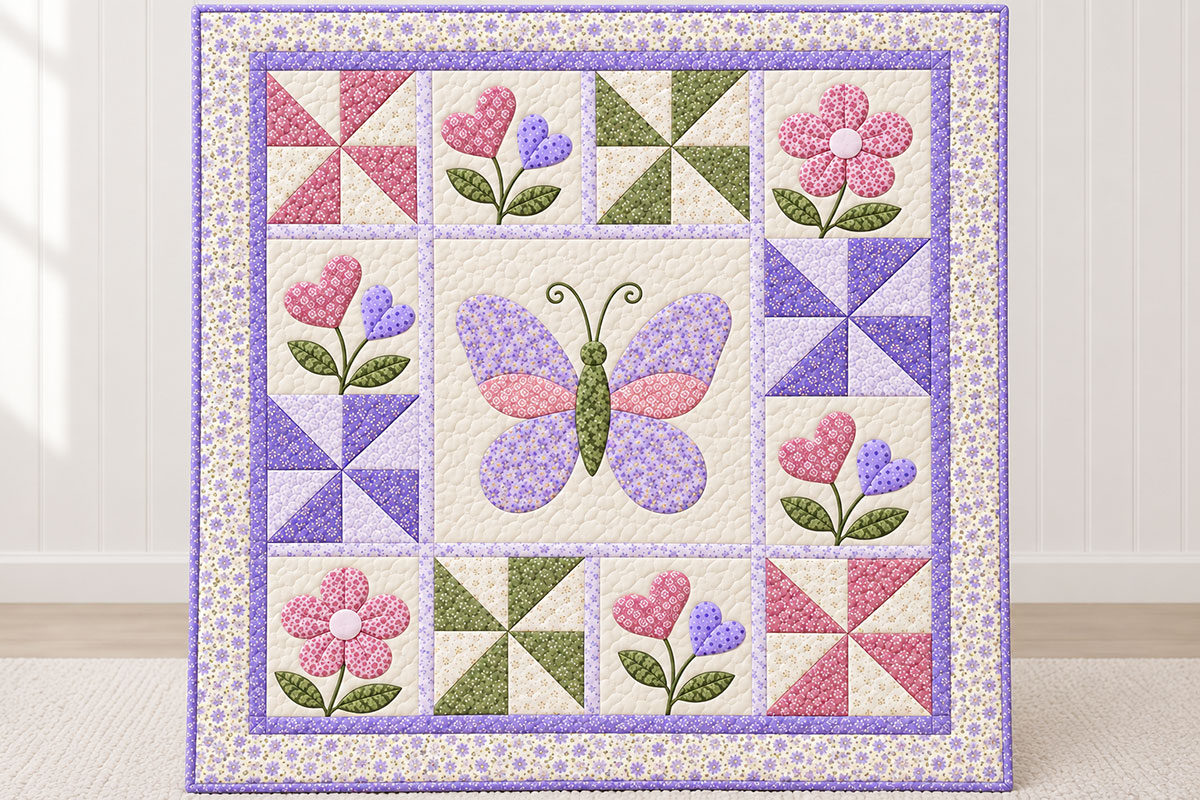
The pieced center finishes at 37 1/2" square. The lavender inner border adds 1/2" on each side, and the floral outer border finishes at 1 3/4" wide. Lavender binding repeats the narrow lavender lines inside the quilt and gives the floral border a clean edge.
The Blooming Hearts Blocks
The four Blooming Hearts blocks are what give this particular butterfly quilt its own identity. Each one uses the same appliqué pieces: one large dusty-pink heart blossom, one smaller lavender heart blossom, a curved branched sage stem and two sage leaves.
I wouldn't make four different heart flowers here. Repeating the same motif is what lets your eye recognize the hearts as part of the design rather than four unrelated appliqué blocks.
There is just a slight change in direction from block to block. The upper Blooming Hearts block stays upright. The left block turns about 7 degrees clockwise, the right block about 7 degrees counterclockwise, and the lower block about 2 degrees clockwise. Those are small rotations. You don't want the flowers leaning dramatically in four different directions.
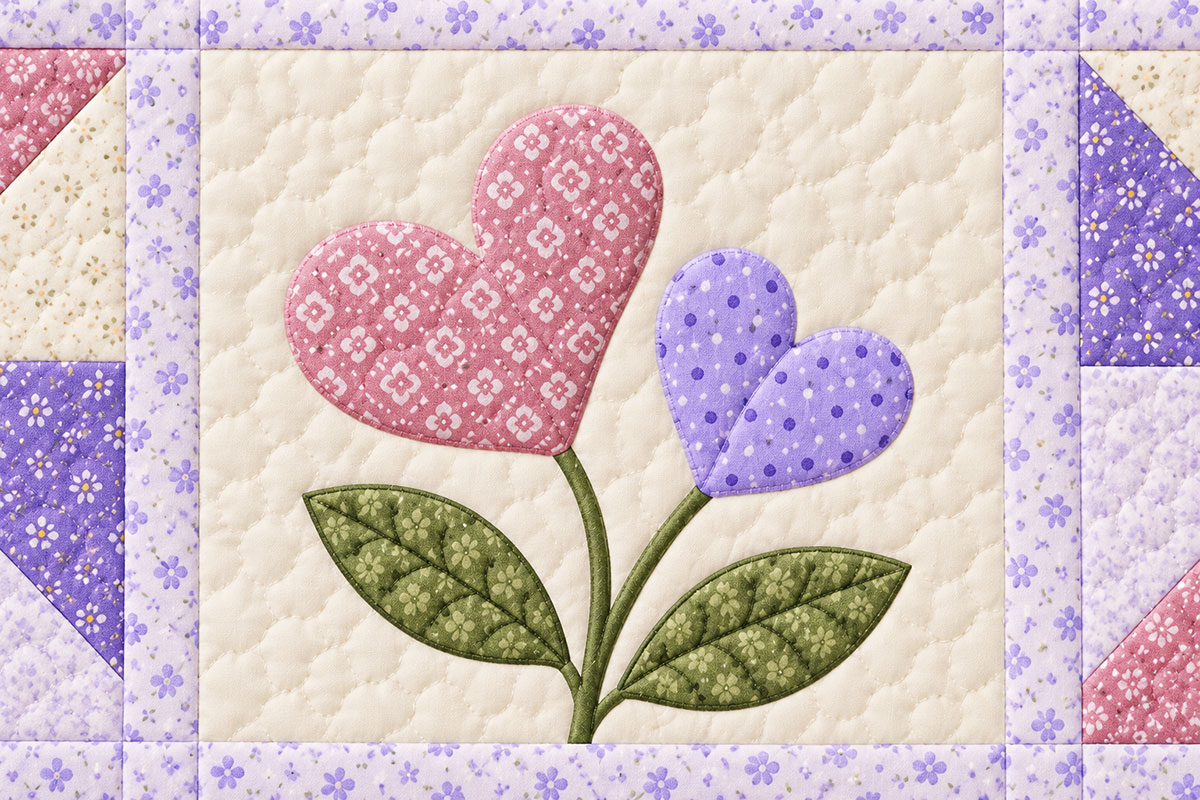
The appliqué is designed for raw-edge fusible construction. That means you can trace and prepare the shapes separately, arrange the entire motif on the cream block, check the placement and then fuse once you're satisfied with it.
Paper-fit the shapes first. It's a simple precaution and especially worthwhile with the curved stem and leaves because a tiny placement change there affects the position of both heart blossoms.
The Central Butterfly Appliqué
The butterfly is the largest appliqué on the quilt and the piece I would position first when assembling the center panel. It has two upper floral wings, two lower floral wings, two dusty-pink accents on the upper wings, a tapered sage body, a rounded sage head and embroidered sage antennae.
The floral fabric itself forms the outside edge of each wing. There aren't separate outline strips or fabric piping around the butterfly, and there aren't extra accent pieces on the lower wings.
Keep that part simple. The floral wings already have plenty going on, particularly once they're surrounded by the little floral sashing.
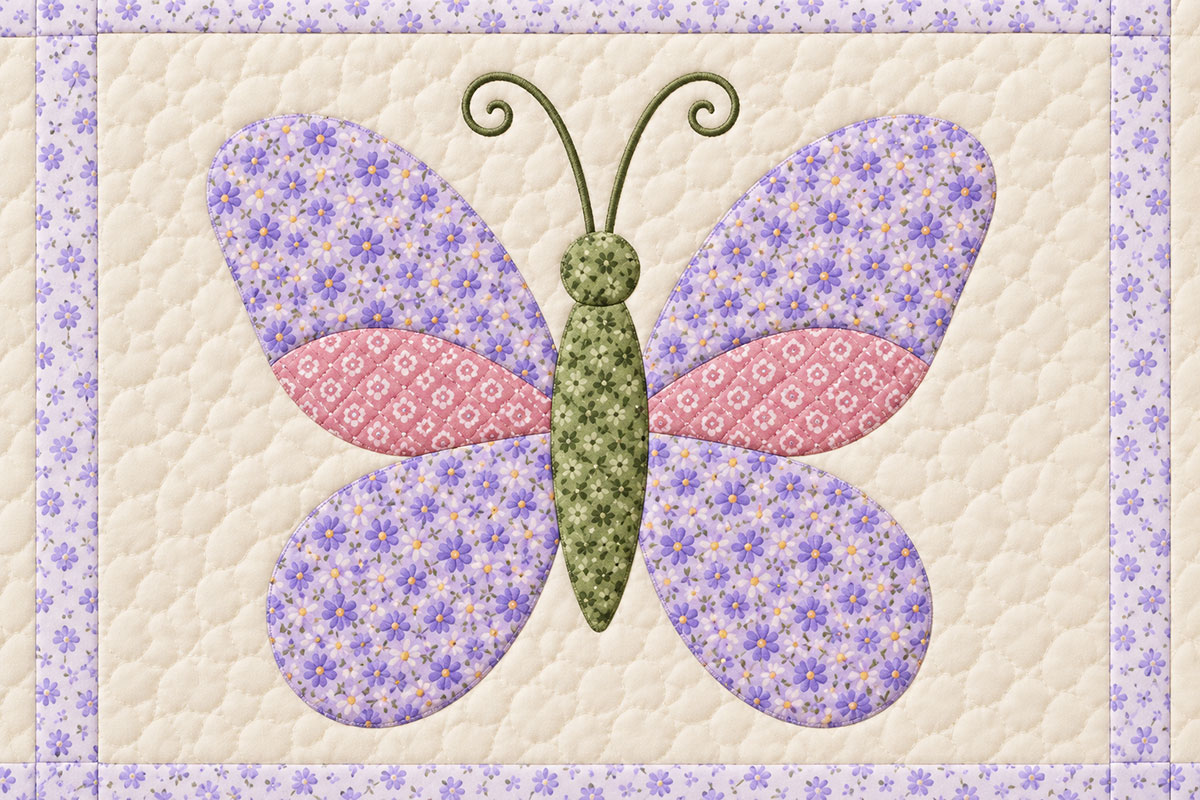
The butterfly has no face and no lettering. The embroidered antennae curl outward above the head and give the center just enough fine detail without adding another fabric piece.
The PDF includes the full-size butterfly templates along with a tiled placement guide so you can assemble the larger motif without trying to judge the wing spacing from the finished quilt image alone.
Six Full-Block Pinwheels
All six pinwheels run edge-to-edge across their 9" finished blocks. There isn't a cream frame around them and there aren't extension strips added to make undersized pinwheels fit the block.
Each pinwheel starts with two colored 6" squares and two cream 6" squares. Those are used to make four half-square triangles. Trim the HST units to 5" before assembling the pinwheel so the completed block measures 9 1/2" unfinished and 9" after it is sewn into the quilt.
The colors are paired across the layout: two dusty-pink pinwheels, two sage and two lavender. I like the balance this gives the quilt. The pinwheels bring in enough straight piecing to offset all those curved appliqué shapes, but they don't compete with the butterfly.
Fabrics and Color Palette
The featured quilt stays with a small pastel palette: dusty pink, lavender, sage, cream and a light floral print that picks up those same colors.
You don't need a huge stack of coordinates for this one. A cream background gives the appliqué room to show, and repeating the same pink, lavender and sage fabrics in different parts of the quilt ties the blocks together.
If you're choosing your own fabrics, I'd pick the floral first. It appears in the butterfly wings, narrow internal sashing and outer border, so it influences more of the quilt than any other print. Then pull your pink, lavender and sage from colors that already appear in that floral.
For the heart blossoms and flower petals, small prints work better than an oversized motif that may disappear when the appliqué shapes are cut. The same idea applies to the leaves and butterfly body. You want enough pattern to keep the pieces interesting without losing the shape of the appliqué.
The pattern uses raw-edge fusible appliqué, so follow the directions for the fusible web you choose and make sure it is appropriate for the fabric and stitching method you plan to use.
What Is Included in the Free PDF
The free printable pattern is the construction document for this quilt. I haven't repeated 29 pages of cutting information and templates here because that's exactly what the PDF is for.
Inside you'll find the finished measurements, materials and yardage, cutting charts, sashing and border chart, quilt layout, pinwheel construction, appliqué instructions, assembly sequence, border instructions, quilting and binding guidance, and the full-size appliqué templates.
The PDF also includes the flower placement guides, a tiled guide for positioning the large butterfly and 1" print-test squares for checking template scale.
The quilt was digitally engineered and the dimensions were checked against the finished layout. It has not been physically test-sewn, so I want to be clear about that distinction. Check the print scale and paper-fit the appliqué templates before you cut your good fabric.
Before You Print the Templates
Print the pattern at 100% or actual size. Do not use "fit to page," "shrink to fit" or another printer setting that changes the scale.
Then measure the 1" test square on the printed page with a ruler. It should measure exactly 1" in both directions. If it doesn't, correct the printer setting before printing and cutting the rest of the templates.
For the tiled butterfly guide, line up the page sections according to the markings in the PDF before using it for placement. I would also lay the paper wing, body and accent templates over the assembled guide once before tracing them onto fusible web. That's the easiest point to catch a printing or assembly error.
Do the same with the flower motifs. Paper-fitting takes only a few minutes and gives you a chance to check the blossom, stem and leaf relationships before any fabric is cut.
Download the Free Butterfly Quilt Pattern
You can download the complete 29-page Blooming Hearts Butterfly Quilt pattern here:
Download the Free Blooming Hearts Butterfly Quilt PDF
Save the PDF before printing so you have the complete pattern available while you're working. Check the 1" test squares first, then print the full-size templates at actual size.
Using a Baby Quilt Safely
A handmade quilt can be used for tummy time, stroller outings, floor play, nursery display or as a keepsake, but it should not be placed loose in an infant's sleep space.
The American Academy of Pediatrics recommends keeping quilts, blankets and other loose bedding out of an infant's crib or other sleep space. You can read the current American Academy of Pediatrics safe sleep recommendations before deciding how and where to use a baby quilt.
More Baby Quilt Ideas
If the butterfly is what brought you here, you'll find more designs and inspiration on my butterfly quilt ideas page.
You can also browse the baby quilt patterns collection for more quilt designs, or take a look at the spring crib quilt patterns if you want more flowers, pastels and seasonal ideas.
The Blooming Hearts design gives you quite a bit to play with even without changing the pattern itself. Different florals can make the same butterfly feel completely different, while those four heart blossoms keep the quilt recognizable.
When you click on links to various merchants on this site and make a purchase, this may result in this site earning a commission. This does not affect the price you pay.

UBGI Gold Standard 2026
Reviewed under the site's
editorial checklist.
Photos, decorating ideas, party setups and reader submissions are shared for inspiration unless a page is specifically presented as a pattern, tutorial, reference guide or step-by-step project. Follow the instructions, measurements, safety guidance and manufacturer directions provided for the particular project or product.
About Jan | Contact | Baby Nursery Ideas (Blog) | Site Map | Privacy Policy | Disclosure Policy | Disclaimer | Affiliate Disclosure | Earnings Disclosure | Facebook | Pinterest
I am a participant in the Amazon Services LLC Associates Program, an affiliate advertising program designed to provide a means for us to earn fees by linking to Amazon. As an Amazon Associate I earn from qualifying purchases.
Copyright © 2006-2026. All Rights Reserved.