Mimosa Bar Baby Shower Setup Guide
Here are 3 mimosa bar baby shower setups with shopping lists and step-by-step instructions so you can set it up once and not worry about it again.
A baby shower mimosa bar looks easy — until the theme, table setup, brunch timing, and decorations all need to feel planned:
Which baby shower ideas make the whole party feel pulled together?
What theme fits best with a mimosa bar?
How do you make the drink table look like part of the decor?
Choose your mimosa bar setup:
The basic ratio that works every time Setup No. 1: Budget Friendly Mimosa Bar
Simple, affordable, and easy to refill Setup No. 2: Pretty Baby Shower Mimosa Bar
Pulled together and photo friendly Setup No. 3: Momosa Themed Mimosa Bar
Fun, themed, and made for a baby shower FAQ About a Mimosa Bar Baby Shower
Quick answers to common setup questions
Simple Mimosa Recipe That Works Every Time
Most people realize this part matters once the first drink gets poured. If the ratio is off, the whole bar feels off. The good news is it is easy to get right.
Basic mimosa ratio
- 1 part chilled sparkling wine or sparkling cider
- 1 part chilled orange juice
Pour the sparkling drink first, then add the juice. This keeps the drink from overflowing and helps it stay fresh longer.
Easy variations guests enjoy
- Orange juice and cranberry juice
- Orange juice and peach juice
- Pineapple juice and sparkling cider
What I notice is most guests stick to one or two combinations. That is why you do not need a long list of fruit or juice options.
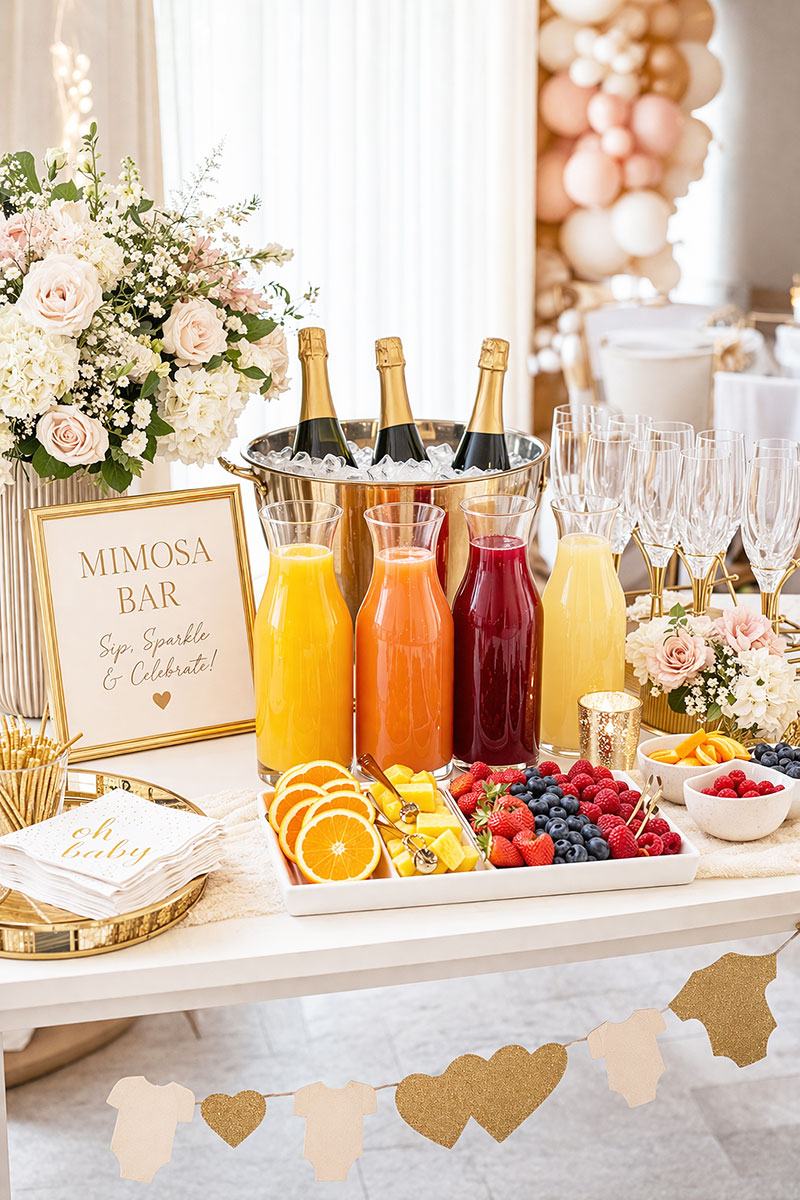
Setup No. 1 Budget Friendly Mimosa Bar: Keep It Simple
How do you set up a mimosa bar for a baby shower?
Place glasses at the front, juices behind them, fruit within reach, and chilled bottles off to one side. Keep everything grouped so guests can pour quickly without asking what goes where.
I notice this is the setup most hosts end up liking best once the party actually starts. Guests relax right away when they can see everything in one glance and pour without pausing.
If you are still organizing the details for the rest of the party, these baby shower ideas and baby shower decorations help the drink table feel connected to everything else.
What it looks like
A smaller table with two juices, one chilled sparkling option, a simple fruit tray, and glasses grouped in one clear spot. It feels easy to use, and that is what matters most.
Shopping list for this setup
- 2 bottles sparkling wine or sparkling cider
- Orange juice
- Pineapple juice or cranberry juice
- 1 bowl orange slices
- 1 bowl berries
- simple champagne flutes
- basic juice carafes
- 1 serving tray
- Napkins
- Ice bucket
Step by step setup
Put the glasses at the front first. That one move makes the entire table easier to understand without thinking. Set the juices behind them so guests naturally move forward instead of reaching across.
Keep the fruit close to the juice. I notice people use garnishes more when they are right in front of them. Place the ice and bottles at one end so refills stay out of the way.
The best mimosa bar is the one guests can use without thinking.
One small detail most people miss
Leave a small empty space on the table. It gives guests a place to set a glass while adding fruit or adjusting their drink. Without that space, the table starts to feel crowded fast.
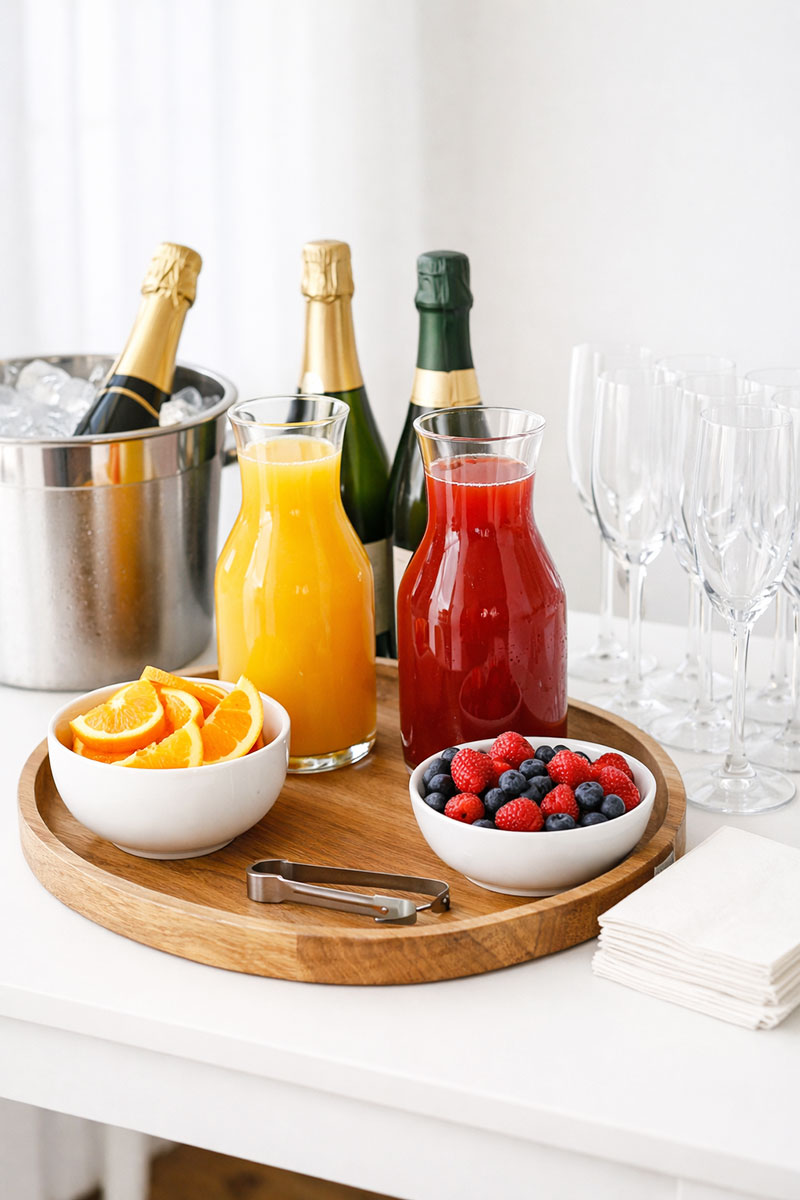
Setup No. 2 Pretty Baby Shower Mimosa Bar That Feels Put Together

This is where it shifts a bit. Guests notice this setup right away because it feels organized before they even walk up to it. A drink station should look clear before it looks styled.
To carry this look across your event, pair it with your main baby shower ideas and baby shower decorations.
What it looks like
Three juices lined up evenly, fruit placed in front of each option, glasses grouped neatly, and one tray that visually pulls everything together.
Shopping list for this setup
- 3 to 4 bottles sparkling wine or sparkling cider
- Orange juice
- Peach juice
- Cranberry juice
- Fresh strawberries
- Blueberries
- Orange slices
- Drink stirrers
- matching juice carafes
- serving tray for a drink station
- Matching flutes or cups
- Napkins
Step by step setup
Line the juices across the back. Place the fruit directly in front of each one so the pairing feels obvious. Guests move faster when they do not have to decide what goes with what.
Keep the glasses grouped in one area near the front. Spreading them out makes the table feel picked over too early.
Use one tray under part of the setup. It helps everything feel finished without adding clutter.
That is what keeps the flow moving.
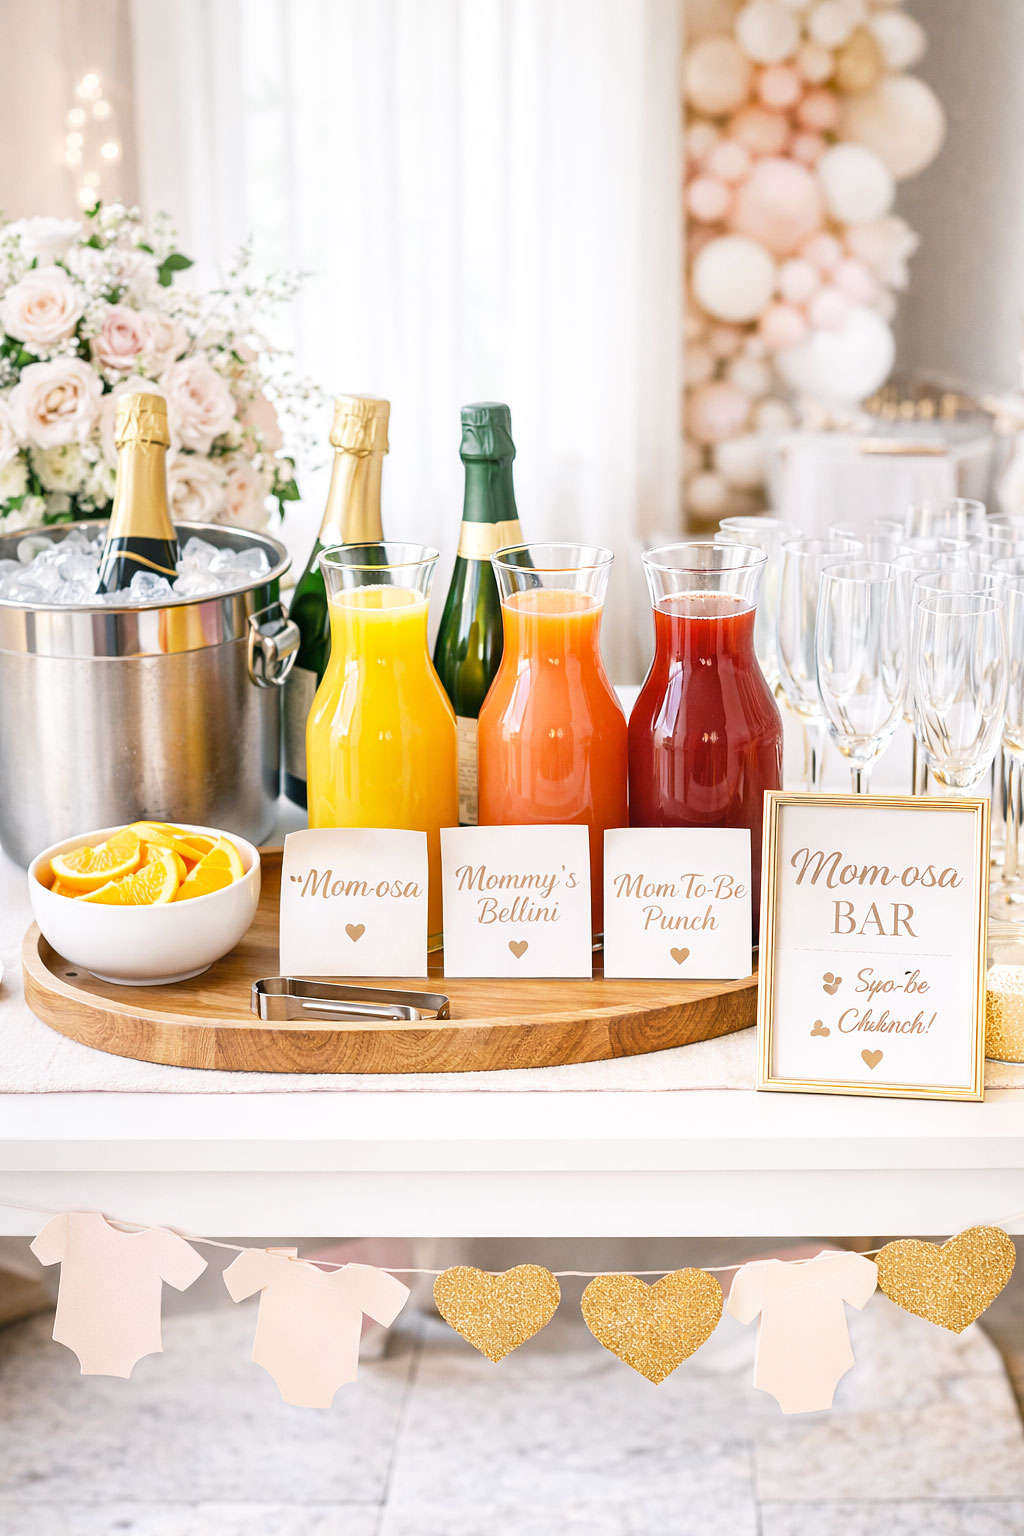
Setup No. 3 Momosa Themed Mimosa Bar Made for a Baby Shower
What makes this work is how it pulls people in without trying too hard. I notice guests linger here longer, and conversations start naturally.
Free Mom-osa Bar Sign Printable
If you want to make this setup feel finished without adding more decor, a simple sign does most of the work. You can download and print this one to place right on your drink table.
To connect everything together, pair it with your baby shower ideas and baby shower games.
What it looks like
A themed drink station with labeled options, grouped fruit, and one clear pouring area so guests do not hesitate.
Shopping list for this setup
- 3 to 4 bottles sparkling wine or sparkling cider
- Orange juice
- Peach juice
- Cranberry juice
- Fresh berries and citrus slices
- Small cards or menu labels
- baby shower drink labels
- Flutes or cups
- Napkins
- Serving tray
Step by step setup
Group the drinks in the center so the theme feels clear right away. Place labels directly in front of each option so guests do not have to ask what they are pouring.
Keep the fruit close and the glasses easy to reach. This setup works best when the layout stays simple and the names do the work.
A themed bar should still feel easy to use.
Which Mimosa Bar Setup Should You Choose?
If you want the easiest setup, go with the budget version. It is quick, simple, and works in smaller spaces.
If you want something that looks pulled together in photos, the pretty setup is the best fit.
If you want something that feels more personal and interactive, the mom-osa version creates that moment.
FAQ About a Mimosa Bar Baby Shower
How many bottles do I need?
For smaller showers, 2 to 4 bottles is usually enough. For larger groups, plan about one bottle for every 6 to 8 guests. Having a nonalcoholic option helps the table feel complete.
What juices work best?
Orange juice is the base. Peach, cranberry, and pineapple are easy additions that give variety without complicating the setup.
Can I do this without alcohol?
Yes. Sparkling cider or nonalcoholic sparkling wine works well. Present it the same way so it feels included.
What is the most common mistake?
Spacing everything too far apart. When guests have to move around too much, the setup slows down.
Where should the mimosa bar go?
Off to one side with room for two people at a time. That keeps the space open and the flow steady.
How do I keep it from getting messy?
Keep items grouped and place napkins within reach. Most spills happen when people have nowhere to set their glass.
For general food safety and drink handling, see FoodSafety.gov.
What to Set Up Next After Your Mimosa Bar
Once your mimosa bar is in place, guests naturally look for the next stop. That is usually food, seating, or something interactive.
When you click on links to various merchants on this site and make a purchase, this may result in this site earning a commission. This does not affect the price you pay.
UBGI Gold Standard 2026
Verified for performance, SEO,
and accessibility compliance.
Photos, decorating ideas, party setups, and reader submissions are shared for inspiration only and are not intended as step-by-step decorating, construction, or DIY instructions.
About Jan | Contact | Baby Room Ideas (Blog) | Site Map | Privacy Policy | Disclosure Policy | Disclaimer | Affiliate Disclosure | Earnings Disclosure | Facebook | Pinterest
I am a participant in the Amazon Services LLC Associates Program, an affiliate advertising program designed to provide a means for us to earn fees by linking to Amazon.
Copyright © 2006-2026. All Rights Reserved.